Kategorie: Technology

  • Arduino Nicla Sense Env: adding advanced environmental sensing to a broad range of applications

    Arduino Nicla Sense Env: adding advanced environmental sensing to a broad range of applications

    Reading Time: 4 minutes

    We’re thrilled to announce the launch of Nicla Sense Env: the latest addition to our portfolio of system-on-modules and sensor nodes, empowering innovators with the tools to unlock new possibilities. This tiny yet powerful sensor node is designed to elevate your environmental sensing projects to new heights. Whether you’re a seasoned professional or just starting your journey with Arduino, Nicla Sense Env is here to help sense the world around you with precision and ease.

    “With Nicla Sense Env, we’re taking a critical step toward addressing one of the most pressing challenges of our time: protecting the environment. This powerful module allows developers to monitor air quality and environmental conditions with precision, paving the way for smarter, more sustainable solutions. By equipping professionals, educators, and makers with the right tools, we’re helping to build a future where technology and environmental stewardship go hand in hand. The compact nature of the Nicla form factor broadens the number of possible applications, spanning from prototyping to testing and volume production for OEMs.” – Fabio Violante, CEO of Arduino

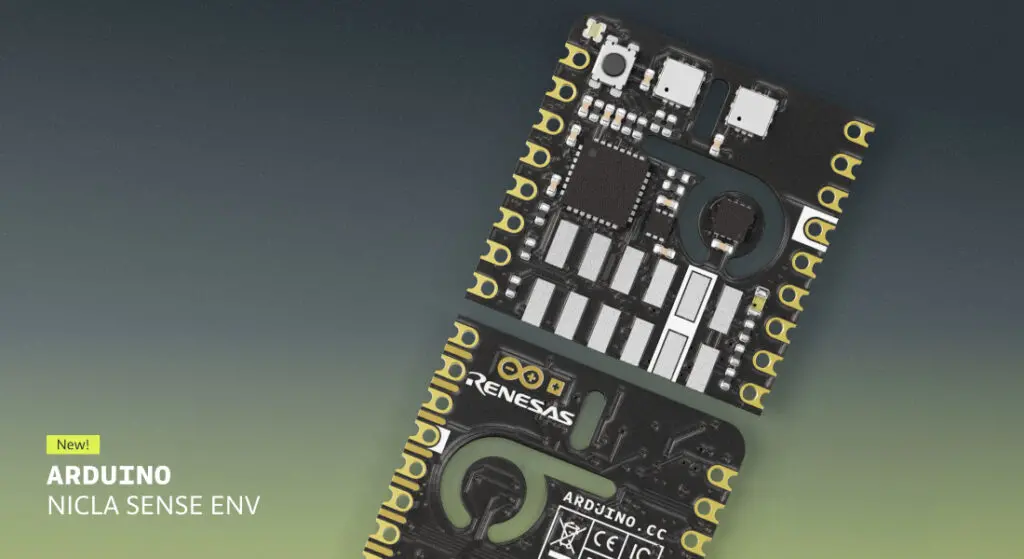
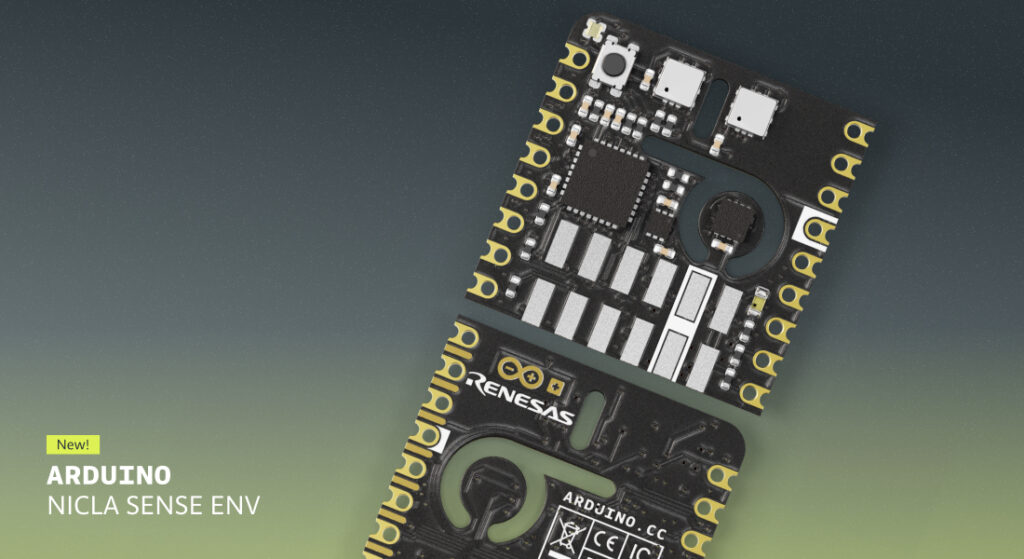
    “Renesas is proud to be the technology supplier of choice for the Arduino Nicla Sense Env, the new modular board to measure real-time indoor air quality, temperature, and humidity at the edge of the IoT network. Renesas’ system architecture, based on the RA2E1 microcontroller and environmental industrial-grade sensors with onboard AI including the ZMOD4410, ZMOD4510 and HS4001, enables Nicla Sense Env to be deployed in a variety of smart building applications, HVAC and air purifier systems, gas leak detection systems, fumes and fire detection systems, and smart city air quality management, with little integration effort.”
    — Brad Rex, Senior Director of Global Systems and Solutions Team at Renesas

    [youtube https://www.youtube.com/watch?v=hA5yRNZV-nE?feature=oembed&w=500&h=281]

    Compact yet capable: let’s unpack the features

    Nicla Sense Env might be small in size, but it’s packed with advanced features that make it a powerhouse for environmental monitoring.

    • Monitor indoor and outdoor environments with AI-ready Renesas sensors. Nicla Sense Env offers temperature and humidity monitoring through the HS4001 sensor and AI-enabled gas detection with the ZMOD4410AI1V and ZMOD4510AI1V sensors. These provide real-time data on air quality, including the detection of TVOCs, NO2, O3, and other gasses, both indoors and outdoors.
    • 22.86 x 22.86 mm = huge potential. With the tiny form factor the Nicla family is known for, Nicla Sense Env can easily fit into any project, allowing you to integrate environmental sensing without compromising on space or design.
    • Robust, reliable, and ready to stand the test of time. Built with industrial-grade sensors, Nicla Sense Env is engineered for durability and accuracy, ensuring reliable performance even in challenging conditions. What’s more, it was designed for 24/7 operation: ultra-low power consumption makes it ideal for long-term deployments in any situation. 
    • Fits right in, with seamless integration and wide compatibility. Whether you’re working with Portenta SOMs or MKR products, Nicla Sense Env connects effortlessly via ESLOV (I2C) or header pins. It’s also compatible with Arduino IDE and MicroPython, so you can start programming right out of the box. And of course, it works great with a variety of libraries and tutorials available through the Arduino ecosystem.

    Real-world applications? We sense endless possibilities!

    Nicla Sense Env is a versatile and accessible tool for environmental monitoring: it’s your new ally whether you’re developing something new or enhancing an existing project, working on a prototype or full-fledged industrial-scale solution.

    Nicla Sense Env fits perfectly into HVAC systems, helping you monitor air quality, humidity, and temperature to keep smart buildings comfortable and compliant with environmental regulations. In air purifiers, it provides real-time data that allow for energy-efficient operation and better air quality by detecting harmful gasses and adjusting the system as needed. When it comes to safety, it can play a critical role in detecting fumes and smoke, triggering early warnings to prevent potential hazards both indoors and outdoors. In industrial settings, it can monitor air quality and detect toxic substances, ensuring that machinery runs safely and efficiently. And these are only the first examples of applications that come to mind! 

    Add a breath of fresh air to your projects

    We look forward to seeing how you will leverage the capabilities of the Arduino Nicla Sense Env to create innovative solutions – whether you’re developing climate control systems, enhancing air quality monitoring, or ensuring safety in industrial environments.

    So, head to the Arduino Store to check out full product details and specifications, and let’s continue to push the boundaries of innovation together – one “tiny” step at a time!

    The post Arduino Nicla Sense Env: adding advanced environmental sensing to a broad range of applications appeared first on Arduino Blog.

    Website: LINK

  • This perplexing robotic performer operates under the control of three different Arduino boards

    This perplexing robotic performer operates under the control of three different Arduino boards

    Reading Time: 2 minutes

    Every decade or two, humanity seems to develop a renewed interest in humanoid robots and their potential within our world. Because the practical applications are actually pretty limited (given the high cost), we inevitably begin to consider how those robots might function as entertainment. But Jon Hamilton did more than just wonder, he actually built a robotic performer called Syntaxx and it will definitely make you feel things.

    It is hard to describe this robot without sounding like a Mad Libs game filled out by a cyberpunk-obsessed DJ. Hamilton designed it to give performances, primarily in the form of synthetic singing accompanied by electronic music. It looks like a crude Halloween mask given life by a misguided wizard sometime in the 1980s. It is pretty bonkers and you should probably watch the video of it in action to wrap your head around the concept.

    Hamilton needed three different Arduino development boards to bring this robot to life. The first, an Arduino Giga R1 WiFi, oversees the robot’s operation and handles voice interaction, as well as audio playback. The second, an Arduino Mega 2560, moves the robot’s neck according to input from two microphones (one on the left, the other on the right). The third, an Arduino Uno R4 WiFi, controls the rest of the servo movement. 

    The result is a robot that is both impressive and also pretty disconcerting. 

    [youtube https://www.youtube.com/watch?v=WTbbxdYEj_s?feature=oembed&w=500&h=281]

    The post This perplexing robotic performer operates under the control of three different Arduino boards appeared first on Arduino Blog.

    Website: LINK

  • The more things change…

    The more things change…

    Reading Time: 2 minutes

    It’s refreshing that newer doesn’t always have to mean bigger and better. I’ve been using a Raspberry Pi 4 for the last few years as a desktop Linux machine, and although it could be faster, then thing that holds me back from upgrading it is nothing to do with the Pi itself. It’s the peripherals: if I moved to a Raspberry Pi 5 I’d have to get new headphones, as the Raspberry Pi 5 moved away from a 3.5mm headphone jack. I’d have to spend money on headphones that use Bluetooth, and forever be losing them or running out of charge. I realise this makes me unusual in the world of the tech enthusiast, but once I get something that works, I just don’t want to go to the effort of changing it.

    That may make me an outlier in terms of individuals, but there’s another consumer sector that really wants to be able to get the bare minimum and stick with it: businesses. Upgrading is a cost. Buying new cables because the new version of a device uses USB-C instead of Micro USB is a cost. Any change at all imposes a cost, and if you can avoid that, you’re winning.

    We all know that things like connectivity and processing speed are features. But price is also a feature, and a really big one. So too is backward compatibility. If I don’t want to buy a new thing because it messes with my minimal setup of screen, keyboard, mouse and headphones, then it’s vanishingly unlikely that I’d invest in a new device if it meant I would have to build a whole new factory to accommodate it.

    It’s great there are new devices to play with. But it’s even greater knowing that you can buy one, and build it into your project, or your product, or even your manufacturing setup, in confidence that it won’t be rendered obsolete by the next new model. It sounds counter-intuitive, but that’s how you keep customers coming back: not by locking them in, but by making it clear that they don’t have to upgrade if they don’t want to.

  • Top Arduino Cloud IoT dashboard ideas with the new Image widget 

    Top Arduino Cloud IoT dashboard ideas with the new Image widget 

    Reading Time: 4 minutes

    Recently, we announced the exciting new Image widget for Arduino Cloud. This powerful feature opens up a world of possibilities for enhancing your IoT dashboards. But the true potential of the Image widget lies in the applications that you create.

    Today, we’re excited to dive deeper and show you what kind of IoT dashboards your can create with the Image widget. Whether you’re using it for smart homes, enterprise solutions, or educational tools, the possibilities are endless—and we’re here to help you discover its full potential!

    As a maker, the Image widget can be a game-changer for your smart home projects. Here are a few examples: 

    1. Home security dashboard: Detect intrusion with camera photos

    Here’s our first IoT dashboard idea: Display live snapshots from a home-made security camera, updating the image at regular intervals or triggering updates based on motion or sound detection. This allows you to keep a close eye on your property, even when you’re away. You can control the whole system from an Arduino Cloud dashboard.

    In this project, you’ll learn how to build a security system using the Arduino Nicla Vision‘s camera. The system captures snapshots when it detects sound levels above a set threshold, and everything is managed through an Arduino Cloud dashboard. From enabling or disabling the system, viewing event history, to receiving alerts, Arduino Cloud makes it easy to control and monitor your security setup. Check out the full project for all the details and step-by-step instructions!

    IoT dashboard idea on Arduino Cloud. Use the image widget to detect intrusion with camera photos

    Image 1: Arduino Cloud intrusion detection dashboard with snapshot of a living room

    2. Plant visual growth diary dashboard

    In this second IoT dashboard idea, you can bring your indoor or outdoor garden into the digital realm. Use the Image widget to create a visual growth diary, displaying daily or weekly photos of your plants. Combine this with soil moisture sensors to get a comprehensive view of your plants’ health and progress over time.

    IoT dashboard idea on Arduino Cloud: Visual growth diary of your plant

    Image 2: Arduino Cloud irrigation dashboard with snapshot of a plant

    NOTE: This dashboard above is based on this original project and has been modified to include the Image widget. These adjustments were made to demonstrate the potential of this new feature in enhancing your Arduino Cloud dashboards. 

    3. DIY Weather station dashboard with outside daily photos

    In this 3rd example, you can turn your Arduino-powered weather station into a visually engaging dashboard. That’s right, display real-time weather icons and images of the current sky conditions. You can even integrate sensor data to provide a complete picture of your local microclimate, making your DIY weather station a must-have for any maker’s smart home.

    IoT dashboard idea: Weather station on Arduino Cloud with image widget

    Image 3: Local weather station Arduino Cloud dashboard with daily photo

    NOTE: This IoT dashboard idea above is based on this original project and has been modified to include the Image widget. These adjustments were made to demonstrate the potential of this new feature in enhancing your Arduino Cloud dashboards.

    By adding a camera, following the instructions of the intrusion detection project described in the first IoT dashboard idea above, you can take your weather dashboard to the next level.

    4. More ideas to use the Image Widget in your Arduino Cloud IoT dashboards

    The new Cloud image widget offers powerful ways to integrate real-time imagery into your data-driven workflows. Below are five additional examples of how the Image widget can enhance your Arduino Cloud

    5. Industrial equipment monitoring: Embed real-time visuals of critical machinery, like thermal imaging data, in your dashboard to quickly identify and address potential issues.

    6. Smart agriculture: Integrate drone or satellite imagery to monitor crop growth, soil conditions, and irrigation systems, helping make data-driven decisions for your farm.

    7. Supply chain visualization: Create interactive maps displaying the real-time location and status of products and materials, while tracking inventory levels and shipment progress.

    8. Quality control: Compare images of acceptable and defective products to enhance visual inspections and streamline quality control processes.

    9. Education: Use real-time or time-lapse visuals to bring live science experiments into digital learning, enriching students’ engagement with STEM subjects.

    Community Spotlight

    We’re excited to see what you, our innovative Arduino community, will create with the Image widget. Share your projects and ideas on the Arduino Project Hub or in the Arduino Cloud forum, and inspire others with your creative applications. Who knows, you might just end up being featured in our next Community Spotlight!

    Conclusion

    The Image widget is more than just a pretty face — it’s a powerful tool that can transform the way you approach IoT projects, whether you’re a maker, an enterprise, or an educator. By unleashing your creativity and leveraging this feature, you can breathe new life into your dashboard or create new breeds of projects.

    So, what are you waiting for? Sign up for Arduino Cloud for free today, start exploring the Image widget and let your imagination run wild. The possibilities are endless, and we can’t wait to see what you create. For more information and tutorials, check out the Arduino Cloud documentation.

    The post Top Arduino Cloud IoT dashboard ideas with the new Image widget  appeared first on Arduino Blog.

    Website: LINK

  • Ada Computer Science: A year in review

    Ada Computer Science: A year in review

    Reading Time: 5 minutes

    With the new academic year fully under way in many parts of the world, it’s the perfect time to reflect on the growth and innovations we’ve achieved with the Ada Computer Science platform. Your feedback has helped us make improvements to better support teachers and students — here’s a look back at some of the key developments for Ada from the past 12 months.

    Teachers in discussion at a table.
    Teachers in discussion at a Raspberry Pi Foundation teacher training event.

    Supporting students through personalised learning, new resources, and new questions

    We made significant improvements throughout the year to support students with exam preparation and personalised learning. We introduced over 145 new self-marking questions and updated 50 existing ones, bringing the total to more than 1000. A new type of question was also launched to help students practise writing longer responses: they label parts of a sample answer and apply a mark scheme, simulating a peer review process. You can read more about this work in the AI section below.

    We updated the question finder tool with an intuitive new design. Instead of seeing ten questions at random, students can now see all the questions we have on any given topic, and can use the filters to refine their searches by qualification and difficulty level. This enables students to better personalise their revision and progress tracking

    “Ada Computer Science has been very effective for my revision. I like how it provides hints and pointers if you answer a question incorrectly.” 

    – Ada Computer Science student

    The ‘Representation of sound’ topic received a major update, with clearer explanations, new diagrams, and improved feedback to support students as they tackle common misconceptions in sound physics. We also refreshed the ‘Representation of numbers’ topic, adding new content and interactive quizzes to support teachers in assessing students’ understanding more effectively. 

    We introduced a new database scenario titled ‘Repair & Reform’, offering an entity relationship diagram, a data dictionary, and a new SQL editor and question set to help students prepare for project-based assessments. We’ve further expanded this scenario into a full project covering all stages of development, including requirements analysis and evaluation. 

    April was dedicated to gearing up for the exam season, with the introduction of revision flashcards and ready-made quizzes on key topics like bitmapped graphics and sorting algorithms. We also launched a student revision challenge, which ran from April to June and attracted over 600 participants.

    “Ada Computer Science is an excellent resource to help support teachers and students. The explanations are clear and relevant, and the questions help students test their knowledge and understanding in a structured way, providing links to help them reconcile any discrepancies or misunderstandings.” 

    – Patrick Kennedy, Computer Science teacher

    Supporting teachers  

    We expanded our efforts to support new computer science teachers with the launch of a teacher mentoring programme that offers free online drop-in sessions. We also hosted a teacher training event at the Raspberry Pi Foundation office in Cambridge (as seen in the picture below), where educators saw previews of upcoming content on AI and machine learning and contributed their own questions to the platform.

    Group photo featuring computer science teachers and colleagues from the Raspberry PI Foundation.

    AI content and AI features

    We continued our focus on AI and machine learning, releasing new learning resources that explore the ethical and social implications of AI alongside the practical applications of AI and machine learning models. 

    To expand the Ada platform’s features, we also made considerable progress in integrating a large language model (LLM) to mark free-text responses. Our research showed that, as of June, LLM marks matched real teachers’ marks 82% of the time. In July, we received ethics approval from the University of Cambridge to add LLM-marked questions to the Ada platform. 

    Computer science education in Scotland

    We made significant strides towards supporting Scottish teachers and students with resources tailored to the SQA Computing Science curriculum. From September to November last year, we piloted a new set of materials specifically designed for Scottish teachers, receiving valuable feedback that we’ve used in 2024 to develop new content. More than half of the theory content for the National 5 and Higher specifications is now available on the platform. 

    Teacher, in the middle of a computing lesson.

    Our ‘Reform & Repair’ database scenario and project align with both SQA Higher and A level standards, providing a comprehensive resource for students preparing for project-based assessments.

    Looking ahead: New resources for September and beyond

    We have big plans for Ada for the next 12 months. Our focus will remain on continuously improving our resources and supporting the needs of both educators and students. 

    After the positive response to our ‘Repair & Reform’ database project, our content experts are planning additional practical projects to support students and teachers. The next one will be a web project that covers HTML, CSS, JavaScript, and PHP, supporting students taking SQA qualifications in Scotland or undertaking the non-examined assessment (NEA) at A level.

    We’ll be working on a number of teacher-focused improvements to the platform, which you’ll also see on Ada’s sibling site, Isaac Physics. These will include an overhaul of the markbook to make it more user-friendly, and updates to the ‘Assignments’ tool so assignments better meet the needs of teachers in schools.

    We’ll be welcoming the next cohort of computer science students to the STEM SMART programme in January 2025 where, in partnership with the University of Cambridge, we’ll offer free, complementary teaching and support to UK students at state schools. Applications are now open.

    Thank you to every teacher and student who has given their time in the last year to share feedback about Ada Computer Science — your insights are invaluable as we work to make high-quality computer science materials easily accessible. Here’s to another fantastic year of learning and growth!

    Website: LINK

  • This automatic laser turret keeps the cats entertained for hours

    This automatic laser turret keeps the cats entertained for hours

    Reading Time: 2 minutes

    Cats may be adorable, but they evolved to be predators. Unfortunately, responsible owners keep their cats indoors to avoid decimating the local wildlife population and that means Mr. Whiskers and Ms. Socks don’t get much opportunity to express their hunting urges. That’s why Sascha at Small Batch Factory designed Gatoino, which is an automatic laser turret toy that lets cats hunt for red dots indefinitely.

    Gatoino automates laser cat toy playtime, putting less strain on owners’ wrists and keeping the fun going for as long as the furry felines want to keep up the chase. It moves the laser dot in two axes and does so in an unpredictable (pseudo-random) way, so it will keep the cats on their toe beans. And an onboard control interface lets the human adjust the playing field size and the movement speed, along with session schedules.

    An Arduino Nano board controls all of that through a custom PCB to keep the wiring tidy. It moves the laser using two small SG90 hobby servo motors in an arrangement similar to a mirror galvanometer. Those parts all fit into a simple 3D-printed enclosure that can be placed on a shelf or mounted onto a wall out of the way.

    [youtube https://www.youtube.com/watch?v=Dbzf_WYTEFQ?feature=oembed&w=500&h=281]

    If you’re interested in building your own Gatoino, the design files and instructions are available for purchase on the Small Batch Factory website.

    The post This automatic laser turret keeps the cats entertained for hours appeared first on Arduino Blog.

    Website: LINK

  • How fun-filled Code Clubs drive learning: New evidence

    How fun-filled Code Clubs drive learning: New evidence

    Reading Time: 4 minutes

    When you walk into a vibrant Code Club, it is easy to see that the young creators are having fun with digital making. But are they actually learning anything? Our recent evaluation has shown that not only are they developing their coding skills, but there are many other benefits.

    Young person sitting at a laptop with an adult mentor helping them with their code.

    Code Club is a network of free coding clubs where young people learn how to create with technology. The Raspberry Pi Foundation supports Code Clubs through training and guidance for mentors, and by providing learning resources that lead to meaningful and lasting learning outcomes for the young people attending the clubs.

    Founded in the UK in 2012, Code Club has grown into a global movement and has already inspired more than 2 million young people to learn how to build their own apps, games, animations, websites, and so much more. We are incredibly proud of the impact Code Club has already achieved and we want many more young people to benefit. Our ambitious goal for the next decade is to reach 10 million more young people through Code Club.

    New impact insights about Code Club

    We’re ambitious about Code Club because we know it works. Over the last year, the Durham University Evidence Centre for Education (DECE) conducted an independent evaluation of the programme that confirmed earlier evidence: attending Code Club leads to positive outcomes for young people.

    Two young people smiling whilst working on their laptop with an adult mentor by their side.

    The DECE evaluation showed that young people who attend Code Club build their coding skills. They also become more confident in learning coding, grow their interest in it, and develop a sense of belonging. Researchers observed how each young person has their individual projects to work on, which promote a sense of ownership and personalised learning, but that there are also opportunities for collaboration and celebrating their achievements with other creators in the club.

    Young people also develop positive attitudes to coding and a range of life skills such as problem solving and communication. These skills and mindsets prepare young people to confidently engage with emerging technologies and with learning in a broader context.

    “Coding is really fun when I know what to do, but sometimes it is hard. But I always keep trying.”

    – Code Club creator.

    Another finding was that Code Clubs are a place where young people who experience difficulties in formal classroom settings can thrive. This suggests Code Clubs can help educators engage a more diverse group of young people in creating with technology than formal education alone could.

    “We see pupils in completely different roles when they are doing these Code Club activities. They enjoy more, and you can see they have skills to do things that we otherwise don’t notice.”

    – Code Club mentor.

    None of the benefits for young people would be possible without the volunteers who give their time and make Code Clubs the positive learning environments they are. Their support is crucial to young people’s engagement and skill development. The evaluation showed that mentors find the experience of volunteering rewarding, and pointed us towards areas where we can offer further support to help them run engaging, impactful Code Clubs.

    “…volunteering with Code Club has helped me feel I’m a useful member of society in my old age, so the benefits have been good for me too.”

    – Code Club mentor.

    How we’re building on our support for clubs

    With AI already transforming so many parts of our lives, learning how to create with technology has never been more important. Generative AI is changing how humans give instructions to computers, and at Code Club, young people can experiment with new technologies such as AI in a safe environment. New projects that support young people to learn about AI technologies will be added to the Code Club Projects site later this month, alongside support for club leaders and mentors on this topic.

    The evaluation methods used by the DECE will help us hone our ongoing impact measurement work for Code Clubs running in communities all over the world. As we continue to support Code Clubs, we are taking into account that the independent evaluation ran in school-based Code Clubs in the UK only. In our work to grow the Code Club network across the globe, we are adapting our support and resources for local contexts in collaboration with partners who share their expertise.

    This will ensure that Code Clubs can provide a fun, welcoming space for all young people. And while they’re having fun, they will also gain relevant learning experiences that empower them to engage confidently with a world that is being transformed by digital technologies.

    If you’re interested in the DECE evaluation’s results, we’ve put together a summary for you to download.

    To get involved in Code Club, visit codeclub.org.

    Website: LINK

  • LED umbrella

    LED umbrella

    Reading Time: 3 minutes

    Thomas Killus has created such a brolly using a Raspberry Pi Pico microcontroller board. It sends instructions to strips of standard WS2812b addressable RGB LEDs that run along the ribs of an umbrella, and this in turn brightly disperses light across the adjoining panels. The umbrella would certainly shine bright in a crowd and maybe even prevent it being left behind on the bus. But it’s also, curiously, the first step towards something bigger.

    “I have always been fascinated with beautiful light installations,” Thomas says. “My dream is to someday build a complete LED suit that can either be pre-programmed or made to interact with the environment through sensors. It would be nothing practical, but I hope to bring a smile to the people around me and myself. I thought an umbrella would be a small step into this direction.”

    The project requires very few parts, but a portable charger will be required

    Brolly good

    Planning the umbrella was straightforward enough. “Get an umbrella, get LEDs and put them together,” Thomas explains. In the past he had tended to use an ESP32 microcontroller for his hardware projects and Python for his pure software projects. “But one day I saw a Raspberry Pi Pico microcontroller in a store and I recognised the great potential of finally using Python in my hardware projects, so I knew I had to give it a try,” he explains.

    The idea was to create a set of pre-programmed animations that could be easily skipped through by simply pressing a button. These animations were created on a PC using a simulator Thomas had developed in Pygame. They were then saved to an SD card which plugged into the umbrella. “Raspberry Pi Pico can read the animation data and control the LEDs accordingly,” he explains. “I thought this way, I wouldn’t have to limit the animations by the computer power or memory limitations of Raspberry Pi Pico.”

    Since all of the lights were connected in one long chain, Thomas only needed to use a single data pin on the Pico to control them all

    Development went reasonably well. “It didn’t cause me major headaches,” Thomas says. “But in the beginning, I had some issues with reading the animation commands fast enough from the SD card while displaying them live but I eventually figured it out using byte files.”

    Shine a light

    There are some features he would like to implement, though. Thomas originally planned to also add an MPU9250 nine-axis motion tracking sensor to measure acceleration, rotation and orientation. “I wanted to add features which will make the umbrella change its lights when you spin it, jump or turn into a different direction and I hoped it would give the user more interactions with the umbrella,” he says.

    The SD card module is connected to Raspberry Pi Pico via the SPI port

    Thomas also wants to reduce the number of visible cables and make the underneath “sparkle with the same joy,” as he puts it. “LED light isn’t diffused on this side and it takes away a lot of the effect,” he laments. Even so, the umbrella has gone down well among the Raspberry Pi community even though many say it has no practical use. “I guess they are right,” he says. “But I enjoyed building it, I learned some things and it made me smile when it lit up for the first time.”

  • This 3D-printed robotic arm can be built with just a few inexpensive components

    This 3D-printed robotic arm can be built with just a few inexpensive components

    Reading Time: 2 minutes

    Robotics is already an intimidating field, thanks to the complexity involved. And the cost of parts, such as actuators, only increases that feeling of inaccessibility. But as FABRI Creator shows in their most recent video, you can build a useful robotic arm with just a handful of inexpensive components.

    This is pint-sized robotic arm that has some of the same features as big and expensive industrial robots, just on a smaller scale. Users can operate the four joints manually, but can also record a series of positions and let the robot automatically move from one to the next. That is a popular programming technique in many industries, making this robot useful for learning real methodology and for performing practical tasks.

    The best part is that this robot is very affordable. All of the parts, with the exception of fasteners and electronic components, are 3D-printable. The electronic components include an Arduino Nano board and four SG90 hobby servo motors that can be found for just a couple of dollars each. FABRI Creator designed a custom PCB to host the Arduino, to provide power input, and to simplify the wiring. That PCB isn’t strictly necessary, but it results in a much tidier robot. 

    [youtube https://www.youtube.com/watch?v=cWuJPlkmxCE?feature=oembed&w=500&h=281]

    The assembled robot is small, but has enough reach to be useful and enough strength to lift light objects. It is a perfect starting point for people who want to learn robotics basics on a budget.

    The post This 3D-printed robotic arm can be built with just a few inexpensive components appeared first on Arduino Blog.

    Website: LINK

  • CrowView Note review

    CrowView Note review

    Reading Time: 2 minutes

    You don’t have to use this little dock mechanism – we can definitely imagine 3D-printing an enclosure that sticks to the back of the lid with a few cables between the laptop and Raspberry Pi. However you choose to connect your Raspberry Pi though, it doesn’t require any extra software setup and is immediately good to go, which is very nice.

    Take it with you

    As there are no computer parts inside the shell, the whole thing is very light, even with a Raspberry Pi attached to it (although it does throw off the balance a little). The heaviest part of the assembly is probably the 5,000mAh battery, which charges nice and quickly, although only with the included DC barrel jack. With a Raspberry Pi plugged in the battery lasts for a couple of hours just fine with fairly normal use, and you can also check the battery with a touch of a button.

    Perhaps due to either how light it is, or the materials used in construction, but the Note does feel a little bit flimsy while using it. The mousepad is fine, however the physical clicks for right and left click feel clunky and only work near the bottom of the touchpad. Compared to other normal laptops the keyboard is actually pretty good though, and is nice to type on – it has an extra bit of resistance that makes the keys satisfying to use.

    Multi-purpose

    We didn’t find much use for it with our other PCs – although we don’t have any mini PCs like a Mac Mini or such around, which seems like a good fit for the CrowView. It’s quite nice for watching videos from a phone though, especially if you’re travelling and don’t want to lug a regular, heavier laptop around with you.

    However, it’s as a Raspberry Pi dock that it really shines for us, and despite our concerns with the build quality and awkwardness of the provided dock system, it works more than well enough that we’re definitely going to be using it in the future instead of juggling cables on monitors and PSUs. We might use a Bluetooth mouse though.

    Verdict

    9/10

    There are some minor build quality issues but the product itself is fantastic and does exactly what you’d want it do.

    Specs

    Display: 14-inch IPS, 1920×1080

    Battery: 5000mAh

    I/O: Keyboard, touchpad, mouse, webcam, USB A, USB-C, speakers, 3.5mm headphone jack, mini HDMI in

  • Introduce the Code Editor into your school

    Introduce the Code Editor into your school

    Reading Time: 2 minutes

    Since we first launched the Code Editor, a free online tool designed to support young people  as they learn text-based programming, we’ve been excited to hear how educators have been trying it out in their classrooms. 

    “I used the Code Editor with my computer science students yesterday and it worked a dream! Students were able to write and run code without any issues.” 

    – Head of Computer Science

    The Code Editor is designed for learning, rather than for professional use, and is informed by our understanding of pedagogy and computing education. It can be accessed from a web browser without installing any additional software. 

    Earlier this year, we announced that we’d be introducing classroom management features and we’re now pleased to confirm that we’ve launched the beta version of Code Editor for Education with school accounts. You can be the first to try out the new features, together with the many schools who have chosen to pre-register their school accounts.

    Simple and easy classroom management

    We’ve kept the educator interface clean, simple, and easy to use. School owners can invite other teachers to join, add students, organise students into classes, and help students reset their passwords quickly. Educators can create coding projects to share with students and view their work.

    Example image of the Raspberry Pi Foundation Code Editor, showcasing its classroom management features.

    All features, totally free

    We’ve added these classroom management features because one of the key problems we’ve seen educators face over the past months has been the lack of an affordable tool to teach text-based coding in the classroom. We will always provide the Code Editor and all of its features to educators and students for free. 

    Safe and private by design

    We take safeguarding seriously, providing visibility of student work at all times, as well as features such as the ability to report a concern. In line with best practices protecting children online, we minimise data capture so that we have just enough to keep students safe. 

    Future developments 

    As the platform is currently in beta, we’d love to hear what you think of the new classroom management features — please send us your feedback

    We’ll be actively looking to develop new features over the coming months. Such features are set to include an extended set of Python libraries, custom instructions that sit alongside starter code projects and teacher-to-student feedback capabilities. All new developments will be informed by ongoing educator feedback. 

    Find out more and register for a free school account.

    Website: LINK

  • Marble art madness from a marvelous machine

    Marble art madness from a marvelous machine

    Reading Time: 2 minutes

    Marbles are underrated. They’re very round, roll well, tend to be pretty shiny, and come in all sorts of neat colors. That last characteristic makes them suitable for artwork, like orbicular pixels. In his most ambitious project to date, Engineezy took advantage of those attributes (roundness and colorfulness) to build this amazing machine that automatically produces marble art displays.

    Engineezy has made a name for himself with his impressive and often complex mechanical design, and this project certainly fits that bill. It is enormous and the entire thing is basically a stack of fascinating mechanisms. There are mechanisms to separate the marbles by color (there are eight colors), elevator mechanisms to lift the marbles to the top of the sorters, pump mechanisms to move the sorted marbles up, feed mechanisms to drop the appropriate marbles into the displays area columns, and a mechanism to dump all the marbles from the bottom to start the process over.

    All of those mechanisms require a whole bunch of motors and drivers, along with several development boards to direct them. The feed mechanisms at the top, for example, operate under the control of an Arduino Nano ESP32. It oversees the movement of the two stepper motors that slide two guides back and forth — a design inspired by IDEX (Independent Dual-Extruder) 3D printers. Those use funnel-like ramps created by two coil springs that adapt to the movement — a rather ingenious idea.

    The mechanisms all work in concert to drop the marbles into the display area, creating images of 32×32 pixels (1,024 “pixels” in total) and up to eight colors. The machine can automatically reset itself and then display a new image, so it can keep going indefinitely while spectators watch the intricate dance play out. 

    [youtube https://www.youtube.com/watch?v=w1ks0Vy98KI?feature=oembed&w=500&h=281]

    The post Marble art madness from a marvelous machine appeared first on Arduino Blog.

    Website: LINK

  • An engineer’s journey to bring the ultimate TMJ pain relief tool to market

    An engineer’s journey to bring the ultimate TMJ pain relief tool to market

    Reading Time: 2 minutes

    To the average person, invention and new product development seem like pretty straightforward processes; you come up with a killer idea, do the engineering work to cobble together a working prototype, have a truckload of units manufactured, and then sell those to turn a profit. But the reality is far, far more complicated than that. However, Noam Aizenberg was able to ease some of the pain by turning to Arduino when he developed the myTMJ Pen.

    The temporomandibular joint (TMJ) connects your jawbone to your skull and any disorders affecting it can cause a great deal of pain. Those disorders are surprisingly common and may affect as much as 12% of the human population, but there aren’t many good therapy solutions available to sufferers. As a TMJ patient himself, Aizenberg designed myTMJ Pen to provide relief.

    As Aizenberg discovered, it takes a tremendous amount of work to bring a product to market — especially one designed for therapeutic use on the jaw muscles. myTMJ Pen combines pinpoint heat and massage, so Aizenberg also had to take safety into consideration. But Aizenberg is a recent mechanical engineering graduate and also has experience with Arduino development boards and the Arduino IDE, helping him to speed through prototype development.

    The production myTMJ Pen will not contain an Arduino board, because space is at a tremendous premium. But Aizenberg did use the Arduino IDE to program the Microchip ATmega48 microcontroller that resides on the device’s custom PCB. That let Aizenberg take advantage of the familiar programming environment, the many available libraries, and the vast amount of documentation in the Arduino ecosystem.

    For those interested in what it actually takes to bring a product to market, Aizenberg has documented every step of the process on his Instagram and YouTube channel

    Aizenberg is currently seeking funding for the product launch on Indiegogo. Those funds will go towards everything from PCB fabrication to regulatory compliance testing.

    The post An engineer’s journey to bring the ultimate TMJ pain relief tool to market appeared first on Arduino Blog.

    Website: LINK

  • Portable Pi 84

    Portable Pi 84

    Reading Time: 4 minutes

    This little device includes a mechanical keyboard that, Michael says: was his primary motivation for making his retro marvel. Having first cut his teeth learning BASIC on a Sharp PC-1260, he quickly became a fan of portable computers and snapped up many more. But when, in recent years, he sought to revive his interest in such machines, he said he’s been left disappointed.

    “I have tried Raspberry Pi and Linux-compatible portables and laptops but I’ve never been really satisfied with their keyboards,” he says, name-checking the Pocket C.H.I.P, Devterm and uConsole projects. “Even at work I used a mechanical keyboard with the company laptop so I started to search for smaller keyboards and portable Raspberry Pi projects. I then found ZeroWriter.”

    Michael originally sought to create his own version of the ZeroWriter project incorporating a Raspberry Pi Zero 2 but felt it was too limited for what he wanted to do

    Key to success

    ZeroWriter is an open e-ink typewriter with a Raspberry Pi Zero 2 W board at its heart. Michael decided to create one for himself, and ordered the Vortex Core 40% keyboard while swapping out the WaveShare 4.2-inch e-paper display with a Waveshare five-inch monitor. “As there was still space, I added a speaker to the side,” he adds. “But the project was limited in terms of the Python audio effects development I wanted to pursue.”

    Michael decided to take the project to another level, hence the use of Raspberry Pi 4. “With the experience of my first build, it was clear that I should go bigger and I also searched for another keyboard,” he says. Looking on pcbway.com, he found the Happy Keyboard, a 47-key, 40% ortholinear mechanical keyboard that uses a Raspberry Pi Pico development board running KMK firmware. It formed the basis of the design for the entire project.

    The hinges are fastened using M4 screws. Although Michael is seeking to improve the hinge design, it allows the display to rest nicely against the machine’s trunk

    “I started with the keyboard because it was the single largest part of the build,” he explains, adding that the next step was to find a display. “I searched for a screen with vertical resolution bigger than 400 or 480, and found a 9.3-inch display by Waveshare with a funky resolution of 1600×600 which fitted perfectly to the 40% keyboard.” This setup dictated the design of the project’s case, and it helped that every Waveshare screen comes with a CAD file and audio amplifier.

    “It was all natural and fell into place because of the size of the components and the requirement that the keyboard should be as low as possible,” Michael says. “Somehow I loved the wide display more than a normal 16:9 display, so this may be the reason for the centred screen.”

    A great case

    Other design considerations needed to be considered. “It was clear in the beginning that the Raspberry Pi 4 and the battery would have to sit behind the keyboard,” Michael says, having decided to place them in a sizable rear compartment. The Raspberry Pi Pico development board also needed to be moved because there wasn’t sufficient room on the main keyboard PCB.

    In extending the back section by up to two centimetres and increasing its height to match that of the screen and keyboard, Michael found space to fit audio speakers. He worked on ways of being able to use the USB ports, too, by creating insert panels on the back of the case for flexibility. “Instead of having to print an entire case, taking tens of hours, every time I decided I’d want to reconfigure the ports, I could just print new panels, which takes about an hour,” he explains.

    The ortholinear mechanical keyboard has 47 keys and it uses the Raspberry Pi Pico W running KMK firmware powered by CircuitPython. It’s possible to fit any keycap or switch to this keyboard, but Michael bought an inexpensive set of blanks from Amazon

    Even so, there were other issues to contend with. Michael had trouble with the HDMI connection being on top of the screen. “I had to rotate it, and it took me some time to figure out how to flip the screen,” he says. “The display’s on-screen menu is still the wrong way around and this can’t be fixed, but I think that’s a Waveshare issue.”

    The biggest headache, however, was power – the system draws juice from a pair of 21700 batteries connected to a UPS HAT. “I tried several battery boards but I was getting random reboots and other issues,” he says. “I then recognised that the cables I used to connect to the Raspberry Pi 4 computer were too thin. After I used better cables it worked fine. There were still some power warnings after two hours but it’s not bad.”

    Powering up

    Battery issues are why he decided against using a Raspberry Pi 5 board, for now at least. “If I could find a battery able to power it, I’d use Raspberry Pi 5,” he says. Michael also wants to be able to move the Raspberry Pi computer away from the side and make a side panel. “This would make it possible to use more single-board computers in the future, and help to connect the screen and keyboard to Raspberry Pi internally,” he says.

    But he’s more than happy with the result so far and he says it’s a build that has fulfilled his requirements. “It’s also been a good way to learn FreeCAD which was fun most of the time – there was a lot of cursing before understanding, though.” He uses the device for programming and watching streams and finds it to be very convenient. “It’s easy to fetch and can be placed on the couch or kitchen table without taking up much room,” he says. And that, in a nutshell, is what a portable computer should be like.

  • Bringing Quake to Arduino: a game-changing project by Nicola Wrachien

    Bringing Quake to Arduino: a game-changing project by Nicola Wrachien

    Reading Time: 2 minutes

    Following up on his successful Doom port last year, engineer Nicola Wrachien – who works at Silicon Labs, a leader in secure, intelligent wireless technology for a more connected world and long-time Arduino partner – has now tackled an even bigger challenge: porting Quake, the iconic 1990s’ first-person shooter, to an Arduino gamepad

    [youtube https://www.youtube.com/watch?v=hVnfwzxTJ00?feature=oembed&w=500&h=281]

    What a great warm-up for the upcoming Matter Challenge! If this kind of project sounds like fun, follow the competition or submit your own entry by October 31st. 

    Sponsored by Mouser Electronics, Silicon Labs and Arduino, the Matter Challenge is open to all skill levels. Take the opportunity to inspire others, by creating an incredible project with the Arduino Nano Matter board.

    Released just three years after Doom, Quake was a huge leap forward in gaming technology. It introduced full 3D environments complete with dynamic lighting effects, and its enemies and weapons were 3D models rather than 2D sprites. The game also featured a scripting engine that gave modders a lot of creative freedom. But with more realistic graphics, a particle engine, and more complex sound effects, Quake was also a far bigger technical challenge to port.

    Tackling this project required Wrachien to level up on memory and speed constraints. If you want to dive deeper into these challenges, be sure to check out the dedicated post on the Silicon Labs community blog.

    In the face of demanding requirements, Wrachien turned to the Arduino Nano Matter, developed with the powerful Silicon Labs® MGM240S as part of a partnership to better enable seamless development of Matter over Thread applications on the Arduino platform, which also led to the release of Arduino’s first-ever Matter software library earlier this year. 

    Reflecting on the Arduino Nano Matter board, Wrachien said: “The Nano Matter board, featuring the Silabs xG24, offers impressive processing power and versatility in a compact size, making it a fantastic tool for both simple and complex projects like this one.”

    If you’re intrigued and want to explore more technical details, dive into Wrachien’s full post and get into the nitty-gritty of this remarkable project on his blog. You can get your Arduino Nano Matter from our store and replicate his idea thanks to all the information he shares, or imagine a new challenging project of your own! 

    The post Bringing Quake to Arduino: a game-changing project by Nicola Wrachien appeared first on Arduino Blog.

    Website: LINK

  • This Kenyan engineer modernizes vintage cars with a custom ECU and EFI upgrades

    This Kenyan engineer modernizes vintage cars with a custom ECU and EFI upgrades

    Reading Time: 2 minutes

    The automotive industry’s switch from carburetion to fuel injection was one of the most effective advancements of the 20th century. Electronic fuel injection allows for precise control over an internal combustion engine’s air-fuel mixture, which dramatically improves fuel efficiency and performance. But that requires computer oversight, which is why Kenyan engineer Peter Mbiria developed his own Arduino-based custom engine control unit (ECU) for upgrading vintage cars.

    Electronic fuel injection conversions — from either carburation or mechanical fuel injection — aren’t very common, because they require computer control and that has to be tailored to the specific engine. With the exception of a few very popular models that warrant turnkey solutions, it simply isn’t worth upgrading most engines. But Mbiria’s custom ECU makes the process much easier, to the point where it can be worthwhile to convert older engines. The conversion gives them new life, increasing economy and power.

    Mbiria’s Voltarent ECU can work with four-cylinder, six-cylinder, and eight-cylinder engines. After the conversion, it controls the injectors and ignition. A small OLED screen, mounted by the car’s dash, displays information and the driver can switch modes (economy, comfort, sport) using a knob. 

    Those modes, and the injector control in general, are only possible because of sophisticated algorithms running on the firmware that Mbiria developed himself. He chose to use an Arduino Due board to take advantage of the many I/O pins, but also for the processing power of the AT91SAM3X8E microcontroller that is necessary to perform the calculations fast enough to keep up with the engine. Mbiria designed a custom PCB to host the Arduino and provide an interface to the injectors, ignition system, and user interface. And with relatively simple tweaks to the Arduino sketch, Mbiria can make the ECU’s firmware suitable for whatever car he’s working on.

    [youtube https://www.youtube.com/watch?v=TMDtOC3X2o4?feature=oembed&w=500&h=281]

    The post This Kenyan engineer modernizes vintage cars with a custom ECU and EFI upgrades appeared first on Arduino Blog.

    Website: LINK

  • Celebrating Coolest Projects 2024, plus dates for 2025

    Celebrating Coolest Projects 2024, plus dates for 2025

    Reading Time: 6 minutes

    Coolest Projects celebrates young digital creators and the amazing things they make with technology. Today, we’re sharing the impact that taking part in Coolest Projects showcases has on young people’s motivation and confidence, as well as announcing dates for Coolest Projects 2025.

    Coolest Projects will be back in 2025.

    Coolest Projects in 2024

    This year, 7197 young people across 4678 projects took part in our global Coolest Projects online showcase, with participants from 43 countries. All of these projects were shared in our online showcase gallery, and we hosted a live-streamed event celebrating the judges’ favourites watched by over 1000 people.

    At the 2024 in-person Coolest Projects events in Ireland and the UK, 192 young people shared 120 projects. At these events, the young creators presented their projects to other attendees and our team of judges. They also took part in other activities, including a digital escape room.

    We wanted to understand how Coolest Projects impacts young people, and so we collected the following data:

    • For the online showcase, mentors and tech creators filled in a survey when they completed their project registration, and we ran focus groups with mentors, who are adults that support the tech creators
    • At the UK and Ireland in-person events, creators completed a survey, other event attendees completed feedback cards, and we also interviewed creators. 

    Online showcase: Impact on skills and confidence

    In the survey, mentors and young people told us that taking part in the Coolest Projects online showcase had a positive impact:

    • 91% of young people and 87% of mentors agreed or strongly agreed that taking part in Coolest Projects online inspired them or their team to continue to participate in computing and technology
    • 89% of young people and 86% of mentors agreed or strongly agreed that taking part in Coolest Projects online increased their or their team’s confidence in coding and digital making

    Mentors told us that the community built by the online showcase gallery played an important role in making young people want to participate,  and improving their confidence. One mentor said that “[being part of the online showcase] motivates them actually to do something innovative and… [the] global community motivates them to think out of the box.”

    The favourites in the web category for Coolest Projects 2024.

    They also reported that the online community inspired young people to solve real-world problems. One mentor said, “the wonderful thing is the kids create so many things which are solutions to world problems.” Others told us that young people feel a great deal of pride that their solutions are available for others to see online and that they get ideas from other projects on how to solve problems. One mentor from India told us about a young person who created a boat to clean rivers and then was inspired to learn to program micro:bit devices, having seen similar projects in the gallery.

    Focus on ‘growth, not competition’

    The phrase ‘growth, not competition’ came from the mentors in the focus group, and we love this description.

    “[With] Coolest Projects… the only agenda is to grow. Grow with the coding, nurture your skills, creativity.” – Focus group attendee.

    In he focus group, mentors told us they really valued the way the Coolest Projects online showcase allows all young people to participate, including those who were less experienced tech creators. One mentor told us that because everyone’s project is displayed in the gallery the beauty is that everybody is encouraged individually… regarding the experience. … They can start with very small things. And they have [the] opportunity to upload it on the platform.”

    One mentor who supports young people in remote locations in India spoke about the way Coolest Projects offers a level playing field where his students can be included and participate to the same extent as less remote places: “students never feel left behind.”

    Three young people working together on a tech project.

    The in-person events also reflected the diversity of young people’s experience of digital making. Of those creators who answered surveys, 35% said it was their first time making this kind of project, while 37% said they had made similar projects before. This mix of experience was also reflected in the interviews, with some young people creating something for the first time and having only started learning coding recently, while others had been developing their projects for a long time. Many creators told us they felt inspired by the opportunity to show their projects to others, regardless of their experience level.

    In-person events: Building a community of digital creators

    Attendees at both Coolest Projects UK and Ireland commented on the sense of community and the excitement that was generated by being around other young people. One young person spoke about how much they enjoyed being “surrounded by people who like coding too”. They really valued seeing other creators’ projects and speaking with their peers.

    The exhibition hall at Coolest Projects Ireland 2023.

    The young people we spoke to reflected on the positive impact of this sense of community and belonging. They told us that seeing others’ projects inspired them to develop their ideas and learn new skills. One young person described how the in-person event allowed them to get inspired and socialise.” A second said, “that’s why I’m here — to get inspired.”

    Another clear theme was how much young people valued the opportunity to show their projects to others. This gave them confidence in their own ability to build things. One creator at Coolest Projects UK spoke about the sense of achievement they felt after building something themselves and then being able to present it to others.

    Two young people share a project on their laptop with a judge at Coolest Projects.

    Young people at both events spoke about their plans for what they wanted to do next, talking about trying new technology such as building games, learning Python, and creating mobile apps. At both events, creators described how they wanted to continue to develop and build on their existing ideas with the possibility of showcasing them again.

    What we want to learn next

    We are continuing to look for ways to improve the Coolest Projects experience for young people and their mentors. As part of this, we are conducting user experience research to understand how we can improve the registration process for the online Coolest Projects showcase.

    We were delighted to hear from mentors in this year’s focus group how much they valued the online showcase gallery, and we want to understand the impact of this resource better as part of Coolest Projects 2025. If you want to find out more about Coolest Projects, we highly recommend taking a look at the amazing projects made by young people around the world

    Dates for Coolest Projects 2025

    We’re so pleased that so many young people around the world loved taking part in Coolest Projects this year. And we’re very excited that Coolest Projects will be back and bigger than ever before in 2025! 

    The Coolest Projects online showcase is open to any young person up to age 18, based anywhere in the world. Registration opens 14 January, and we’ll host a celebratory livestream on 25 June.

    A Coolest Projects sign with two people doing handstands in front of it.

    Coolest Projects in-person events will also be popping up around the world. In-person events are open to everyone up to age 18 in the host country. Family and friends are very welcome to come along too. 

    Save the date for:

    • Coolest Projects Ireland, 1 March 2025
    • Coolest Projects USA, 5 April 2025
    • Coolest Projects Belgium, 20 April 2025
    • Coolest Projects UK, 17 May 2025
    • Coolest Projects Belgium, date to be confirmed (TBC)
    • Coolest Projects Ghana, date TBC
    • Coolest Projects India, date TBC
    • Coolest Projects Malaysia, date TBC
    • Coolest Projects South Africa, date TBC

    Keep an eye on the Coolest Projects website for more event dates and details coming soon.

    It’s never too early to start making and saving digital projects to showcase next year. We can’t wait to see what the world’s young tech creators will make!

    Website: LINK

  • Arduino IDE 2.3.3: discover new support for shared spaces and more!

    Arduino IDE 2.3.3: discover new support for shared spaces and more!

    Reading Time: 2 minutes

    We’re excited to announce that the Arduino IDE 2.3.3 is now live

    What’s in the new version

    This new release is packed with improvements, including one feature we’re particularly proud of: support for shared spaces in Arduino Cloud. If you have a Cloud Business plan or School plan, you can now view and edit shared space sketches directly within the IDE, making collaboration with your team even easier and more efficient.

    This builds on the recent news that collaborative coding has been added to the Arduino Cloud Editor, extending the functionality to the IDE itself. 

    In addition, Arduino CLI 1.x is part of this release, alongside several fixes and performance enhancements. Some highlights include a cancelable verify and upload process, improved handling of custom board options, and more (you can check out the full list of changes in the release notes on GitHub).

    By the community, for the community

    We want to extend a heartfelt thank you to everyone who contributes to the ongoing development of the Arduino IDE. Your feedback, testing, and contributions help make the Arduino platform what it is today – a tool for everyone.

    Finally, a reminder: Arduino IDE, like many of our projects, is open-source and free for the entire community. If you’re passionate about innovation and want to support initiatives like this, we encourage you to contribute and donate to the open-source cause: a dedicated page will open when you download the new version, but you can simply access it at this link at any time as well. Together, we can keep improving and making tools like Arduino IDE available to everyone. 

    Check out the Arduino IDE 2.3.3 today, and happy coding!

    The post Arduino IDE 2.3.3: discover new support for shared spaces and more! appeared first on Arduino Blog.

    Website: LINK

  • Plasma 2350 review

    Plasma 2350 review

    Reading Time: 3 minutes

    You can buy the Plasma 2350 board on its own or in a Starter Kit (£34.50 / $38) with a USB-A to USB-C cable and 10m string of 66 individually addressable frosted LED stars. These look superb when lit up, and are a great way of showcasing the capabilities of the Plasma 2350. We also tried out a long 300-LED strip and there was easily enough current (up to 3A) from the USB-C power connection to light them all.

    The Starter Kit includes a 10m string of frosted RGB LED stars that showcase the Plasma 2350’s capabilities with some eye-catching effects

    Wired for light

    Connecting your LED string or strip to the board is simple. As on the Plasma 2040, there are four screw terminals on one end: for 5V power, data, clock, and ground. While WS2812/NeoPixel LED strips have only three wires, omitting the clock connection, the latter is needed for DotStar LEDs. A little care needs to be taken to make sure each wire is in the correct terminal and that they’re screwed securely.

    Despite coming in a slimmer ‘gum stick’ form factor than the Plasma RP2040, the board manages to cram in many useful features. There’s an unpopulated header down one long edge to break out selected GPIO pins, offering access to UART and I2C interfaces, along with analogue inputs, PWM outputs, and PIO state machines. There’s also a Qwiic/STEMMA QT connector for breakout boards, as well as Pimoroni’s new proprietary SP/CE (Serial Peripheral / Connector Evolution) port – an eight-pin JST-PH connector including four pins for SPI.

    Only slightly longer than a Raspberry Pi Pico 2, the Plasma 2350 makes use of the same microcontroller chip for fast processing and flicker-free lighting

    Buttons for everything

    One slight downside of the SP/CE’s inclusion is that there’s no room for a B user button next to the A one (as on the Plasma 2040), although the Boot button doubles as a user input. There’s also a handy Reset button, to save repeatedly disconnecting and connecting the USB-C power. An on-board RGB LED is a nice touch, too.

    Before you can start programming some light patterns, you’ll need to install MicroPython. In its RP2350 GitHub repo, Pimoroni provides a custom UF2 file for the Plasma 2350. To install it, connect the board to your computer via USB while holding the Boot button, to mount it as a drive, then drag the file over to it. Alternatively, if you prefer CircuitPython, with which you can utilise Adafruit’s excellent LED Animation library, there’s also a UF2 image for that.

    Using MicroPython in the Thonny IDE, we tried out some code examples from Pimoroni’s GitHub repo, altering the constant for the number of LEDs to match our string. While there are only a few examples there – including a nice ‘rainbow’ colour-cycling effect – we found that most of the ones for the Plasma 2040 and Plasma Stick 2040 W still work. Impressive lighting effects include alternating/random blinkies, sparkles, snowfall, fire, pulsing and a lovely rainbow sweeping across the string of LEDs.

    Since the Plasma 2350 lacks on-board Wi-Fi, you can’t get your LEDs to react to data from the network, but you could always connect a breakout input such as a temperature sensor.

    Verdict

    9/10

    An easy way to control NeoPixel/DotStar LED strings with programmable effects, with extra processing power if you need it.

    Features

    Features: RP2350A processor; Boot, Reset, and user buttons; on-board RGB LED

    LED compatibility: 5V WS2812/NeoPixel, APA102/DotStar

    Connections: 4 × screw terminals, USB-C port for power/programming, Qwiic/STEMMA QT, SP/CE, unpopulated 15-pin GPIO header

  • These Shattered Space helmet replicas stay video game accurate using an Arduino Nano

    These Shattered Space helmet replicas stay video game accurate using an Arduino Nano

    Reading Time: 2 minutes

    Starfield, a game set in the vast expanse of our galaxy, is receiving a new expansion called “Shattered Space” in which players can don novel weapons and gear to take on the latest challenge. As part of its release, the expansion’s publisher Bethesda reached out to cosplayer Jonas Zibartas and tasked him with creating a pair of render-accurate helmets that could be worn all day at conventions.

    Within the first couple weeks of nonstop designing and test fits, Zibartas had a helmet model that consisted of 130 individual parts and where airflow was a major priority. Similar to a motorcycle helmet, the inner layer is comprised of soft fabric overlayed on top of a rigid, yet porous, helmet shell. Two fans near the front bring in fresh air from the outside and help prevent the transparent visor layer from becoming too foggy due to the wearer’s breathing. Raised just above this shell is a secondary set of 3D-printed accent pieces that give the helmet its finer details/form.

    In Shattered Space, these helmets have lighting accents both inside the visor and at various points outside the helmet which act as indicators or headlamps. Zibartas was able to embed all of these features thanks to a dense strip of LEDs and an Arduino Nano.

    The meticulous process of constructing these incredibly detailed helmets can be found here in Zibartas’s YouTube video below!

    [youtube https://www.youtube.com/watch?v=AZqaHBKlm48?feature=oembed&w=500&h=281]

    The post These Shattered Space helmet replicas stay video game accurate using an Arduino Nano appeared first on Arduino Blog.

    Website: LINK

  • Let’s play at the Maker Faire Rome 2024!

    Let’s play at the Maker Faire Rome 2024!

    Reading Time: 2 minutes

    We’re excited to be back at Maker Faire Rome as a Gold Sponsor of the 12th edition (October 25-27, 2024), with some memorable experiences lined up for all makers, innovators, and creators who attend!

    Learn by playing at our booth 

    Visit us at the fair for a playful, interactive experience where you can explore the world of Arduino through fun, hands-on demos and games. 

    We want to offer a creative approach to learning how to use technology, and give everyone a chance to draw inspiration from some simply fantastic projects: have you seen the new spin Luca Doglione, our Plug and Make Kit Star, has put on vintage arcade games? That’s just one example of what you’ll find at the Arduino booth in Hall 41. So, join us to have fun and let your imagination soar, as you create your own personalized projects!

    Within a complete ecosystem of easy-to-use hardware, software solutions and cloud services, we will turn the spotlight on some of our most exciting product launches for the year, designed to make innovation more accessible than ever: Alvik robot and Plug and Make Kit

    Our latest maker kit has something for everyone, whether you’re a seasoned engineer or a beginner just starting your journey! So be sure to come check out our growing range of tools, and discover firsthand how fun, quick and easy it can be to make – not just use – technology. 

    Don’t miss exclusive product discounts

    We’ll be offering unprecedented discounts on Arduino products, available through our official resellers at Maker Faire Rome. This is a unique opportunity to get your hands on the latest tech, at prices you won’t find anywhere else!

    Meet the Arduino team and community

    Come meet the Arduino staff, connect with content creators, and interact with fellow fans at this year’s Maker Faire Rome. Whether you’re seeking technical advice, creative inspiration, or just want to geek out with like-minded people, our booth will be the place to be.

    Mark your calendars and join us at Maker Faire Rome 2024, October 25th-27th at Gazometro Ostiense. Just remember to get your tickets in advance

    We can’t wait to meet you, play together, and build the future of making.

    The post Let’s play at the Maker Faire Rome 2024! appeared first on Arduino Blog.

    Website: LINK