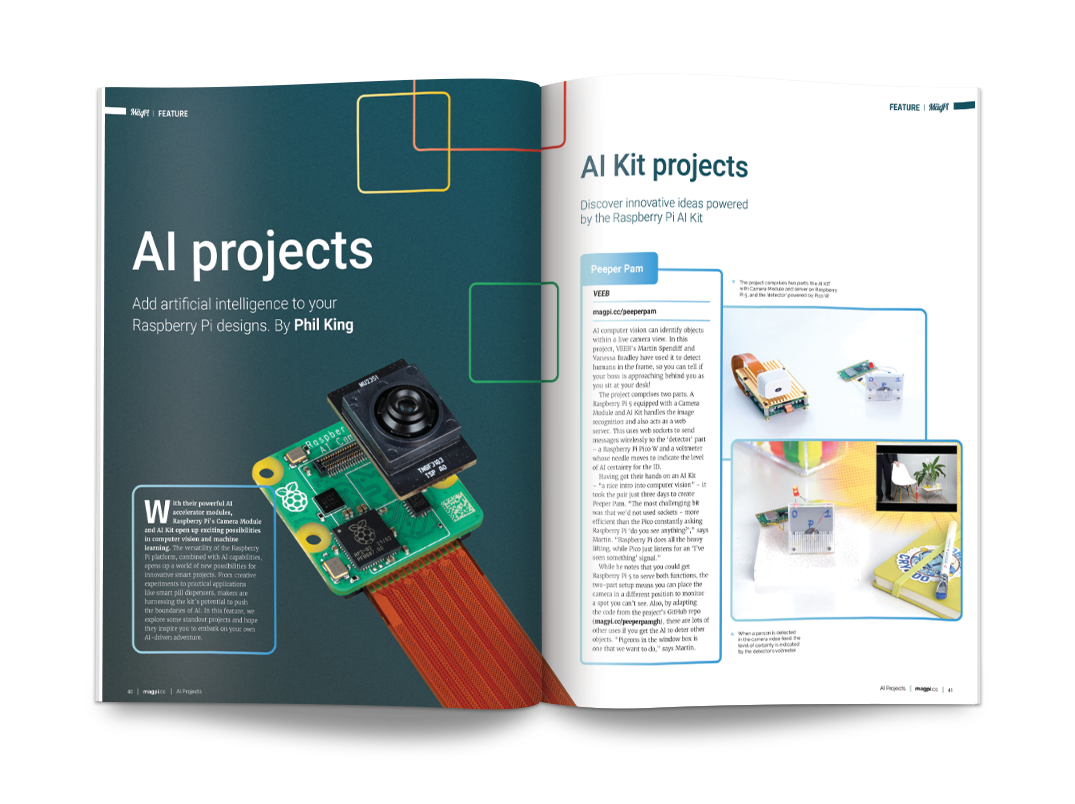
Discover a range of practical AI Projects that put Raspberry Pi’s AI smarts to good use. We’ve got people detectors, ANPR trackers, pose detectors, text generators, music generators, and an intelligent pill dispenser.
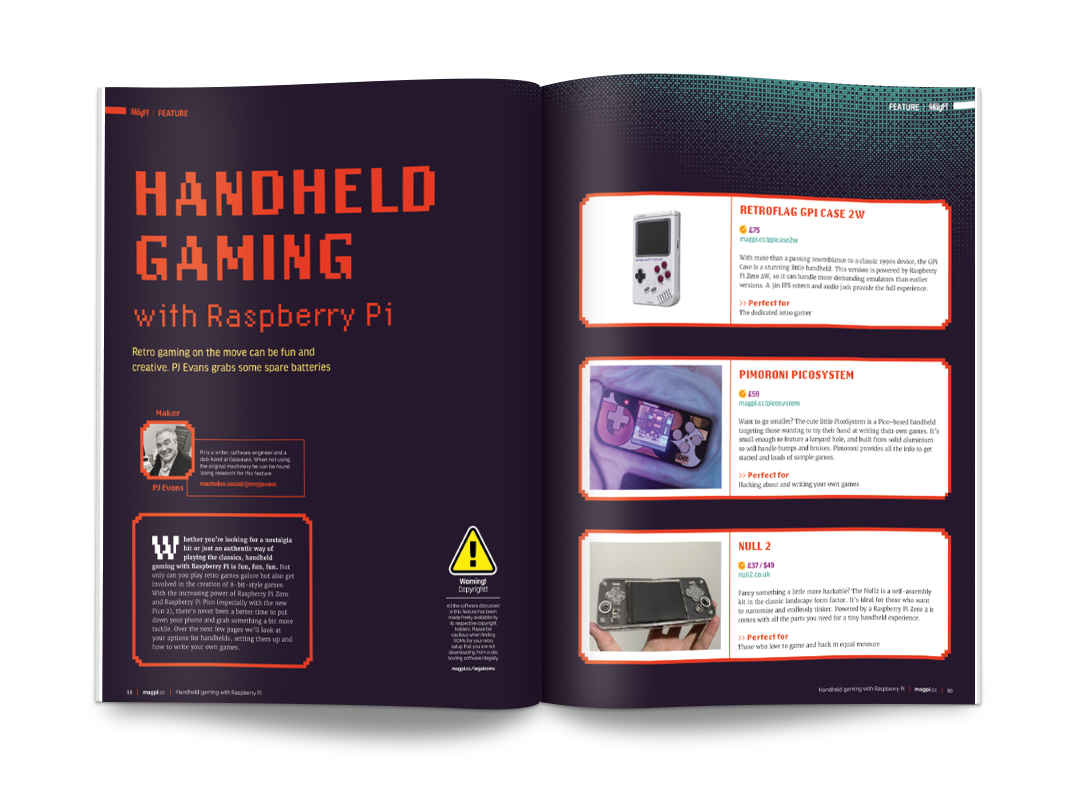
Handheld gaming
Retro gaming on the move can be fun and
creative. PJ Evans grabs some spare batteries and builds a handheld gaming console.
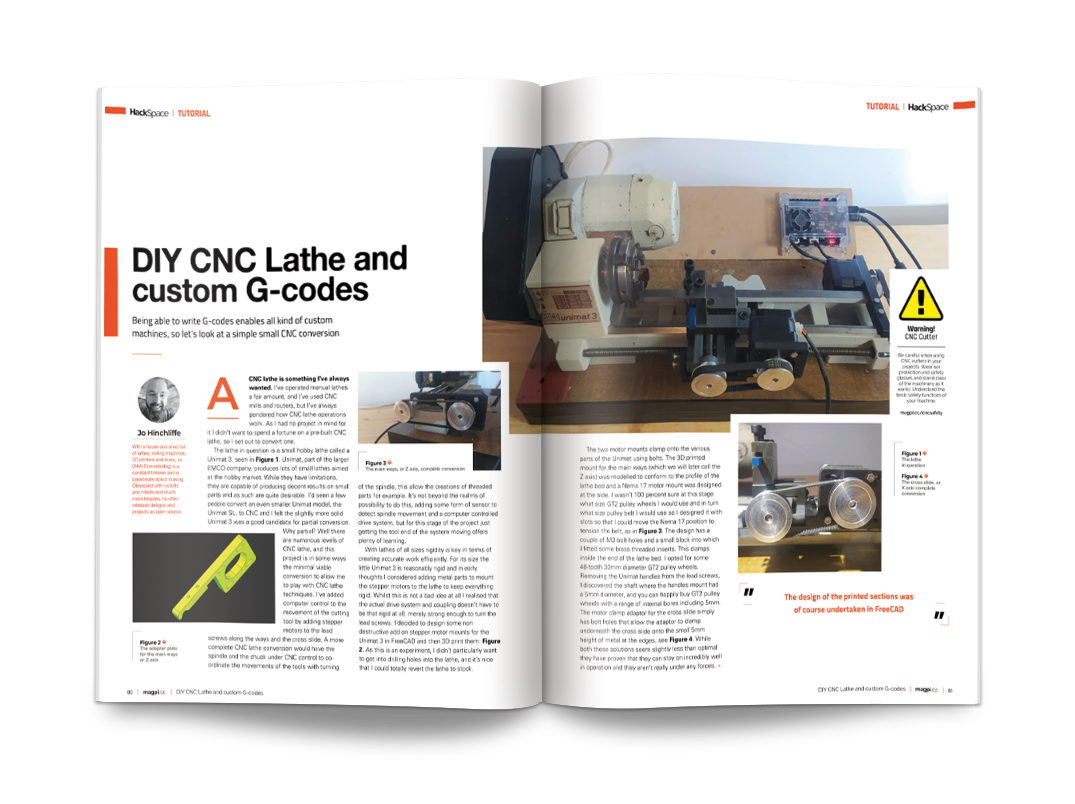
DIY CNC Lathe
Being able to write G-codes enables all kind of custom machines. In this tutorial Jo Hinchcliffe looks at a simple small CNC lathe conversion.
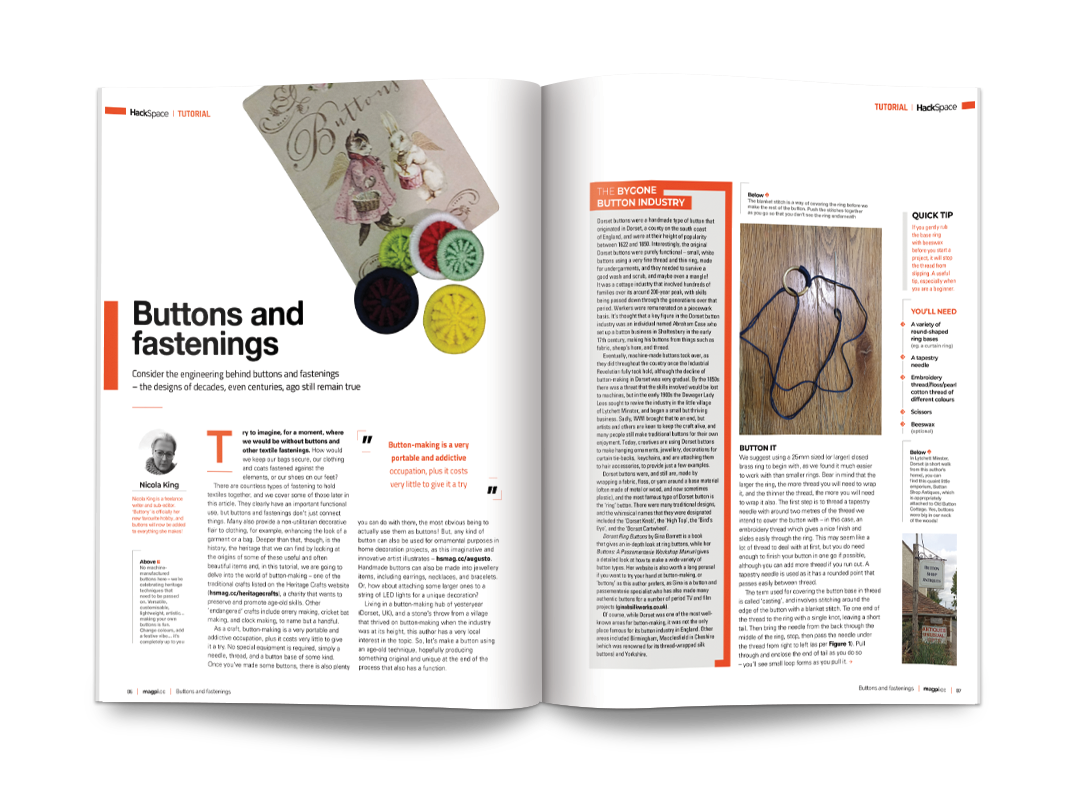
Buttons and fastenings
Where would we be without buttons and fasteners. Nicola King takes a deep dive into the types of fastenings that you can use in your crafting projects.
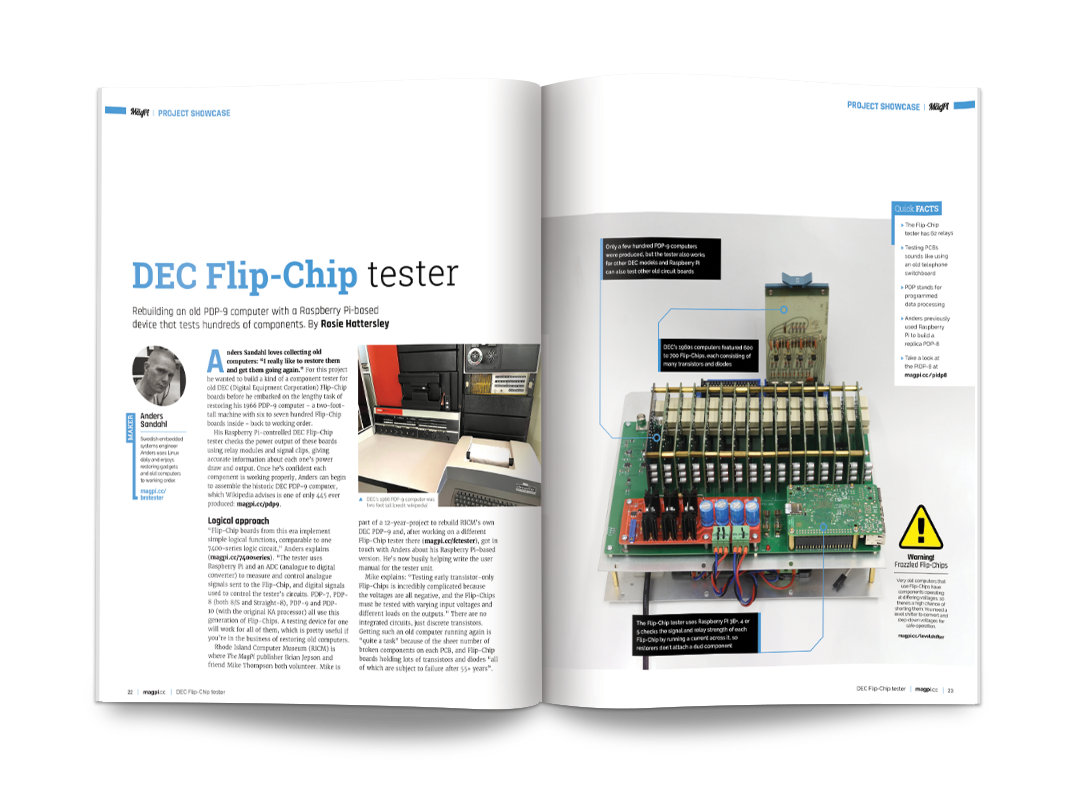
DEC Flip-Chip tester
Rebuilding an old PDP-9 computer with a Raspberry Pi-based device that tests hundreds of components.
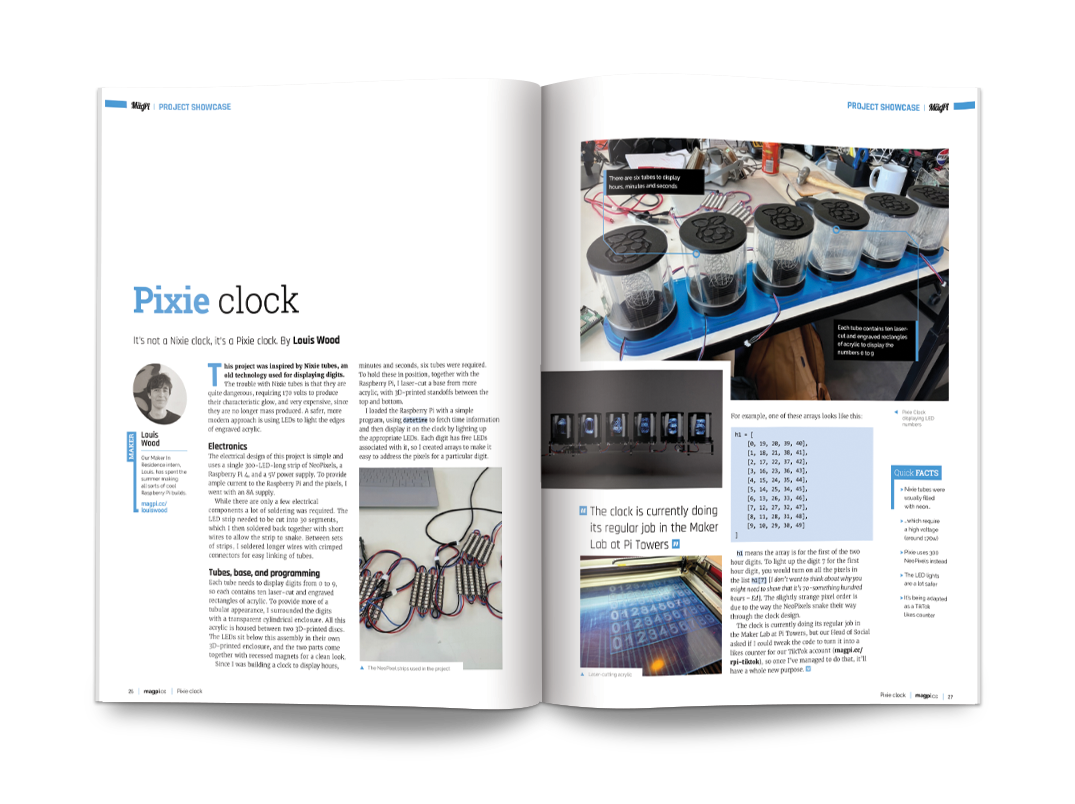
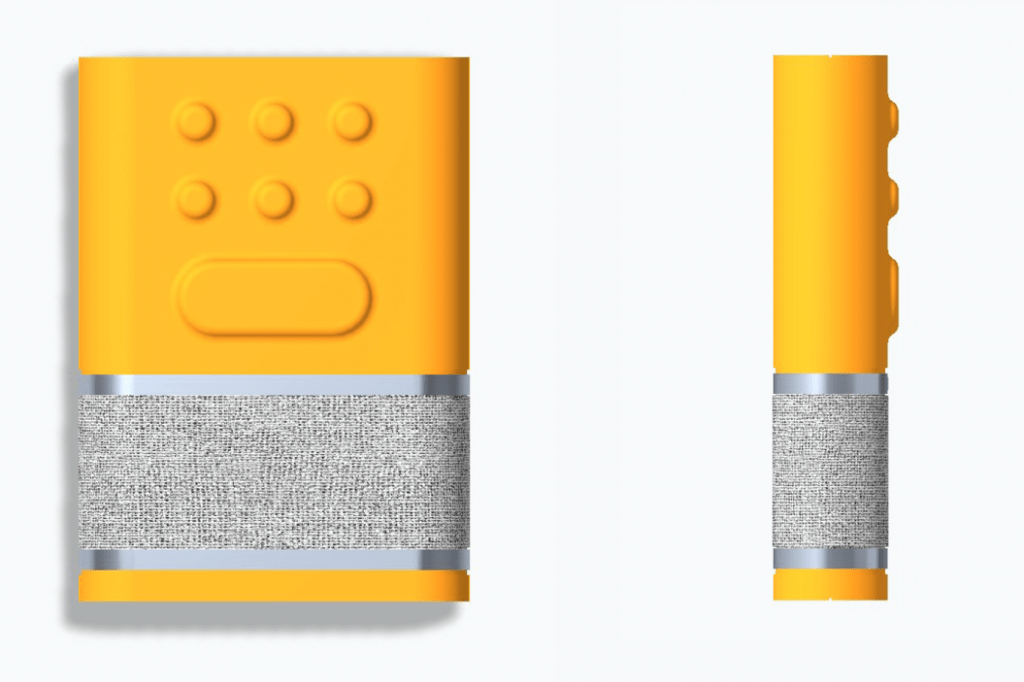
Pixie clock
This project recreates an old Nixie tube clock, only using ultra-modern (and vastly safer) LED lights.
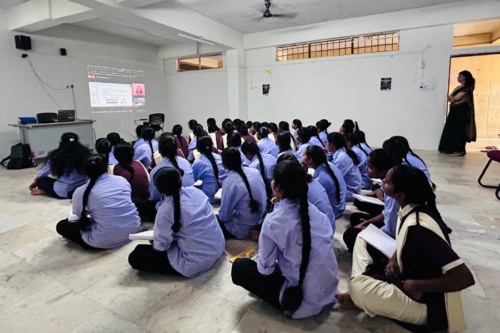
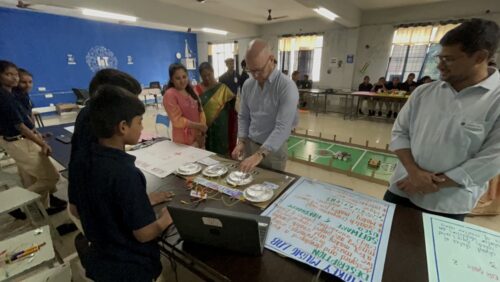
The aim of our partnership is to enable students in the school and undergraduate college to learn about coding and computing by providing the best possible curriculum, resources, and training for teachers.
As both institutions are government institutions, education is provided for free, with approximately 800 high-performing students from disadvantaged backgrounds currently benefiting. The school is co-educational up to grade 10 and the college is for female undergraduate students only.
The partnership is strategically important for us at the Raspberry Pi Foundation because it helps us to test curriculum content in an Indian context, and specifically with learners from historically marginalised communities with limited resources.
Adapting our curriculum content for use in Telangana
Since our partnership began, we’ve developed curriculum content for students in grades 6–12 in the school, which is in line with India’s national education policy requiring coding to be introduced from grade 6. We’ve also developed curriculum content for the undergraduate students at the college.
In both cases, the content was developed based on an initial needs assessment — we used the assessment to adapt content from our previous work on The Computing Curriculum. Local examples were integrated to make the content relatable and culturally relevant for students in Telangana. Additionally, we tailored the content for different lesson durations and to allow a higher frequency of lessons. We captured impact and learning data through assessments, lesson observations, educator interviews, student surveys, and student focus groups.
Curriculum well received by educators and students
We have found that the partnership is succeeding in meeting many of its objectives. The curriculum resources have received lots of positive feedback from students, educators, and observers.
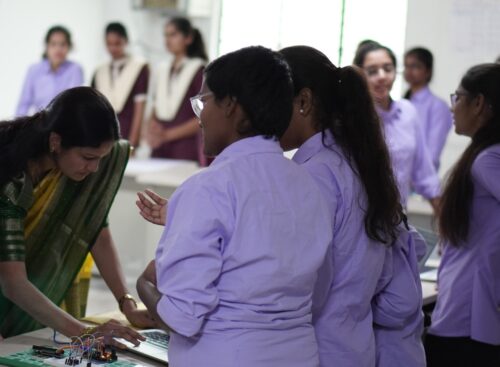
In our recent survey, 96% of school students and 85% of college students reported that they’ve learned new things in their computing classes. This was backed up by assessment marks, with students scoring an average of 70% in the school and 69% in the college for each assessment, compared to a pass mark of 40%. Students were also positive about their experiences of the computing and coding classes, and particularly enjoyed the practical components.
“My favourite thing in this computing classes [sic] is doing practical projects. By doing [things] practically we learnt a lot.” – Third year undergraduate student, Coding Academy College
“Since their last SA [summative assessment] exam, students have learnt spreadsheet [concepts] and have enjoyed applying them in activities. Their favourite part has been example codes, programming, and web-designing activities.” – Student focus group facilitator, grade 9 students, Coding Academy School
However, we also found some variation in outcomes for different groups of students and identified some improvements that are needed to ensure the content is appropriate for all. For example, educators and students felt improvements were needed to the content for undergraduates specialising in data science — there was a wish for the content to be more challenging and to more effectively prepare students for the workplace. Some amendments have been made to this content and we will continue to keep this under review.
In addition, we faced some challenges with the equipment and infrastructure available. For example, there were instances of power cuts and unstable internet connections. These issues have been addressed as far as possible with Wi-Fi dongles and educators adapting their delivery to work with the equipment available.
Our ambition for India
Our team has already made some improvements to our curriculum content in preparation for the new academic year. We will also make further improvements based on the feedback received.
The long-term vision for our work in India is to enable any school in India to teach students about computing and creating with digital technologies. Over our five-year partnership, we plan to work with TGSWREIS to roll out a computing curriculum to other government schools within the state.
Through our work in Telangana and Odisha, we are learning about the unique challenges faced by government schools. We’re designing our curriculum to address these challenges and ensure that every student in India has the opportunity to thrive in the 21st century. If you would like to know more about our work and impact in India, please reach out to us at india@raspberrypi.org.
We take the evaluation of our work seriously and are always looking to understand how we can improve and increase the impact we have on the lives of young people. To find out more about our approach to impact, you can read about our recently updated theory of change, which supports how we evaluate what we do.
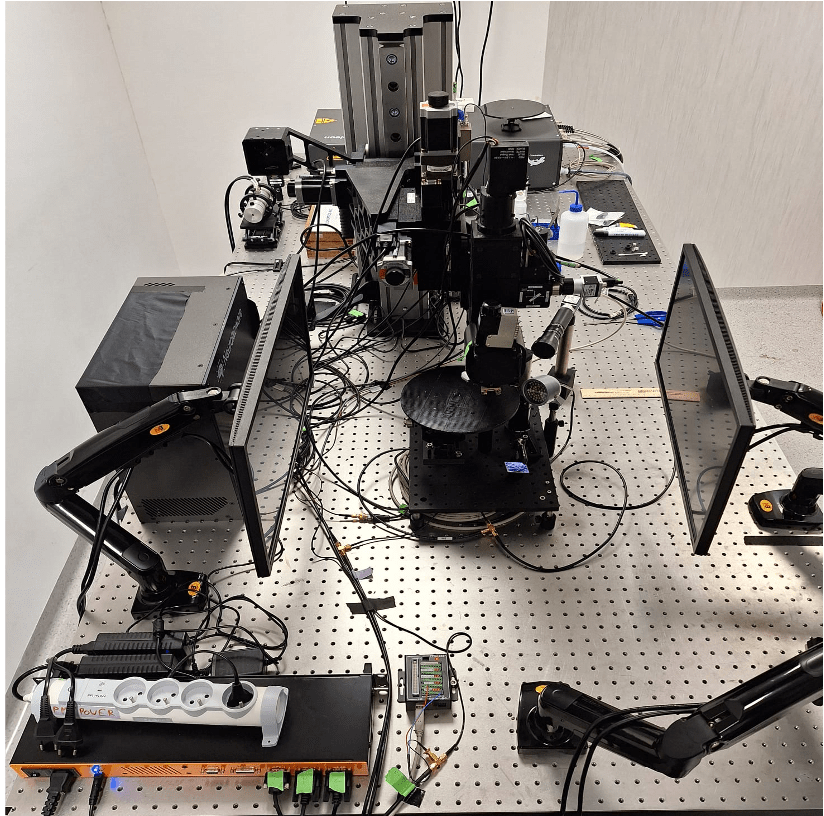
Common research methods to study the visual system in the laboratory include recording and monitoring neural activity in the presence of sensory stimuli, to help scientists study how neurons encode and respond, for example, to specific visual inputs.
One of the biggest technical problems in the neural recording setups used in such experiments, is achieving precise synchronization of multiple devices communicating with each other, including microscopes and screens displaying the stimuli, to accurately map neural responses to the visual events.
For example, in the Rompani Lab, a visual neuroscience laboratory at the European Molecular Biology Laboratory (EMBL) in Rome, the recording system (a two-photon microscope) needs to communicate with the visual stimulation system (composed of two screens) that are used to show visual stimuli while recording neural activity. To synchronize these systems efficiently, they turned to an Arduino UNO Rev3. “Its simplicity, reliability, and ease of integration made it an ideal tool for handling the timing and communication between different devices in the lab,” says Pietro Micheli, PhD student at EMBL Rome.
How the setups works
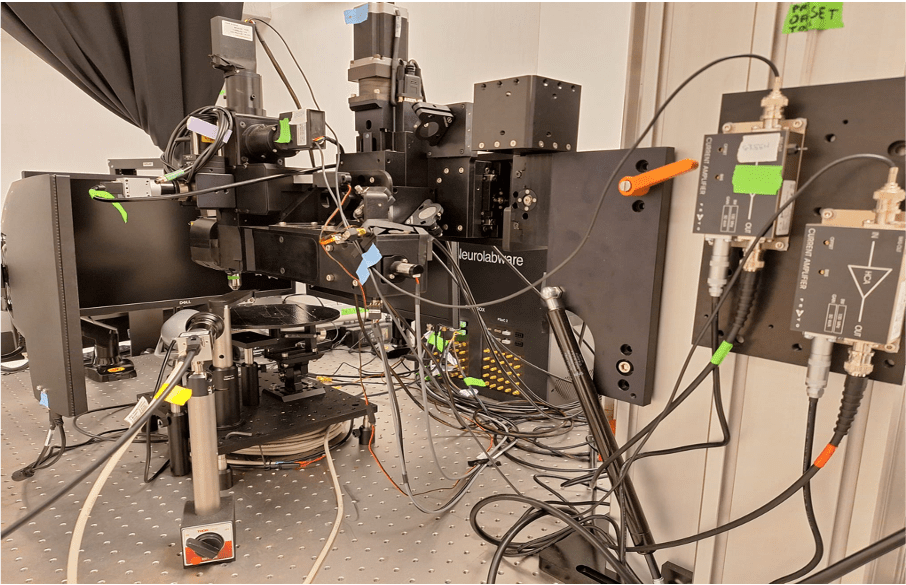
The Arduino UNO Rev3 is used to signal to the microscope when the stimulus (which is basically just a short video) starts and when it ends. While the microscope is recording and acquiring frames, a simple firmware tells the UNO to listen to the data stream on a COM port of the computer used to control the visual stimulation.
Within the Python® script used for controlling the screens, every time a new stimulus starts a command is written on the serial port. The microcontroller reads the command, which can be either ‘H’ or ‘L’, and sets the voltage of the output TTL at pin 9 to 5V or 0V, respectively. This TTL signal goes to the microscope controller, which generates time stamps for the microscope status. These timestamps contain the exact frame numbers of the microscope recording at which the stimulus started (rising edge of the TTL) and ended (falling edge of the TTL).
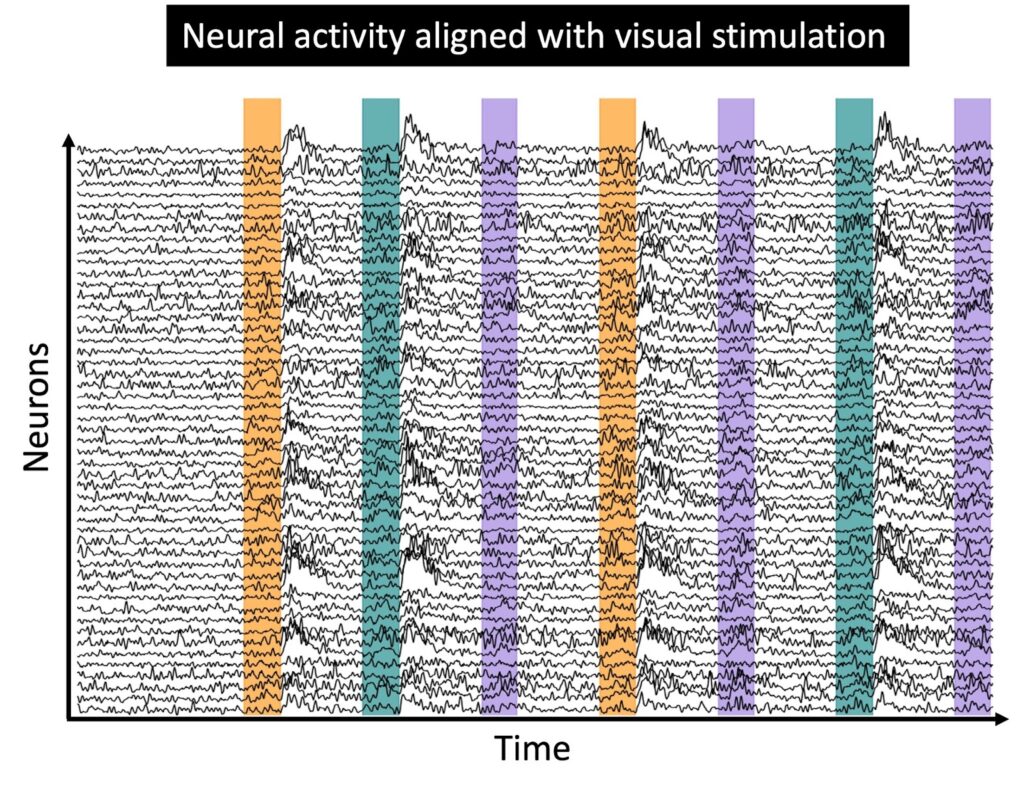
All this information is essential for the analysis of the recording, as it allows the researchers at EMBL Rome to align the neural responses recorded to the stimulation protocol presented. Once the neural activity is aligned, the downstream analysis can begin, focusing on understanding the deeper brain activity.
Ever wonder what neurons that are firing look like?
Micheli shared with us an example of the type of neural activity acquired during an experimental session with the setup described above.
The small blinking dots are individual neurons recorded from the visual cortex of an awake, behaving mouse. The signal being monitored is the fluorescence of a particular protein produced by neurons, which indicates their activity level. After the light emitted by the neurons has been recorded and digitised, researchers extract fluorescence traces for each neuron. At this point, they can proceed with the analysis of the neural activity, to try to understand how the visual stimuli shown are actually encoded by the recorded neural population.
Save 35% off the cover price with a subscription to The MagPi magazine. UK subscribers get three issues for just £10 and a FREE Raspberry Pi Pico W, then pay £30 every six issues. You’ll save money and get a regular supply of in-depth reviews, features, guides and other Raspberry Pi enthusiast goodness delivered directly to your door every month.
Since the inception of Arduino, the Arduino IDE has been a go-to tool for people learning to code and creating projects ranging from remote-controlled cars to soil moisture monitoring. No wonder it’s been downloaded over 24 million times this year, so far!
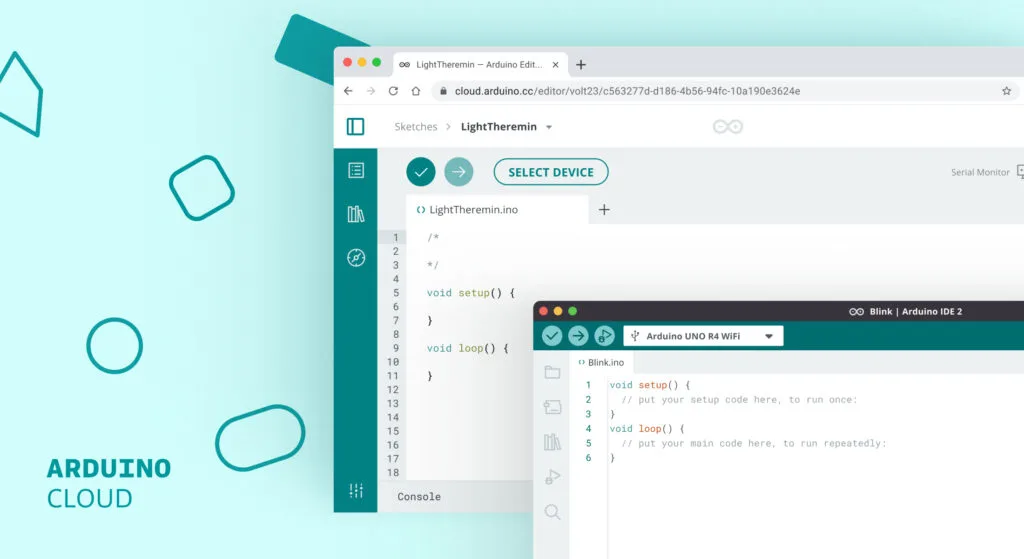
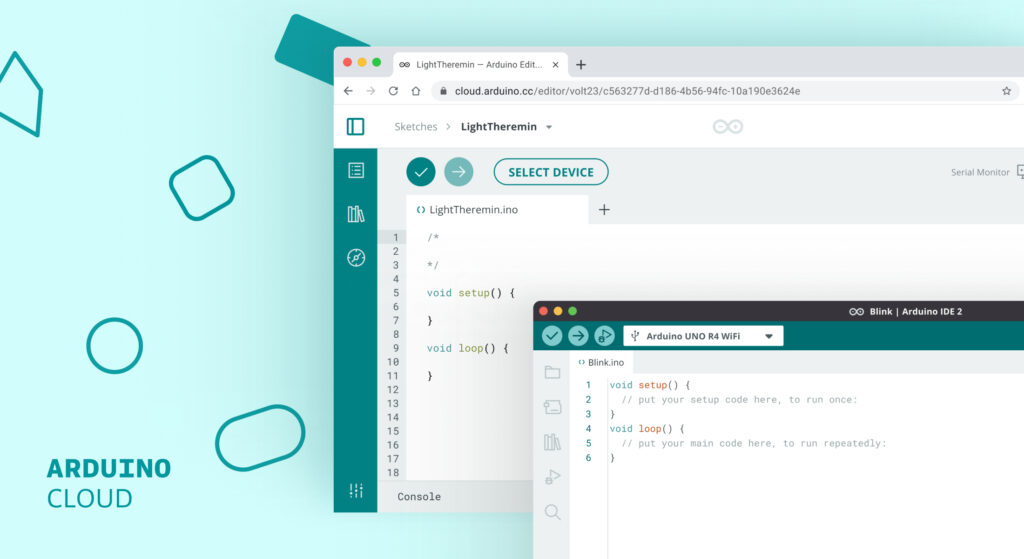
Now if you’ve ever wondered whether you can use Arduino IDE online, you’re not alone. Many Arduino enthusiasts, from hobbyists to professionals, have been asking the same question. The good news? Yes, there is an online Arduino IDE, and it’s called the Arduino Cloud Editor! Available through Arduino Cloud, the Cloud Editor (previously known as the Arduino Web Editor), offers a seamless, free way to code from anywhere without the hassle of traditional software. It gives you peace of mind knowing that there is no risk of losing your valuable sketches – or all the hours you spent developing them.
Both the traditional Arduino IDE and the Cloud Editor have their strengths, but choosing the right one depends on your specific needs and project requirements. So, in this post, we’ll dive into the details so you can make an informed choice and pick the editor that is most suitable for you.
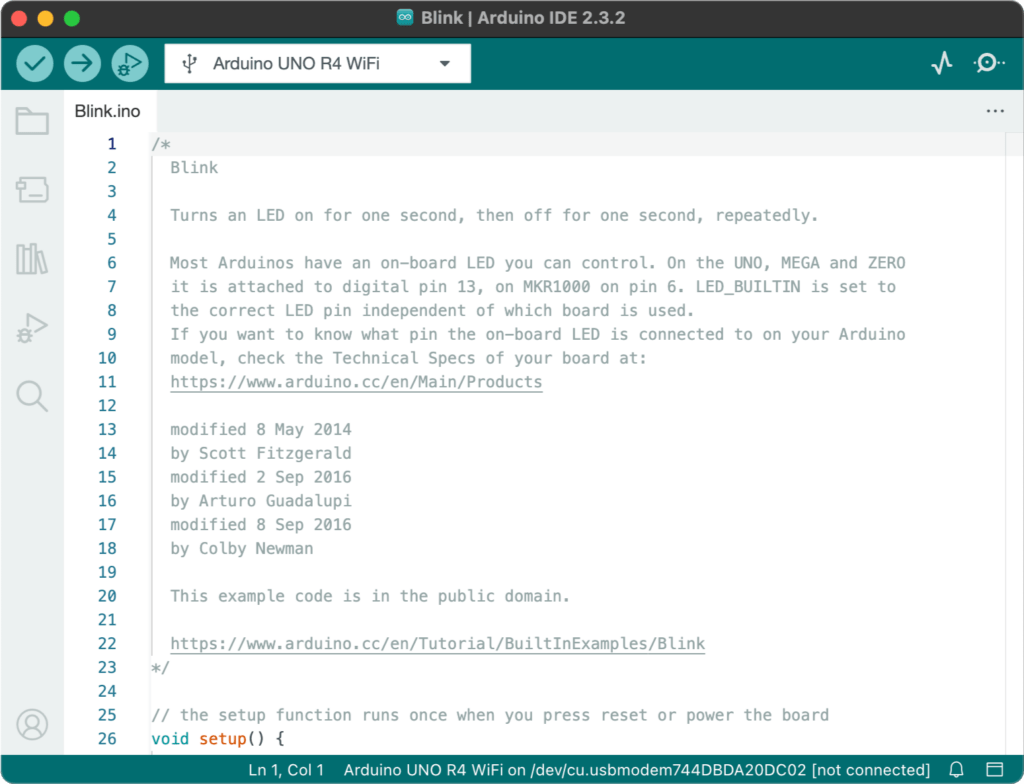
Arduino IDE: greater control, offline use, and stability
Screenshot of the Arduino IDE 2.3.2
The traditional Arduino IDE is installed on your computer, allowing you to write and upload code directly to your Arduino board via a USB cable. Once installed, the IDE can be used offline, making it a reliable choice for projects in areas with limited or no internet access, for example while camping or in remote work locations.
It gives you complete control over updates, letting you maintain a stable environment by choosing when (or if) to install the latest changes. Plus, it’s equipped with a robust debugger, a serial monitor, and access to thousands of libraries contributed by the Arduino community.
Key features of the desktop IDE include:
Serial Monitor & Serial Plotter: Essential tools for debugging and visualizing data.
Library Manager: Access to over 5,000 libraries created by the Arduino community.
Autocompletion: The easiest way to speed up your coding process.
In short, the traditional IDE offers more control, such as the option to manually update or freeze the version you’re using, and requires only occasional internet connection for updates.
Who can benefit from the Arduino IDE? Teachers and users who prefer a stable environment without frequent changes may find it particularly valuable.
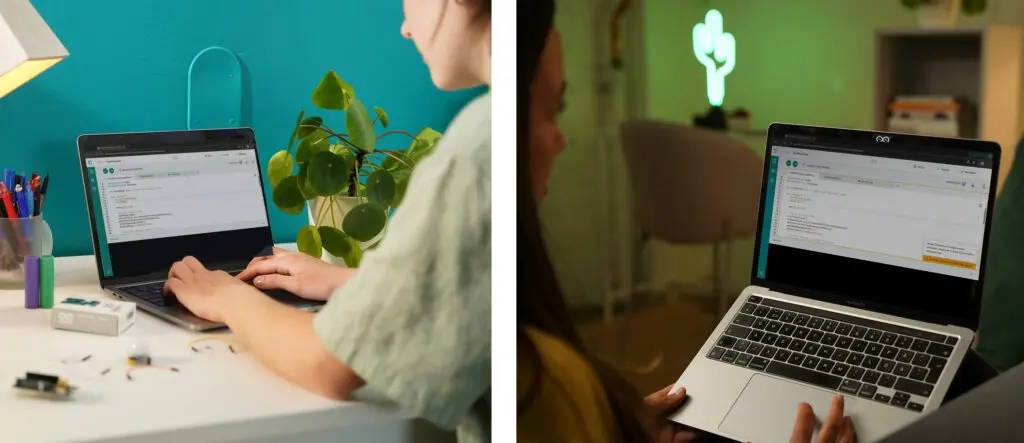
Arduino Cloud Editor: a convenient Arduino IDE online experience
The Arduino Cloud Editor offers a similar experience to the traditional version but adds the convenience of cloud storage and extra features.
One of its most appealing benefits is accessibility: you can access your projects from any computer, whether you’re at school, at home, or at work. Actually, you can even have them in your backpocket on your smartphone when you’re on the go! Cloud auto saving also ensures you never lose progress due to technical issues, providing a safeguard for your projects.
The Cloud Editor automatically updates itself as well as pre-installed libraries, saving you from manual maintenance. Real-time collaborative coding is another standout feature, enabling teams and students to work together on sketches seamlessly.
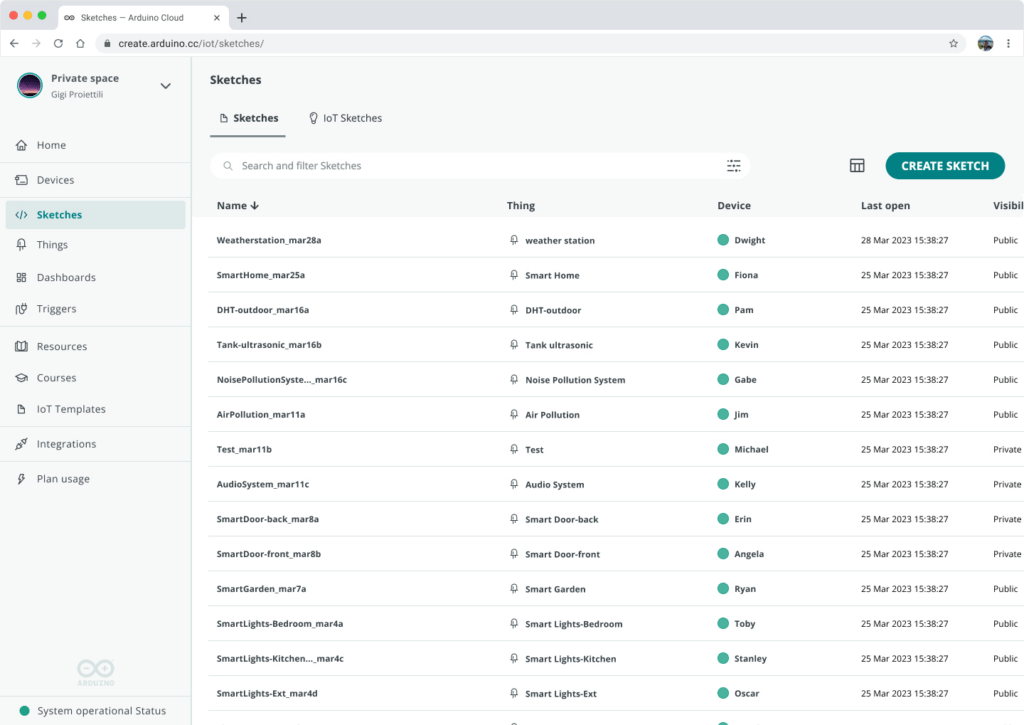
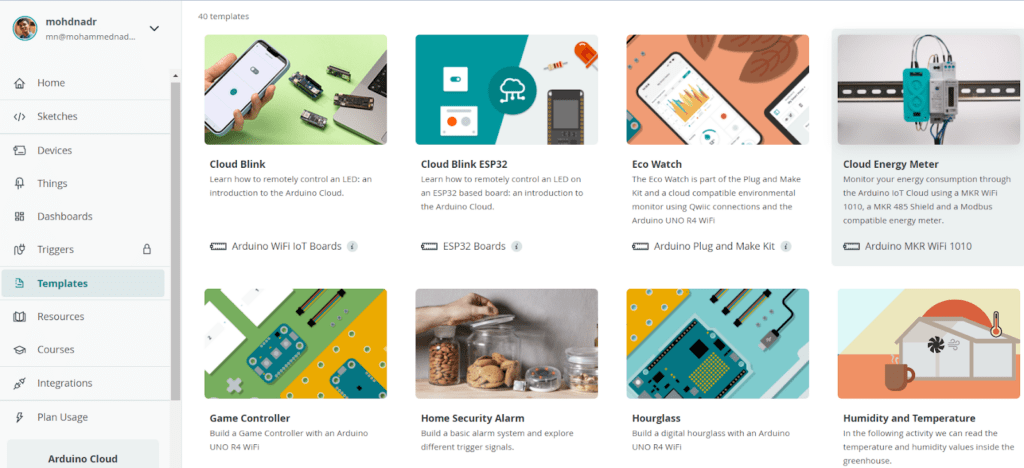
The Cloud Editor is available through Arduino Cloud, a full integrated development experience. In other words, it’s part of a bigger ecosystem. You can build IoT projects faster with pre-built templates, customize dashboards to monitor and control your devices remotely, and even integrate voice commands via Alexa or Google Home without writing a single line of code.
Screenshot of the templates section in Arduino Cloud
Who can benefit from the Cloud Editor? Anyone who needs real-time collaboration and easy access to their projects from anywhere.
The traditional Arduino IDE is ideal for users who need offline access and greater control over updates. It’s faster when compiling and uploading code, and offers advanced debugging tools that the Cloud Editor lacks.
On the other hand, if you need flexibility to work from multiple locations or collaborate in real-time, the Arduino Cloud Editor’s seamless integration with cloud storage and automatic updates make it a more convenient option, especially for beginners. Features like OTA updates are particularly useful for projects requiring frequent, remote updates.
As a quick summary:
Choose the traditional Arduino IDE if:
You prefer working offline or in remote locations without internet access.
You want full control over when updates are installed.
You’re using non-Arduino hardware that requires specific libraries or configurations.
Choose the Arduino Cloud Editor if:
You want to access and edit your projects from anywhere, on any device.
You appreciate automatic updates and zero maintenance.
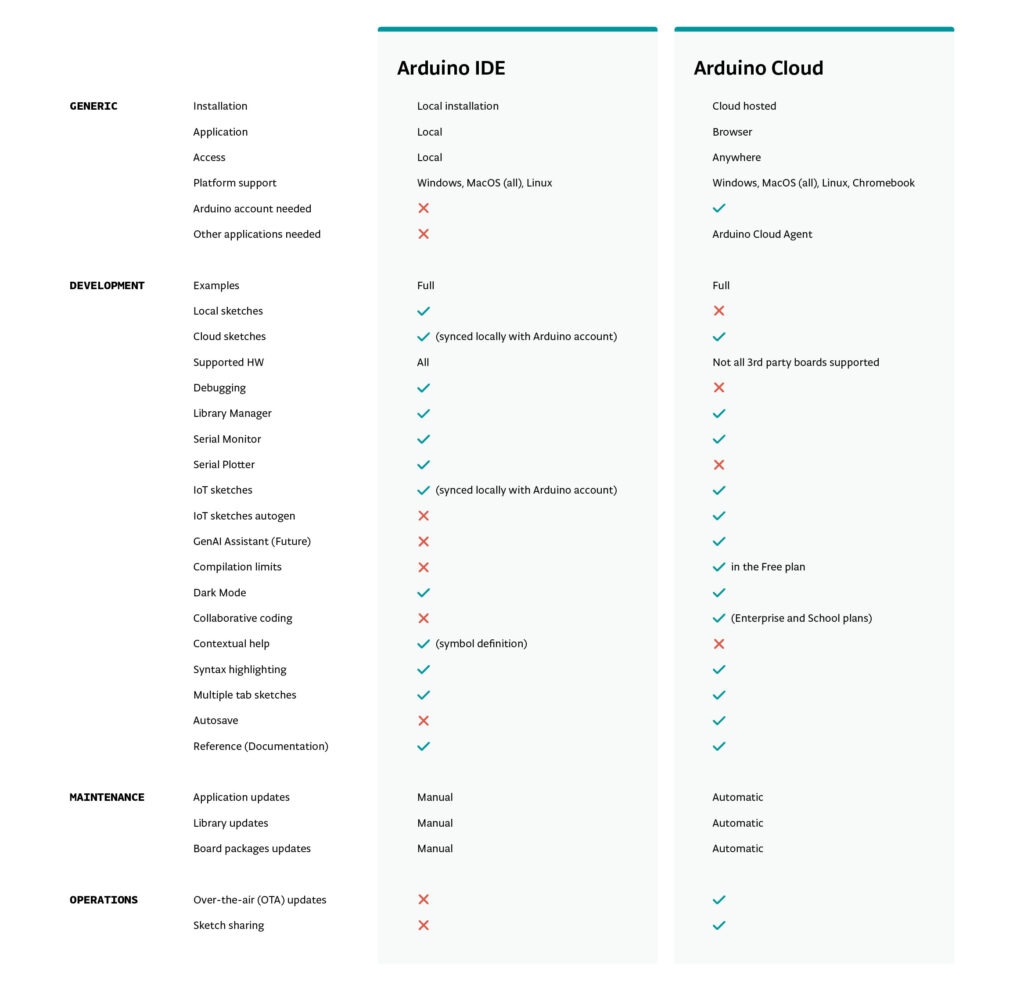
We’ve summarized the features available in the two editors in the detailed comparison table below, to help you decide which option best suits your project needs.
Ultimately, your choice should reflect your project’s complexity, collaboration needs, and hardware requirements.
How to get started with the IDE of your choice
Having decided which IDE is best for you, are you now ready to dive in?
To get started with the traditional Arduino IDE, download the software and check out the Arduino Docs guide that shows you how to program using the IDE.
For the Cloud Editor, simply create an Arduino account and explore the detailed Cloud documentation to help you bring your dream project ideas to life!
We’re excited to introduce #Virgil, an innovative project that combines the power of Arduino technology with a passion for history, creating a groundbreaking interactive experience for museums.
UsingArduino’s versatile and scalable ecosystem, #Virgil operates completely offline, allowing visitors to interact with 3D avatars in a seamless and immersive way. The project brings the past to life, offering dialogue-driven encounters with key historical figures thanks to voice recognition and edge AI – with the option to choose among many different languages.
“#Virgil is meant to celebrate the past and, more importantly, open new avenues for education and inspiration. We want to prove how technology, when guided by ethical values, can amplify and perpetuate our cultural heritage in ways that used to be unimaginable,” comments Enrico Benevenuta, coordinator of the Territori Svelati project and AI expert.
Matteo Olivetti, great-grandson of Olivetti’s founder Camillo, drew inspiration from the iconic Divisumma to design a dedicated hardware setup, Olivox.
Powered by the Portenta X8 and Max Carrier, the device connects via HDMI to any screen, engaging visitors in a rich, interactive experience without the need for smartphones or a stable internet connection. This approach allows the project to adapt easily to different exhibitions and contexts, while offering full control over the visitor experience.
Internationally renowned 3D artist Elvis Morelli was entrusted with creating the first avatar of the project – and it’s no coincidence that Camillo Olivetti was chosen.
The story of Olivetti resonates deeply with Arduino’s own mission of pushing the boundaries of technology, and #Virgil represents a continuation of that legacy by bridging the gap between the past and future through cutting-edge tools.
To find out more about the project and perhaps have a chat with your favorite pioneer of technology and innovation, visit #Virgil’s booth at the upcoming 2024 Maker Faire Rome, booth E.09. Don’t forget to stop by Arduino’s booth N.07 to find out more about our products, and let us know what you asked Camillo!
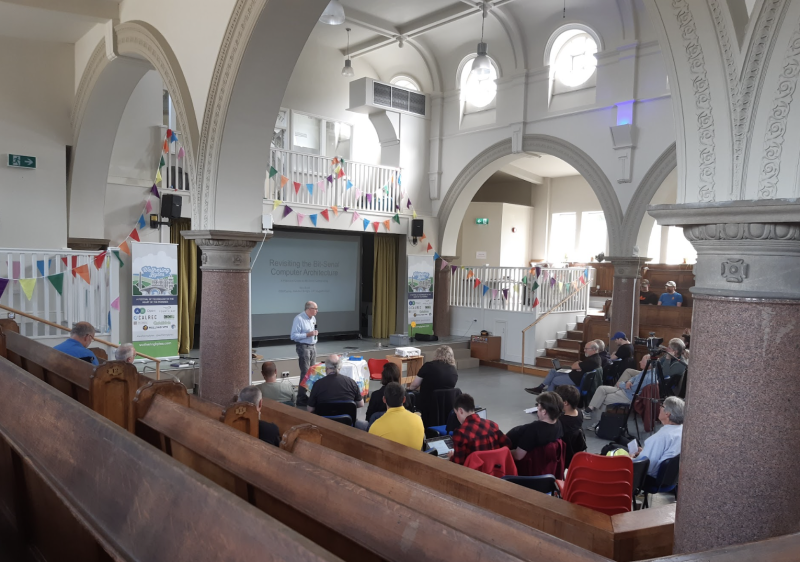
Friday kicked off with a talk on Dina St Johnston, founder of the UK’s first independent software company, which she started in 1959. After that came computing with human-worn sensors; mainframes; human creativity in the age of AI; and a look at Raftabar the robot, which uses facial recognition (and two Raspberry Pi boards) to attempt to engage humans in conversation. The day also featured an exploration of modular synthesis by musician Loula Yorke; how to poke holes in things with prototypes; and a look at the work being done by Open Innovations, an organisation that’s applying open data to policy recommendations in the north of England.
Saturday was the start of Open Source Hardware Camp, and featured a brilliant range of projects. Hackspace contributor Jo Hinchliffe gave a talk on open-source rocketry and the tools he uses to build flying machines, with particular reference to open source design software KiCAD. Omer Kilic and Stuart Childs taught us how to go from 10 units to 10,000 with their Adventures in Manufacturing talk. As DIY electronics enthusiasts we often wonder if we could invent the Next Big Thing, and this talk explored “the strange space between engineers, product owners and factories – setting up production lines and working with a variety of suppliers, from prototypes to mass production”.
There was plenty for fans of vintage computing: Tony Abbey is part of the team that rebuilt the EDSAC computer at the National Museum of Computing in Bletchley, and he was there to tell us all about that project. EDSAC was one of the first general-purpose computers, built in 1949, and even though the clunking electromechanical technology of those days has been far superseded by microcontrollers that you can buy for pennies, the lessons learned by rebuilding an early computer are well worth a look.
Andy Bennett shared his steampunk sunflower (left), which taught us that getting organic shapes to fit on PCBs isn’t quite as easy as it looks. He’s influenced by the work of Mohit Bhoite and Jiri Praus, both wonderful makers who have documented their build process to produce stunning open circuit sculptures. In the next talk, Roger Light explained how he built a digital camera sensor, spending £50,000 to make a device capable of capturing images at a resolution of 256×256 pixels.
Our favourite talk, and one which really encapsulates the brilliance of the one hardware movement, was by Spencer Owen. In 2013, Spencer built a clone of a Z80 computer on a breadboard, which went on to become the RC2014 kit computer. His talk this year was on dye sublimation printing onto PCBs. He’s worked out that with the same hardware you might use to print on to mugs and T-shirts, you can print on to the silkscreen layer of a PCB, opening up all sorts of colours and designs. Our favourite bit of Spencer’s talk is that he used the process to make a computer with rainbow PCBs, which he sold to raise money for LGBT charities; our second favourite bit of the talk is that, as JLCPCB now offers full-colour silkscreens, he wouldn’t have bothered with sublimation printing if he were starting today, but he did it anyway.
That’s something we love about open source hardware – very often, the point isn’t that you can do it better, or cheaper, but that you’ve done it for yourself. And we love it that events like this keep happening, where we share the knowledge and enthusiasm that keeps communities thriving.
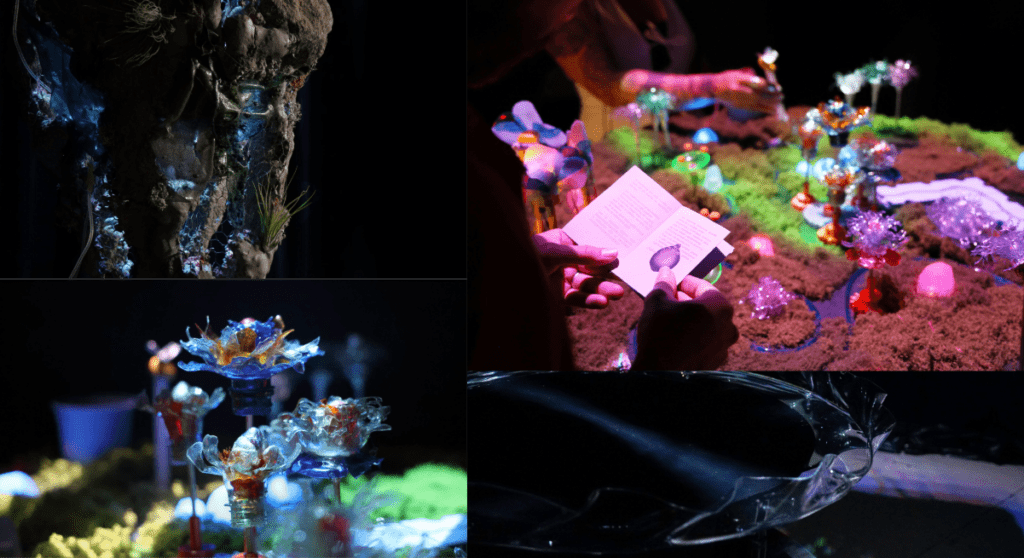
Art and engineering are not separate concepts. There is a great deal of overlap between the two and many modern disciplines increasingly blur those lines. Mónica Riki is an “electronic artist and creative coder” who embodies that idea: you might remember her and her incredible Arduino UNO R4-powered installations from our blog post last year. In addition to her artistic practice, her technology-forward approach inspires her work as an educator, as she helps her master’s students develop hybrid concepts that use microcontrollers, sensors, lights and a variety of different technologies to create interactive art pieces. The level of creativity that technology is able to unleash is readily apparent in two of her students’ projects: Flora and Simbioceno.
Flora, created by College of Arts & Design of Barcelona students Judit Castells, Paula Jaime, Daniela Guevara, and Mariana Pachón, is a board game in the form of an interactive art installation. It was inspired by nature, with gameplay occurring throughout a simulated ecosystem. An Arduino UNO R4 WiFi board handles the interactive elements, with additional hardware including NFC readers, motors and accompanying drivers, sensors, pumps, LEDs, and more.
Simbioceno, by Ander Vallejo Larre, Andrea Galano Toro, Pierantonio Mangia, and Rocío Gomez, also uses an UNO R4 WiFi. It consists of two ecosystems: one aquatic and one aerial-terrestrial. They exist in symbiosis, communicating and sharing resources as necessary. Hardware includes LEDs, pumps, and biofeedback sensors. The students put particular thought into the construction materials, many of which are recycled or biomaterials.
Both projects are interactive art and expressions of creativity. While they do integrate technology, that technology isn’t the focal point. Instead, the technology helps to bring the two experiences to life.Feeling inspired by this creative use of the Arduino platform? We hope you’ll develop your own projects and share them with us and the entire community: contact creators@arduino.cc or upload directly to Project Hub! You could be our next Arduino Star.
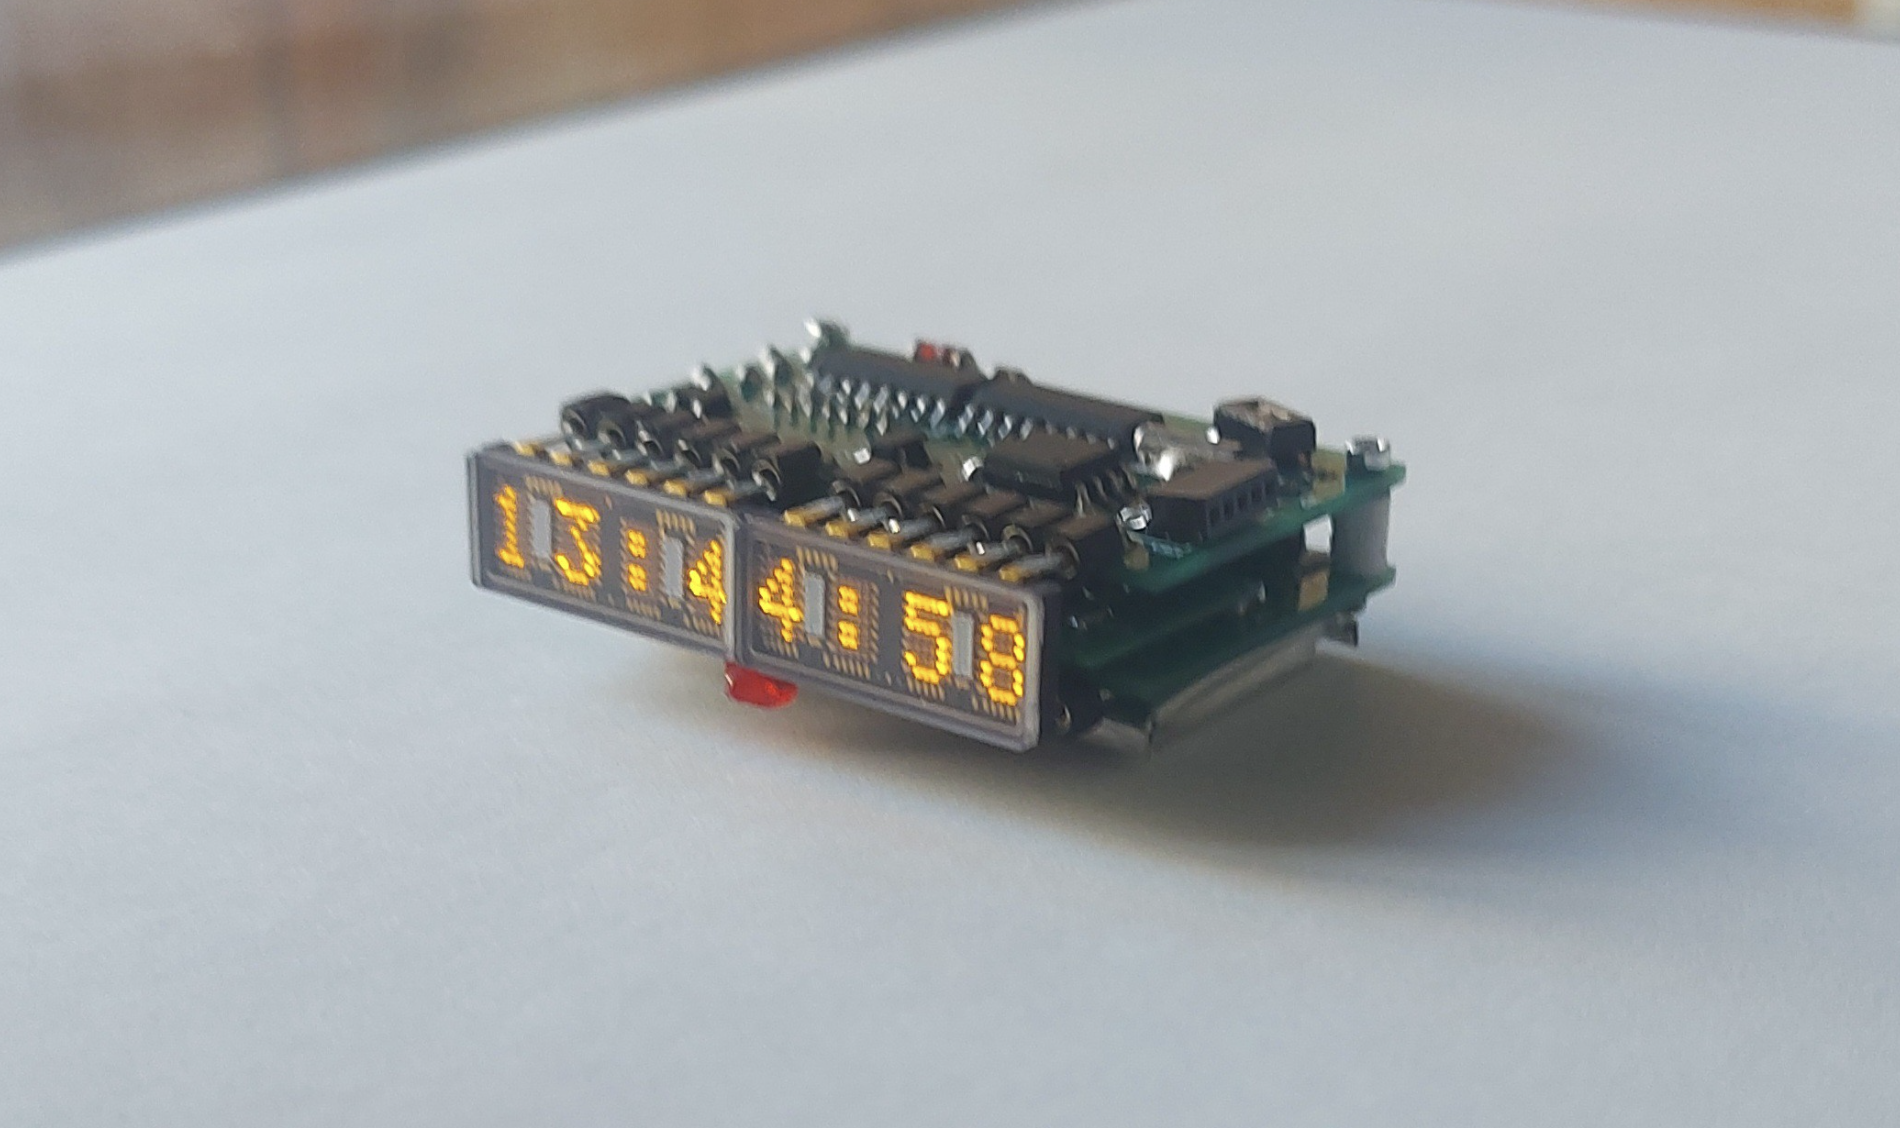
With a six-digit, seven-segment display such as the HDSP-2000 (itself an unusual choice – he hasn’t made this easy), Vitalii needed to find a way to multiplex the signals coming out of the chip, multiplying the I/O signals with transistors until he had enough to control each of the segments in the display. The result is this wonderful wristwatch, the custom PCB that enables the ATtiny85 to control the display, and a great deep dive into multiplexing written up on Hackaday.io.
We’re seriously impressed by this feat of electronic engineering. If you are too and you want to try it yourself, we’d suggest that you start with a single seven-segment display, a breadboard, and go from there – this tiny form factor presents loads of difficulties, all of which have been overcome here with aplomb.
Thousands of learners worldwide take their first steps into text-based programming using the Python programming language. Python is not only beginner-friendly, but is also used extensively in industry.
In 2015, Python developer Daniel Pope, who has a keen interest in education, noticed that beginners often have great ideas for creating projects but struggle because the software libraries they need to use are aimed at more confident programmers. To address this, he created Pygame Zero — a simplified version of the popular PyGame software. Since then, various developers have expanded the range of ‘zero’ libraries for Python.
How Python zero libraries help beginner programmers
The Raspberry Pi Foundation has a long history of supporting Python zero libraries. GPIO Zero was launched back in 2015, followed by guizero and then picozero. The goal of all ‘zero’ libraries is the same: to help beginner programmers create amazing projects using simple, understandable code, supported by useful documentation.
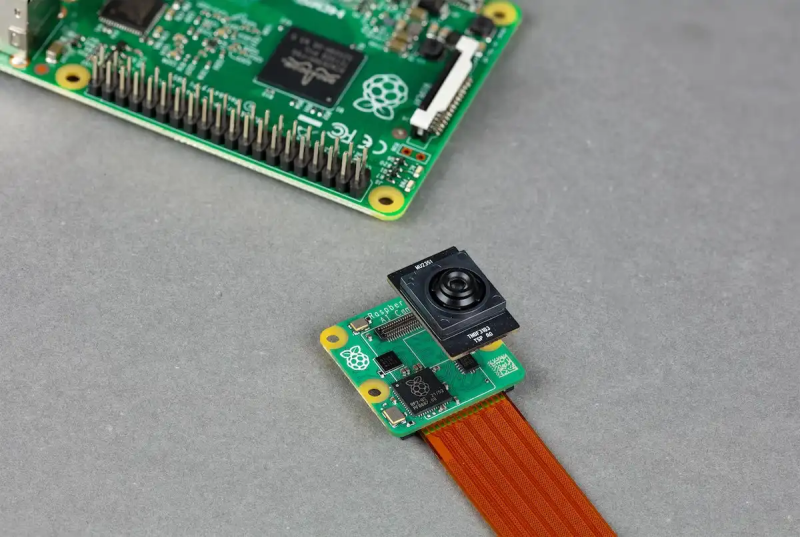
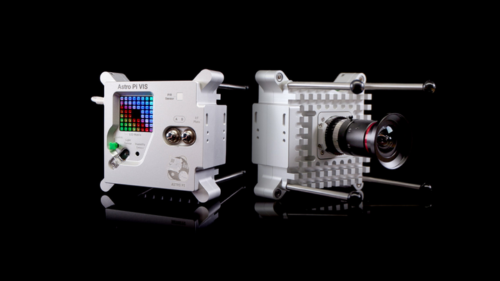
The Picamera2 library is a powerful tool for advanced users, but beginners — such as Astro Pi: Mission Space Lab programme participants — would benefit from a zero library to allow them to use the Raspberry Pi Camera module.
The Astro Pi Mark II units
Image taken by Astro Pi: Mission Space Lab programme participants
Picamzero: how to get started
The Code Club Projects and Youth Programmes teams at the Raspberry Pi Foundation have joined forces to createpicamzero: a new library that makes it simple for beginners to use the Raspberry Pi Camera board.
As with the other ‘zero’ libraries, it’s straightforward to get started. You can install picamzero by typing two commands in your Raspberry Pi’s terminal:
sudo apt update
sudo apt install python3-picamzero
Once it’s installed, setting up your program to communicate with your camera is easy:
from picamzero import Camera
cam = Camera()
You can ask picamzero to take a time-lapse sequence and make a video of your images using a single line of code.
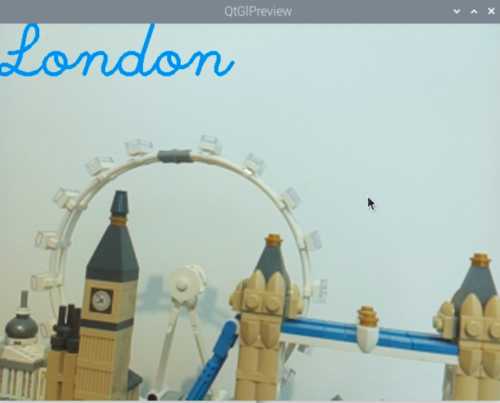
Picamzero also makes it easy to add text and image overlays to your images.
A Lego scene captured using picamzero
We’ve written beginner-friendly documentation for the new library so that you can explore what you can create using just a few lines of code. We’ve also updated our resources so that you can start making exciting projects using picamzero straight away:
We hope you enjoy using picamzero. Please get in touch if you have any feedback or suggestions. Happy coding!
In the world of photography, the exposure triangle is immutable. To get a properly exposed photo (not too bright or too dark), you need a balance of aperture size (how much light gets in), shutter speed (how long the light gets in), and ISO (sensitivity to light at the expense of noise). But the shooting situation often limits how the photographer can adjust each parameter. To freeze action, for example, you need a very fast shutter — reducing the light you let in and therefore exposure. To compensate, you might need to use a flash and this DIY device can help with the timing.
There is a reason that photography flash units only come on for a split second (about 1/10,000th of second is normal): they’re incredibly bright and would burn out if left on for any length of time. To freeze action, such as a balloon popping, you need a fast shutter speed. Too slow and the photo will be all blurry. Exact numbers vary, but 1/8,000th of a second isn’t unusual for the mechanical shutter on a modern mirrorless camera. To get proper exposure, you need to time the shutter to open at the exact same time that the flash is illuminating your subject and that is something you could never achieve through manual control.
That’s hardly a new problem and so cameras are capable of releasing the shutter at the proper time in relation to the flash, but how do you sync those two events with whatever action you want to freeze? If that action happens to make a noise, this device is the solution.
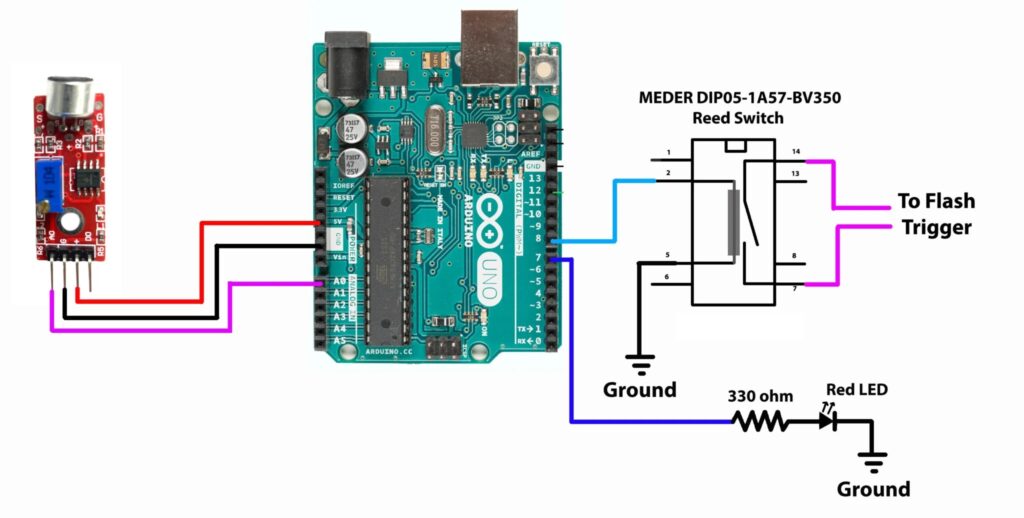
This device, based on an Arduino UNO Rev3 board, uses a microphone to listen for loud noises. If a noise exceeds a set threshold, the Arduino triggers the flash. An isolation circuit made with a Reed switch protects the Arduino from the high voltage of the flash. Reed switches are relatively slow, but they’re affordable. For better performance, an opto-isolator could be used instead.
To demonstrate this, students at Rochester Institute of Technology froze the action on some ballon pops and the results look great.
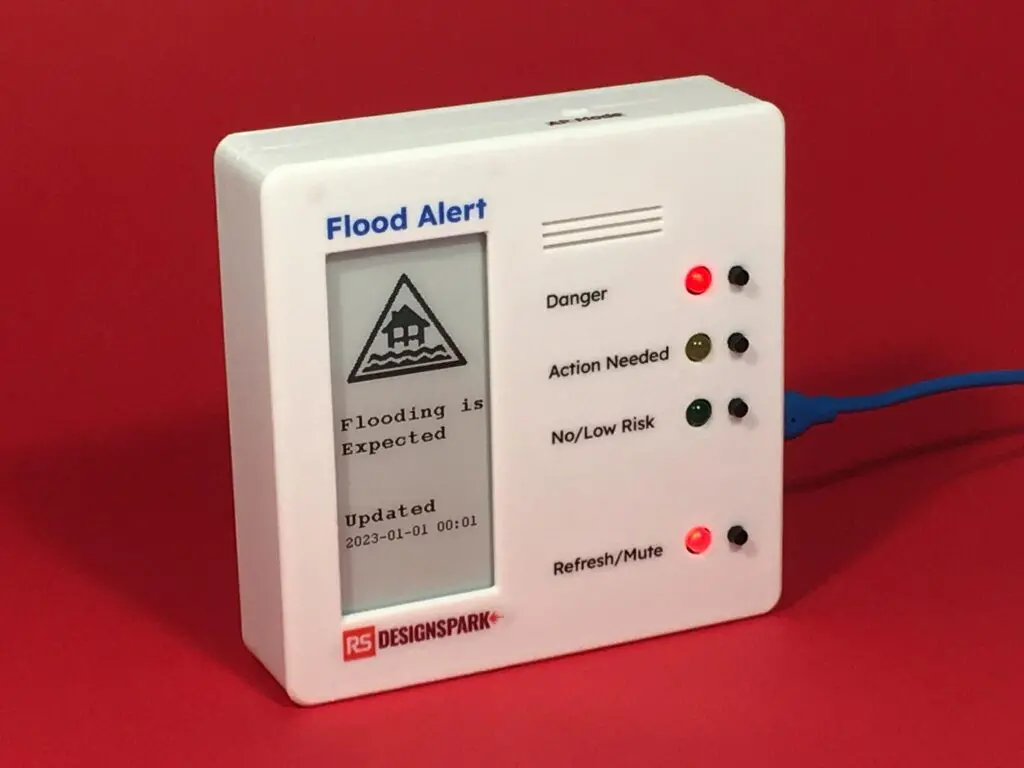
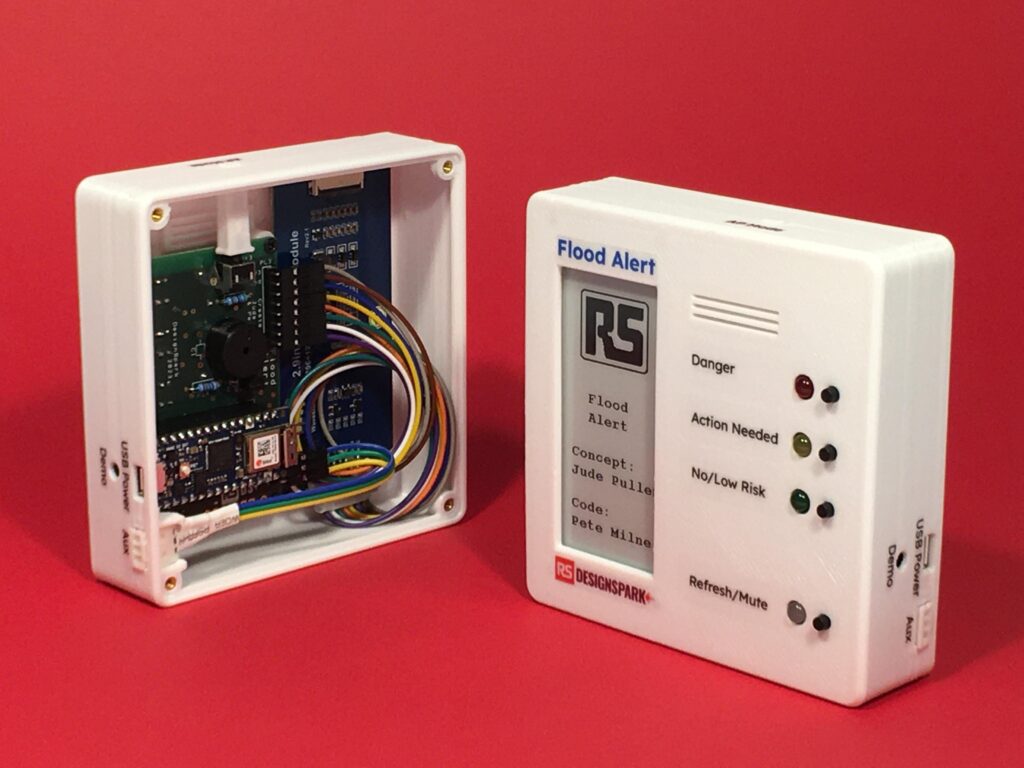
As climate change continues to worsen, events such as heavy rains, hurricanes, and atmospheric rivers have only intensified, and with them, large amounts of flooding that pose serious risks to life and property. Jude Pullen and Pete Milne, therefore, have responded by creating a “physical app” that can show the potential for flood dangers in real-time with sound, lights, and an ePaper display.
The Arduino Nano 33 IoT powering the Flood Alert device sources its data from the UK Environmental Agency’s API to get statistics on an area’s latest risk level along with an extended description of what to expect. Initially, the electronics were mounted to a breadboard and housed within a cardboard enclosure, but a later revision moved everything to soldered protoboard, a 3D-printed case, and even added a piezoelectric buzzer to generate audible alerts.
For now, the Flood Alert’s sole source of data is the aforementioned API, but Pullen hopes to expand his potential data sources to include “hyper-local” sensors that can all be aggregated and analyzed to give a much more precise view of flooding in a smaller area.
Collaborative coding in education can be a game-changer for students, providing them with real-world skills in communication, teamwork, and problem-solving.
If you are on a paid Cloud School or Business plan and you have created a Shared Space, Collaborative Coding will already be enabled for you. Just open a sketch file from your organization space and start editing.
You can purchase an Arduino Cloud School or Business plan on this page.
How does Collaborative Coding work?
Before, to edit a shared sketch, the user needed to make a copy to edit it, only the owner could edit the original sketch. Users could end up with many copies of the same sketch. Now, if you’re editing a shared sketch and another user tries to access it, they’ll get an instant notification in the lower corner of the Arduino Cloud Editor. Once you’re done or have uploaded the sketch, the other user can edit it.
Below are seven ways that showcase how collaborative coding can enhance learning experiences in educational settings.
1. Remote team projects
In today’s increasingly connected world, remote collaboration has become a critical skill. By assigning students to a remote team project, such as building a smart greenhouse, educators can simulate real-world tasks. In this scenario, each student tackles a different component of the project: one works on coding for temperature sensors, another handles humidity control, while another focuses on pressure regulation.
Through real-time collaboration tools, students can test and integrate their code seamlessly, making it easier to identify and resolve issues as they arise. This approach doesn’t just encourage communication and teamwork; it also gives students valuable exposure to the challenges of coordinating efforts across distances – a skill essential in modern engineering and tech careers.
2. Peer learning and mentorship
As the students code, mentors can provide immediate feedback, guide them through debugging, and teach best practices. This instant interaction accelerates learning by allowing students to correct mistakes as they occur and learn more efficiently. Mentors can also demonstrate advanced coding techniques, improving the overall skill set of junior students while fostering a supportive learning environment.
3. Interdisciplinary projects
A great way to incorporate collaborative coding is through interdisciplinary projects, which bring together students from diverse fields like computer science, physics, and environmental science. Take a weather station project, for example. Each student can code different elements, and with the Collaborative Coding feature, they can seamlessly integrate their work into a unified system in real time. This setup not only helps students share their domain-specific knowledge but also prepares them for real-world scenarios where interdisciplinary collaboration is crucial.
4. Classroom code review sessions
Arduino Cloud simplifies live code review sessions. Teachers can use the platform to host collaborative peer reviews, where students suggest improvements and optimizations on each other’s code. The Collaborative Coding feature allows these suggestions to be implemented and tested instantly, creating an interactive learning experience. This real-time feedback helps students improve their coding skills by learning to write cleaner, more efficient code. It also exposes them to different problem-solving approaches.
5. Hackathons and coding competitions
Hackathons are a great way to encourage teamwork and creative problem-solving, with students having to work closely together under time constraints. The Collaborative Coding feature enables real-time teamwork, allowing students to brainstorm, write, and debug code simultaneously. This setup encourages effective communication and quick decision-making, which are crucial skills in high-pressure environments like coding competitions. Students also learn how to divide tasks, manage time, and integrate different components swiftly.
6. Cross-school collaborative projects
Collaborative coding doesn’t have to be limited to one classroom. By connecting students from different schools, you can promote collaboration on larger, more ambitious projects. For example, students from various schools could work on a shared environmental monitoring system, with each school responsible for different parts such as data collection, interface design, and system integration.
Using the Collaborative Coding feature, they can integrate their code into a unified system in real time, learning from each other’s approaches and gaining exposure to different coding styles and experiences.
7. Pair programming exercises
In pair programming exercises, two students work together on a single coding task – whether that’s in the classroom or remotely. One student writes the code while the other reviews it in real time, and they switch roles regularly so both get hands-on experience with every part of the project.
This technique encourages close collaboration and helps students develop their communication skills and systematic debugging techniques. It also gives them the opportunity to learn from each other’s strengths and weaknesses, improving their overall coding abilities.
Conclusion
Integrating collaborative coding into the classroom can dramatically enhance the learning experience for students, giving them the skills they need to thrive in the modern workforce. From remote team projects and interdisciplinary work to peer mentoring and hackathons, these use cases demonstrate how coding can be both a collaborative and creative activity. By fostering teamwork, communication, and technical expertise, educators can prepare students for success in coding and beyond.
Alternatively, if you have access to a soldering iron and a drill, you can build your own home arcade setup. This build by SrGamer is based on a Raspberry Pi 5, and features two joysticks, loads of buttons and a gloriously chunky red power switch built into the case. The case was bought from Etsy rather than handmade, as the maker didn’t have much space to work, no woodworking experience and no access to workbenches, table saws, and other tools. We’re all standing on the shoulders of giants. All SrGamer had to do was see the potential, then bring it to life. We’re slightly worried by the choice of an MDF case, as it’s not the strongest material, and if you spill beer on it then it’ll swell up and deform, so if you use it in any of your project, be sure to finish with a coat of paint.
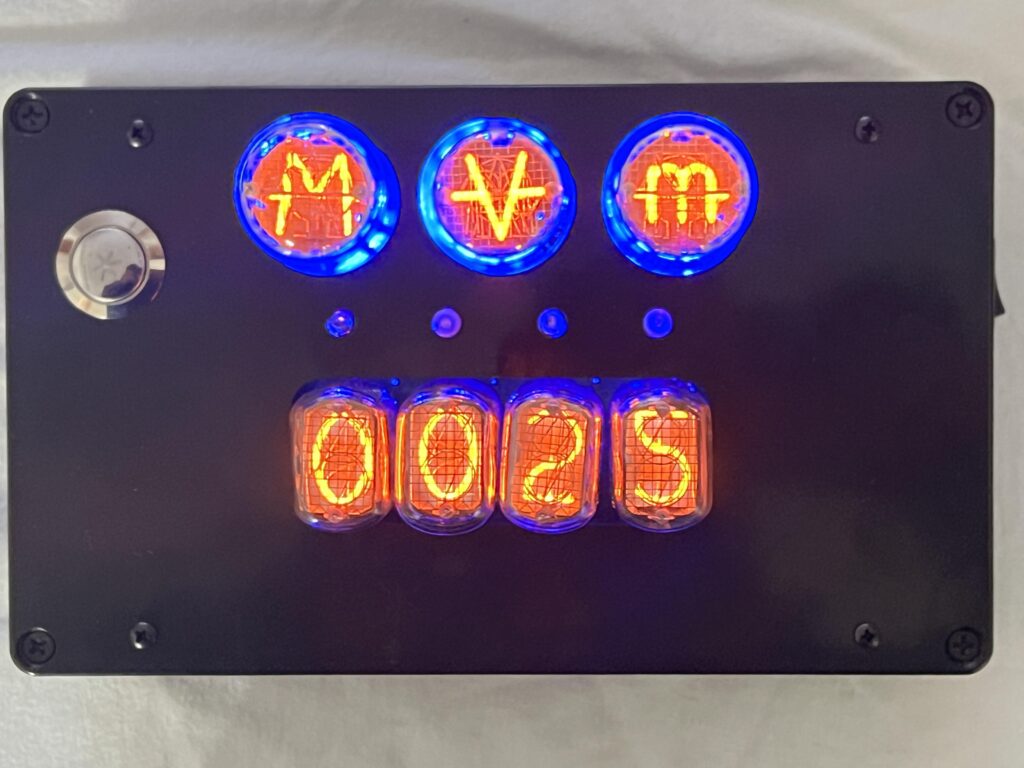
Everyone loves the look of Nixie tubes, with their glowing orange characters made of curvy filament. But we usually only see makers using Nixie tubes for one purpose: clocks. That’s unfortunate, because they have a lot more potential, as illustrated by Bob Cascisa’s Nixie tube slot machine game.
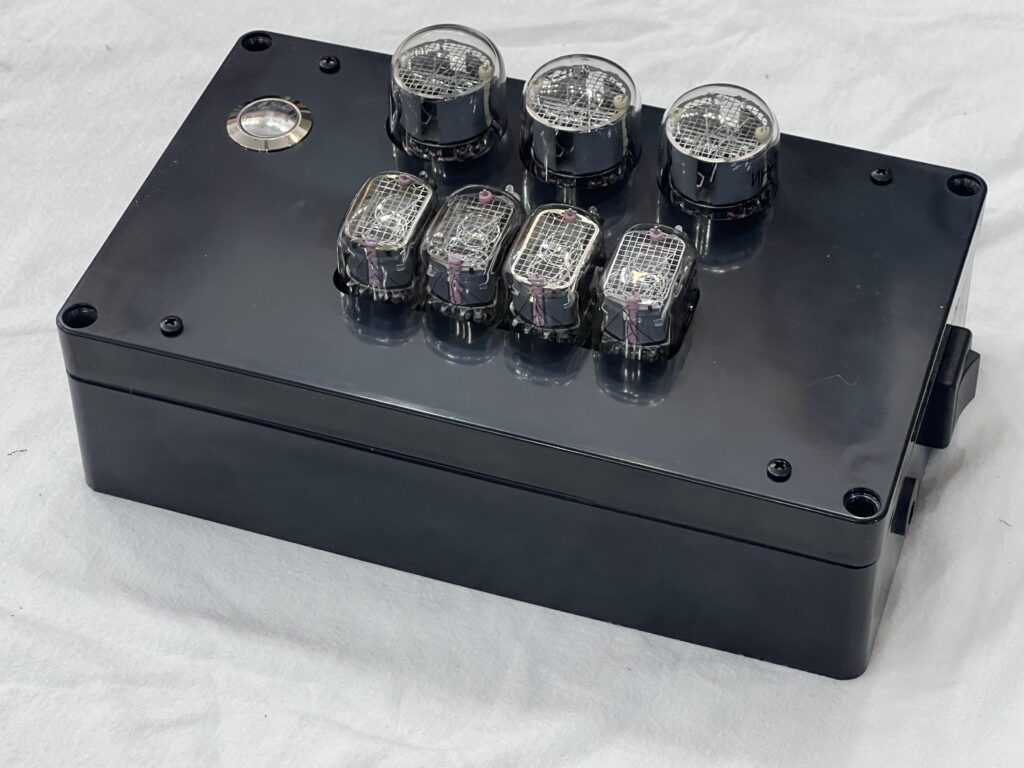
This is a really delightful device that puts the slot machine experience into a handheld form factor, with a beautiful Nixie tube display. It has a single button to spin the “wheels,” and seven Nixie tubes to show the action. The top three Nixie tubes represent the wheels and they cycle through distinct symbols. The bottom four Nixie tubes show the player’s balance to keep track of payouts.
The bottom Nixie tubes are IN-12 models, which are Soviet NOS (New Old Stock) models capable of displaying numeric digits. The top Nixie tubes are rarer IN-7 models that can display a handful of symbols that would be useful for lab instruments, such as ?. Cascisa chose those IN-7 tubes because their symbols have a more iconographic appearance than standard alphanumeric characters, which English-speakers would try to read.
An Arduino Nano board controls the gameplay. It plugs into a custom PCB that Cascisa designed to house all of the components necessary to drive the Nixie tubes — a difficult job compared to modern LED and LCD displays. It requires a power supply that can provide high voltage to the Nixie tubes. Power comes from an 18650 battery pack inside the simple enclosure, with a charging port on the side.
By Vegas slot machine standards, the gameplay is pretty simple. But this unit’s Nixie tube display certainly looks much nicer than the retina-scarring graphics on those machines.
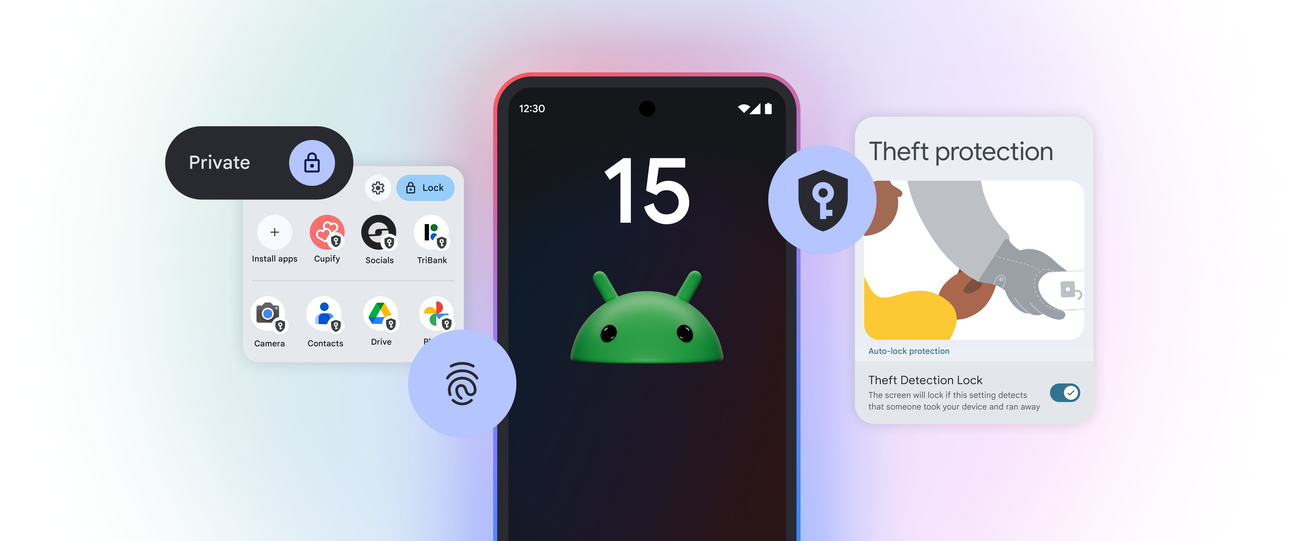
Today, Android 15 starts rolling out to Pixel devices. These updates include security features that help keep your sensitive health, financial and personal information protected from theft and fraud. Plus, we’re introducing improvements for large-screen devices that help you get more done, and updates across apps including camera, messaging and passkeys.
Your Android devices are always getting better thanks to new features and updates rolling out all the time — not just once a year. This year, we rolled out helpful new AI updates to Android devices, including Circle to Search and new ways to interact with Gemini. And today, we’re bringing you even more updates, here’s a look at what’s new:
Help deter theft and recover a stolen device faster
The new Theft Detection Lock uses AI to help keep your data safe. If your phone senses someone has snatched it and is trying to run, bike or drive away, it will automatically lock your device. You can also use Remote Lock to quickly lock your device from any device using your phone number and a simple security check. These features are now available for most Android 10+ devices.
And Android 15 brings additional protections that prevent thieves from guessing your passwords and accessing sensitive information. For example, we’re adding authentication requirements for settings targeted by thieves, like removing your SIM or turning off Find My Device, and will lock down your device if we sense multiple failed attempts for apps and settings. These updates make it harder for thieves to reset and sell a stolen device, and deter more thefts before they happen. Learn more about the new theft protection features on the Google Online Security blog.
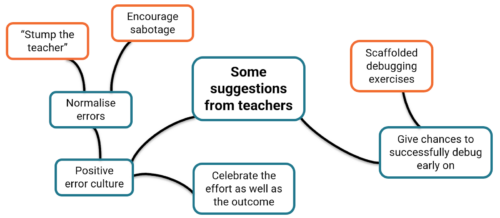
At times, it can seem like everything is being automated with AI. However, there are some parts of learning to program that cannot (and probably should not) be automated, such as understanding errors in code and how to fix them. Manually typing code might not be necessary in the future, but it will still be crucial to understand the code that is being generated and how to improve and develop it.
As important as debugging might be for the future of programming, it’s still often the task most disliked by novice programmers. Even if program error messages can be explained in the future or tools like LitterBox can flag bugs in an engaging way, actually fixing the issues involves time, effort, and resilience — which can be hard to come by at the end of a computing lesson in the late afternoon with 30 students crammed into an IT room.
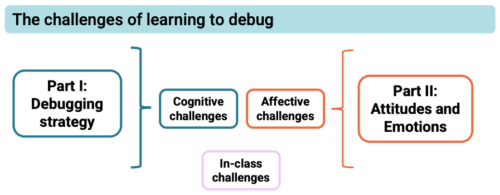
Debugging can be challenging in many different ways and it is important to understand why students struggle to be able to support them better.
But what is it about debugging that young people find so hard, even when they’re given enough time to do it? And how can we make debugging a more motivating experience for young people? These are two of the questions that Laurie Gale, a PhD student at the Raspberry Pi Computing Education Research Centre, focused on in our July seminar.
Laurie has spent the past two years talking to teachers and students and developing tools (a visualiser of students’ programming behaviour and PRIMMDebug, a teaching process and tool for debugging) to understand why many secondary school students struggle with debugging. It has quickly become clear through his research that most issues are due to problematic debugging strategies and students’ negative experiences and attitudes.
When Laurie Gale started looking into debugging research for his PhD, he noticed that the majority of studies had been with college students, so he decided to change that and find out what would make debugging easier for novice programmers at secondary school.
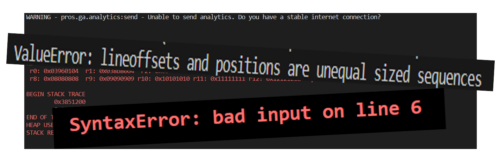
When students first start learning how to program, they have to remember a vast amount of new information, such as different variables, concepts, and program designs. Utilising this knowledge is often challenging because they’re already busy juggling all the content they’ve previously learnt and the challenges of the programming task at hand. When error messages inevitably appear that are confusing or misunderstood, it can become extremely difficult to debug effectively.
Program error messages are usually not tailored to the age of the programmers and can be hard to understand and overwhelming for novices.
Given this information overload, students often don’t develop efficient strategies for debugging. When Laurie analysed the debugging efforts of 12- to 14-year-old secondary school students, he noticed some interesting differences between students who were more and less successful at debugging. While successful students generally seemed to make less frequent and more intentional changes, less successful students tinkered frequently with their broken programs, making one- or two-character edits before running the program again. In addition, the less successful students often ran the program soon after beginning the debugging exercise without allowing enough time to actually read the code and understand what it was meant to do.
The issue with these behaviours was that they often resulted in students adding errors when changing the program, which then compounded and made debugging increasingly difficult with each run. 74% of students also resorted to spamming, pressing ‘run’ again and again without changing anything. This strategy resonated with many of our seminar attendees, who reported doing the same thing after becoming frustrated.
Educators need to be aware of the negative consequences of students’ exasperating and often overwhelming experiences with debugging, especially if students are less confident in their programming skills to begin with. Even though spending 15 minutes on an exercise shows a remarkable level of tenaciousness and resilience, students’ attitudes to programming — and computing as a whole — can quickly go downhill if their strategies for identifying errors prove ineffective. Debugging becomes a vicious circle: if a student has negative experiences, they are less confident when having to bug-fix again in the future, which can lead to another set of unsuccessful attempts, which can further damage their confidence, and so on. Avoiding this downward spiral is essential.
Laurie stresses the importance of understanding the cognitive challenges of debugging and using the right tools and techniques to empower students and support them in developing effective strategies.
To make debugging a less cognitively demanding activity, Laurie recommends using a range of tools and strategies in the classroom.
Some ideas of how to improve debugging skills that were mentioned by Laurie and our attendees included:
Using frame-based editing tools for novice programmers because such tools encourage students to focus on logical errors rather than accidental syntax errors, which can distract them from understanding the issues with the program. Teaching debugging should also go hand in hand with understanding programming syntax and using simple language. As one of our attendees put it, “You wouldn’t give novice readers a huge essay and ask them to find errors.”
Teaching systematic debugging processes. There are several different approaches to doing this. One of our participants suggested using the scientific method (forming a hypothesis about what is going wrong, devising an experiment that will provide information to see whether the hypothesis is right, and iterating this process) to methodically understand the program and its bugs.
Most importantly, debugging should not be a daunting or stressful experience. Everyone in the seminar agreed that creating a positive error culture is essential.
Teachers in Laurie’s study have stressed the importance of positive debugging experiences.
Some ideas you could explore in your classroom include:
Normalising errors: Stress how normal and important program errors are. Everyone encounters them — a professional software developer in our audience said that they spend about half of their time debugging.
Rewarding perseverance: Celebrate the effort, not just the outcome.
Modelling how to fix errors: Let your students write buggy programs and attempt to debug them in front of the class.
In a welcoming classroom where students are given support and encouragement, debugging can be a rewarding experience. What may at first appear to be a failure — even a spectacular one — can be embraced as a valuable opportunity for learning. As a teacher in Laurie’s study said, “If something should have gone right and went badly wrong but somebody found something interesting on the way… you celebrate it. Take the fear out of it.”
In our current seminar series, we are exploring how to teach programming with and without AI.
Join us at our next seminar on Tuesday, 12 November at 17:00–18:30 GMT to hear Nicholas Gardella (University of Virginia) discuss the effects of using tools like GitHub Copilot on the motivation, workload, emotion, and self-efficacy of novice programmers. To sign up and take part in the seminar, click the button below — we’ll then send you information about joining. We hope to see you there.
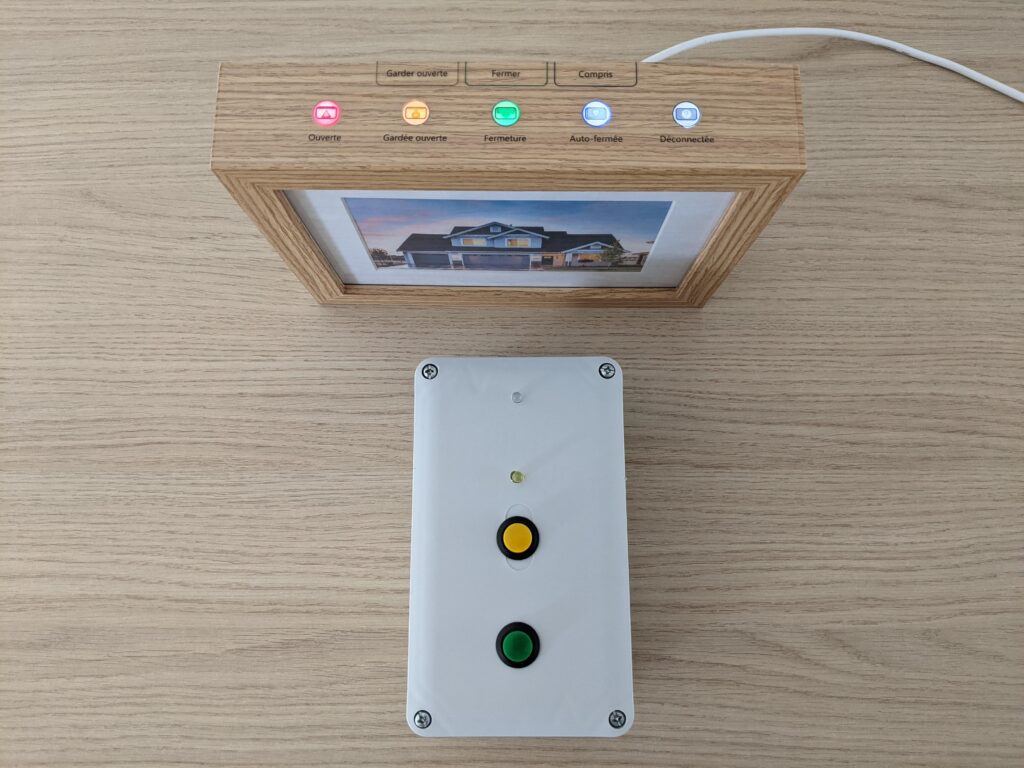
Your automatic garage door is almost certainly the most vulnerable access point in your house. Traditional systems are notorious for their susceptibility to replay attacks, but even more sophisticated modern garage door openers and those that lack remote functionality entirely are still prone to human error — you may simply forget to close the door. This “auto closer” system developed by SébastienL42 prevents such errors.
At its heart, this setup’s purpose is to close a garage door that a homeowner mistakenly left open. That’s a common problem, as you can see for yourself if you drive around a suburban residential neighborhood at night. If a homeowner forgets to close their garage door, SébastienL42’s device will sound a notification through an indoor dashboard. If enough time passes, it will go ahead and close the door itself.
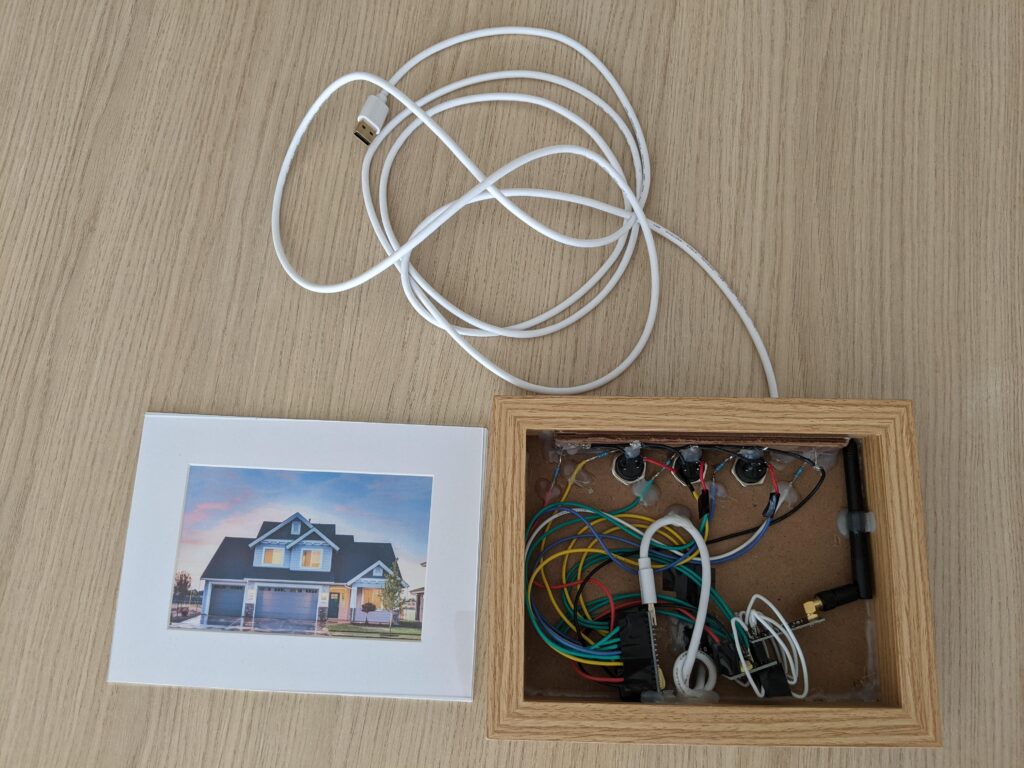
That functionality requires two Arduino Nano Every boards. The first goes in the garage and connects to the garage door opener so it can close to the door. It detects a closed door using a pair of microswitches. The second Arduino is for the indoor dashboard, which provides notifications and control buttons. SébastienL42 designed that dashboard to fit into a picture frame and it looks really nice.
The two Arduino boards communicate with each other via nRF24L01 radio transceiver modules, which could potentially create a new vulnerability. But SébastienL42 put serious thought into that possibility and eliminated exposure by simply making the system incapable of opening the garage door — it can only close it. If a bad actor somehow gained access, they wouldn’t be able to do anything more nefarious than close the door for the homeowner. And the garage door opener’s standard safety features remain in place, so there shouldn’t be any danger.
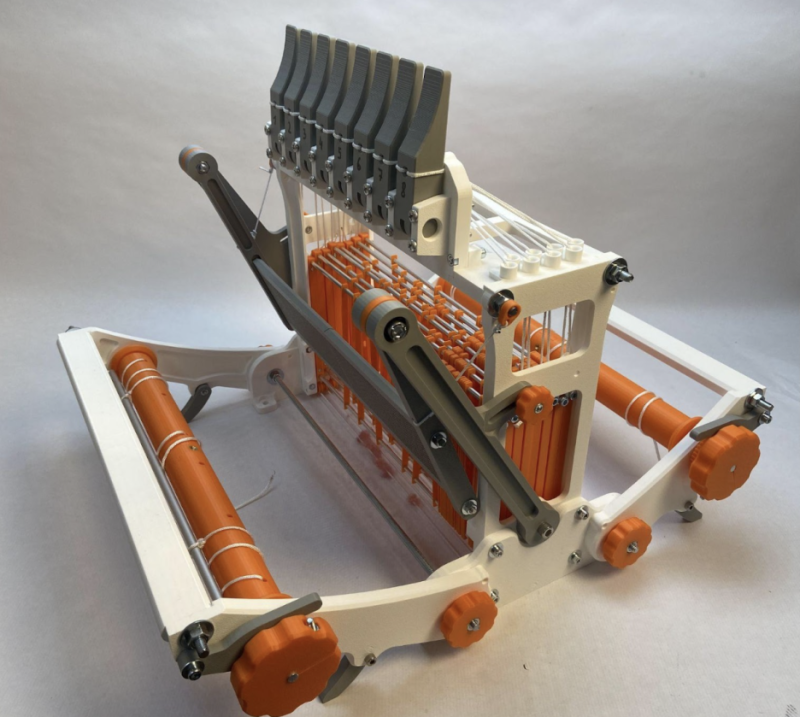
If you’ve ever tried to specialise in any field of making, you’ll find that at some point you’ll have stopped – or at least delayed – creating things, in order to make things that help you make things. If you’re at the start of your journey into woodworking, for example, you’ll very sensibly want to start with a bench hook, to hold workpieces steady while you’re sawing them. Then, of course, you’ll need a bench, otherwise the bench hook is useless. A few weeks pass, and at every turn, you’re spending more time making jigs than you are making the thing you wanted to make – what even was that again?
With Halloween just around the corner, we’ve got the perfect project to make your decorations more fun and interactive. All you have to do is take the Arduino UNO R4 WiFi and Modulino nodes included in your Plug and Make Kit to create an awesome jack-o’-lantern that will light up and cackle with evil laughter when someone walks by!
Connect it to Arduino Cloud and you’ll be able to check on it and even remotely trigger some spooky surprises.
This is an easy project that anyone can do, and we’ll walk you through the steps to make it happen.
A step-by-step guide to make spooky super simple
This project is a great introduction to making interactive things. You won’t just be setting up some store-bought props, you’ll be creating technology and bringing your pumpkin to life!
To get started, you’ll need:
Plug and Make Kit (including UNO R4 WiFi, Modulino Pixels for the glowing eyes, and Modulino Distance to trigger the action when someone approaches)
An MP3 module and a small speaker for the creepy sounds
A microSD card to store your sounds (feel free to use the ones we provide, or record your own!)
The Modulino Distance sensor detects when someone approaches your jack-o’-lantern, and that’s when the magic begins. The Modulino Pixels light up the eyes, syncing with the spooky sounds played from the MP3 module. Everything is controlled with an UNO R4, and thanks to Arduino Cloud, you can even control the pumpkin remotely, change the sounds, and keep track of how many people you’ve scared.
All the code and details are ready for you to download from Arduino’s Project Hub. We’ve also created a template that will help you set everything up quickly. This template automatically uploads the code to your UNO board and creates a custom dashboard so you can monitor and control your creation. Just follow the link to get started!
Unleash your creativity!
Sure to make a lasting impression on your trick-or-treating visitors, this project offers you the chance to have fun while actuallylearning a lot about electronics, coding, and the Internet of Things (IoT).
Why just buy interactive objects when making your own is so rewarding? So grab your tools, start building, and give your Halloween the high-tech twist it deserves!
As always, we highly encourage you to customize the project with your own ideas: with the UNO R4 WiFi and Modulino nodes included in the Plug and Make Kit, you have all the tools you need.
For example, you could use Modulino Buttons to change scary sounds locally, or make your scary jack-o’-lantern even smarter. It can check the weather from an online forecast and change the LEDs’ color to let you know if it’s going to rain, help you use your smartphone to monitor the temperature outside in real time via Arduino Cloud… and much more!
The Arduino Cloud has long been a trusted platform for makers, engineers, and developers to manage their IoT projects with ease. From tracking sensor data to automating smart devices, the cloud enables seamless connectivity. Complementing this, the Arduino IoT Remote mobile app gives users the power to monitor and interact with their dashboards from anywhere. Now, we’re excited to announce a new feature that enhances your experience even further: the ability to change dashboard layouts directly through the mobile app!
Let’s dive into this exciting new update, along with some other minor features recently added to improve your experience.
Change your dashboard layouts from the IoT Remote app
Previously, modifying or rearranging the layout of your IoT dashboards was only possible through the browser on a PC. While this worked well for desktop users, it wasn’t convenient for those who needed to make changes on the go. With the latest update, you can now modify the “mobile view” of your dashboard directly through the Arduino IoT Remote app.
It’s important to note that Arduino Cloud dashboards have two distinct views: mobile and desktop. This new feature allows you to customize the layout specifically for your mobile devices, without affecting the desktop version. So whether you’re monitoring your projects on your phone or tablet, you can now optimize the layout for a mobile-friendly experience.
By customizing the mobile view, you gain more control over how your data is displayed and interacted with on your phone—perfect for users who need a quick overview and control of their IoT systems while away from their desktops.
How to use the new layout feature
Using this new feature is simple. Here’s how you can rearrange your dashboard layout in the IoT Remote mobile app:
1. Open the Arduino IoT Remote app and log into your account. 2. Navigate to the dashboard you want to modify. 3. On the Settings menu of the dashboard, tap the Rearrange button. 4. Select a widget by clicking on it, and move it around the dashboard to the new location or change its size. 5. Click on CANCEL to discard your changes or on SAVE to save your changes, and your updated layout will be visible across all your mobile devices.
What else is new on the IoT Remote app?
In addition to the layout customization feature, during the past months we’ve introduced several minor updates to make your app experience even smoother:
Sync dashboard cover image: Now, you can set a cover image for your dashboard, and it will automatically sync across all your devices. Whether for branding, personalization, or easy recognition, this feature ensures visual consistency on every device you use.
Disable trigger from Notification Detail: You can now enable or disable a trigger directly from the Notification Detail screen. This feature provides quick control over automated actions, helping you fine-tune your project with minimal hassle.
Clear notifications via the Activity Manage Panel: Keep your notifications organized by clearing them all from the new Activity Manage Panel. This helps you stay focused by removing unnecessary clutter from your feed.
Install the Arduino IoT Remote on your mobile phone
These new features make it easier than ever to stay on top of your IoT projects from anywhere with your mobile phone. Whether you’re monitoring, controlling, or tweaking your dashboard, the Arduino IoT Remote app is the perfect tool for the job, and it’s free!Ready to experience these new updates? Download the Arduino IoT Remote app today from the App Store or Google Play and take full control of your IoT projects from the convenience of your mobile device.
I was working part time alongside job hunting after uni, and came across the application for a graphic design role at Raspberry Pi. I then got invited for an interview where I got to meet my lovely team, and speak through a few of my projects. After a couple of weeks I received an email saying I didn’t get the graphic design position advertised…however I was offered an internship for six months as a graphic designer! After two months of my internship I was offered a full time position.
What did you know about Raspberry Pi before joining?
I’ve known about Raspberry Pi for many years through my dad. On one of his birthdays we got him a Raspberry Pi 4B from the store in Cambridge!
What Raspberry Pi design stuff have you worked on?
I have worked on a variety of projects ranging from packaging to web assets to magazines to events. My first packaging project was reskinning the PoE HAT.
I also designed the tote bags you may have seen at any of the pop-up stores we’ve had, as well as on past magazines, like a feature page I had the pleasure of working on in Wireframe.
Have you made anything with a Raspberry Pi, or have any plans to?
I currently have a Raspberry Pi 5 at home that is in desperate need of a project for it! My dad and I are constantly looking for inspiration, so plans are pending…
What other hobbies do you have?
Over lockdown I taught myself to crochet: cardigans, plushies etc. I even made some cutesy leaf coasters for some of my colleagues. I have also completed two half marathons so far. Unfortunately – or thankfully – I didn’t get a ballot place in the London marathon next year.
Einwilligung verwalten
Um dir ein optimales Erlebnis zu bieten, verwenden wir Technologien wie Cookies, um Geräteinformationen zu speichern und/oder darauf zuzugreifen. Wenn du diesen Technologien zustimmst, können wir Daten wie das Surfverhalten oder eindeutige IDs auf dieser Website verarbeiten. Wenn du deine Einwillligung nicht erteilst oder zurückziehst, können bestimmte Merkmale und Funktionen beeinträchtigt werden.
Funktional
Immer aktiv
Die technische Speicherung oder der Zugang ist unbedingt erforderlich für den rechtmäßigen Zweck, die Nutzung eines bestimmten Dienstes zu ermöglichen, der vom Teilnehmer oder Nutzer ausdrücklich gewünscht wird, oder für den alleinigen Zweck, die Übertragung einer Nachricht über ein elektronisches Kommunikationsnetz durchzuführen.
Vorlieben
Die technische Speicherung oder der Zugriff ist für den rechtmäßigen Zweck der Speicherung von Präferenzen erforderlich, die nicht vom Abonnenten oder Benutzer angefordert wurden.
Statistiken
Die technische Speicherung oder der Zugriff, der ausschließlich zu statistischen Zwecken erfolgt.Die technische Speicherung oder der Zugriff, der ausschließlich zu anonymen statistischen Zwecken verwendet wird. Ohne eine Vorladung, die freiwillige Zustimmung deines Internetdienstanbieters oder zusätzliche Aufzeichnungen von Dritten können die zu diesem Zweck gespeicherten oder abgerufenen Informationen allein in der Regel nicht dazu verwendet werden, dich zu identifizieren.
Marketing
Die technische Speicherung oder der Zugriff ist erforderlich, um Nutzerprofile zu erstellen, um Werbung zu versenden oder um den Nutzer auf einer Website oder über mehrere Websites hinweg zu ähnlichen Marketingzwecken zu verfolgen.