Kategorie: Technology

  • Computing Curriculum Framework: Adapting to India’s diverse landscapes

    Computing Curriculum Framework: Adapting to India’s diverse landscapes

    Reading Time: 5 minutes

    The digital revolution has reshaped every facet of our lives, underscoring the need for robust computing education. At the Raspberry Pi Foundation our mission is to enable young people to realise their full potential through the power of computing and digital technologies. Since starting out in 2008 as a UK-based educational charity, we’ve grown into a global leader in advancing computing literacy.

    An educator and students working on a coding task.

    At the heart of our efforts lies a simple yet powerful vision: to ensure every young person develops the knowledge, skills, and confidence to use digital technologies effectively. This includes understanding societal and ethical issues, using technology for creative problem solving, and fostering a mindset of adaptability that will enable them to thrive amid rapid technological change.

    A vision for global computing education

    To realise this vision, we developed The Computing Curriculum (TCC). Launched in 2018 as part of the UK’s National Centre for Computing Education, TCC is a comprehensive set of free teaching resources tailored for students aged 5–16. Over the years, the curriculum has evolved through rigorous testing and teacher feedback, which has helped to make it one of the most effective and inclusive computing education tools globally.

    A group of students in a classroom.

    Contextualising computing education for India

    India’s vast diversity — in languages, social and economic contexts, and educational infrastructure — creates unique challenges and opportunities. As a result, we at the Raspberry Pi Foundation have adapted and localised our computing curriculum to meet the needs of Indian students. Collaborations with the Telangana Social Welfare Residential Educational Institutions Society (TGSWREIS) and the Odisha Mo School programme have been pivotal in this endeavour.

    Modelling data using a spreadsheet (Grade 9)
    Creating media — audio production (Grade 7)

    In Telangana, we adapted TCC to create a 70+ hour computing curriculum designed for government schools with limited resources. Similarly, in Odisha, elements of this curriculum have been tailored to develop Kaushali, an IT and coding curriculum for over 8,000 state schools. This localised approach ensures that computing education becomes accessible and relevant for students across India.

    A curriculum designed for impact

    The computing curriculum for India spans Grades 6 to 10 (age group 11-16) and is structured to ensure progressive learning. Students revisit foundational concepts repeatedly, building on prior knowledge as they advance through the grades. The curriculum emphasises forming a strong understanding of concepts over rote learning and integrates research-informed pedagogical approaches.

    Students using computers in a classroom.

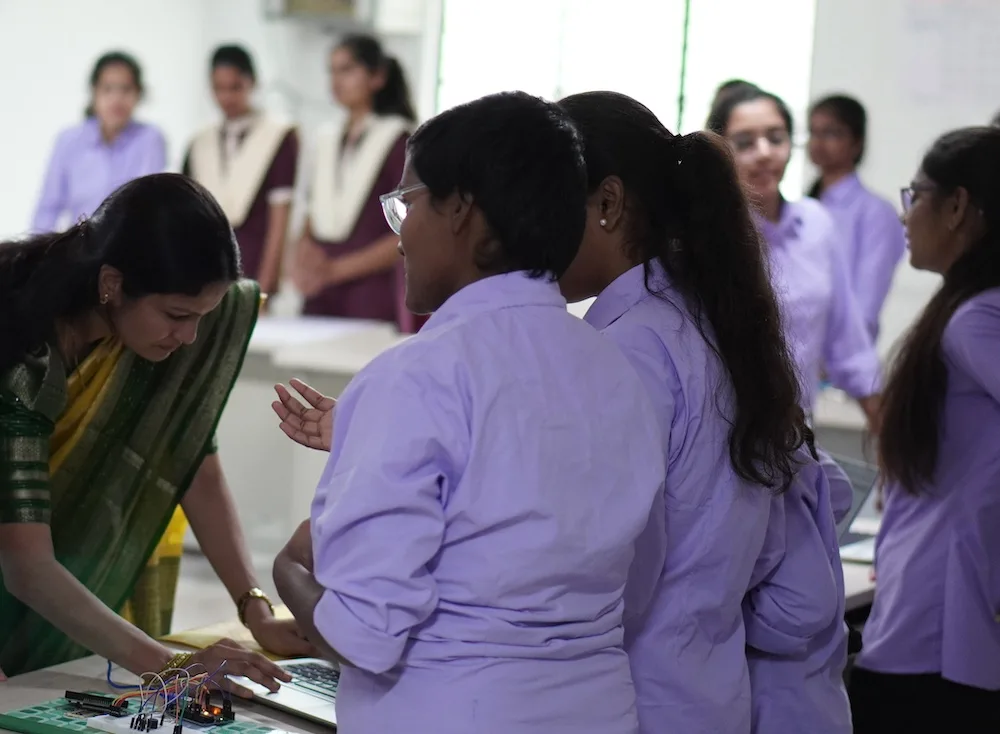
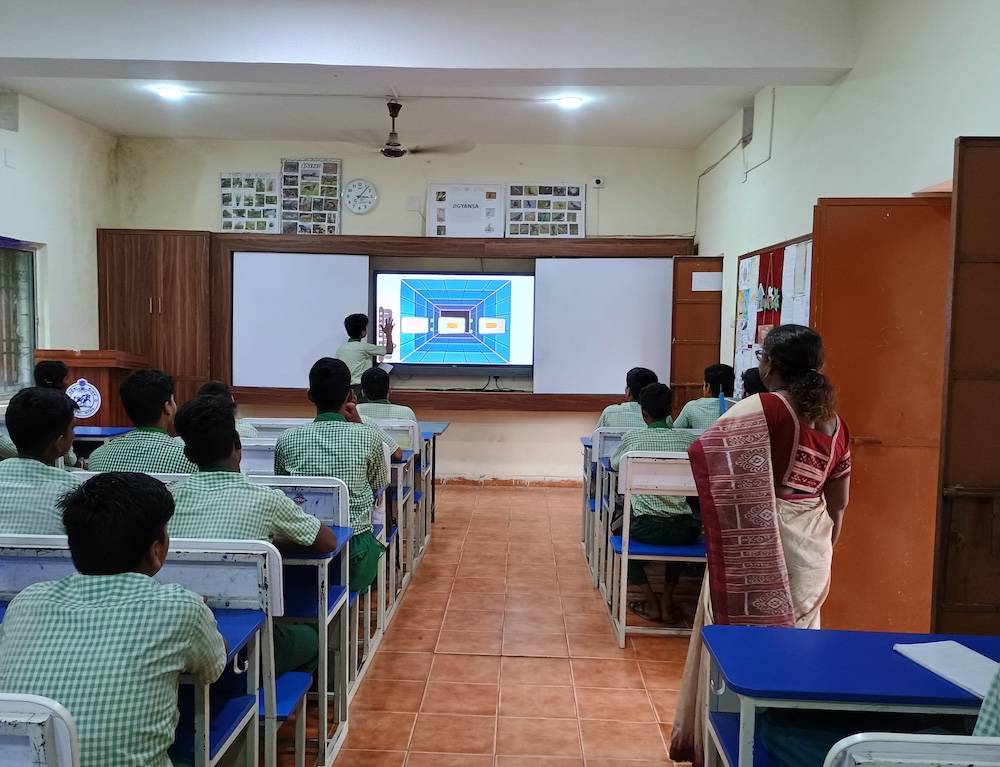
    We tested our localised curriculum resources in Telangana Coding Academy, and there was lots of positive feedback from educators and observers. Overall, the educators were happy with the content format, and the observers noted that students enjoyed learning and completing the activities. This was also evident from the student discussion notes and student survey responses.

    “[…] this content is more than what we are expecting for the school years[…] this time they [are] having [a] practical session. So they are very happy to do it and whenever they are free[,] they will come and ask us. ‘[C]an you take [an] extra class for us?’” – Educator

    “[…] They are very [appreciative of] the content and [t]hey [are] learning very well, and the response is very good.” – Educator

    Key features of the curriculum:

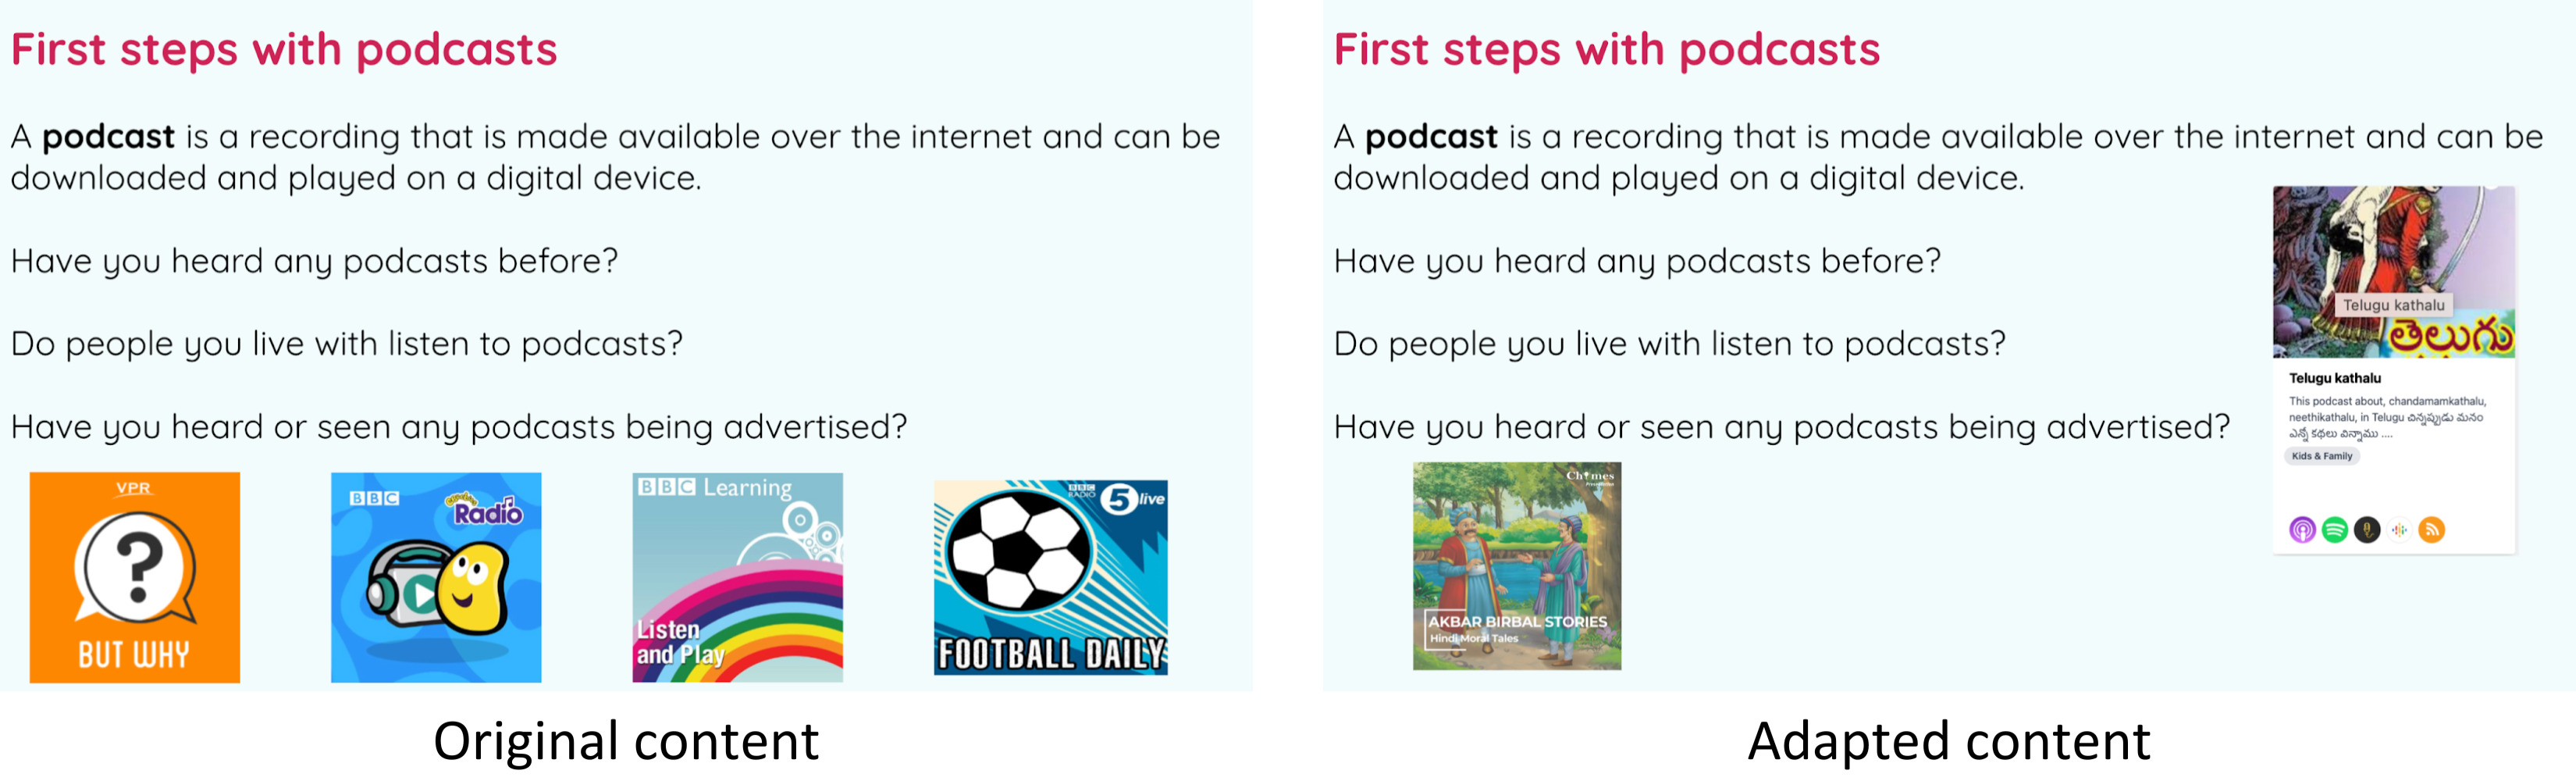
    • Tailored content: Materials are customised to align with the proficiency levels and contexts of Indian students, ensuring accessibility
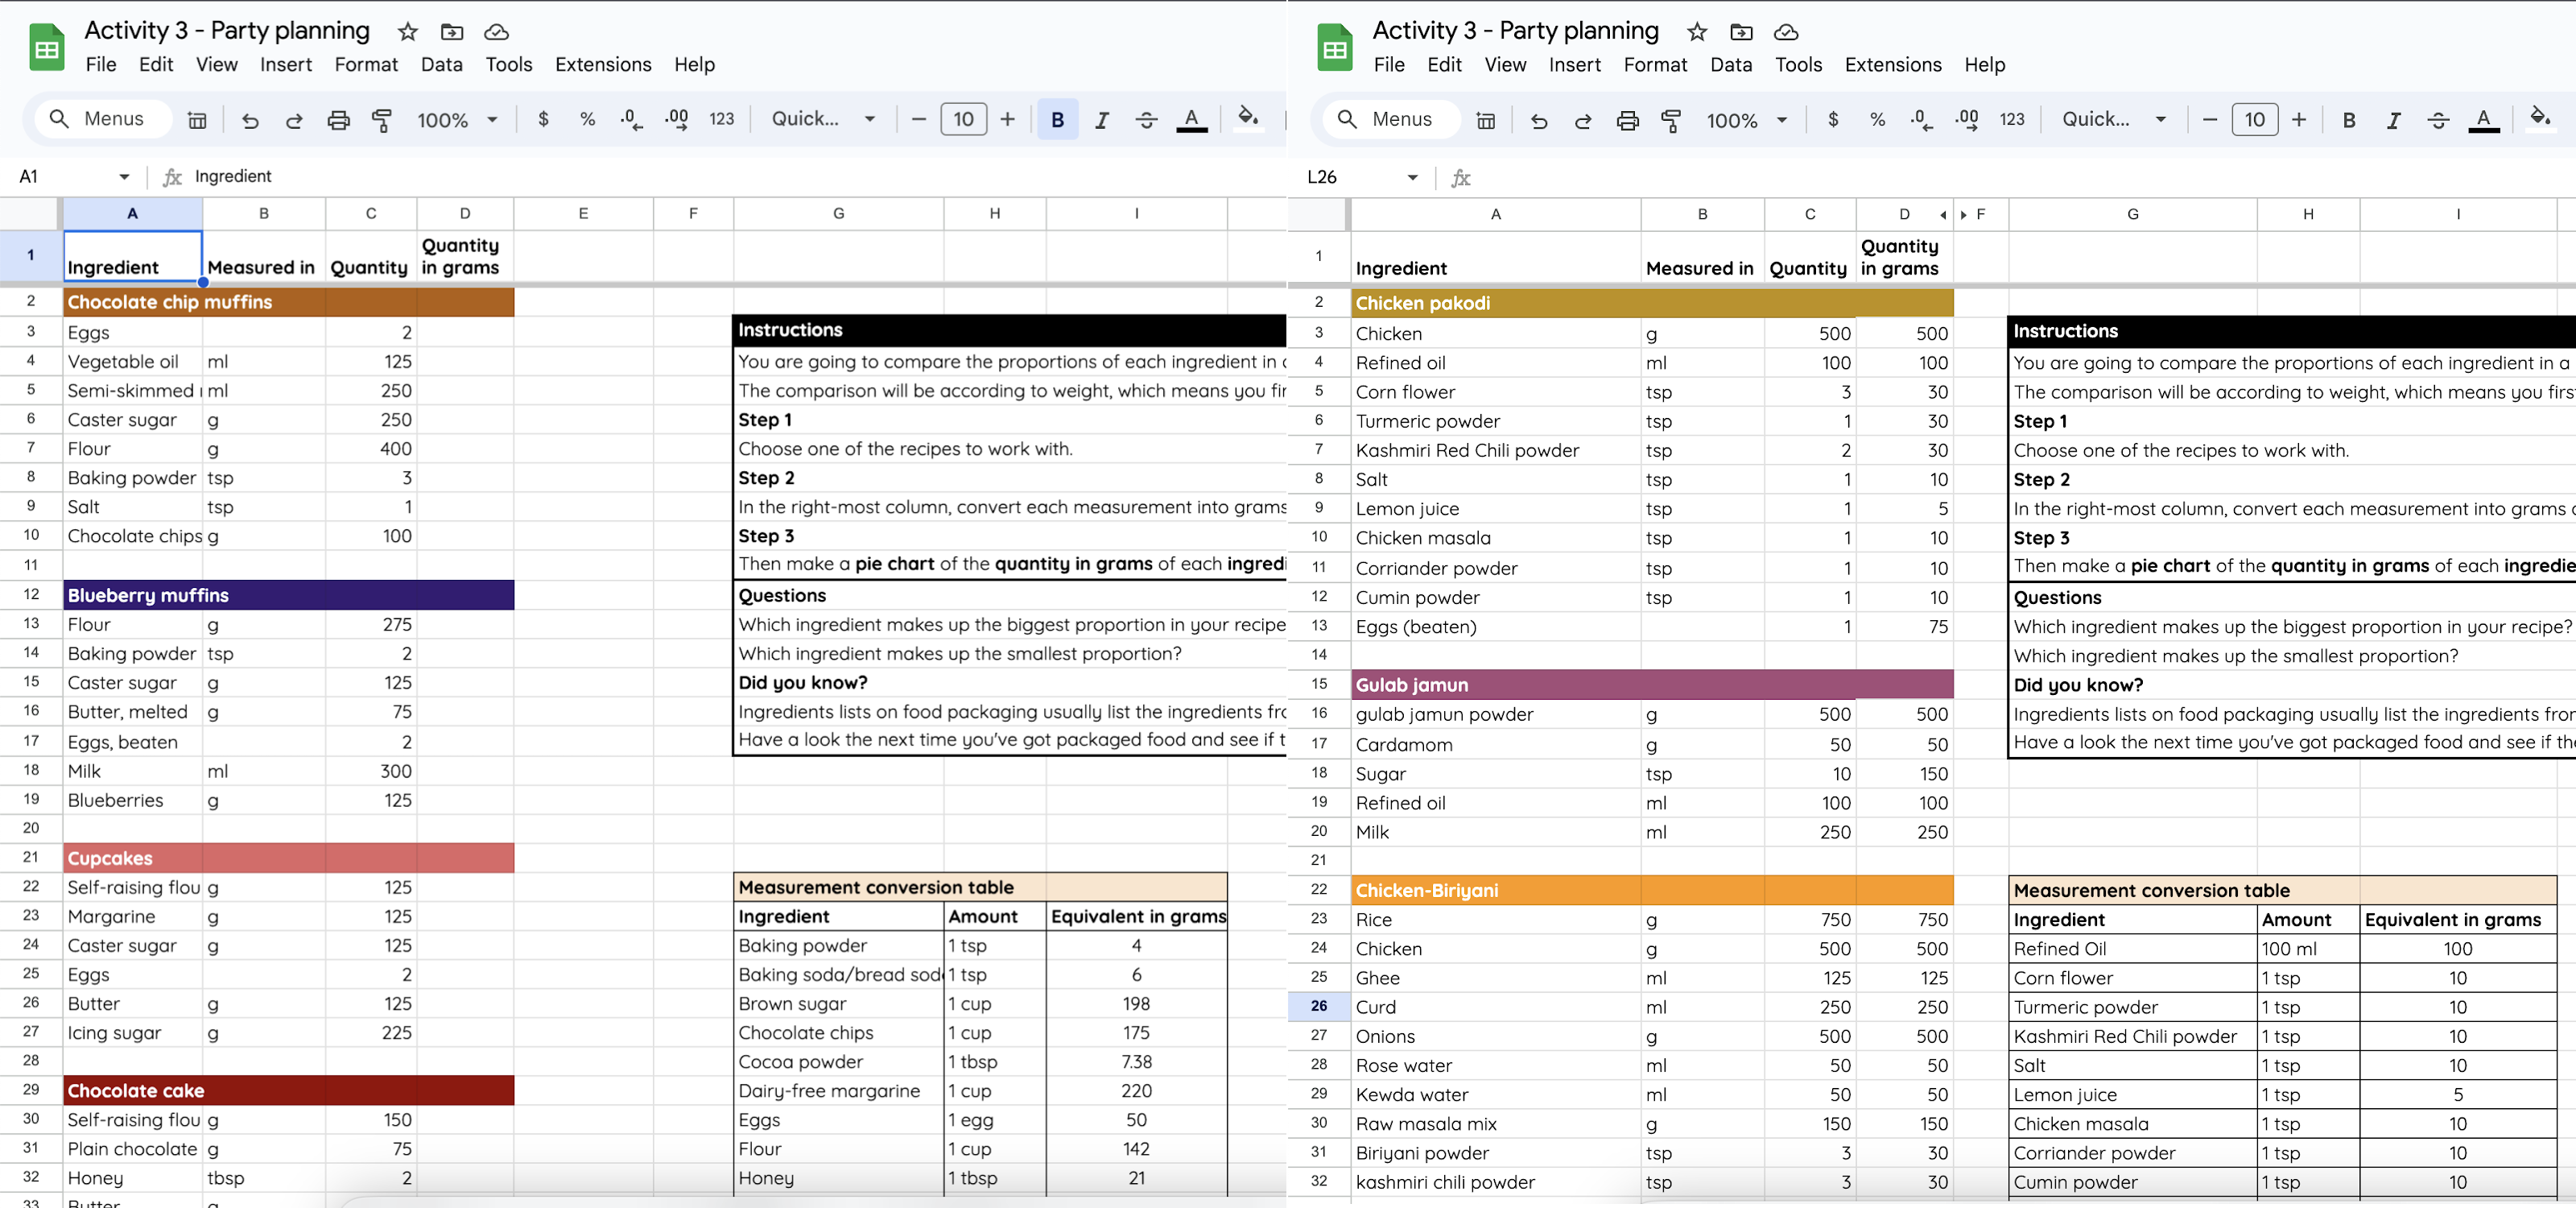
    • Localised examples: By incorporating culturally relevant examples, students find the learning experience relatable and engaging
    • Simplified language: Designed for students who may lack confidence in English, the curriculum employs clear and concise language for better comprehension
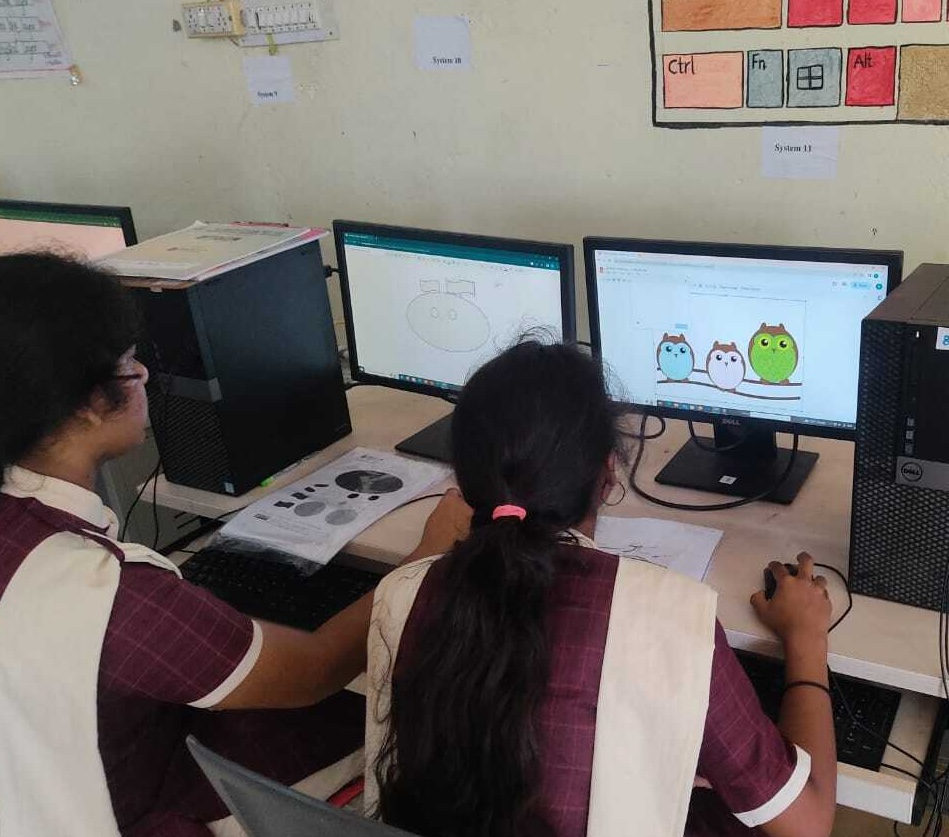
    • Hands-on learning: Practical activities, including projects and model creation, solidify understanding and foster creativity
    • Ready-to-use resources: Teachers are equipped with lesson plans, presentations, worksheets, and activity sheets, reducing preparation time and enhancing delivery

    Learning objectives:
    The curriculum focuses on equipping students with:

    • An understanding of digital systems and their impact on people and society
    • Computational thinking and problem-solving skills for real-world applications
    • Confidence and knowledge to become creators and innovators
    • Awareness of digital citizenship and responsible technology use

    Curriculum structure:
    Each academic year includes 30–34 sessions, each lasting 45–60 minutes. Lessons are structured into deliverable units comprising detailed plans, presentations, and worksheets. Both plugged (computer-based) and unplugged (activity-based) learning methods are used, with a 60:40 ratio, ensuring balanced and inclusive learning experiences.

    Sample progression across grades:

    Curriculum highlights

    Grade 6: Building a foundation

    Students develop foundational computer skills, learn basic text formatting, and explore introductory programming concepts using Scratch. They also begin to understand how to group and describe objects based on their properties.  

    Grade 7: Expanding horizons

    Students delve into computer networks, the internet, and the World Wide Web. They learn to use loops in Scratch programming and explore data organisation using flat-file databases and spreadsheets.  

    Grade 8: Deepening understanding

    Students gain a deeper understanding of how computer systems function and use spreadsheets for data analysis. They continue to build their programming skills in Scratch, focusing on sequences, variables, and selection. They are also introduced to HTML and CSS for basic web development.  

    Grade 9: Exploring advanced concepts

    Students learn about data representation, including binary and character coding schemes. They design and create websites using HTML and CSS, incorporating accessibility and good web design principles. They also explore the layers of computing systems, including hardware, operating systems, and logic circuits.  

    Grade 10: Applying knowledge and skills

    Students explore advanced data representation, including image and sound representation. They are introduced to cybersecurity concepts and delve deeper into Python programming, focusing on selection and iteration. They also learn about data science and how to create a blog to support a cause.

    Assessment framework:
    To measure student progress effectively, the curriculum incorporates both formative and summative assessments:

    • Formative assessments: Embedded in lessons to monitor progress and identify misconceptions early.
    • Summative assessments: Provide a holistic overview of learning outcomes through tools like multiple-choice quizzes and rubrics. These assessments focus on understanding concepts and skills, moving beyond mere code writing.

    Bridging the digital divide

    Our localised computing curriculum is more than a technical education initiative — it is helping to bridge the digital divide. By empowering students with essential digital skills, it fosters innovation, enhances employability, and enables young people to participate actively in the global digital economy.

    The road ahead

    As technology continues to evolve, so does the need for adaptive and inclusive computing education. We remain committed to supporting governments, educators, and students in this journey. By fostering a generation of digitally literate and empowered individuals, we can create a future where technology serves as a force for good in society.

    Through collaborations and localised efforts, the dream of making computing education accessible to every corner of India is steadily becoming a reality. Together, we can equip students with the skills and mindset needed to navigate the complexities of the digital age and shape a brighter, more inclusive future.

    Website: LINK

  • The latest AI news we announced in DecemberThe latest AI news we announced in December

    The latest AI news we announced in DecemberThe latest AI news we announced in December

    Reading Time: < 1 minute

    For more than 20 years, we’ve invested in machine learning and AI research, tools and infrastructure to build products that make everyday life better for more people. 2024 has been another big year for AI, and we ended on a high note with updates across AI models, consumer products, and research and science.

    Here’s a look back at just some of our AI announcements from December.

    Website: LINK

  • Does your sample contain DNA or RNA? DIYNAFLUOR can tell you on a budget

    Does your sample contain DNA or RNA? DIYNAFLUOR can tell you on a budget

    Reading Time: 2 minutes

    Lab equipment is — traditionally at least — tremendously expensive. While there are understandable reasons for those costs, they are prohibitive to anyone operating outside of a university or corporate lab. But as the “citizen science” movement has grown, we’ve seen more and more open-source and affordable designs for lab equipment hitting the internet. The latest will be interesting to anyone who wants to do work with DNA or RNA: the DIYNAFLUOR

    DINYAFLUOR stands for “DIY Nucleic Acid Fluorometer,” which describes this device’s function. A fluorometer is a piece of equipment the measures the amount of light emitted by anything that fluoresces. In this context, that would be a reagent that increases in fluorescence when it comes into contact with the nucleic acid in DNA or RNA. The more light the fluorometer detects, the more nucleic acid is present in the sample. Sensitivity is important, which is part of the reason that fluorometers are expensive (usually several thousand dollars for basic models).

    The DIYNAFLUOR, on the other hand, only costs about $40 to build. It works with both custom and commercially made fluorescent DNA quantification kits and can measure DNA on the scale of nano-micrograms.

    This is affordable because its designers built it around off-the-shelf components that are easy to source and a 3D-printable enclosure. The primary component is an Arduino UNO Rev3 board, which looks at the sample through a TSL2591-based light sensor. An LED puts out 470nm light to excite the reagent and optical filters remove the unwanted wavelengths. User-friendly software with a simple GUI lets citizen scientists take measurements and record data directly to their computers.

    This may be a specialized device with narrow appeal. But for those who want to work with DNA or RNA outside of a “real” lab, the cost and performance of DIYNAFLUOR is unbeatable.

    The post Does your sample contain DNA or RNA? DIYNAFLUOR can tell you on a budget appeared first on Arduino Blog.

    Website: LINK

  • Deploy your smart meeting room management system with Arduino GIGA

    Deploy your smart meeting room management system with Arduino GIGA

    Reading Time: 3 minutes

    Managing shared spaces, especially meeting rooms, can be a headache in busy offices. At Arduino, we’ve experienced it firsthand in our flexible and dynamic offices around the world – where colleagues could often be seen wandering around with their laptops, trying to find a quiet place for videocalls or brainstorming sessions. 

    We started with a simple shared Google Calendar, but as we often do, we took it a step further by creating an innovative solution – using Arduino GIGA R1 WiFi and GIGA Display Shield.

    Open the door to better room booking 

    Our engineers developed a physical device that can be conveniently installed next to every meeting room door, using the Arduino GIGA and GIGA Display Shield. The device connects seamlessly with Google Calendar APIs, allowing users to check room availability and book a space directly from the touchscreen. The APIs are managed by a custom Python® application that processes Google Calendar data and updates the corresponding IoT Thing in Arduino Cloud.

    No more knocking on doors or interrupting meetings to check if the room is free! It’s all displayed in real-time, and booking is just a tap away. And, of course, everything is built with data privacy in mind.

    To power the user-friendly interface we used LVGL, the “light and versatile visual library” perfect for building custom GUIs. We also leveraged Squareline Studio – because sometimes coding just feels like too much work – to easily design the display’s look and feel. 

    For the finishing touch, we even created a custom 3D-printed case (for which you can just download the STL file right here).

    Take it to the next level with automation

    But why stop at meeting room booking? With this phygital system, you can integrate sensors to collect additional data like room temperature, humidity and lighting, automating systems to improve comfort and energy efficiency. 

    Get started today

    Built on two of Arduino’s most advanced products, the Arduino GIGA and GIGA Display Shield, this solution opens endless possibilities for automation and customization in your office. 

    Ready to make your own? Check out the code and files on Project Hub and the repository on GitHub, to get started! And don’t forget to let us know what you’ll build.

    The post Deploy your smart meeting room management system with Arduino GIGA appeared first on Arduino Blog.

    Website: LINK

  • Raspberry Pi 500 and Monitor in The MagPi 149

    Raspberry Pi 500 and Monitor in The MagPi 149

    Reading Time: 3 minutes

    The latest edition of The MagPi covers all the new products in depth, with detailed specifications, documentation, and interviews with the CM5 engineer. We’ve also got information on the new Raspberry Pi Pico 2 W, Raspberry Pi Hub, and Raspberry Pi Connect service.

    There’s a lot of new products this month and we haven’t forgotten about the makers. This month’s mag is also packed with projects, from a Hackberry Pi to an Adventure Time electric guitar.

    Priority Boarding is back! The MagPi subscribers can buy a Raspberry Pi 500 first

    Priority Boarding is back!

    Raspberry Pi 500 is in high demand. Subscribers to The MagPi can buy a Raspberry Pi 500 first with our Priority Boarding scheme. Take out a subscription to The MagPi and you’ll get a code via email to skip the line and get your Raspberry Pi 500 computer.

    Raspberry Pi's solution for embedded customers gets updated with Raspberry Pi 5 power

    Introducing Compute Module 5 

    Compute Modules make it easier for embedded customers to build custom products using Raspberry Pi hardware. Compute Module 5 puts all the power of Raspberry Pi 5 into an embeddable, programmable board that can be placed inside a development product.

    One reader has repurposed a BlackBerry keyboard with Raspberry Pi Zero 2 W hardware

    Hackberry Pi Zero

    This project takes an original keyboard from a BlackBerry phone and combines it with an ultra-modern Raspberry Pi Zero 2 W and 4-inch display.

    Allie Katz has built this amazing cosplay guitar using Raspberry Pi

    Adventure Time Guitar

    Raspberry Pi 5 is “the beating heart” of this impressive Adventure Time Self-Playing Guitar which features programmable buttons, custom speakers, and a touchscreen.

    The easiest guide for newcomers to get going with Raspberry Pi hardware

    Get started with Raspberry Pi

    It’s that time of the year when we welcome a new generation of makers to Raspberry Pi. Find out how to connect everything up, run an OS, and start using your Raspberry Pi with our guide to desktop computing and digital making.

    Build a streaming media box that can stream your server content to a television

    Build your own streaming server 

    This month KG builds a specialised LibreELEC-based Kodi box so our TV can talk to a server we build in issue 148.  We look at receiving those streams beyond the web interface by building a streaming media receiver box for your TV

    This distraction-free writing tool is built using Cherry MX keys and a Raspberry Pi computer

    Micro Journal

    This Raspberry Pi Zero 2-based computer offers distraction-free writing Micro Journal is a modern solution with a nostalgic twist with all the charm of a vintage typewriter and delicious clicky Cherry MX keys.

    You’ll find all this and much more in the latest edition of The MagPi magazine. Pick up your copy today from our store, or subscribe to get every issue delivered to your door.

  • Exploring Alvik: 3 fun and creative projects with Arduino’s educational robot platform

    Exploring Alvik: 3 fun and creative projects with Arduino’s educational robot platform

    Reading Time: 3 minutes

    Alvik is cute, it’s smart, it’s fun… so what can it actually do? 

    To answer this question, we decided to have fun and put the robot to the test with some of the most creative people we know – our own team! A dozen Arduino employees volunteered for a dedicated Make Tank session earlier this fall, and came up with a few great in-house projects for us to share – and you to try! 

    We were so happy with the creative and engaging ideas that we took them on the road for the Maker Faire Rome 2024: they were a hit and attracted many curious visitors to the Arduino booth.

    Hello, Alvik!

    This interactive project, created by Christian Sarnataro and Leonardo Cavagnis, brings to life Alvik’s friendly personality. By waving your hands in front of a Nicla Vision camera, you trigger a cheerful “big hands” gesture in response: it’s Alvik’s way of welcoming newcomers to robotics!

    Why it’s great: The project highlights Alvik’s ease of use and intuitive interactivity, while demonstrating how advanced learners can tap into the robot’s AI capabilities to create meaningful, engaging robotic experiences.

    Robo-Fight Club

    Developed by Davide Neri and Alexander Entinger, this competitive game turns Alvik into a feisty battling robot. Participants control their Alvik to push opponents out of the arena, while trying special moves like “yellow-banana” for spins, “green-slime” to reverse controls, and “blue-ice” to freeze competitors for five seconds. Any robot stepping out of the arena automatically loses the match.

    Why it’s great: Robo-Fight Club demonstrates how Alvik can be used for multiplayer, interactive gaming experiences while teaching users about programming logic and control systems.

    Alvik Mini City

    In this project by Giovanni Bruno, Julián Caro Linares, and Livia Luo, Alvik works tirelessly in a mini city, moving balls from one floor to another. The project showcases how robotics can assist in repetitive and potentially hazardous tasks, inspiring us to imagine practical applications for robotics in their daily lives.

    Why it’s great: This project emphasizes how Alvik is more than just an educational robot – it’s a tool for exploring real-world use cases in automation and problem-solving.

    Your turn!

    Alvik is the perfect companion to learn coding and robotics because it’s easy to get started with, but powerful enough to support complex projects. With the option to program using block-based coding, in MicroPython or the Arduino language, everyone from beginners to advanced users can choose the environment that suits their needs best!

    Inspired by these projects? Check out all of Alvik’s features and specs on this page, or go ahead and start your journey today! Don’t forget to share your creations with us: upload your projects to Project Hub or email creators@arduino.cc – we can’t wait to see what you build!

    The post Exploring Alvik: 3 fun and creative projects with Arduino’s educational robot platform appeared first on Arduino Blog.

    Website: LINK

  • UNO Rev3 or UNO R4? Choosing the perfect Arduino for your project

    UNO Rev3 or UNO R4? Choosing the perfect Arduino for your project

    Reading Time: 5 minutes

    The Arduino UNO is legendary among makers, and with the release of the UNO R4 in 2023, the family gained a powerful new member. But with two incredible options, which UNO should you pick for your project? Here’s a breakdown of what makes each board shine, depending on your needs, skills, and goals.

    Why the UNO Rev3 is still a go-to classic

    The UNO Rev3 has been around for over a decade, earning its reputation as a solid, reliable board perfect for beginners. Simple, robust, and versatile, it’s the “base camp” of the Arduino ecosystem. Its 8-bit architecture makes it straightforward to understand exactly what’s happening in your code. 

    Applications and ideal uses 

    The UNO Rev3 is fantastic for projects like controlling LEDs, motors, and simple sensors – as well as any of the 15 projects included in our best-selling Arduino Starter Kit.

    Its ability to handle a higher current directly from each pin makes it ideal for connecting power-hungry sensors or motors without needing extra components. It’s also compatible with an enormous number of sketches and libraries that have been built around it over the years.

    One key advantage? The microcontroller on the UNO Rev3 can be removed, allowing you to use it independently – a feature that many seasoned users love.

    Over the years, users have pushed it to the limit to create some pretty impressive applications: a remarkably powerful library for audio, an interactive crypto-mining tool, and even a whole BASIC computer that you can hang around your neck like a badge!

    The UNO R4 was designed for the modern maker

    The UNO R4 builds on everything makers love about the Rev3, adding features that bring it up to speed with the needs of today’s tech. Its 32-bit Arm® Cortex®-M4 guarantees significantly faster processing power and can handle more advanced projects. It comes in two versions: the UNO R4 Minima for essential functionality and the UNO R4 WiFi for Internet-connected projects.

    The latter is the brains of the Plug and Make Kit: the easiest way to go from zero to tech hero, with step-by-step tutorials to create a custom weather station, a video game controller, a smart timer and so much more!

    Advanced features for new possibilities

    The UNO R4 packs in features that are groundbreaking for the UNO family:

    • 12-bit DAC: Enables analog output for audio waveforms or other analog components without external circuitry.
    • CAN bus: Ideal for connecting multiple devices in robotics or automotive projects.
    • Wi-Fi® and Bluetooth® on the R4 WiFi model: Easily build IoT projects and connect to the Arduino Cloud to control your devices remotely.
    • Enhanced Diagnostics: The R4 WiFi includes an error-capturing mechanism that helps beginners by identifying issues in the code, a fantastic learning tool.

    Applications and ideal uses 

    With increased memory and processing power, the UNO R4 is perfect for projects that require complex calculations or manage multiple processes. Think IoT, data sensing, automation systems, creative installations or scientific equipment where precise measurements and real-time adjustments are key.

    What’s more, the UNO R4 has the capability to leverage AI – and our community has jumped at the chance of exploring whole new realms. One user built a gesture recognition system made of cardboard, another added smart detection to a pet door to always know if their cat was home or not, and another yet came up with a great tool to always know what song is playing.
    Not to mention the possibilities for advanced animations like this one – inspired by Bad Apple – developed thanks to the LED matrix right on the UNO R4.

    Is a 32-bit MCU always better than an 8-bit?

    The short answer is, no. We believe the best solution is always determined by the requirements of the project at hand: bigger, faster, more powerful or more expensive is not always better.

    8-bit microcontrollers process data in 8-bit chunks, which limits the size of numbers they can handle directly to values between 0 and 255 (or -127 and 128). This limitation makes them best suited for applications with minimal data processing needs, such as basic tasks like toggling LEDs or controlling simple sensors. However, they also tend to be more affordable and to consume less power, making hardware design less expensive, and have a simpler architecture, which translates to easier programming. So, if you are still learning the basics and need the most straightforward tool, or you are tackling a project with minimal requirements, an 8-bit MCU is not only all you need, but probably your best option.

    On the other hand, if you need to work on much larger numbers and perform data-heavy calculations, 32-bit microcontrollers can handle advanced applications like image processing and real-time analytics. The difference is not just 4-fold going from 8 to 32: it’s a huge jump from 255 to 4,294,967,295! Almost by definition, any solution that requires this kind of performance will be more complex to design and program, require more memory, and consume more power, often affecting battery life. The upside, of course, is the incredible potential of what you can achieve!

    Compatibility and transitioning from UNO Rev3 to UNO R4

    If you already have experience with the UNO Rev3 and are considering the R4, but have concerns about compatibility, rest assured: they have the same form factor, pinout, and 5V operating voltage. This makes it easy to transfer accessories such as shields from one to the other. 

    On the software side, tutorials and projects are often compatible. We have even created a GitHub repository where you can check compatibility for libraries with the new R4 (and even help us update information or add new R4-friendly versions). This is part of the effort we share with our community to make sure that transitioning to the UNO R4 – if you choose to do so – is as seamless as possible.

    Which Arduino UNO should I choose?
    UNO Rev3 UNO R4
    • Best for beginners or those working on foundational projects.

    • Great for educational settings, where understanding core programming concepts and hardware interactions are the focus.

    • Ideal if you need a reliable, budget-friendly, no-frills board with vast project resources available online.

    • Perfect for advanced users or beginners looking to push boundaries with more complex projects.

    • Best for IoT, data-intensive, or networked applications that require more processing power.

    • A smart choice if you’re experimenting with new peripherals like CAN bus, DAC, or Wi-Fi/Bluetooth connectivity.

    Choose your UNO and start creating!

    Whether you choose the classic UNO Rev3 or the more recent UNO R4, you’re joining a global community of makers, educators, and inventors who love to create. Both boards offer incredible opportunities, each tailored to different stages and styles of making.
    Ready to dive into a new project? Buy your next UNO and discover limitless possibilities!

    The post UNO Rev3 or UNO R4? Choosing the perfect Arduino for your project appeared first on Arduino Blog.

    Website: LINK

  • Win! One of five Raspberry Pi Monitors

    Win! One of five Raspberry Pi Monitors

    Reading Time: < 1 minute

    We’ve been looking forward to the new Raspberry Pi Monitor for ages now – the inexpensive and lightweight display is perfect for so many uses, whether you’re in a classroom, at your desk, or on the go. We have five to giveaway, and you can enter the competition below…

  • Arduino Education at Bett 2025: Shaping the future of K-12 and HE

    Arduino Education at Bett 2025: Shaping the future of K-12 and HE

    Reading Time: 3 minutes

    Mark your calendars… Arduino Education is coming to Bett UK 2025! Taking place for three days from January 22nd-24th at the ExCeL exhibition center in London, Bett is the ultimate global event for educational innovation. 

    We are attending the stand with our partner CreativeHut again this year. Join us at our booth (Stand NF10) where we’ll bring the future of education to life. Get hands-on with our latest solutions, meet our passionate team of experts, and discover how you can use Arduino Education kits in the classroom to boost STEAM skills and improve learning outcomes. 

    Explore the latest EdTech solutions for K-12 teachers

    If you’ve been keeping up with our social media posts, you’ll know that we recently launched block-based coding for the Alvik robot. Now’s your chance to see it in action. Perfect for younger learners, block-based coding with Alvik enables students as young as seven to engage with robotics through hands-on, cross-disciplinary projects and lessons. And don’t miss our live demos showcasing just how simple it is to program Alvik using MicroPython too.

    But that’s not all. You’ll also have the chance to get hands-on with the Plug and Make Kit – a powerful tool that allows educators and students to explore the world of IoT (Internet of Things). Designed for hands-on learning, the kit includes seven engaging projects that provide a structured starting point. And with seamless integration into Arduino Cloud, collaboration and innovation have never been easier.

    Are you an HE educator? We’ve got you covered too!

    If you’re teaching at the higher education level, we’ve got something special for you too. Stop by our stand to explore the cutting-edge PLC Starter Kit, an incredible resource for teaching industrial automation. Designed to bridge the gap between theory and practice, this kit prepares students for real-world challenges and helps them grasp complex concepts with ease.

    And here’s the really exciting part – we’ll be showcasing a brand-new kit specifically designed for higher education in industry automation. Be among the first to experience this innovative solution, designed to take advanced learning to the next level. You heard it here first!

    Get involved with interactive demos and more

    At our booth, you’ll have the opportunity to take part in interactive demonstrations and explore a comprehensive content platform catering to K-12 and higher education. This includes resources on coding, robotics, DIY smart IoT projects, PLC (Programmable Logic Controllers), and computer vision solutions, all aimed at enriching the educational journey.

    Will we be award winners?

    We’re beyond excited to share that Arduino Education has been shortlisted for the Bett Awards 2025 in the category of AV, VR/AR, Robotics, or Digital Devices – and it’s all thanks to our incredible Alvik robot! Watch this space to find out if we win!

    We can’t wait to see you at Bett 2025. For more information and to book your ticket, visit the Bett website.

    The post Arduino Education at Bett 2025: Shaping the future of K-12 and HE appeared first on Arduino Blog.

    Website: LINK

  • Five reasons to join the Astro Pi Challenge, backed by our impact report

    Five reasons to join the Astro Pi Challenge, backed by our impact report

    Reading Time: 4 minutes

    We are excited to share our report on the impact of the 2023/24 Astro Pi Challenge. Earlier this year we conducted surveys and focus groups with mentors who took part in the Astro Pi Challenge, to understand the value and impact the challenge offers to young people and mentors. You can read the full report here, but here are the highlights.

    A child taking part in Astro Pi Mission Zero.

    What is the Astro Pi Challenge?

    The European Astro Pi Challenge is an ESA Education project run in collaboration with the Raspberry Pi Foundation. It offers young people the amazing opportunity to learn how to code and conduct scientific investigations in space, by writing computer programs that run on Raspberry Pi computers on board the International Space Station (ISS). The annual Astro Pi Challenge is open to young people up to age 19 in ESA member and associate countries.

    Each year, there are two missions: Mission Zero and Mission Space Lab.

    Five reasons to take part in the Astro Pi Challenge

    Based on the findings in this report, we wanted to highlight five great reasons to take part in the Astro Pi Challenge, and direct you to some resources to help you get started — there is still plenty of time to enter the 2024/25 challenge!

    ESA astronaut Sławosz Uznański Astro Pi Challenge 2025 ambassador.

    1. Young people get to run their code in space

    Mentors told us how excited young people were to be working on something that connected with the real world, and how proud they were that their code ran on the International Space Station.

    “Participating in Mission Space Labs offers students a great opportunity to work with the International Space Station, to see the Earth from above, to challenge them to overcome the terrestrial limits.” – Mission Space Lab mentor

    2. Young people are inspired to continue to learn

    91% of mentors told us that young people who successfully wrote code for Mission Space Lab were likely or very likely to participate in computing and digital making challenges in the future.

    Mission Zero mentors shared that young people who saw others take part in the mission were inspired to get involved.

    3. Young people learn new skills

    Mission Space Lab mentors told us that young people who successfully wrote code for Mission Space Lab had a greater understanding of STEM concepts, and increased their skills and confidence in computing and digital making.

    Mentors also said that Mission Zero provides a great first step into using Python.

    “I think it was very good at setting up the first bit of Python and just having a very limited command set and a very quick result…” – Mission Zero mentor

    4. Astro Pi mentors have fun

    It’s not just the young people that enjoy Astro Pi — 95% of Mission Space Lab mentors and 99% of Mission Zero mentors said they somewhat or very much enjoyed taking part.

    5. We provide the resources and support Astro Pi mentors need

    Mentors gave us positive feedback on the guidance we provided to help them support young people. This year, we have produced even more resources and ways to support mentors to lead missions.

    “The Mission [Space] Lab guide was fantastic for my students; step by step” – Mission Space Lab mentor

    How to get involved

    Astro Pi opened for registration on 16 September this year, and there is still plenty of time for you to sign up and run the missions with your young people. You can find all the information you need to take part on astro-pi.org, including the mentor guides, which help you prepare to run the activities.

    Mission Zero mentor guide
    Mission Space Lab mentor guide

    We also provide project guides for Mission Zero and Mission Space Lab that walk young people through the steps they need to follow to get a working program ready for submission.

    Mission Space Lab workshop held at RPF HQ.

    If you would like some help getting started, you can:

    Key dates

    17:30 – 18:30 CET, 16 January – Mission Space Lab livestream and technical Q&A
    17:30 – 18:30 CET, 28 January – Mission Zero codealong
    09:00 CET, 24 February – Mission Space Lab closes
    09:00 CET, 24 March – Mission Zero closes

    Website: LINK

  • Turn your old Android smartphone into an Arduino screen with the RemoteXY app

    Turn your old Android smartphone into an Arduino screen with the RemoteXY app

    Reading Time: 2 minutes

    Each component you add to your Arduino project increases its complexity and the opportunity for mistakes. But most projects require some “auxiliary” hardware — components that you use to interact with the Arduino or to help it do the job you’re asking of it. Buttons and displays are great examples. But as Doctor Volt demonstrates in his most recent video, you can replace both of those with the high-quality touchscreen on your old Android smartphone using the RemoteXY app.

    You likely learned early in your Arduino journey that the serial connection between the Arduino development board and a PC is very handy. It lets the Arduino output information and also lets you input commands. But an entire computer (even a laptop) is pretty bulky and requires a lot of power. The RemoteXY app, available for Android devices, lets you use your smartphone to do the same job.

    Even better, you can use the RemoteXY app with an Arduino library to get an interface much more sophisticated than a normal serial terminal. The app still communicates with the Arduino via serial behind the scenes, but it uses that data to enable nice touchscreen-friendly GUI controls, graphs, and more. 

    For that to work, you need a way for your Android smartphone to establish a serial connection with your Arduino board. That is easy to do using an OTG cable with a USB-to-Serial adapter. Together, those let your smartphone talk to your Arduino just like your PC does. Doctor Volt’s video walks you through setting up and using the RemoteXY Arduino library and how to configure the app.

    [youtube https://www.youtube.com/watch?v=d93kF9tAtxc?feature=oembed&w=500&h=281]

    In a short amount of time, you’ll get a user-friendly interface for your project on the smartphone’s high-resolution touchscreen.

    The post Turn your old Android smartphone into an Arduino screen with the RemoteXY app appeared first on Arduino Blog.

    Website: LINK

  • This nature-inspired display reacts to ambient sounds

    This nature-inspired display reacts to ambient sounds

    Reading Time: 2 minutes

    We all need ways to calm down and relax, and few things are as effective as nature itself. Taking inspiration from organic patterns and smooth, flowing waves, dzeng on Instructables has built an LED wall light that responds in real-time to the sounds within a room.

    The project started out as a 2D vector graphic that featured several overlapping, organic leaf patterns arranged within a circle. This pattern was then etched onto a piece of clear acrylic via a laser cutter before being attached to a blue-painted base. For the lighting effects, dzeng added an LED strip between the two layers before connecting it to an Arduino Nano ESP32.

    The reactive lighting effects are provided by the Nano ESP32’s sketch, which maintains two variables: brightness and delay. Every loop, the current sound levels are read from a microphone and averaged before being mapped onto the aforementioned values. Finally, the currently-illuminated LED is shifted by one position on the strip and the calculated brightness is applied.

    To see it and the entire design process, you can view dzeng’s tutorial here on Instructables.

    The post This nature-inspired display reacts to ambient sounds appeared first on Arduino Blog.

    Website: LINK

  • Speed up your project’s compile time by up to 50% in Arduino Cloud!

    Speed up your project’s compile time by up to 50% in Arduino Cloud!

    Reading Time: 3 minutes

    At Arduino, we know how precious your time is when you’re building your next big project or experimenting with new ideas. That’s why we’re thrilled to introduce a game-changing update to the Cloud Editor Builder — the engine behind compiling your sketches in Arduino Cloud.

    This update is all about you: making your development faster, smoother, and more secure, so you can focus on what truly matters — creating.

    Here’s what’s new:

    Faster compilations: Up to 50% faster!

    No more waiting around! With the new builder, sketch compilations are now up to 50% faster, enabling you to focus more on creating and testing your projects, and less on waiting. Two years ago, we significantly improved the Cloud Editor Builder, setting a new standard for performance.

    And now, whether you’re working on a quick prototype or a complex IoT solution,  we provide you with faster compilation times, which means you can iterate and innovate more efficiently.

    See compilation progress at a glance

    One of the standout features of the new builder is the introduction of a dedicated compilation progress bar. Now, you can see exactly how far along the compilation process is, with clear visibility into its completeness percentage. No more guesswork — just a smoother and more transparent experience.

    Your IoT projects, more secure

    We’ve also made improvements under the hood, adding an extra layer of security and reliability to the Cloud Editor Builder. Your data and projects are safer than ever, giving you peace of mind while you create.

    IDE vs. Cloud Editor: Which one fits your workflow?

    We understand that every Arduino user has unique needs, which is why we offer both the Arduino IDE and the Cloud Editor. Wondering which option suits your workflow best? We’ve prepared a clear comparison table showcasing the key differences between the two tools. From compilation speeds to storage options, see how the Cloud Editor stacks up against the IDE.

    Check out the full comparison table in this article.

    Ready to experience the difference?

    The new Cloud Editor Builder will be live in the coming days, and we can’t wait for you to try it! Stay tuned for updates, and get ready to enjoy faster compilations, improved usability, and enhanced security.

    We’re excited to see how this update will elevate your projects. As always, we’d love to hear your feedback. Please share your thoughts, questions, and experiences with us on social media or Arduino Forum.

    Let’s build something amazing together!

    Ready to elevate your projects? Discover the full potential of the Arduino Cloud Editor and explore all its powerful features here. Need guidance? Dive into our comprehensive documentation.

    The post Speed up your project’s compile time by up to 50% in Arduino Cloud! appeared first on Arduino Blog.

    Website: LINK

  • Wax: digital music manager

    Wax: digital music manager

    Reading Time: 4 minutes

    Wax differs from most existing music managers in three ways. Instead of individual tracks, music is catalogued as ‘works’ – such as an album, a symphony, an opera, etc. Secondly, works are categorised by genre, but it also allows you to tag works in a way that is relevant to the genre too; symphonic works can include composer and conductor, while pop music comes with the group and title.

    The final feature is that it will start playing music as soon as you’ve given it enough requirements (in the form of metadata), which you can then change on the fly.

    Multi-core wonder

    Wax is specifically designed for Raspberry Pi 4 because of its quad-core processor. “Wax uses one core to run the user interface, one for playing, one for ripping, and the fourth for time-consuming tasks like fetching metadata from the cloud, like MusicBrainz and Cover Art Archive,” Jeffrey says. “Many audiophiles worry needlessly that burdening a processor involved in playing a sound file can impair the quality of the sound it produces. The multi-processing architecture of Wax obviates this concern as the core responsible for playing the music is not simultaneously performing any other tasks.”

    As a 2TB SSD is being used for storage, you only need normal sized SD card for Raspberry Pi. Jeffrey has used 2GB here. The SSD goes into the underside of the Argon ONE case, and connects via a USB 3.0 adapter

    From the app you can select music starting by genre. “Works by the same composer are listed together,” Jeffrey tells us. “Likewise, multiple versions of each work are listed together. This hierarchical sorting makes it easy to survey the collection for the desired recording – possibly one that you forgot you had. Wax also provides incremental search if you already have a specific work in mind.”

    Individual tracks or even the entire work can be added to the queue. You can also group tracks within a work – perhaps to represent the acts of an opera. “The other interesting feature is that the values in any column can alternatively be represented as a filter button,” Jeffrey continues. “[I can convert] the ‘subgenre’ field to a filter button by dragging the column header to the filter button area. Selecting a value with the filter button removes works from the list that do not match that value.”

    Dive deeper

    While the ‘gears and levers’ are usually hidden, you can enter a robust edit mode that lets you customise metadata, as well as creating new metadata for works. You can use the metadata downloaded from the online sources when creating and editing too.

    Specific data is used to filter inside genres – the categories of data can be edited too. “WaxConfig is a separate program used for configuring Wax,” Jeffrey says. “Most importantly, this is where you specify genres, including their name and the primary and secondary keys. The Info page provides information about your collection, including the number of works in each genre.”

    You can see an example of this in the image to the left. Jeffrey has put together a very in-depth guide on how to install and setup Wax, as well as going into more depth on how to use it. Performance on Raspberry Pi 4 is good too, especially on Jeffrey’s setup.

    If you need to dive deeper to edit the tags for genres, you’re able to do that with Wax-Config

    “I run Wax on a Raspberry Pi 4 with 4 GB of RAM,” Jeffrey tells us. “I use the NanoSound One DAC with the Argon One M.2 case. The NanoSound One DAC uses the TI PCM5122 DAC for high-quality audio output – 112 dB SNR. The Argon case makes it possible to integrate a 2TB SSD which I use for storing my sound archive.”

    Even with the high-power audio hardware and no active cooling, the CPU temperature only reached 45C, with a CPU load of 2.4 (of a theoretical maximum of 4.0 due to the quad-core architecture). He even reckons a 2GB Raspberry Pi would do the job just fine.

    “Wax makes it easy to find and appreciate the music I want to hear,” Jeffrey says. “Finding a recording of a specific work was often hard and always inconvenient when I had to sort through thousands of LPs and CDs. With Wax, I can make a selection from the comfort of my listening position. I sacrifice nothing for this convenience because Wax presents all the information I need to appreciate the recording — artist names, for example — and I am able to explore further, as I used to do by reading record jackets or CD liner notes, by accessing Wikipedia and liner notes in Wax from the comfort of my listening position. Instead of a wall full of recordings, my entire collection now fits in a tiny box powered by a Raspberry Pi.”

  • Move Mario remotely with this online N64 controller system

    Move Mario remotely with this online N64 controller system

    Reading Time: 2 minutes

    For obvious reasons, video game console controls provide input commands directly to the console. Modern consoles may do so wirelessly, but the effect is the same: direct input. But what if you connected a “controller” to the internet? Then you could play from anywhere and that is exactly what Redditor Lovelyroyalette achieved with this Arduino Due-based N64 controller.

    The N64 controller communication protocol has been well-documented for decades now and is pretty easy to replicate using an Arduino. In fact, there is even a handy library available (called N64Controller) that makes that simple to achieve. Connect a few wires and it will send commands to the N64 like they’re coming from a real controller.

    Normally, people use that functionality to build their own custom N64 controllers. But Lovelyroyalette chose to do something a little different and connected the Arduino Due to their laptop, which runs a server hosting a web interface where visitors can input controller commands. Push “A” on that interface and the laptop will tell the Due to send the “A” command to the N64, causing Mario to jump.

    Not only is that neat from a technical standpoint, but it has some practical uses. The most obvious is to allow remote play — including remote multiplayer sessions in Goldeneye. With a video capture card, the web interface can display the game for remote players to see. This also has interesting applications for streamers, who could, for instance, let the chat send controller commands for some added interactivity.

    The post Move Mario remotely with this online N64 controller system appeared first on Arduino Blog.

    Website: LINK

  • Android XR: The Gemini era comes to headsets and glassesAndroid XR: The Gemini era comes to headsets and glassesVP & GM

    Android XR: The Gemini era comes to headsets and glassesAndroid XR: The Gemini era comes to headsets and glassesVP & GM

    Reading Time: 2 minutes

    Blending technology with everyday life, with help from AI

    Android XR will first launch on headsets that transform how you watch, work and explore. The first device, code named Project Moohan and built by Samsung, will be available for purchase next year.

    With headsets, you can effortlessly switch between being fully immersed in a virtual environment and staying present in the real world. You can fill the space around you with apps and content, and with Gemini, our AI assistant, you can even have conversations about what you’re seeing or control your device. Gemini can understand your intent, helping you plan, research topics and guide you through tasks.

    We’re also reimagining some of your favorite Google apps for headsets. You can watch YouTube and Google TV on a virtual big screen, or relive your cherished memories with Google Photos in 3D. You’ll be able to explore the world in new ways with Google Maps, soaring above cities and landmarks in Immersive View. And with Chrome, multiple virtual screens will let you multitask with ease. You can even use Circle to Search to quickly find information on whatever’s in front of you, with just a simple gesture.

    Plus, because it’s Android, your favorite mobile and tablet apps from Google Play will work right out of the box, with even more apps, games and immersive content made for XR arriving next year.

    Website: LINK

  • Explore e-paper technology with Nano Matter and the new EPDK-Matter from Pervasive Displays

    Explore e-paper technology with Nano Matter and the new EPDK-Matter from Pervasive Displays

    Reading Time: 2 minutes

    We’re excited to share that Pervasive Displays has just launched the E-Paper Development Kit for Matter! This groundbreaking, self-contained kit is designed to revolutionize how smart home devices use e-paper displays, enhancing user experience while driving down energy consumption. Created in collaboration with us and our long-time partner Silicon Labs, this kit marks a significant milestone in the integration of Matter protocol and e-paper technology

    What is e-paper? 

    E-paper technology is a display technology that mimics the appearance of ink on paper, using minimal power and providing excellent visibility in various lighting conditions, making it ideal for energy-efficient and highly readable digital displays.

    Discover the new kit!

    The E-Paper DevelopmentDisplay Kit for Matter (or “EPDK–Matter”) includes everything you need to explore the possibilities of e-paper technology in smart homes, building automation, and industrial IoT applications. 

    It includes an EXT4 Expansion Board, a state-of-the-art 2.90” e-paper screen, and an adapter board for easy connectivity (all designed and manufactured by Pervasive Displays) – and it bundles with an Arduino Nano Matter, which we developed based on the MGM240S SoC from Silicon Labs. The open-source libraries include Matter examples and leverage the Arduino SDK, together with extensive documentation.

    Peripherals include a 3-axis accelerometer and temperature/humidity sensors, a button, an RGB LED, and a passive NFC antenna. The Matter protocol ensures seamless communication between devices, further improving connectivity and interoperability in smart home environments.

    Perfect for both beginners and advanced developers, the kit provides ready-to-use examples for Arduino IDE, alongside a GitHub repository for deeper customization. It’s even compatible with other boards from the Nano family.

    All in all, it’s the full package for prototyping and developing your own ultra-low power, high-performance projects with e-paper displays: the possibilities are endless!

    Ready to dive into action? Explore all the tech specs and purchase options for your E-Paper Development Kit for Matter on Pervasive Display’s dedicated page. Try it out with our dedicated tutorial to get started! And stay tuned for more exciting projects and innovations from our partners!

    The post Explore e-paper technology with Nano Matter and the new EPDK-Matter from Pervasive Displays appeared first on Arduino Blog.

    Website: LINK

  • How can we teach students about AI and data science? Join our 2025 seminar series to learn more about the topic

    How can we teach students about AI and data science? Join our 2025 seminar series to learn more about the topic

    Reading Time: 4 minutes

    AI, machine learning (ML), and data science infuse our daily lives, from the recommendation functionality on music apps to technologies that influence our healthcare, transport, education, defence, and more.

    What jobs will be affected by AL, ML, and data science remains to be seen, but it is increasingly clear that students will need to learn something about these topics. There will be new concepts to be taught, new instructional approaches and assessment techniques to be used, new learning activities to be delivered, and we must not neglect the professional development required to help educators master all of this. 

    An educator is helping a young learner with a coding task.

    As AI and data science are incorporated into school curricula and teaching and learning materials worldwide, we ask: What’s the research basis for these curricula, pedagogy, and resource choices?

    In 2024, we showcased researchers who are investigating how AI can be leveraged to support the teaching and learning of programming. But in 2025, we look at what should be taught about AI, ML, and data science in schools and how we should teach this. 

    Our 2025 seminar speakers — so far!

    We are very excited that we have already secured several key researchers in the field. 

    On 21 January, Shuchi Grover will kick off the seminar series by giving an important overview of AI in the K–12 landscape, including developing both AI literacy and AI ethics. Shuchi will provide concrete examples and recently developed frameworks to give educators practical insights on the topic.

    Our second session will focus on a teacher professional development (PD) programme to support the introduction of AI in Upper Bavarian schools. Franz Jetzinger from the Technical University of Munich will summarise the PD programme and share how teachers implemented the topic in their classroom, including the difficulties they encountered.

    Again from Germany, Lukas Höper from Paderborn University, with Carsten Schulte will describe important research on data awareness and introduce a framework that is likely to be key for learning about data-driven technology. The pair will talk about the Data Awareness Framework and how it has been used to help learners explore, evaluate, and be empowered in looking at the role of data in everyday applications.  

    Our April seminar will see David Weintrop from the University of Maryland introduce, with his colleagues, a data science curriculum called API Can Code, aimed at high-school students. The group will highlight the strategies needed for integrating data science learning within students’ lived experiences and fostering authentic engagement.

    Later in the year, Jesús Moreno-Leon from the University of Seville will help us consider the  thorny but essential question of how we measure AI literacy. Jesús will present an assessment instrument that has been successfully implemented in several research studies involving thousands of primary and secondary education students across Spain, discussing both its strengths and limitations.

    What to expect from the seminars

    Our seminars are designed to be accessible to anyone interested in the latest research about AI education — whether you’re a teacher, educator, researcher, or simply curious. Each session begins with a presentation from our guest speaker about their latest research findings. We then move into small groups for a short discussion and exchange of ideas before coming back together for a Q&A session with the presenter. 

    An educator is helping two young learners with a coding task.

    Attendees of our 2024 series told us that they valued that the talks “explore a relevant topic in an informative way“, the “enthusiasm and inspiration”, and particularly the small-group discussions because they “are always filled with interesting and varied ideas and help to spark my own thoughts”. 

    The seminars usually take place on Zoom on the first Tuesday of each month at 17:00–18:30 GMT / 12:00–13:30 ET / 9:00–10:30 PT / 18:00–19:30 CET. 

    You can find out more about each seminar and the speakers on our upcoming seminar page. And if you are unable to attend one of our talks, you can watch them from our previous seminar page, where you will also find an archive of all of our previous seminars dating back to 2020.

    How to sign up

    To attend the seminars, please register here. You will receive an email with the link to join our next Zoom call. Once signed up, you will automatically be notified of upcoming seminars. You can unsubscribe from our seminar notifications at any time.

    We hope to see you at a seminar soon!

    Website: LINK

  • New features in Android to help you stay safe from unwanted Bluetooth trackingNew features in Android to help you stay safe from unwanted Bluetooth tracking

    New features in Android to help you stay safe from unwanted Bluetooth trackingNew features in Android to help you stay safe from unwanted Bluetooth tracking

    Reading Time: < 1 minute

    Android’s unknown tracker alerts automatically notify you if an unfamiliar Bluetooth tracker is moving with you to help you take action to protect yourself.

    As part of our ongoing commitment to safety, we’ve made technology improvements to bring you alerts faster and more often. We’re also rolling out two new features for Find My Device compatible tags:

    • Temporarily Pause Location: You can now temporarily pause location updates from your phone to prevent your device’s location from being used by a detected unknown tag for up to 24 hours. This provides an extra layer of privacy and control, allowing you to take a first action quickly while you locate and physically disable the tag.
    • Find Nearby: If you receive an unknown tracker alert, you can now use the „Find Nearby“ feature to pinpoint the tag’s location. Your Android device will guide you to the tag, to help you find it if it’s hidden.

    Your safety is our priority, so we’re continuously improving unknown tracker alerts to help you stay ahead of unwanted tracking. Learn more about these new features in our help center.

    Website: LINK

  • A new Plug and Make Kit challenge! A game of rhythm and creativity

    A new Plug and Make Kit challenge! A game of rhythm and creativity

    Reading Time: 3 minutes

    The Arduino Plug and Make Kit is all about unleashing creativity while simplifying the process of turning ideas into reality. It enables everyone to focus on the fun of creating with the power of the UNO R4 WiFi and a user-friendly, modular design – bypassing the complexities of traditional circuit building. 

    Case in point: the kit’s intuitive features inspired Loris Bottello to create a project that combines his passion for music with playful interaction. A project he kindly shared with us – and all of you! – with this great step-by-step guide on Project Hub.

    Meet Loris Bottello, Plug and Make Kit Star

    Bottello worked for years at Arduino as a Senior Product Designer, focusing on Arduino Cloud and Project Hub. An expert at creating user-friendly tools and platforms that empower makers, he was excited to participate in our role-reversing Make Tank – where colleagues from different teams joined efforts to put the Plug and Make Kit to the test. 

    It was during one of these in-house sessions that some experimentation with Modulino nodes led to Sync a Song. The concept of syncing music and lights came naturally to Bottello, who is also a singer and guitarist in a rock band.

    [youtube https://www.youtube.com/watch?v=nZoxANVnjuY?feature=oembed&w=500&h=281]

    Sync a Song

    Sync a Song is a game for one or two players, reminiscent of vintage reel-to-reel tape recorders: the challenge is to spin two reels at the same speed. When in perfect sync, you’ll see LEDs light up green and hear a song as your reward. Want a new tune? Simply press the buttons on Modulino Buttons to switch tracks!

    While you’ll need two Plug and Make Kits to complete this project, assembly is straightforward: just use two Modulino bases connected by Qwiic cables – you can even top them with 3D-printed reels for an authentic retro look. 

    And have fun customizing your own version! It’s easy to add a favorite song or tweak the visuals to create your own interactive, creative experience, mixing playful nostalgia and modern tech.

    Less (complexity) is more (fun)

    For Bottello, the Plug and Make Kit’s biggest strength lies in its simplicity and flexibility. “In the past, I spent a lot of time figuring out circuits and debugging hardware. With the kit, I can dive straight into coding and focus on building an interesting experience,” he explains. By eliminating the need for breadboards, wires, and resistors, the kit allows creators to dedicate more time to refining their ideas and exploring new possibilities.

    “The Plug and Make Kit is perfect for experimenting and learning by creating a variety of projects without overthinking the technical setup. It’s a true enabler of creativity.”

    So, grab your Plug and Make Kit and check out the full tutorial to recreate Sync a Song: you’ll be bringing your own ideas to life in no time! 

    Don’t forget to share your creations with us on Project Hub or email creators@arduino.cc to get in touch: we can’t wait to see what you build.

    The post A new Plug and Make Kit challenge! A game of rhythm and creativity appeared first on Arduino Blog.

    Website: LINK

  • This unique wall sconce welcomes you home with warm light

    This unique wall sconce welcomes you home with warm light

    Reading Time: 2 minutes

    Have you ever walked through your front door after a long day of work and realized that your home just isn’t as inviting as it seems like it should be? While it may not work miracles, some nice and welcoming lighting can make a big difference. That’s why Lauren Palazzi made this unique wall sconce called Acceptus that automatically turns on when it detects your arrival.

    Smart features aside, this is an intriguing design with a shape that generates interest all on its own. The wood base, carved in two pieces with a CNC router, has a profile that feels organic. Even before the light comes on, it projects warmth. The LED lighting on the internal perimeter enhances that effect with a soothing glow. Laser-cut acrylic “cover” panels on the front give the sconce a modern art vibe that is sure to appeal to many.

    The key smart feature of Acceptus is the presence detection, which lets it turn on the LED lighting when it senses your arrival. That works using an Arduino Nano ESP32 board that monitors an area, such as the entry way by the front door, through a PIR (passive infrared) motion sensor. That’s the same kind of sensor used for security floodlights and the technology is very reliable. When the Arduino “sees” movement through that PIR sensor, it uses a transistor to connect power to the LED strip.

    Palazzi recommends mounting Acceptus next to the door frame, opposite the hinges. That way, the movement of the door will activate the light. If you want to build your own Acceptus, Palazzi was kind enough to upload all of the necessary files to Instructables.

    The post This unique wall sconce welcomes you home with warm light appeared first on Arduino Blog.

    Website: LINK

  • This frighteningly realistic animatronic head features expressive silicone skin

    This frighteningly realistic animatronic head features expressive silicone skin

    Reading Time: 2 minutes

    The human face is remarkably complex, with 43 different muscles contorting the skin in all kinds of ways. Some of that is utilitarian — your jaw muscles are good for chewing, after all. But a lot of it seems to be the result of evolution giving us fantastic non-verbal communication abilities. That isn’t an easy thing to replicate by artificial means, but Will Cogley managed to make this silicone-skinned animatronic head that is frighteningly realistic.

    Most people, when seeing this animatronic head, will feel something between unease and outright disgust or terror. Cogley purposefully exaggerated the movements and proportions to give the head a more cartoonish appearance in an attempt to navigate around the uncanny valley, but it still looks a bit too human to be comfortable. 

    That is largely the result of the realistic silicone skin that Cogley molded and then attached onto the internal skeleton (skull?) frame using magnets. That attachment method is pretty similar to the way our own people skin attaches to our muscles and tendons, and it produces expressions that are quite human.

    The internal skeleton was 3D-printed and actuated by a plethora of small servo motors. Cogley designed a custom shield PCB for an Arduino Mega 2560 to control the servos. He hasn’t yet programmed it beyond a handful of basic movements and facial expressions, but he’s set it up so that there is a great deal of potential for future programmatic upgrades.

    [youtube https://www.youtube.com/watch?v=yWrldOS6xBw?feature=oembed&w=500&h=281]

    Going forward, Cogley wants to experiment with some other molding techniques and so we may see an even more realistic version soon.

    The post This frighteningly realistic animatronic head features expressive silicone skin appeared first on Arduino Blog.

    Website: LINK