Schlagwort: Voice Control

  • Adjusting office chair height with simple voice commands

    Adjusting office chair height with simple voice commands

    Reading Time: 2 minutes

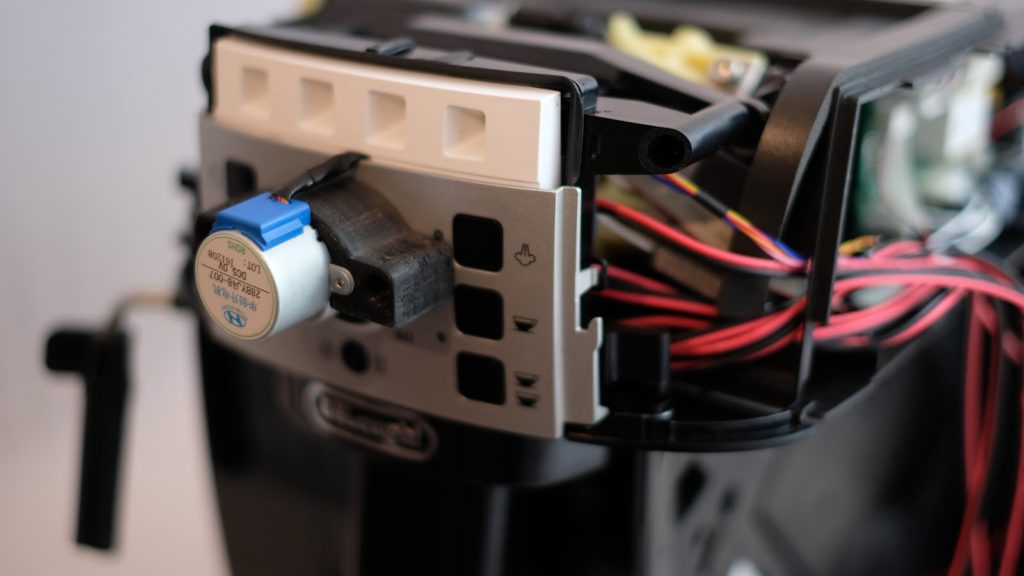
    A month ago, ElectronicLab modified his office chair with an electric car jack, giving it motorized height adjustment. That worked well, but required that he push buttons to raise or lower the seat. Pushing those buttons is a hassle when one’s hands are full, so ElectronicLab went back to the workbench to add voice control capabilities.

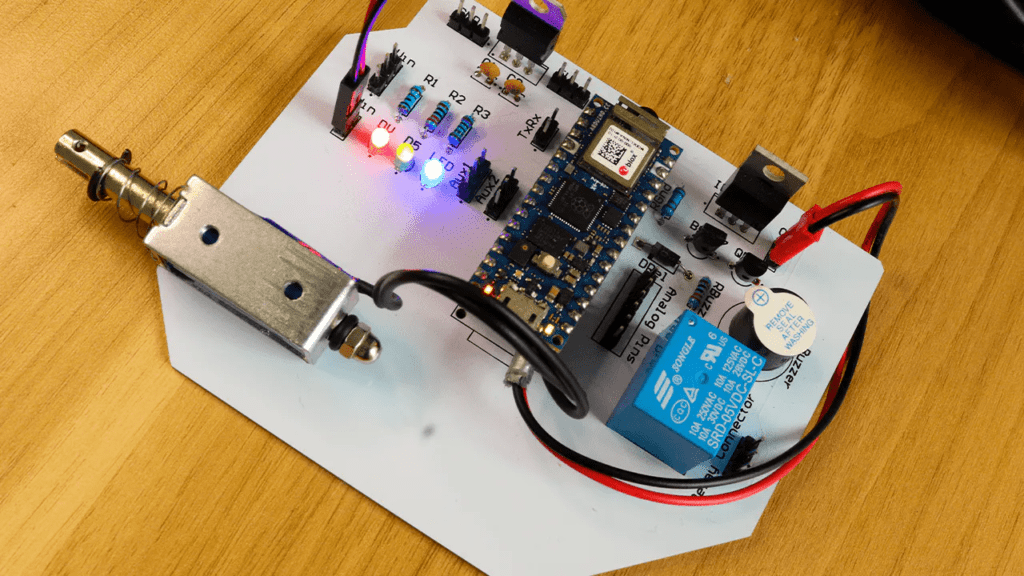
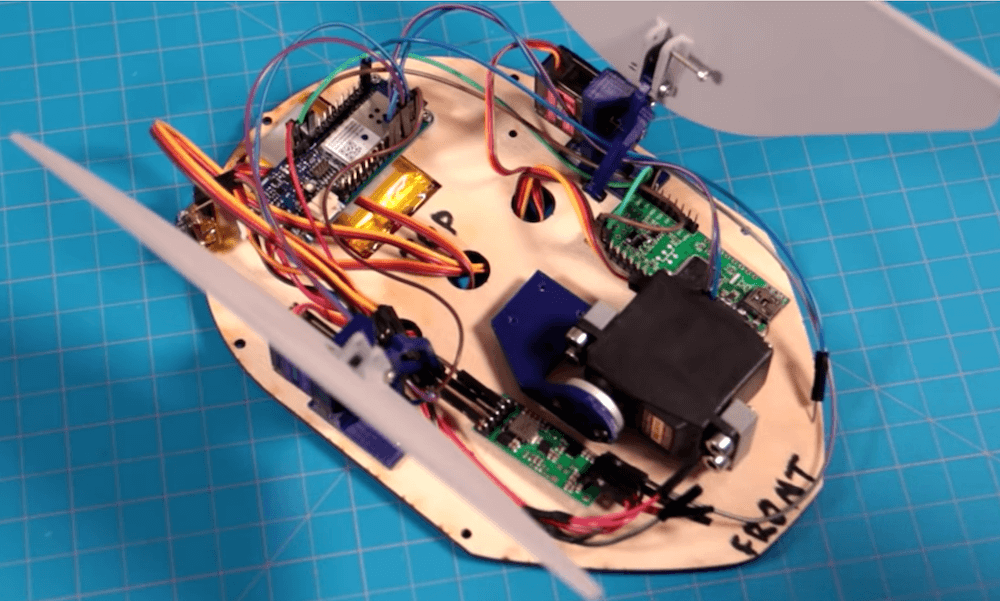
    ElectronicLab was using an Arduino Nano to control the electric jack motor in response to button presses, so he already had most of the hardware necessary to make the system smarter. He just needed the Arduino to recognize specific voice commands, which he was able to achieve using an ELECHOUSE Voice Recognition Module V3.

    That voice recognition modules supports up to 80 voice commands, but ElectronicLab only needed a few of them — just enough to tell the chair which direction to move and how far to go. The module came with a microphone, which ElectronicLab was able to attach outside of the 3D-printed enclosure where it could pick up his voice.

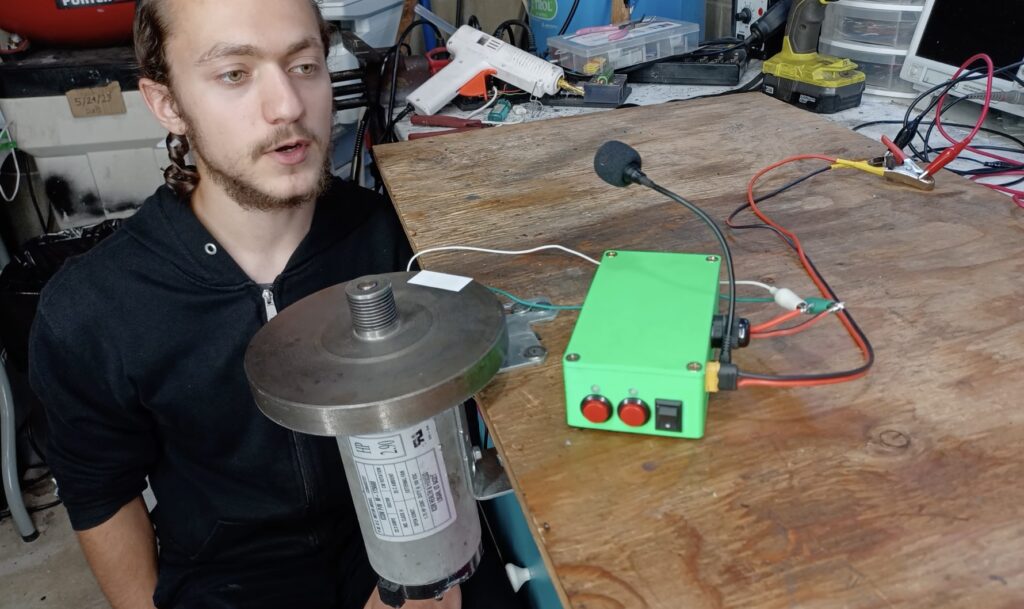
    But there was still one problem: the movement was very slow. The jack was designed to lift a car, so it uses a high-torque motor with a 10:1 planetary gearset to drive a hydraulic pump. ElectronicLab didn’t need that much torque, so he welded the planetary gears to give the motor a direct 1:1 ratio. Sadly, that was a mistake. The hydraulic oil can’t flow fast enough to keep up, so the motor pulls way too much current for the driver.

    Still, the voice control was a success and so ElectronicLab can simply swap out the motor.

    [youtube https://www.youtube.com/watch?v=kZaVKgvQFiE?feature=oembed&w=500&h=281]

    The post Adjusting office chair height with simple voice commands appeared first on Arduino Blog.

    Website: LINK

  • Upgrade your shop with voice-controlled smart LED lighting

    Upgrade your shop with voice-controlled smart LED lighting

    Reading Time: 2 minutes

    Congratulations! You finally have a garage to call your own and you’re ready to turn it into the workshop of your dreams. But before you go on a shopping spree in Home Depot’s tools section, you may want to consider upgrading from that single dim lightbulb to more substantial lighting — otherwise, you’ll never find the screws you drop on the ground. LeMaster Tech can help with his great video on installing DIY voice-controlled smart LED lighting.

    LeMaster Tech’s primary goal was simply to increase the brightness in the garage. He took the route that gives the best bang for the buck: LED tubes. Those are similar in form factor to fluorescent light tubes, but they can put out more lumens with fewer watts and they tend to last a lot longer. They also don’t need expensive and bulky ballasts. LeMaster Tech installed several of those on the ceiling of his garage, then took things to the next level.

    These LED light tubes work with standard household mains AC power, so they can be wired like regular light bulbs. But instead, LeMaster Tech made them smart by wiring them through a relay board controlled by an Arduino UNO Rev3 board. That lets the Arduino safely switch each light tube on and off. LeMaster Tech gave it the ability to do that in response to voice commands by adding a DFRobot Gravity voice recognition module. That handy module works entirely offline and uses a simple AI to recognize spoken words. It has 121 built-in words and supports 17 custom words, so LeMaster Tech was able to tailor it to his needs.

    Now he can switch the lights with a simple voice command and even activate pre-programmed effects, like flashing the lights. 

    [youtube https://www.youtube.com/watch?v=L6Vg9dT7hsU?feature=oembed&w=500&h=281]

    The post Upgrade your shop with voice-controlled smart LED lighting appeared first on Arduino Blog.

    Website: LINK

  • Voice-enabled controller makes video games more accessible

    Voice-enabled controller makes video games more accessible

    Reading Time: 2 minutes

    Almost all modern video games require either a gamepad or a keyboard and mouse, which means that they’re inaccessible to many people with disabilities that affect manual dexterity. Bob Hammell’s voice-enabled controller lets some of those people experience the joy of video games.

    This is a simplified video game controller with a minimal number of physical buttons, but with special voice-activated virtual buttons to make up the difference. The gamepad only has six physical buttons, plus an analog joystick. That makes it much easier to handle than a typical modern controller, which might have a dozen buttons and two joysticks. If the player has the ability, they can utilize the physical controls and then speak commands to activate the game functions not covered by those buttons.

    The controller’s brain is an Arduino Micro board, which Hammell selected because it can be configured to show up as a standard USB HID gamepad or keyboard when connected to a PC. The physical controls are an Adafruit analog two-axis joystick and tactile switches. An Adafruit 1.3″ OLED screen displays information, including the status of the voice activation.

    An Elechouse V3 Voice Recognition Module performs the voice recognition and it can understand up to 80 different commands. When it recognizes a command, like “menu,” it tells the Arduino to send the corresponding virtual button press to the connected computer. It takes time for a person to speak a command, so those are best suited to functions that players don’t use very often.

    If you know someone that would benefit from a controller like this, Hammell posted a full tutorial and all of the necessary files to Hackster.io so you can build your own.

    The post Voice-enabled controller makes video games more accessible appeared first on Arduino Blog.

    Website: LINK

  • Controlling a bionic hand with tinyML keyword spotting

    Controlling a bionic hand with tinyML keyword spotting

    Reading Time: 2 minutes

    Arduino TeamAugust 31st, 2022

    Traditional methods of sending movement commands to prosthetic devices often include electromyography (reading electrical signals from muscles) or simple Bluetooth modules. But in this project, Ex Machina has developed an alternative strategy that enables users to utilize voice commands and perform various gestures accordingly.

    The hand itself was made from five SG90 servo motors, with each one moving an individual finger of the larger 3D-printed hand assembly. They are all controlled by a single Arduino Nano 33 BLE Sense, which collects voice data, interprets the gesture, and sends signals to both the servo motors and an RGB LED for communicating the current action.

    In order to recognize certain keywords, Ex Machina collected 3.5 hours of audio data split amongst six total labels that covered the words “one,” “two,” “OK,” “rock,” “thumbs up,” and “nothing” — all in Portuguese. From here, the samples were added to a project in the Edge Impulse Studio and sent through an MFCC processing block for better voice extraction. Finally, a Keras model was trained on the resulting features and yielded an accuracy of 95%.

    Once deployed to the Arduino, the model is continuously fed new audio data from the built-in microphone so that it can infer the correct label. Finally, a switch statement sets each servo to the correct angle for the gesture. For more details on the voice-controlled bionic hand, you can read Ex Machina’s Hackster.io write-up here.

    [youtube https://www.youtube.com/watch?v=0mc9VOxiwgo?feature=oembed&w=500&h=281]

    Website: LINK

  • This smartlock uses voice recognition to control access

    This smartlock uses voice recognition to control access

    Reading Time: 2 minutes

    A Smartlock are a highly convenient way to secure a house, and they can have their number of connectivity options expanded even further by connecting them to an IoT home assistant service such as Google Assistant or Amazon Alexa.

    Arduino TeamJuly 16th, 2022

    Jithin Sanal’s project uses Amazon’s Alexa skill to automatically secure a custom door locking mechanism without the need for Bluetooth or a fingerprint.


     It is based around a Nano RP2040 Connect, and due to its onboard connectivity suite, can talk with the Arduino Cloud.


    Other than the Nano, Sanal designed a simple PCB. With pads for a buzzer, voltage regulator, and several LEDs for monitoring.

    The circuit also includes a relay that applies power to a solenoid.
    Which acts as a deadbolt when power is applied.

    After receiving the bare PCB and soldering each component onto it, Sanal moved onto writing the code for his creation. In simple terms, the Arduino Cloud project contains a single variable for getting/setting the value of the lock.

    [youtube https://www.youtube.com/watch?v=QE4WQh3YQWs?feature=oembed&w=500&h=281]

    A method is called in the fw that sets the solenoid to this new state and makes a few beeps with the buzzer.


    Associating the Arduino Alexa skill with the IoT device, thus letting someone set the lock as a dedicated Smartlock device.

    You can see more details on this project in Sanal’s Hackster.io write-up.

    Website: LINK

  • Driving a arduino robot car with nothing but your voice

    Driving a arduino robot car with nothing but your voice

    Reading Time: 2 minutes

    Arduino TeamJuly 15th, 2022

    Traditional control of RC cars and other small vehicles has typically relied on some kind of joystick-based solution, often with one for adjusting direction and the other for speed. But YouTuber James Bruton wanted to do something different: make a rideable go-kart that is entirely driven with one’s voice.

    His solution is based around Deepgram’s speech recognition service, which enables users to send small snippets of audio samples up to its cloud via an API and receive replies with a transcript of what was said.


    As for the kart itself, its chassis was created by first welding together several steel tubes and attaching a based of thick plywood on top. The front cutout allows for a large caster wheel to spin left or right with the aid of a chain driven by a repurposed windshield wiper motor assembly. Absolute positioning of this wheel was achieved by measuring the voltage of a potentiometer that spins along with the chain.


    And finally, a pair of hub motor wheels, akin to the ones found on hoverboards and scooters, were placed at the rear for propulsion. Each motor was connected to its specific driver, and in turn, were connected to an Arduino Uno.

    When the user wishes to move a certain direction or change their speed. They simply have to speak into the accompanying USB microphone.
    That lets a Raspberry Pi receive a transcript and pass a command to the Arduino.

    As seen in the video below, Bruton’s voice-controlled go-kart is a blast to use, albeit a bit dangerous too.

    [youtube https://www.youtube.com/watch?v=k-0nsVijPaU?feature=oembed&w=500&h=281]

    Deepgram has a speech recognition API that lets developers get fast and accurate transcripts for both pre-recorded and live audio. Deepgram has a whole set of SDKs to make it even easier to get started in your language of choice. Features include profanity filtering, redaction, and individual speaker detection to make your transcripts as useful as possible. Deepgram can be run locally or using the Deepgram cloud service. I’m going to be using the cloud service with this Raspberry Pi computer to control some hardware. But first I need to build something!

    Website: LINK

  • This Portal fan brought Wheatley to life as his own personal assistant

    This Portal fan brought Wheatley to life as his own personal assistant

    Reading Time: 2 minutes

    Arduino TeamNovember 19th, 2021

    The video game Portal 2 is widely regarded as a classic that introduced players to several memorable characters, including one of the main protagonists-turned-antagonists, Wheatley. This anthropomorphized personal assistance robot was able to move, speak, and listen/respond to speech from a user, which is exactly what Steve Turner was trying to recreate when he built his own version of Wheatley. His animatronic device starts by waking up, and from there it selects a folder of audio files to play at random. Additionally, its AI-powered interactivity is provided by an Amazon Echo Dot via Alexa and the Arduino Cloud

    In order to generate eye movements, Wheatley’s five servo motors are controlled by a single Nano 33 IoT, where three are dedicated to moving the eye and two move the eyelids up and down. As for storing the nearly 900 audio files, a DFPlayer Mini and an SD card hold them all for later playback by a BC127 Bluetooth audio module. This package is able to read files from the SD card and output them over Bluetooth to the Echo Dot, which in this case acts as a wireless speaker. Finally, the central “eye” can change colors via three independently addressable RGB LED rings to show Wheatley’s current status.

    When put together, all these components comprise a project that closely mimics Wheatley from Portal 2 and having a way to interact with it through voice commands makes it even better. You can see this project in action below, or watch its build log here.

    Website: LINK

  • Connect your space heater to the Arduino Cloud and control it via Alexa

    Connect your space heater to the Arduino Cloud and control it via Alexa

    Reading Time: 2 minutes

    Arduino TeamOctober 13th, 2021

    Being able to design your own custom smart home device is a great way to both have fun experimenting with various hardware/software and to escape the walled IoT device ecosystems that so many users find themselves trapped within. One maker who goes by mrdesha came up with a smart heater solution that utilizes the new Arduino Oplà IoT Kit to provide voice functionality to their room heater. 

    In terms of hardware, mrdesha’s project is quite simple as it just needs a few parts to function. The main component is the MKR IoT Carrier board from the Oplà Kit, along with the MKR WiFi 1010 that fits into it. Because the Oplà has two relays onboard, a pair of buttons on the heater’s remote were connected to the common (COM) and normally closed (NC) terminals, allowing for a single GPIO pin to digitally “press” each button. 

    Over in the Arduino Cloud, three variables were created that control various aspects of the heater, including on/off, set high-power mode, and set low-power mode. These variables are also all compatible with the Alexa integration, meaning that a user can simply tell their smart home speaker to adjust the heater automatically. 

    For more details about the project, you can view mrdesha’s write-up here and a demo of it in the video below.

    [youtube https://www.youtube.com/watch?v=JWfewZqy7WY?feature=oembed&w=500&h=281]

    Website: LINK

  • VoiceTurn is a voice-controlled turn signal system for safer bike rides

    VoiceTurn is a voice-controlled turn signal system for safer bike rides

    Reading Time: 2 minutes

    Arduino TeamJuly 19th, 2021

    Whether commuting to work or simply having fun around town, riding a bike can be a great way to get exercise while also enjoying the scenery. However, riding around on the road presents a danger as cars or other cyclists / pedestrians might not be paying attention while you try to turn. That is why Alvaro Gonzalez-Vila created VoiceTurn, a set of turn signals that are activated by simply saying which direction you are heading towards.

    VoiceTurn works by using the Arduino Nano 33 BLE Sense at its heart to both listen for the “left” or “right” keywords and then activate the appropriate turn signal. Gonzalez-Vila took advantage of edge machine learning through the Edge Impulse Studio. First, he collected audio samples consisting of the words “left,” “right,” and then random noise via the Google Speech Commands Dataset. Next, he sent them through an MFCC block that does some processing to extract human speech features. And finally, the Keras neural network was trained on these features to produce a model. 

    With the model deployed to the Nano 33 BLE Sense, Gonzalez-Vila developed a simple program that continually reads in a waveform from the microphone and passes it to the model for inference. Based on the result, a string of NeoPixels on either the left or right will begin to light up for a predetermined number of cycles. As seen in his video below, the VoiceTurn works really well at detecting keywords and is easy to see from a distance. You can read more about how this project was built in its write-up here.

    [youtube https://www.youtube.com/watch?v=3fPsYWwPe0U?feature=oembed&w=500&h=281]

    Website: LINK

  • This Inspector Gadget hat actually responds to voice commands

    This Inspector Gadget hat actually responds to voice commands

    Reading Time: 2 minutes

    This Inspector Gadget hat actually responds to voice commands

    Arduino TeamOctober 31st, 2020

    If you ever watched the 1980s Inspector Gadget cartoon, you undoubtedly wanted a hat like his, which can pop out all kinds of useful tools under voice control. Although it won’t allow you to fly off after saying “go go gadget ‘copter,” DJ Harrigan’s replica does produce a spinning propeller and an emergency light with 16 RGB LEDs.

    Underneath this 3D-printed hat is a pair of micro servos, with linkage systems that open the top flaps. A standard servo extends the actual gadget. Controlling the device is a MKR1000, and voice commands are registered via a MikroElektronika SpeakUp click board.

    [youtube https://www.youtube.com/watch?v=XelqOddKPGc?feature=oembed&w=500&h=281]

    While many characters sparked DJ’s imagination for invention and quest for technical skills, one of the earliest was everyone’s favorite 1980’s cyborg policeman: RoboCop, er uh Inspector Gadget! While Inspector Gadget’s gadgets certainly obeyed the laws of cartoon physics rather than real physics, they’re just beyond the edge of plausibility. So in a year long preparation for Halloween 2021, DJ is setting out to make a voice activated hat that can summon real gadgets from his head. No plastic surgery necessary. Some assembly required. 

    Website: LINK

  • Start a 1976 Jeep with voice commands using a MacBook and an Arduino

    Start a 1976 Jeep with voice commands using a MacBook and an Arduino

    Reading Time: < 1 minute

    Start a 1976 Jeep with voice commands using a MacBook and an Arduino

    Arduino TeamMarch 9th, 2020

    After being given a 2009 MacBook, John Forsyth decided to use it to start a 1976 Jeep via voice control.

    The build uses the laptop’s Enhanced Dictation functionality to convert text into speech, and when a Python program receives the proper keywords, it sends an “H” character over serial to an Arduino Uno to activate the vehicle.

    The Uno uses a transistor to control a 12V relay, which passes current to the Jeep’s starter solenoid. After a short delay, the MacBook then transmits an “L” command to have it release the relay, ready to do the job again when needed!

    As a fan of Iron Man, Forsyth channeled his inner Tony Stark and even programmed the system to respond to “JARVIS, let’s get things going!”

    [youtube https://www.youtube.com/watch?v=j-GmDpiXWng?feature=oembed&w=500&h=281]

    Website: LINK

  • Hack your coffee machine with voice control

    Hack your coffee machine with voice control

    Reading Time: 2 minutes

    Hack your coffee machine with voice control

    Arduino TeamSeptember 12th, 2018

    Are you still pushing buttons and adjusting knobs with your fingers to brew your favorite coffee? If so, then this voice-controlled solution could be the next project on your list.

    To accomplish this hack, a rather high-end coffee maker was disassembled and modified, adding an Arduino Nano to press buttons, along with a small motor and driver board to adjust its dial. Voice control is provided via Snips software running on a Raspberry Pi, which passes the pertinent commands along for coffee making.

    When the devices around you no longer require a lengthy operation manual, but rather, require only a voice command, this unlocks an environment where technology disappears into the background, so that you can regain the freedom to spend quality time with the people you care about. That is in fact our mission at Snips, to make technology disappear.

    Case-in-point: this voice-activated coffee machine. You can ask it to make you a double espresso or a flat white, to pour you some hot water or even to turn itself off.

    It’s purely a demo project, but at our Snips office in Paris, we’ve grown used to the convenience, and so we wanted to make it as easy as possible for anyone interested to replicate it at home.

    Code and modification instructions are available on the Snips team’s blog post, while the brewing results can be seen in the demo video below. 

    [youtube https://www.youtube.com/watch?v=4gN1bvl24ZM?feature=oembed&w=500&h=281]

    Website: LINK