Schlagwort: Uno
-

The Emotion Aid is a wearable device that communicates its user’s emotions
Reading Time: 2 minutesMany people (especially those with autism spectrum disorder) have difficulty communicating with others around them. That is always a challenge, but becomes particularly noticeable when one cannot convey their emotions through body language. If someone can’t show that they’re not in the mood to talk, that may lead to confusing interactions. To…
-

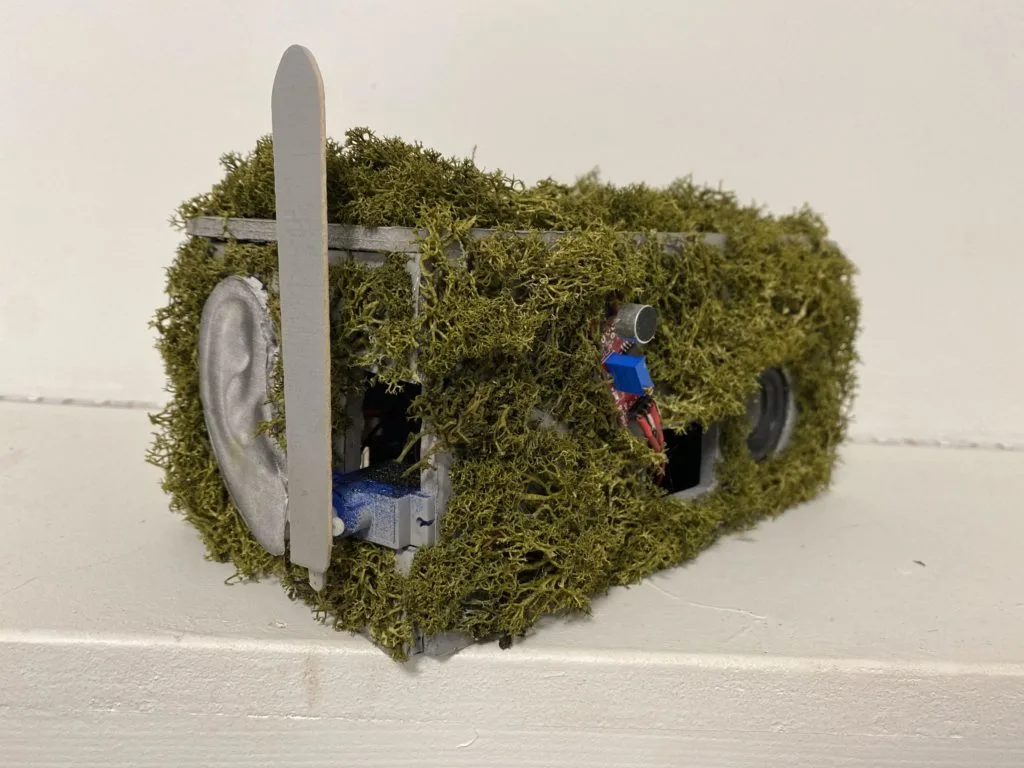
Stop snoring in its tracks with this helpful device
Reading Time: 2 minutesFor those who have to put up with a snoring partner or roommate, the scourge of listening to those droning sounds can be maddening and lead to a decrease in the quality of one’s sleep. So, as an attempt to remedy this situation, Flin van Asperen devised an “anti-snoring machine” out of…
-

Fingertip force control aids in sports and musical training
Reading Time: 2 minutesA great number of activities require the precise application of force with the fingertips. When playing a guitar, for example, you must exert the proper amount of force to push a string against the fret board. Training is difficult, because new guitarists don’t know how much force to apply. This wearable system…
-

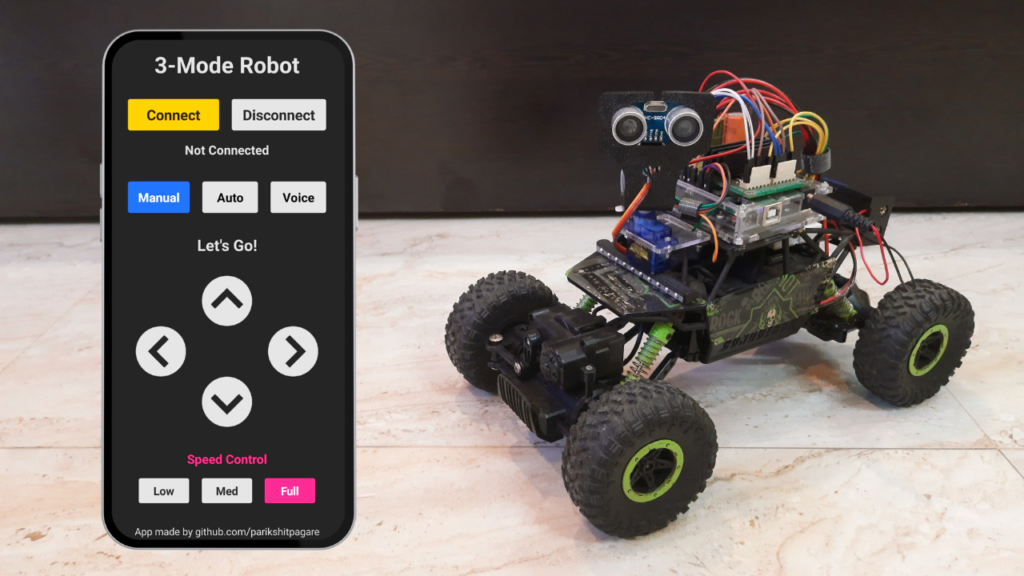
This robot car accepts voice commands or operates autonomously
Reading Time: 2 minutesThe fantastic thing about Arduino boards and maker hardware as a whole is that they make creativity accessible. Just a few decades ago, it would take serious expertise and a generous budget to build even a simple robot. But with the technology available today, Parikshit Pagare was able to create this robot…
-

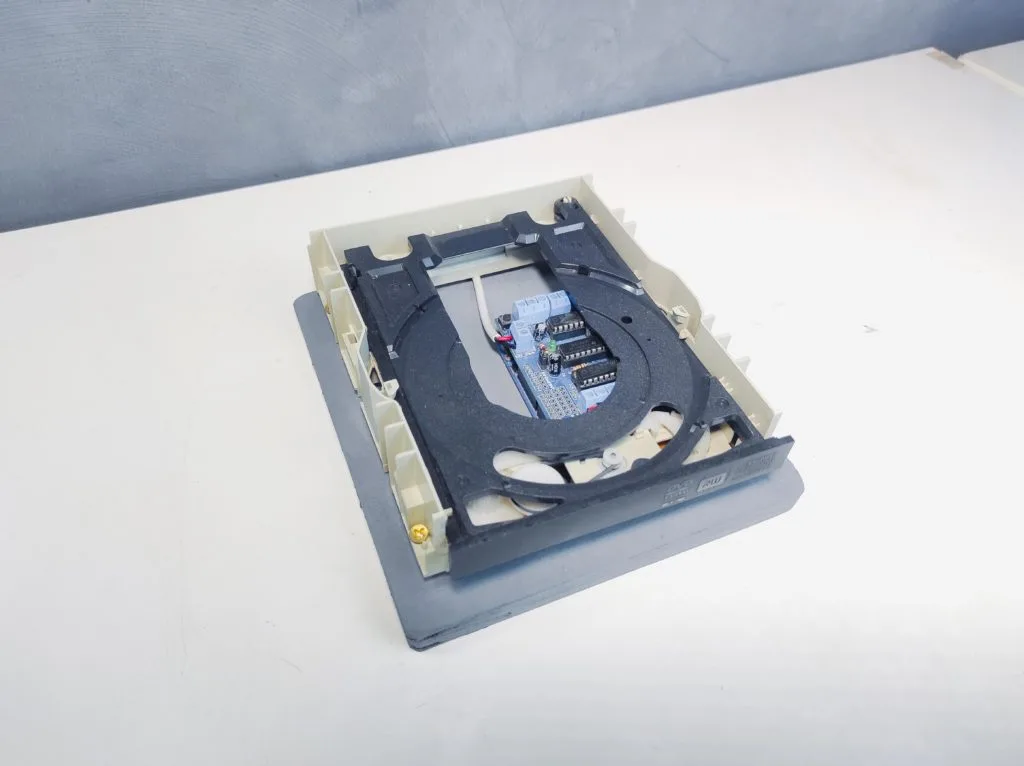
A PCB shaker perfect for a maker
Reading Time: 2 minutesThere are a few approaches to making your own PCBs at home, and perhaps one of the most interesting yet potentially tedious methods involves making a UV-resistant mask and then etching away the non-copper areas with an acid bath. This etching step requires constantly moving the acid across the board’s surfaces for…
-
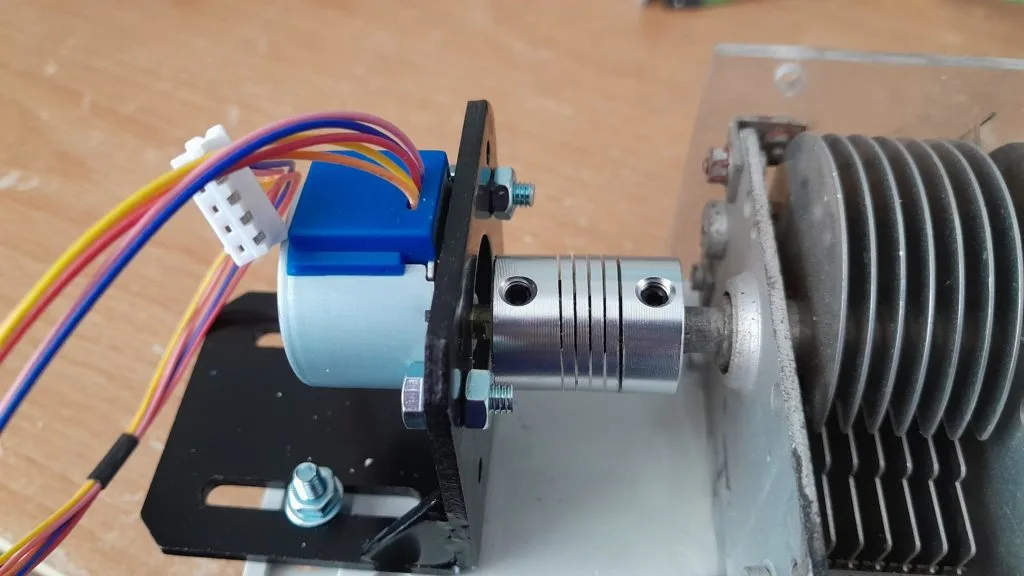
Building an experimental magnetic loop antenna with a stepper motor and an Arduino
Reading Time: 2 minutesHam radio allows for the broadcast and reception of non-commercial radio signals across vast distances with relatively inexpensive equipment. As the name implies, ham radio relies on antennas to function, and most designs can take up large amounts of space. An alternative antenna is the magnetic loop design which has a tall…
-

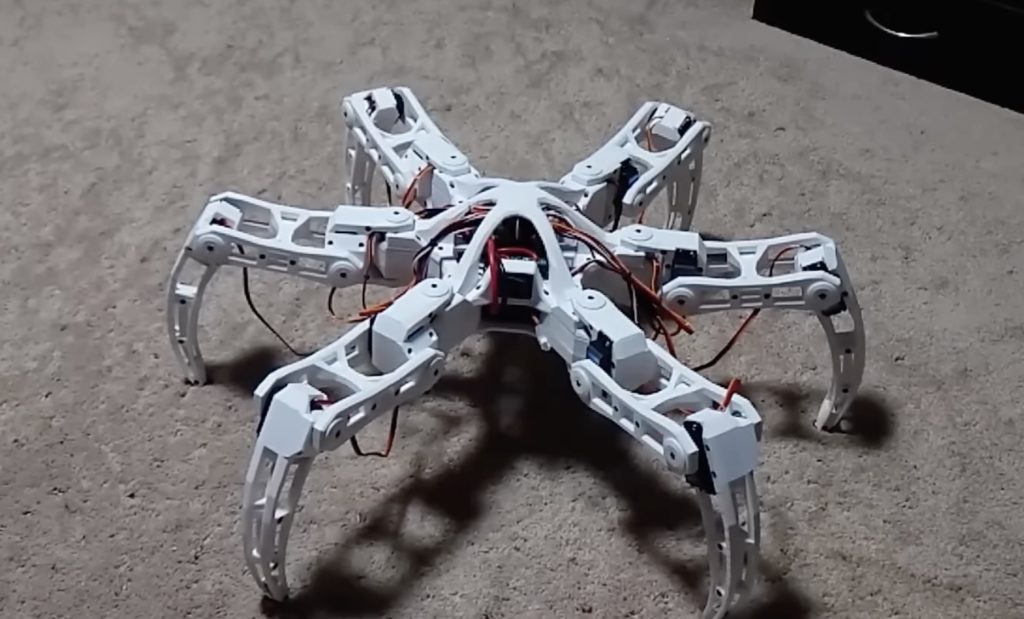
A very nimble DIY hexapod robot
Reading Time: 2 minutesWhile robots can get around on two legs (or even none), it is difficult to get a smooth and efficient gait. Moving up to four legs improves the situation a bit, but each of those legs will still need multiple joints and careful balance for the robot to move in a stable…
-

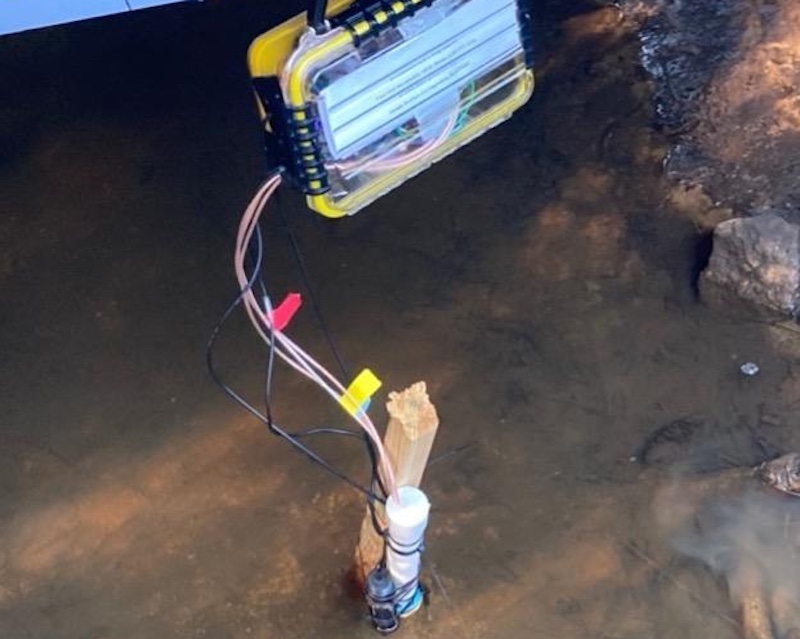
This remote sensor system determines if water is good for drinking
Reading Time: 2 minutesThe public often hears from various media outlets and documentaries that many regions in the world lack consistent access to quality drinking water. But what does exactly does that mean? It is more than water that is clear and free of parasites. Distilled water, for example, isn’t recommended as drinking water because…
-

Smart bedside mat won’t let you snooze your alarm
Reading Time: 2 minutesThere is one thing that we can agree on: more sleep is better. None of us want to wake up, which makes that snooze button oh so tempting. That leads to the inevitable cycle of pushing the snooze button over and over again until suddenly you find yourself let for work or your kid’s…
-

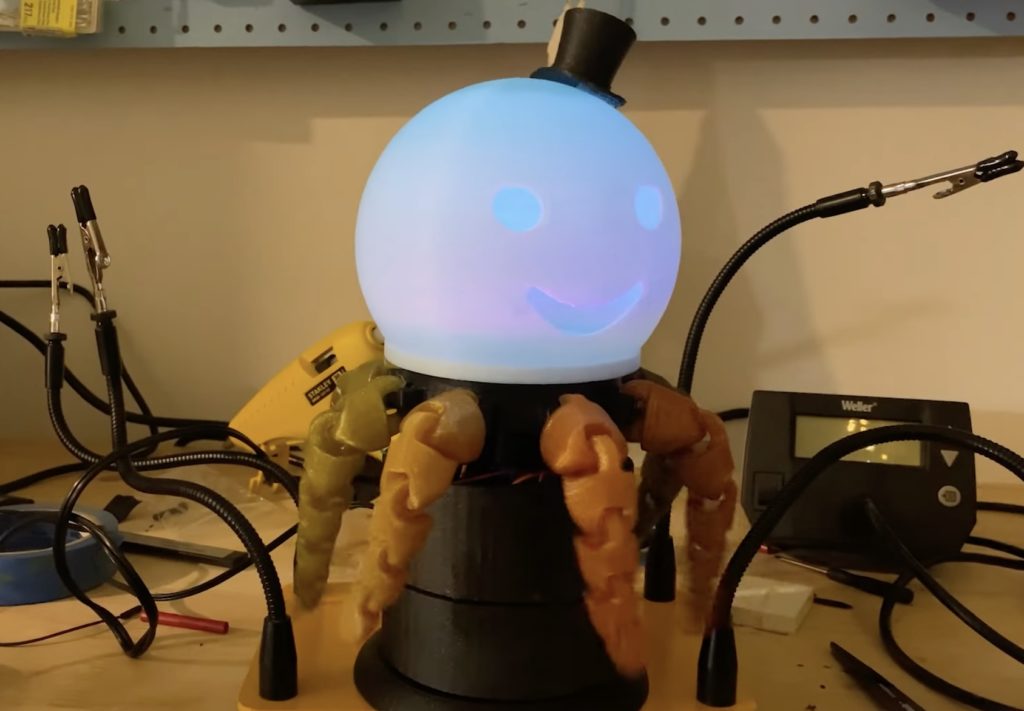
Lamptopus: The most adorable desk lamp in the world
Reading Time: 2 minutesSometimes the only motivation you need for a project is “because I want to.” That is especially true for cute and quirky decoration that doesn’t need to prioritize functionality. The perfect example of this is Ruby Zoom’s Lamptopus, which is the most adorable desk lamp in the world. Lamptopus is a small…
-

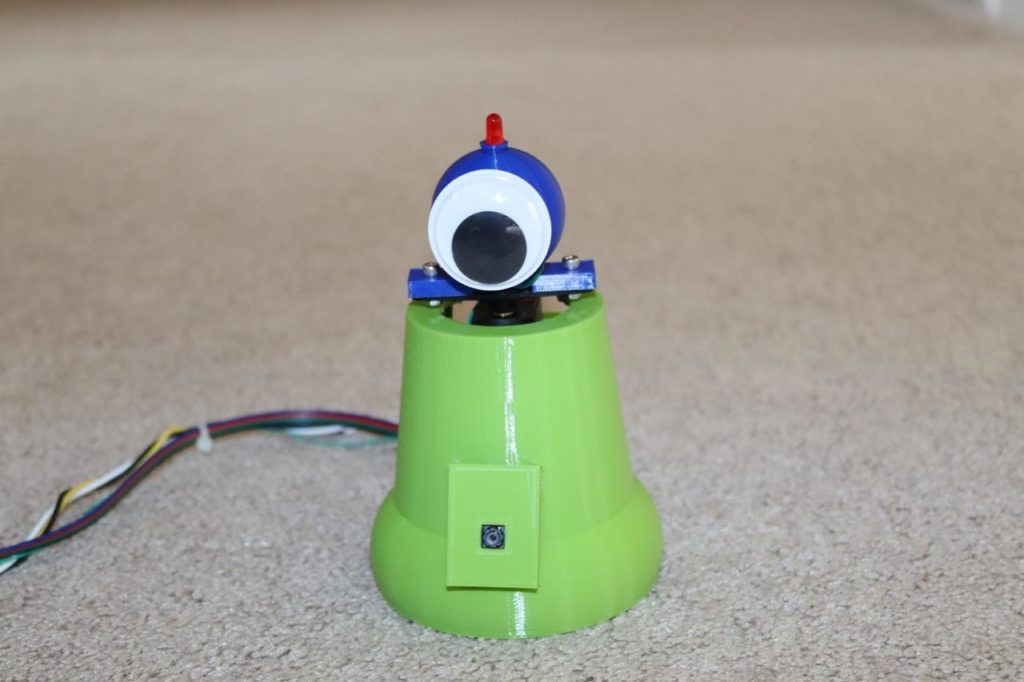
Turn your lights on and off by staring at this little robotic switch
Reading Time: 2 minutesUnlike every other hands-free light switch that relies on infrared motion detection or changes in ambient light values, Michael Rigsby’s “Look at Me Light Switch” instead requires a person to stare at it for six seconds. Based on an embedded machine learning model and a microcontroller, this device uses Person Sensor from Useful Sensors,…
-
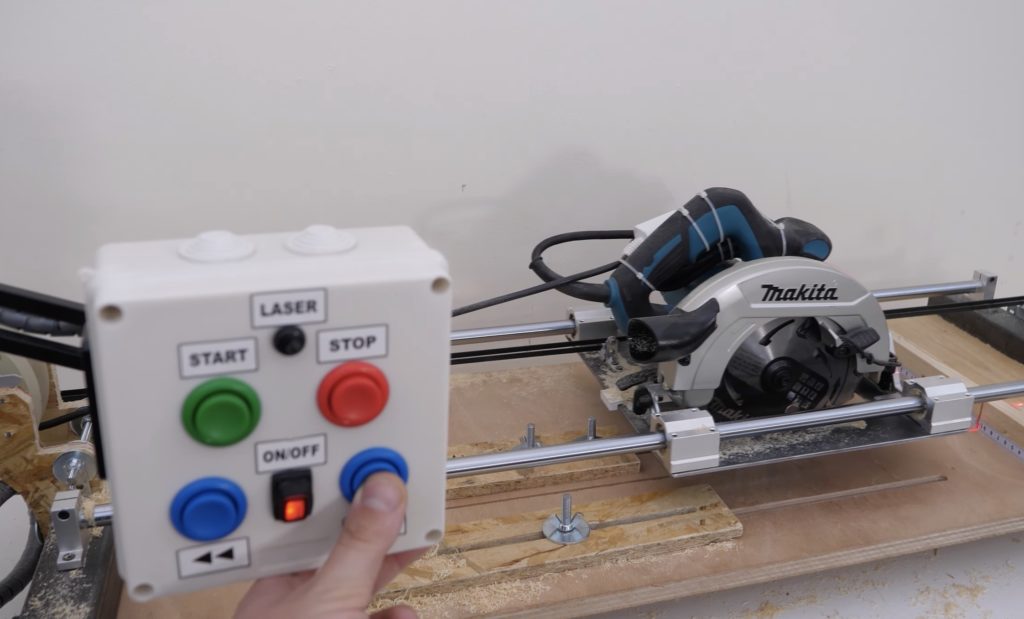
Self-guided circular saw automates woodworking
Reading Time: 2 minutesA circular saw is a must-have tool for anyone who wants to do even basic woodworking. But getting clean, straight cuts is a skill that takes practice to develop. To automate the process in order to perform clean cuts every time with zero effort, Red Tie Projects created this self-guided circular saw.…
-

All aboard the java train!
Reading Time: 2 minutesThese days, everyone seems to turn to robots for automating tasks in the physical world. But robots are often clumsy and unreliable — not to mention expensive. Trains, on the other hand, are famous for their reliability. With that in mind, YouTuber James Whomsley designed a model train railway to bring coffee…
-

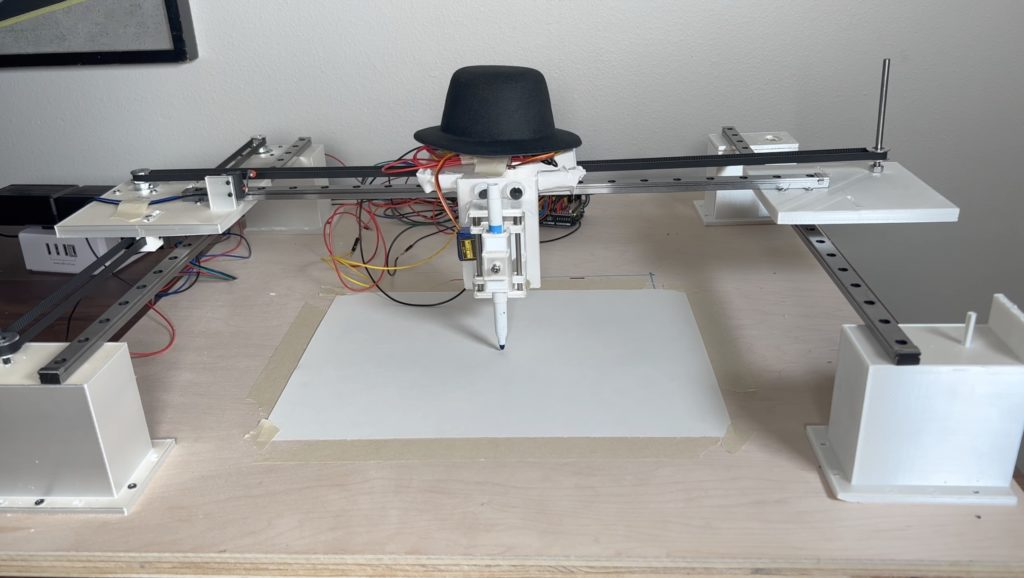
Plotting AI-generated art onto paper
Reading Time: 2 minutesAI-generated art is all the rage right now, thanks to widespread sharing on social media. The appeal is obvious: anyone can utilize an online service to create a unique (and often hilarious) piece of art based on a simple prompt. To display that art, one can utilize a high-quality printer or a…
-
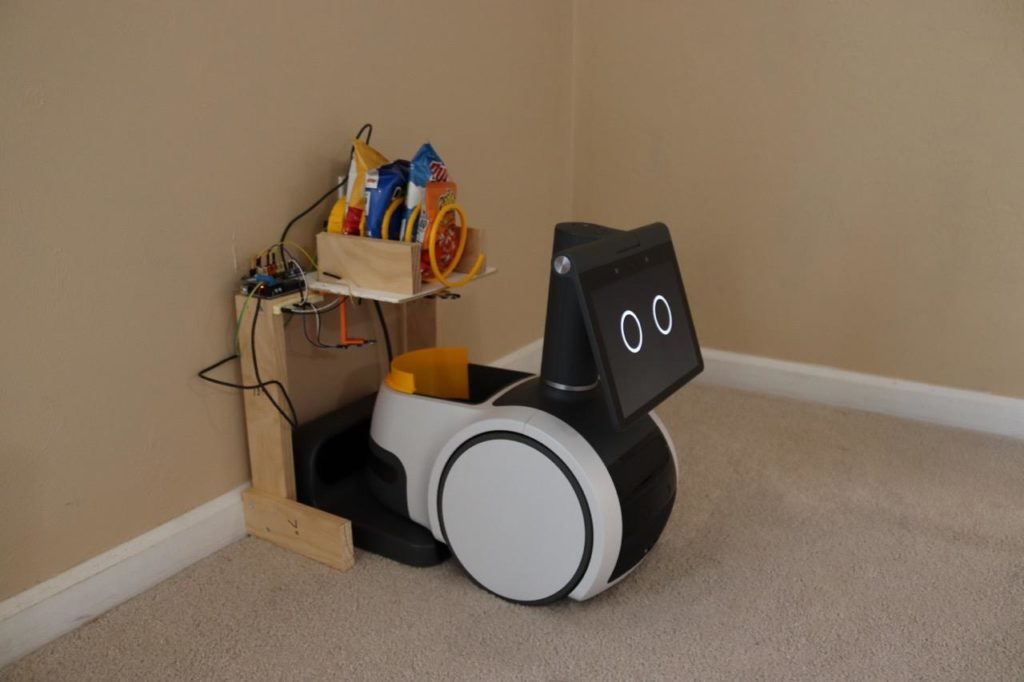
Snacky, the snack dispenser, enables snack delivery
Reading Time: 2 minutesSometimes you get a hankering for a snack, but there is no snack within arm’s reach. Such a situation is a tragedy and exactly what we built society and technology to avoid. To prevent this frankly appalling possibility, Michael Rigsby made Snacky, which is a snack-dispensing system that lets Amazon Astro robots…
-
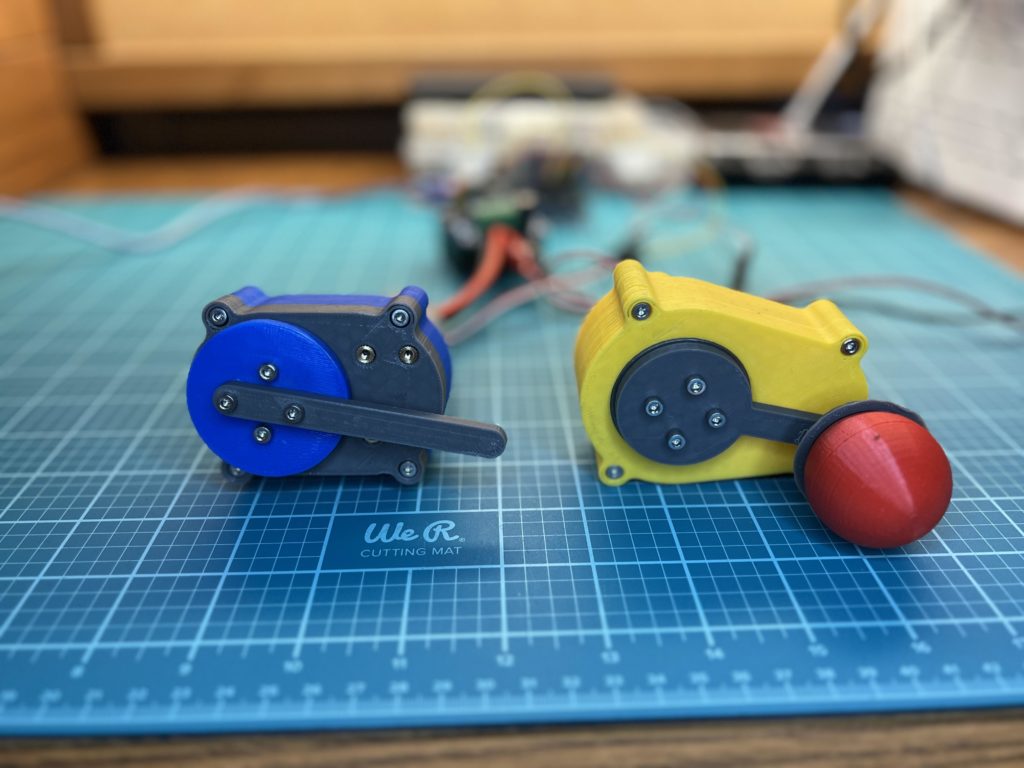
3D-printed continuous rotation servo motor is super smooth
Reading Time: 2 minutesThere are three types of motors that makers typically consider: stepper motors, servo motors, and DC motors (either brushed or brushless). Stepper motors are great when you need high precision and torque, but tend to have jerky movement. DC motors work well for high speed movement that doesn’t need any rotational accuracy.…
-

Augmented reality fire drills make training more effective
Reading Time: 2 minutesWhile we adults don’t experience them often, school kids practice fire drills on a regular basis. Those drills are important for safety, but kids don’t take them seriously. At most, they see the drills as a way to get a break from their lessons for a short time. But what if they…
-

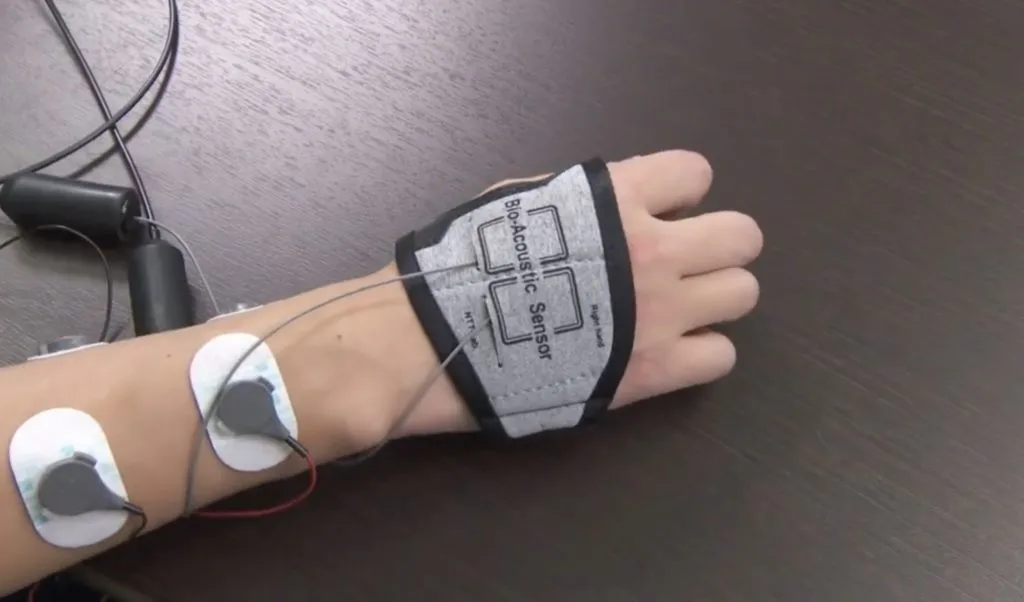
New authentication technology measures light reflected by hands
Reading Time: 2 minutesBiometric identification and authentication is big business. As an example, consider Apple’s Face ID technology, which has made strong smartphone security both user friendly and readily available. But Face ID requires substantial hardware and computational power to work, which makes it ill-suited for applications where cost is a major concern. To fill…
-

Robot collects ping pong balls after matches
Reading Time: 2 minutesIf you frequent driving ranges, you’ve probably seen a machine (often attached to the front of an armored golf cart) designed to pick up golf balls. Because a driving range can easily fill up with thousands of golf balls an hour, such machines are necessary. After noticing that nobody wanted to pick…
-

Sci-fi film prop doubles as a DJ helmet
Reading Time: 2 minutesTake a moment to think about some of your favorite electronic music DJs. How many of them wear some sort of a helmet or mask? You can probably think of at least a few. For whatever reason, DJs like their privacy. Daniel Aagentah was tasked with making a sci-fi film prop helmet…
-

A 3D-printable, Arduino-controlled star tracker great for astrophotography
Reading Time: 2 minutesMost modern digital cameras are perfectly capable of capturing photos of the stars. But many of them have trouble collecting the small amount of light available in a short amount of time, which means that you need to leave the shutter open for 30 seconds or more to get a decent exposure.…
-
This search and rescue robot creates 3D maps of disaster areas
Reading Time: 2 minutesIf you look at footage from the search and rescue efforts following any disaster, you’ll see that first responders have a very difficult time navigating through rubble to find people in need of emergency care. They also have to take extra precautions, as gas line ruptures and other hazards present dangers they…