Schlagwort: Uno
-

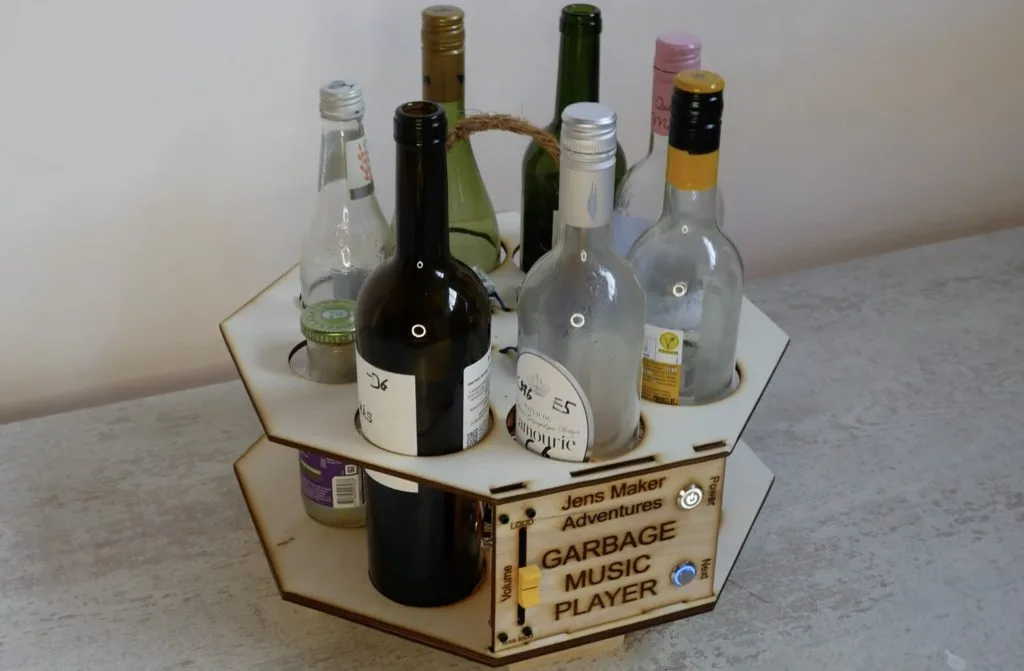
This robot turns old bottles into a musical instrument
Reading Time: 2 minutesPercussion instruments are likely the first kind that humanity invented, because they’re quite simple: hit a thing and a noise happens. Different things produce different frequencies with different timbres, and glass bottles have a nice xylophonic sound to them. Because glass bottles are easy to find among discarded garbage, Jens of the…
-

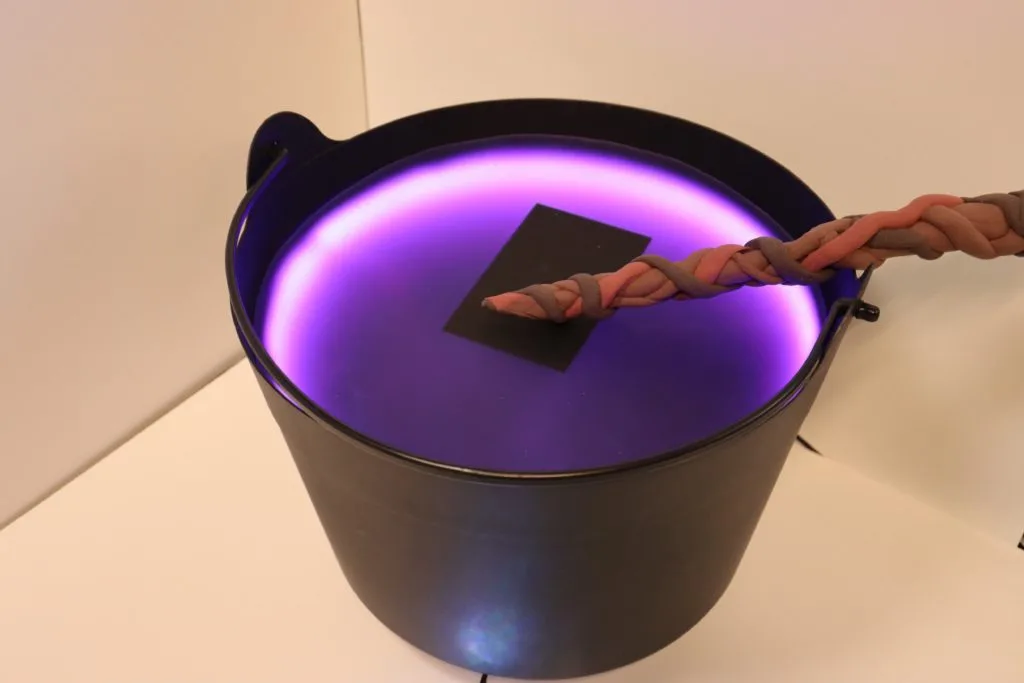
Brew virtual potions by mixing ingredients in this interactive cauldron
Reading Time: 2 minutesThe large, bubbling cauldron is a classic mainstay in our Halloween decorations as it evokes imagery of devious witches and their mysterious concoctions. Fed up with this being a mere display piece, element14 Presents’ Katie Dumont created an enchanted cauldron that allows visitors to brew their own digital potions from an array of distinct ingredients…
-

Jet-powered Star Wars speeder bike built from repurposed hoverboard
Reading Time: 2 minutesDeveloping your skill set is all about pushing the boundaries of your current knowledge and experience, but that inevitably leads to occasional failure. When that happens, you need to know how to pivot and complete the project. A great example of that is James Bruton’s Star Wars speeder bike built from a…
-

Tiny DIY Roomba cleans desks and countertops
Reading Time: 2 minutesThe future we were promised was supposed to include robot maids and flying cars. The future we got has Roomba vacuums and Southwest Airlines. But at least those Roomba vacuum robots work pretty well for keeping floors slightly cleaner. Sadly, they leave elevated surfaces untouched and dust-ridden. To address that limitation, Jared…
-

Lab-on-a-drone detects and analyzes pollutants from the sky
Reading Time: 2 minutesAir quality concerns encompass several different pollutants and irritants. Chlorofluorocarbons (CFCs) were, for example, a major concern in the 20th century due to the damage they cause to the ozone layer. But not all pollutants are easy to monitor. Hydrogen sulfide, which causes irritation of the eyes, nose, and throat at low…
-

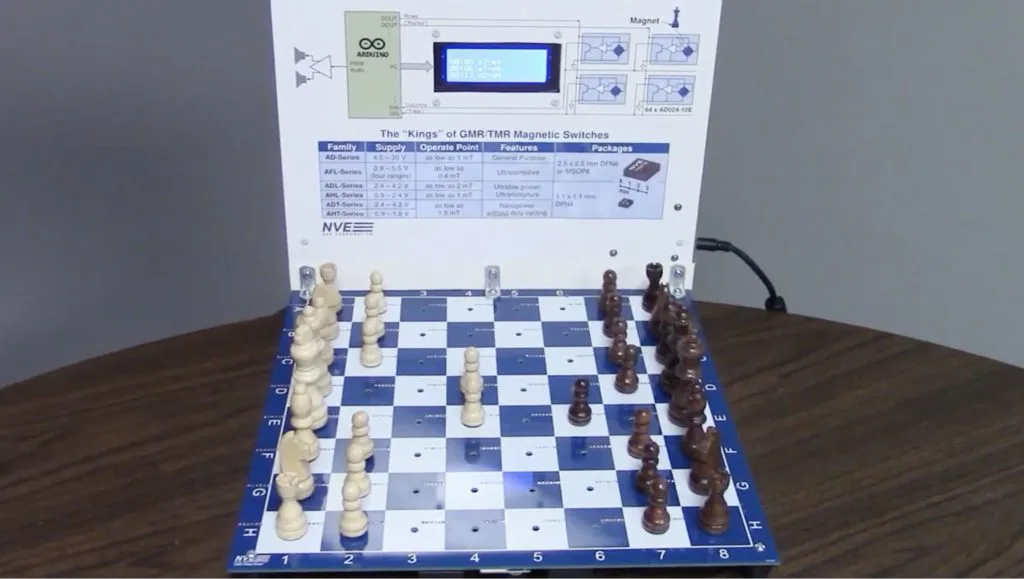
Practical magnetic switches make this electronic chessboard possible
Reading Time: 2 minutesYou can play chess just as easily on a $2 set from a thrift store as you can on a $2,000 ornate set from a bespoke retailer. But that doesn’t stop people from building or buying those fancy chess sets. If you’re the DIY type, you may even be interested in an…
-

This bionic hand responds to motion control
Reading Time: 2 minutesBuilding a robot is only half the battle, because you also need a way to control it. Something like a rover may work with a simple joystick or even typed commands. But complex robots often have many motors and controlling those all directly becomes a challenge. That’s why Will Cogley chose motion…
-

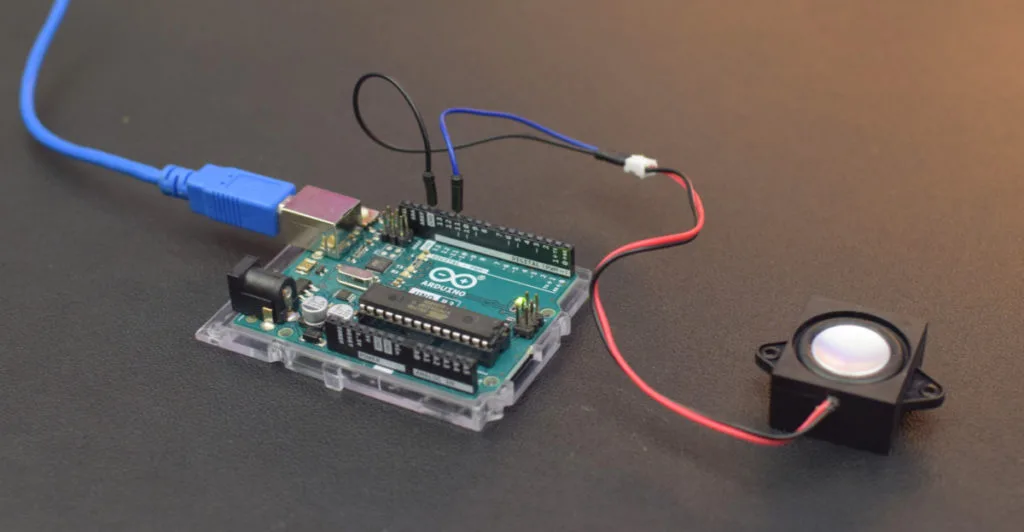
Arduino speaks without any special hardware
Reading Time: 2 minutesWe see many Arduino projects that feature audio output, but they tend to require a substantial amount of additional hardware. Audio files take up a lot of storage space, so they require something like an SD card adapter. Audio signals are analog, so they require a DAC (digital-to-analog converter) to get good…
-

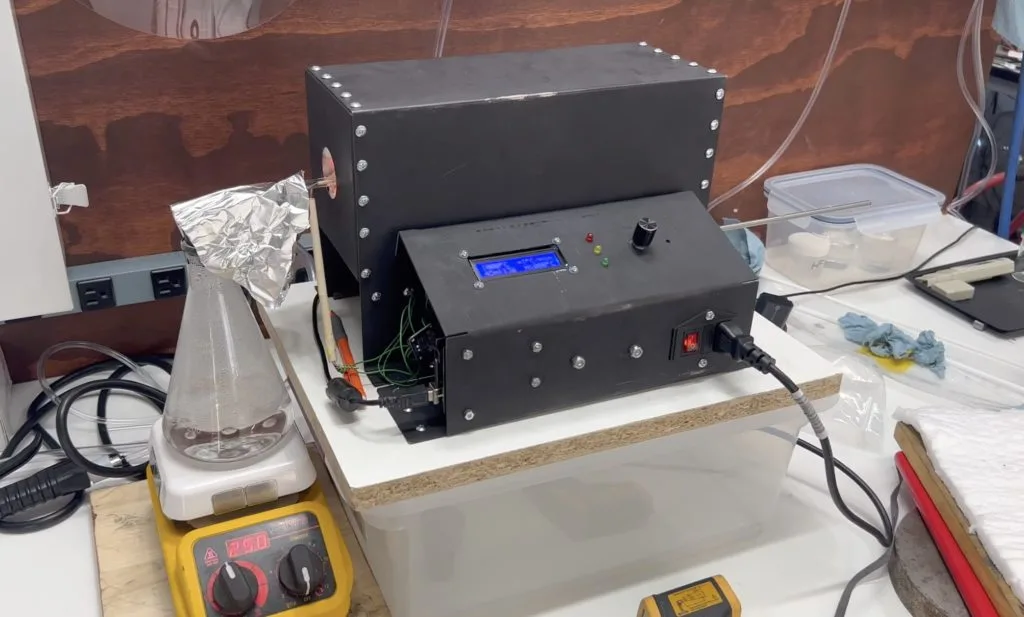
A DIY tube furnace for creating ICs
Reading Time: 2 minutesModern integrated circuit (IC) chips can have transistors as small as two nanometers, which is only about 10 silicon atoms laid end-to-end. At that scale, fabrication looks more like chemistry than any kind of physical manipulation — a machinist isn’t carving tiny transistors into silicon wafers. For many types semiconductors, the fabrication…
-

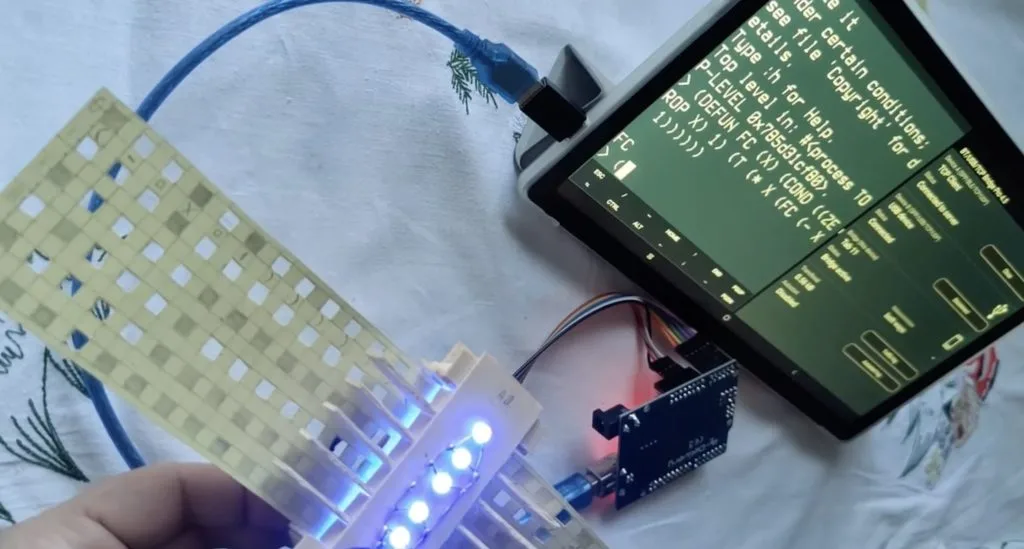
Clem Mayer created a handheld BASIC computer badge with the Arduino UNO Rev3
Reading Time: 2 minutesAlthough we recently launched the new 32-bit Arduino UNO R4, Clem Mayer wanted to honor its 8-bit predecessor by making something special using the Rev3. Drawing on old hardware designs, the ZX-81 is an 8-bit computer based on the Z80 processor which has 1KB of RAM and 1KB of EEPROM available for the…
-

Channel your inner Bruce Lee with this DIY reflex coach
Reading Time: 2 minutesVideo games are popular because they provide a clear and reliable loop of effort and reward. If you smash the baddie, you get experience; get enough experience and you level up. But real life isn’t like that and there is little direct correlation between effort and reward, which is dissatisfying. Gamification techniques…
-

Introducing UNO R4 WiFi support in the Arduino Cloud
Reading Time: 2 minutesWe are excited to announce that the Arduino Cloud now supports the UNO R4 WiFi board, providing makers with seamless connectivity and enhanced features. Building upon the recent release of the much-anticipated UNO R4 in our store, this new integration significantly amplifies the capabilities of the Arduino Cloud. The UNO R4 WiFi…
-
This Arduino reads punch cards for cloud computing
Reading Time: 2 minutesYou already know that computers store and interpret data in binary: ones and zeroes. There are many, many ways to store binary data, because it works with anything that can maintain at least two states. In the early days of computing, punch cards were common. They were paper cards with a grid…
-
Recreating the famous Miller-Urey experiment with Arduino
Reading Time: 2 minutesEvolution is fact — at least as much as anything is a “fact” in the scientific sense. What is still very much in question is abiogenesis, which is the origin of life from inorganic compounds. Evolution is the mechanism that took unicellular life to our current biodiversity, but scientists don’t know exactly…
-

mail2code lets you program via email
Reading Time: 2 minutesGetting started with physical computing presents a challenge to newcomers, whether due to the cost of acquiring hardware, learning how to manipulate GPIO pins, and being able to easily view what others have done to achieve their results. Norbert Heinz, who runs the site and YouTube channel HomoFaciens, therefore decided to build a system that anyone can…
-

This beer pong-playing robot uses sophisticated math to sink shots
Reading Time: 2 minutesBeer pong is a classic party game involving skill, persistence, and alcohol tolerance. Participating in friendly games of beer pong is a great way to socialize with peers, but what if you aren’t very good at tossing ping pong balls into red Solo cups? In that case, you may want to follow…
-
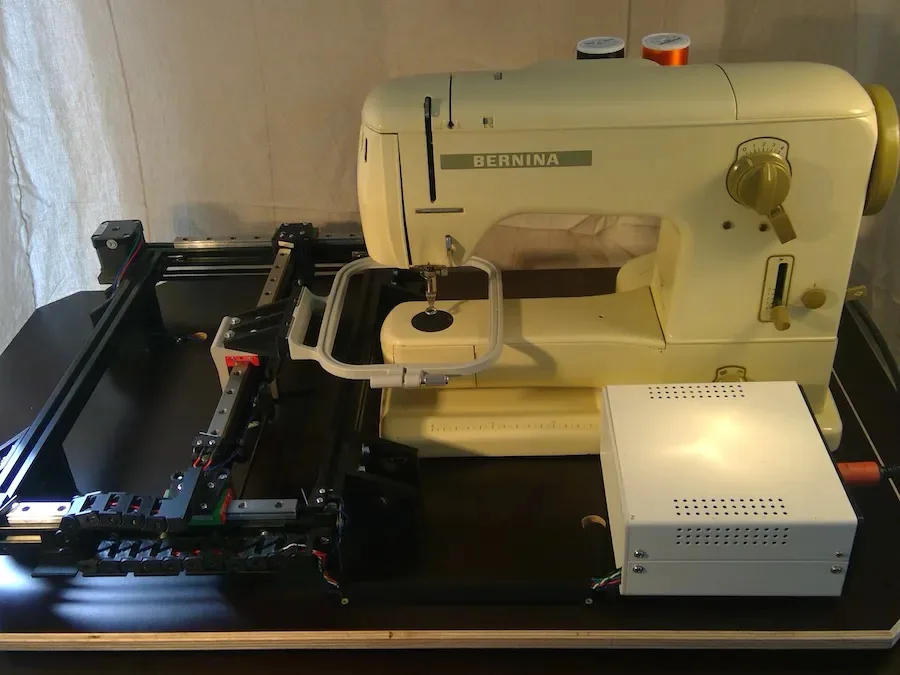
Upgrade your sewing machine for CNC embroidery
Reading Time: 2 minutesWith a CNC (computer numerical control) embroidery machine, you can sew any custom patterns you want: text, logos, or goofy pictures. But commercial CNC embroidery equipment is expensive and consumer versions often leave a lot to be desired, which is why you might want to check out this write-up by SpaceForOne that…
-
Analyze the ambient sound around you with this Arduino setup
Reading Time: 2 minutesYou’ve probably heard that there isn’t any sound in space. That’s because sound is vibration traveling through a medium, like air or wood, and space is a mostly empty vacuum. The frequency of the vibration in a medium is the pitch of the sound and the amplitude is the volume. If you…
-

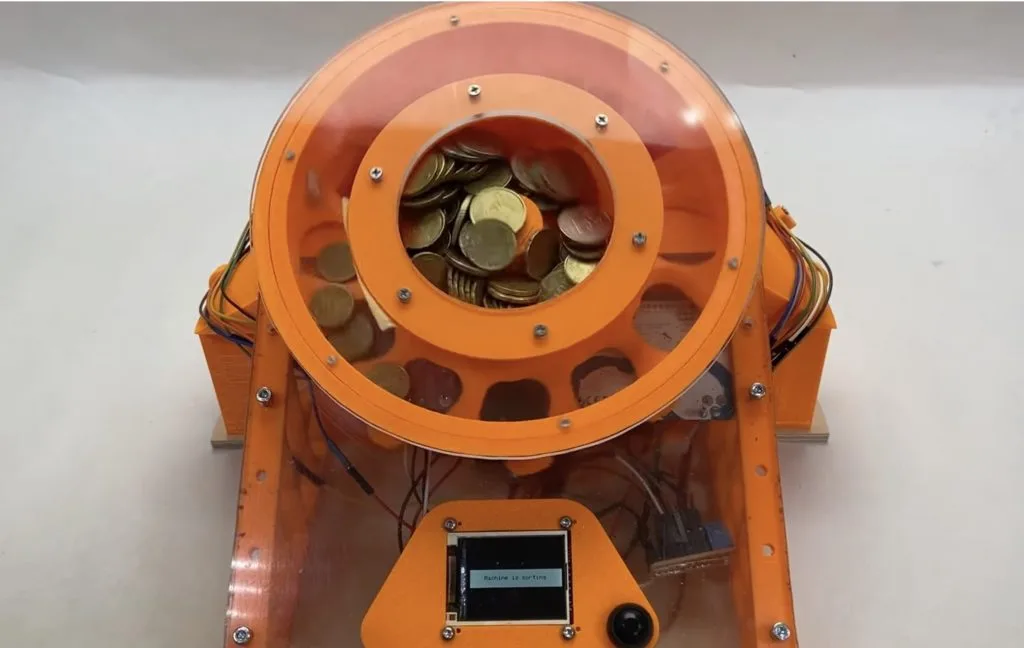
Sort up to 280 coins per minute with this 3D-printed machine
Reading Time: 2 minutesCounting one’s coins by hand can take a very long time, and for those wanting to avoid physically going to the bank or paying a fee at a commercial machine, what options remain? The YouTuber known as Fraens has created a full 3D-printed coin sorter and counter that combines technology with a clever design to accomplish…
-

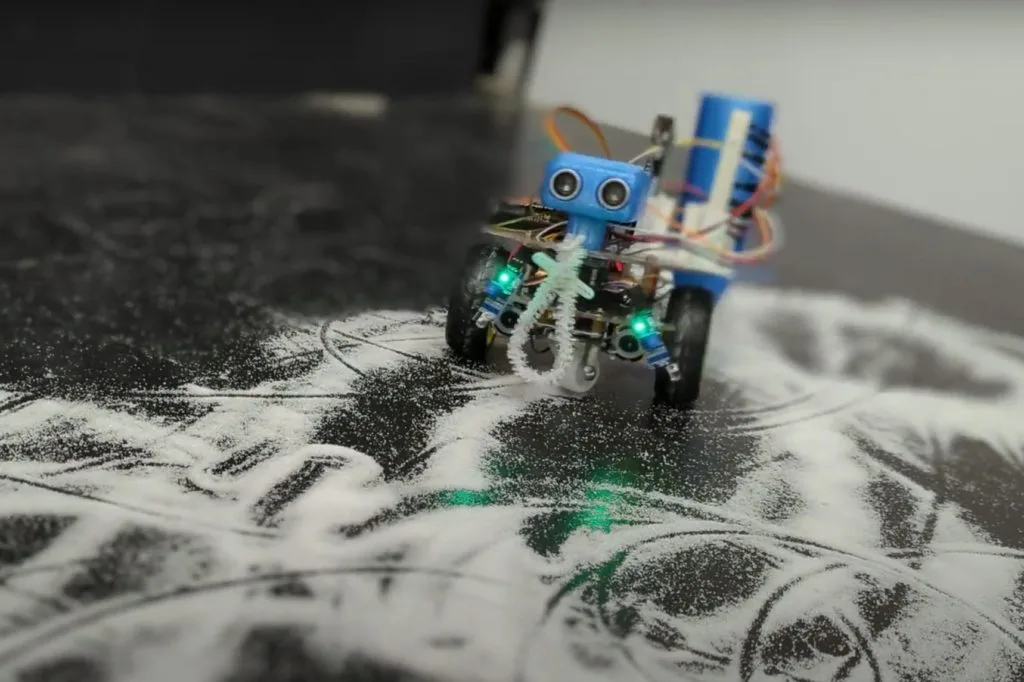
The Whimsy Artist is a little robot that both creates and destroys art
Reading Time: 2 minutesMany people find the subjectivity of art to be frustrating, but that subjectivity is what makes art interesting. Banksy’s self-shredding art piece is a great example of this. The original painting sold at auction for $1.4 million—and then it shredded itself in front of everyone. That increased its value and the now-shredded…
-

DIY air hockey table uses an Arduino to keep score
Reading Time: 2 minutesInspired by game nights with her family, Lorraine Underwood from element14 Presents wanted to build a project that would be both fun and playable many times over. Based on these parameters, she opted to design and construct her own take on an air hockey table that would be capable of keeping score automatically. The base of…
-

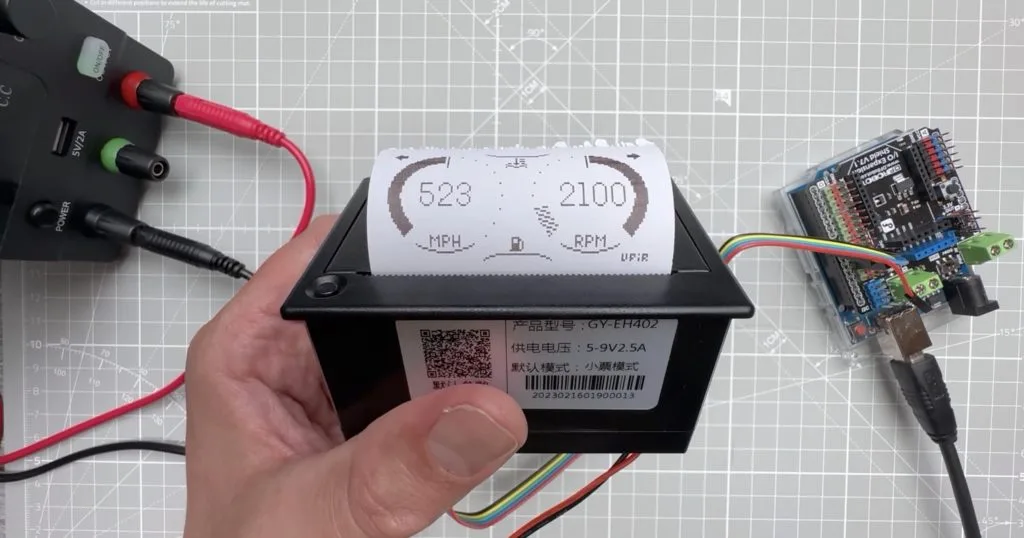
Control a thermal printer with your Arduino
Reading Time: 2 minutesYou would probably recognize a thermal printer as the thing that spits out receipts at a cash register. They offer a two key advantages: they do not require ink cartridges and they are compact. But because they print by applying heat to special paper that darkens when hot, they have low resolution…