Schlagwort: Uno

  • Augment your tongue’s senses with the Cthulhu Shield

    Augment your tongue’s senses with the Cthulhu Shield

    Reading Time: 2 minutes

    Augment your tongue’s senses with the Cthulhu Shield

    Arduino TeamJanuary 31st, 2019

    Whether one of your senses is weak or non-existent, or you would simply like a way to augment your perception and control options, the Cthulhu Shield can be applied in either situation

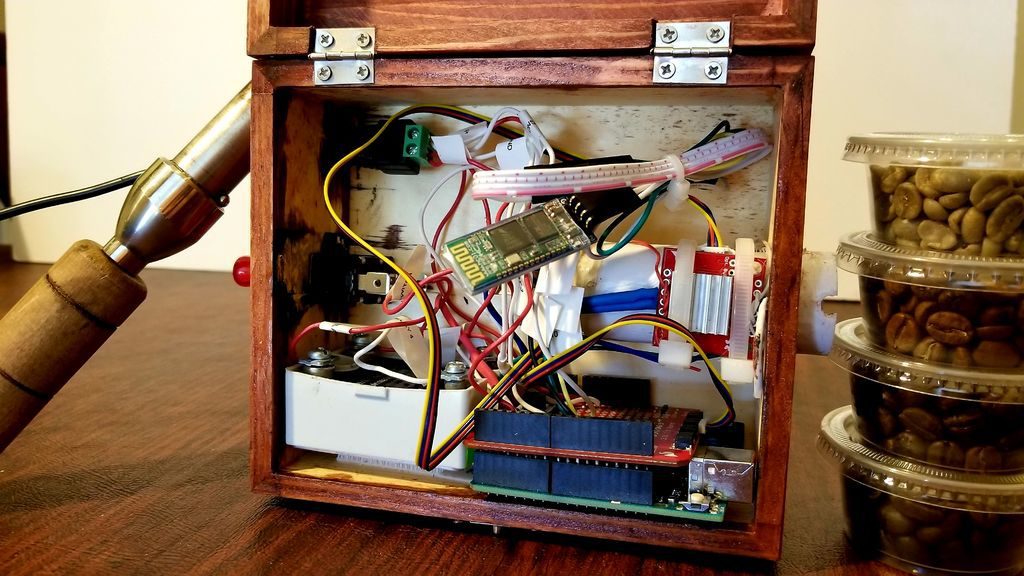
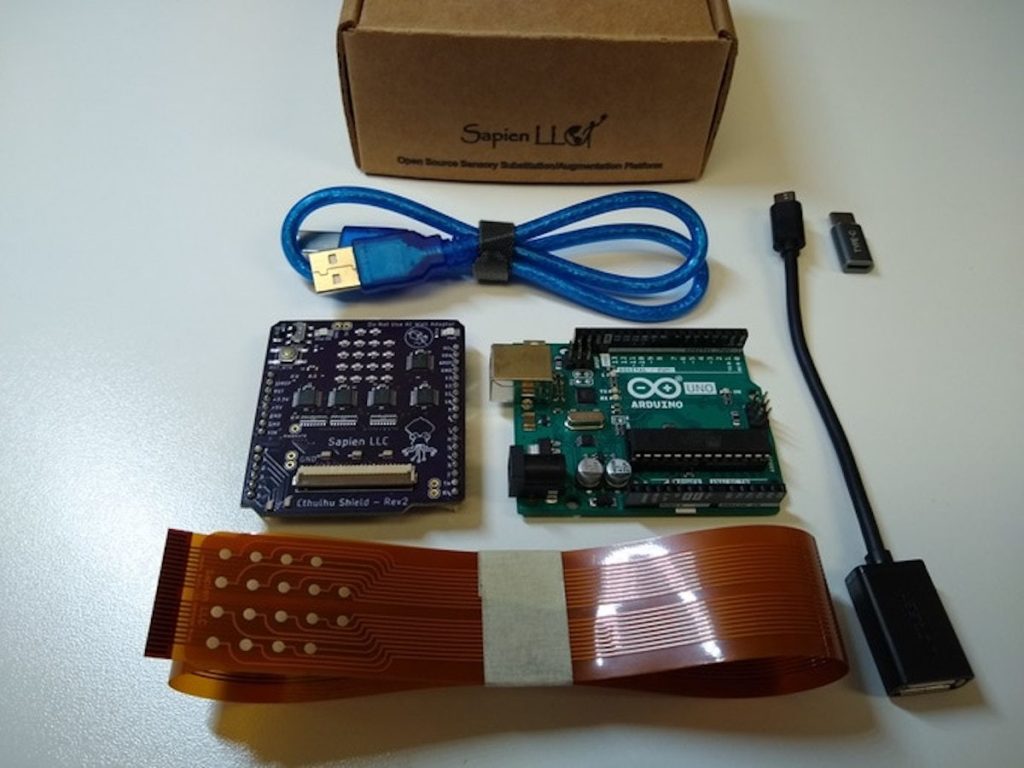
    The device takes the form of an Arduino Uno or Mega shield, with a strange flexible electrode setup that is placed directly on the user’s tongue.

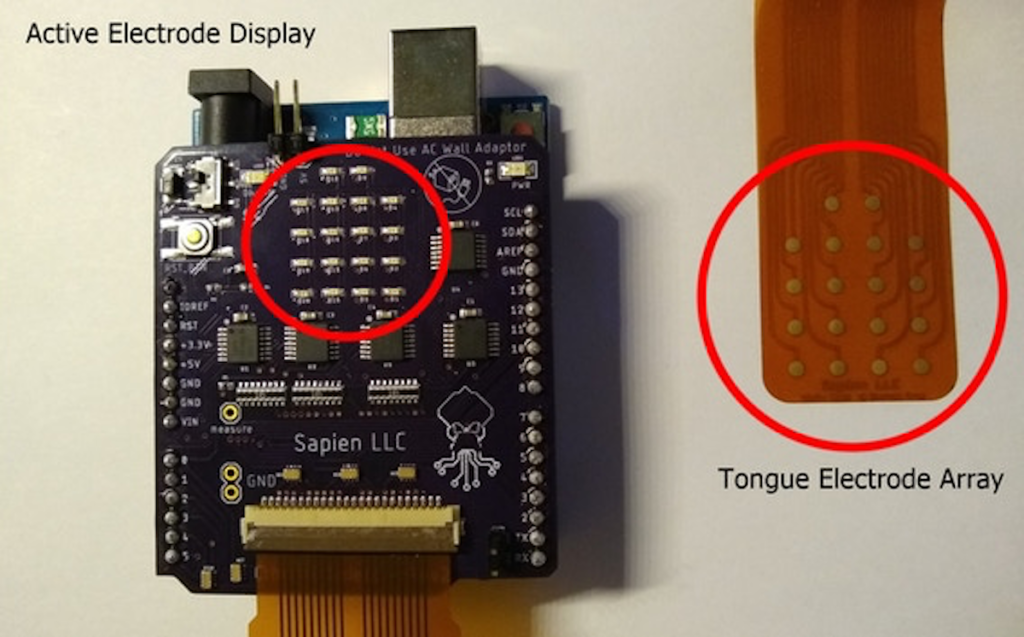
    When these electrodes are fired, they activate nerve fibers on the tongue, producing a feeling like that of carbonated bubbles popping. This can then be used to convey information to the user, whether this is visual, sound, or even Internet updates or other non-traditional stimuli. Importantly, it can also be utilized as an interface for tongue computer control. 

    The Cthulhu Shield lets anyone experiment and make devices that can expand your sensory experience!

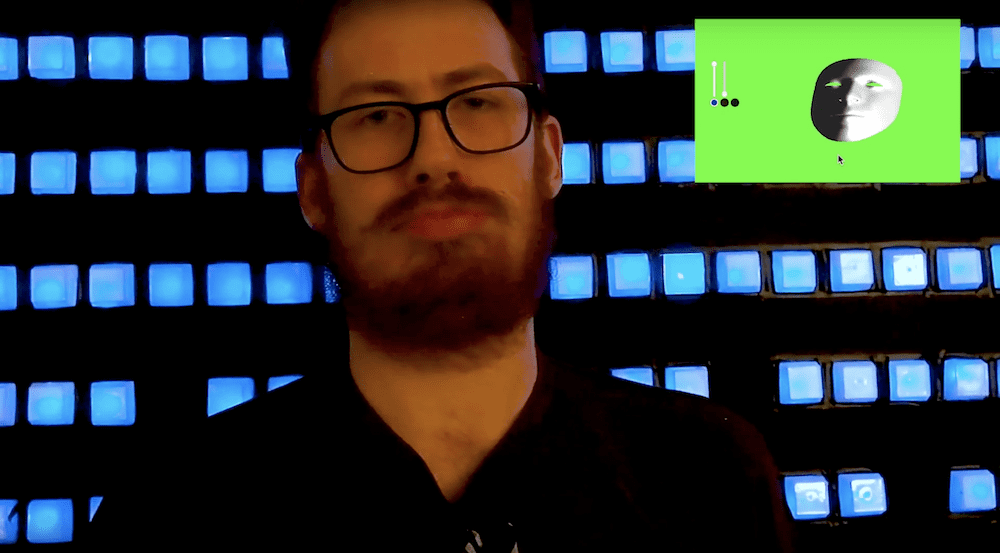
    We’ve made android apps and example programs that will let you use the Cthulhu Shield and your smartphone to ‘see’ and ‘hear’ with your tongue without needing to write a single line of code!

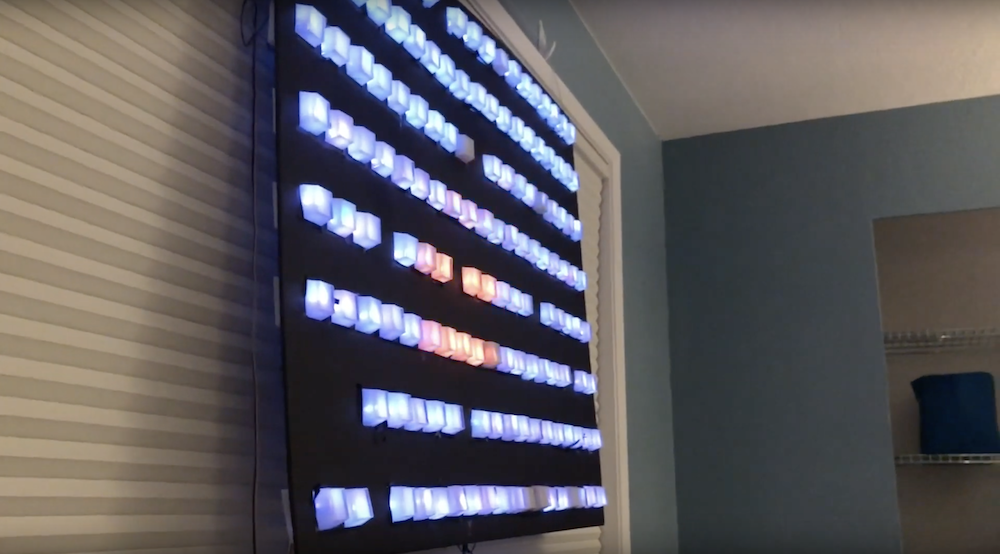
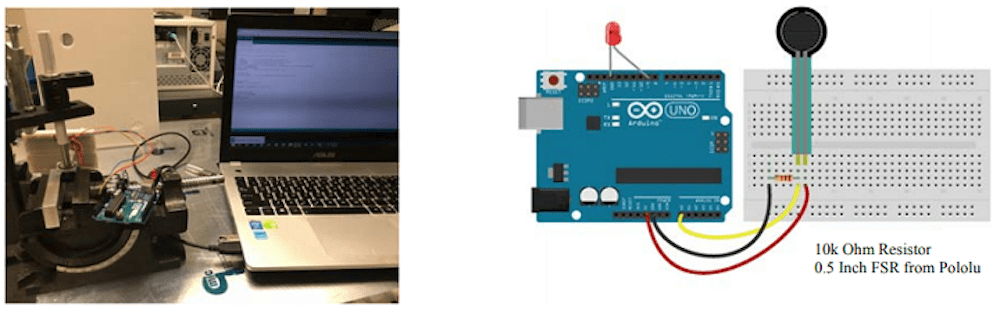
    For those of you interested in making your own projects, we’ve written an easy to use Arduino library and provided example code to get you started on projects including tongue-heat-vision, tongue-based GPS directions, and soon, tongue-ultrasonic hearing. But don’t limit yourselves to the examples we’ve provided, the only limit to what you can make is your imagination!

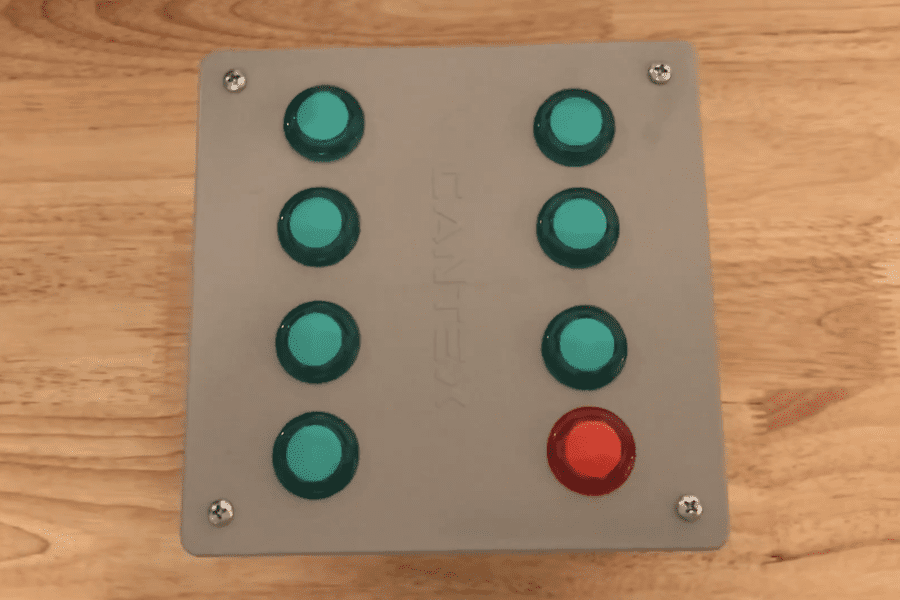
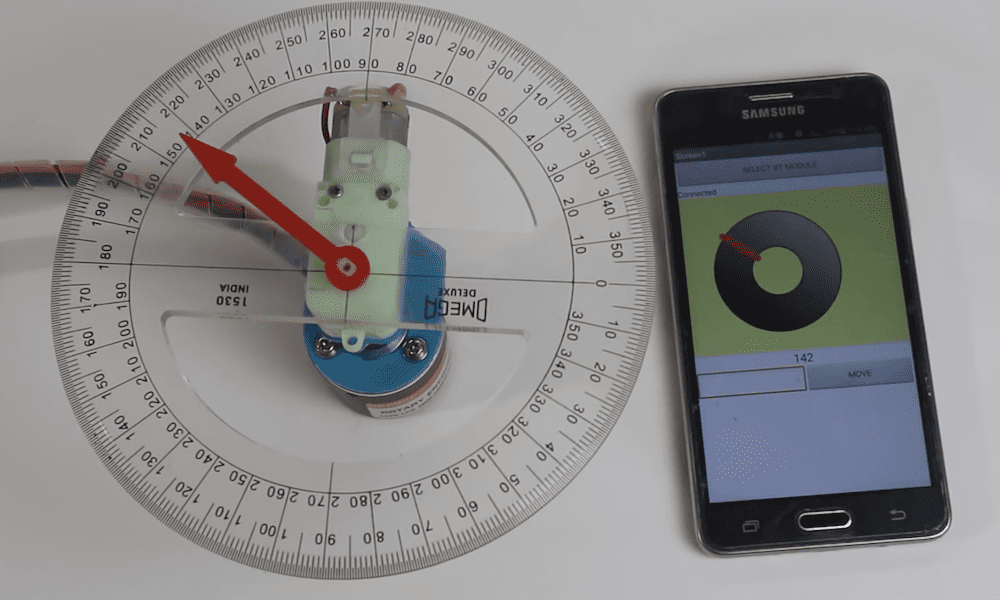
    Finally, we designed the Cthulhu to be used as a tongue based computer interface (because if you already have something in your mouth, why not use it to control your computer)? Write your own code to hotkey video game actions, send text messages, or control a wheelchair or mobility device with your tongue. 

    [youtube https://www.youtube.com/watch?v=vBUp2dJDEKc?feature=oembed&w=500&h=281]

    If you’d like to get your hands on one, the Cthulhu Shield is now being funded on Kickstarter, while code and board schematic are available on GitHub.

    Website: LINK

  • Wake up with this mobile robot alarm!

    Wake up with this mobile robot alarm!

    Reading Time: < 1 minute

    Wake up with this mobile robot alarm!

    Arduino TeamJanuary 30th, 2019

    Waking up before 9am can be a challenge for Nikodem Bartnik, but he also hates to waste time sleeping when he could instead make something.

    In order to help him with this “joyous” task, he assembled a line-following robot that scoots his phone out of the room in the morning, forcing him to get out of bed and chase it down.

    The device utilizes a pair of gearmotors in a standard tank-like configuration for movement, and sensors to follow a black line on the floor. A sound sensor allows its Arduino Uno controller to pick up on alarm sounds coming from his phone, which is mounted on the robot with a 3D-printed holder. When activated, it follows the path out of his room, waiting for Bartnik’s bleary eyed—but awake—arrival. 

    [youtube https://www.youtube.com/watch?v=sEWsbTDQUv4?feature=oembed&w=500&h=281]

    Website: LINK

  • A carbon fiber bike filament winder controlled by Arduino

    A carbon fiber bike filament winder controlled by Arduino

    Reading Time: < 1 minute

    A carbon fiber bike filament winder controlled by Arduino

    Arduino TeamJanuary 18th, 2019

    Bryan Kevan wanted to build his own bicycle, but wasn’t satisfied with purchasing a frame—or even ready-made tubing. He instead chose to create the frame from raw strands of carbon fiber

    The overall bike build is shown here, which necessitated him designing a variety of jigs, including a CNC wrapping machine.

    His device uses an Arduino Uno, along with a pair of driver boards, to carefully roll strands of carbon fiber on a PVC mandrel in an overlapping pattern. Epoxy was dripped on the assembly during the process, resulting in CF rods that were lighter and much cheaper than purchased rods. 

    After quite a bit more work assembling everything together, Kevan now has a bike frame that is truly made to his specs!

    Website: LINK

  • This robot is eggsactly what you need to cook breakfast

    This robot is eggsactly what you need to cook breakfast

    Reading Time: < 1 minute

    This robot is eggsactly what you need to cook breakfast

    Arduino TeamJanuary 17th, 2019

    Normally, boiling an egg involves heating water in a saucepan, then dropping an egg inside to be properly heated. James Bruton, however, now has a bit of help in the form of his breakfast-making robot. 

    The device uses two servos, along with a motor/encoder/screw assembly to rotate and lower the egg into place. It then takes it out after six minutes, and tips it out into a secondary container.

    As of now, temperature is manually controlled, but it’s tracked with a DS18B20 temperature sensor to initiate the egg lowering procedure. An Arduino Uno takes care of the lifting screw assembly, while an Arduino Mega handles everything else.

    [youtube https://www.youtube.com/watch?v=XTXuOAIRFFU?feature=oembed&w=500&h=281]

    Website: LINK

  • This Arduino-powered piano can play just about any MIDI file

    This Arduino-powered piano can play just about any MIDI file

    Reading Time: 2 minutes

    This Arduino-powered piano can play just about any MIDI file

    Arduino TeamJanuary 16th, 2019

    After letting his Arduino languish in a drawer for some time, Brandon Switzer decided to take it out and start experimenting. While he could have started off small, Switzer chose to instead create his own player piano system, completing it at a cost of around $650.

    While the details of the project aren’t explicitly spelled out, you can see a time-lapse of this amazing build in the video below. As you can imagine, it took a massive amount of breadboard space to get all the electronics laid out, and a similarly impressive number of solenoids to activate all of the keys. 

    Additionally, he had to do plenty of mechanical work, including the cringeworthy job of actually drilling into a what appears to be a functional piano!

    In early August 2017 I was looking to partake in some kind of engineering project that would be fun and also help me learn new things. For a long time I had an Arduino Uno that had been sitting in a drawer, and for the first time I took it out to experiment with it and create something new.

    For a long time I had been inspired by player pianos — it’s something about the way the keys move on their own that make them so wonderful. I wanted to create something like that — something that didn’t only work but also impressed the viewer — for a cheap cost.

    One of my goals in creating this was to show that it’s possible to replicate amazing things for little money, and I think I proved this. While a player system from Yamaha or Pianodisc cost upwards of $10,000, I built my own system for a measly $650. Not only that, but once you buy your $10,000 player piano, you have to purchase extra apps and songs if you actually want to play something on it. Overall I’m very satisfied with the way the piano turned out, and I’m excited to use it in the future.

    [youtube https://www.youtube.com/watch?v=FcgFfY4fVqU?feature=oembed&w=500&h=281]

    Website: LINK

  • An Arduino-powered mini turntable with magnetic attachments

    An Arduino-powered mini turntable with magnetic attachments

    Reading Time: < 1 minute

    An Arduino-powered mini turntable with magnetic attachments

    Arduino TeamJanuary 14th, 2019

    If you need a motorized turntable for filming or simply displaying your latest project, here’s an easy 3D-printable option from Ali of Potent Printables

    The design takes two forms—one using a full-sized hobby servo, and a smaller version that employs a micro servo for motion, both of which are set up for continuous rotation.

    Electronics for the project are fairly straightforward, with an Arduino Uno powering the tables via an Adafruit Motor Shield. While this could be expanded for different I/O or sensor use, the clever bit of this configuration is its interchangeable design. A master circle is connected to the servo horn, while the swappable plates attach to it with magnets, accommodating a flat surface, mounting holes, or even LEGO bricks.

    [youtube https://www.youtube.com/watch?v=cBNzXSJFYJ8?feature=oembed&w=500&h=281]

    Website: LINK

  • A semi-autonomous circular robot for escape rooms

    A semi-autonomous circular robot for escape rooms

    Reading Time: 2 minutes

    A semi-autonomous circular robot for escape rooms

    Arduino TeamJanuary 11th, 2019

    If you’ve ever been to an escape room, you’ve undoubtedly had to deal with a wide variety of puzzles that you have to solve in order to get out of the “prison” that you’ve willingly thrown yourself into. Beyond the puzzle that you’re trying to decode, the mechanisms used can be extremely clever, and coming up with a new device to use in these scenarios was a perfect challenge for this team of Belgian college students.

    Based on the project requirements, they created a Roomba-like circular robot controlled by an Arduino Uno and motor shield that drives a pair of DC motors. The idea, while not fully implemented due to time constraints, is that it can be remotely operated only after solving a riddle and within a certain time period, then drive itself back to a designated spot once the game is over. 

    Here is a summary of what happens in the robot:

    – The non-autonomous part: a remote controller is linked to Arduino through a receiver. Players control the remote and therefore control the Arduino which controls the motors. The Arduino is turned on before the game starts, but it enters the main function when players solve a riddle on the remote controller. An IR wireless camera is already turned on (turned on at the same time as the “whole” (controlled by the Arduino) when switch on/off turned on). Players guide the car with remote controller: they control the speed and the direction. When the timer that starts when the main function is entered is equal to 30 minutes, the control from the controller is disabled.

    – The autonomous part: the control is then managed by the Arduino. After 30 minutes, the IR line tracker sensor starts following a line on the ground to finish the parcours.

    For inspiration on building your own, check out the team’s write-up (including code) and a clip of the prototype below.

    [youtube https://www.youtube.com/watch?v=MFrxjl-ja58?feature=oembed&w=500&h=281]

    Website: LINK

  • FelixMatic automatically feeds your cat at preset times

    FelixMatic automatically feeds your cat at preset times

    Reading Time: 2 minutes

    FelixMatic automatically feeds your cat at preset times

    Arduino TeamJanuary 4th, 2019

    For busy people with unpredictable schedules, keeping one’s feline friend fed in a timely manner can be a challenge. Fortunately, there are automatic cat food dispensers available, or you can even build one yourself.

    Open Electronics’ 3D-printed device, called “FelixMatic,” claims to be more complex and complete than average off-the-shelf solutions. Not only can it be programmed to supply up to nine meals a day using a spiral-action rotary feeder, but it also measures food levels with a load cell for dispensing feedback. 

    Control is via an Arduino Uno along with an RTC shield for meal timing, while the user interface consists of an LCD display and five buttons.

    Having a pet involves big responsibilities, first of all granting them food; unfortunately, a hectic lifestyle and imposed work hours do not go hand-in-hand with the needs of our four-legged friends, and surely anyone living on their own will have a hard time providing the pets meals on schedule. In order to solve a problem that is surely dear to any pet owner, and especially cat and dog owners, we have designed a device we called FelixMatic: it is a practical automatic dispenser of dry food for cats (or small dogs) equipped with a high-capacity container that can easily be opened from the top and a bowl to collect the kibble when it is supplied. We know we can already find automatic dispensers on the market, however, our example is unique because it can be programmed with 9 meals a day in order to supply very precise quantities of dry food.

    The way the dispenser works is more complex and complete than the average available product on the market, in fact, it does not only supply food but it also gives exact doses as decided by us; basically, at a preset time, a cochlea at the base of the container will turn, and drop a certain amount of kibble in the bowl, regulated by a dedicated weight sensor.

    Website: LINK

  • Wind your thread automatically with this Arduino-powered machine

    Wind your thread automatically with this Arduino-powered machine

    Reading Time: 2 minutes

    Wind your thread automatically with this Arduino-powered machine

    Arduino TeamJanuary 3rd, 2019

    If you ever wondered how thread could be wound on spools without human intervention, this build by Mr. Innovative will show you one option. 

    The YouTuber’s DIY machine features a motor to rotate a small roller, pulling thread off a larger “feeder” spool. An encoder disk and photoelectric sensor are used to measure how much thread has been dispensed, and a servo-powered arm swings back and forth to allow the thread to feed evenly.

    The device is controlled by an Arduino Uno and custom PCB shield, while an encoder and OLED display serve as the user interface.

    I have made a thread coil winding machine, using Arduino and 3D-printed parts. For GUI I have used 0.96 OLED display, and for user input I have used a rotary encoder knob. A photoelectric speed sensor is used to measure the length of thread.

    The machine has two modes of operation. 1st is manual mode in which thread starts to wind on coil until stop is not pressed. In 2nd mode, auto mode, the machine will wind the thread as per the user predefined length.

    Parts, code, and print files can be found in the video description if you’d like to construct something similar.

    [youtube https://www.youtube.com/watch?v=tsxu_KMYnTs?feature=oembed&w=500&h=281]

    Website: LINK

  • Squeeze through pipes with this six-wheeled robot

    Squeeze through pipes with this six-wheeled robot

    Reading Time: 2 minutes

    Squeeze through pipes with this six-wheeled robot

    Arduino TeamJanuary 3rd, 2019

    If you need a robot to traverse piping systems, what are you to do? You could purchase a (very expensive) inspection robot, or you could instead build your own like the prototype pipe-crawler presented here. 

    The device features six spring-loaded wheel assemblies that help it get a grip on different diameters of pipe, with two of the wheels powered for locomotion.

    An Arduino Uno controls the uniquely-shaped bot, with an LN298N H-bridge used to regulate the three 9V batteries wired in series that run the motors. 

    Pipeline systems deteriorate progressively over time through various means. Pipeline inspection robot are designed to remove the human factor from labour intensive or dangerous work environments and also to act in inaccessible environment. However, if you take a look at the prices of those robots you will find that they are way too expensive.

    This project aims to create another kind of pipeline inspection robot. Because we think that It is beneficial to have a robot with an adaptable structure to the pipe diameter, and cheaper at the same time.

    Our challenge is to make this robot adaptable to diameters varying from 260mm to 390mm based on two sliding mechanisms.

    Be sure to see it in action in the short video below! 

    [youtube https://www.youtube.com/watch?v=EsJhEv6tLso?feature=oembed&w=500&h=281]

    Website: LINK

  • Control model trains wirelessly with your smartphone

    Control model trains wirelessly with your smartphone

    Reading Time: < 1 minute

    Control model trains wirelessly with your smartphone

    Arduino TeamJanuary 2nd, 2019

    Model trains have been a staple of DIY hobbiysts for generations, and while wireless control options can be purchased, KushagraK7’s hack lets you use your phone instead.

    The setup consists of an Arduino Uno, along with a motor driver shield to vary the trains’s peed and direction, as well as flip turnouts to allow for different sections of track to be used.

    The system employs a novel interface system, where an off-the-shelf Bluetooth receiver passes DTMF (telephone dial tones) to a decoder board, which then sends this decoded data on to the Arduino. While some might opt for an HC-05 Bluetooth module or similar, this enables control with a standard tone generator app, and the phone could even be physically connected via a stereo cable if convenient.

    [youtube https://www.youtube.com/watch?v=u5J_W7DCo_o?feature=oembed&w=500&h=281]

    Website: LINK

  • An inexpensive device for analyzing roasted coffee beans

    An inexpensive device for analyzing roasted coffee beans

    Reading Time: 2 minutes

    An inexpensive device for analyzing roasted coffee beans

    Arduino TeamDecember 18th, 2018

    While you may not consider in detail how your coffee is roasted, those that produce it must pay special attention to make sure that the end product is consistent. Equipment to help analyze roasted coffee is normally quite expensive, but using a near-infrared sensor, Arduino Uno and Bluetooth module, Spencer Corry was able to make his own analysis setup.

    As shown in the video below, after calibration, beans are inserted into the analysis chamber using a tryer scoop. Light is shined onto the roasted beans, and the intensity of the reflected near-infrared radiation is analyzed in six different wavelengths. Intensity data is then transmitted via Bluetooth to a smart device, which can be used to make sure things are roasted perfectly.

    There has recently been a growth of small roasting companies offering custom in-house roasts. These companies are looking for less expensive alternatives to hiring and training a roast master or using the expensive Agtron Process Analyzer. The Degree of Roast Infrared Analyzer for Coffee Roasters, as described in this document, is meant to be an inexpensive means of measuring the degree of roast of coffee beans. The Degree of Roast Infrared Analyzer uses a tryer, a tool found on coffee roasters used to sample the coffee during roasting, to hold a sample of coffee. The tryer is inserted into the analyzer where the AS7263 NIR Spectral sensor is used to measure 6 different infrared bands (610, 680, 730, 760, 810, and 860nm). The reflectance measurements are transmitted via Bluetooth and can then be correlated to the degree of roast. The analyzer must first be calibrated by pressing a button on the inside of the box in which the PVC is used as a white balance as it has a relatively flat reflectance in the spectral range detected by the sensor.

    [youtube https://www.youtube.com/watch?v=NgYNQm1fcKk?feature=oembed&w=500&h=281]

    Website: LINK

  • An Arduino-based rocket motor thrust test stand

    An Arduino-based rocket motor thrust test stand

    Reading Time: 2 minutes

    An Arduino-based rocket motor thrust test stand

    Arduino TeamDecember 17th, 2018

    If you enjoy model rocketry, you may wonder just what the thrust curve of the motors you’re using looks like. In order to answer that question, YouTuber ElementalMaker decided to construct his own test stand using an Arduino Uno coupled to a 10Kg load cell with an HX711 amplifier board. The test procedure is started with a little red button, and after warning LED blinks away for 10 seconds, it activates a relay and fires the motor under into the stand.

    The experimental setup seen in the video yields successful thrust curves for both a ½ inch and ¾ inch motor. As you might expect, the ¾ produces more thrust than its smaller cousin, though at 2,683 grams versus the ½ inch motor’s 658, it’s an impressive difference indeed. 

    The heart of the stand is a common load cell (the sort of thing you’d find in a digital scale) coupled with a HX711 amplifier board mounted between two plates, with a small section of vertical PVC pipe attached to the topmost plate to serve as a motor mount. This configuration is capable of measuring up to 10 kilograms with an 80Hz sample rate, which is critically important at this type of rocket motors only burn for a few seconds to begin with. The sensor produces hundreds of data points during the short duration of the build, which is perfect for graphing the motor’s thrust curve over time.

    Given such a small window in which to make measurements, [ElementalMaker] didn’t want to leave anything to chance. So rather than manually igniting the motor and triggering the data collection, the stand’s onboard Arduino does both automatically. Pressing the red button on the stand starts a countdown procedure complete with flashing LED, after which a relay is used to energize a nichrome wire “electronic match” stuck inside the motor.

    The project is based on a paper archived here if you’d like to examine the design.

    [youtube https://www.youtube.com/watch?v=-yq1EmTkBCs?feature=oembed&w=500&h=281]

    Website: LINK

  • Build a single-pixel scanning camera with an RGB sensor

    Build a single-pixel scanning camera with an RGB sensor

    Reading Time: 2 minutes

    Build a single-pixel scanning camera with an RGB sensor

    Arduino TeamDecember 15th, 2018

    Sensors like the TCS34725 from Adafruit can detect a single color. It stands to reason then, that if you were to aim this sensor at a multitude of points and record the resulting data, you could have a one-pixel camera. As seen here, Tucker Shannon decided to take this concept and run with it, constructing his own with an Arduino Uno and a pair of stepper motors.

    The device looks like something akin to some sort of auto-turret, and directs the sensor in a square spiral for image acquisition. The resulting pictures are certainly low-res, but good enough to pick out recognizable forms with a little imagination. 

    The color sensor tells the Arduino what color it “sees” at any given time. By pointing it at every single point within a field of view, I can record these colors and use them later to reconstruct an image.

    Using two stepper motors, the camera points the sensor at every “pixel” within the photo and records what it sees. It uses these values to “paint” a picture of whats in front of it!

    Components include: 1x Arduino Uno, 1x Adafruit RGB Color Sensor TCS34725, x2 BYJ-48 Stepper motor with drivers, x1 3mm OD aluminum tube, x20 M3x6mm fasteners. Alternatively a photoresistor can be used in place of the RGB sensor for black and white photos!

    Code for the project can be found on GitHub, and print files are on Thingiverse if you’d like to build your own!

    Website: LINK

  • Keep track your weekly tasks with Arduino and arcade buttons

    Keep track your weekly tasks with Arduino and arcade buttons

    Reading Time: 2 minutes

    Keep track your weekly tasks with Arduino and arcade buttons

    Arduino TeamDecember 14th, 2018

    All of us have daily tasks we need to perform, but what if you often forget whether you’ve done something, or simply need to give your child a little extra motivation? One great way would be Simon Prickett’s Arduino Task Tracker, inspired by Simone Giertz’s Every Day Calendar. 

    Prickett’s clean-looking device is built into an electrical junction box, which holds the guts, including an Arduino Uno inside. It also exposes eight arcade-style LED buttons on top.

    After you, or in this case Prickett’s son, complete a chore, press one of the seven green buttons. Once they are all lit, the Arduino Task Tracker produces a “victory roll” sequence. The eighth red button is then used to start the week over again. 

    Sound like something you’d like to recreate? Code and more info for the project can be found GitHub.

    [youtube https://www.youtube.com/watch?v=BcS5LLRLeBo?feature=oembed&w=500&h=281]

    Website: LINK

  • Mood-controlled RGB light wall

    Mood-controlled RGB light wall

    Reading Time: 2 minutes

    Mood-controlled RGB light wall

    Arduino TeamDecember 5th, 2018

    In the build shown below, Evan McMahon dares to ask the question, “Have you ever been disappointed by a mood ring?” While that might seem a bit random, the answer is a likely “yes” if you’ve ever worn one with the expectation of any sort of accuracy. Fortunately, he didn’t just pose the question, but also came up with a clever solution, using an array of lights under Arduino control.

    For the setup, McMahon uses the camera on his iPhone to take video of his smiling or frowning mug, and analyzes it with the help of Unity running on a computer to translate this into his apparent state of mind.

    This info is then sent to an Arduino Uno, which puts the programmable LED lights into dance mode if he’s happy, and makes them shine blue if he’s a bit blue himself!

    I made another thing! This time it’s a mood wall that reacts to your facial expressions. I made it out of an Arduino, poster board, disposable cups, NeoPixels, an iPhone X and a whole lot of cutting. The wall itself is driven by Unity, sampling animations and particle systems to make a final light show presentation.

    [youtube https://www.youtube.com/watch?v=Wip2i5hBl6o?feature=oembed&w=500&h=281]

    Website: LINK

  • Simple PID control intro device

    Simple PID control intro device

    Reading Time: < 1 minute

    Simple PID control intro device

    Arduino TeamDecember 3rd, 2018

    You may have come across the term “PID control,” and while this proportional-integral-derivative control method does a great job of smoothing out oscillations, where does one get started? 

    One solution would be Mr Innovative’s demo device, showcased in the video below. In it, a DC gear motor is able to smoothly rotate an arrow overlaid on a protractor by a certain number of degrees.

    Input is via a Bluetooth smartphone interface, and an encoder is used for feedback to the commanding Arduino Uno. Everything is fastened together by 3D-printed parts, and if you’d like to try your own PID experiment, code and print files are linked in the video description.

    [youtube https://www.youtube.com/watch?v=K7FQSS_iAw0?feature=oembed&w=500&h=281]

    Website: LINK

  • Keyboard dampener prototype aims to reduce typing injuries

    Keyboard dampener prototype aims to reduce typing injuries

    Reading Time: 2 minutes

    Keyboard dampener prototype aims to reduce typing injuries

    Arduino TeamNovember 29th, 2018

    While we don’t normally think of typing on a computer as a dangerous job, the U.S. Department of Labor reports that workers spend 25,000 hours away from work due to repetitive strain injuries, such as using a computer. Part of this could be due to the fact that the average computer user applies two to seven times the necessary force needed to activate a keyboard’s keys, slamming them down, then experiencing a sudden stop.

    In order to help cushion these small blows, researchers Alec Peery and Dušan Sorma at Ohio University have been exploring a mechanical keyboard concept with a 3D-printed dampener built in. Testing has been undertaken using the popular Cherry MX switches, with typing simulated by dropping a 150 gram cylinder from 125mm, then measured using an Arduino Uno and force sensing resistor.

    This paper is a demonstration of how 3D printing can be used to create a composite (plastic and rubber) keyboard switch that is ergonomically superior to a traditional injection moulded plastic switch. The prototype switch developed in this project aims to reduce impact forces from keyboard use exerted on user’s fingers by “cushioning” the act of bottoming out the switch during a key press. This concept is significant to industry because it aims to reduce overuse injuries caused from work on computer, a portion of the $20 Billion a year owed in worker compensation in the United States. A commercial Cherry MX keyboard switch has been modified through CAD modelling and 3D printing to incorporate damping regions in the lower half of the switch housing. The switch housings were simultaneously 3D printed with plastic and rubber and their force damping properties were tested with an Arduino UNO microcontroller and force sensing resistor resting on the key tops.

    The full research paper is available here.

    Website: LINK

  • Stream weather conditions to the cloud!

    Stream weather conditions to the cloud!

    Reading Time: < 1 minute

    Stream weather conditions to the cloud!

    Arduino TeamNovember 26th, 2018

    Weather reports on the news, your computer, or smartphone are very good—something that people 100 years ago could only dream of—but what if you want to know the exact weather in a fixed location from anywhere in the world? One solution would be Jakub Nagy’s excellent cloud-connected station.

    It uses an Arduino Uno to collect data from temperature, humidity, pressure, and UV index sensors, along with a Nano to read a rain gauge. The data, with images from a webcam, are passed along to a service called Weathercloud, where this report out of the Slovak Republic can be viewed remotely. 

    If you’d like to assemble a similar device to measure conditions in your area, instructions are available in his write-up, including a parts list that will run around $130.

    Website: LINK

  • Upgrade a sewing machine into an automatic embroidery rig

    Upgrade a sewing machine into an automatic embroidery rig

    Reading Time: 2 minutes

    Upgrade a sewing machine into an automatic embroidery rig

    Arduino TeamNovember 26th, 2018

    A needle and thread is extremely useful if you need to fasten a few pieces of fabric or sew on a button, and a sewing machine takes things up several notches in speed an accuracy. This venerable machine, however, can now be enhanced with a trio of stepper motors under Arduino Uno GRBL control to take things to an entirely new level.

    The “Self-Made Embroidery Machine” employs a setup very similar to a 3D printer or CNC router. Two steppers move the fabric around, while a third actuates the needle. This allows the user to program in decorative shapes and patterns as shown in the video below, and the build process is well documented if you’d like to create your own!

    Sewing machine part is any old or new sewing machine. Only change for original is stepper motor with synchronised pulley system (chain/belt drive) and more embroidery friendly presser foot. It is recommended to use older sewing machine, way more convenient to mount stepper motor to cast iron and prices are relatively cheap.

    XY movement consists mainly 3D printed parts, 12 pcs and similar parts known from self build 3D printers. Both axes use GT2 belts, NEMA 17 steppers and both directions are fully scalable.

    Synchronous movement comes from Arduino powered GRBL G-code interpreter, it is mouthful, but basically machine moves using G-code send to Arduino. It is not that complicated and it is only carrier like any other one when going from system to another one.

    Now we have movement and code, but how to make nice shapes and export to G-code. It is nothing to do with medieval sorcery, it is a matter of downloading Inkscape and extension called Inkstitch.

    Help and examples how to use Inkstitch extension can be found address above. End result should be really close to hobby level embroidery machines, just slower speed. After all, embroidery machine is nothing more than overgrown sewing machine.

    [youtube https://www.youtube.com/watch?v=0lERsPc5gEk?feature=oembed&w=500&h=281]

    Website: LINK

  • Convert a Dremel tool into an Arduino-controlled CNC machine

    Convert a Dremel tool into an Arduino-controlled CNC machine

    Reading Time: 2 minutes

    Convert a Dremel tool into an Arduino-controlled CNC machine

    Arduino TeamNovember 26th, 2018

    3D printers get most of the attention in maker-fabrication news, but other computerized tools, like laser cutters and CNC routers, can also be extremely useful. In fact, Nikodem Bartnik decided to create his own Dremel-based machine constructed out of 3D-printed parts and aluminum profiles. 

    Electronics include an Arduino Uno and CNC stepper shield running GRBL for control, along with some NEMA 17 steppers and motor drivers, a relay for the Dremel, and a 12V / 30A power supply.

    As with many other projects, his build went through several iterations, but the final results—seen in the video below—are quite good. The machine, which only cost him around $300, is able to mill MDF and acrylic.

    If you’d like to make your own, Bartnik outlines his design in the first video below, then shows how to use it in the second. 

    [youtube https://www.youtube.com/watch?v=239aFAqYBpQ?feature=oembed&w=500&h=281]

    [youtube https://www.youtube.com/watch?v=TXEHunJmjcg?feature=oembed&w=500&h=281]

    Website: LINK

  • Creep out guests with an Arduino-controlled teddy bear

    Creep out guests with an Arduino-controlled teddy bear

    Reading Time: < 1 minute

    Creep out guests with an Arduino-controlled teddy bear

    Arduino TeamNovember 14th, 2018

    Halloween has become something of a hacker holiday, giving creative people the world over a chance to show off their spooky animatronic inventions outside without neighborhood scrutiny. This year, Instructables user “gocivici” created a display inspired by the doll in a rocking chair featured in the movie Annabelle, but decided to use an Arduino-infused teddy bear instead. 

    The setup is simple but effective, using an Arduino Nano and solenoid to rock the chair. The bear’s head rotates using another Arduino board—an Uno this time—along with a second solenoid and 3D-printed assembly stuffed inside. Control is accomplished via a small wireless remote, though a motion sensor could also be employed.

    [youtube https://www.youtube.com/watch?v=R9Il16HriTQ?feature=oembed&w=500&h=375]

    Website: LINK