Schlagwort: Uno
-

Juuke is an Arduino-powered RFID music player for the elderly
Reading Time: 2 minutesJuuke is an Arduino-powered RFID music player for the elderly Arduino Team — August 1st, 2020 While many of us take playing tunes for granted, whether via MP3s, CDs, or streaming services, for others — such as many that are very young or old — actually figuring out the interface can be…
-

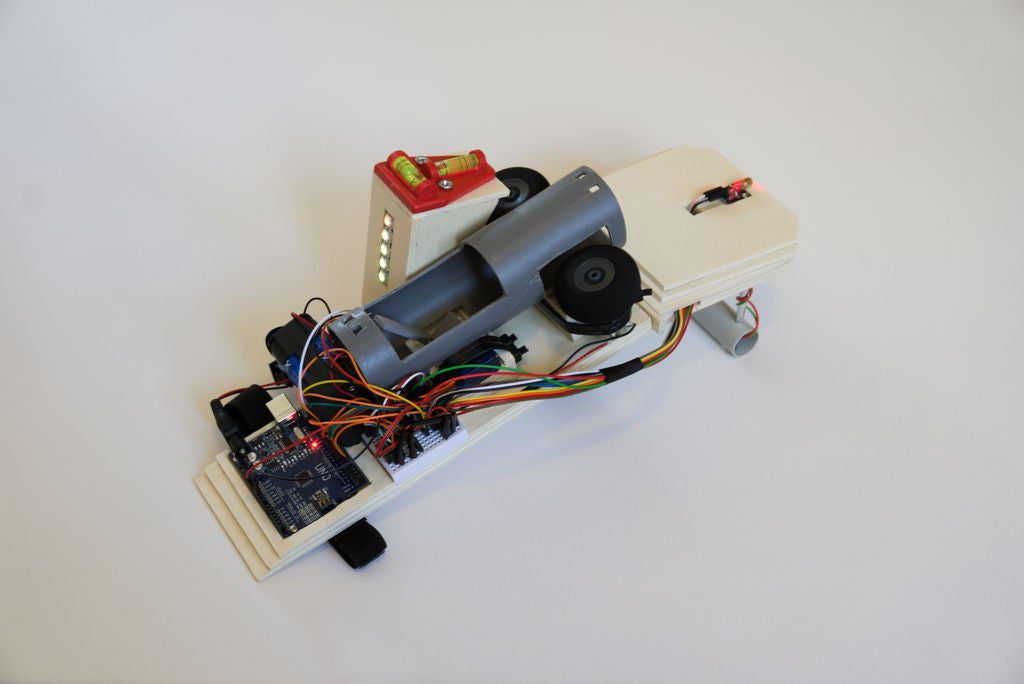
The PongMate CyberCannon Mark III is a surefire way to never lose at beer pong
Reading Time: < 1 minuteThe PongMate CyberCannon Mark III is a surefire way to never lose at beer pong Arduino Team — July 31st, 2020 If you participate in beer pong, and your skills aren’t up to the challenge, you might be in for a rough time. While “practice makes perfect,” if you’d rather shortcut…
-

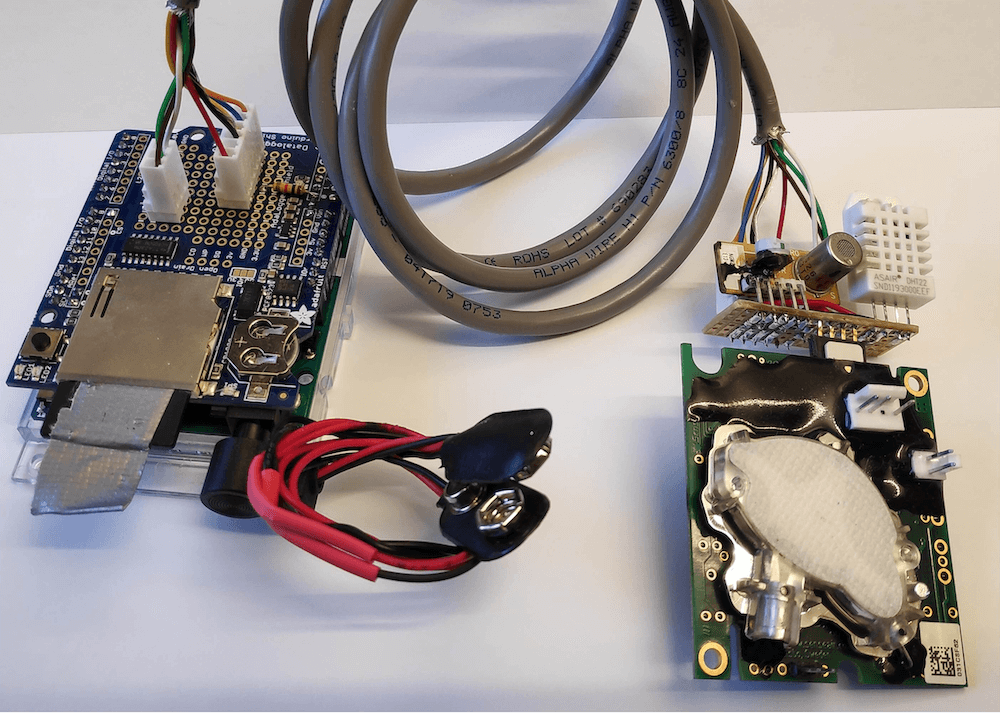
Researchers develop a simple logger for greenhouse gas flows
Reading Time: < 1 minuteResearchers develop a simple logger for greenhouse gas flows Arduino Team — July 28th, 2020 Researchers at Linköping University in Sweden have developed an Arduino-based logger to measure levels of methane and carbon dioxide in greenhouse environments. The device also implements a DHT22 temperature and humidity sensor, data from which can be correlated…
-

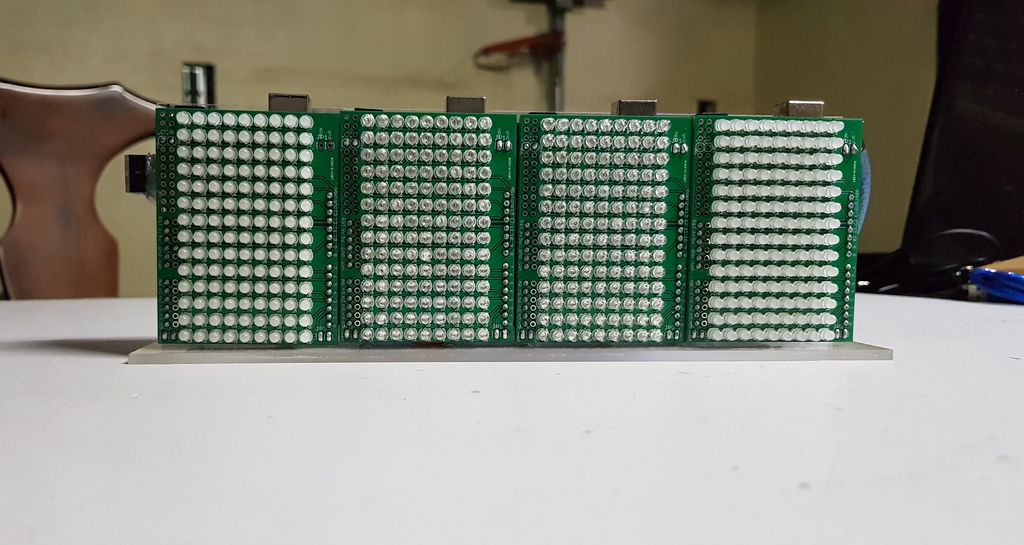
This ‘crazy’ spectrum analyzer visualizes tunes with four Arduinos and 504 LEDs
Reading Time: 2 minutesThis ‘crazy’ spectrum analyzer visualizes tunes with four Arduinos and 504 LEDs Arduino Team — July 26th, 2020 Spectrum analyzers are a great way to visualize music, and “TUENHIDIY” came up with an interesting take on this device using not one, but four Arduino Unos. Each board receives the same sound input via…
-

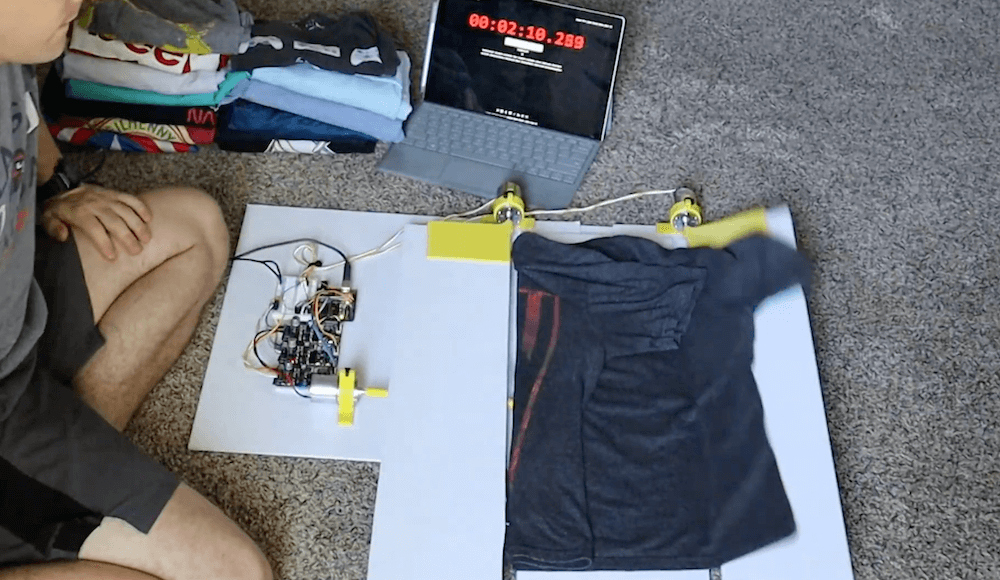
This Arduino-powered machine folds your shirts at the push of a button
Reading Time: < 1 minuteThis Arduino-powered machine folds your shirts at the push of a button Arduino Team — July 21st, 2020 Inspired by an old FlipFold TV ad, YouTuber Ty Palowski decided to make his own automated shirt folding machine. Palowski’s device is made in four folding sections, which lie flat to accept the…
-

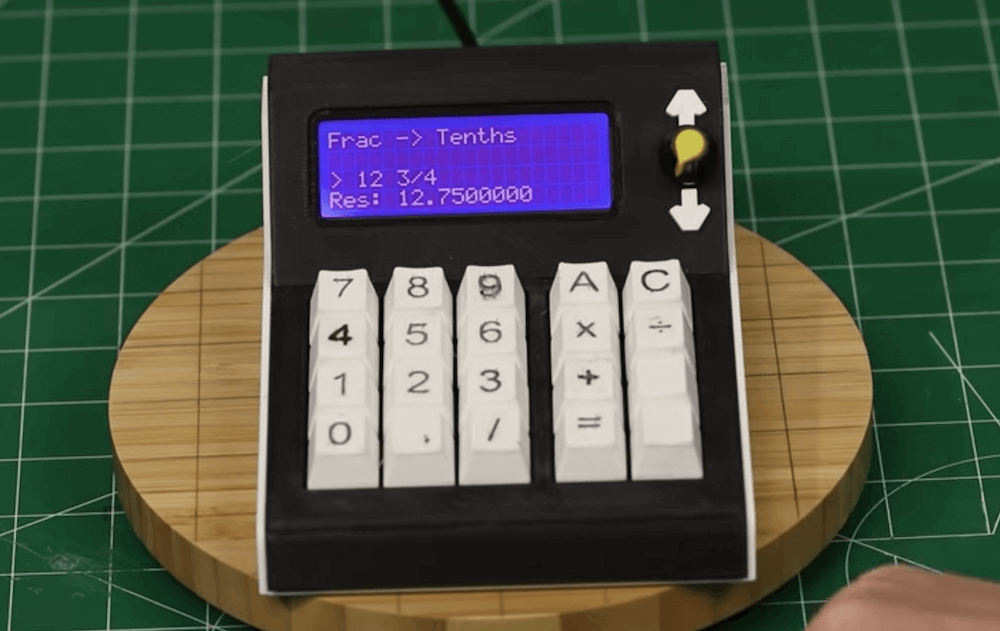
Creating a convenient calculator for unit conversions
Reading Time: < 1 minuteCreating a convenient calculator for unit conversions Arduino Team — July 19th, 2020 Whether you work in meters, feet, inches, or kilometers — or any number of other units corresponding to properties that you need to convey — conversions are a fact of life when making things. While this could mean…
-

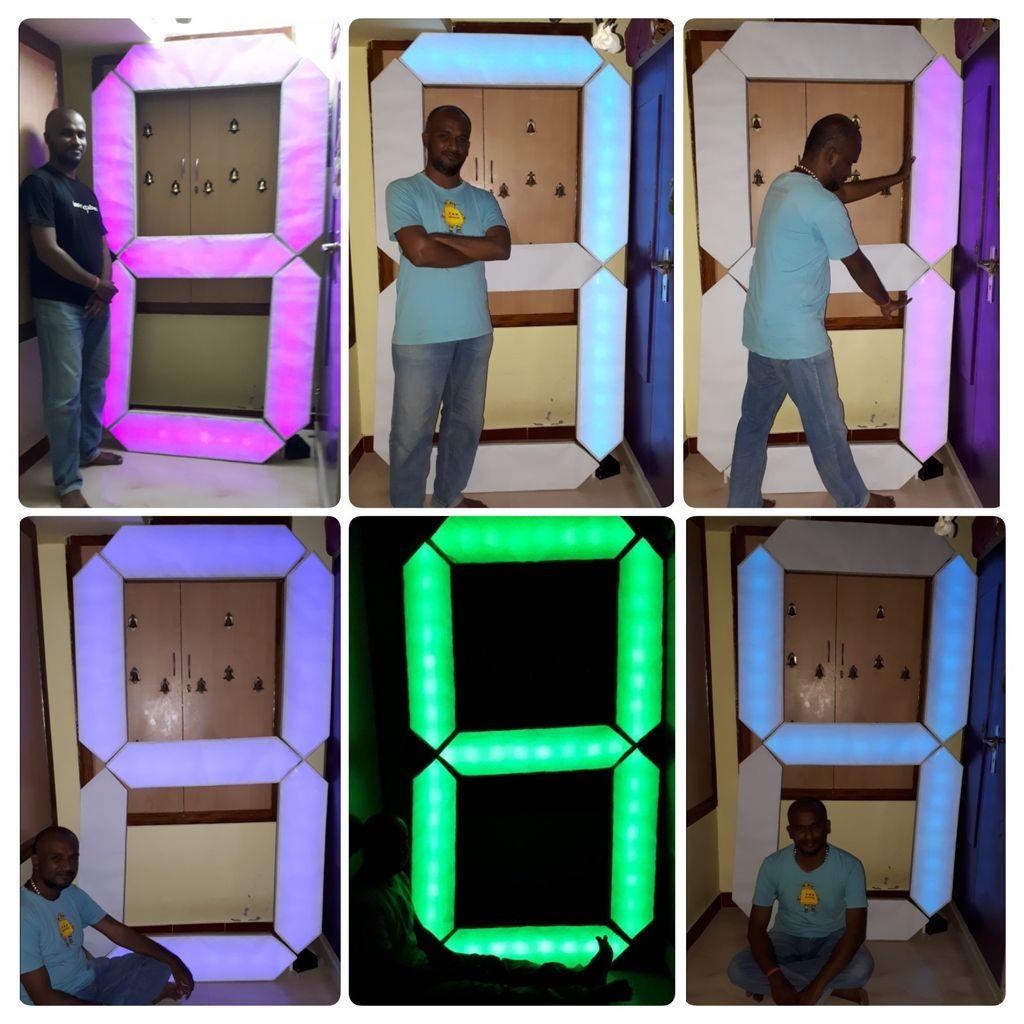
A 7-foot-tall 7-segment display
Reading Time: 2 minutesSeven-segment displays are normally diminutive items, able to show info from a clock or other device, in a size that’s easily tucked away when not needed. Jegatheesan Soundarapandian’s single-digit display, however, is just the opposite standing at nearly seven feet tall. The project is constructed out of cardboard, with a PVC spine for…
-

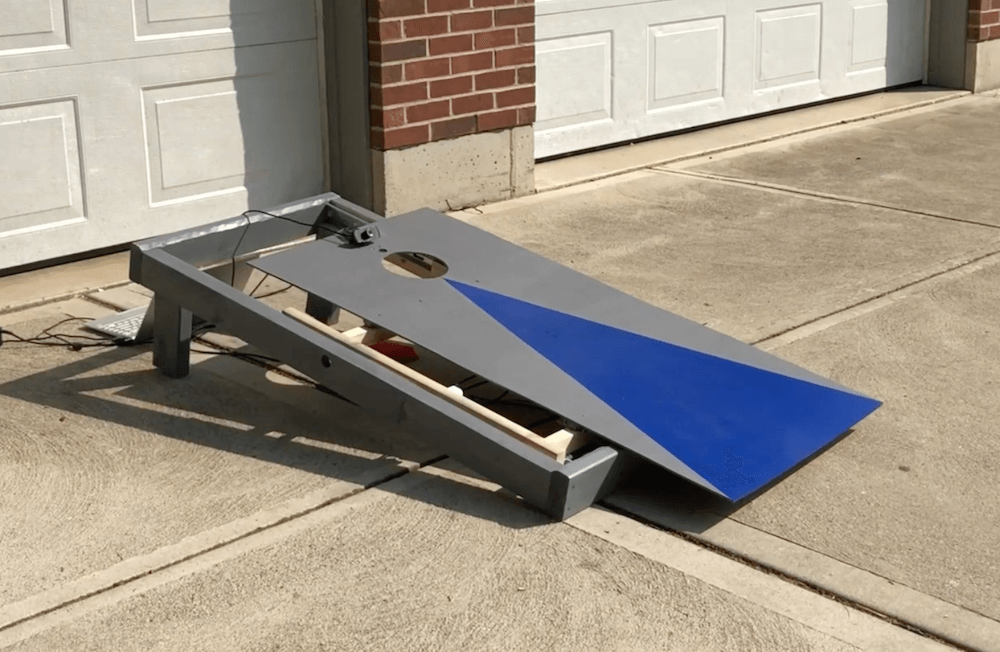
Robotic cornhole board guarantees three points every time
Reading Time: < 1 minuteRobotic cornhole board guarantees three points every time Arduino Team — July 8th, 2020 You may have seen Mark Rober’s automated dartboard or Stuff Made Here’s backboard, which use advanced engineering to create apparatuses that ensure you “can’t miss.” Now that summer is in full swing, what about a robotic cornhole board?…
-

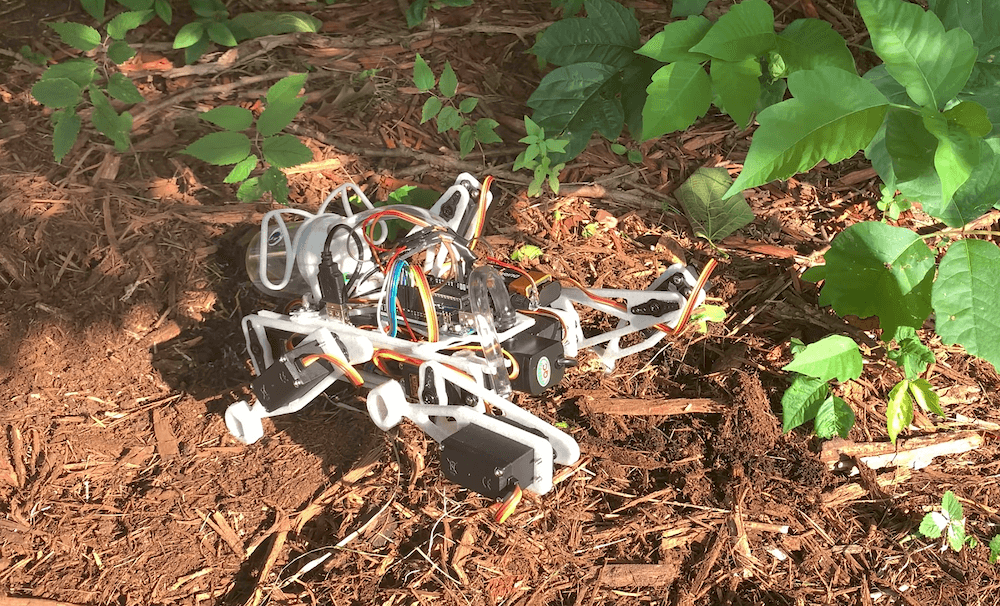
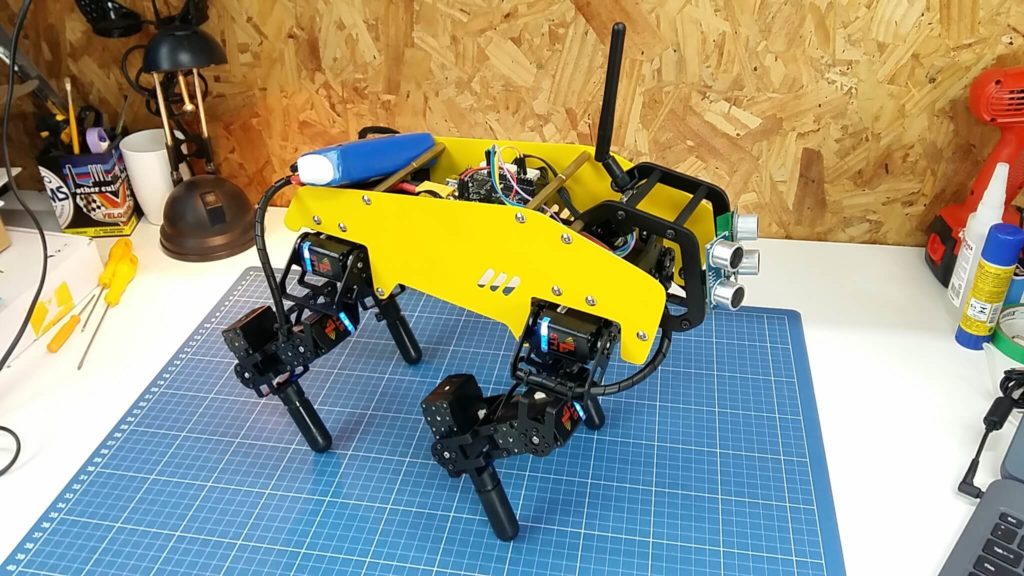
This robo-dog sprays poison ivy with weed killer
Reading Time: < 1 minuteThis robo-dog sprays poison ivy with weed killer Arduino Team — July 1st, 2020 Poisonous plants, like poison ivy, can really ruin your day. In an effort to combat this “green menace,” YouTuber Sciencish decided to create his own quadruped robot. The robotic dog is equipped with two servos per leg,…
-

A tabletop bowling game with automated scoring
Reading Time: < 1 minuteA tabletop bowling game with automated scoring Arduino Team — June 24th, 2020 Do you love to bowl? Are you still unable to do so due to the pandemic? Then this project by high school engineering teacher “lainealison” is right up your alley! This rig features a 5½ foot (1.68 meter) lane…
-

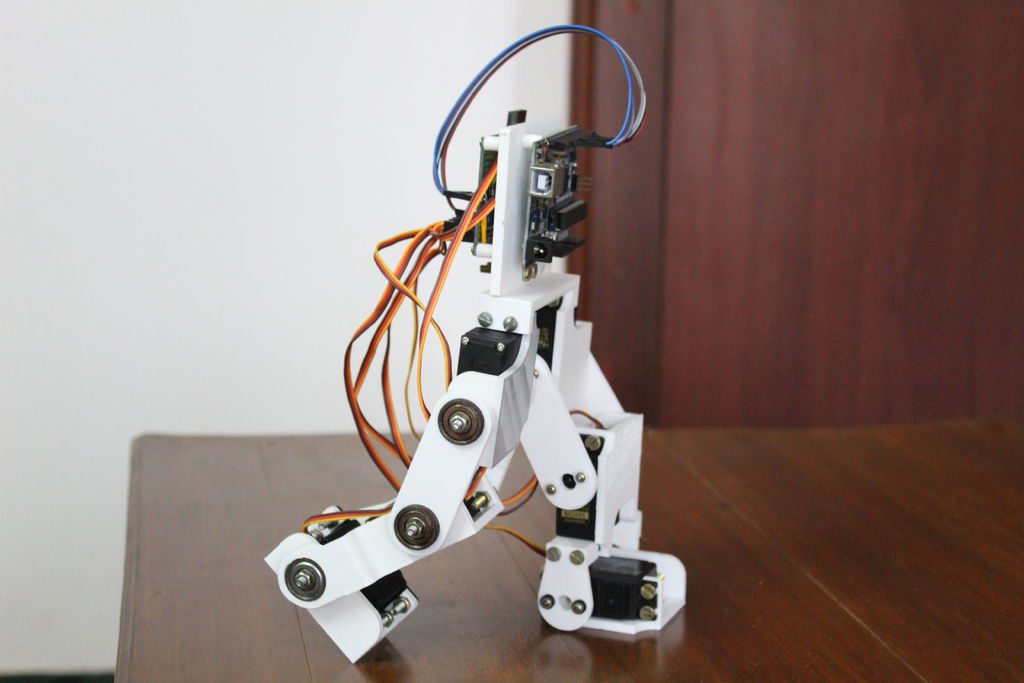
Building an Arduino-based bipedal bot
Reading Time: < 1 minuteBuilding an Arduino-based bipedal bot Arduino Team — June 21st, 2020 If you’d like to build a walking biped robot, this 3D-printed design by Technovation looks like a fantastic place to start. Each leg features three servos that actuate it at the hip, knee, and ankle for a total of six…
-

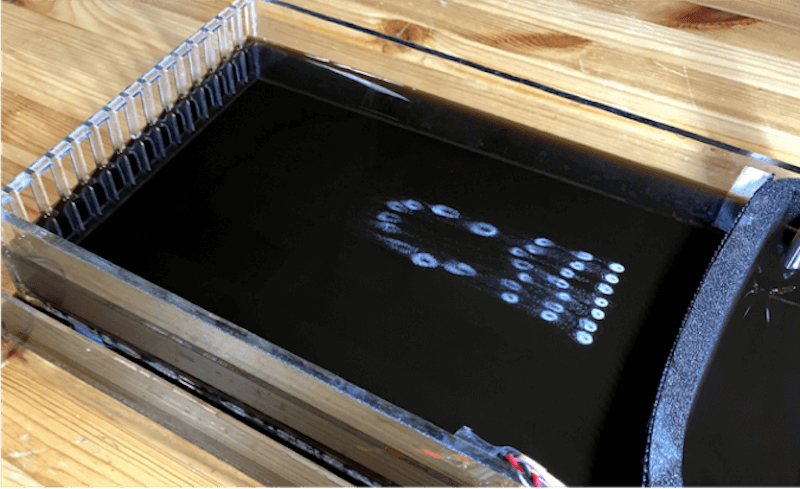
This ephemeral display shows messages using floating bubbles
Reading Time: < 1 minuteThis ephemeral display shows messages using floating bubbles Arduino Team — June 19th, 2020 While electronics and water don’t generally mix, researchers at Ochanomizu University in Japan have come up with an ephemeral display method that uses floating clusters of bubbles to show messages on a liquid surface. The device, known as…
-
Arduino-based inkjet printer slowly but surely gets the job done
Reading Time: 2 minutesArduino-based inkjet printer slowly but surely gets the job done Arduino Team — June 16th, 2020 As a prototype for a continuously printing art project, Norbert (AKA “HomoFaciens”) has built an inkjet printer that uses an Arduino and the mechanics of a discarded 3D printer to slowly generate black and white images. The…
-

This Mad-Eye relies on Arduino, not magic
Reading Time: 2 minutesThis Mad-Eye relies on Arduino, not magic Arduino Team — June 14th, 2020 In the Harry Potter series, professor Alastor Moody is known for wearing a very distinct prosthetic eyeball that moves in a “mad” manner. When Instructables member replayreb’s son decided to go to a costume party dressed as this character,…
-

No string attaches this tin can telephone
Reading Time: < 1 minuteNo string attaches this tin can telephone Arduino Team — June 9th, 2020 Geoff (AKA Facio Ergo Sum) has created a new take on the classic “tin can telephone,” using an Arduino and nRF24L01 transceiver to pass audio signals instead of a physical string. The build and testing process are outlined in…
-
Monitoring CPU usage with an Arc Reactor
Reading Time: 2 minutesMonitoring CPU usage with an Arc Reactor Arduino Team — June 3rd, 2020 Iron Man Arc Reactors have brought joy to makers of all ages, whether as something cool on a movie screen, as a hacked together light assembly, or even a cosplay prop created from a DIY kit. Michael Klements decided…
-

Meet TELEBOT, the terrifying telepresence robot
Reading Time: 2 minutesMeet TELEBOT, the terrifying telepresence robot Arduino Team — June 1st, 2020 The Internet has been perhaps more important than ever to keep us connected these days. Available technology, however, apparently wasn’t good enough for brothers Hunter and Josh Irving, who built their own telepresence robot using parts on-hand during their own…
-

GoodBoy is a robot dog that runs on Arduino
Reading Time: < 1 minuteGoodBoy is a robot dog that runs on Arduino Arduino Team — May 27th, 2020 Daniel Hingston wanted to build a four-legged walking robot for several years, and with current coronavirus restrictions he finally got his chance. His 3D-printed robodog, dubbed “GoodBoy,” is reminiscent of a miniature version of Boston Dynamics’ Spot,…
-

This cycling game is controlled by a real bike
Reading Time: < 1 minuteThis cycling game is controlled by a real bike Arduino Team — May 26th, 2020 What is one to do when stuck indoors due to bad weather or other circumstances, without the ability to ride your beloved bicycle? If you’re game designer Jelle Vermandere, you build your own cycling simulator as…
-

AirTouch: Pneumatic sensing for 3D prints
Reading Time: < 1 minuteAirTouch: Pneumatic sensing for 3D prints Arduino Team — May 22nd, 2020 3D printing allows us to make a wide variety of shapes, but adding interactive features generally means somehow strapping various electronics to them. The AirTouch project, however, presents an alternative option by enabling a fabricated object to sense up to…
-

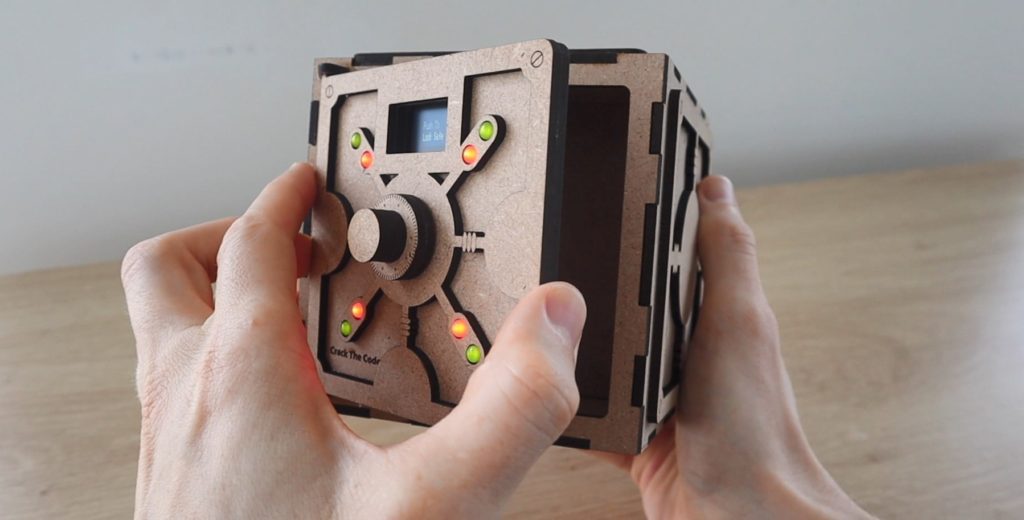
Create your own crack the code game with an Arduino-controlled safe
Reading Time: < 1 minuteCreate your own crack the code game with an Arduino-controlled safe Arduino Team — May 22nd, 2020 Michael Klements’ laser-cut, Arduino-controlled “safe” may not be the most secure model that you can find, but it certainly makes for a very entertaining puzzle. Users can place whatever “treasure” they want hidden inside, shut…
-
mechDOG, a 12-servo robotic pup
Reading Time: < 1 minutemechDOG, a 12-servo robotic pup Arduino Team — May 18th, 2020 Mech-Dickel Robotics has designed a beautiful quadruped robot dubbed mechDOG, which utilizes a dozen servos for motion. This gives each leg three degrees of freedom, allowing the cat-sized beast to travel a meter in 8.46 seconds. While it won’t break any…