Schlagwort: Uno R4
-

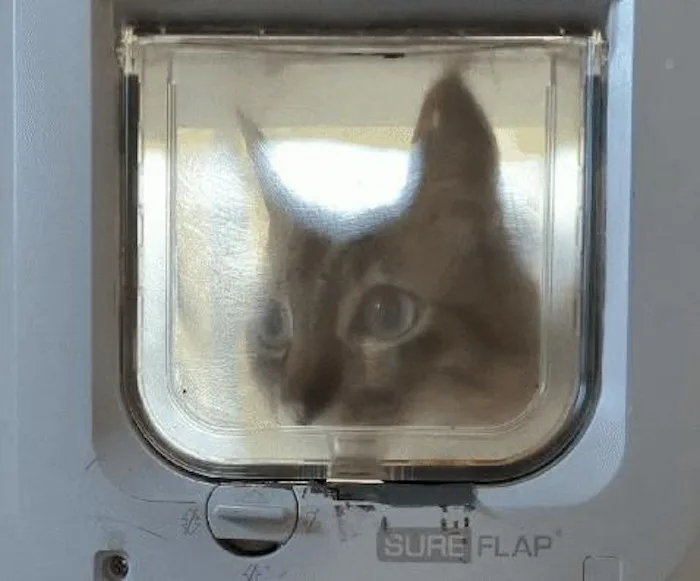
AI-powered pet flap tracks where your furry friend is
Reading Time: 2 minutesFor those who own a pet with the freedom to move between the house and the yard, keeping tabs on where they are can be a challenge, especially if there’s a pet flap involved. Instructables member “madmcu” wanted to know where their cat was whilst away from the house on vacation, so they came up…
-

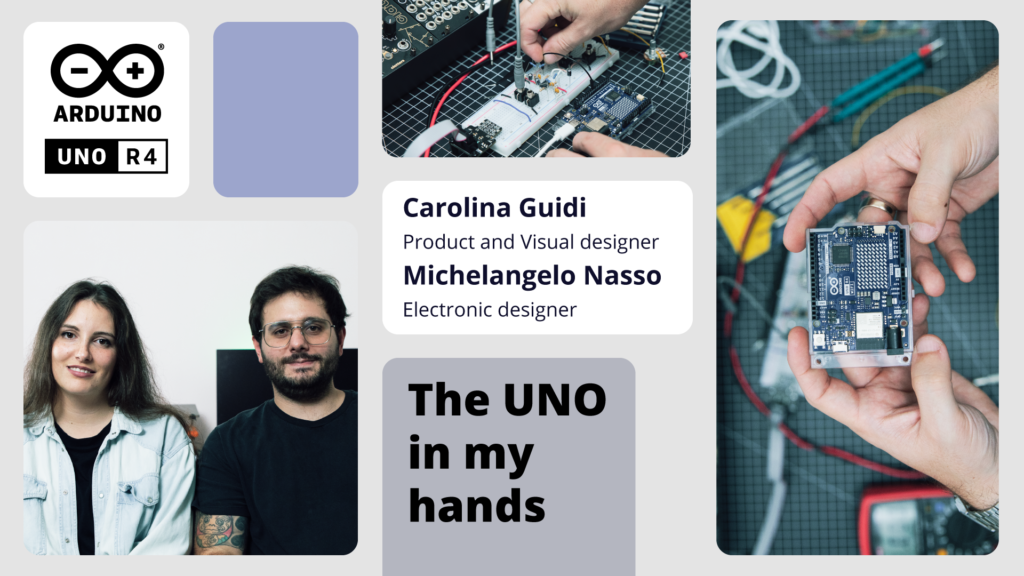
UNO R4 Stars: Meet Clatters Machines
Reading Time: 2 minutesThe launch of the Arduino UNO R4 marks a huge leap forward for our community. For us, it’s also the chance to celebrate the people who bring our ecosystem to life with their bright ideas, radiant enthusiasm, and shining insight. That is how the UNO R4 Stars blog post series began: to highlight makers who…
-
UNO R4 Stars: Meet Anouk Wipprecht
Reading Time: 3 minutesThe launch of the Arduino UNO R4 marks a huge leap forward for our community. For us, it’s also the chance to celebrate the people who bring our ecosystem to life with their bright ideas, radiant enthusiasm, and shining insight. That is how the UNO R4 Stars blog post series began: to highlight makers who…
-

A terrifying FNAF-style Mickey Mouse animatronic
Reading Time: 2 minutesThe copyright for Steamboat Willie famously expired at the beginning of this year. Steamboat Willie was the first appearance Mickey Mouse, so this copyright expiration is a big deal for Disney. Anyone will be able to use the character for the first time in history, as Mickey Mouse is now in the…
-
UNO R4 Stars: Meet Brenda Mboya
Reading Time: 3 minutesThe launch of the Arduino UNO R4 marks a huge leap forward for our community. For us, it’s also the chance to celebrate the people who bring our ecosystem to life with their bright ideas, radiant enthusiasm, and shining insight. That is how the UNO R4 Stars blog post series began: to highlight makers who…
-
UNO R4 Stars: Meet Michael Cheich
Reading Time: 3 minutesThe launch of the Arduino UNO R4 marks a huge leap forward for our community. For us, it’s also the chance to celebrate the people who bring our ecosystem to life with their bright ideas, radiant enthusiasm, and shining insight. That is how the UNO R4 Stars blog post series began: to highlight makers…
-
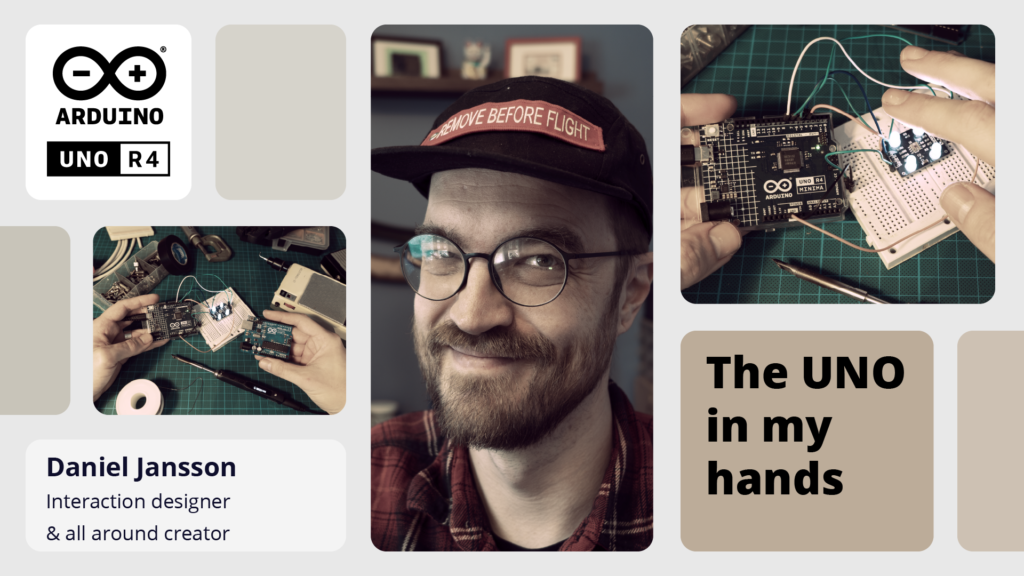
UNO R4 Stars: Meet Daniel Jansson
Reading Time: 3 minutesThe launch of the Arduino UNO R4 marks a huge leap forward for our community. For us, it’s also the chance to celebrate the people who bring our ecosystem to life with their bright ideas, radiant enthusiasm, and shining insight. That is how the UNO R4 Stars blog post series began: to highlight makers who…
-

Replicating two of history’s most iconic BattleBots with the Arduino UNO R4
Reading Time: 2 minutesWhen the BattleBots TV show first hit the airwaves in 2000, it felt like we were finally living in the future. Engineers and enterprising hobbyists from around the world would compete to build the most destructive robots, which then entered into televised mortal combat within an arena. The original series had many notable robots,…
-

Electronics embedded in elastomer enabled this exotic dress
Reading Time: 2 minutesIntegrating electronic components into textiles is usually a challenge, as they are rigid and most textile applications require flexibility. But new materials and fabrication processes are changing that dynamic. FashionTech designer Anouk Wipprecht and Chromatic 3D Materials were able to take advantage of those to develop this futuristic, motion-activated dress illuminated by…
-

Teaching an Arduino UNO R4-powered robot to navigate obstacles autonomously
Reading Time: 2 minutesThe rapid rise of edge AI capabilities on embedded targets has proven that relatively low-resource microcontrollers are capable of some incredible things. And following the recent release of the Arduino UNO R4 with its Renesas RA4M1 processor, the ceiling has gotten even higher as YouTuber Nikodem Bartnik has demonstrated with his lidar-equipped mobile robot. Bartnik’s…
-
UNO R4 Stars: Meet Tigris Li
Reading Time: 3 minutesThe launch of the Arduino UNO R4 marks a huge leap forward for our community. For us, it’s also the chance to celebrate the people who bring our ecosystem to life with their bright ideas, radiant enthusiasm, and shining insight. That is how the UNO R4 Stars blog post series began: to highlight makers who…
-

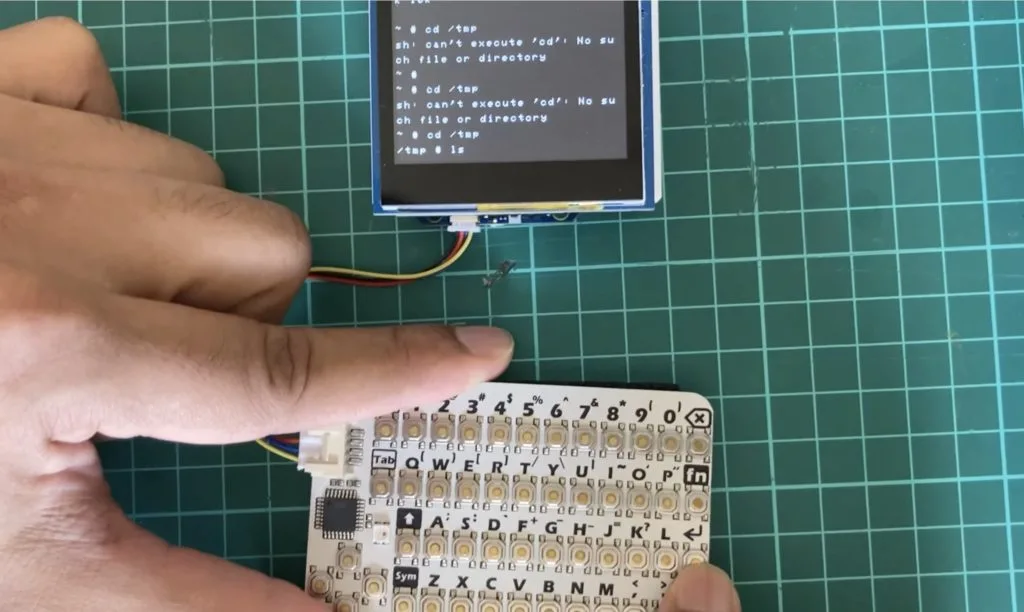
Arduino Nano ESP32 becomes an ultra-low-powered, pocket-sized Linux PC
Reading Time: 2 minutesWhile many users get them confused, microcontroller development boards and single-board computers are very different things. Single-board computers can run full operating systems, like your desktop PC or laptop does. Microcontroller development boards, like those from Arduino, are usually limited to simpler firmware. But as microcontrollers become more powerful, the line gets…
-
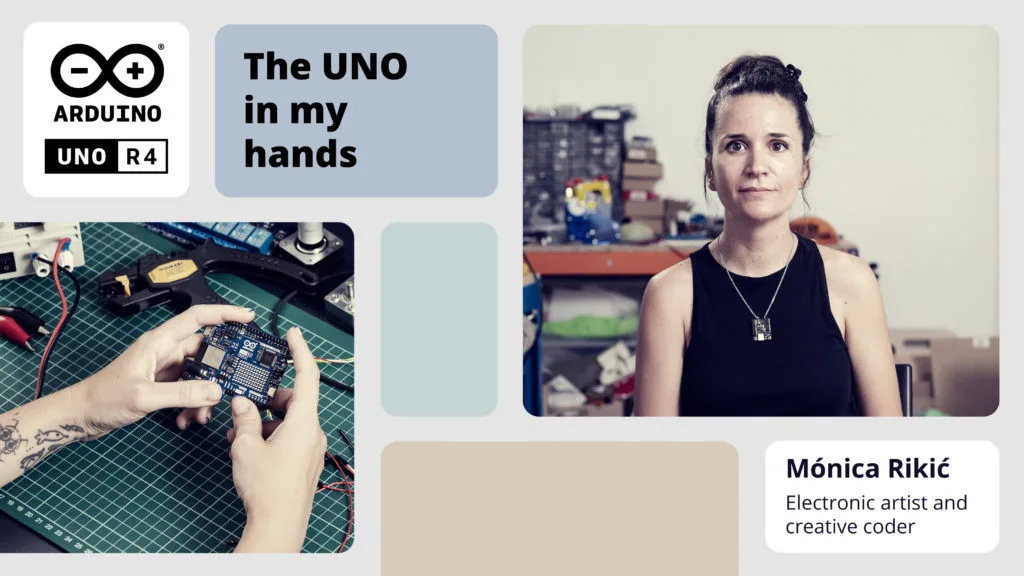
UNO R4 Stars: Meet Monica Rikic
Reading Time: 3 minutesThe launch of the Arduino UNO R4 marks a huge leap forward for our community. For us, it’s also the chance to celebrate the people who bring our ecosystem to life with their bright ideas, radiant enthusiasm, and shining insight. That is how the UNO R4 Stars blog post series began: to highlight makers who…
-

Turning a Barbie dreamhouse into a screamhouse with the Arduino UNO R4
Reading Time: 2 minutesWith its bright color scheme and generally upbeat tone, the recently released Barbie movie evokes many of the same feelings as the toy brand. In keeping with this idea, Jaimie and Jay of the Wicked Makers YouTube channel decided to take it in the opposite direction by transforming a Barbie dollhouse into a haunted mansion for…
-
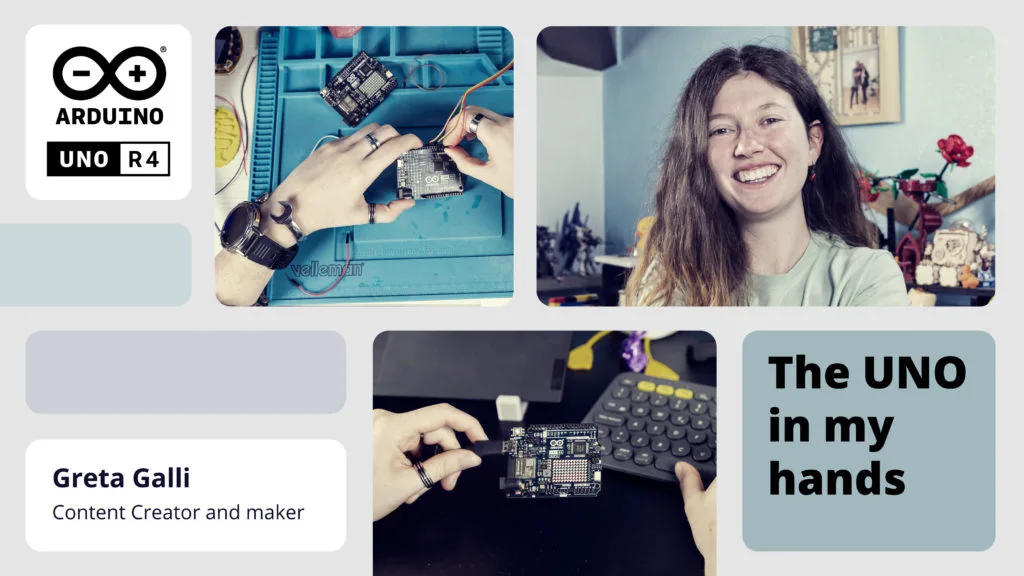
UNO R4 Stars: Meet Greta Galli
Reading Time: 2 minutesThe launch of the Arduino UNO R4 marks a huge leap forward for our community. For us, it’s also the chance to celebrate the people who bring our ecosystem to life with their bright ideas, radiant enthusiasm, and shining insight. That is how the UNO R4 Stars blog post series began: to highlight makers who…
-

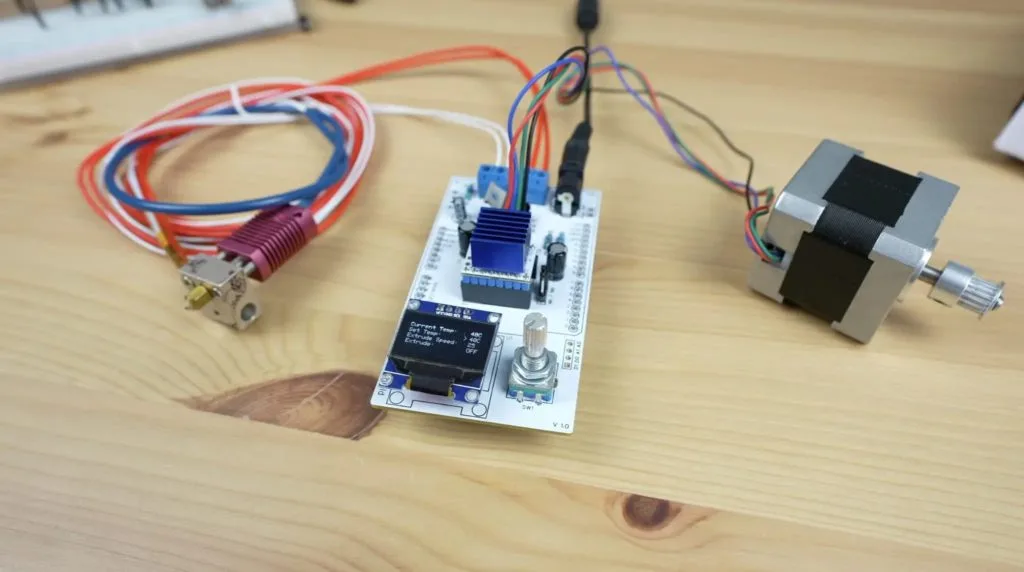
Building a dedicated 3D printer hot end controller with the Arduino UNO R4 WiFi
Reading Time: 2 minutes3D printers need to set their hot ends to a very specific temperatures suited to the filament material and keep them at those temperatures throughout the printing process. Most use PID (Proportional-Integral-Derivative) control for that purpose, which modulates power according to an algorithm that prioritizes stability and prevents feedback oscillations. But what…
-
UNO R4 Stars: Meet Gustavo Silveira
Reading Time: 2 minutesThe launch of the Arduino UNO R4 marks a huge leap forward for our community. For us, it’s also the chance to celebrate the people who bring our ecosystem to life with their bright ideas, radiant enthusiasm, and shining insight. That is how the UNO R4 Stars blog post series began: to…
-

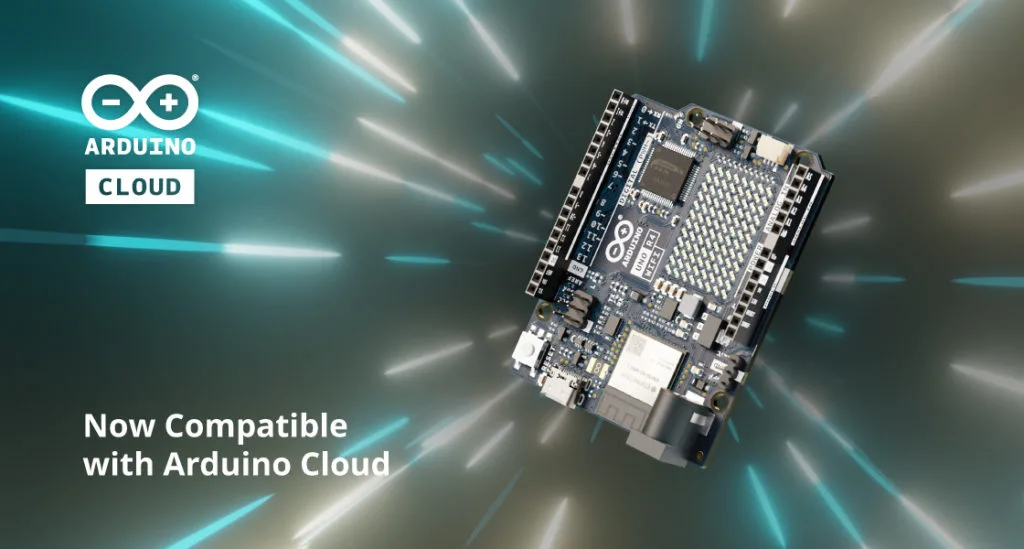
Introducing UNO R4 WiFi support in the Arduino Cloud
Reading Time: 2 minutesWe are excited to announce that the Arduino Cloud now supports the UNO R4 WiFi board, providing makers with seamless connectivity and enhanced features. Building upon the recent release of the much-anticipated UNO R4 in our store, this new integration significantly amplifies the capabilities of the Arduino Cloud. The UNO R4 WiFi…
-

Predicting soccer games with ML on the UNO R4 Minima
Reading Time: 2 minutesBased on the Renesas RA4M1 microcontroller, the new Arduino UNO R4 boasts 16x the RAM, 8x the flash, and a much faster CPU compared to the previous UNO R3. This means that unlike its predecessor, the R4 is capable of running machine learning at the edge to perform inferencing of incoming data.…
-

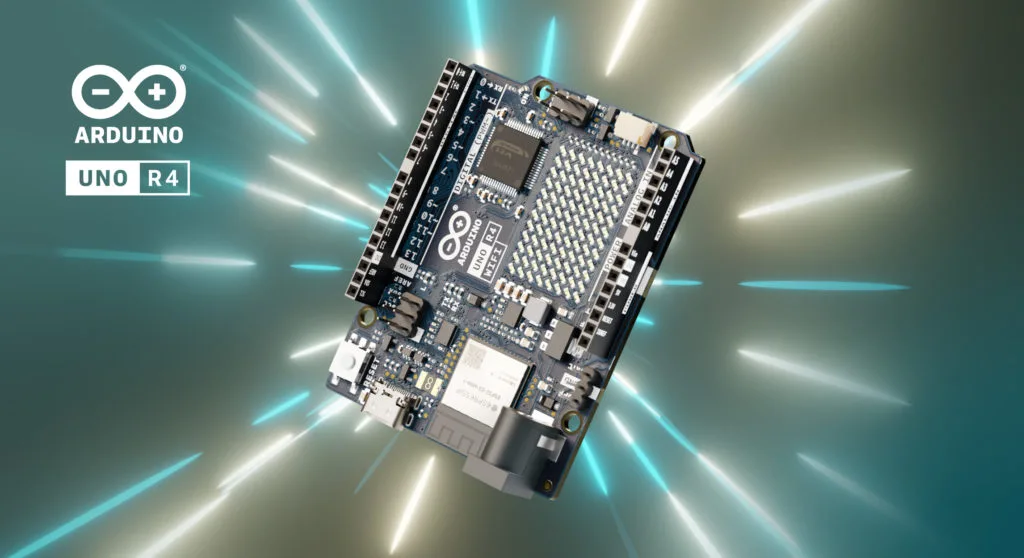
UNO R4: The new dimension of making
Reading Time: 3 minutesThe revolutionary UNO R4, announced on Arduino Day, is now available on the Arduino Store! The fourth version of the iconic, beloved UNO adds a whole new dimension to the world of DIY and making revolutionized by the simple 8-bit microcontroller over a decade ago. Take your maker potential to new heights:…
-
Early adopters: We want you!
Reading Time: < 1 minuteDuring Arduino Day 2023, we announced the new UNO R4 and we are now looking for contributors from the community to help support the portability of libraries and open source projects based on an AVR Arduino boards such as the UNO R3, Mega, Leonardo, and Nano. The Arduino UNO R4 is…