This post is written by Jan Jongboom and Dominic Pajak.
Running machine learning (ML) on microcontrollers is one of the most exciting developments of the past years, allowing small battery-powered devices to detect complex motions, recognize sounds, or find anomalies in sensor data. To make building and deploying these models accessible to every embedded developer we’re launching first-class support for the Arduino Nano 33 BLE Sense and other 32-bit Arduino boards in Edge Impulse.
The trend to run ML on microcontrollers is called Embedded ML or Tiny ML. It means devices can make smart decisions without needing to send data to the cloud – great from an efficiency and privacy perspective. Even powerful deep learning models (based on artificial neural networks) are now reaching microcontrollers. This past year great strides were made in making deep learning models smaller, faster and runnable on embedded hardware through projects like TensorFlow Lite Micro, uTensor and Arm’s CMSIS-NN; but building a quality dataset, extracting the right features, training and deploying these models is still complicated.
Using Edge Impulse you can now quickly collect real-world sensor data, train ML models on this data in the cloud, and then deploy the model back to your Arduino device. From there you can integrate the model into your Arduino sketches with a single function call. Your sensors are then a whole lot smarter, being able to make sense of complex events in the real world. The built-in examples allow you to collect data from the accelerometer and the microphone, but it’s easy to integrate other sensors with a few lines of code.
Download the Arduino Nano 33 BLE Sense firmware — this is a special firmware package (source code) that contains all code to quickly gather data from its sensors. Launch the flash script for your platform to flash the firmware.
Launch the Edge Impulse daemon to connect your board to Edge Impulse. Open a terminal or command prompt and run:
Your device now shows in the Edge Impulse studio on the Devices tab, ready for you to collect some data and build a model.
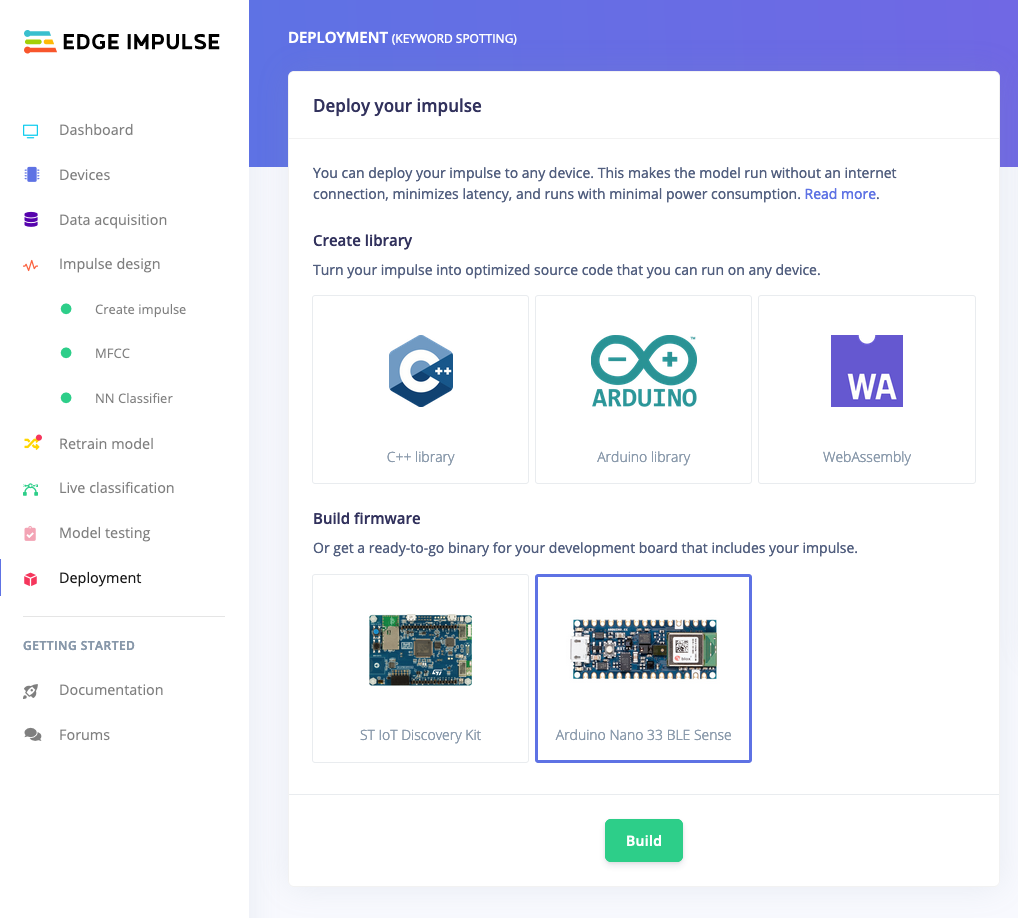
Once you’re done you can deploy your model back to the Arduino Nano 33 BLE Sense. Either as a binary which includes your full ML model, or as an Arduino library which you can integrate in any sketch.
Deploying to Arduino from Edge Impulse
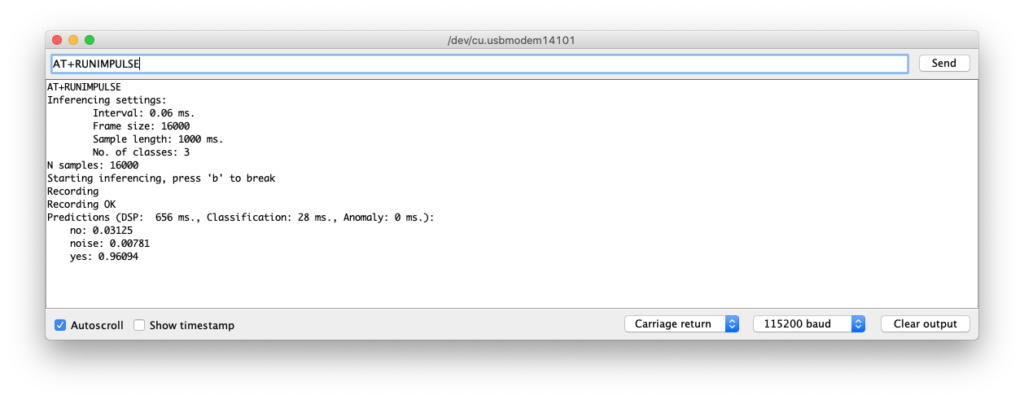
Your machine learning model is now running on the Arduino board. Open the serial monitor and run `AT+RUNIMPULSE` to start classifying real world data!
Keyword spotting on the Arduino Nano 33 BLE Sense
Integrates with your favorite Arduino platform
We’ve launched with the Arduino Nano 33 BLE Sense, but you can also integrate Edge Impulse with your favourite Arduino platform. You can easily collect data from any sensor and development board using the Data forwarder. This is a small application that reads data over serial and sends it to Edge Impulse. All you need is a few lines of code in your sketch (here’s an example).
After you’ve built a model you can easily export your model as an Arduino library. This library will run on any Arm-based Arduino platform including the Arduino MKR family or Arduino Nano 33 IoT, providing it has enough RAM to run your model. You can now include your ML model in any Arduino sketch with just a few lines of code. After you’ve added the library to the Arduino IDE you can find an example on integrating the model under Files > Examples > Your project – Edge Impulse > static_buffer.
To run your models as fast and energy-efficiently as possible we automatically leverage the hardware capabilities of your Arduino board – for example the signal processing extensions available on the Arm Cortex-M4 based Arduino Nano BLE Sense or more powerful Arm Cortex-M7 based Arduino Portenta H7. We also leverage the optimized neural network kernels that Arm provides in CMSIS-NN.
A path to production
This release is the first step in a really exciting collaboration. We believe that many embedded applications can benefit from ML today, whether it’s for predictive maintenance (‘this machine is starting to behave abnormally’), to help with worker safety (‘fall detected’), or in health care (‘detected early signs of a potential infection’). Using Edge Impulse with the Arduino MKR family you can already quickly deploy simple ML based applications combined with LoRa, NB-IoT cellular, or WiFi connectivity. Over the next months we’ll also add integrations for the Arduino Portenta H7 on Edge Impulse, making higher performance industrial applications possible.
On a related note: if you have ideas on how TinyML can help to slow down or detect the COVID-19 virus, then join the UNDP COVID-19 Detect and Protect Challenge. For inspiration, see Kartik Thakore’s blog post on cough detection with the Arduino Nano 33 BLE Sense and Edge Impulse.
We can’t wait to see what you’ll build!
Jan Jongboom is the CTO and co-founder of Edge Impulse. He built his first IoT projects using the Arduino Starter Kit.
Dominic Pajak is VP Business Development at Arduino.
This post was originally published by Sandeep Mistry and Dominic Pajakon the TensorFlow blog.
Arduino is on a mission to make machine learning simple enough for anyone to use. We’ve been working with the TensorFlow Lite team over the past few months and are excited to show you what we’ve been up to together: bringing TensorFlow Lite Micro to the Arduino Nano 33 BLE Sense. In this article, we’ll show you how to install and run several new TensorFlow Lite Micro examples that are now available in the Arduino Library Manager.
The first tutorial below shows you how to install a neural network on your Arduino board to recognize simple voice commands.
Example 1: Running the pre-trained micro_speech inference example.
Next, we’ll introduce a more in-depth tutorial you can use to train your own custom gesture recognition model for Arduino using TensorFlow in Colab. This material is based on a practical workshop held by Sandeep Mistry and Don Coleman, an updated version of which is now online.
If you have previous experience with Arduino, you may be able to get these tutorials working within a couple of hours. If you’re entirely new to microcontrollers, it may take a bit longer.
Example 2: Training your own gesture classification model.
We’re excited to share some of the first examples and tutorials, and to see what you will build from here. Let’s get started!
Note: The following projects are based on TensorFlow Lite for Microcontrollers which is currently experimental within the TensorFlow repo. This is still a new and emerging field!
Microcontrollers and TinyML
Microcontrollers, such as those used on Arduino boards, are low-cost, single chip, self-contained computer systems. They’re the invisible computers embedded inside billions of everyday gadgets like wearables, drones, 3D printers, toys, rice cookers, smart plugs, e-scooters, washing machines. The trend to connect these devices is part of what is referred to as the Internet of Things.
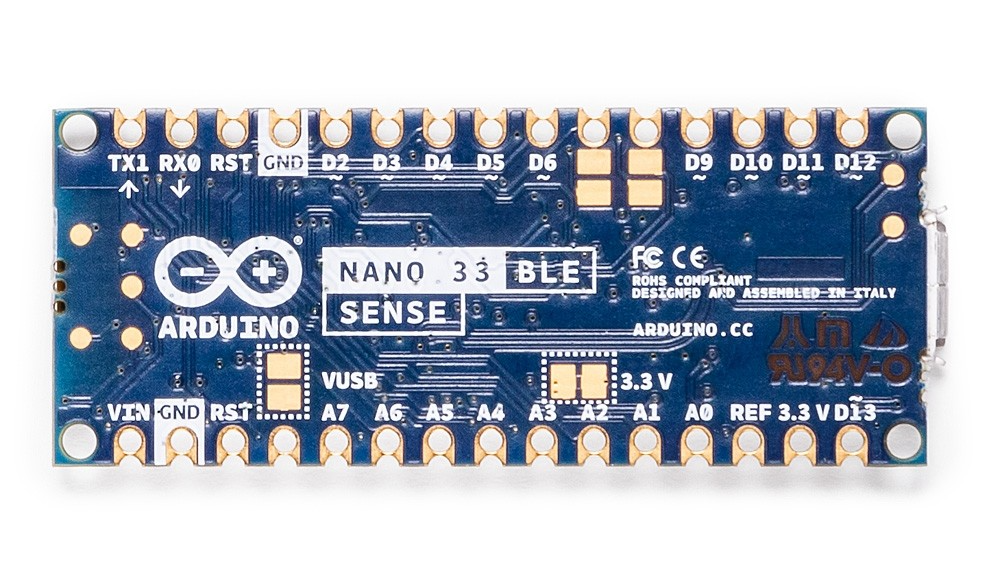
Arduino is an open-source platform and community focused on making microcontroller application development accessible to everyone. The board we’re using here has an Arm Cortex-M4 microcontroller running at 64 MHz with 1MB Flash memory and 256 KB of RAM. This is tiny in comparison to cloud, PC, or mobile but reasonable by microcontroller standards.
Arduino Nano 33 BLE Sense board is smaller than a stick of gum.
There are practical reasons you might want to squeeze ML on microcontrollers, including:
Function – wanting a smart device to act quickly and locally (independent of the Internet).
Cost – accomplishing this with simple, lower cost hardware.
Privacy – not wanting to share all sensor data externally.
Efficiency – smaller device form-factor, energy-harvesting or longer battery life.
There’s a final goal which we’re building towards that is very important:
Machine learning can make microcontrollers accessible to developers who don’t have a background in embedded development
On the machine learning side, there are techniques you can use to fit neural network models into memory constrained devices like microcontrollers. One of the key steps is the quantization of the weights from floating point to 8-bit integers. This also has the effect of making inference quicker to calculate and more applicable to lower clock-rate devices.
TinyML is an emerging field and there is still work to do – but what’s exciting is there’s a vast unexplored application space out there. Billions of microcontrollers combined with all sorts of sensors in all sorts of places which can lead to some seriously creative and valuable TinyML applications in the future.
What you need to get started
The Arduino Nano 33 BLE Sense has a variety of onboard sensors meaning potential for some cool TinyML applications:
Environmental – temperature, humidity and pressure
Light – brightness, color and object proximity
Unlike classic Arduino Uno, the board combines a microcontroller with onboard sensors which means you can address many use cases without additional hardware or wiring. The board is also small enough to be used in end applications like wearables. As the name suggests it has Bluetooth LE connectivity so you can send data (or inference results) to a laptop, mobile app or other BLE boards and peripherals.
Tip: Sensors on a USB stick – Connecting the BLE Sense board over USB is an easy way to capture data and add multiple sensors to single board computers without the need for additional wiring or hardware – a nice addition to a Raspberry Pi, for example.
TensorFlow Lite for Microcontrollers examples
The inference examples for TensorFlow Lite for Microcontrollers are now packaged and available through the Arduino Library manager making it possible to include and run them on Arduino in a few clicks. In this section we’ll show you how to run them. The examples are:
micro_speech – speech recognition using the onboard microphone
magic_wand – gesture recognition using the onboard IMU
person_detection – person detection using an external ArduCam camera
For more background on the examples you can take a look at the source in the TensorFlow repository. The models in these examples were previously trained. The tutorials below show you how to deploy and run them on an Arduino. In the next section, we’ll discuss training.
How to run the examples using Arduino Create web editor
Once you connect your Arduino Nano 33 BLE Sense to your desktop machine with a USB cable you will be able to compile and run the following TensorFlow examples on the board by using the Arduino Create web editor:
Compiling an example from the Arduino_TensorFlowLite library.
Focus on the speech recognition example: micro_speech
One of the first steps with an Arduino board is getting the LED to flash. Here, we’ll do it with a twist by using TensorFlow Lite Micro to recognise voice keywords. It has a simple vocabulary of “yes” and “no”. Remember this model is running locally on a microcontroller with only 256KB of RAM, so don’t expect commercial ‘voice assistant’ level accuracy – it has no Internet connection and on the order of 2000x less local RAM available.
Note the board can be battery powered as well. As the Arduino can be connected to motors, actuators and more this offers the potential for voice-controlled projects.
Running the micro_speech example.
How to run the examples using the Arduino IDE
Alternatively you can use try the same inference examples using Arduino IDE application.
First, follow the instructions in the next section Setting up the Arduino IDE.
In the Arduino IDE, you will see the examples available via the File > Examples > Arduino_TensorFlowLite menu in the ArduinoIDE.
Select an example and the sketch will open. To compile, upload and run the examples on the board, and click the arrow icon:
For advanced users who prefer a command line, there is also the arduino-cli.
Training a TensorFlow Lite Micro model for Arduino
Gesture classification on Arduino BLE 33 Nano Sense, output as emojis.
Next we will use ML to enable the Arduino board to recognise gestures. We’ll capture motion data from the Arduino Nano 33 BLE Sense board, import it into TensorFlow to train a model, and deploy the resulting classifier onto the board.
The idea for this tutorial was based on Charlie Gerard’s awesome Play Street Fighter with body movements using Arduino and Tensorflow.js. In Charlie’s example, the board is streaming all sensor data from the Arduino to another machine which performs the gesture classification in Tensorflow.js. We take this further and “TinyML-ifiy” it by performing gesture classification on the Arduino board itself. This is made easier in our case as the Arduino Nano 33 BLE Sense board we’re using has a more powerful Arm Cortex-M4 processor, and an on-board IMU.
We’ve adapted the tutorial below, so no additional hardware is needed – the sampling starts on detecting movement of the board. The original version of the tutorial adds a breadboard and a hardware button to press to trigger sampling. If you want to get into a little hardware, you can follow that version instead.
Setting up the Arduino IDE
Following the steps below sets up the Arduino IDE application used to both upload inference models to your board and download training data from it in the next section. There are a few more steps involved than using Arduino Create web editor because we will need to download and install the specific board and libraries in the Arduino IDE.
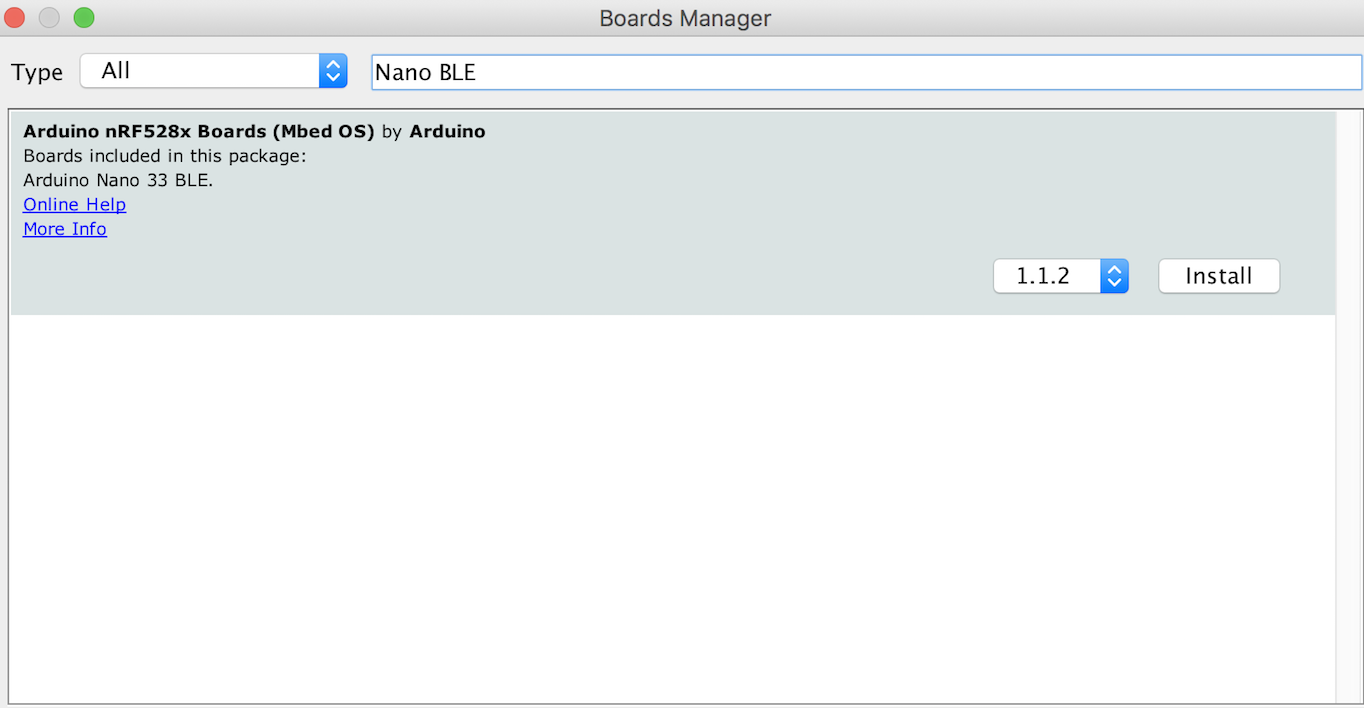
In the Arduino IDE menu select Tools > Board > Boards Manager…
Search for “Nano BLE” and press install on the board
It will take several minutes to install
When it’s done close the Boards Manager window
Now go to the Library Manager Tools > Manage Libraries…
Search for and install the Arduino_TensorFlowLite library
Next search for and install the Arduino_LSM9DS1 library:
Finally, plug the micro USB cable into the board and your computer
Choose the board Tools > Board > Arduino Nano 33 BLE
Choose the port Tools > Port > COM5 (Arduino Nano 33 BLE)
Note that the actual port name may be different on your computer
First, we need to capture some training data. You can capture sensor data logs from the Arduino board over the same USB cable you use to program the board with your laptop or PC.
Arduino boards run small applications (also called sketches) which are compiled from .ino format Arduino source code, and programmed onto the board using the Arduino IDE or Arduino Create.
We’ll be using a pre-made sketch IMU_Capture.ino which does the following:
Monitor the board’s accelerometer and gyroscope
Trigger a sample window on detecting significant linear acceleration of the board
Sample for one second at 119Hz, outputting CSV format data over USB
Loop back and monitor for the next gesture
The sensors we choose to read from the board, the sample rate, the trigger threshold, and whether we stream data output as CSV, JSON, binary or some other format are all customizable in the sketch running on the Arduino. There is also scope to perform signal preprocessing and filtering on the device before the data is output to the log – this we can cover in another blog. For now, you can just upload the sketch and get sampling.
To program the board with this sketch in the Arduino IDE:
Compile and upload it to the board with Sketch > Upload
Visualizing live sensor data log from the Arduino board
With that done we can now visualize the data coming off the board. We’re not capturing data yet this is just to give you a feel for how the sensor data capture is triggered and how long a sample window is. This will help when it comes to collecting training samples.
In the Arduino IDE, open the Serial Plotter Tools > Serial Plotter
If you get an error that the board is not available, reselect the port:
Tools > Port > portname (Arduino Nano 33 BLE)
Pick up the board and practice your punch and flex gestures
You’ll see it only sample for a one second window, then wait for the next gesture
You should see a live graph of the sensor data capture (see GIF below)
Arduino IDE Serial Plotter will show a live graph of CSV data output from your board.
When you’re done be sure to close the Serial Plotter window – this is important as the next step won’t work otherwise.
Capturing gesture training data
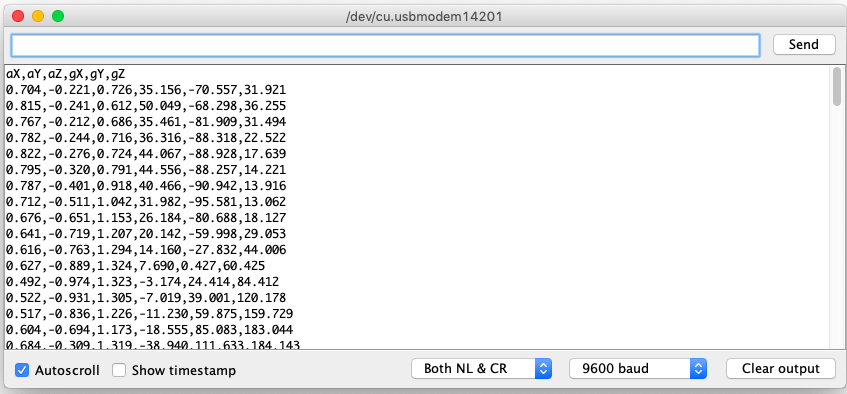
To capture data as a CSV log to upload to TensorFlow, you can use Arduino IDE > Tools > Serial Monitor to view the data and export it to your desktop machine:
Reset the board by pressing the small white button on the top
Pick up the board in one hand (picking it up later will trigger sampling)
In the Arduino IDE, open the Serial Monitor Tools > Serial Monitor
If you get an error that the board is not available, reselect the port:
Tools > Port > portname (Arduino Nano 33 BLE)
Make a punch gesture with the board in your hand (Be careful whilst doing this!)
Make the outward punch quickly enough to trigger the capture
Return to a neutral position slowly so as not to trigger the capture again
Repeat the gesture capture step 10 or more times to gather more data
Copy and paste the data from the Serial Console to new text file called punch.csv
Clear the console window output and repeat all the steps above, this time with a flex gesture in a file called flex.csv
Make the inward flex fast enough to trigger capture returning slowly each time
Note the first line of your two csv files should contain the fields aX,aY,aZ,gX,gY,gZ.
Linux tip: If you prefer you can redirect the sensor log output from the Arduino straight to a .csv file on the command line. With the Serial Plotter / Serial Monitor windows closed use:
$ cat /dev/cu.usbmodem[nnnnn] > sensorlog.csv
Training in TensorFlow
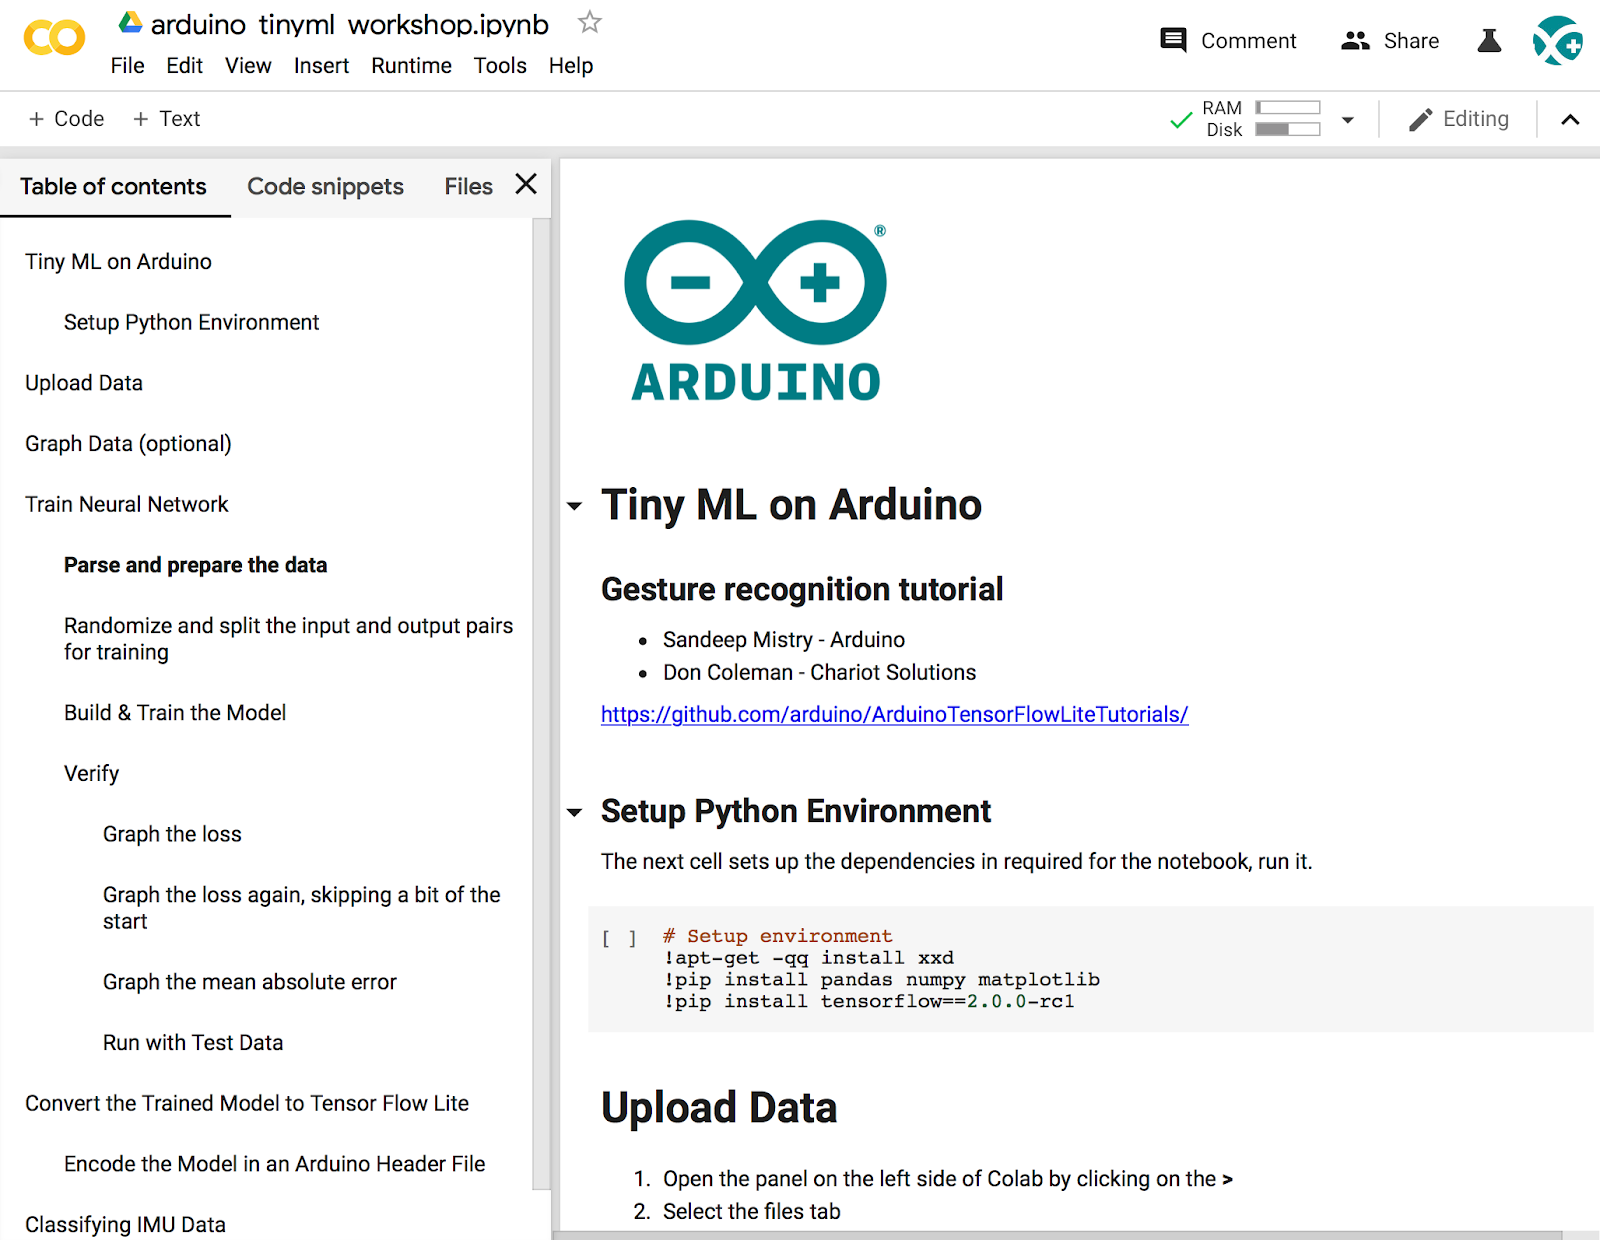
We’re going to use Google Colab to train our machine learning model using the data we collected from the Arduino board in the previous section. Colab provides a Jupyter notebook that allows us to run our TensorFlow training in a web browser.
Arduino gesture recognition training colab.
The colab will step you through the following:
Set up Python environment
Upload the punch.csv and flex.csv data
Parse and prepare the data
Build and train the model
Convert the trained model to TensorFlow Lite
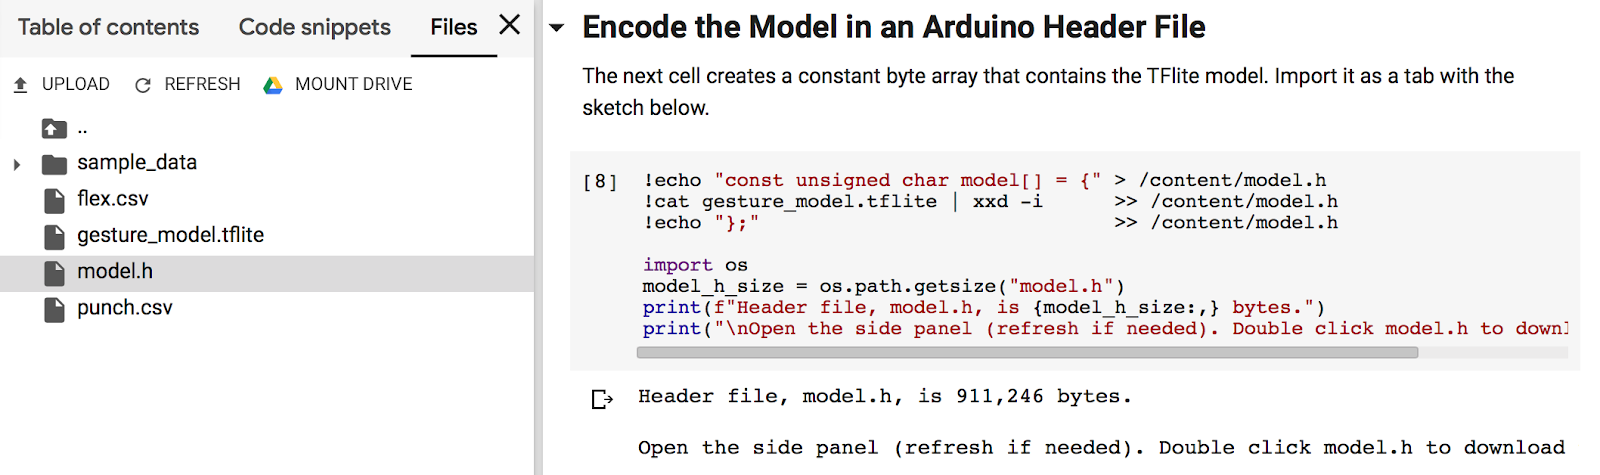
Encode the model in an Arduino header file
The final step of the colab is generates the model.h file to download and include in our Arduino IDE gesture classifier project in the next section:
Create a new tab in the IDE. When asked name it model.h
Open the model.h tab and paste in the version you downloaded from Colab
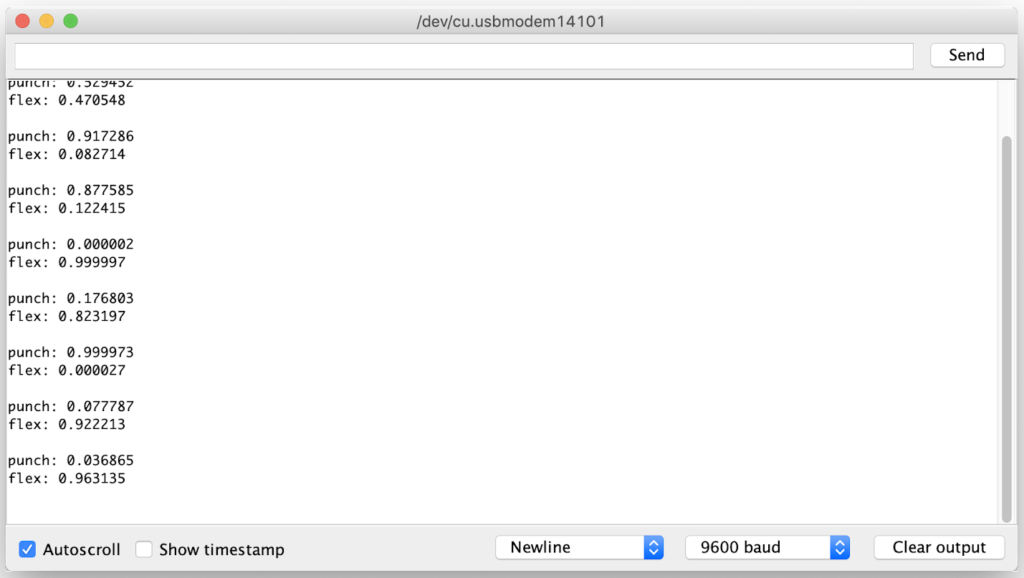
Upload the sketch: Sketch > Upload
Open the Serial Monitor: Tools > Serial Monitor
Perform some gestures
The confidence of each gesture will be printed to the Serial Monitor (0 = low confidence, 1 = high confidence)
Congratulations you’ve just trained your first ML application for Arduino!
For added fun the Emoji_Button.ino example shows how to create a USB keyboard that prints an emoji character in Linux and macOS. Try combining the Emoji_Button.ino example with the IMU_Classifier.ino sketch to create a gesture controlled emoji keyboard.
Conclusion
It’s an exciting time with a lot to learn and explore in TinyML. We hope this blog has given you some idea of the potential and a starting point to start applying it in your own projects. Be sure to let us know what you build and share it with the Arduino community.
Um dir ein optimales Erlebnis zu bieten, verwenden wir Technologien wie Cookies, um Geräteinformationen zu speichern und/oder darauf zuzugreifen. Wenn du diesen Technologien zustimmst, können wir Daten wie das Surfverhalten oder eindeutige IDs auf dieser Website verarbeiten. Wenn du deine Einwillligung nicht erteilst oder zurückziehst, können bestimmte Merkmale und Funktionen beeinträchtigt werden.
Funktional
Immer aktiv
Die technische Speicherung oder der Zugang ist unbedingt erforderlich für den rechtmäßigen Zweck, die Nutzung eines bestimmten Dienstes zu ermöglichen, der vom Teilnehmer oder Nutzer ausdrücklich gewünscht wird, oder für den alleinigen Zweck, die Übertragung einer Nachricht über ein elektronisches Kommunikationsnetz durchzuführen.
Vorlieben
Die technische Speicherung oder der Zugriff ist für den rechtmäßigen Zweck der Speicherung von Präferenzen erforderlich, die nicht vom Abonnenten oder Benutzer angefordert wurden.
Statistiken
Die technische Speicherung oder der Zugriff, der ausschließlich zu statistischen Zwecken erfolgt.Die technische Speicherung oder der Zugriff, der ausschließlich zu anonymen statistischen Zwecken verwendet wird. Ohne eine Vorladung, die freiwillige Zustimmung deines Internetdienstanbieters oder zusätzliche Aufzeichnungen von Dritten können die zu diesem Zweck gespeicherten oder abgerufenen Informationen allein in der Regel nicht dazu verwendet werden, dich zu identifizieren.
Marketing
Die technische Speicherung oder der Zugriff ist erforderlich, um Nutzerprofile zu erstellen, um Werbung zu versenden oder um den Nutzer auf einer Website oder über mehrere Websites hinweg zu ähnlichen Marketingzwecken zu verfolgen.