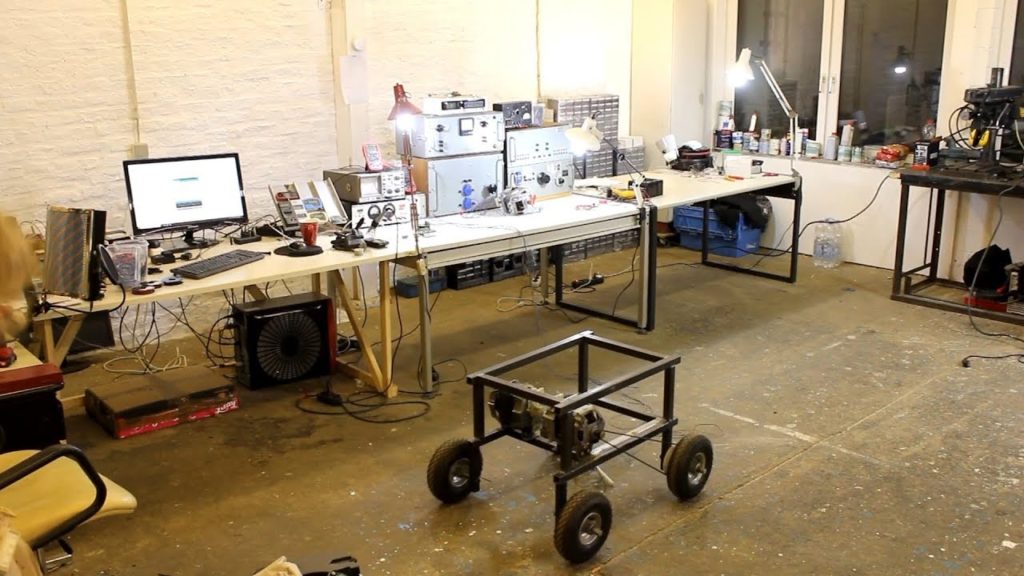
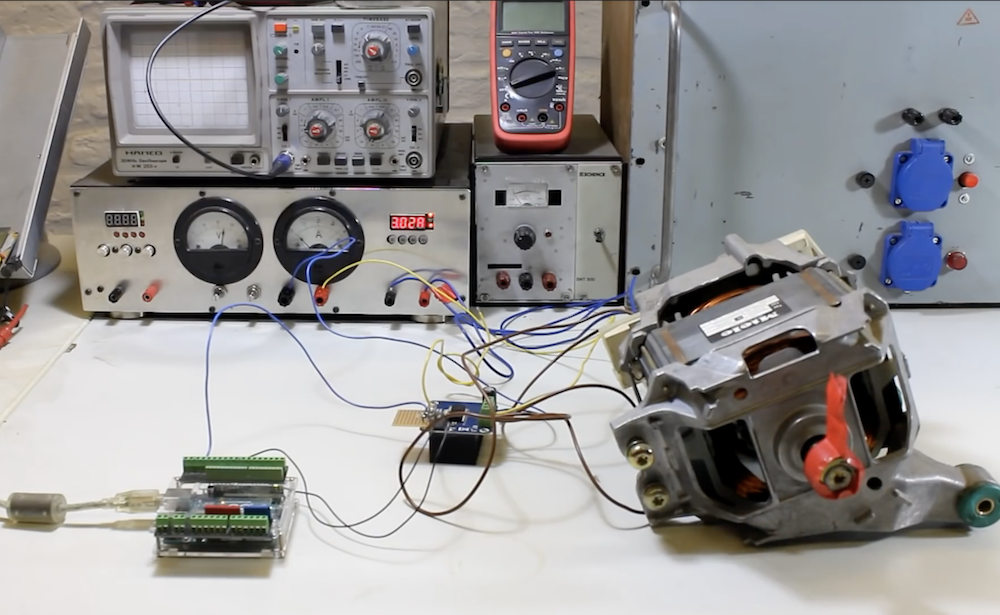
Powering small robots could be considered the specialty of Arduino boards, but what if you want to control something much bigger? There are, of course, ways to do this, but larger motors are naturally more difficult to source. This hasn’t deterred YouTuber The Post Apocalyptic Inventor, however, who has been exploring the use of European-style washing machine motors to drive a large steel tubing robot chassis.
While the project is not yet finished, he’s turned to an Arduino Uno for experimental control along with a variety of other components to provide the proper power.
Be sure to check out video below of this robot-in-progress if you’re interested in “beefing up” your next project!
An Arduino-controlled robotic button dispenser for your next event
Arduino Team — February 12th, 2019
Giving away buttons at Maker Faires or trade shows is a great way to promote your brand, but what if you want to dispense these trinkets in style? That was the idea behind this automated button dispenser mechanism from Jeremy S. Cook, which drops buttons one at a time, and uses a capacitive sensor to detect when someone presses a marked “activation circle” on its base.
When triggered, the Arduino Uno commands two servo motors in sequence to release the lower button, while holding the other stacked buttons in place. The button-in-motion then proceeds down a 3D-printed slide, shooting out into the receiver’s hands—or floor depending on one’s reflexes!
Be sure to check out the build process in the video below, and you can find code/print files on GitHub if you’d like to make your own!
Fluoride can be healthy in certain concentrations, but above a certain level it instead has the opposite effect, causing serious dental and bone diseases. While the cost and benefit of any substance use has to be carefully weighted, up until now, verification that water source isn’t contaminated—above just 2 ppm—has been the purview of well-equipped laboratories.
The prototype device used with SION-105 to detect fluoride anions in drinking water (Photo: Marie-Thé and Etienne Roux)
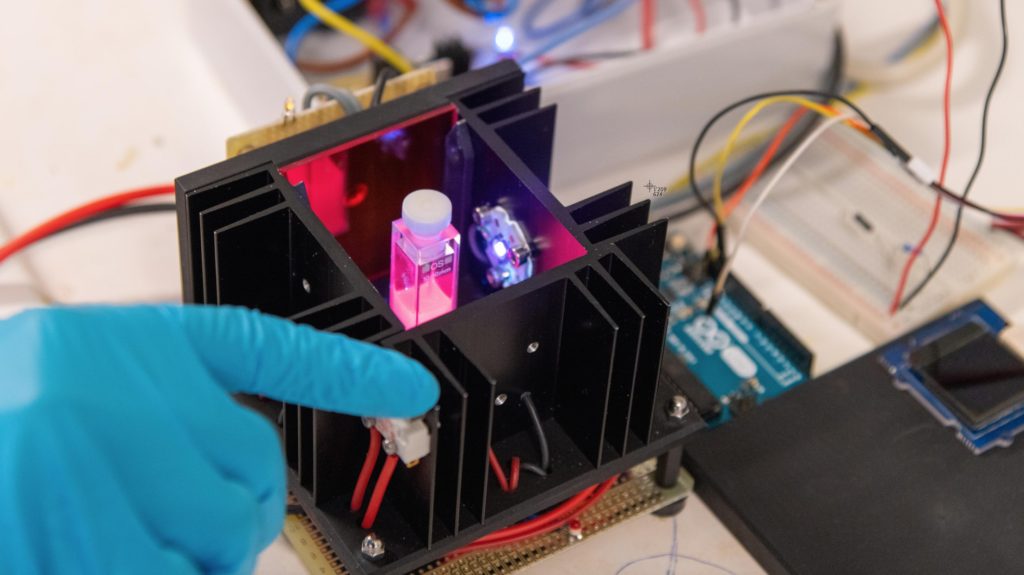
Researchers at EPFL in Lausanne, Switzerland, however, have come up with a technique that can accurately determine fluoride concentrations using only a few drops of water. The key to this development is a new compound known as SION-105, which is normally luminescent, but darkens when it encounters fluoride. This means that instead of more expensive laboratory equipment, UV LEDs can be used with a photodiode to quantitatively measure the substance’s appearance, and thus the quantity of fluoride in drinking water.
A photograph of SION-105 suspended in solvents with (L) and without (R) fluoride ion contamination. (Photo: Mish Ebrahim)
From the images in EPFL’s write-up, the prototype test apparatus appears to utilize several commonly available components, including an Arduino Uno and small OLED display for user feedback.
Published in the Journal of the American Chemical Society (JACS), the device is named SION-105, is portable, considerably cheaper than current methods, and can be used on-site by virtually anyone.
The key to the device is the design of a novel material that the scientists synthesized (and after which the device is named). The material belongs to the family of “metal-organic frameworks” (MOFs), compounds made up of a metal ion (or a cluster of metal ions) connected to organic ligands, thus forming one-, two-, or three-dimensional structures. Because of their structural versatility, MOFs can be used in an ever-growing list of applications, e.g. separating petrochemicals, detoxing water, and getting hydrogen or even gold out of it.
SION-105 is luminescent by default, but darkens when it encounters fluoride ions. “Add a few droplets of water and by monitoring the color change of the MOF one can say whether it is safe to drink the water or not,” explains Mish Ebrahim, the paper’s first author. “This can now be done on-site, without any chemical expertise.”
After purchasing a new television, maker Andreas Spiess’ remote no longer worked seamlessly with the controller his family had been using. While a universal remote could have solved the problem, in order to keep things simple to use, he instead came up with an infrared “babel fish” signal translator—named after the language translation animal Hitchhiker’s Guide to the Galaxy’s.
The device receives infrared signals from the original remote, then uses an Arduino Nano to pass the properly translated pulses on to his TV and receiver. A 3W IR diode transmits these new signals with the help of an N-channel MOSFET, giving it enough power to control each component, even without the proper line-of-sight orientation.
It’s a hack that could be useful in many situations, and Speiss goes over how it was made, along with design requirements in the video below.
Visualize tunes with James Bruton’s laser projector graphic EQ display
Arduino Team — February 7th, 2019
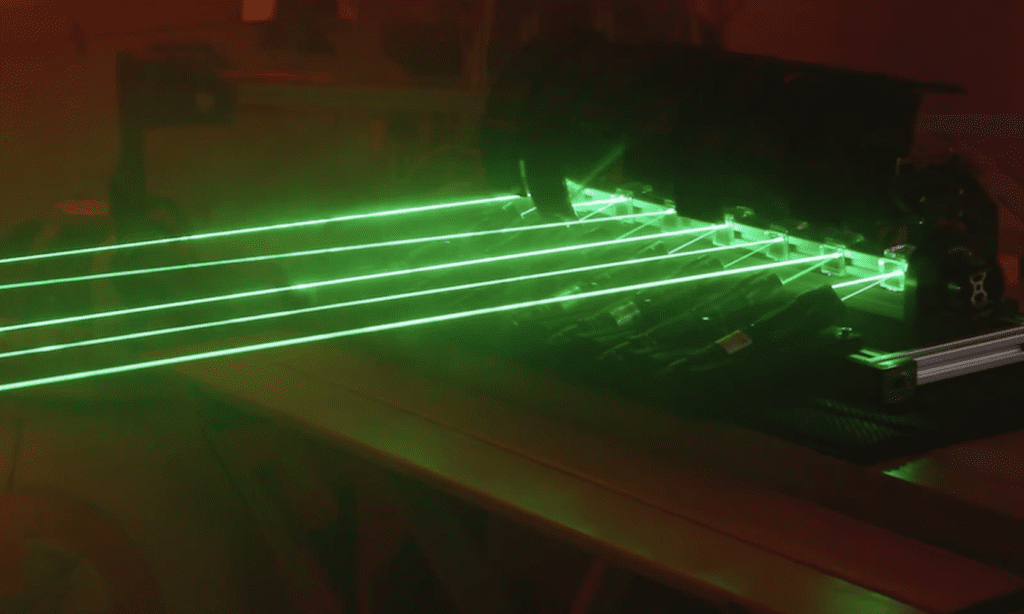
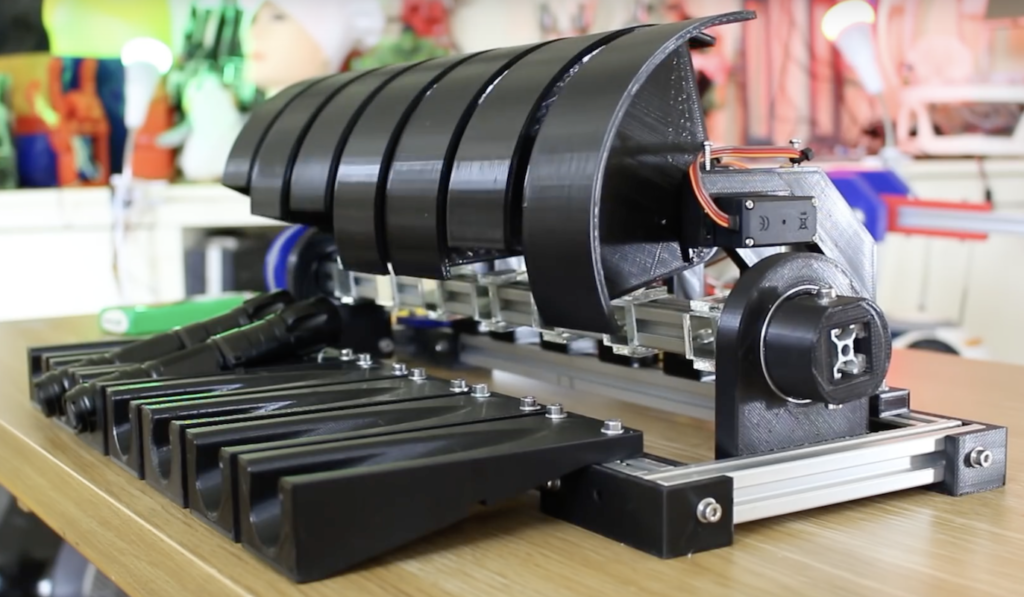
If you’d like to visualize your music, VU meters make an excellent tool. While they are generally built into audio equipment, maker James Bruton had the idea to construct his own using lasers. His setup features an MSGEQ7 module to separate sound frequencies, sending data on seven different ranges to an ArduinoMega board.
The Arduino then uses this information to selectively lower seven shutters via servos. When lowered, these shutters hide part of the lines formed by lasers and a spinning mirror assembly to indicate each sound frequency’s intensity.
The resulting machine not only effectively projects a visual of the music playing on a nearby wall, but also looks like some sort of mythical beast or contraption, progressively waving its appendages while emitting eerie green light!
Although this kind of project can be fun, be sure to wear the proper safety equipment when dealing with powerful lasers!
In our pursuit to democratize Internet of Things development, today we are excited to announce the Arduino IoT Cloud!
The Arduino IoT Cloud is an easy-to-use platform that makes it very simple for anyone to develop and manage their IoT applications, then deploy them to a large number of users. It allows users to create applications that solve real-life problems, and hopefully, improve their lives.
With the launch of the Arduino IoT Cloud, Arduino now provides its one million users a complete end-to-end approach to IoT that includes hardware, firmware, cloud services, and knowledge. After six months of private beta testing, I am very pleased to release the public beta of the Arduino IoT Cloud with automatic dashboard generation, Webhooks support, and full TLS secure transport.
— Luca Cipriani, Arduino CIO
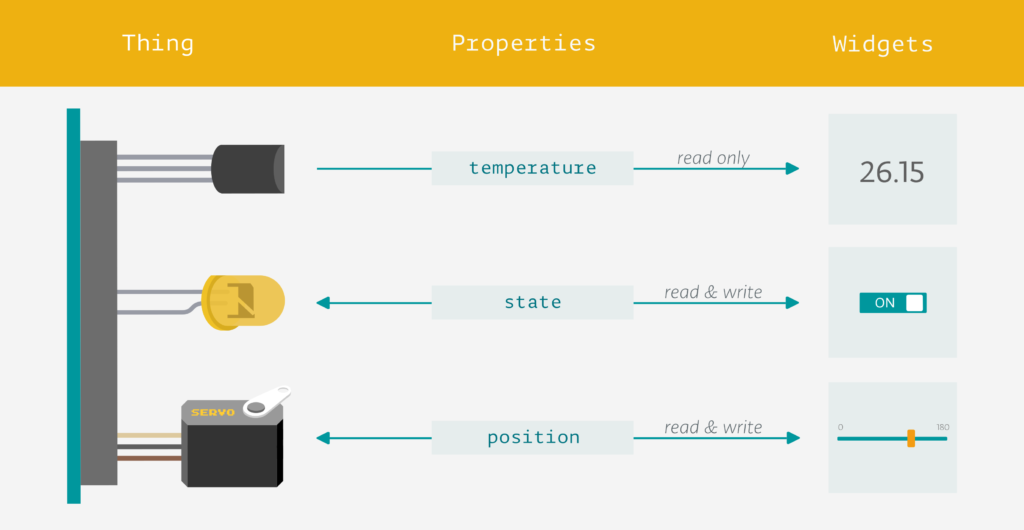
Convenience and flexibility are key considerations for the Arduino IoT Cloud. Arduino boards usually require you to program them by entering code by way of a sketch — now the Arduino IoT Cloud can do this for you. It will quickly and automatically generate a sketch when setting up a new thing, thus enabling a developer to go from unboxing their board to a working device within five minutes. The Arduino IoT Cloud also provides other methods of interaction, including HTTP REST API, MQTT, Command-Line Tools, Javascript, and Websockets.
Going from an idea to a fully-functional IoT device has been a tedious process even for the most advanced engineers and developers… until now. Arduino now offers a complete platform with the MKR family providing a streamlined way to create local IoT nodes and edge devices using a range of connectivity options and compatibility with third-party hardware, gateway, and cloud systems. Whilst the Arduino IoT Cloud lets users manage, configure, and connect not only Arduino hardware but the vast majority of Linux-based devices — truly democratizing IoT development.
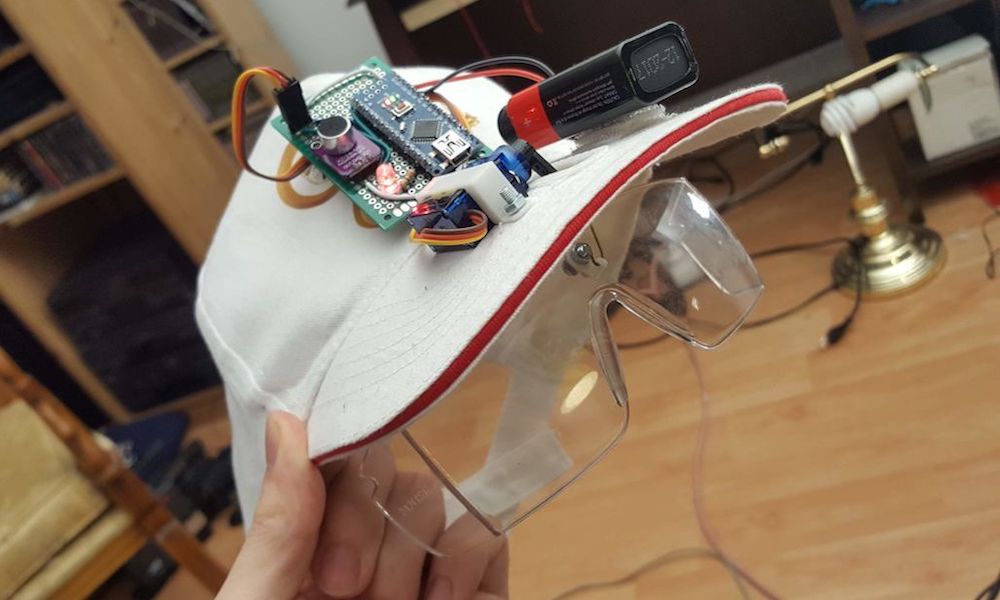
Görkem Bozkurt has a bit of a problem. When he gets going with a build, sometimes safety glasses are forgotten in the excitement of making something new. While understandable, this doesn’t make things any less dangerous, so he came up with a novel idea to put on his safety specs on automatically.
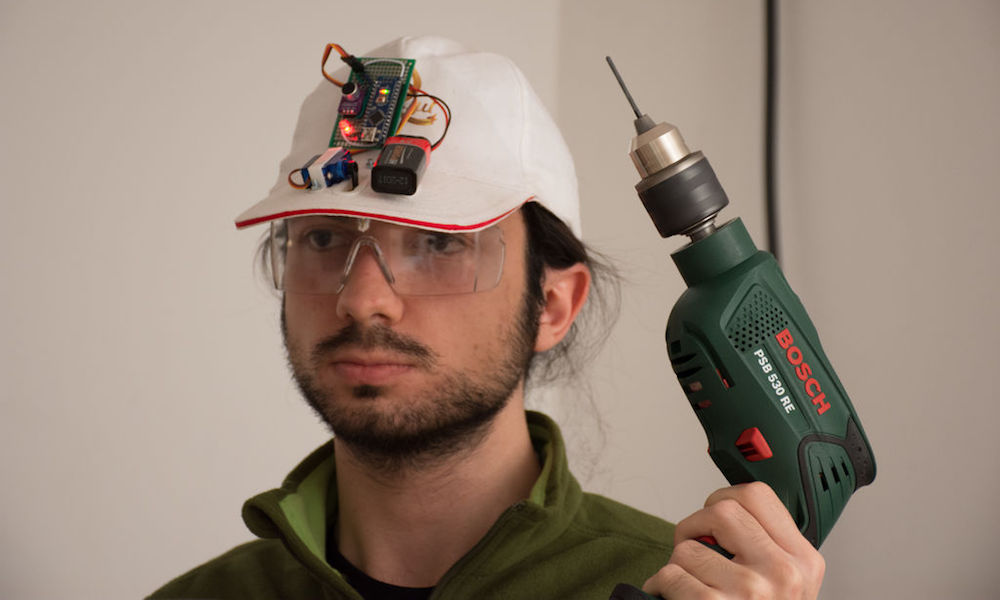
His wearable creation attaches an Arduino Nano and a MAX4466 electret mic amplifier to the top of a previously normal hat, along with a small servo connected to a pair of lens below the bill. If a loud sound is heard, the goggles are lowered by the servo in response. They’re then retracted when the noise, and hopefully the danger, is gone.
While the system is still very much a work-in-progress, it’s an entertaining concept that Bozkurt hopes to develop further.
“Rare Candy” played on even more rare electronic instrument
Arduino Team — February 5th, 2019
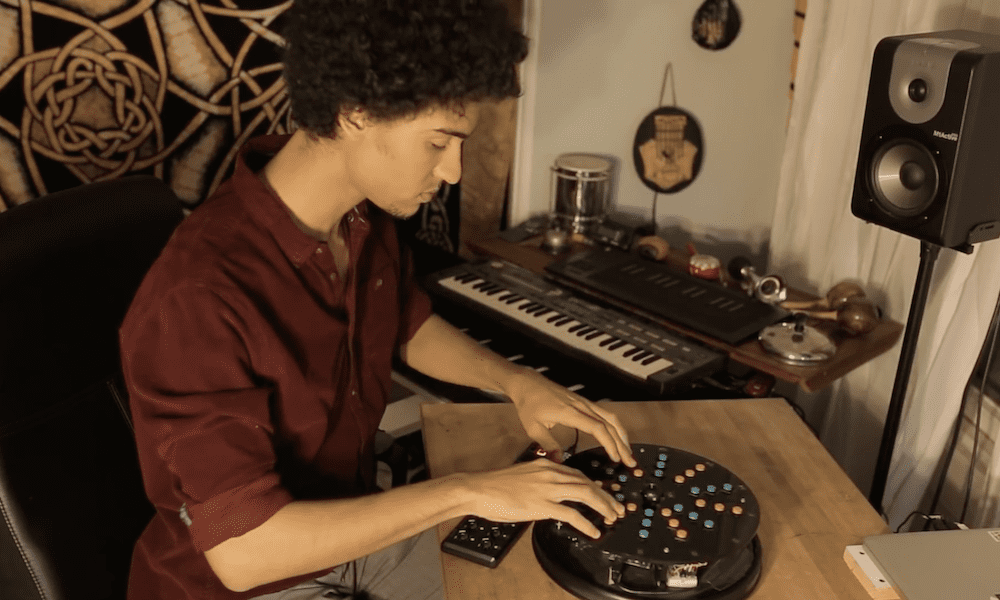
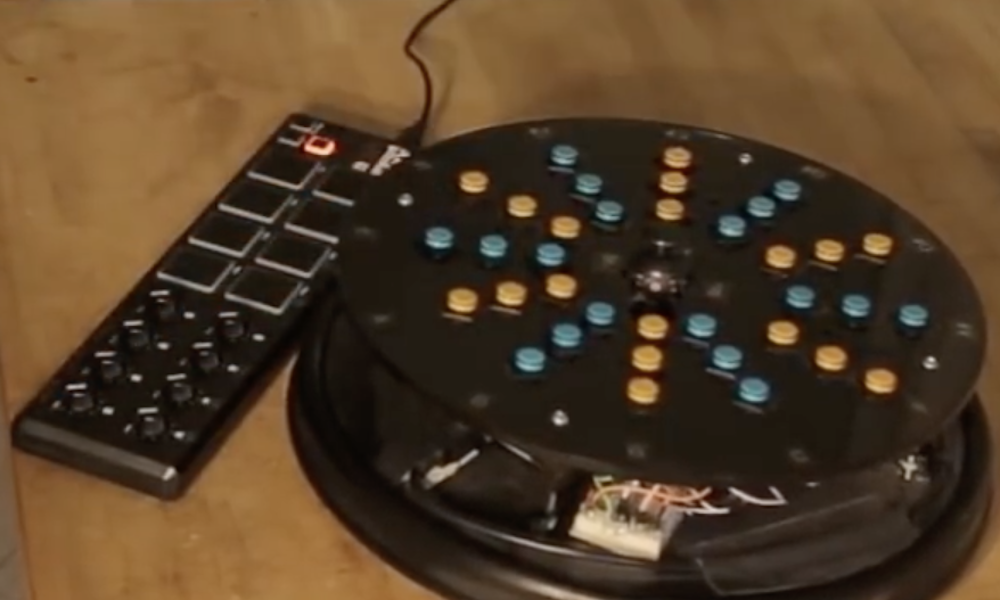
According to musician/maker Ruben Dax, “Few things make him happier than being able to create things that create things.” As seen in the video below, what he’s created is a very strange cylindrical instrument with an array of buttons and what appears to be an auxiliary loop controller.
What he creates with it is music that starts off as simple “plink-plonk” sounds, but builds up into something of an orchestral arrangement.
The DIY device utilizes an Arduino Mega for control, with a bunch of pushbuttons and a dual-axis joystick for inputs. Button info is then sent to his computer over Bluetooth, which takes care of actual MIDI generation.
As cool as this is, a new gadget is in the works, which uses a Leonardo and other hardware for plug-and-play functionality. Whether this will interfere with the instrument’s unique rotating action remains to be seen!
Open source microfluidics platform uses Arduino CNC control
Arduino Team — February 5th, 2019
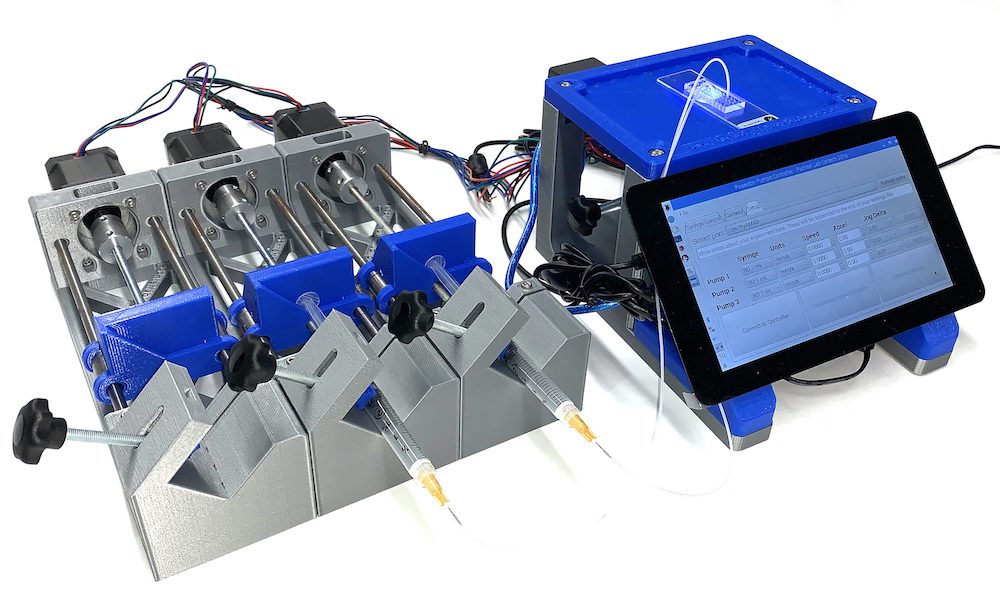
Microfluidics deals with the manipulation of tiny amounts of liquid, and as such, specialized equipment must be used for any sort of measurable experimentation. While you could purchase an expensive commercial solution, the Poseidon system—developed by students at the California Institute of Technology—presents an excellent open source option which can be built for a fraction of the cost.
Fluid distribution is managed by a computer GUI or via a terminal window. Steppers handle each of the system’s three “axes,” and push fluid out of syringes under control of an ArduinoUno and CNC shield. A microscope is also available for a full experimental setup.
The Poseidon syringe pump and microscope system is an open source alternative to commercial systems. It costs less than $400 and can be assembled in an hour. It uses 3D-printed parts and common components that can be easily purchased either from Amazon or other retailers. The microscope and pumps can be used together in microfluidics experiments, or independently for other applications. The pumps and microscope can be run from a Windows, Mac, Linux, or Raspberry Pi computer with an easy to use GUI.
The Poseidon system was designed to be customizable. It uses the Raspberry Pi and Arduino electronics boards, which are supported by a strong ecosystem of open source hardware and software, facilitating the implementation of new functionalities.
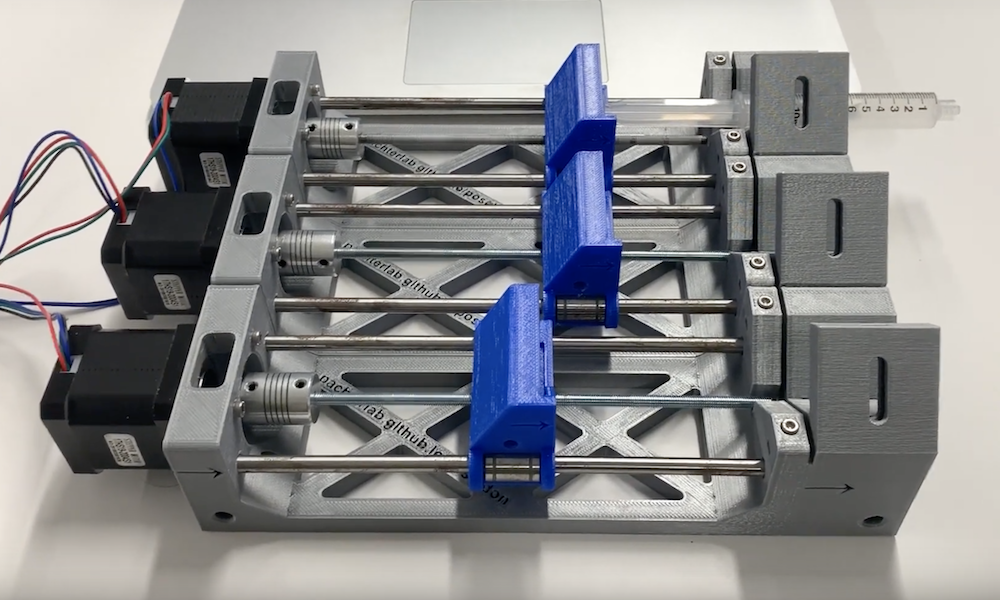
The pump driver uses an Arduino with a CNC shield to run up to three pumps. Each pump has a stepper motor that drives lead screw which in turn moves a sled that is mounted on linear bearings. The displacement of the sled moves the syringe forward or backward allowing the user to dispel or intake liquid.
The controller station uses a Raspberry Pi with a touchscreen to connect to the Arduino and microscope via USB. Because the microscope and Arduino use USB connections, they can alternatively be connected to a computer instead of a Raspberry Pi.
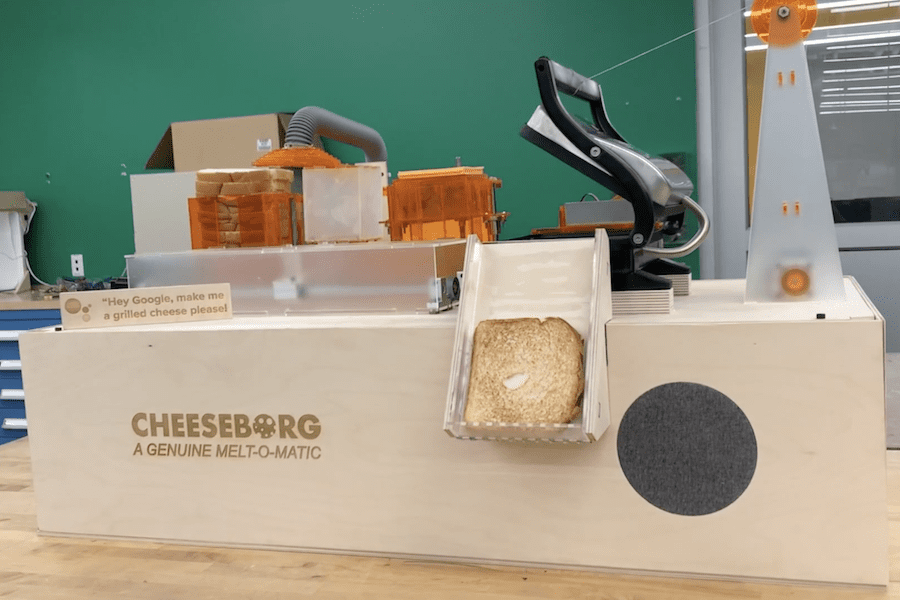
Do you like grilled cheese? Would you rather not make it yourself? If so, then the Cheeseborg by Taylor Tabb, Mitchell Riek, and Evan Hill could be the perfect device for you!
This assembly line-like robot first stacks bread-cheese-bread using a vacuum gripper, and passes the unheated sandwich onto the grill via a pusher mechanism. Butter spray is first added to the bottom of the grill, then the top of the sandwich when present in order to coat both sides. Upon heating, the finished sandwich is pushed into a “food slot” for consumption.
Electronics are controlled using an Arduino Mega, while Google assistant running on a Raspberry Pi allows for voice activation. So the next time you’re hungry, all you have to do is ask, “Hey Google, make me a grilled cheese please!”
Our goal was to make an easy snack even easier. The design combines 7 individual subsystems enabling the assembly, cooking, and serving of a perfect, repeatable, tasty grilled cheese.
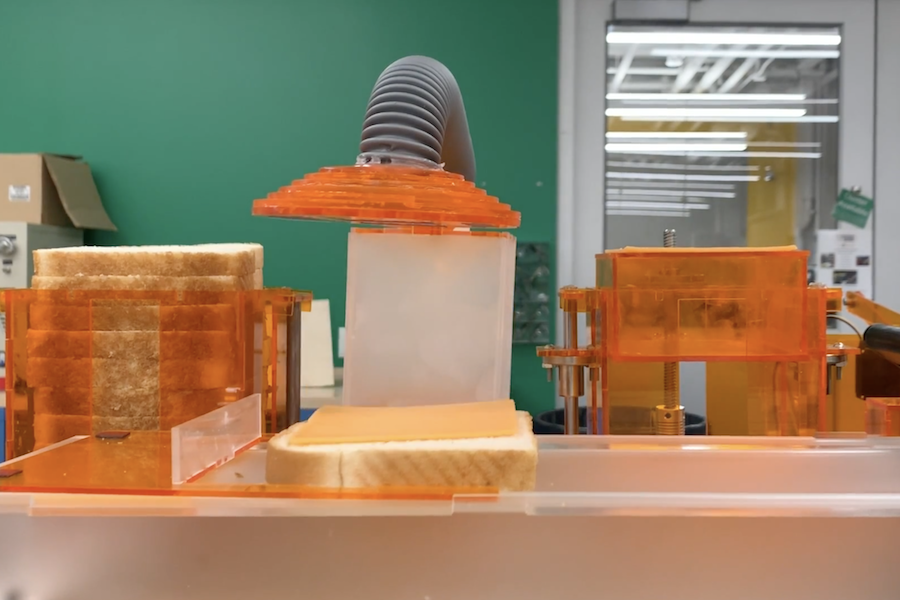
A big learning was how challenging it is to manipulate bread and cheese repeatedly. After several iterations, we converged on a vacuum lift mechanism, inspired by industrial robotic manipulation of small electronics. Due to the porosity of bread and the gloss of cheese, it was very challenging to find a mechanism working for both, but vacuum certainly seemed to do the trick!
For the actuation of of the electromechanical subsystems, we use stepper motors and servos combined with linkages, lead screws, linear bearings, a winch, and other mechanical components. For buttering (not pictures) we have a delightful spray butter can attached to an acrylic stand beside the grill.
Beyond the mechanisms, which are controlled by an Arduino Mega, the system is enabled with Google Assistant SDK running on an Raspberry Pi 3B, so the whole thing can be activated just by saying “Hey Google, make me a grilled cheese please!” From there, the machine stacks the bread, cheese, bread, then slides over the platform toward the grill as the buttering station sprays the bottom of the grill. Once the sandwich is placed on the grill, the butter sprays again (to coat the top of the sandwich). Then the grill closes, and cooks for the precise amount of the time for the perfect gooey grilled cheese! Then the grill opens and the sandwich is kicked to the serving slot for a hungry friend to enjoy.
Augment your tongue’s senses with the Cthulhu Shield
Arduino Team — January 31st, 2019
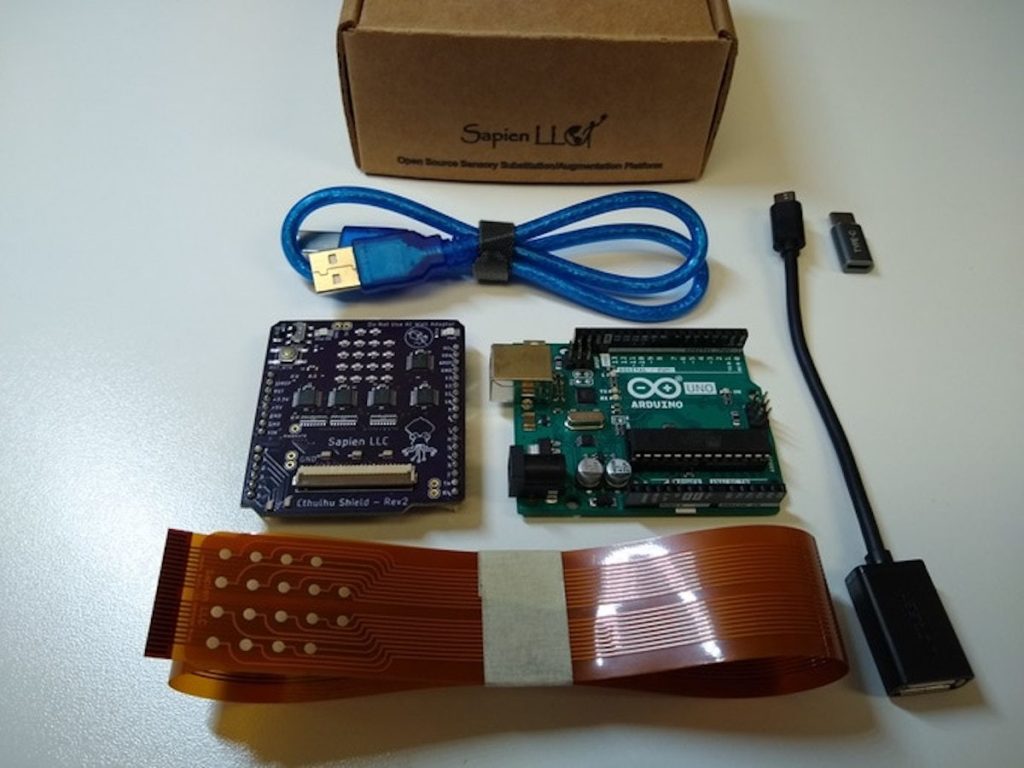
Whether one of your senses is weak or non-existent, or you would simply like a way to augment your perception and control options, the Cthulhu Shield can be applied in either situation.
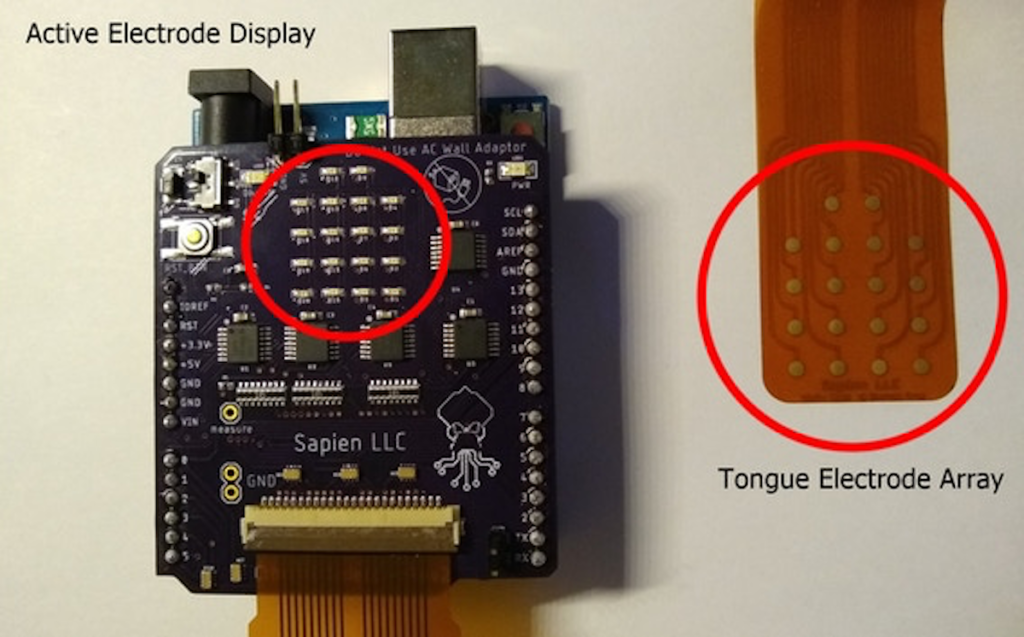
The device takes the form of an Arduino Uno or Mega shield, with a strange flexible electrode setup that is placed directly on the user’s tongue.
When these electrodes are fired, they activate nerve fibers on the tongue, producing a feeling like that of carbonated bubbles popping. This can then be used to convey information to the user, whether this is visual, sound, or even Internet updates or other non-traditional stimuli. Importantly, it can also be utilized as an interface for tongue computer control.
The Cthulhu Shield lets anyone experiment and make devices that can expand your sensory experience!
We’ve made android apps and example programs that will let you use the Cthulhu Shield and your smartphone to ‘see’ and ‘hear’ with your tongue without needing to write a single line of code!
For those of you interested in making your own projects, we’ve written an easy to use Arduino library and provided example code to get you started on projects including tongue-heat-vision, tongue-based GPS directions, and soon, tongue-ultrasonic hearing. But don’t limit yourselves to the examples we’ve provided, the only limit to what you can make is your imagination!
Finally, we designed the Cthulhu to be used as a tongue based computer interface (because if you already have something in your mouth, why not use it to control your computer)? Write your own code to hotkey video game actions, send text messages, or control a wheelchair or mobility device with your tongue.
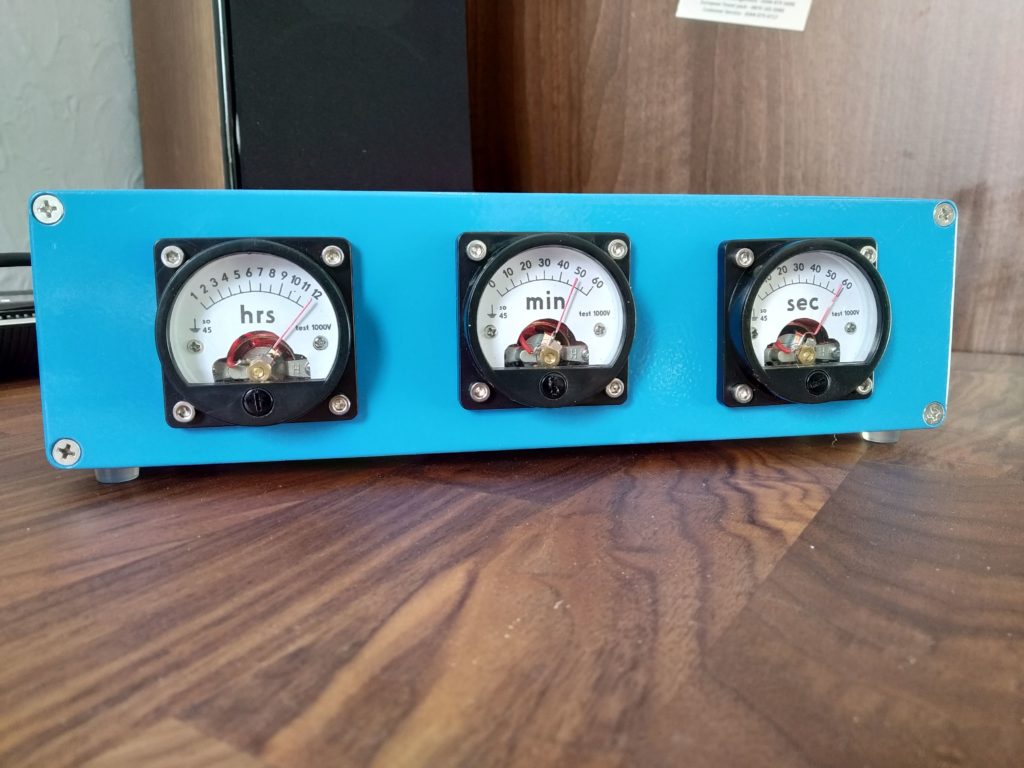
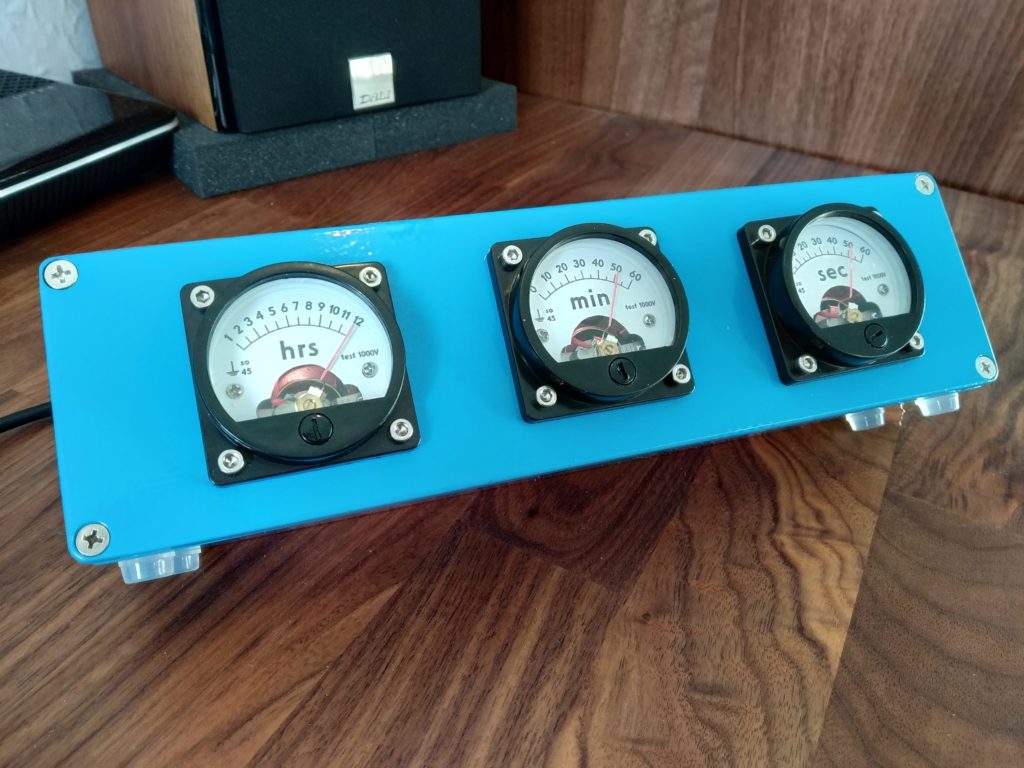
Three voltmeters combined into one clock any engineer would love
Arduino Team — January 30th, 2019
Apparently not satisfied with available timekeeping devices, ElegantAlchemist crafted a unique clock using an Arduino Nano, an RTC module, and three formerly 1000VAC analog meters.
The first order of business for the build was converting the meters into something that could traverse its range with only 5V, accomplished by replacing the stock resistor, diode, and capacitor with a 2.2kohm resistor.
Now controllable via Arduino, new faceplate labels were designed in CorelDraw for a very professional look. Everything was encased in an aluminum stomp box enclosure—actually several as multiple clocks were constructed—and RGB LEDs were also added behind each display.
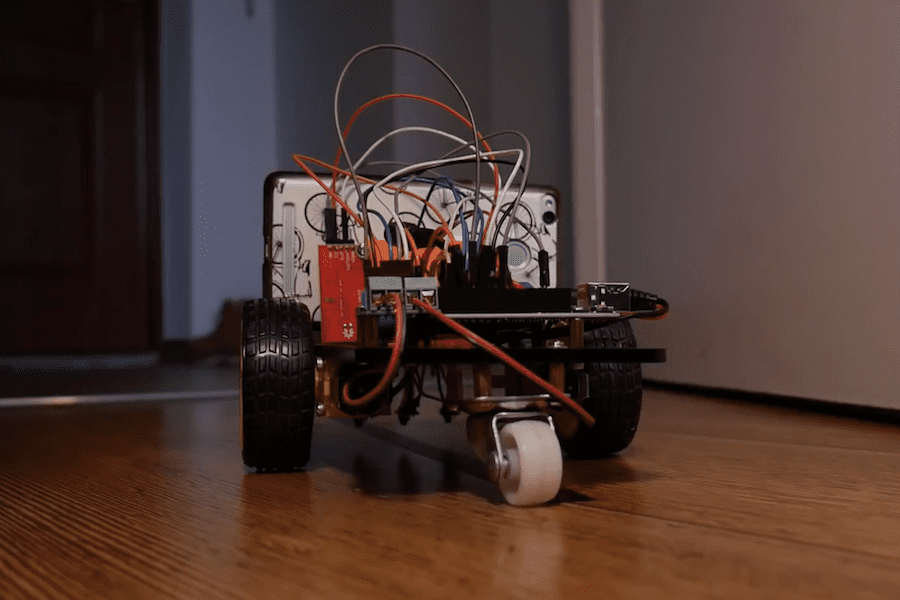
Waking up before 9am can be a challenge for Nikodem Bartnik, but he also hates to waste time sleeping when he could instead make something.
In order to help him with this “joyous” task, he assembled a line-following robot that scoots his phone out of the room in the morning, forcing him to get out of bed and chase it down.
The device utilizes a pair of gearmotors in a standard tank-like configuration for movement, and sensors to follow a black line on the floor. A sound sensor allows its Arduino Uno controller to pick up on alarm sounds coming from his phone, which is mounted on the robot with a 3D-printed holder. When activated, it follows the path out of his room, waiting for Bartnik’s bleary eyed—but awake—arrival.
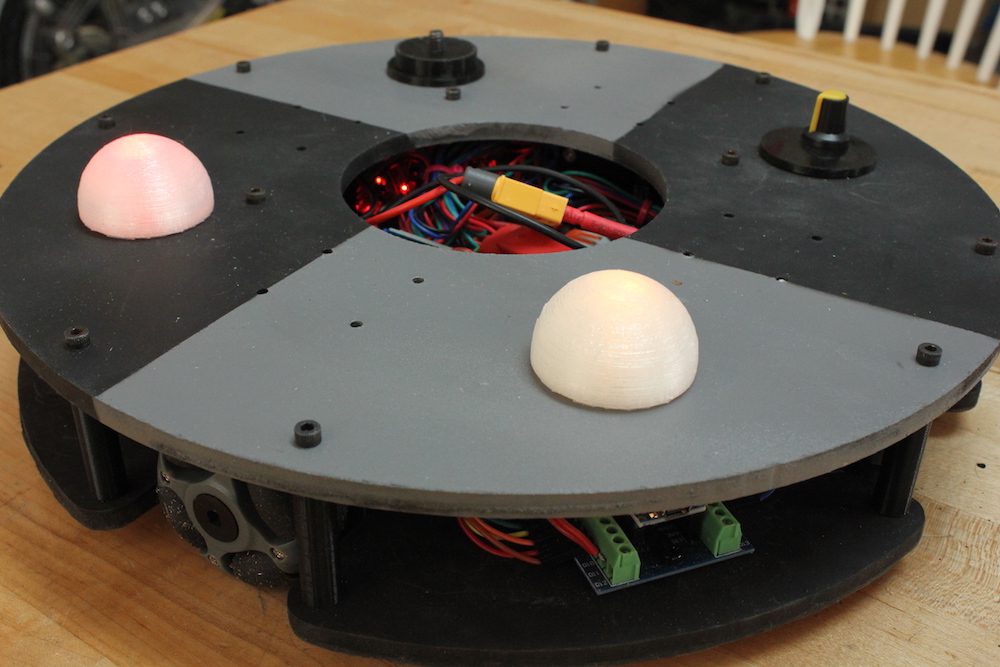
When we last saw this omni robot by Jeremy S. Cook, it was lurching around under Arduino Nano and Bluetooth command. After much work, he finally has it to a state where it rolls nicely on a flat surface—even carrying a little strandbeest at just after 8:30 in the demo video.
The biggest revision for the robot was new “grippier” wheels, but electronics were also enhanced, including a LiPo battery (with a voltage divider monitoring circuit), potentiometer for speed control, and LED eyes.
Changes were facilitated by a screw terminal board attached to the Nano, which minimized solder work, while keeping the robot’s wiring secure. More details and code are available here, while the upgrade/troubleshooting process can be seen in the video below.
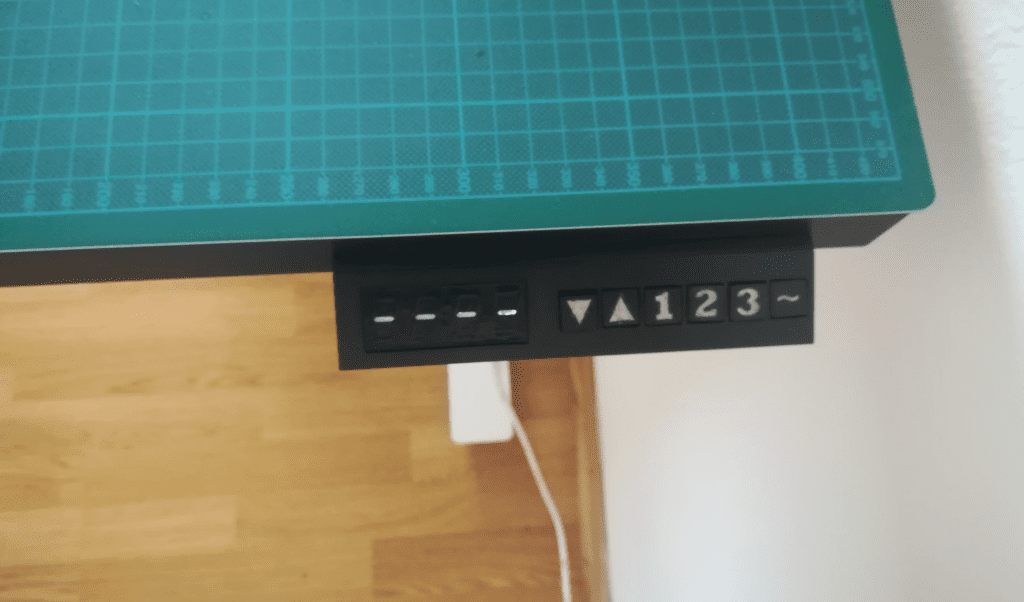
Martin Mihálek took the leap into standing desks, and purchased a SKARSTA table from IKEA. Although being able to adjust things by hand is useful, who wants to do that nowadays? Instead of manually cranking it every time, he—with help from iLLiac4—decided to augment it with a motor in order to lower and raise things as needed.
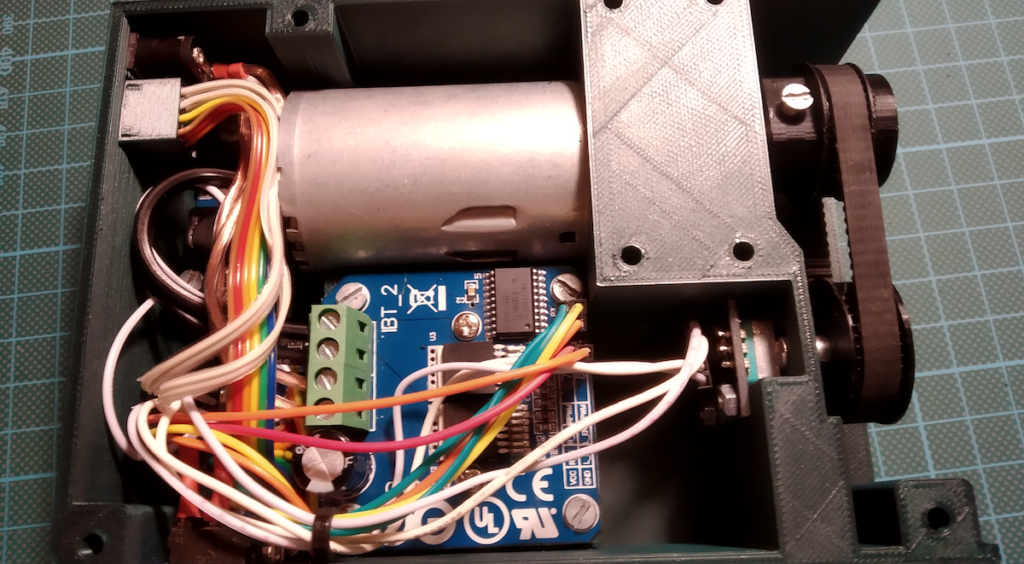
Initial experiments used a FIXA electric screwdriver (also from IKEA) to power the SKARSTA, but he eventually settled on a DC gearmotor, attached to the desk via a 3D-printed assembly.
Two versions are described in the project’s GitHub write-up; one employs an H-bridge board for control, the other uses relays. Both are controlled by an Arduino Nano. A keypad allows for calibration and three stored heights, while current position and feedback are shown on a TM1637 4-digit 7-segment display.
Save the date: Arduino Day 2019 is Saturday, March 16th!
Arduino Team — January 29th, 2019
For the sixth year, we are inviting the open source community to join us for Arduino Day 2019 on Saturday, March 16th!
Arduino Day is a worldwide celebration of Arduino’s birthday. It’s a 24-hour-long event—organized by both the community and our team—where those interested in Arduino get together, share their experiences, and learn more about the platform. Participation is open to anyone, either as a organizer or participant, from makers and students to professional developers and educators.
In 2018, there were 529 events spanning across the globe full of activities, workshops, talks, and project exhibitions for a wide range of audiences and skill sets. This year, we are hoping to make Arduino Day even bigger! If you want to organize an event, please fill out this online form and submit your proposal by March 3rd.
Wind your watch cheaply and quietly on your bedside table
Arduino Team — January 28th, 2019
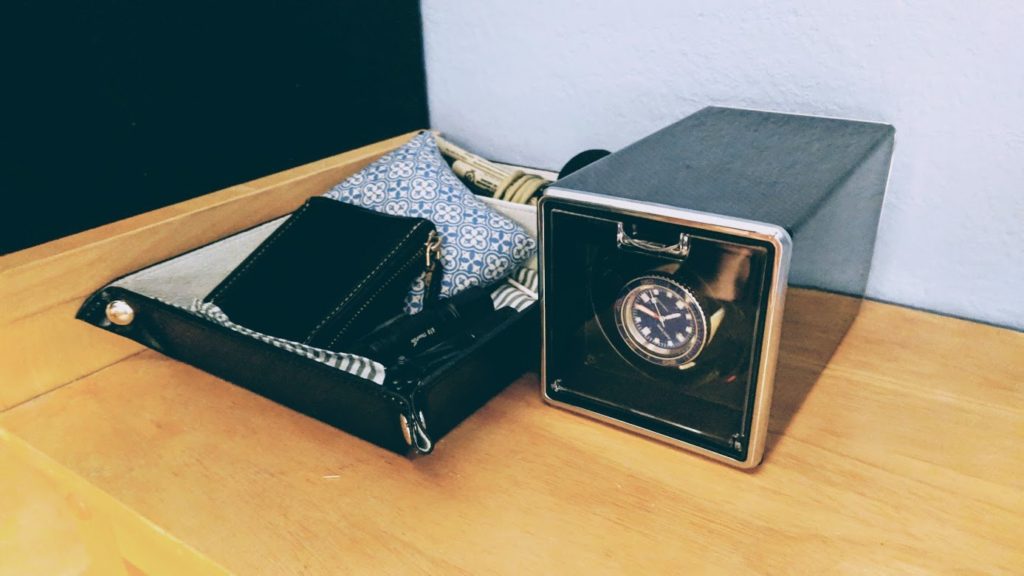
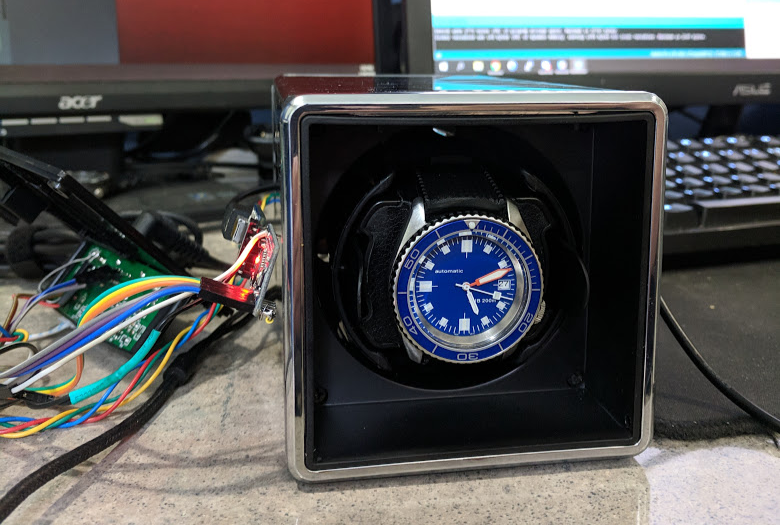
If you wear a self-winding watch—which uses your natural motions for power—you might notice that it stops working if it’s left off your wrist for too long. To avoid these situations, watch winders are available to turn them automatically, but tend to either be very expensive, or cheap and noisy.
With a bit of hacking, however, Kristopher Marciniak was able to get the best of both worlds. He replaced the stock motor of an inexpensive winder with a stepper, and used an Arduino along with a Trinamic SilentStepStick driver for silent and well-controlled movement.
The result is a device that rotates quietly as programmed, then stops in exactly the desired position.
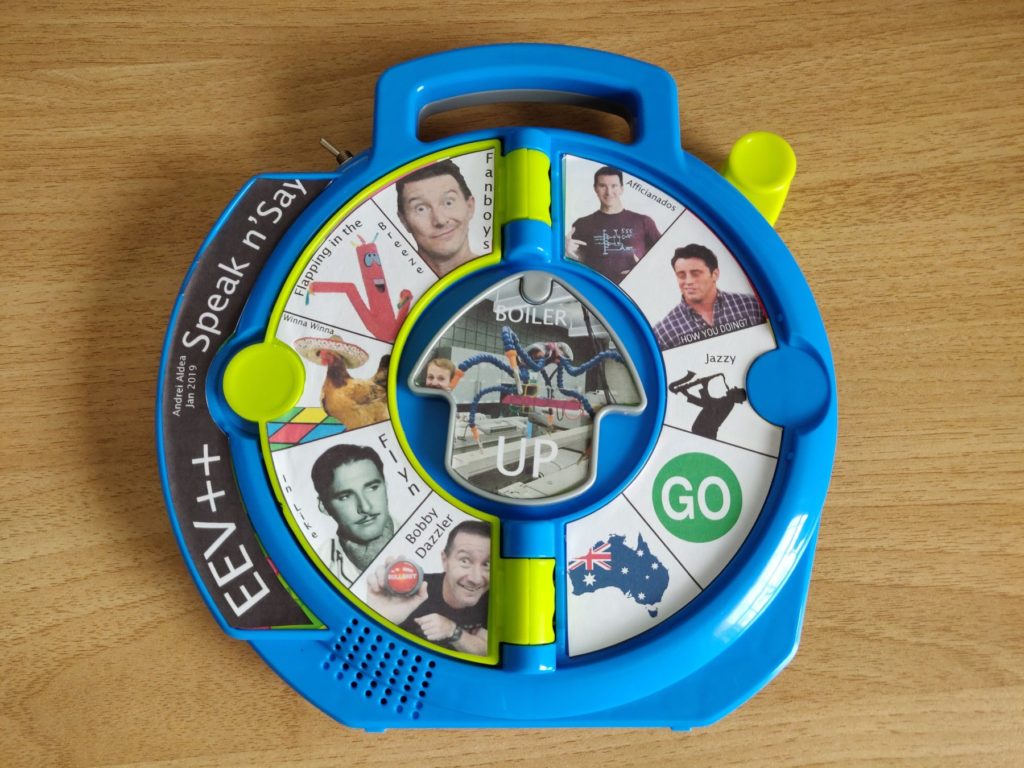
The See ‘n Say is an educational toy that originated in the 1960s, speaking out whatever the child pointed to on a dial. The device has evolved over the years from a mechanical sound mechanism to one that uses electronics in its design, which inspired Andrei Aldea to convert one of them into an EEV Blog catchphrase machine!
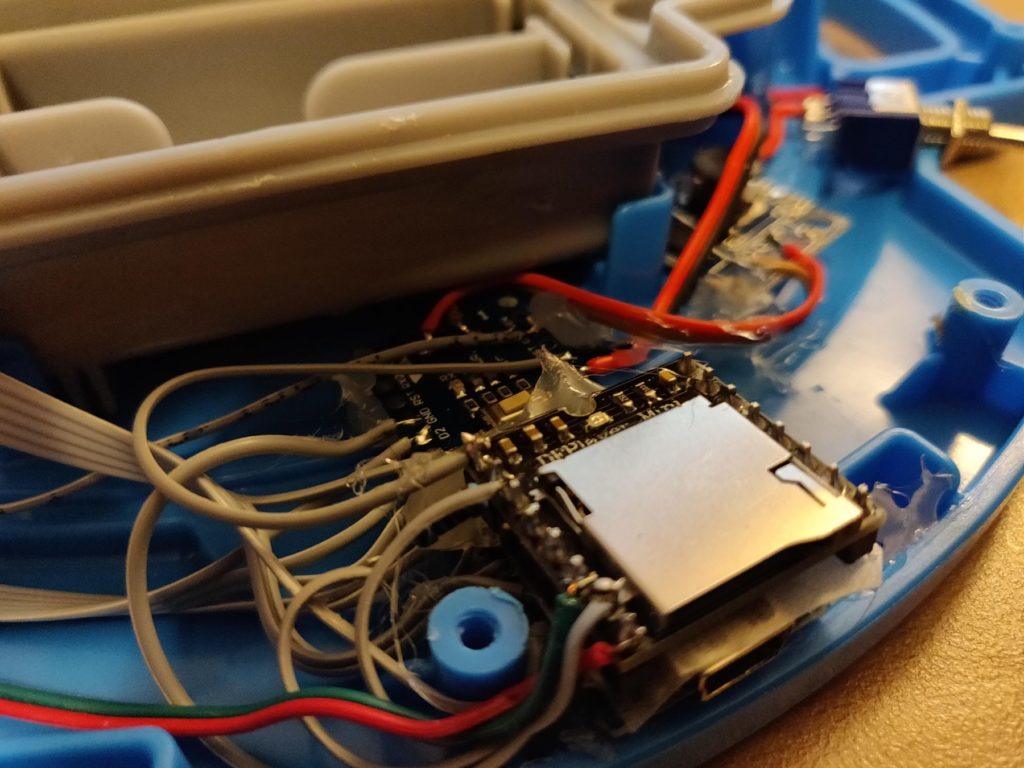
Aldea replaced most of the electronics with an Arduino Nano, plus an MP3 module to power the speaker. Internal buttons that normally trigger sounds based on the dial rotation, along with a “page” switch, are wired into the Arduino. The hacked toy can now select from a library of over 300 audio clips of host Dave Jones and other “bonus” material for hours of entertainment!
While binging some The Ben Heck Show videos I ran across and old episode titled Speak & Dave Jones in which Ben hacks a Fisher Price See N’Say toy to play a sound for each of Dave Jones’ catchphrases.
The video itself (and especially the idea) is quite fun, but he used a custom PCB for the button matrix and a Propeller(? I think it was) micro, which make the whole project a lot more tedious than it needed to be, not to mention he never posted any of the code/graphics/design files he used.
Since this seemed like an easy enough project to tackle in an afternoon, and I had all the parts (minus the toy itself) lying around, I decided to give it a go while adding some of my own features.
Announcing the Arduino Education thematic years initiative
Arduino Team — January 26th, 2019
Aside from all the product announcements at Bett, we’re excited to unveil a new annual initiative from the Arduino Education team to keep the community up-to-date on contests and exhibitions, suggest experiments, and highlight educational products and events of relevance within a selected topic.
The Arduino Education thematic years calendar is a unique way to involve our passionate educators and students, and work together to achieve something on a much larger scale.
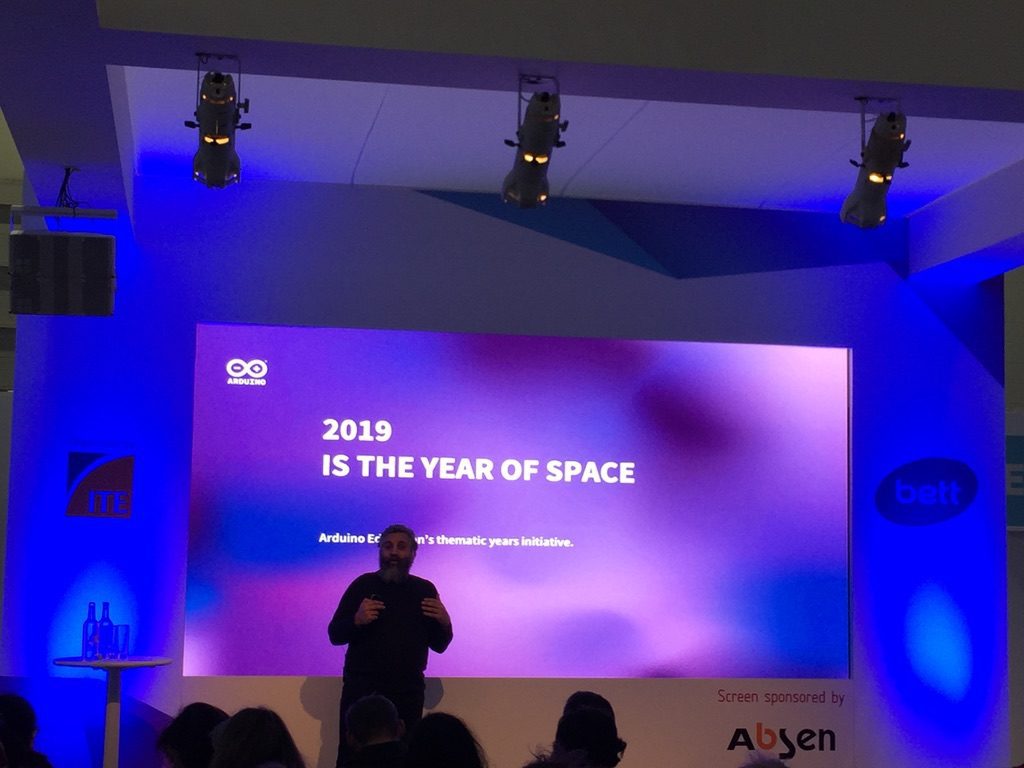
For 2019, we have decided to take our efforts from the classroom to outer space.
2019 Is the Year of Space
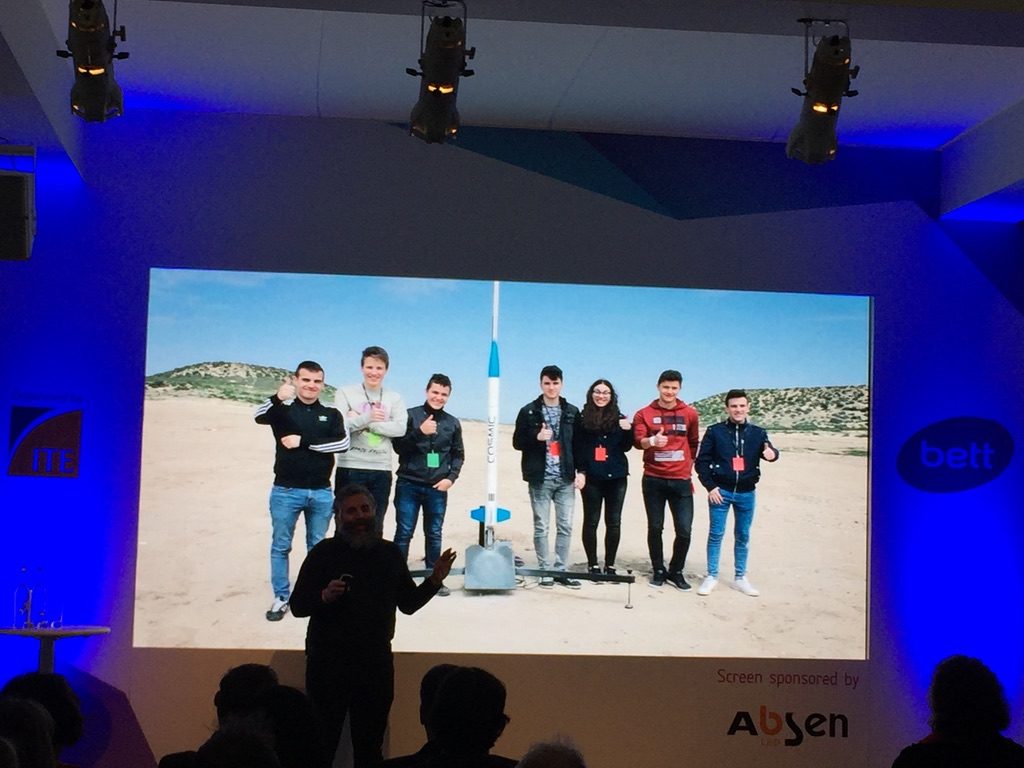
Educators from all over the world have been using space as a context to build inspirational education resources. Different space agencies, through dissemination activities, have reached out to schools and universities trying to inspire students to become the next generation of scientists and engineers. Robots, satellites the size of a soda can, radio communication systems, weather monitoring devices, maps, amongst others, are examples of projects from those who want to bring the topic of space closer to the classroom. Arduino plays a major role in this, and therefore we want to contribute to the development and dissemination of future space scientists.
A Calendar of Activities
The Arduino Education thematic year calendar is not written in stone. We, in collaboration with a series of stakeholders, suggest a point of departure, but we will welcome your contributions. Please send us your event proposals via email to space.year@arduino.cc and we will share them. If you would like to make an announcement for an upcoming workshop, event, course, or if you are looking for partners to do so in your region, we will use the Arduino forum as a public way to discuss the possibilities.
Each thematic year will see the direct involvement of the community, both in proposing/running events related to the chosen topic and to select the theme for the following year. For starters, here is a brief snapshot of planned activities in the months to come:
January
Official announcement at BETT London
Balloon launching in Malmö, Sweden
February
Balloon launching in Soria, Spain with Fundación Trilema
Arduino instrumentation course for space experiments at Luleå University of Technology (LTU), Sweden
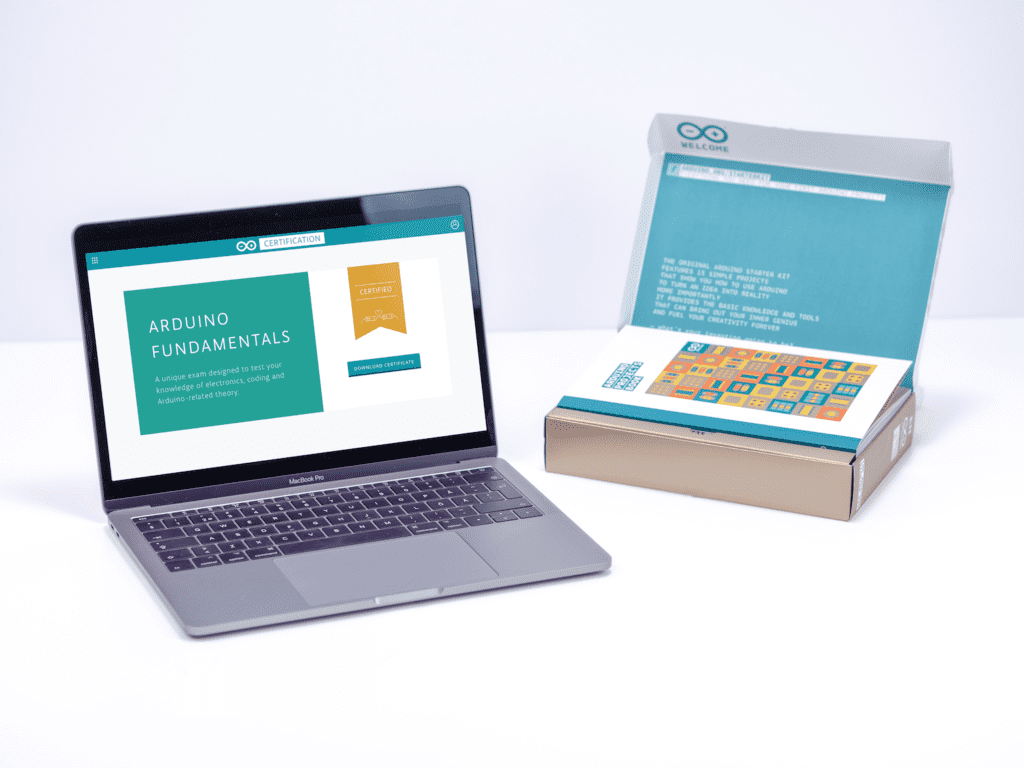
The Arduino Certification Program (ACP) is an Arduino initiative to officially certify Arduino users at different levels and evaluate their expertise in key Arduino knowledge areas. Certifications are offered at three tiers — enthusiasts, educators and professionals — which have been identified as the largest Arduino user groups through extensive feedback from the community.
The first step, the Arduino Certification: Fundamentals Exam, is a structured way to enhance and validate your Arduino skills, and receive official recognition as you progress. Anyone interested in engaging with Arduino through a process that involves study, practice, and project building is encouraged to pursue this official certificate.
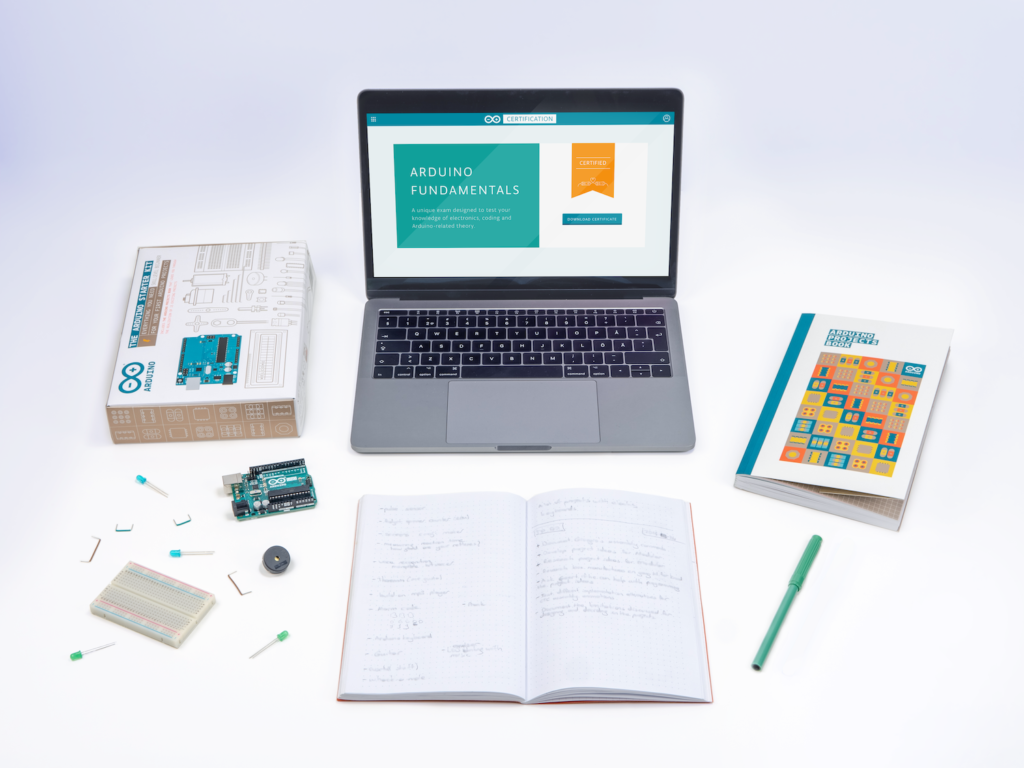
Developed in consultation with leading technology curriculum, interaction design, and electronic engineering professionals, the Arduino Certification: Fundamentals Exam assesses skills based on exercises consisting of practical tasks from the Arduino Starter Kit.
The official assessment covers three main key areas: theory and introduction to Arduino, electronics, and coding.
During the exam, you will be asked to answer 36 questions of varied format and difficulty, which should take approximately 75 minutes to complete.
Questions will test your knowledge on, but will not be limited to, the following topics:
Introduction to Arduino: Physical computing and Arduino, Arduino Uno, Arduino IDE and uploading, programming basics, electronics concepts, blink!, and the breadboard.
Sensors and Actuator: Sensors, actuators, as well as digital and analog input/output.
Input and Output Types: Using serial monitor, LEDs, motors, piezo as input/output, switches, variable resistors, IR, and PIR.
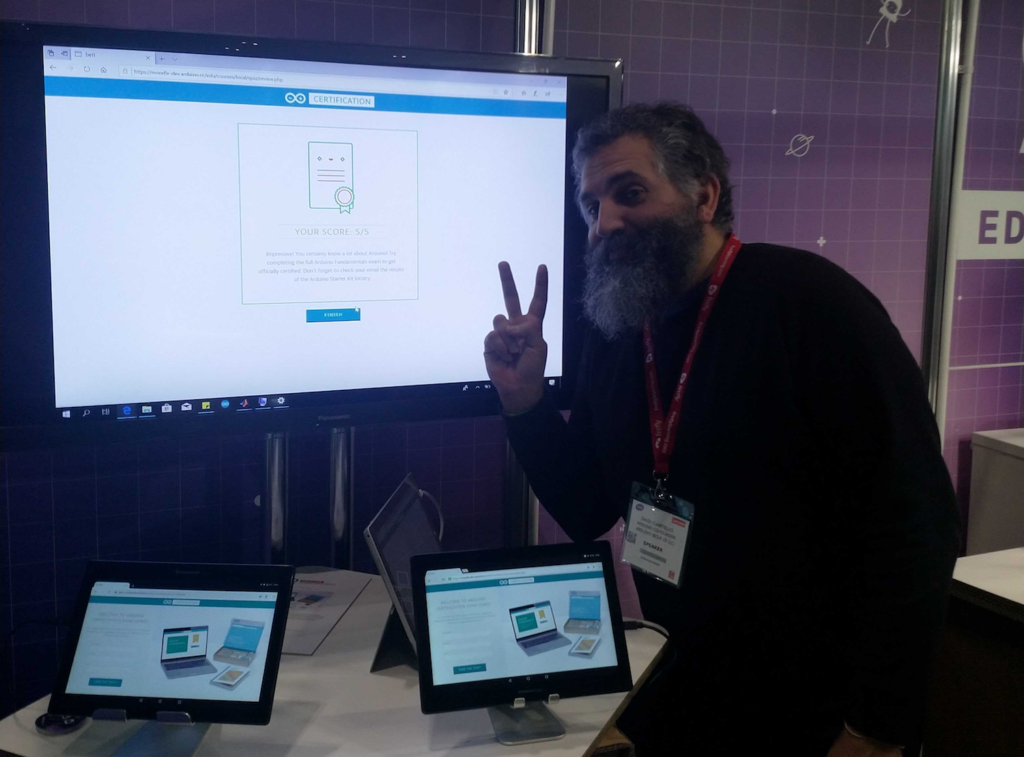
The Arduino Certification: Fundamentals Exam is currently on display at Bett 2019. Stop by stand C375 to see a demo for yourself and learn more about the program!
A university research project for Arduino community members by a community member
Arduino Team — January 24th, 2019
Back in December, we received an email from a university student named Lucrezia Alfonsi regarding her dissertation research. Lucrezia’s goal is to to understand what motivates our community to use Arduino, share knowledge, and produce open source innovations. Not only would we love to help Lucrezia, we always like hearing about our users’ involvement with open hardware and software.
The survey, which can be found here, will be up until February 20th and the results will be posted later on our blog. By answering Lucrezia’s report, we hope to provide our community with rich insights into the experiences and inspirations of our users.
Hi, I’m Lucrezia Alfonsi, a Bocconi University MSc student. Right now, I’m writing my MSc thesis and I would like to ask your help completing the survey I have prepared for last research steps – it takes only 10 minutes, the data are anonymously tracked and the results will be elaborated only for academic purposes.
“I strongly believe in ‘doing well, by doing good’ and I immediately associate this with the motivation that moves Arduino Community members to improve and innovate everyday”; this is what I think, how I started my email to Arduino, and why I decided to focus my thesis on individual attitudes and motivational factors that lead open-source software and hardware communities, like Arduino Community. This is my genuine interest in the new and the right moment to challenge it.
Here, you can find the direct link to the questionnaire I built appropriately; I think this research can give something interesting back. Feel free to take a look and decide if you would like to bring your precious contribution.
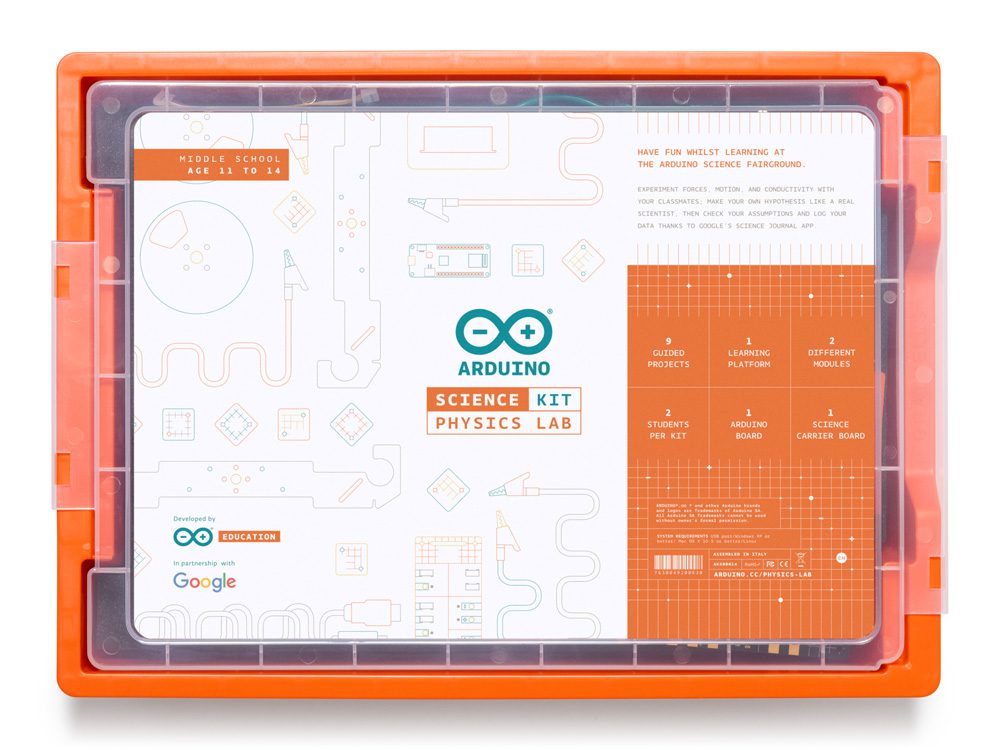
The Arduino Science Kit Physics Lab, developed in collaboration with Google, is the first official Arduino kit designed for middle school curriculum.
The Arduino Education Science Kit Physics Lab provides middle schoolers (ages 11 to 14) with a hands-on experience, enabling them to explore forces, motion, and conductivity with their classmates. Students can make their own hypothesis like a real scientist, then check their assumptions, and log data thanks to Google’s Science Journal app — a digital notebook for conducting and documenting science experiments using the unique capabilities of their own devices.
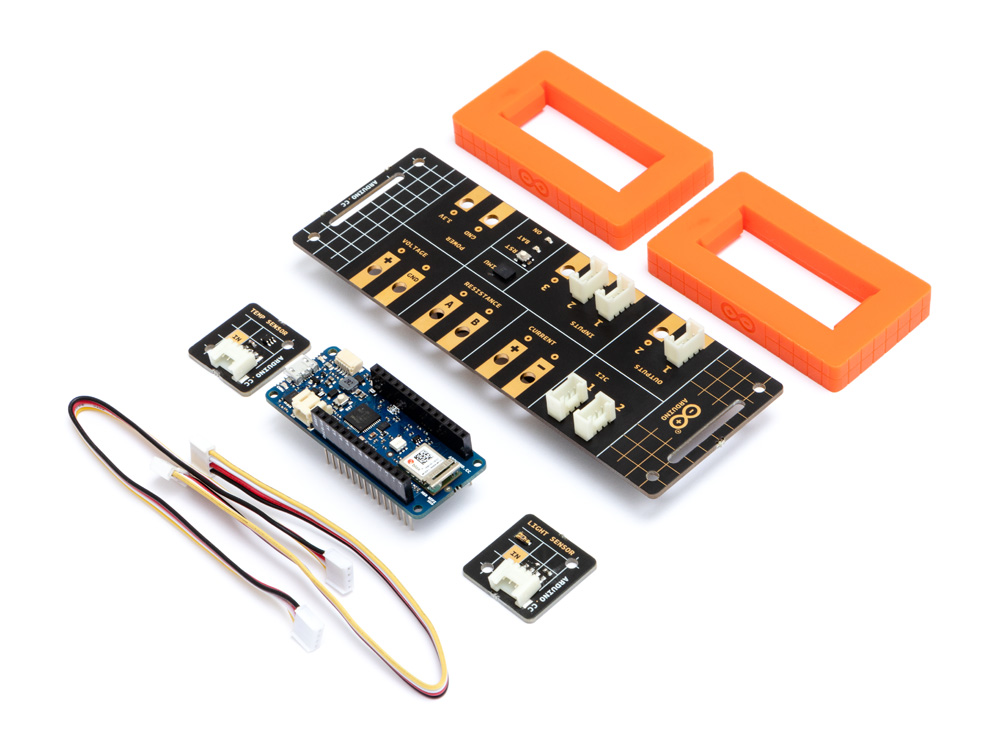
The kit, based on the MKR WiFi 1010, includes a range of sensors to measure light, temperature, motion, and magnetic fields, as well as a set of props and full access to online course content for teachers and students to conduct nine exciting science projects inspired by popular fairground rides like the Gravitron and Pirate Ship.
“The Arduino Science Kit is perfect for developing transferable skills such as critical thinking and problem solving through an inquiry-based learning approach. The projects featured in the kit have been aligned with several National curricula including the Next Generation Science Standard (NGSS) for K-12, and the National UK Curriculum, so teachers can be assured that the Physics Lab is not only easy to set up and fun to use, but also contains all the necessary lesson plans and physical experiments for students to actively engage with their learning.” – David Cuartielles
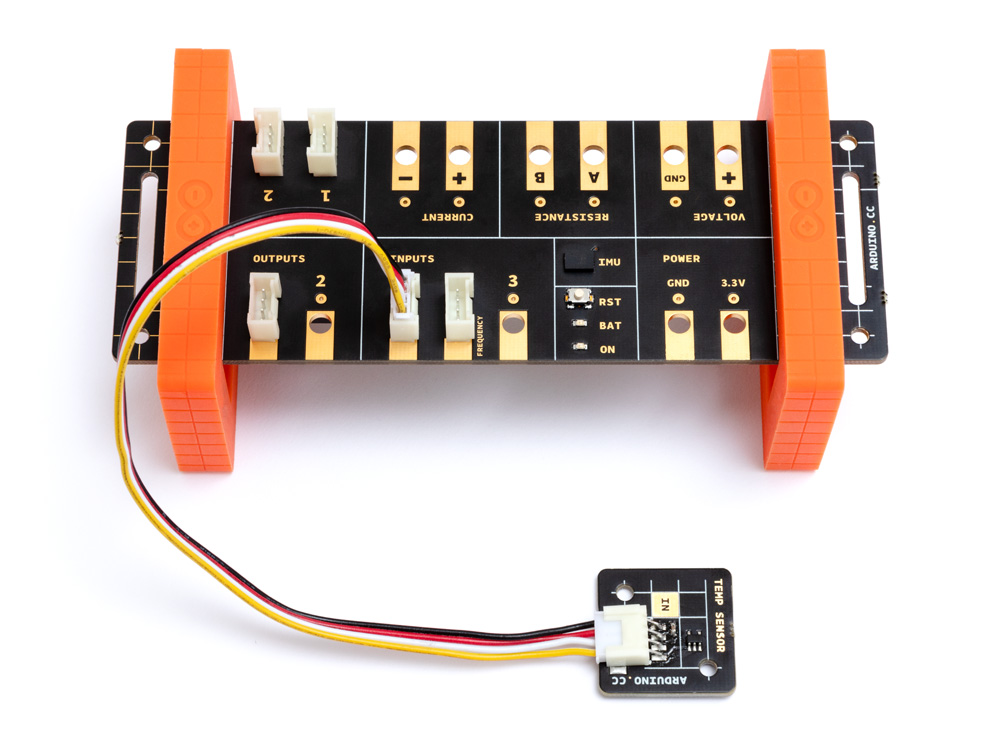
With the Physics Lab, no prior electronics knowledge is required. Students simply upload their sketch onto an Arduino board using Arduino Create for Chromebook, connect their Android mobile device to the board, build their project, and then use the onboard sensor and plug-and-play modules to simulate the rides’ dynamics. Data is transmitted from the experiment to the student’s mobile device via Bluetooth, where they can analyse and record their results in Google’s Science Journal App or worksheets.
The Arduino Education Science Kit Physics Lab isn’t confined to the classroom. In fact, students can use the kit outdoors to turn the playground into their very own fairground by applying the concepts they’ve learned to design and test their own rides.
The Arduino Education Science Kit Physics Lab comes in a handy storage box for later use, along with the MKR WiFi 1010 and all the parts needed to assemble and carry out the experiments. It will be coming soon to the Arduino Store and available globally starting in March 2019.
Um dir ein optimales Erlebnis zu bieten, verwenden wir Technologien wie Cookies, um Geräteinformationen zu speichern und/oder darauf zuzugreifen. Wenn du diesen Technologien zustimmst, können wir Daten wie das Surfverhalten oder eindeutige IDs auf dieser Website verarbeiten. Wenn du deine Einwillligung nicht erteilst oder zurückziehst, können bestimmte Merkmale und Funktionen beeinträchtigt werden.
Funktional
Immer aktiv
Die technische Speicherung oder der Zugang ist unbedingt erforderlich für den rechtmäßigen Zweck, die Nutzung eines bestimmten Dienstes zu ermöglichen, der vom Teilnehmer oder Nutzer ausdrücklich gewünscht wird, oder für den alleinigen Zweck, die Übertragung einer Nachricht über ein elektronisches Kommunikationsnetz durchzuführen.
Vorlieben
Die technische Speicherung oder der Zugriff ist für den rechtmäßigen Zweck der Speicherung von Präferenzen erforderlich, die nicht vom Abonnenten oder Benutzer angefordert wurden.
Statistiken
Die technische Speicherung oder der Zugriff, der ausschließlich zu statistischen Zwecken erfolgt.Die technische Speicherung oder der Zugriff, der ausschließlich zu anonymen statistischen Zwecken verwendet wird. Ohne eine Vorladung, die freiwillige Zustimmung deines Internetdienstanbieters oder zusätzliche Aufzeichnungen von Dritten können die zu diesem Zweck gespeicherten oder abgerufenen Informationen allein in der Regel nicht dazu verwendet werden, dich zu identifizieren.
Marketing
Die technische Speicherung oder der Zugriff ist erforderlich, um Nutzerprofile zu erstellen, um Werbung zu versenden oder um den Nutzer auf einer Website oder über mehrere Websites hinweg zu ähnlichen Marketingzwecken zu verfolgen.