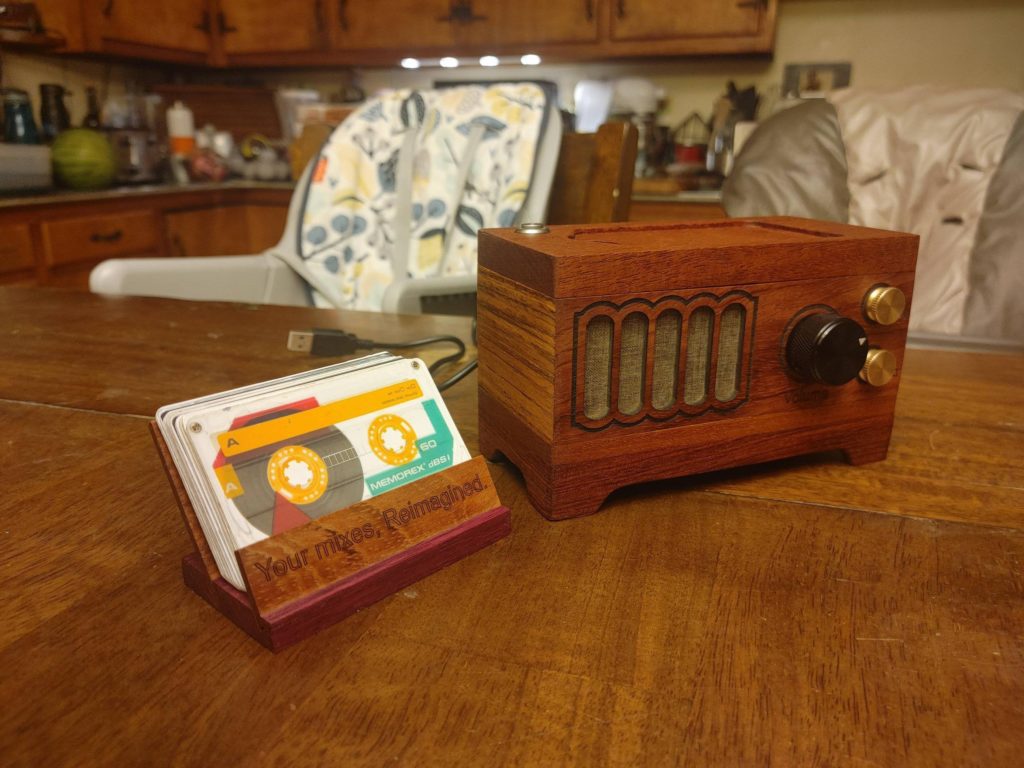
By every objective measure, with the possible exception of durability, today’s technology is superior to that of the past. That is certainly true of music players, with modern devices having the ability to stream almost every song ever recorded and the capability to do so with high fidelity. But old stuff looks cooler, which is why Redditor flatulentdisaster crafted this modern RFID music player that still delivers vintage charm.
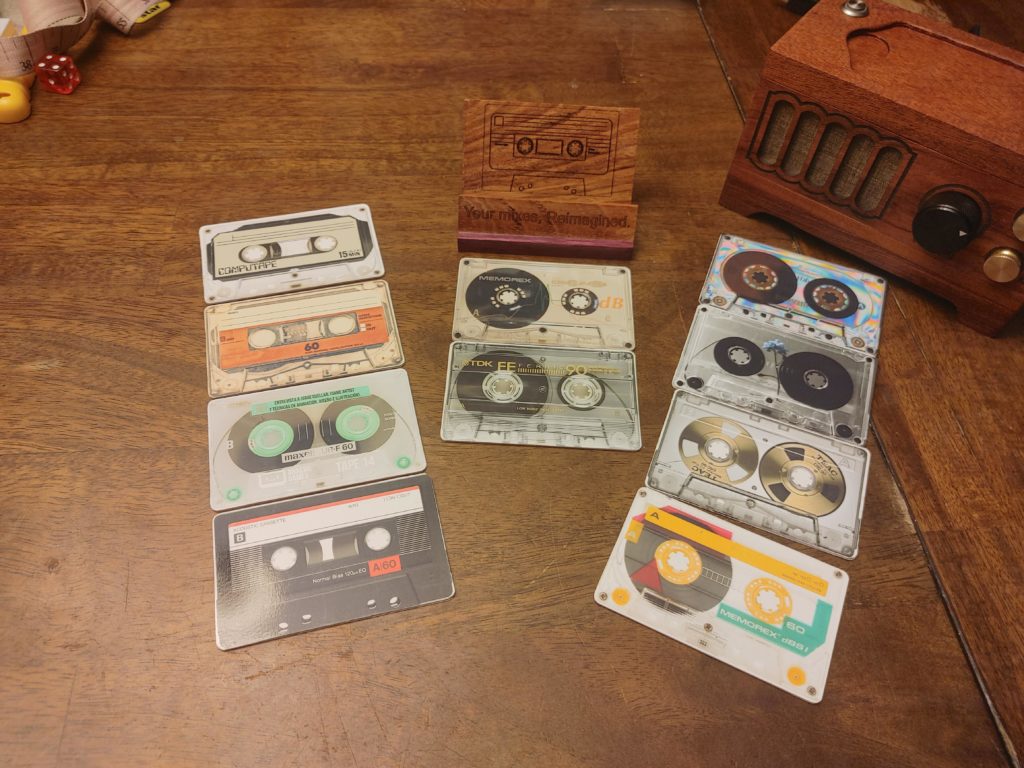
One could be forgiven for assuming that this device is legitimately vintage, because the wood enclosure looks like something straight out of the mid-century. If you saw this sitting on your grandma’s shelf, you would think it had been there since the ’50s. But the electronics and functionality are all modern. Users select from one of several RFID cards, each with a cassette tape label associated with a specific playlist. When the user taps the RFID card on top of the wood music player, it starts the associated playlist.
Most similar projects utilize single-board computers, but this one is built around an Arduino Nano instead — demonstrating the power of this development board. It connects to both a DFRobot DFPlayer Mini MP3 player and an MFRC522 RFID reader. Each RFID card has a unique numerical identifier, which the Arduino reads through the MFRC522. It then uses that variable to select the proper music folder stored on an SD card. The DFPlayer Mini has a built-in DAC (Digital-to-Analog Converter) and amplifier, so it can pump the music out directly to a set of small speaker drivers.
These special windshield wipers move to the beat of a car’s stereo
Arduino Team — March 28th, 2022
Having your windshield wipers move to the beat of your favorite song can be a fun moment while driving, which is why YouTuber Cranktown City wanted to ensure this would always be the case by adding some intelligence to his truck’s wiper blades. The idea is simple: have a microcontroller “listen” to the music currently being played, analyze the beat, and then move the wipers accordingly.
To begin, the truck’s wiper blade control unit was ripped out and replaced with an Arduino Uno along with a new DC motor driver and motor encoder for determining its absolute position. The Uno is able to listen to the music thanks to a tiny MSGEQ7 spectrum analyzer module, which takes the incoming analog music signal and splits it up into seven different bands of frequencies. When the average amplitude of the frequency that is correlated with drums goes above a specified threshold, the position variable for the motor flips from 0 to 180 and vice versa.
After gluing everything together inside a watertight enclosure and attaching the device to his truck, it was finally time to take the system out for a test drive. Much to his surprise and delight, Cranktown City’s “dancing wipers” project worked quite well and moved in sync to strong drumbeats. You can see more about how he built this project below!
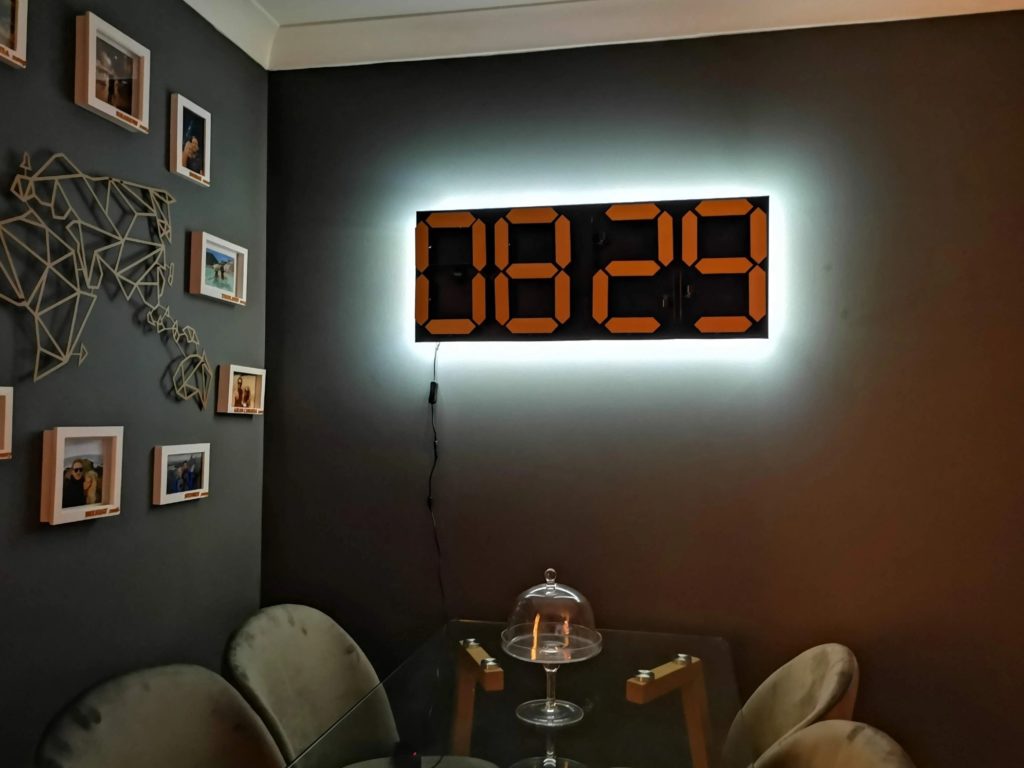
While digital display technologies exist for just about every possible use case, sometimes you want the aesthetics that only electromechanical displays provide. Many makers have built electromechanical seven-segment displays for this purpose, but they are usually driven by noisy servo motors. David McDaid wanted something quieter and created this silent electromechanical four-digit seven-segment display for use as a wall clock.
Like most similar displays, this uses an individual motor for each segment of each digit. For four digits, that is a total of 28 motors. 28 servo motors get quite noisy, which is why McDaid employed stepper motors paired with silent drivers. Those are typically used for 3D printers in order to make those printers less annoying, but they work well for this project, too. Those stepper motors only need to tilt their respective segments by 90 degrees to “turn off” that segment, so little torque was required.
McDaid implemented common 12V 28BYJ-48 steppers with BIGTREETECH TMC2208-V3.0 drivers. Because there are so many motors to drive, McDaid chose an Arduino Mega 2560 for control. It sends UART signals to the drivers through a series of chained shift registers on custom PCBs, so each set of seven segments go through a single PCB. A DS3231 RTC module keeps time. Five input buttons let McDaid set the time or switch between modes — including a mode that displays a random four letter word. McDaid 3D-printed the segments in a pleasant gold color, which contrasts well with the gray-painted back board.
The Arduino Cloud Games was first hinted at just after Christmas, 2021. That’s how long these amazing members of the Arduino community have been toiling on some genuinely incredible projects.
The top three were just announced live on the community day at Arduino Week 2022, so we thought we’d give you a closer look at what they built. Firstly though, even if it’s something of a cliche, we’ve got to say that picking them was insanely difficult. The quality, imagination and skills we’ve seen throughout the Arduino Cloud Games has been staggering. Seriously, there are very few people who work at Arduino that could build such amazing things.
So if you didn’t make it into the top three, despair not! You were up against some of the toughest creative competition in the maker world. You all blew our minds with every new project that arrived on Project Hub, so you should be incredibly proud that you made it into the finals. Keep on building!
Quick Recap of the Arduino Cloud Games
The objective was fairly broad. Initially people were asked just to pitch an idea for a Cloud-connected project. Of the hundreds of pitches we received, 100 were chosen to receive a free Oplà IoT Kit to be used in the build.
We’ve had a couple of great months over on the Arduino Discord server chatting about the projects as the participants got to work. It’s been one of those wonderful examples of what the Arduino community is all about. Some wonderful collaboration, makers helping makers, and a showcase of talent that’s such high quality it’s hard to believe.
So, chosen with a great deal of difficulty, here are the top three Arduino Cloud Games projects!
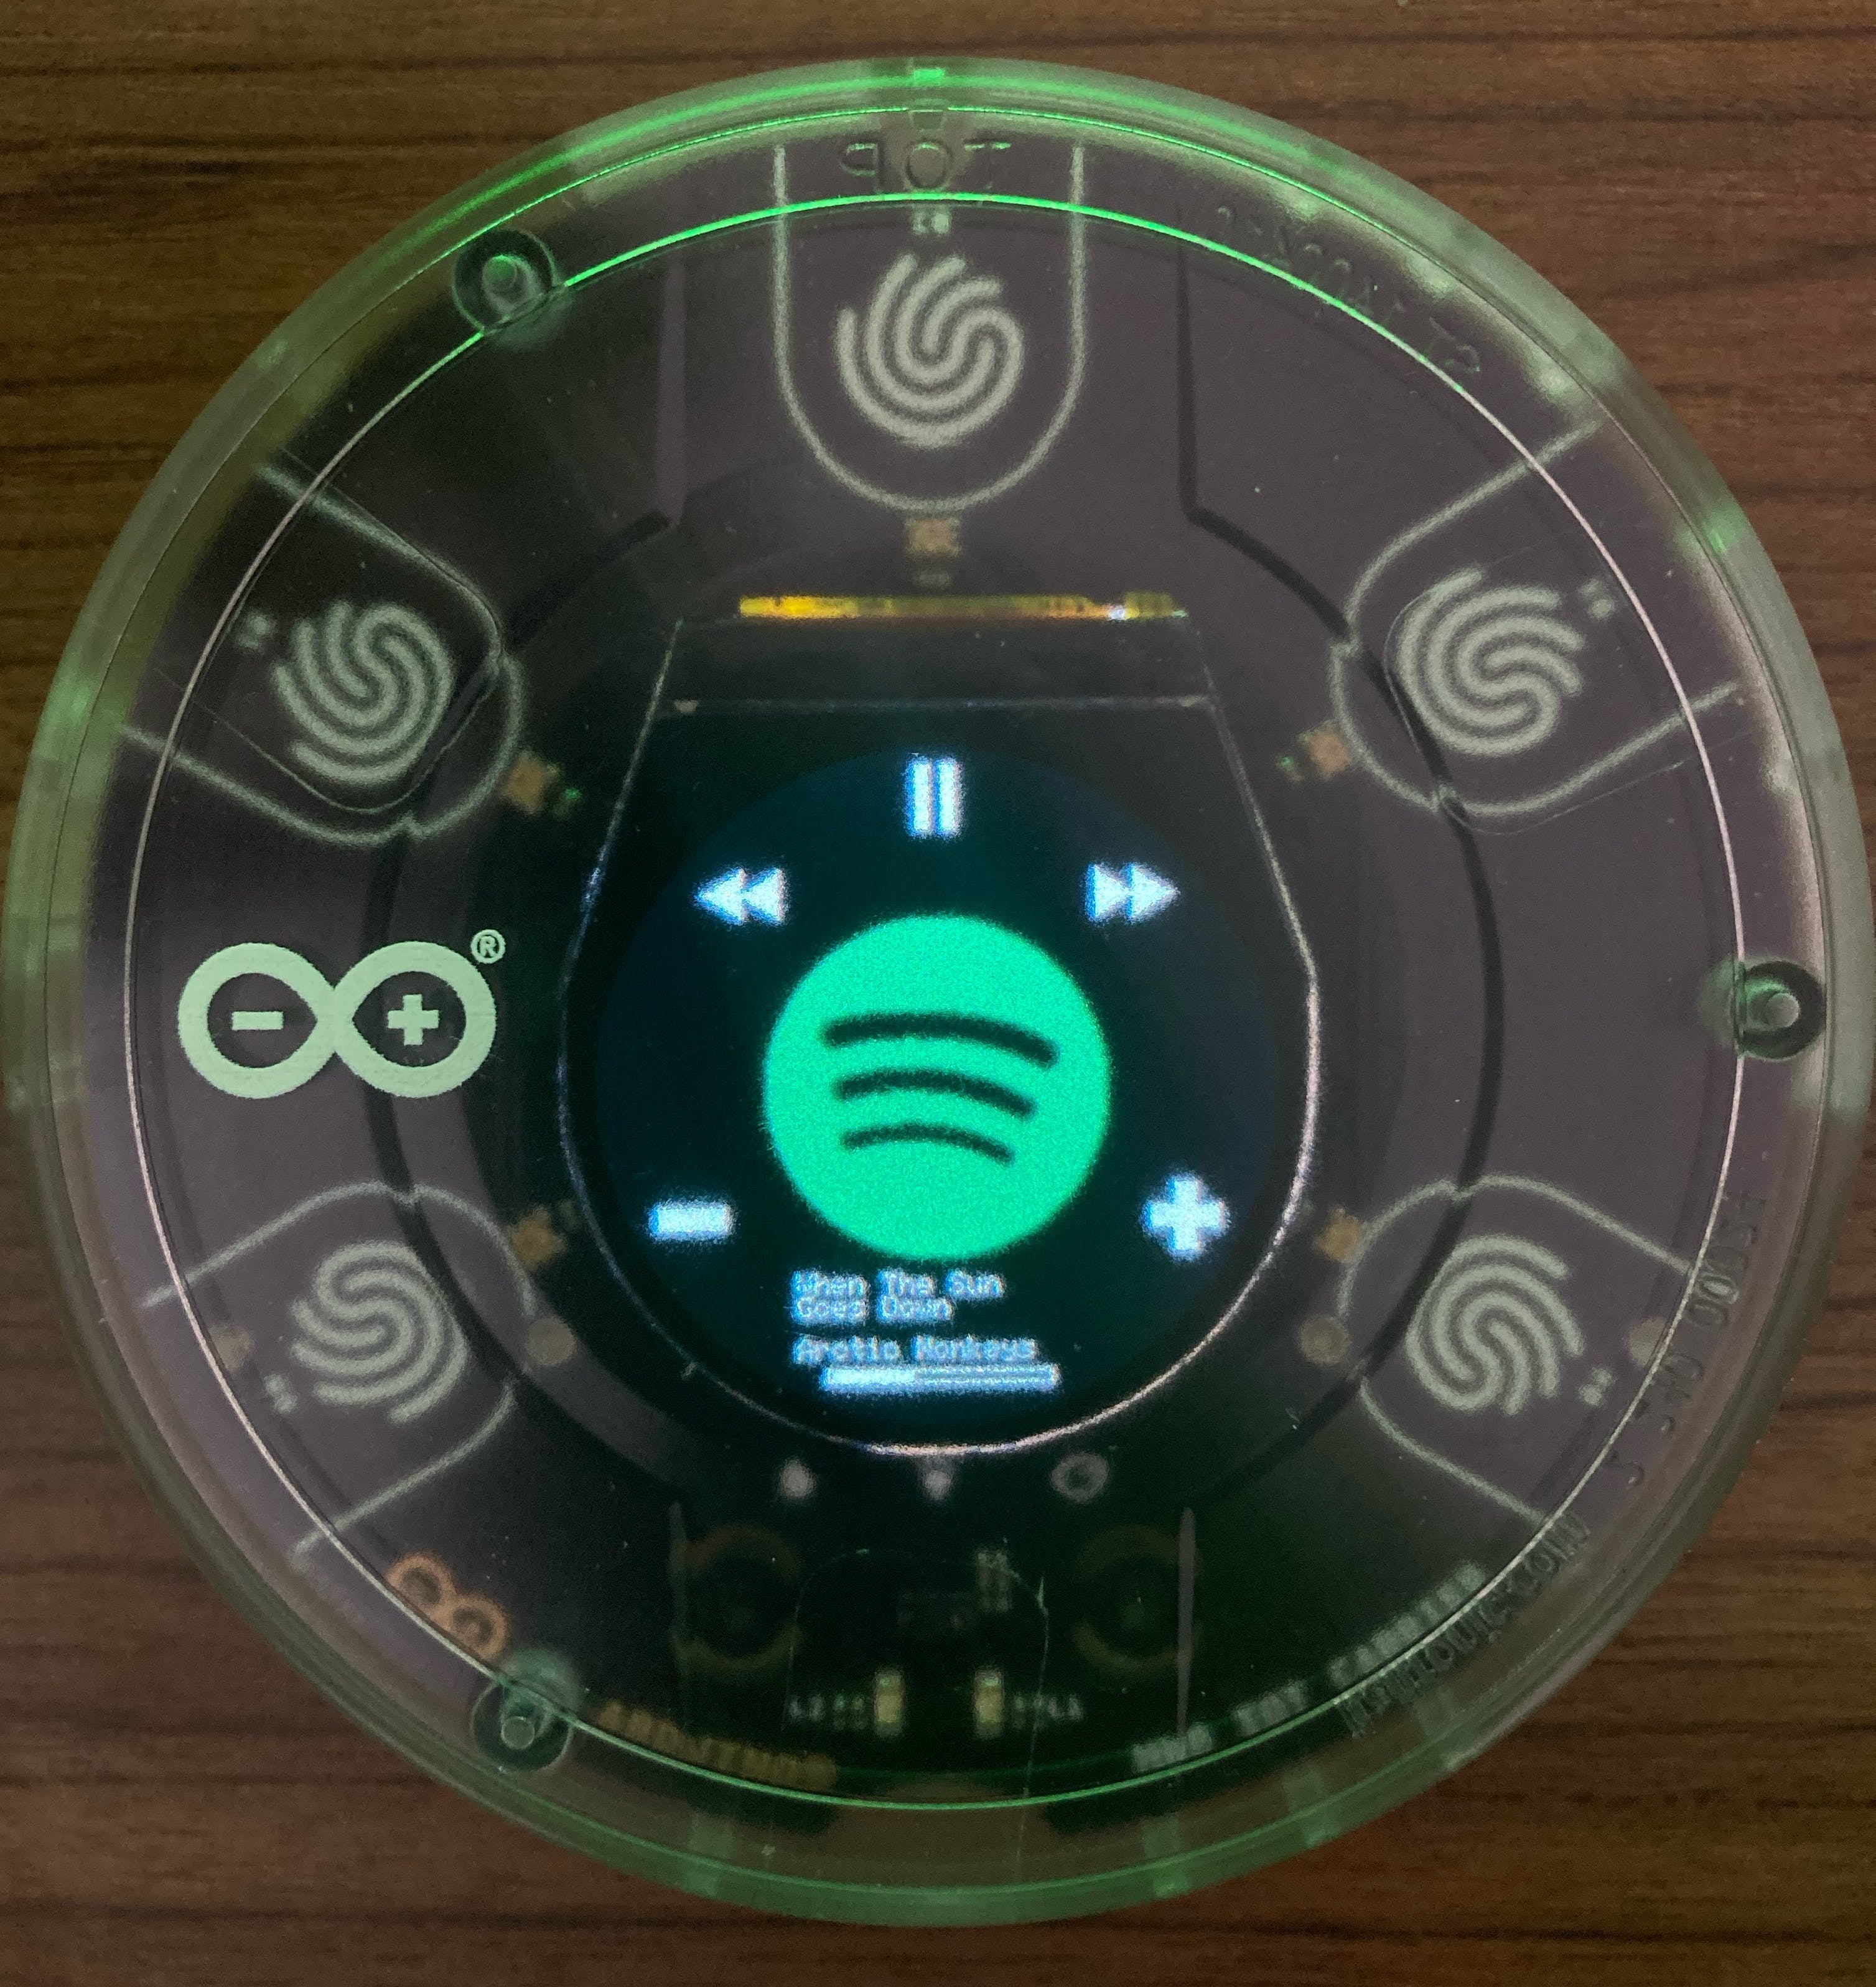
BRONZE: Oplà Spotify Controller
Altug put together a project that, on face value, is quite simple. But this is a swan; gliding gracefully on the surface, while furiously kicking below the water to drive everything forward against a strong current!
With some devilishly cunning workarounds, he was able to connect his Oplà IoT Kit to the Spotify API. From there he turned the screen and capacitive buttons into a music controller, while displaying extra info in an Arduino Cloud dashboard.
The Spotify Controller was chosen for third place as it’s almost like two projects in one. A web server, and an API controller. It expands control of a closed system (in this case Spotify) to offer a very neat solution that anyone can build for themselves. We also found it particularly inspiring, as seeing an Arduino device controlling a service like Spotify makes you realize just how much an Arduino project is capable of. And that’s worth the $250 Arduino Store voucher, for sure.
If you can control Spotify, you can control anything!
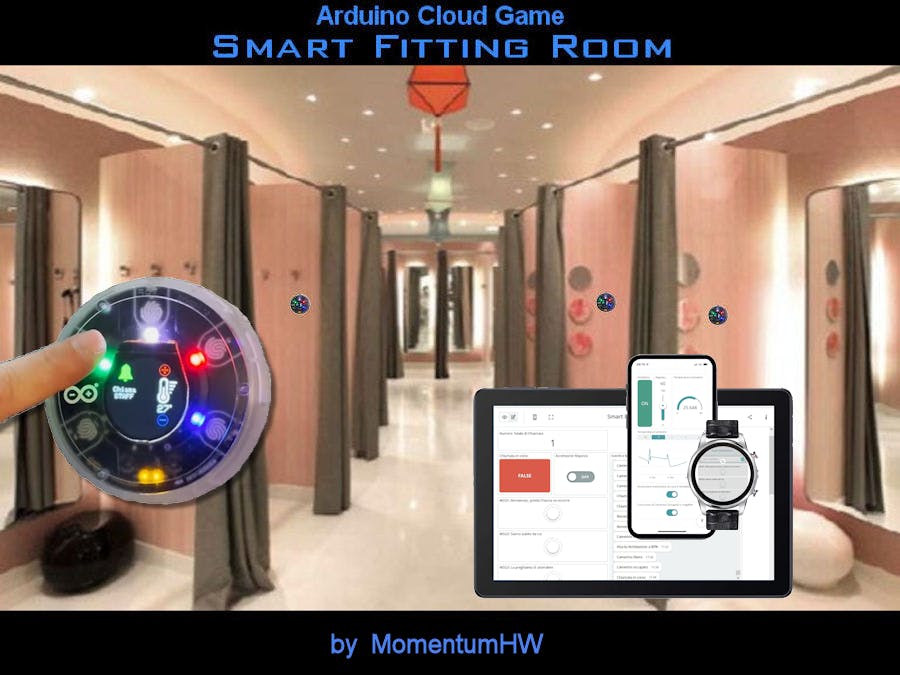
SILVER: Smart Fitting Room
Problem solving and finding solutions are two different things. As Henry Ford said, “If I’d have asked people what they wanted, they would have said a faster horse.” That’s never been more clear since we saw momentumhw’s Arduino Cloud Games project.
His system places an Oplà inside each cubicle of a clothes store changing room. As well as having a couple of environmental controls on there, the primary focus was on customer assistance.
People in the changing rooms can call for assistance without needing to leave the cubicle. Furthermore, the Arduino Cloud dashboard gives the store owner (or whoever’s manning the changing rooms) a detailed control and monitoring station to keep an eye on things.
Such an inspired way to give an Arduino project a commercial application, which it earned the $500 store voucher. Not only that, but it also shows small business owners how they could improve their customer experience in simple, ingenious, inexpensive ways.
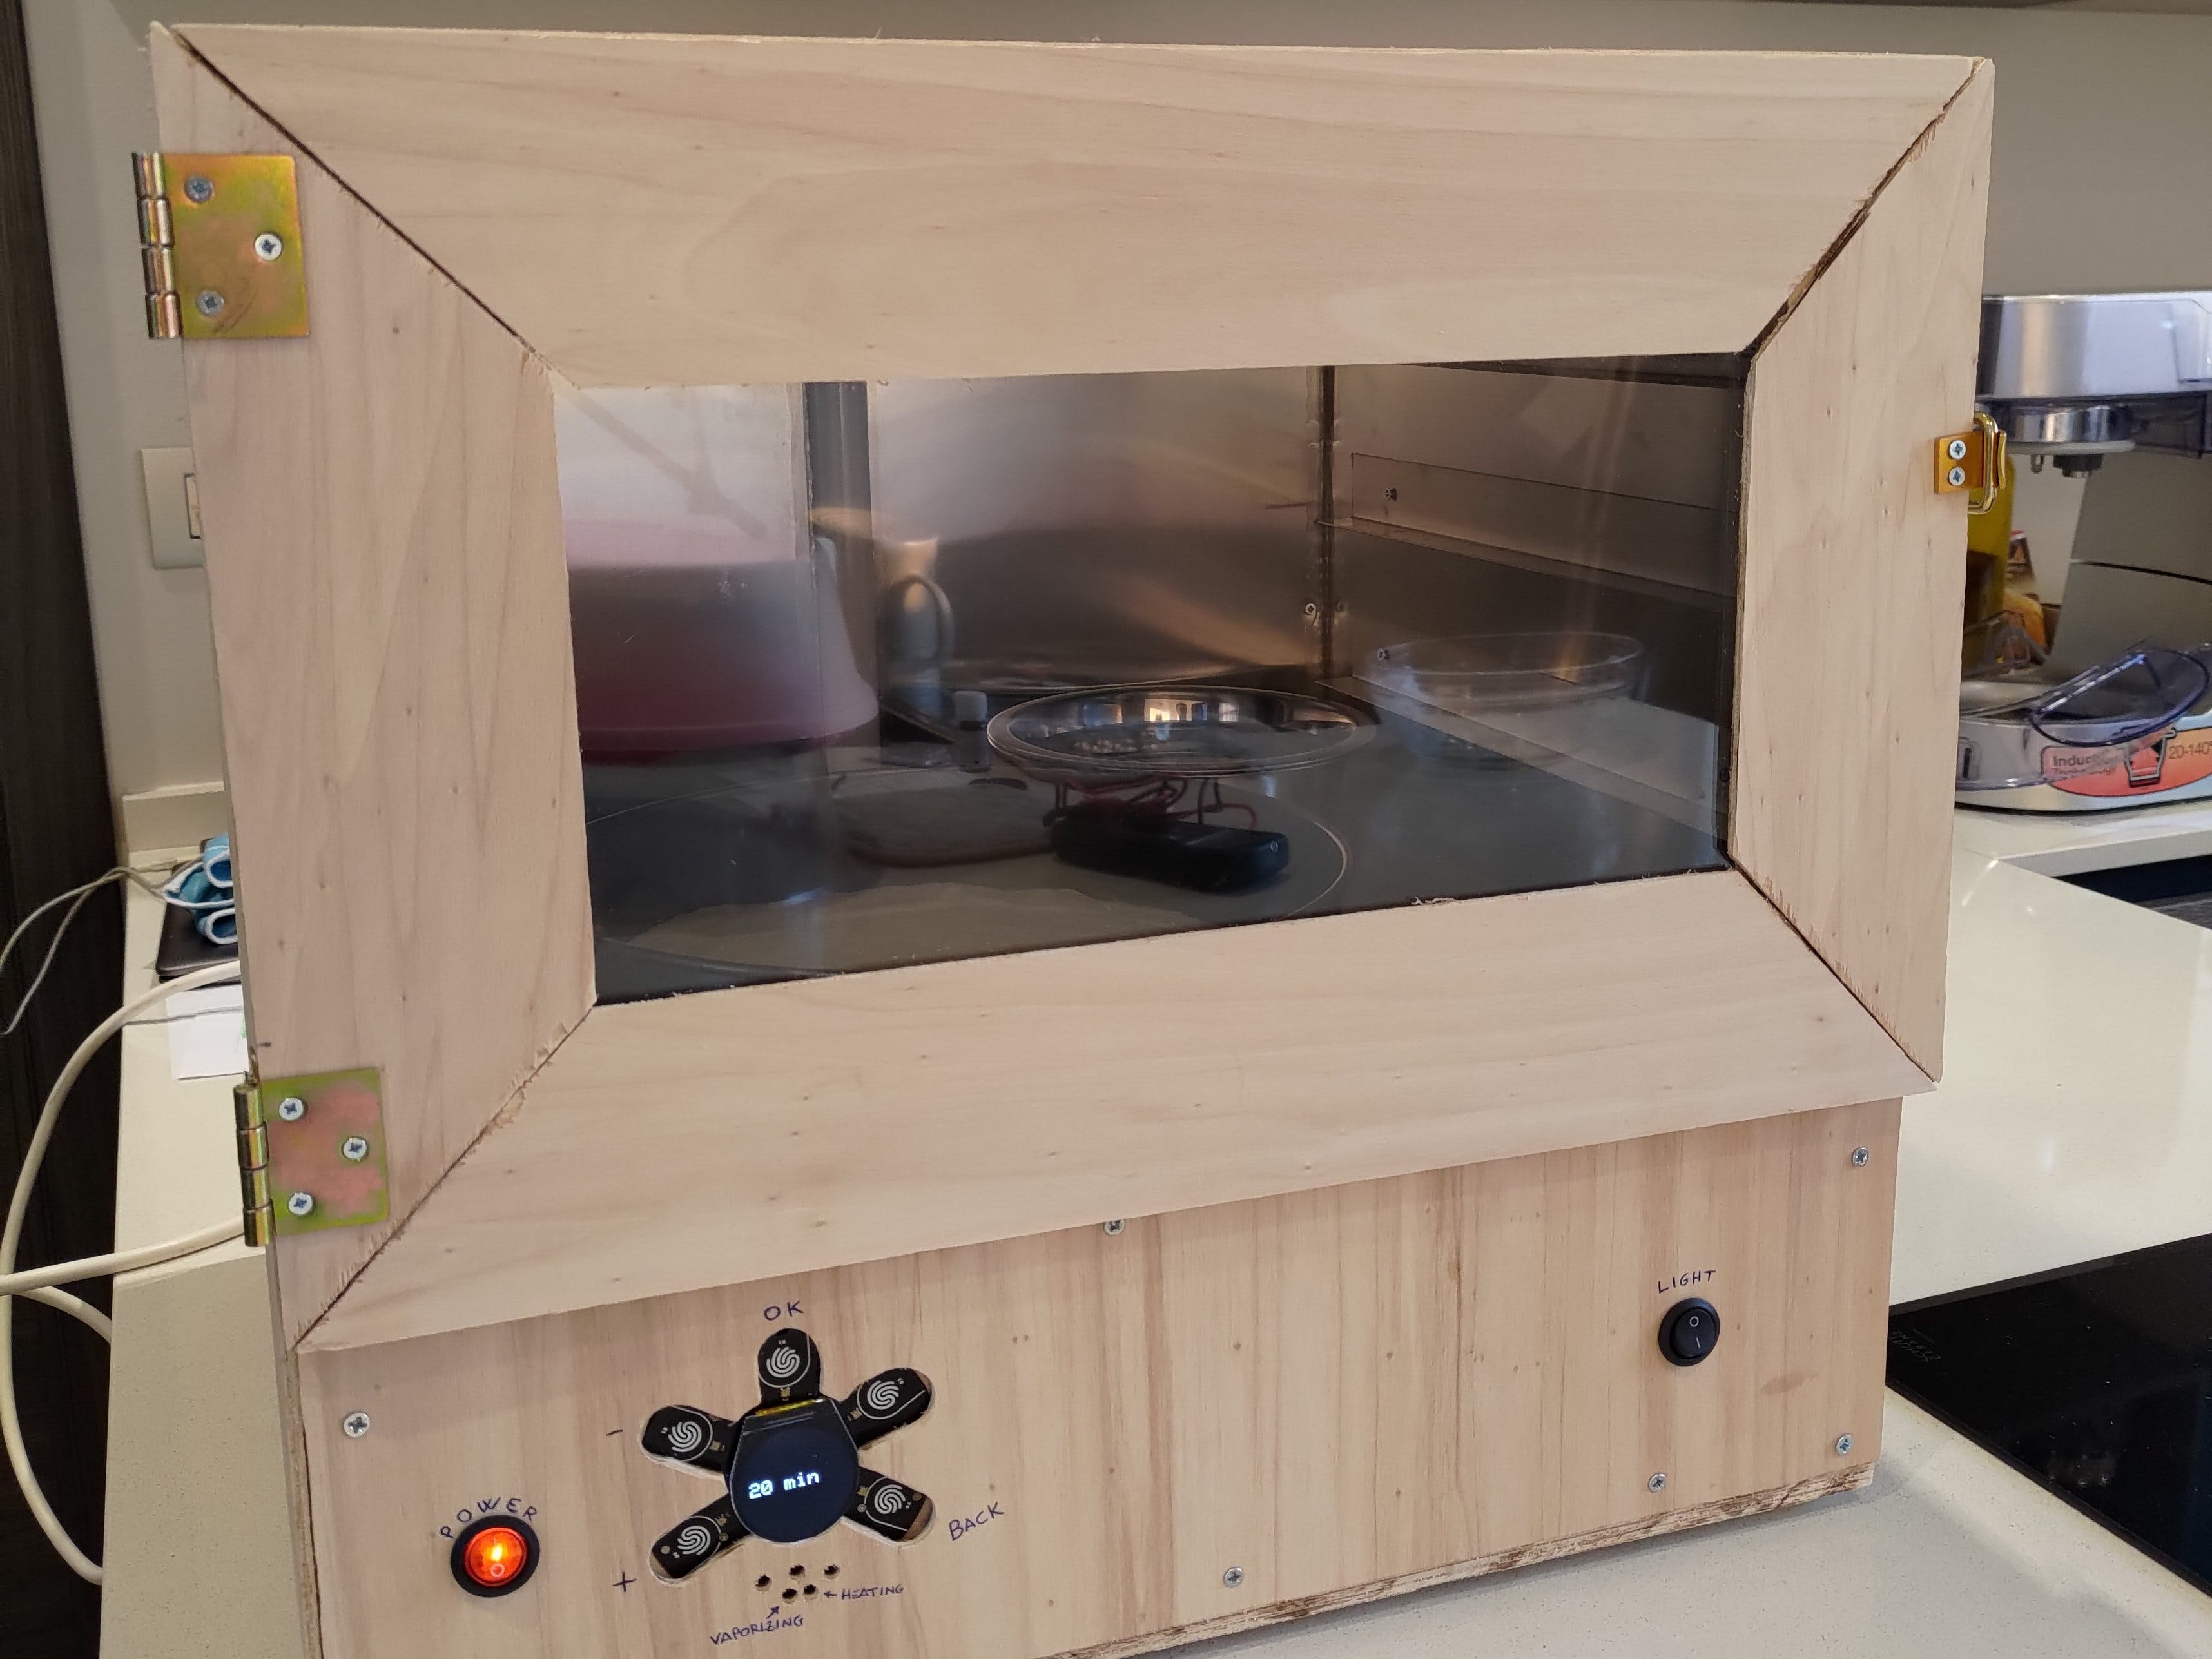
GOLD: Bakerino
Which brings us to the top award. Nestaflavio built a project at the request of his girlfriend, who has a particular passion for baking bread and pastries. The difficulty she faces is the ambient weather conditions in their locale. Primarily, it’s very dry, and the lack of humidity prevented dough from rising properly.
So this project became a leavening chamber, which allows you to control the temperature and humidity while the dough is rising. With the Oplà taking care of the sensor monitoring and environment control, it also provided a display and buttons for adjustments. Coupled with remote monitoring and controls from an Arduino Cloud dashboard, this project solved the issue with grace and ingenuity.
We felt it was the quintessential Arduino project. Not a replacement or DIY version of a commercial product, but a clever and functional solution to a genuine need. Something that people both inside and outside of the maker community would want, and could replicate for themselves. So please join us in congratulating nestaflavio for landing the $1,000 store voucher, and the gold award!
Do go and visit Project Hub to check out the rest of the Arduino Cloud Games projects, all of which were of incredible quality. Which one are you going to make first?
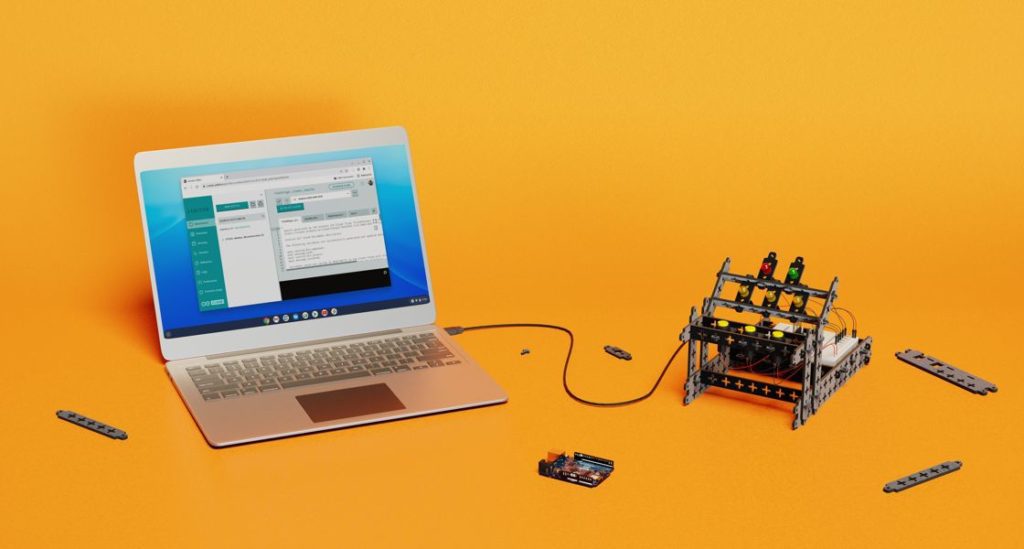
Many educators, especially those using CTC GO!, have reached out to us for a solution that will make the board compatible with Chromebooks.
So we’re pleased to announce that from today, educators and students who are using CTC GO! can now program the UNO Wifi Rev2, that comes with the kit, with their Chromebooks.
What makes Chromebooks different?
Unlike other personal computers, such as the Windows, Mac, and Linux operating systems, programming an Arduino board in Chrome OS is slightly different. Chrome OS uses the Chrome browser as the primary user interface where users can access their web based applications downloaded directly from the Chrome store.
This lean user experience makes the organization of tools, access to information, and communication between educators and students simpler, as compared to other personal computers.
This ease of accessibility of tools through web apps, however, brings in some limitations, especially when connecting external devices. One of the limitations is that users aren’t able download the Offline IDE to program their boards. Therefore, accessing and programming the Arduino on a Chromebook can only be done through using the online Web Editor.
The second limitation of using web apps is their limited access to external devices. Most computers recognize an Arduino device when connected to the computer as an external device.
The communication between the web apps running in most personal computers besides the Chrome OS use ‘agents’ as a middle man to handle communication with external devices over USB. For example, when you use the Create Web Editor, you will also have to download the Create plugin to access your board. In a similar manner, Arduino Create Chrome acts as an agent that communicates between the Chrome browser on Chromebooks and your Arduino board.
How come the UNO WiFi Rev2 board is only compatible now?
So far, we have provided support for a bunch of boards on Chromebooks based on their application and use case demands. Since the UNO WiFi Rev2 board uses a different bootloader, we had to find a way to port the same bootloader as used in the classic Arduino UNO into the board.
This bootloader makes the UNO WiFi Rev2 board accessible by the stand serial port. This way, it’s accessible – just like every other board – through the serial port.
What you need to do
You just need a Macbook or a Windows machine (we have a Linux update coming out soon), and upload a new firmware that will make the board detectable by your Chromebook.
Once you have uploaded the new firmware, you can unplug the board and connect it to your Chromebook, download the Arduino Create for Education agent on your Chromebook browser – and you’re ready to go. It’s that simple! You can also find more detailed instructions in this tutorial.
Chromebooks are widely used today due their high accessibility factor, making them a viable option for educators to adopt as personal computers for education – especially when education is done remotely.
In a similar manner, we are working towards providing more support for our educational kits by making them more accessible on different platforms and educational systems.
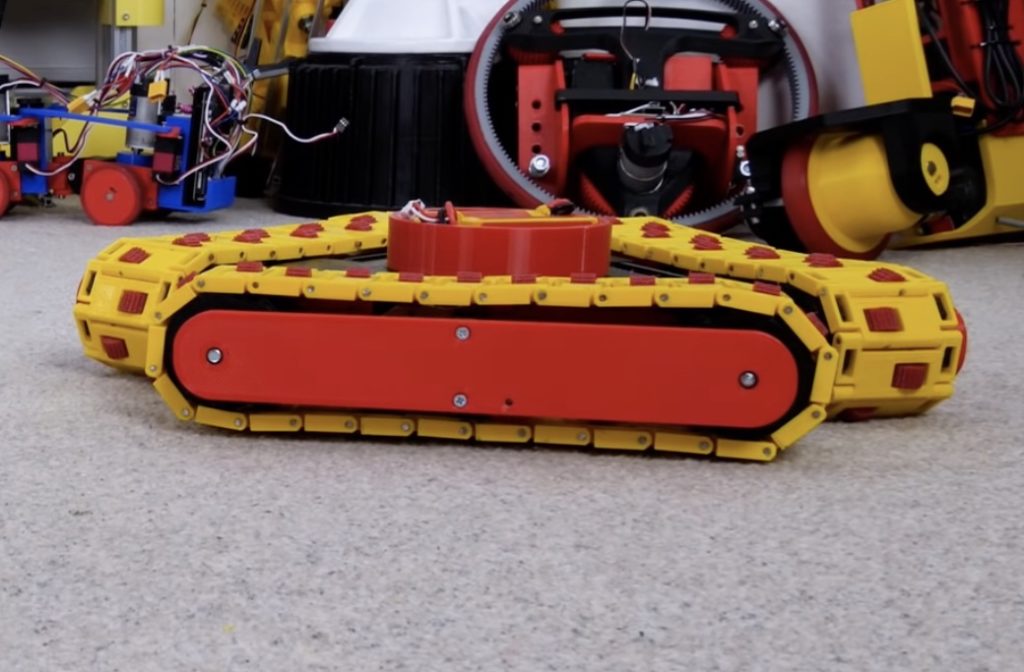
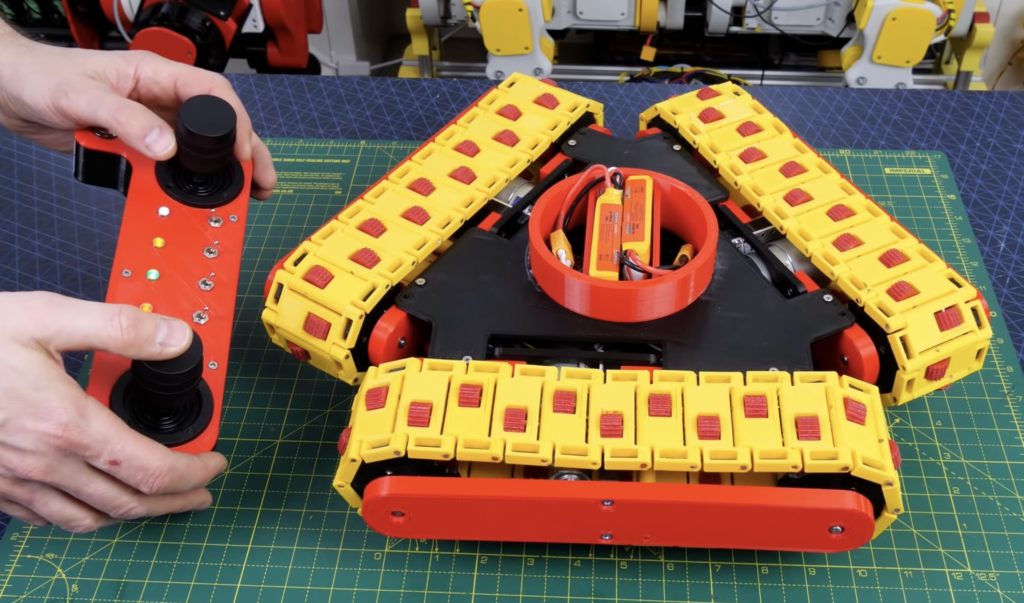
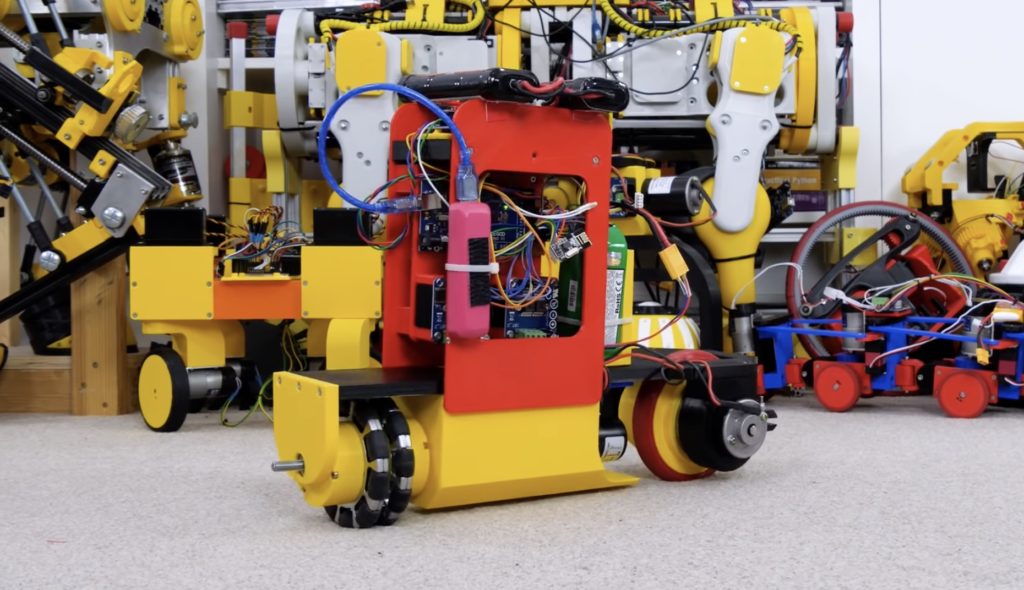
Omni wheels are fantastic because they let a vehicle drive forward, backward, left, right, and rotate — all without a steering mechanism. There are only two catches: all four omni wheels must be driven and omni wheels don’t handle rough terrain or obstacles well. Tank tracks are perfect for rough terrain, so James Bruton thought to combine the two concepts. To test this idea, he built an Arduino-controlled robot with a triangle of tank tracks.
This robot has three tank tracks, each of which is driven by a simple geared DC motor. Burton arranged those in a triangle formation, so each track is at a 60 degree angle to the other two tracks. Normally, an arrangement like this would be a disaster, as it couldn’t drive in any direction without dragging at least one of the tracks. But Bruton lined all of the tracks with small wheels, which have axes of rotation perpendicular to the track motor axles. Those wheels rotate freely, so the vehicle can move without resistance — even when that movement is perpendicular to one of the tracks.
Movement requires the coordination of all three track motors in order to vector the motor speed. Bruton used an Arduino Mega 2560 board for the job, because it has plenty of pins available to control the motor drivers via PWM. It also had pins to spare for an SPI connection to an nRF24L01 radio transceiver, which receives commands from Bruton’s general purpose robot remote control.
The robot drove quite well on smooth carpet and is able to maneuver in a manner similar to what you’d see with standard omni wheels. Unfortunately, it wasn’t able to handle obstacles. The tracks were too smooth to get traction on an obstacle and constructing them from a grippy material would have kept them from sliding when necessary. While the robot didn’t accomplish Bruton’s goal, it is still interesting to see in action and is a thoughtful exploration of alternative drive types.
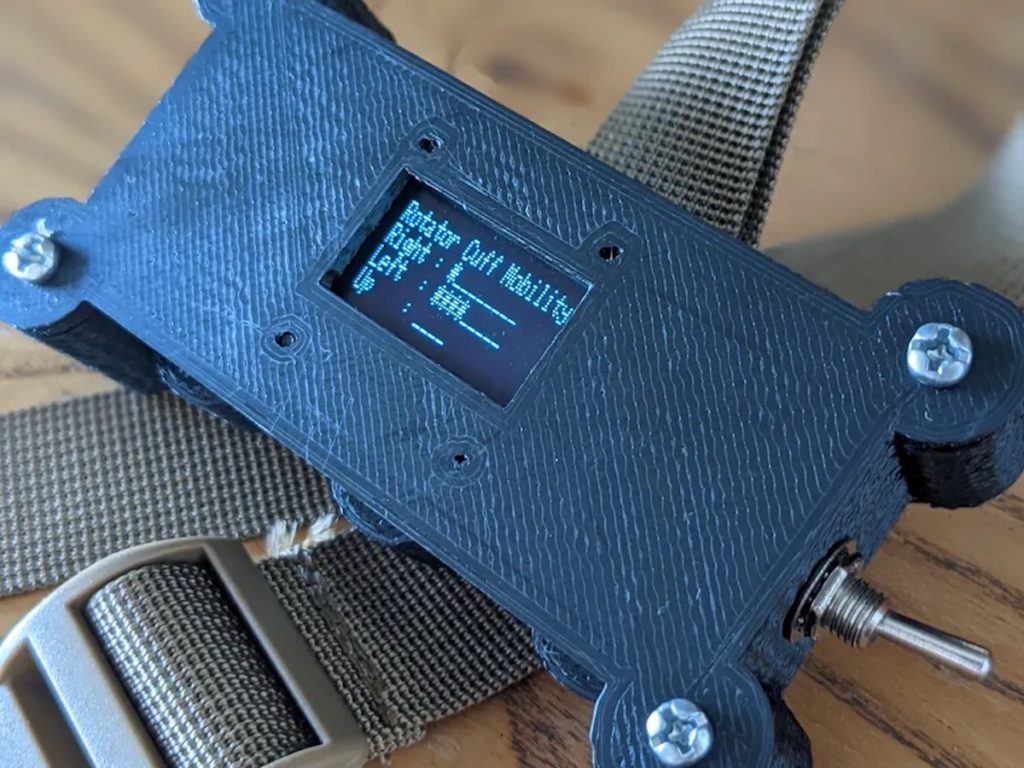
Shoulder injuries can be quite complex and require months of careful physical therapy to overcome, which is what led to Roni Bandini to build a tinyML-powered wearable that monitors a patient’s rotator cuff movements to aid in the recovery process. His system is designed around a Nano 33 BLE Sense and its onboard accelerometer that measures both the types and frequencies of certain shoulder motions.
After 3D printing a small case to house the Arduino along with a battery pack and an OLED display, Bandini created a new project using the Edge Impulse Studio. The impulse takes in time-series three-axis accelerometer data, runs it through a spectral analysis block, and then infers the current movement being performed by the wearer.
Once switched on, the system initializes a set of three movement counts to zero: right, left, and up, while the last type, idle, is not counted. Then throughout the day, the patient is encouraged to perform various exercises in order to fill up the bars completely. The eventual goal is to make steady progress towards having a recovered rotator cuff joint with a larger range of motion than immediately after the injury.
Bandini’s video explaining this shoulder recovery system can be viewed below, and the project’s design files/code can be found here on Hackster.io.
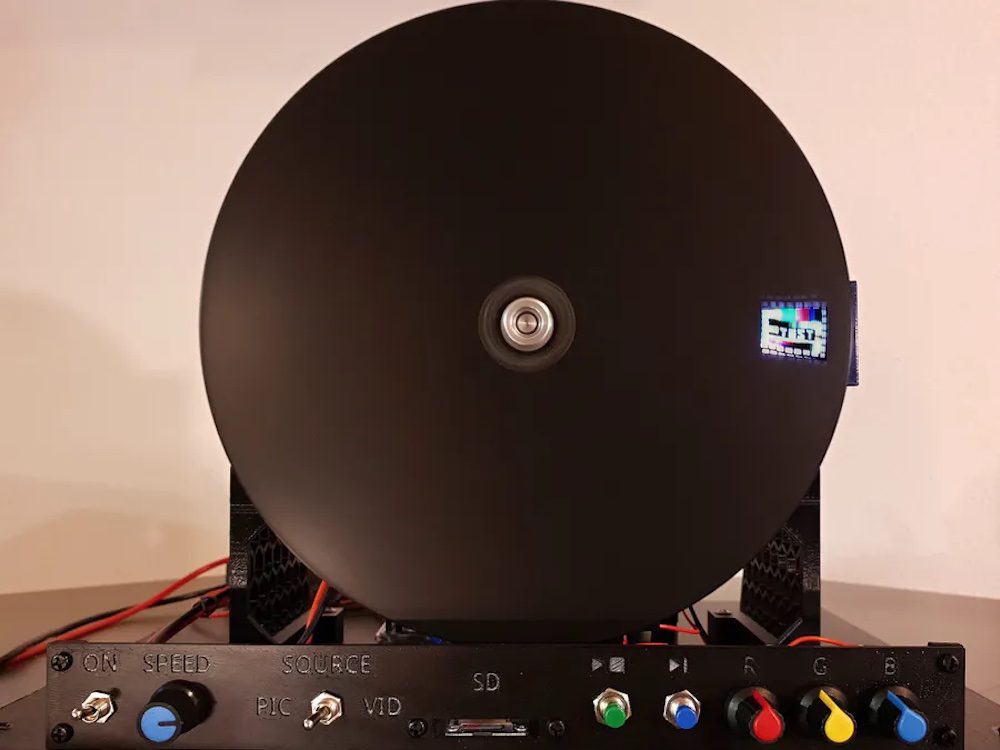
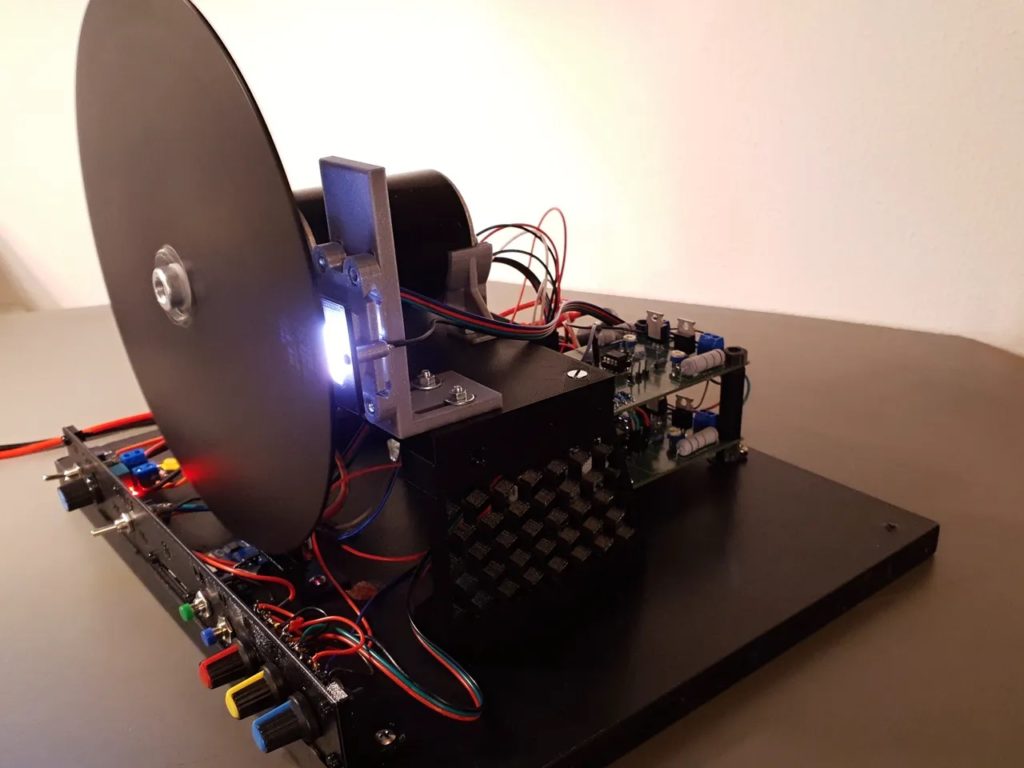
Nipkow displays are a special kind of persistence-of-vision device in that they use a spiral of tiny cutouts on a large spinning disk along with a single point of color generation to make an image. Maker Mac70 has come up with his own 3D-printed version, which integrates an Arduino Mega 2560 board, a fast motor, and sensors to create a machine that can show either static images or short animations — all with just one LED.
The base of the Nipkow display is a 12V DC motor that is able to spin the disk quickly enough so that each colored dot appears as one image. Synchronization was achieved by taking an infrared object sensor and pointing it towards the edge of the disk. A small reflective strip then signals to the Arduino that one rotation has been completed and the next frame can be drawn.
For high color accuracy and granularity, mac70 designed his own triple DAC solution, which takes in many GPIO inputs and produces three distinct analog levels that vary the intensity of the RGB LED. Finally, bitmap files are stored on the SD card and read by the Mega in sequential order.
More details on the project can be found in mac70’s write-up and you can see it in action below!
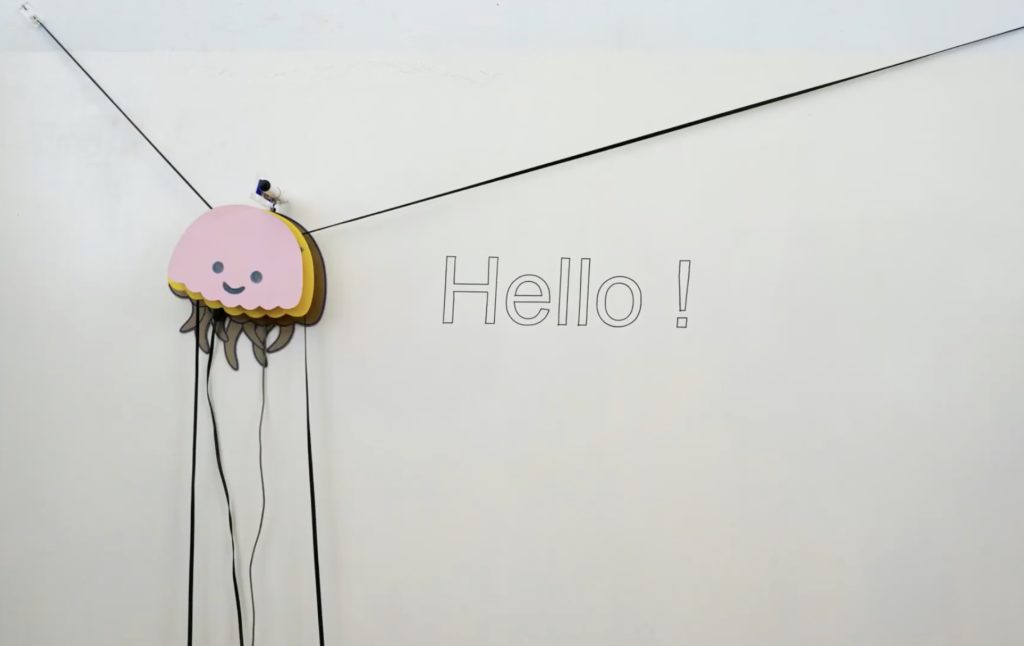
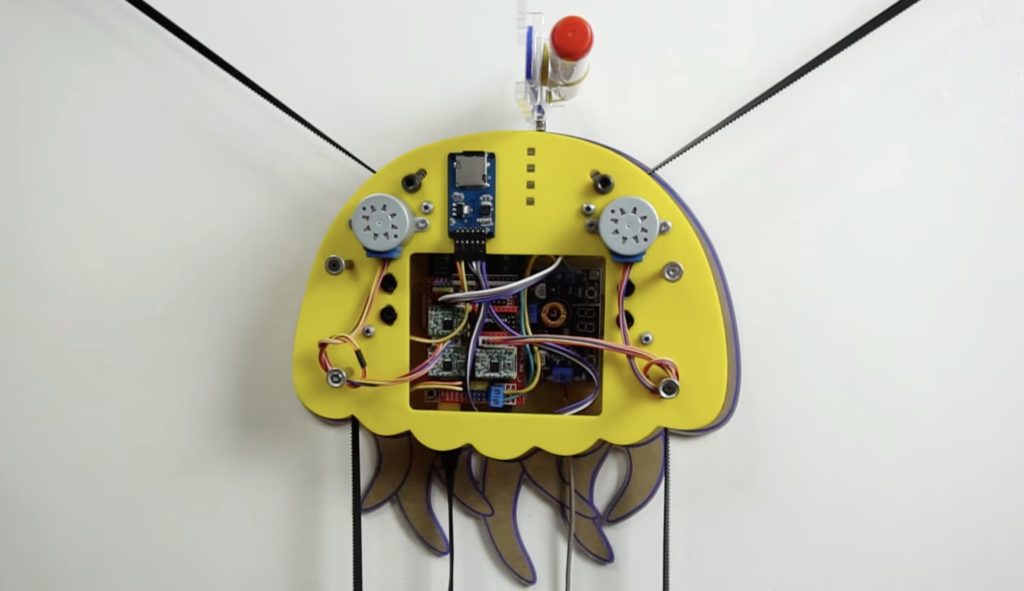
Back in August 2021, mechatronics engineer ‘engineer2you’ had the idea to create a fun CNC plotter that easily mounts to a pair of points along a wall and traverses across the surface to draw on it, essentially becoming a self-contained mural-making robot. The jellyfish-looking device, named Fumik, is able to sketch patterns within a 5×3 meter area and it does this with the help of an Arduino Mega 2560.
The back of the robot houses two stepper motors that each has a pulley at its end, which allows Fumik to pull itself horizontally and adjust its height vertically. The images themselves are stored in a special format that lists a series of lines, arcs, and movements that have been extracted from an SVG file. Once read off the onboard SD card, these commands are translated to physical movements which drag the attached drawing instrument across the wall.
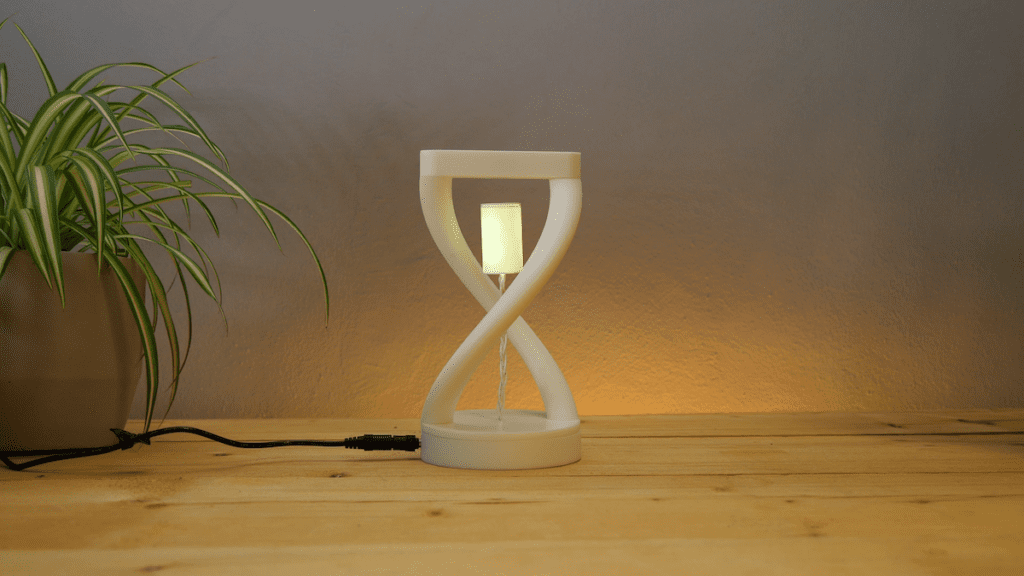
The humble lamp can come in many different forms, but nearly all of them feature a singular bulb that is uninspired and only responds to a light switch or potentially an app. YouTuber Tom Ouwerkerk, on the other hand, has designed a creative light accessory that is entirely 3D-printed and includes an intelligent central bulb that “magically” levitates above the base, defying gravity.
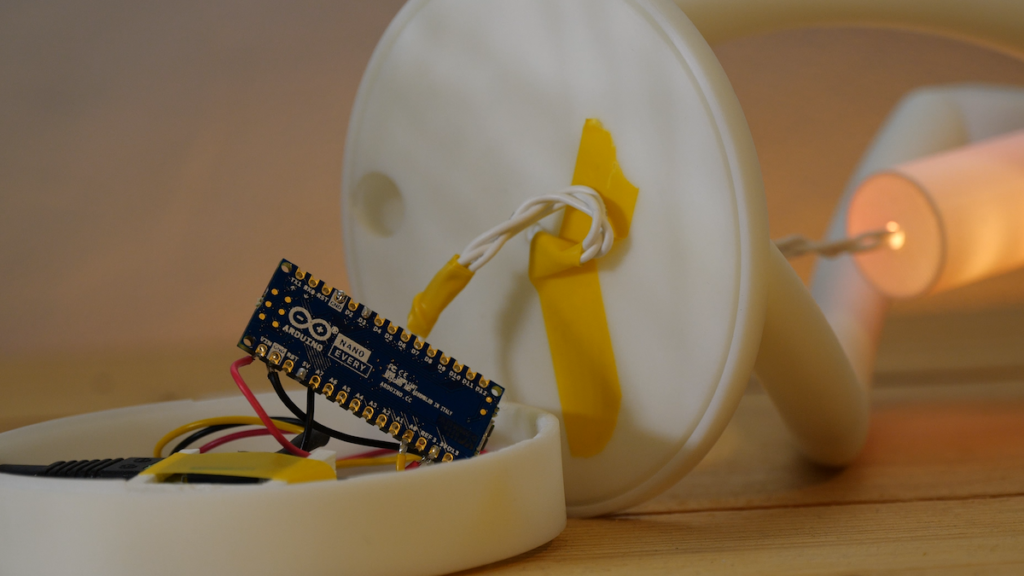
For the base of the lamp, Ouwerkerk printed a simple ring with a cutout on its side for plugging in a DC barrel jack. From there, he added an Arduino Nano Every that is responsible for controlling a strip of four WS2812B RGB LEDs and sensing if the bulb has been placed into its off position. When the bulb isn’t resting on top of the base, its top magnet gets attracted to the other magnet, which faces down from the top of the lamp and helps pull it upwards for the floating effect.
As seen in Ouwerkerk’s demo video below, the lamp produces a wide range of diffused colors while appearing as an elegant display piece. You can read more about this project and check out its design files on Instructables.
We’re proud to announce a new addition to the Arduino ecosystem, the Nicla Vision.
This is a brand new, ready-to-use, 2MP standalone camera that lets you analyze and process images on the edge for advanced machine vision and edge computing applications.
Now you can add image detection, facial recognition, automated optical inspection, vehicle plate reading, gesture recognition and more to your projects. Nicla Vision has a powerful dual processor and is packed with features that make an infinite number of applications possible in building and industrial automation, safety and security, and prototyping. Everything from business-savvy predictive maintenance (by detecting and analyzing surface wear, for example) to user-friendly smart kiosks that anyone can explore via intuitive gestures. All true to Nicla’s mission to provide a new range of easy-to-use, cost-effective and accessible tools to advanced users and enthusiasts alike.
Packed with potential, you can use Nicla Vision anywhere because it’s small in size and can be battery-powered. At the far end of your construction site, or in a tight spot in front of analog meters, it works wherever it’s needed.
What’s more, Nicla Vision is compatible with Portenta and MKR components. It fully integrates with OpenMV, supports MicroPython and features WiFi and Bluetooth® Low Energy connectivity to complement a wide range of professional and consumer equipment. This means you can easily add ready-to-use sensors such as a camera, microphone, IMU and ToL to your projects.
Prototyping machine vision applications just got a lot faster.
Nicla Vision Features
Part of the Nicla range alongside the Nicla Sense ME, it’s based on Arduino’s smallest form factor at just 22.86 x 22.86 mm.
It has a powerful dual core microcontroller and is equipped with a 2MP color camera that supports tinyML, taking image processing capabilities to the next level.
Nicla Vision offers both WiFi and Bluetooth® Low Energy connectivity.
On top of image detection and recognition, it senses and captures distance, sound, movement and vibration data, thanks to a smart six-axis motion sensor, integrated microphone and distance sensor.
It maximizes compatibility: all Nicla products also fit perfectly into any solution based on Portenta or MKR.
Need a standalone solution? Nicla Vision can be battery-powered.
Whether in a dark warehouse or on the other side of your house, the Nicla Vision has the abilities and intelligence to keep an eye on things for you. If you’ve ever dreamed about interacting with machines that simply understand what you need because they can see you, this device is for you.
It’s not that long since Arduino IDE 2 came out of beta, and already we’re on release candidate 4. And it’s well worth the update, as there are some excellent new features that you won’t want to miss out on.
Automatic Updates
Starting off with the big one, as of Arduino IDE 2 RC4 you’ll be automatically notified about future updates. The software will keep a check on new versions of the IDE as and when they become available. It’ll ask you for a confirmation about downloading and installing the new release, and then it’s just a click to get it.
No need to go searching for the updates or downloading installer files any more. “Hassle free upgrades” is how one of our developers eloquently described it! Take a look below.
Linux users also get a shot in the arm with this latest candidate. We’ve added an AppImage file, so you can run the Arduino IDE on any distro, without the needing to install anything. Cool right?!
File association with .ino files means that both MacOS and Windows users can launch the IDE directly from Finder or Explorer by double clicking the sketch file. A few less mouse miles required to get your sketch open and ready for you to work on.
Also cutting down on the number of clicks is a new feature that restores your last session and reopens closed workspaces on startup.
And of course there are the usual rounds of changes and bugfixes, all of which you can find in the changelog.
So go and grab Arduino IDE 2 RC4 and let us know your thoughts over on social media!
World-leading technology research and consulting company Gartner has recently published its Hype Cycle for Digital Business Capabilities. It’s full of ideas and recommendations for executives who need to future-proof their strategy and leapfrog the competition in the disruptive landscape of digital business.
We’re proud to see Arduino mentioned among sample vendors in the publication, specifically in the section dedicated to the emerging “Digitally Connected Products” market.
Gartner’s analysts point out completely new scenarios and opportunities for companies selling products with digital or IoT capabilities. From product-as-a-service models to acquiring data along the customer journey that begins after purchase. This translates into potential profits for a growing number of brands, as different technologies converge to make digital capabilities attainable at competitive prices.
Want to find out more about insights and predictions that can keep you ahead of the curve?
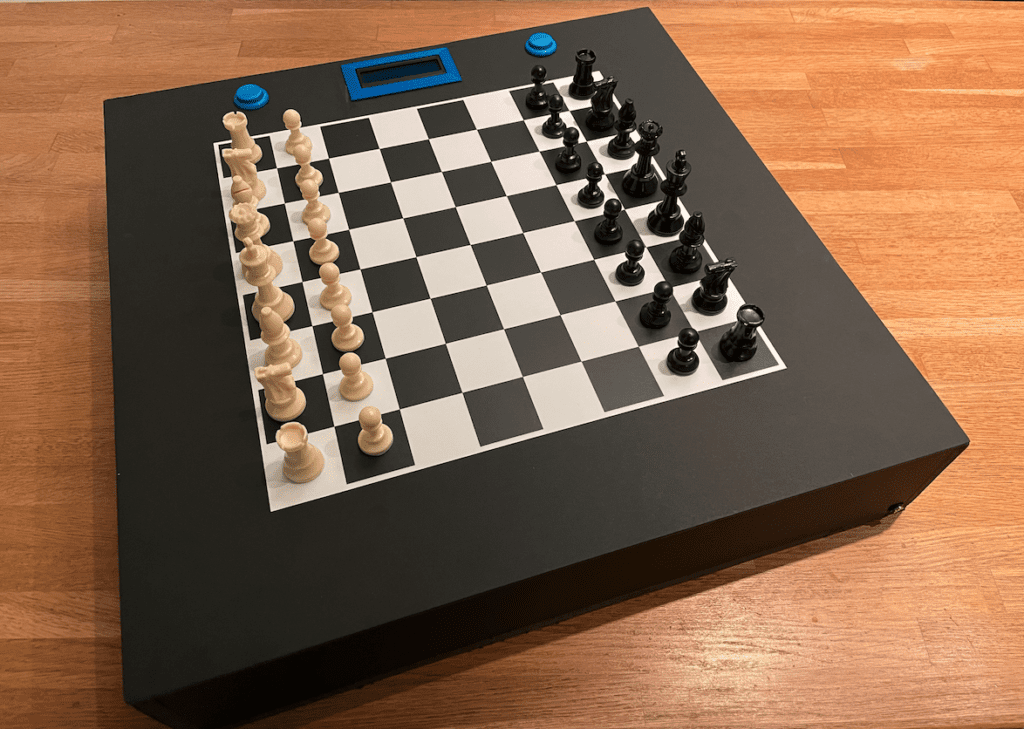
Chess still remains an extremely popular game but finding someone to play against can be a struggle, especially when it’s done in-person instead of through a screen. Greg06 on Instructables has created an automated chessboard that can not only tell where specific pieces are moved, but also play against a live human opponent intelligently while moving its own pieces.
At the base of the gameboard is a two-axis gantry system, which is responsible for moving the chess pieces positioned above via an electromagnet. And rather than placing one stepper motor on each axis, the gantry takes advantage of the CoreXY concept which can move the magnet in all directions with a complex arrangement of pulleys, belts, and two stationary stepper motors. Controlling this is a single Arduino Nano connected to a pair of A4988 drivers, a MOSFET for driving the magnet, and two limit switches for homing.
The game is able to determine which piece was moved and to which specific grid square via an 8×8 matrix of reed switches that close a circuit whenever there is a magnet nearby. To save on GPIO pins, four multiplexers were added in order to take the 64 incoming values from the switches and convert it into a single 6-bit value. Finally, a 16×2 character LCD was included for providing instructions/menus to the player(s).
The entire system works by running several iterations of a chess minimax algorithm that attempts to select the optimal move given the current state of the board. To see it in action, you can watch Greg’s demo’s video below or read more about the project here on Instructables.
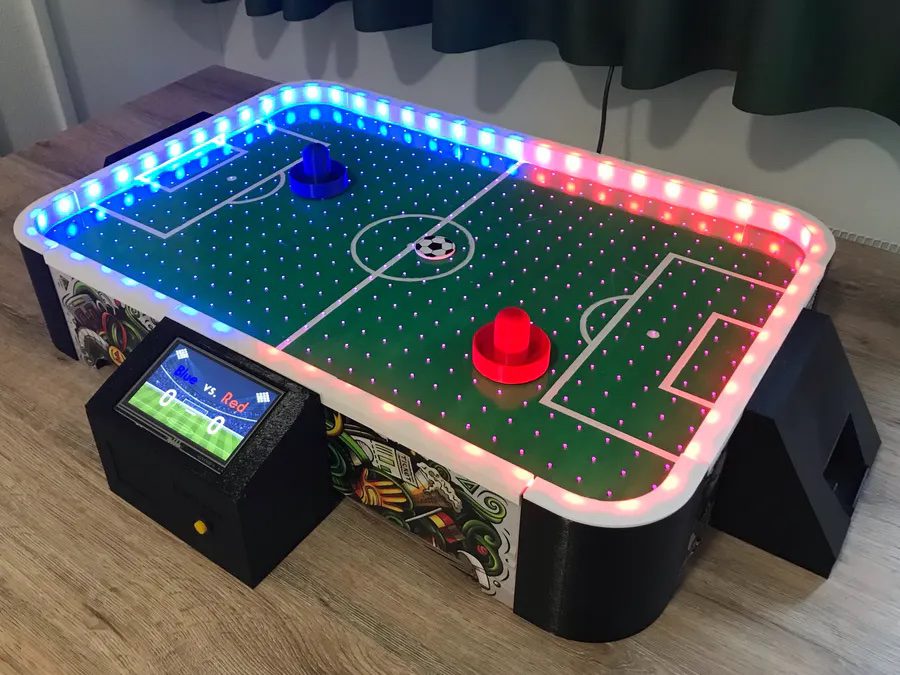
The classic tabletop game of air hockey has existed in its current form for decades, and while it can be fun initially, the lack of exciting components can make it dull after a while. So, in order to exercise his creative and technical skills, Silas Hansen decided to create his own spin on the game by making an air football table. His project was designed and built from scratch with some very innovative fabrication techniques.
The base of the air football table was crafted by laser cutting various pieces of MDF board into the side panels and the second layer of the top. To ensure smoothness, the top layer was cut from a solid panel of acrylic that also had a series of holes for air to pass through. Lastly, the corner supports, mounts, and game pieces were 3D-printed.
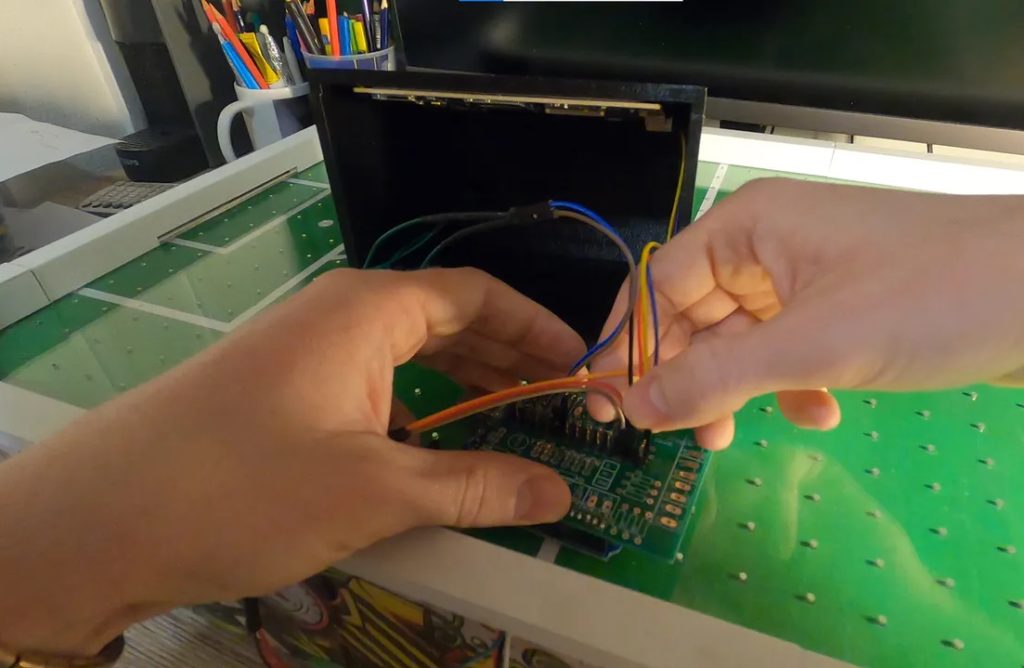
For scorekeeping, each end of the table was fitted with a single IR line tracking sensor which sends a pulse to the Arduino Uno whenever the puck passes underneath. In response, the WS2812B strips surrounding the table light up in the winner’s color and the newly updated score is sent via UART to an attached Nextion 4.3” TFT screen. All of the electronics can be powered off by pressing a red push button, although the large fan at the base must be physically disconnected from its batteries.
Arduino Week takes place between 21-26 March, 2022, marking the first time we’ve expanded the birthday celebration into a full week of talks, events, launches and presentations. We’re reserving the last day of the week (Saturday, 26th March) for these community-driven events; putting the spotlight on your celebrations for the big finale.
We recently wrapped up the call for speakers, after we received a huge number of pitches and ideas for people who wanted to take part in the official Arduino Week event. Now we want to hear all about any events you’re planning to help us raise awareness and have fun with open-source hardware, software and services!
Applications are Open for Arduino Week Events
Let’s get right into the good stuff. If you’re planning on hosting your own Arduino Week event, click the button below to send in an application. Once approved, you’ll be listed on the Arduino Week website as an official organizer!
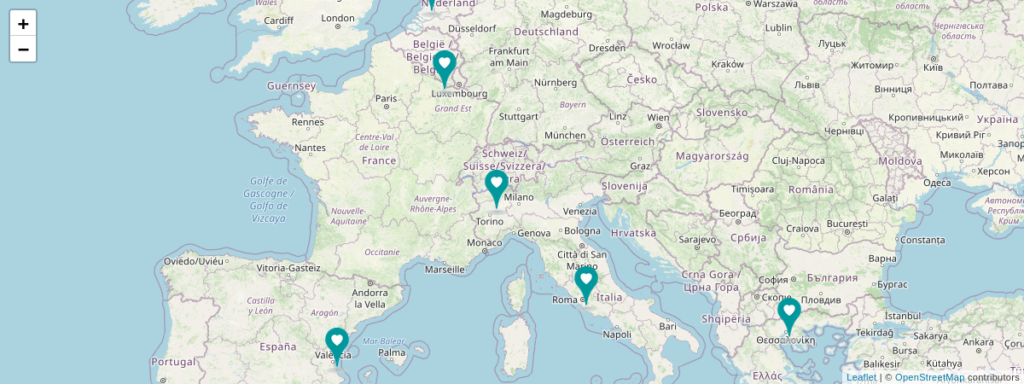
We’re building up a map of all the Arduino Week events that the global community is hosting this year, and we want to add a pin for yours. It can be online, in person, or a hybrid of the two, so there’s ample opportunity for anyone and everyone to take part.
All we need in the application form are a few details about what you’ve got planned. Where it’s at, what kind of online presence it’ll have, and perhaps most importantly of all, what’s on the agenda.
Speaking of which, there are no hard and fast rules about what your Arduino Week event needs to be. You might be hosting a hackathon, having interviews and talks with experts or creators, running on- or offline workshops, or anything else that shows your love for Arduino, open-source, and the culture of sharing.
If your event makes it onto the Arduino Week list, we’ll help you to promote your event online. You’ll also receive a digital kit containing all the images, logos and assets you need to show that you’re an official part of Arduino Week. And then afterwards we’ll send you a certificate of participation, which can be great for job or school applications, as well as helping you to proudly showcase your passion for all things Arduino!
Applications are open right now, and close at midnight on 14th March (promptly!). So don’t delay. Join Arduino Week today!
As you know, Arduino is all about open source, and now our Docs and Help Center sites now join the community club becoming open-source. Arduino lovers everywhere can now contribute to the content on official Arduino documentation websites through their public GitHub repositories.
How you can contribute
You’ll need a GitHub account, since it’s all handled through the repository.
Head on over to the Docs repo or the Help Center repo. In the file list, you’ll see the “content” folder, which is the various pages are found. You might need to tunnel down through it until you eventually find the page you’re looking for, but it’s in there.
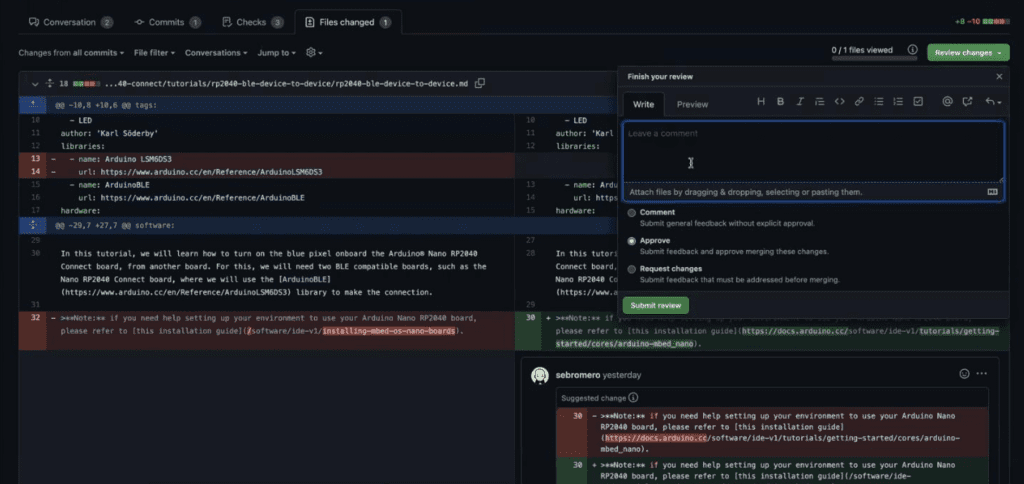
The content can be edited directly in GitHub, so there’s no need to download anything. Just make the changes, suggestions or contributions that you want. You can then create a branch and click the “Pull request” button, and your changes will be sent to the Arduino Docs team to be reviewed. If they’re accepted, you’ll be credited in the Git history for your contributions!
For the tutorial pages on the various boards hosted in Docs, you can find a shortcut to the correct file in GitHub. On the right hand side of the page you’ll see a new box, called “Suggest Changes”. The “Edit this page” button takes you straight to the relevant file in the GitHub repo, so you don’t need to drill down through the content folder to find it.
What you can contribute
It doesn’t necessarily have to be simple corrections or edits, either. If you want to submit your own tutorial or article, you can do so by forking the repository, adding your content there and eventually create a pull request.
Everything on the site is very carefully curated, so we can’t guarantee that contributions will be published, but you’re more than welcome if you feel you’ve something valuable to share. Make sure you read the guidelines and consider summarizing your proposal in the issue tracker before starting to write the actual content, to get feedback from our content team and the community.
So keep your eagle eye out on the repository for any opportunity to become a contributor and join the community!
James Bruton’s strange bicycle robot self-balances with an omni wheel
Arduino Team — February 26th, 2022
Omni wheels, sometimes referred to by the trademarked Mecanum name, are special wheels lined with rollers. Thanks to the orientation of the rollers, a vehicle equipped with four omni wheels (each driven independently) can move in any direction by vectoring each wheel relative to the others. A typical setup includes four omni wheels, but James Bruton proved that even a single one is useful when he built this strange self-balancing bicycle robot.
This robot is part of a larger project exploring full-sized self-balancing bicycles. It’s a small robot meant for experimenting with some unusual concepts. The front wheel is an omni wheel with its own motor and an axle that is perpendicular to that of the rear wheel, which is a conventional wheel driven by a second motor. The orientation of the omni wheel means that the robot can move the front end left and right easily, providing the inverted pendulum dynamic for self-balancing. When the robot needs to drive forward or backward, the rear motor provides propulsion and the omni wheel rollers spin freely.
As with other self-balancing robots, this requires fast and precise PID control to stay upright. An Arduino Mega 2560 board takes frequent readings from an IMU (inertial measurement unit) and detects if the robot tilts too far to one side. When it does, it turns the omni wheel motor in one direction or the other, measured by an encoder, to correct itself and balance. Commands sent from Bruton’s own custom remote tell the Arduino when it should rotate the rear drive motor. Steering commands influence the balancing routines, allowing the robot to lean or pivot in order to make a turn.
Um dir ein optimales Erlebnis zu bieten, verwenden wir Technologien wie Cookies, um Geräteinformationen zu speichern und/oder darauf zuzugreifen. Wenn du diesen Technologien zustimmst, können wir Daten wie das Surfverhalten oder eindeutige IDs auf dieser Website verarbeiten. Wenn du deine Einwillligung nicht erteilst oder zurückziehst, können bestimmte Merkmale und Funktionen beeinträchtigt werden.
Funktional
Immer aktiv
Die technische Speicherung oder der Zugang ist unbedingt erforderlich für den rechtmäßigen Zweck, die Nutzung eines bestimmten Dienstes zu ermöglichen, der vom Teilnehmer oder Nutzer ausdrücklich gewünscht wird, oder für den alleinigen Zweck, die Übertragung einer Nachricht über ein elektronisches Kommunikationsnetz durchzuführen.
Vorlieben
Die technische Speicherung oder der Zugriff ist für den rechtmäßigen Zweck der Speicherung von Präferenzen erforderlich, die nicht vom Abonnenten oder Benutzer angefordert wurden.
Statistiken
Die technische Speicherung oder der Zugriff, der ausschließlich zu statistischen Zwecken erfolgt.Die technische Speicherung oder der Zugriff, der ausschließlich zu anonymen statistischen Zwecken verwendet wird. Ohne eine Vorladung, die freiwillige Zustimmung deines Internetdienstanbieters oder zusätzliche Aufzeichnungen von Dritten können die zu diesem Zweck gespeicherten oder abgerufenen Informationen allein in der Regel nicht dazu verwendet werden, dich zu identifizieren.
Marketing
Die technische Speicherung oder der Zugriff ist erforderlich, um Nutzerprofile zu erstellen, um Werbung zu versenden oder um den Nutzer auf einer Website oder über mehrere Websites hinweg zu ähnlichen Marketingzwecken zu verfolgen.