Schlagwort: tech

  • The Edgytokei is a nunchucks-inspired edge clock

    The Edgytokei is a nunchucks-inspired edge clock

    Reading Time: 2 minutes

    The Edgytokei is a nunchucks-inspired edge clock

    Arduino TeamJanuary 11th, 2018

    Just when you thought you’d seen every possible hacked clock design, creator Ekaggrat Singh Kalsi has come up with something new: a faceless clock that is able to tell time with two hands that never make a full rotation.

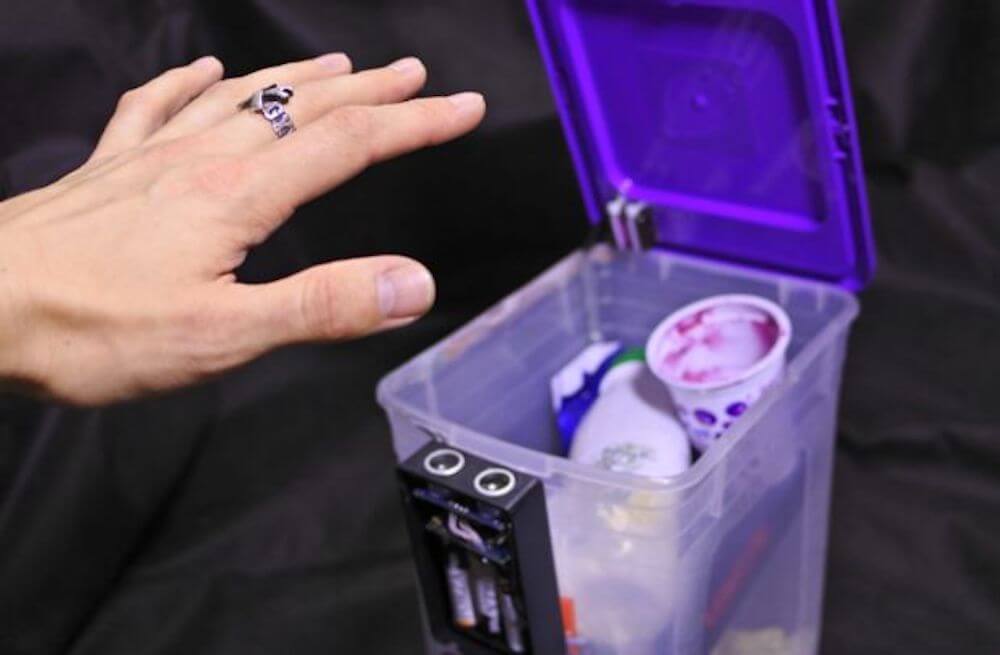
    Instead, an Arduino Nano powers a novel mechanical gear assembly via a pair of motors, which causes the two hands to physically switch positions between the second arm being mounted on the base and on the tip of the first arm. This strange representation of time changes form every fifteen minutes.

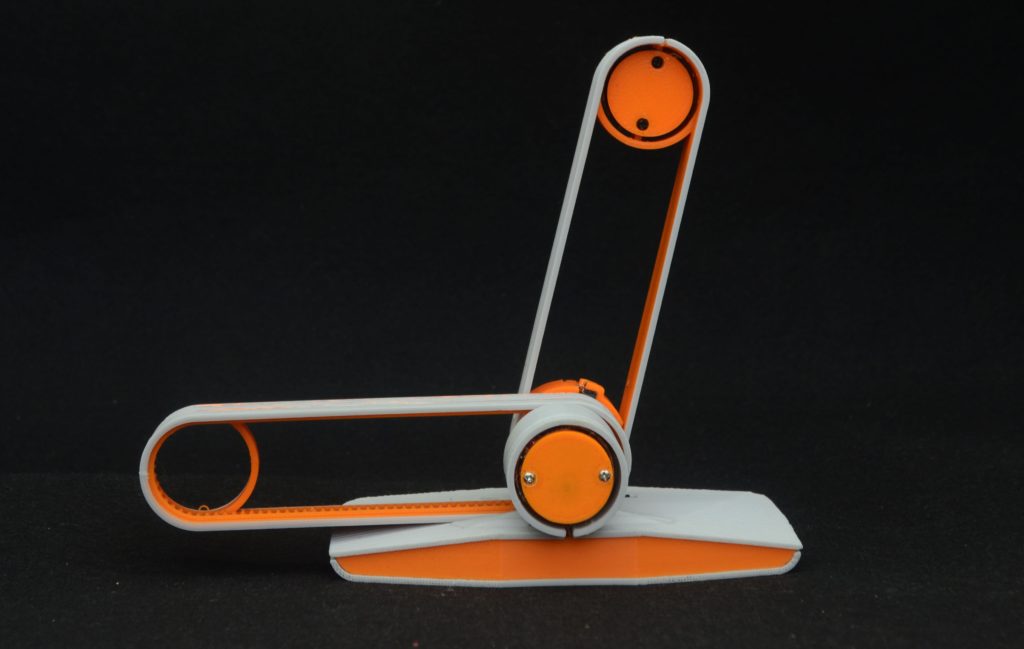
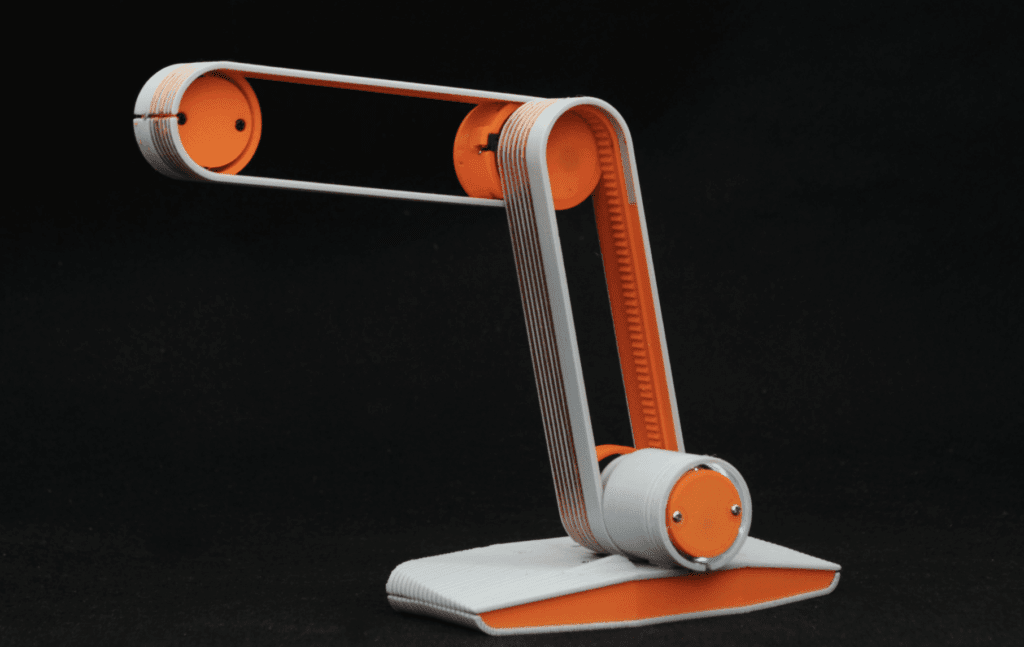
    The Edgytokei which literally means edge clock is inspired from the Japanese nunchucks. Just like the nunchucks the clock is just a pair of two arms displaying time by balancing themselves on the edge. The clock consists of two arms and the base on which the arms are anchored. Both the arms are of equal length as the role of the arms changes with different hours of the day.

    The fulcrum of the clock flips from the center to the left or right of the clock every quarter hour so that the clock can stand on the edge to represent the time between quarter past and quarter to hour. This flipping of the arms keeps the clock dancing on the edge throughout the day. The base which contains the electronics of the clock provides a anchor for the clock and prevents the arms from falling over.

    If that sounds unique, then wait until you see it in action below. More details on the build can be found via this Hackaday write-up.


    Website: LINK

  • Recreating the Apollo Guidance Computer Display and Keyboard with Arduino

    Recreating the Apollo Guidance Computer Display and Keyboard with Arduino

    Reading Time: < 1 minute

    Recreating the Apollo Guidance Computer Display and Keyboard with Arduino

    Arduino TeamJanuary 11th, 2018

    Nearly 50 years ago, mankind made the giant leap of being able to travel to the moon. To celebrate, ST-Geotronics has come of with a replica of the Apollo Guidance Computer Display/Keyboard, or AGC DSKY as it’s abbreviated.

    The display was prototyped on a huge breadboard assembly, along with an Arduino Mega, then finished using a custom PCB and Arduino Nano.

    3D-printed parts are used to form the housing, in addition to a variety of electronics. These include an actual GPS unit, along with a custom three-segment LED assemblies to display “+” and “-” as needed.

    Be sure to check it out in the video seen here, showing off its interface, as well as an MP3 unit that plays back a 1962 JFK speech about going to the moon.


    Website: LINK

  • Build a block balancing game with Arduino and servos

    Build a block balancing game with Arduino and servos

    Reading Time: 2 minutes

    Build a block balancing game with Arduino and servos

    Arduino TeamJanuary 8th, 2018

    If you’re tired of classic tower building games like Jenga or stacking cards and would like a new challenge, “mr_fid” has come up with a game where you balance blocks on a tree assembly. The nicely crafted device then moves around to throw the blocks off using three servos and push rods.

    Everything is controlled by an Arduino Nano that randomly selects the intensity of the movement and which color of block to be stacked, displayed on a circular arrangement of programmable LEDs.

    Once a block has been added, a button in the middle of the LEDs is pushed and tree movement starts, potentially destabilizing the player’s work.

    Nice Arduino project. Featuring an Arduino Nano controlling 3 servos to move the tree. Firstly the “Roll” button is pressed to give you a colour and amplitude once the correct bit has been placed on the tree the “Shake” button is pressed and the tree moves around. Any bits which fall off are given to the person whos go it was! the idea of the game is to get rid of all your bits first. If when you press the “Roll” button you don’t have the correct colour OR the strength is to high then if you wish you can miss your go.

    You can check the game out in the first video below, or see the second video for information on how to avoid jittery servos in this type of setup.


    Website: LINK

  • Add colorful effects to your 1980s boombox with Arduino and LEDs

    Add colorful effects to your 1980s boombox with Arduino and LEDs

    Reading Time: < 1 minute

    Add colorful effects to your 1980s boombox with Arduino and LEDs

    Arduino TeamJanuary 5th, 2018

    While ’80s-style boomboxes have their own unique character, per hacker “Dancorp’s” excellent mod, it’s clear that they could be improved dramatically with programmable LEDs.

    This build uses a capacitive filtering arrangement to feed line out signals from the boombox into an Arduino Uno, which then controls three LED strips.

    Two of these strips are arranged around the speaker cones, emitting beautiful LED effects to go along with the music playing, while the third can be used to light up the built-in VU meters.

    A schematic along with Arduino code are available on Dancorp’s write-up. It looks like a fairly accessible project, especially given the extra space available in electronics from that era.


    Website: LINK

  • Rick and Morty fans will love this butter robot

    Rick and Morty fans will love this butter robot

    Reading Time: < 1 minute

    Rick and Morty fans will love this butter robot

    Arduino TeamJanuary 4th, 2018

    Up until the present day, if you need butter, you simply ask another human to “pass the butter,” leading to minor inconvenience and awkwardness. Engineering students in Brussels have come up with a novel solution: a robot that brings the butter to you!

    The robot, inspired by Rick and Morty’s Butter Bot, is powered by an Arduino Uno and summoned to hungry humans via an infrared remote control.

    When the signal detected by onboard IR sensors, the robot moves over using continuous-rotation modded servos, then flips its cap-like lid to reveal the butter inside.

    Want a Butbot of your own? You can find the build process and code in the student team’s write-up here.


    Website: LINK

  • Build a six-wheeled RC vehicle for any terrain

    Build a six-wheeled RC vehicle for any terrain

    Reading Time: 2 minutes

    Build a six-wheeled RC vehicle for any terrain

    Arduino TeamJanuary 4th, 2018

    In order to create the ultimate off-road RC rig, “asrebro” designed his own six-wheeled vehicle, operated with the help of Arduino.

    To give it decent range and reliability, the hacker turned to a stock transmitter and receiver, but routed the PWM signals onboard to a Mega. The Arduino uses a pair of H-bridge boards to drive all six motors/wheels for tank-like movement.

    Since an Arduino is used, this opens up a wide range of manual and automatic control options, and could even be used to power robotic accessories like a gripper or gimbal with a camera.

    I decided to build a bigger robot that will easily overcome various obstacles on its way and will be able to move with a load of at least a dozen kilos. I also assumed that the robot should be able to cope in difficult terrain such as sand, snow and rubble. To make it possible, I built a 6-wheel [aluminum and duralumin] chassis equipped with 6 motors of sufficient high power and suitable motor driver and power supply. I also wanted my robot to be controlled from a long distance (at least 200 meters) so I used a good quality 2.4GHz transmitter and receiver.

    You can see it in action below, traversing through a forest near Warsaw, Poland.


    Website: LINK

  • RoboGlove assists users with gripping objects

    RoboGlove assists users with gripping objects

    Reading Time: 2 minutes

    RoboGlove assists users with gripping objects

    Arduino TeamJanuary 3rd, 2018

    The RoboGlove project is a robotic glove by students at the Université Libre de Bruxelles that is designed to assist the wearer when continuously gripping objects.

    This is accomplished by a series of three servos that transmit force through cables for the index finger, middle finger, and thumb. Control is via an Arduino Uno, which takes input from pressure sensors in the three finger fixtures, helping the wearer keep gripping when force is initially exerted to close a fist.

    The glove has a wire connection that links the fingers to some servo motors: a wire is attached to the extremity of the finger and to the servo, so when the servo turns, the wire is pulled and the finger is flexed. In this way, by controlling the grip done by the user through some pressure sensors in the extremity of the fingers, we are able to actuate the motors in a controlled way and help the gripping by bending the finger proportionally to the rotation of the motors and so to the rolling up of the wires. In this way we should be able either to allow weak people to grip objects or help even people in physiological conditions to grip objects and to keep it without any effort.

    While still a prototype, it’s an interesting device that could be developed further into a very helpful augmentation. You can see it in action below!


    Website: LINK

  • Playing chiptunes on an old reed organ with Arduino

    Playing chiptunes on an old reed organ with Arduino

    Reading Time: < 1 minute

    Playing chiptunes on an old reed organ with Arduino

    Arduino TeamJanuary 3rd, 2018

    After finding an organ left outside to rot, hacker “tinkartank” decided to use it for his own purposes, adding push buttons under each key as inputs to an Arduino Mega.

    He also reused the control rods with potentiometers as a secondary input method, and added a tiny OLED to display the system’s menu. With this unique interface setup, the Mega drives a MOS6581 SID chip—originally used to produce sound on the Commodore 64—for music generation, and can interface with Eurorack modules as needed.

    Want to see more? Be sure check out the SID organ in action below, and read the entire project write-up here.


    Website: LINK

  • Control lights and sounds with the Arduino-powered LED Eclipse

    Control lights and sounds with the Arduino-powered LED Eclipse

    Reading Time: < 1 minute

    Control lights and sounds with the Arduino-powered LED Eclipse

    Arduino TeamJanuary 2nd, 2018

    If you need a MIDI device that can be programmed as your own unique light and sound controller, then Jon Bumstead’s LED Eclipse may be just what you’re looking for.

    The circular device, roughly the diameter of a large plate, is constructed out of 30 layers of MDF, and boasts 10 capacitive sensors made with copper strips, as well as 10 corresponding programmable LEDs.

    An Arduino Uno powers the assembly, which can be seen being played like a multi-player electronic piano towards the end of the video below. It can also be used as a Simon-style game, and even a light display—though you could program it for any other application you desire!


    Website: LINK

  • Designing an Arduino-powered Braille generator

    Designing an Arduino-powered Braille generator

    Reading Time: < 1 minute

    Designing an Arduino-powered Braille generator

    Arduino TeamJanuary 2nd, 2018

    Did you know that embossing machines needed to generate Braille characters can cost thousands of dollars? After finding this out, hacker Carlos Campos decided to design and build his own using 3D-printed parts, along with an Arduino Mega and a RAMPS board for control.

    Instead of punching each dot, the device pushes a pin out onto the paper, then rolls the dot onto it from the other side, leading to a much quieter operation than normal machines.

    Check out the clips below to see the pin actuator by itself and the embosser in action. More details and videos can also be found on Facebook. The project is still in the experimental stages, so collaborators are invited to help turn it into an even more useful implement.


    Website: LINK

  • Ultrasonically levitate particles and liquid

    Ultrasonically levitate particles and liquid

    Reading Time: 2 minutes

    Ultrasonically levitate particles and liquid

    Arduino TeamDecember 29th, 2017

    If you thought the power of levitation was only available to magicians (and perhaps magnets) then check out this amazing project from Asier Marzo. It uses an Arduino Mega to control an 8×8 array of ultrasonic transducers, which when carefully coordinated using a simulation program, not only can suspend a particle but cause it to move around the grid of transducers.

    You can find a summary of this kind of device’s capabilities in Marzo’s write-up, including haptic feedback, use as a directional speaker, and even levitating liquids in a standing wave setup.

    We present Ultraino, a modular, inexpensive, and open platform that provides hardware, software and example applications specifically aimed at controlling the transmission of narrowband airborne ultrasound. The software can be used to define array geometries, simulate the acoustic field in real time and control the connected driver boards. The driver board design is based on an Arduino Mega and can control 64 channels with a square wave of up to 17 Vpp and ?/5 phase resolution. Multiple boards can be chained together to increase the number of channels. 40 kHz arrays with flat and spherical geometries are demonstrated for parametric audio generation, acoustic levitation and haptic feedback.

    You can also skip to 8:30 in the video below to see it manipulating a particle, or to 9:30 where several individual drops of alcohol and food coloring are able to float in mid-air.


    Website: LINK

  • Monitor your sleep quality with Arduino

    Monitor your sleep quality with Arduino

    Reading Time: 2 minutes

    Monitor your sleep quality with Arduino

    Arduino TeamDecember 27th, 2017

    While it can be difficult to get enough sleep, at least you can try to make it as restful as possible when you are in bed. That’s the idea behind this project by Julia Currie and Nicholas Sarkis, who developed an Arduino Nano-based sleep monitor for their final ECE 4760 project at Cornell.

    The bulk of the monitoring device takes the form of a glove which measures heart rate using an IR sensor, along with movement via an accelerometer. Breathing is recorded using a conductive band wrapped around the user’s chest, which changes resistance depending on how it is stretched.

    The Nano mounted to the glove collects this information, and transmits it wirelessly using an nRF24L01 chip to a PIC32 microprocessor on a base station. Data is then graphed nicely on a TFT display for further analysis.

    You can read more about the project here and see the video below!


    Website: LINK

  • These students made their own Guitar Hero-like video game

    These students made their own Guitar Hero-like video game

    Reading Time: 2 minutes

    These students made their own Guitar Hero-like video game

    Arduino TeamDecember 23rd, 2017

    If you’d like to create your own simulated guitar from scratch, you’ll want to check out this project by Cornell ECE students Jake Podell and Jonah Wexler. It uses four conductive strings on the neck to sense which note is selected, along with a pick wired as input to tell when the string has been plucked.

    An Arduino Uno takes these inputs and feeds them to a computer via USB serial. Information is then transmitted over Bluetooth to a PIC32 microcontroller, which displays a scrolling fretboard on a TFT screen.

    The pseudo-musician must strum along to the song shown—Ode to Joy in this case—hearing a strumming sound for correct notes, or an annoying beep for errors.

    Similar to the classic music games like Rock Band and Guitar Hero, we use a TFT to display notes that move across the screen towards a strum region, produce guitar plucks and undertones of a song, and keep track of the user’s score. The user plays notes on a wireless mock guitar built with carbon-impregnated elastic as strings and a conducting plectrum for the guitar pick. The guitar is connected to an Arduino Uno which communicates wirelessly via Bluetooth to the PIC32. The goal of this video game is to learn the basic finger movements of holding down strings and strumming at the correct time for novice guitar players. The project can easily be extended for more advanced finger movements on the strings and strum timing for those with more experience.

    You can see more of the project in its write-up here and in the video below!


    Website: LINK

  • Turn a flatbed scanner into a PCB UV exposure device

    Turn a flatbed scanner into a PCB UV exposure device

    Reading Time: 2 minutes

    Turn a flatbed scanner into a PCB UV exposure device

    Arduino TeamDecember 23rd, 2017

    If you want to create your own custom PCBs, you could design it and wait for a fab house to send it back, dealing with any errors, or you could do it yourself. Hacker Andras Kabai decided to go for the second option, and made his own UV exposure tool to help him with the process using an old flatbed scanner as the base.

    Rather than line the entire underside of the bed with LEDs, he cleverly repurposed the single-axis gantry that would normally hold the scanning unit to instead contain a row of LEDs to expose the PCB on top.

    The project was prototyped with an Arduino Pro Mini, but was eventually supplanted by a Mega when the smaller board’s limits were reached.

    Plenty of DIY PCB UV exposure tool building posts are available on the internet with total different approaches. I also designed my own, to fulfill my needs: it should be relative small and portable and the hacking/modding should be fun. ? Flat bed scanners were found as possibly good target. Compared to most of the other scanner mods, which use LED arrays or fluorescent tubes across the whole scanner bed area, my plan was to use the scanner carriage with only few LEDs and control its movement (and brightness) under the given PCB.

    You can check out the device’s development in the videos below, which show off its interface and the gantry in motion.


    Website: LINK

  • Create a custom Secret Santa trivia box with Arduino

    Create a custom Secret Santa trivia box with Arduino

    Reading Time: 2 minutes

    Create a custom Secret Santa trivia box with Arduino

    Arduino TeamDecember 20th, 2017

    Participating in Reddit’s Secret Santa this year, hacker “Haxxa” decided to go all out, picking out not only several gifts for the recipient, but an Arduino-powered trivia box to house them in.

    In use, an Arduino Nano onboard feeds queries to the gift recipient on an LCD display, allowing them to answer using one of three buttons. When 20 questions have been answered correctly, the box unlatches via a servo motor.

    In addition to the physical items inside, the project also generates its own web page, revealing digital gifts to go along with the physical items!

    To open the box, my giftee must complete the trivia game, there are 25 questions all based around my giftee’s interests, posts and hobbies. Once complete they will be rewarded with the gifts inside. I also included a wireless access point which activates upon completion of the game. Connecting to this access point reveals a website with more digital gifts including subscriptions, more games and challenges.

    You can see it in action below and find its code over on GitHub.


    Website: LINK

  • Interact with the virtual world in a whole new way

    Interact with the virtual world in a whole new way

    Reading Time: 2 minutes

    Interact with the virtual world in a whole new way

    Arduino TeamDecember 20th, 2017

    As reported by the Creative Applications Network, “Tangibles Worlds explores the effects of tactile experience as a catalyst for full immersion in VR.”

    The project by Stella Speziali takes the form of three separate boxes, along with an Oculus Rift headset. When a hand is placed in one of these boxes, the user is virtually transported to another dimension of sight and sound, controlled by IR distance sensors, flex sensors, capacitive wire, and several other devices interfaced with an Arduino Mega.

    Each box contains an IR distance sensor, which detects when a hand is inserted and display the virtual world attributed to the box. This new virtual world surrounds the user. A sensor is placed on each wall within the boxes, this sensor recognizes the hand and activates an animation inside the virtual world. I tried to map the sensors in the virtual universe so that a little clue is given to the user and will lead him to trigger the animations.

    The idea behind this installation is to go beyond “traditional” VR controllers for entirely new level of interaction. The video seen here gives an excellent preview of the strangeness of this type of interface, though using it with a headset and sensors would likely be an altogether different experience!


    Website: LINK

  • This control panel references your favorite sci-fi films

    This control panel references your favorite sci-fi films

    Reading Time: 2 minutes

    This control panel references your favorite sci-fi films

    Arduino TeamDecember 19th, 2017

    While you may question if some of the blinking lights and buttons in science fiction movies actually do anything, you’d still really like to hit those buttons just to see what happens, right? If that sounds like you, then something like this rocket ship panel from maker “r570sv” might be just the thing for your entertainment.

    The build features three Arduino boards for control, and references a total of 13 works of sci-fi throughout the brightly lit-up panel. Highlights of the project include a controllable infinity mirror, and a Raspberry Pi-driven screen that displays different movie clips depending on what combination of buttons, switches, and knobs are selected. Still other buttons and lights don’t really do anything, following along perfectly from the theme.

    You can see more of the panel on Instructables and in the video below!


    Website: LINK

  • Star Wars fan creates an Arduino-powered rebel pilot chest box

    Star Wars fan creates an Arduino-powered rebel pilot chest box

    Reading Time: < 1 minute

    Star Wars fan creates an Arduino-powered rebel pilot chest box

    Arduino TeamDecember 19th, 2017

    If you’d like a rebel fighter pilot suit, complete with the automated chest box, then look no further than this excellent build from “badjer1.”

    It features a chest box with the same dimensions seen in the movies that lights up randomly, and even allows bored pilots to play a game of Pong on its double-LED matrix display using a dial next to it.

    The Arduino Uno-powered device can also scroll through marquee displays featuring X-Wings and TIE Fighters, and play the Imperial March as required.

    You can see more about the project, including how the box and the rest of the uniform were weathered, in badjer1’s write-up here.


    Website: LINK

  • Automatic trash can optimized for battery life

    Automatic trash can optimized for battery life

    Reading Time: < 1 minute

    Automatic trash can optimized for battery life

    Arduino TeamDecember 15th, 2017

    If you have a trash can with a lid, you’ve probably accepted the small inconvenience of opening it with your hand and foot. YouTube hacker MadGyver, however, came up with a different solution using an Arduino Nano and a micro servo to open the lid whenever someone places a hand near the unit’s ultrasonic sensor.

    In order to run the device on batteries, MadGyver modified the Nano for efficiency, shedding the power LED, along with the voltage regulator. He also used a transistor to turn off power to the servo when in standby mode, and added a capacitor to accommodate for the power surge experienced when the servo starts moving.

    After these mods, his trash can should theoretically function for over three years with the correct batteries! Check it out in the video below!


    Website: LINK

  • New search engine and Arduino reference!

    New search engine and Arduino reference!

    Reading Time: 2 minutes

    New search engine and Arduino reference!

    mastrolinuxDecember 14th, 2017

    The Arduino web team has working hard behind the scenes improving our legacy systems. Now, it’s time to work on something more interesting for the team and more useful for our community! From here on out, we will update you every month on the latest and greatest activities…

    Today, we are announcing a pair of major features that are only a mere preview of what you can expect to see from an Arduino user’s point of view:

    • The blog has a new search engine that is much faster, more precise, and allows readers to filter results.
    • The Arduino reference is now quicker,  mobile-friendly, and completely open to contributions. You can check out our GitHub reference repo here.

    Let’s look at how those two features work and how they are implemented. The search engine is powered by our provider Algolia, offering an impressively fast search engine and enhanced UX. Our goal is to integrate it with each of our websites and finally have a unified search for all Arduino-related content.

    We are going to be testing the search engine for a bit on the blog and eventually roll it out to our websites.

    Perhaps what we are most proud of, though, is the new reference engine:

    • Arduino users can directly contribute to the reference by creating a pull request here.
    • We are going to support multiple languages. In fact, some users have already helped us in creating French, German, Korean, Italian, Japanese, Portuguese, and Spanish versions.
    • As soon as a new pull request has been merged, the system deploys to our website automatically, and if someone modifies the English version of the reference, all other language repositories are going to be notified as well.

    This is just the beginning with much more to come. Stay tuned!


    Website: LINK

  • Slide the “time clock” into position with Arduino

    Slide the “time clock” into position with Arduino

    Reading Time: < 1 minute

    Slide the “time clock” into position with Arduino

    Arduino TeamDecember 14th, 2017

    Years ago, if you wanted to track employee hours, you needed to have them punch a time card. Saunders Machine Works, however, uses a facial recognition system running on an iPad for this purpose, meaning they had to figure out how to sense employees of different heights. What they came up with is a fixture that automatically raises and lowers the tablet, using a stepper motor and linear rails.

    The project employs a Lidar sensor on the bottom of the device to detect employee presence, and another above the iPad’s mounting hardware to sense when it’s at the correct height, moving until the top sensor is clear. Control is provided by a pair of Arduino Nanos.

    Be sure to check it out in the video below!


    Website: LINK

  • 3D-printed miniature roller coaster powered by Arduino Mega

    3D-printed miniature roller coaster powered by Arduino Mega

    Reading Time: < 1 minute

    3D-printed miniature roller coaster powered by Arduino Mega

    Arduino TeamDecember 13th, 2017

    While many enjoy roller coasters, few can claim the same dedication of engineer Matt Schmotzer, who 3D-printed a 1/25th scale replica of Invertigo, a boomerang coaster at Kings Island in Ohio.

    As reported on 3D Printer Chat, the CAD model took only a week to complete, but 3D printing this 4’ x 8’ creation took an incredible 450 hours. This doesn’t include the countless hours spent assembling and debugging it.

    The coaster runs on an Arduino Mega, using 42 of the 54 available IO pins. This allows it to not only lift and drop the coaster, but also feature details like actuated gates and restraints to keep the tiny imaginary passengers safe.

    Be sure to check it out in the video below!


    Website: LINK