Schlagwort: tech articles
-

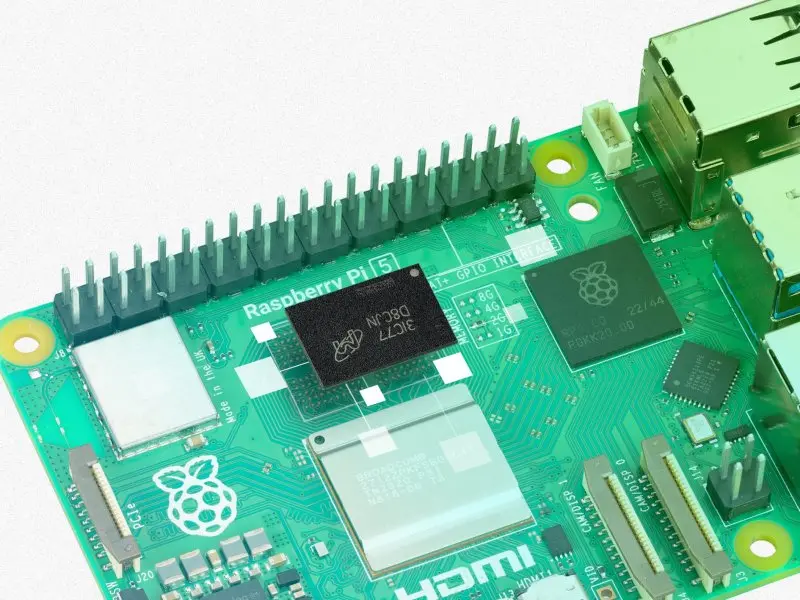
The more things change…
Reading Time: 2 minutesIt’s refreshing that newer doesn’t always have to mean bigger and better. I’ve been using a Raspberry Pi 4 for the last few years as a desktop Linux machine, and although it could be faster, then thing that holds me back from upgrading it is nothing to do with the Pi itself.…
-

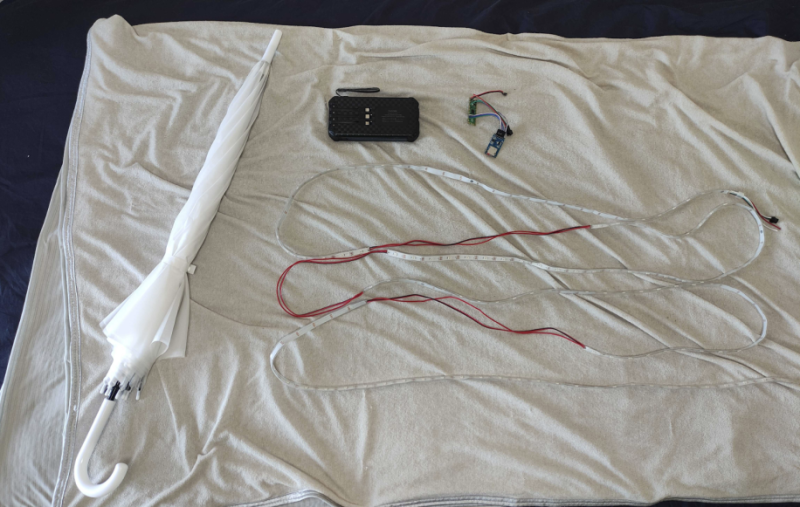
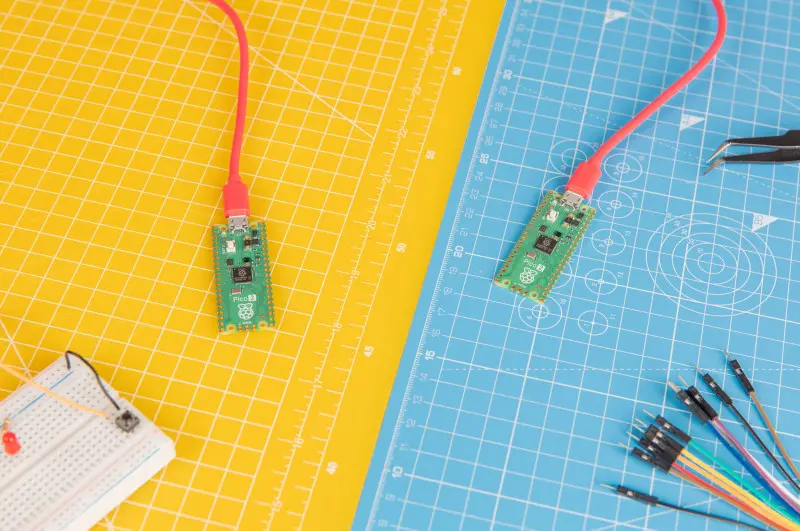
LED umbrella
Reading Time: 3 minutesThomas Killus has created such a brolly using a Raspberry Pi Pico microcontroller board. It sends instructions to strips of standard WS2812b addressable RGB LEDs that run along the ribs of an umbrella, and this in turn brightly disperses light across the adjoining panels. The umbrella would certainly shine bright in a…
-

CrowView Note review
Reading Time: 2 minutesYou don’t have to use this little dock mechanism – we can definitely imagine 3D-printing an enclosure that sticks to the back of the lid with a few cables between the laptop and Raspberry Pi. However you choose to connect your Raspberry Pi though, it doesn’t require any extra software setup and…
-

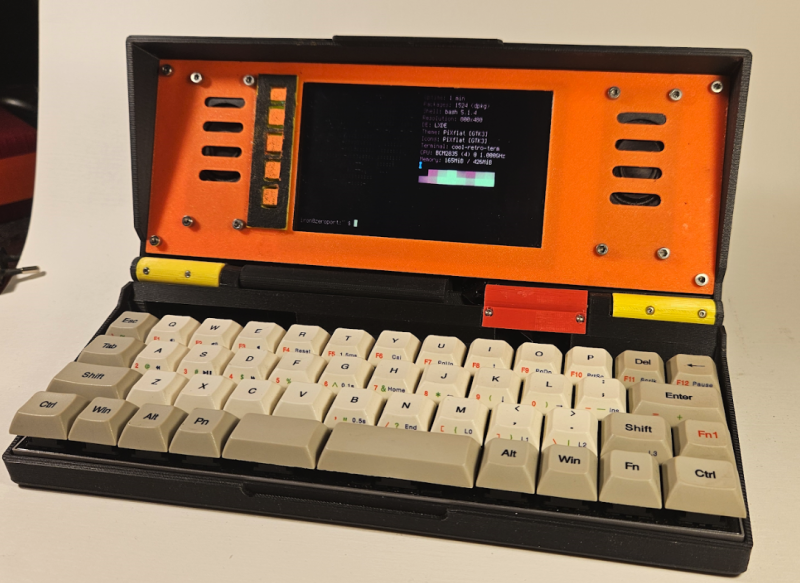
Portable Pi 84
Reading Time: 4 minutesThis little device includes a mechanical keyboard that, Michael says: was his primary motivation for making his retro marvel. Having first cut his teeth learning BASIC on a Sharp PC-1260, he quickly became a fan of portable computers and snapped up many more. But when, in recent years, he sought to revive…
-

Plasma 2350 review
Reading Time: 3 minutesYou can buy the Plasma 2350 board on its own or in a Starter Kit (£34.50 / $38) with a USB-A to USB-C cable and 10m string of 66 individually addressable frosted LED stars. These look superb when lit up, and are a great way of showcasing the capabilities of the Plasma…
-

Play Retro Horror Classics on Raspberry Pi 5 in The MagPi magazine #146
Reading Time: 2 minutesRetro Horror KG revisits the classics from gaming horror’s great 1990s golden age this month. Spattered with gore, and overcome by a desperate urge to prove that computer games weren’t just for families. Discover how to hook up a modern Blu-ray drive to Raspberry Pi 5 and play Halloween classics like Alone…
-

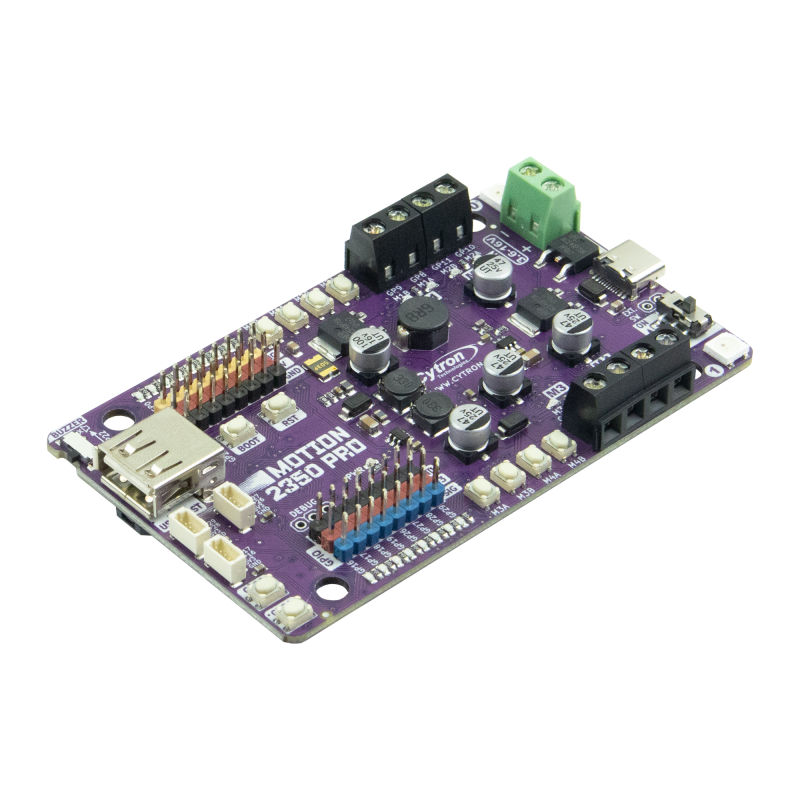
Win 1 of 5 MOTION 2350 Pro robotics controllers
Reading Time: < 1 minuteWe love Raspberry Pi robots, and Raspberry Pi Pico has become a fantastic addition to the world of hobby robotics. With the release of Pico 2 and RP2350, their ability to pilot automatons has only grown. Scroll down below to win one of the brand new robotics controllers that makes use…
-

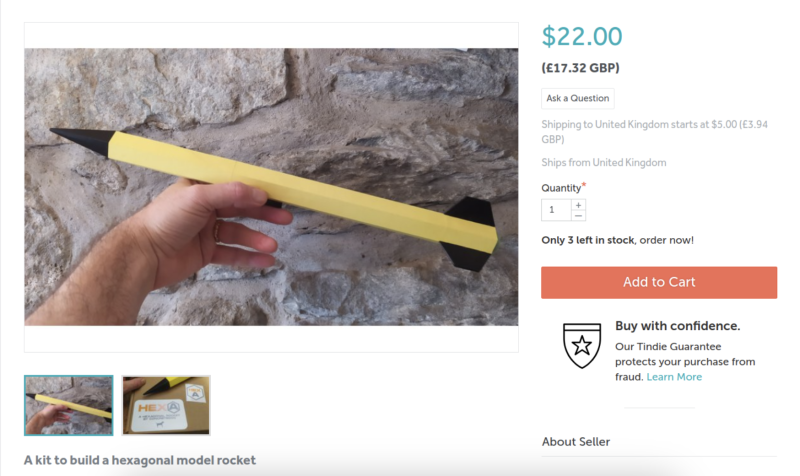
Do the hustle!
Reading Time: 8 minutesSigning up for Tindie is pretty trivial. You need a basic account to be able to buy from Tindie, and every account has all the options to start selling. Your need to give your store a name, then set up a verified PayPal account, and then you are ready to list your…
-

Poetry camera
Reading Time: 3 minutesA fresh focus The Poetry Camera began life as an ‘AI classifier’ and was partly inspired by Kelin’s friend Susi Fu’s Artist and Machine performances examining how artists and computers can learn from each other. “Susie would draw sketches of the person standing in front of her, while a machine – using…
-

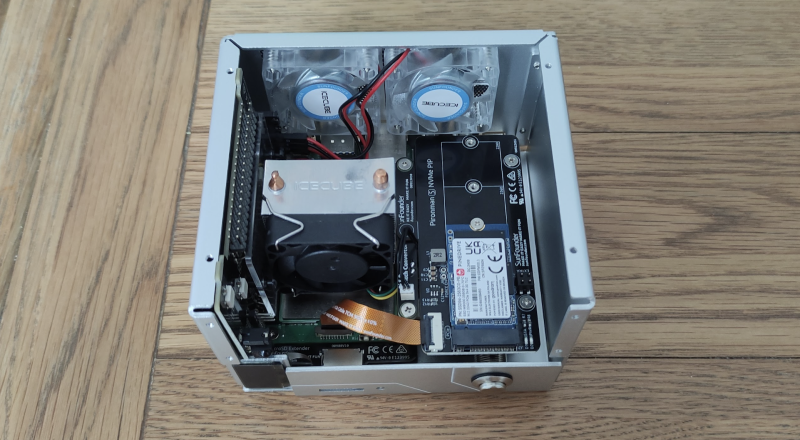
Pironman 5 case review
Reading Time: 2 minutesA microSD slot extender enables easy access, while an adapter board extends Raspberry Pi 5’s USB-C power port and converts its micro-HDMI outputs to full-size HDMI ones. It also houses a button battery for the real-time clock. An IO expander board extends the GPIO pins, powers the two RGB fans, and connects…
-
Raspberry Pi PLC 38R review
Reading Time: 3 minutesWhile the company also produces PLCs based on Arduino and ESP32 microcontrollers, the model reviewed here is one of the Raspberry Pi-based range and therefore benefits from superior processing power – an advantage when handling multiple real-time processes – and the ability to run a full Linux operating system, the familiar Raspberry…
-

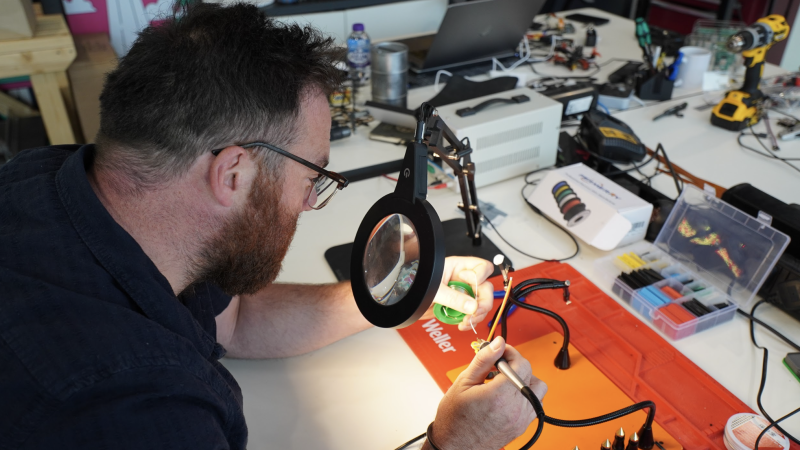
Meet Andrew Gregory: a new face in The MagPi
Reading Time: 3 minutesWhat is your history with making? A lot of people who get into making reckon that they used to take things apart and put them back together when they were kids. Whenever I tried doing that I got told off. Instead, whenever anything broke, it was my job to take it apart…
-
ReComputer R1000 industrial grade edge IoT controller review
Reading Time: 2 minutesOut of the box it looks a bit like an unassuming full Raspberry Pi in a nice heat-sink case, albeit a fair bit chunkier. The size comes from the sheer number of features packed into the box – UPS modules, power-over-Ethernet, multiple RJ45 ports, 4G modules, LoRa capabilities, external antenna ports, SSD…
-

Thumby Color mini gaming device review
Reading Time: 3 minutesThe faster dual-core RP2350 processor running at 150Mhz enables Thumby Color to run an 0.85-inch 128×128px 16-bit backlit colour TFT LCD display inside an absolutely miniscule case measuring 51.6 × 30 × 11.6mm. The case has a hole through it enabling Thumby Color to double up as a keychain fob; enabling you…
-

Welcoming HackSpace
Reading Time: 2 minutesFrom our perspective, this gives us a bigger and better magazine. It also opens up a new aspect of making that we haven’t traditionally given as much thought to as HackSpace. While The MagPi magazine tends to focus heavily on Raspberry Pi products – it is “the Official Raspberry Pi magazine” after…
-
Pico 2 and RP2350 in The MagPi magazine #145
Reading Time: 3 minutesPico 2 & RP2350 It has faster processors, more memory, greater power efficiency, and industry-leading security features and you can choose between Arm and RISC-V cores. The new Pico 2 is an incredible microcontroller board and we’ve secured interviews with the Raspberry Pi engineering team. RP2350 Products out now Plenty of companies…
-

Win! One of 20 Raspberry Pi Pico 2
Reading Time: < 1 minuteSave 35% off the cover price with a subscription to The MagPi magazine. UK subscribers get three issues for just £10 and a FREE Raspberry Pi Pico W, then pay £30 every six issues. You’ll save money and get a regular supply of in-depth reviews, features, guides and other Raspberry Pi…
-

10 amazing big builds
Reading Time: 3 minutesRaftberry Floating dock It can be nice to pootle around a lake, especially with some delicious food and company. This Raspberry Pi-powered raft uses arcade controls to move around on the water. Teslonda Custom electric car Taking a 1981 Honda Accord and souping it up is one thing, then there’s making it…
-

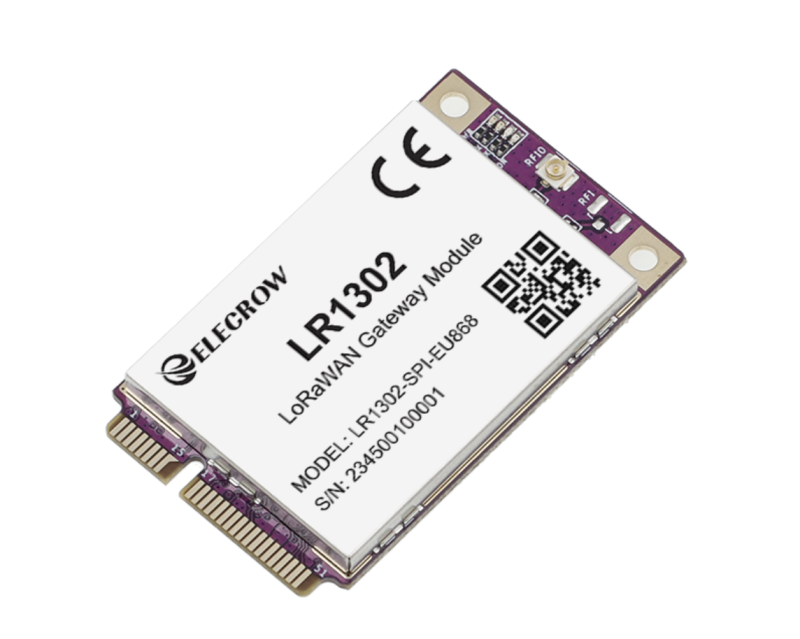
LR1302 LoRaWAN HAT + Gateway Module review
Reading Time: 2 minutesConstruction is simple – simply slot the Gateway Module into the HAT’s mini PCIe connector, and slot the HAT on top of your Raspberry Pi. There are external antennas to add as well, including a fancy GPS module in case you need to know its location. From source The software is a…
-

Video magnifier
Reading Time: 3 minutes“[It’s a] technical version of a magnifying glass to help people with low vision,” Markus tells us. “It’s basically a camera that can be connected to any HDMI screen, with a simple interface to scale and modify images. There are lots of professional devices out there, and a few DIY takes on…
-
Laptop dock CrowView Note now on Kickstarter
Reading Time: < 1 minuteWhile we’ve not had enough time to assess it for review yet, we’ve had a chance to play with one for a bit with a Raspberry Pi 5 and we’re very intrigued by it. CrowView has speakers, a webcam, a microphone, and an in-built battery so all you need to do…