Schlagwort: tech

  • This robot picks locks using brains instead of brawn

    This robot picks locks using brains instead of brawn

    Reading Time: 2 minutes

    A physical lock, like what secures your front door, has a finite and calculable number of combinations, just like a digital keypad does. There are a set number of pins in the lock and each can be one of a set number of lengths. Each of those numbers varies based on manufacturer and model, but that information is easy to find. As a result, it is possible to brute force such a lock by trying all of the combinations. But that’s time-consuming, so this robot built by Sparks and Code works smarter instead of harder.

    In this case, “smarter” meant deducing the pin lengths instead of trying all of the combinations in sequence. The technique used by the robot to perform that deduction is what makes this project so interesting.

    Each pin in the lock has a spring that pushes it down against the key’s edge. Typically, the springs for all of the pins are identical. But because the pins are of different lengths, the force required to push a pin to a specific height (above an imaginary reference line) varies. By measuring that force and comparing it against reference measurements for known pin lengths, the robot can guess the length of the pin and therefore the correct “combination” (the key bittings).

    The robot has an Arduino Nano board that measures the spring force by pushing a wire into the lock with a servo motor. That servo motor mounts onto a load cell, which outputs a signal proportional to the force on the servo motor and therefore the wire and therefore the spring. The robot has such an assembly for each of the five lock pins.

    This idea, while very clever, proved to be difficult to implement in the real world. Sparks and Code struggled to get accurate measurements and had to rely on collecting several measurements to average. Even that didn’t work well on many of the pins. 

    But the concept is still intriguing and we hope to see Sparks and Code continue with the development.

    The post This robot picks locks using brains instead of brawn appeared first on Arduino Blog.

    Website: LINK

  • Dive into satellite IoT with the new Arduino-compatible Iridium Certus 9704 Development Kit

    Dive into satellite IoT with the new Arduino-compatible Iridium Certus 9704 Development Kit

    Reading Time: 3 minutes

    IoT (Internet of Things) devices can be very useful, but they do, by definition, require internet access. That’s easy enough when Wi-Fi® is available, and it is even possible to rely on LoRa® and cellular data connections to transmit data outside of urban areas. However, deploying an IoT device to a truly remote location has been difficult and expensive in the past. Now, that’s changing thanks to the new 9704 Development Kit, created by Iridium to make satellite-based IoT accessible.

    Iridium’s original incarnation was the first commercial satellite communications provider. Over the course of more than two decades, the company built an impressive constellation of satellites providing data connections from low Earth orbit. The constellation currently consists of 66 active satellites, with coverage across the globe. That coverage is perfect for IoT devices in remote regions and that’s why Iridium teamed up with Device Solutions to help them bring to life their vision for the Arduino-compatible Iridium Certus 9704 Development Kit.

    The Iridium Certus 9704 Launch Pad Developer Board is compact at just 67×77 mm and equipped with an Iridium Certus 9704 satellite transceiver module, capable of two-way data communication through the Iridium Messaging Transport (IMT) service. The kit also includes everything else necessary to get started: a 3,000-mAh lithium-ion battery, a helical Iridium antenna with SMA right-angle adapter, a microSD card, and even a USB-C cable.

    To make this as accessible as possible, Iridium brought in Device Solutions to ensure the hardware for the Iridium Certus 9704 Launch Pad Developer Board was compatible with the Arduino IDE and ecosystem. That board contains a Microchip ATSAMD21J18A microcontroller, which integrates nicely with everything Arduino. 

    The board has UART, SPI, and I2C connections available, as well as 22 digital I/O pins. Of those, 12 are also PWM (pulse-width modulation) pins, 8 are analog input pins, one is an analog output pin, and 14 can act as external interrupts. As with any other Arduino-compatible development board, developers can use those connections and pins to read data from sensors or control components, like LEDs and motors.

    Other onboard hardware includes a u-blox MAX-M10S GNSS (Global Navigation Satellite System) module, a Texas Instruments BQ24195L IC for battery management, a momentary pushbutton, and a piezo buzzer.

    Put that all together and you have a capable Arduino-compatible development board with satellite connectivity via Iridium’s robust service. The Iridium Certus 9704 allows for messages up to 100 kB in size, which is plenty for the vast majority of applications. And it has an 83% reduction in idle power consumption (compared to transceivers of the previous generation), which allows for extended operation on battery power.

    Device Solutions is proud to have supported Iridium in their creation of the Iridium Certus 9704 Development Kit to democratize satellite IoT. Iridium’s Executive Director of Product Engineering, Garrett Chandler, said, “the uptake of this product into the market has exceeded even our own highest expectations – and I strongly believe it is due to the Arduino-centric strategy we employed when designing the product and the user experience.”

    If you’d like to dive into satellite IoT for your next deployment, you can request to order an Iridium Certus 9704 Development Kit on the Iridium website

    The post Dive into satellite IoT with the new Arduino-compatible Iridium Certus 9704 Development Kit appeared first on Arduino Blog.

    Website: LINK

  • Alvik Fight Club: A creative twist on coding, competition, and collaboration

    Alvik Fight Club: A creative twist on coding, competition, and collaboration

    Reading Time: 3 minutes

    What happens when you hand an educational robot to a group of developers and ask them to build something fun? At Arduino, you get a multiplayer robot showdown that’s part battle, part programming lesson, and entirely Alvik.

    The idea for Alvik Fight Club first came to life during one of our internal Make Tanks, in preparation for Maker Faire Rome 2024. Senior software developer Davide Neri and senior firmware engineer Alexander Entinger started experimenting with ways to turn our educational robot into a game-ready platform. We teased the outcome in this post last December: a sumo-style arena match where players control their robots in real-time, using power-ups like “banana spin,” “reverse slime,” and “freeze blast” to outsmart and outmaneuver their opponents. The last robot standing inside the ring wins.

    Fun to play, but we think even more fun to recreate! That’s why Pedro Lima from our Product Experience team has recently stepped in to expand the project into a complete, step-by-step guide free on Arduino Project Hub.

    From fun idea to ready-to-run project

    The tutorial for Alvik Fight Club includes full code, hardware setup, and game logic for multiplayer battles using up to four Alvik robots.

    Check it out to learn how to:

    • Control Alvik in real time with a custom remote based on Arduino Nano ESP32 and Modulino nodes
    • Add power-up logic with visual feedback using the robot’s onboard RGB LEDs
    • Detect collisions, edge boundaries, and win conditions
    • Build an arena and create your own game rules!

    Because the code is open and modular, there’s plenty of room to remix and extend the concept – whether you want to add voice commands, integrate more sensors, or simply make the game a bit more chaotic.

    Discover our STEM champion! 

    Yes it’s fun, but Alvik Fight Club also highlights what Alvik does best: it gives students and developers a hands-on way to explore real-world robotics and programming using rock-solid sensors and systems.

    Alvik is designed to inspire creativity, problem-solving, and collaboration. It’s an educational tool built by people who love to experiment and share. And projects like Fight Club show just how far that mindset can go! Try the project yourself, or share it with your classroom or club. We’d love to see your own take on the robot battle game – and where Alvik takes you next.

    The post Alvik Fight Club: A creative twist on coding, competition, and collaboration appeared first on Arduino Blog.

    Website: LINK

  • Concept Bytes’ coffee table tracks people and walks itself across a room when called

    Concept Bytes’ coffee table tracks people and walks itself across a room when called

    Reading Time: 2 minutes

    The term “mmWave” refers to radio waves with wavelengths on the millimeter scale. When it comes to wireless communications technology, like 5G, mmWave allows for very fast data transfer — though that comes at the expense of range. But mmWave technology also has some very useful sensing and scanning applications, which you may have experienced for yourself while going through airport security. The fellas at Concept Bytes employed mmWave sensing to make their coffee table track people.

    Eight months ago, Concept Bytes posted a video showcasing their walking coffee table. It could move around on strandbeest-inspired legs, which looks pretty amazing. They redesigned that coffee table in their most recent video and made it a lot more sophisticated. Part of that sophistication is the ability to locate people in the room and walk to them when called.

    At first glance, the new table looks similar to the original. But it was engineered to be easier to build using 3D-printed parts, to contain hidden coolers, to operate by remote control, and to come when called.

    The leg mechanisms are based on Giliam de Carpentier’s Carpentopod geometry, which resembles the work of Theo Jansen. But that mechanism was algorithmically optimized for very smooth motion with input from electric motors. 

    The coffee table has two sets of those legs to enable tank-style steering. An Arduino Nano RP2040 Connect board controls their motors through H-bridge drives. Another Nano RP2040 Connect housed in the remote allows for control via Wi-Fi. The coffee table’s Arduino is able to detect the sound of clapping hands through its onboard microphone. That is a command to come to the clapper.

    It finds the clapper using an AI-Thinker RD-03D mmWave sensor that works a bit like radar, but at relatively short distances (0.5 to 8 meters) and with very good precision. It is so precise that, upon hearing a clap, the table will walk directly to the clapper and stop immediately in front of them.

    The post Concept Bytes’ coffee table tracks people and walks itself across a room when called appeared first on Arduino Blog.

    Website: LINK

  • Building a Wi-Fi robot controller that accepts voice commands

    Building a Wi-Fi robot controller that accepts voice commands

    Reading Time: 2 minutes

    The whole point of a robot is that it can operate without direct control input from an operator. Except there are many exceptions and it isn’t uncommon for roboticists and operators to require direct control. The Tinkering Techie needed to add that capability to his rover robot and built his own Wi-Fi controller that also accepts voice commands.

    Conventional remote control (RC) vehicles communicate through analog radio. But it is becoming increasingly common to use Wi-Fi instead, because it allows for a lot of data transmission and Wi-Fi is now usually available in most indoor locations (ad hoc is common, too). Makers can also take advantage of development boards that have built-in Wi-Fi connectivity. In this case, The Tinkering Techie turned to the Arduino UNO R4 WiFi and a generic ESP8266 dev board acting as a Wi-Fi adapter for an Arduino Nano

    The UNO R4 WiFi is in the controller and is the server. The ESP8266 board is on the robot and connects to that server through a router to retrieve commands. Once it finds a command, such as “turn right 90 degrees,” it passes that along to the Nano that controls the robot’s motors and monitors its sensors.

    The controller has a pair of joysticks so The Tinkering Techie can pilot the robot like an RC car. But it also has a DFRobot Gravity Offline Language Learning Voice Recognition Sensor. That has 121 pre-programmed voice commands and also supports 17 custom commands. Using those, The Tinkering Techie was able to make the robot respond to verbal instructions, like “turn right 90 degrees.”

    The post Building a Wi-Fi robot controller that accepts voice commands appeared first on Arduino Blog.

    Website: LINK

  • This automatic emergency braking system protects RC cars

    This automatic emergency braking system protects RC cars

    Reading Time: 2 minutes

    It is a story as old as time (or at least the 1960s): kid gets an RC car for Christmas and excitedly takes it for spin, but crashes it into a wall within five minutes and tears ensue. The automotive industry has cut down on accidents by implementing automatic emergency braking safety features, so why can’t RC cars have something similar? They can and Narrow Studios proved it by creating their own DIY emergency braking system to protect their toy vehicle.

    Christmas morning jokes aside, this is practical. Today’s RC cars can accelerate very quickly and reach surprisingly high top speeds, which means they’re easy to crash. These vehicles can easily cost several hundred dollars, so such crashes are a hit to both the ego and the wallet. The system made by Narrow Studios prevents those crashes and is relatively affordable to integrate.

    The hardware necessary to add emergency braking to an RC car consists of two major components: an Arduino Nano board and ultrasonic sensors. A simple version of this system could be built with just one ultrasonic sensor, but Narrow Studios used four: two on the front bumper and one on each side.

    The Arduino constantly monitors the ultrasonic sensors. Under normal circumstances, they won’t report seeing anything — or at least not anything close by. But if something like a wall is nearby, the Arduino will immediately go into action and send a braking command (via a PWM signal) to the RC receiver. That’s a Flysky FS-i6X in this case, but the process should work with most others.

    It isn’t perfect and it isn’t very “smart,” but this system could genuinely prevent expensive crashes and that makes it worth considering if you have a nice RC car.

    The post This automatic emergency braking system protects RC cars appeared first on Arduino Blog.

    Website: LINK

  • This unique electronic toy helps children learn their shapes

    This unique electronic toy helps children learn their shapes

    Reading Time: 2 minutes

    It isn’t a secret that many kids find math to be boring and it is easy for them to develop an attitude of “when am I ever going to use this?” But math is incredibly useful in the real world, from blue-collar machinists using trigonometry to quantum physicists unveiling the secrets of our universe through advanced calculus. By engaging children early on in fun, intuitive ways, we can lay a mathematical foundation to build upon and TIEboard is a unique electronic toy that could help.

    Developed by researchers from the Keio Graduate School of Media Design and University of Auckland, TIEboard is an interactive digital tool aimed at teaching kids geometric concepts. It is a bit like the classic Lite-Brite toy, but for geometric shapes and smart enough to guide learning. It consists of a grid of points, each of which is a hole that can be lit by an LED and accept a “thread.” Those threads are fiber optic and light up. They’re also conductive and make contact with pads around the holes.

    A basic lesson to guide the construction of a square would light up four points. The child could then string threads between those points to form the sides of the square in glowing colors. More complex lessons are possible and kids can progress through them as they grasp the fundamentals of shapes and geometry. 

    An Arduino Nano Every board provides that functionality by setting the colors of the LEDs and monitoring the matrix of copper pads around the holes. Buttons let the pupil move through the different lessons. 

    The lessons created for the TIEboard prototype are limited and the researchers found that some of the test participants struggled to follow along, but the concept is strong and lesson refinement would likely improve the results in the future.

    Read more about TIEbaord in the team’s paper here.

    Image credit: Arooj et al.

    The post This unique electronic toy helps children learn their shapes appeared first on Arduino Blog.

    Website: LINK

  • This machine automatically scans books from cover to cover

    This machine automatically scans books from cover to cover

    Reading Time: 2 minutes

    Hard data is hard to find, but roughly 100 million books were published prior to the 21st century. Of those, a significant portion were never available in a digital format and haven’t yet been digitized, which means their content is effectively inaccessible to most people today. To bring that content into the digital world, Redditor bradmattson built this machine that automatically scans books from cover to cover.

    There are, of course, already machines on the market for scanning books. But the inexpensive models require manual page-turning and the more feature-packed models are very expensive. Bradmattson’s book scanner is fully automatic and can scan a whole stack of books without the assistance of a human operator. And the machine is relatively affordable to build, which makes it easier to justify the digitization of books that might otherwise be overlooked.

    Oh, and it is portable. The whole thing folds up into a briefcase, so the operator can take it from location to location, digitizing books along the way.

    As you’d expect, this machine is fairly complex. But the basic gist is that a stack of books rests on one side and gravity drops each one down onto a feed mechanism, which carries the book to the scanning area. There, a suction gripper lifts the cover. Next, a plexiglass press holds down the pages while a camera snaps a photo. To flip to the next page, a PC fan creates negative pressure to gently grip the paper and then the whole process repeats. When the whole book has been scanned, it slides over to the output area and the next book enters the scanning area.

    A computer running Python oversees the process and catalogs the images. It controls the various motors through an Arduino GIGA R1 WiFi board paired with a CNC shield, as well as additional relays and a servo driver board.

    The post This machine automatically scans books from cover to cover appeared first on Arduino Blog.

    Website: LINK

  • The PlatypusBot is a TurtleBot3-inspired robot built from vacuum cleaner parts

    The PlatypusBot is a TurtleBot3-inspired robot built from vacuum cleaner parts

    Reading Time: 2 minutes

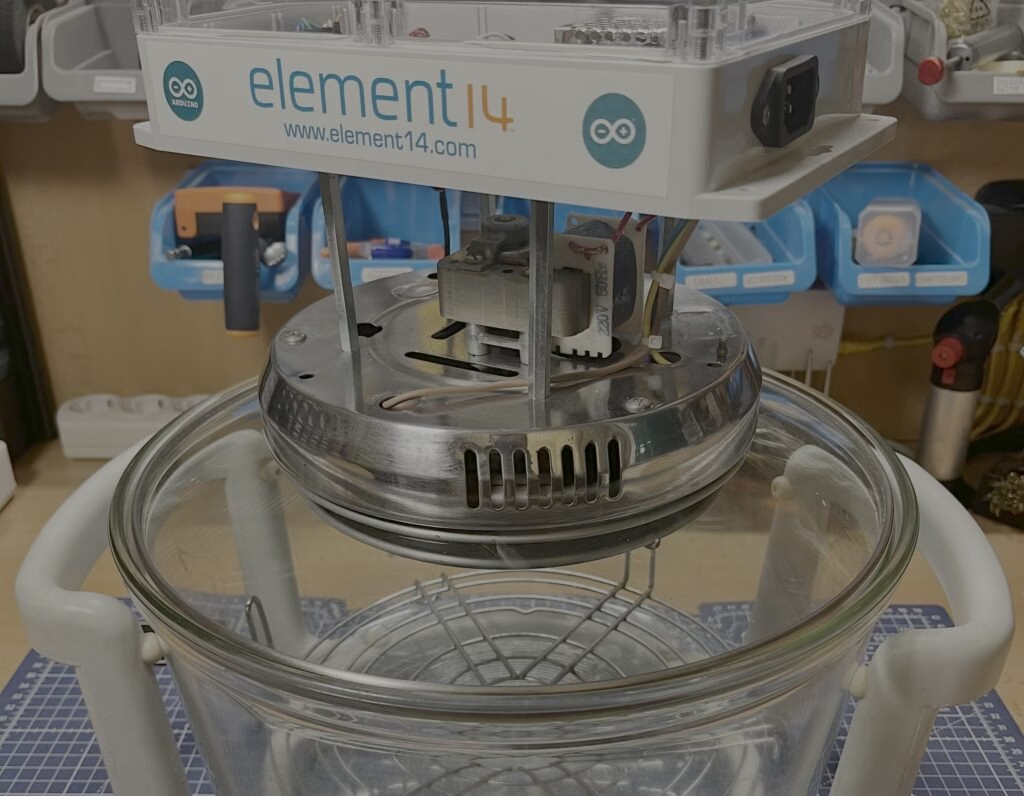
    We all love the immense convenience provided by robot vacuum cleaners, but what happens when they get too old to function? Rather than throwing it away, Milos Rasic from element14 Presents wanted to extract the often-expensive components and repurpose them into an entirely new robot, inspired by the TurtleBot3: the PlatypusBot.

    Rasic quickly got to work by disassembling the bot into its drive motors, pump, and several other small parts. Luckily, the main drive motors already had integrated encoders which made it very easy to connect them to an Arduino UNO R4 WiFi and an L298N motor driver for precise positional data/control. Further improving the granularity, Rasic added a 360-degree lidar module and enough space for a Raspberry Pi in order to run SLAM algorithms in the future.

    For now, this 3D-printed robot assembled from reclaimed robot parts is controlled via a joystick over UDP and Wi-Fi. The host PC converts the joystick’s locations into a vector for the motors to follow, after which the values are sent to the UNO R4 WiFi for processing.

    For more details on this project, you can read Rasic’s element14 blog post

    The post The PlatypusBot is a TurtleBot3-inspired robot built from vacuum cleaner parts appeared first on Arduino Blog.

    Website: LINK

  • Why we chose Claude for the Arduino Cloud AI Assistant

    Why we chose Claude for the Arduino Cloud AI Assistant

    Reading Time: 4 minutes

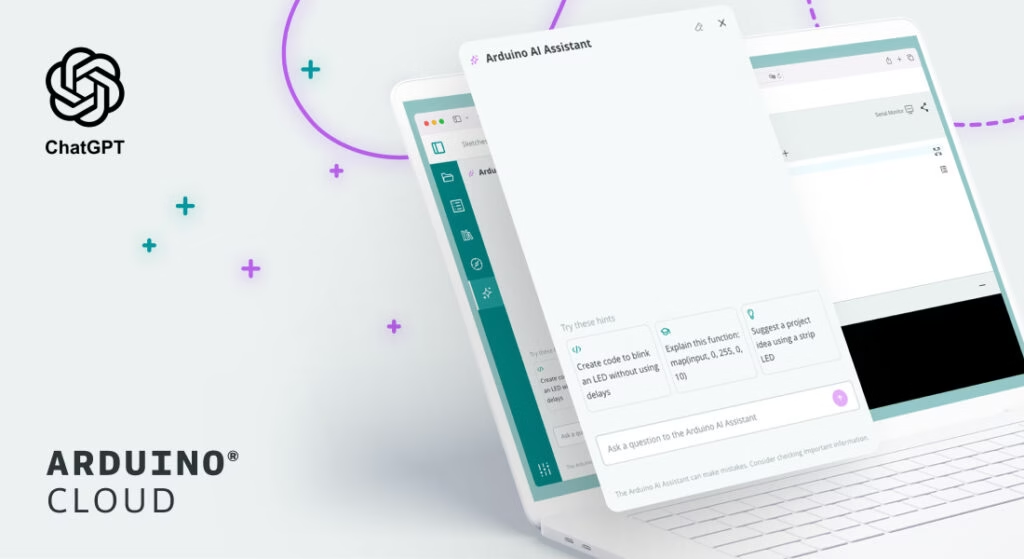
    We know that introducing AI into your coding environment comes with questions – about safety, accuracy, privacy, and trust. That’s why we want to be transparent about how we built the recently-announced Arduino AI Assistant in the Cloud IDE, and why we chose to power it with Claude by Anthropic, available via Amazon Web Services (AWS) Bedrock. This feature is not a shortcut. It’s a tool to help you learn faster, test smarter, and stay focused on the creative side of building. Here’s how, and why, we made it.

    Arduino AI Assistant: Your smart coding companion

    Claude was designed from the ground up to be a collaborator – not just a chatbot. It’s one of the top-performing large language models (LLMs) when it comes to writing, explaining, and editing code. It is available through Amazon Bedrock, a fully managed service that makes foundation models accessible via API.  We integrated Claude via AWS because it allowed us to easily access a secure and scalable model directly within the infrastructure we already trust and use

    We tested multiple models, and Claude stood out for its ability to understand context, generate cleaner code, and explain concepts clearly. It was also a good match for our goals: not just delivering answers, but helping you learn, debug, and iterate.

    Context-aware with less hallucination

    In developing the Arduino Cloud AI Assistant, we’ve implemented Retrieval Augmented Generation (RAG) – a technique that gives the AI more relevant context before it answers your question. Basically, when you ask the assistant something, we don’t just send your prompt to Claude directly. Instead, we first provide it with hand-picked, structured documentation based on your sketch, board, and use case.

    This means you’re more likely to get reliable, Arduino-specific answers, and less likely to see hallucinated or misleading code. We regularly update these documents based on product releases and user feedback – so the system continues to improve over time.

    Privacy comes first

    We’ve built clear guardrails into the AI Assistant’s behavior – both our own and the ones provided by AWS Bedrock. These include:

    • No personal or identifiable data (like private sketches or account info) is ever shared with the LLM.
    • Every response stays within the Arduino context – the assistant won’t answer or suggest anything unrelated to our platform.
    • Guardrails help prevent suggestions for harmful or inappropriate projects, reinforcing our community guidelines.

    We’ve also taken a minimal-data approach. The assistant only sees what it needs to generate a useful reply – no more, no less.

    Community-led AI Assistant

    This assistant wasn’t designed in a vacuum. Before launch, we worked closely with users through interviews and beta testing to identify the most common questions and pain points. The feedback we received shaped everything from prompt engineering to UI design.

    We’re continuing to build this tool with you. That’s why every answer includes a thumbs up/down feedback option, and why we monitor the results closely.  Some of the most useful improvements – like support for more libraries, better error messages, and undo/redo functionality – came directly from user suggestions.

    Your input helps us tune the assistant – and the documents it draws from – to serve the real needs of real developers.

    Supporting learning, not replacing it

    We’ve heard the concerns about generative AI – from hallucinated code to worries that AI tools could erode developer skills or take over human jobs. We share some of these concerns, and we’ve taken a careful approach. 

    We designed the Arduino AI Assistant to be just that: an assistant, not a replacement. It’s not there to write your entire project. It’s there to help you fix bugs, understand syntax, explore ideas, and stay in flow while you build. For example, you can ask the assistant: “Explain this sketch”, and it will walk you through the code step by step, helping you understand a project written by someone else or clarify syntax you’re unfamiliar with.

    We’ve added lightweight signals – like “experimental” tags and a friendly reminder not to blindly trust code to encourage self-learning.

    Have you tried the Arduino Cloud AI Assistant yet?

    The Arduino Cloud AI Assistant is available to everyone – even on the free plan.
    You can try it today with up to 30 free interactions per month, right inside the Cloud Editor.

    If you need more, our Maker and School plans include 1,500 monthly interactions, and Team or Enterprise plans unlock unlimited usage.

    Get started now at cloud.arduino.cc/features and let the assistant help you code smarter, debug faster, and stay in flow.

    The post Why we chose Claude for the Arduino Cloud AI Assistant appeared first on Arduino Blog.

    Website: LINK

  • This 1D camera captures 2D images of things it can’t see

    This 1D camera captures 2D images of things it can’t see

    Reading Time: 2 minutes

    Yes, the title of this article sounds pretty crazy. But not only is it entirely possible through the lens of physics, but it is also practical to achieve in the real world using affordable parts. Jon Bumstead pulled it off with an Arduino, a photoresistor, and an inexpensive portable projector.

    Today’s digital camera sensors are the result of a fairly linear progression from a camera obscura up through film cameras. The light from the scene enters through a lens that focuses all of that light on the 2D plane at the same time. The digital “sensor” is actually a whole grid of tiny sensors that each measure the light they receive. The camera records those values and reconstructing them gives you a digital image.

    Bumstead’s “camera” works differently and only records a single point of light at a time. The entire camera is actually just an Arduino Mega 2560 (an UNO also works) with a photoresistor. The photoresistor provides a single analog light measurement and the Arduino reads that measurement, assigns a digital value, and passes the data to a PC.

    Here’s the cool part: by only illuminating one point of the scene at a time, the camera can record each “pixel” in sequence. Those pixel values can then be reconstructed into an image. In this case, Bumstead used a portable video projector to provide the illumination. It scans the illumination point across the scene as the Arduino collects data from the photoresistor.

    Bumstead also experimented with more complex techniques that rely on projected patterns and a lot of very fancy math to achieve similar results.

    Finally, Bumstead showed that this also works when the photoresistor doesn’t have line-of-sight to the scene. In that demonstration, light from the scene bounces off a piece of paper, kind of like a mirror. The photodetector only sees the reflected light. But that doesn’t matter — remember, the photodetector is only seeing a single point of light anyway. Whether that light came directly from the surface of objects in the scene or bounced off paper first, the result is the same (just with a bit less quality, because the paper isn’t a perfect reflector).

    The post This 1D camera captures 2D images of things it can’t see appeared first on Arduino Blog.

    Website: LINK

  • Arduino Cloud Café: Teach real coding concepts with Arduino AI Assistant

    Arduino Cloud Café: Teach real coding concepts with Arduino AI Assistant

    Reading Time: < 1 minute

    Are you an educator looking to make coding easier and faster to teach? 

    Join Andrea Richetta, Principal Product Evangelist at Arduino, and Roxana Escobedo, EDU Product Marketing Specialist, for a special Arduino Cloud Café live webinar on July 7th at 5PM CET.

    You will discover how the new AI Assistant in Arduino Cloud can help you save valuable time in the classroom. We’ll also show you how the AI Assistant can generate, explain, and fix code, giving both you and your students the support you need to focus on creativity and learning.

    What to expect

    • Watch live demos with the UNO R4 WiFi and Plug and Make Kit
    • Learn how to generate sketches, fix errors, and understand your code better
    • Get Andrea Richetta’s top 5 expert tips to work smarter with AI
    • Ask your questions live during our open Q&A

    Whether you’re teaching STEM in a classroom or mentoring young developers, this session will help you engage with smarter, faster, AI-powered teaching.

    Register now

    Don’t miss your chance to see the AI Assistant in action and find out how AI is shaping the future of Arduino development.

    The post Arduino Cloud Café: Teach real coding concepts with Arduino AI Assistant appeared first on Arduino Blog.

    Website: LINK

  • This spinning water contraption is actually a functional battery

    This spinning water contraption is actually a functional battery

    Reading Time: 2 minutes

    If you ask someone to think of a battery, they’re probably going to picture a chemical battery, like a AA alkaline or a rechargeable lithium-ion battery. But there are other kinds of batteries that store energy without any fancy chemistry at all. If you find a way to save energy for later, you have a useful battery. Erik, of the Concept Crafted Creations YouTube channel, achieved that by storing kinetic energy in a spinning flywheel weighted with water.

    This isn’t a crazy idea, because flywheels exist specifically to store kinetic energy in a spinning mass. In this case, most of that mass comes from tubes full of water. Water is cheaper than something like cast iron and it is easy to adjust the levels to maintain perfect balance.

    But this wet flywheel has another trick up its sleeve: adjustable moment of inertia. Watch an ice skater as they tuck into spin and you’ll understand this. By pulling their arms and legs close their axis of rotation, the skater can reduce their overall moment of inertia and increase their speed. Erik’s flywheel can do the same thing by actuating the cylinders of water to bring them in closer to the rotational axis.

    To control that process, Erik used an Arduino Nano board housed in a simple laser-cut box with a potentiometer for adjusting speed, and buttons to control power and the arm actuation. A beefy brushless DC motor spins up the flywheel under power. Then, when it is time to collect that power (such as to power the lightbulb Erik used for demonstration), that motor acts as a dynamo, like in a generator. 

    As a battery for long-term power storage, this isn’t very practical. In a vacuum with perfect frictionless bearings, it would be. But in the real-world the flywheel will slow down on its own in short order. Even so, it is still a great illustration of the concept.

    The post This spinning water contraption is actually a functional battery appeared first on Arduino Blog.

    Website: LINK

  • Elevate your IoT with ultra-wideband: Meet Arduino Stella and Portenta UWB Shield!

    Elevate your IoT with ultra-wideband: Meet Arduino Stella and Portenta UWB Shield!

    Reading Time: 2 minutes

    We are proud to announce two groundbreaking additions to the Arduino Pro portfolio: the Arduino Stella and Portenta UWB Shield, developed in partnership with Truesense. These advanced tools leverage ultra-wideband (UWB) technology to redefine precision tracking, indoor navigation, and contactless human-machine interactions, empowering IoT innovation across industries. Whatever you have in mind, you’ll leverage streamlined development thanks to ready-to-use Arduino IDE libraries, examples, and tutorials, enabling you to move from concept to prototype faster. 

    With UWB technology, you can achieve pinpoint accuracy in even the most complex environments, connect effortlessly with UWB-enabled smartphones and cloud platforms, and ensure your data remains private and secure thanks to UWB’s hard-to-intercept signals. You can learn more about our collaboration with Truesense and the power of UWB technology in our recent blog post: Arduino and Truesense partner to bring UWB technology to millions.

    Arduino Stella shines for precision and versatility

    Featuring an nRF52840 microcontroller and Truesense DCU040 module, the Arduino Stella delivers unparalleled accuracy for real-time tracking. Its compact design and seamless integration with UWB-enabled smartphones and apps like NXP Trimension, Apple’s Nearby Interaction, and Android’s UWB Jetpack library make it the perfect solution for modern tracking and automation needs.

    Stella excels in industries such as healthcare, logistics, and smart buildings, offering advanced functionality like:

    • Pinpointing location tracking for high-value assets
    • Intuitive human-machine interaction
    • Automated safety and monitoring systems
    • Reliable indoor navigation

    Portenta UWB Shield extends the end-to-end capabilities of the Portenta family

    Powered by the Truesense DCU150, the Portenta UWB Shield easily adds UWB connectivity to the Portenta C33. This versatile shield acts as a base station and a client device, enabling precise real-time location services (RTLS) and two-way ranging.

    With its modular and robust design, the Portenta UWB Shield is ideal for:

    • Smart logistics with dynamic route optimization
    • Interactive environments for enhanced user experiences
    • Secure and responsive IoT systems

    Expand possibilities with ultra-wideband!

    Every new addition to our ecosystem is a tool designed to make innovation accessible and scalable for professionals across industries. The Arduino Stella and Portenta UWB Shield, in particular, make it easier than ever to tackle applications such as:

    • Human-machine interaction: Enable intuitive commands and real-time feedback using UWB-equipped devices.
    • Follow-me AGVs: Automate logistics with autonomous vehicles that dynamically follow workers in warehouses.
    • Secure item transportation: Track critical items with proximity alerts and temperature monitoring during transit, leveraging compatibility with Modulino nodes.
    • Residential access control: Automate door access for authorized personnel with UWB-enabled smartphones.
    • EV automatic recharge: Streamline EV charging by triggering the process based on real-time vehicle positioning.
    • High-value asset tracking: Monitor valuable equipment in real time with location alerts and optimization tools.

    Ready to elevate your IoT projects to new heights, with unmatched precision, seamless integration, and secure communication? Find the Arduino Stella and Portenta UWB Shield on the Arduino Store today!

    The post Elevate your IoT with ultra-wideband: Meet Arduino Stella and Portenta UWB Shield! appeared first on Arduino Blog.

    Website: LINK

  • Build your own 4DOF robotic arm on a budget

    Build your own 4DOF robotic arm on a budget

    Reading Time: 2 minutes

    Robot arms are very cool and can be quite useful, but they also tend to be expensive. That isn’t just markup either, because the components themselves are pricey. However, you can save a lot of money if you make some sacrifices and build everything yourself. In that case, you can follow Ruben Sanchez’s tutorial to create your own four degrees of freedom robot arm from scratch.

    This design has four actuated axes: the base, the shoulder, the elbow, and the wrist. Depending on the end effector you need, a gripper might count as another. It has a reach of up to 80cm and a maximum payload capacity of 350g, which is enough to move small objects.

    Sanchez reduced the cost of this robot arm (compared to typical designs) in two ways. The first is by constructing the frame from aluminum sheet cut by hand, with laser markings as a guide template. The second is by using DC gear motors with external encoders for actuation, rather than purpose-built robotic actuators. They won’t have as much accuracy or repeatability, but they’re affordable.

    An Arduino Due board controls the motors through Pololu drivers. The Arduino receives movement commands from a connected PC, which can look at the work area through an Intel RealSense camera attached by the end effector.

    Sanchez provides the Arduino Sketch to get started, but encourages users to develop their own control software. To help with that, his writeup includes some nice explanations of inverse kinematics, the math involved, and how to implement it.

    [youtube https://www.youtube.com/watch?v=iZUxTX9gKQQ?feature=oembed&w=500&h=281]

    The post Build your own 4DOF robotic arm on a budget appeared first on Arduino Blog.

    Website: LINK

  • Find your way to AI with Arduino, at the EDGE AI FOUNDATION’s event in Milan

    Find your way to AI with Arduino, at the EDGE AI FOUNDATION’s event in Milan

    Reading Time: 2 minutes

    We’re heading to Milan! On July 2nd-4th, Arduino will be taking part in the EDGE AI FOUNDATION’s annual European event – a three-day gathering dedicated to exploring the future of artificial intelligence at the edge. With a mix of inspiring keynotes, hands-on workshops, product demos, and networking opportunities, this event brings together global leaders from academia and industry to shape what’s next in edge AI and tinyML.

    Arduino is proud to be part of this community. You’ll find us on the exhibition floor with live demos of some of our most advanced edge computing solutions – from cloud-connected, AI-driven object recognition to intuitive device control via natural gestures, from robotics and environmental sensing to factory automation and beyond.

    If you’re attending, don’t miss the talk by Arduino’s Chief Product Officer Marcello Majonchi on July 2nd at 10:25am – “Empowering at the Edge: the ‘Arduino way’ to AI” will unveil the next generation of tools designed to make the development of intelligent applications faster, easier, and more open than ever!

    As always, we’re excited to show how powerful tools can still be open, accessible, and easy to use. By collaborating with organizations like the EDGE AI FOUNDATION, we’re helping more people explore AI at the edge and build real-world applications that are sustainable, scalable, and smart.

    Curious to join us? The event is open to professionals, researchers, and students alike – and there’s discounted pricing for academic attendees. Head to the event site to register and check out the full program!

    See you in Milan – and be sure to come say hi to the Arduino team on site!

    The post Find your way to AI with Arduino, at the EDGE AI FOUNDATION’s event in Milan appeared first on Arduino Blog.

    Website: LINK

  • Toss-launching drones is hard — this automatic launcher does it better

    Toss-launching drones is hard — this automatic launcher does it better

    Reading Time: 2 minutes

    Typically, consumer drones take off from the ground or some other solid surface. But that isn’t very cinematic and toss launches — when the pilot throws the drone up into the air — are a lot more interesting to watch. Sadly, NickFPV isn’t very good at tossing his drone and that invites ridicule in his videos’ comment sections. To redeem himself, he built this automatic drone launcher triggered by an Arduino.

    When developing the launching mechanism, NickFPV found inspiration in his kitchen. Or more accurately, he found inspiration in the kitchens of cartoons, where toasters rocket charred bread to comical altitudes. He figured that if it works for toast, it could work for a micro drone. He just needed more stored kinetic energy.

    As with a toaster, NickFPV’s mechanism stores kinetic energy in a spring. When released, that spring pulls up a platform riding on hardened steel rods. The spring and rods attach to a 3D-printed frame and a pin latch holds the platform in place until the launch. The drone sits on that platform and when the platform reaches the top, it stops while the drone continues skyward. 

    NickFPV could have tugged a string to pull out that pin, but the launcher is pretty small and that pin requires some force to pull. Doing that while standing safely a few feet away would inevitably drag the entire launcher. To solve that problem, NickFPV added an Arduino to trigger the launch.

    That is an Arduino UNO R4 WiFi board and it controls a servo motor mounted on the launcher. At the press of a button, the servo yanks the string that pulls the latch pin. Power comes from a portable USB battery pack, so any location can become a launch pad.

    The launcher proved to be a success and it throws the drone a good six feet up, where its motors can take over to achieve flight. Now, NickFPV’s viewers won’t see his poor throws.

    [youtube https://www.youtube.com/watch?v=WdWmJkuHe_Y?start=1&feature=oembed&w=500&h=281]

    The post Toss-launching drones is hard — this automatic launcher does it better appeared first on Arduino Blog.

    Website: LINK

  • This robotic tongue drummer bangs out all the ambient hits

    This robotic tongue drummer bangs out all the ambient hits

    Reading Time: 2 minutes

    If you like to listen to those “deep focus” soundtracks that are all ambient and relaxing, then you’ve heard a tongue drum in action. A tongue drum, or tank drum, is a unique percussion instrument traditionally made from an empty propane cylinder — though purpose-built models are now common. Several tongues are cut into one end cap and weighted to produce specific notes when struck. As with all instruments, playing a tongue drum is an art. To simplify that, Jeremy Cook built a robot capable of playing a small tongue drum.

    When robotizing a percussion instrument, it is common to use solenoids and that is what Cook did here. Solenoid actuators like these move linearly and can strike with pretty decent force, which makes them a good choice. Cook’s drum has eight tongues, so his robot has eight solenoids held by flexible friction arms mounted onto a C-shaped laser-cut MDF frame. PVC pipes actual as the vertical structural supports on that frame.

    An Arduino Opta Lite micro PLC sends power to the solenoids through an Arduino Pro Opta Ext D1608S solid-state relay expansion module, which contains eight SSRs that can each handle 24VDC at 2A.

    To tell the robot what tunes to play, Cook added a MIDI input that comes through an Opta-compatible I2C and serial adapter of his own design. That adapter is available for sale on Tindie if you want one. 

    The MIDI input can come from a something like a keyboard for real-time manual control, or it can come from a PC for playing pre-written (or algorithm-generated) ambient hits. If you attended the Orlando Maker Faire last year, you may have had a chance to try this robotic tongue drummer for yourself.

    [youtube https://www.youtube.com/watch?v=bK5F8mKTI4w?feature=oembed&w=500&h=281]

    The post This robotic tongue drummer bangs out all the ambient hits appeared first on Arduino Blog.

    Website: LINK

  • Using an Arduino Nicla Vision as a drone flight controller

    Using an Arduino Nicla Vision as a drone flight controller

    Reading Time: 2 minutes

    Drone flight controllers do so much more than simply receive signals and tell the drone which way to move. They’re responsible for constantly tweaking the motor speeds in order to maintain stable flight, even with shifting winds and other unpredictable factors. For that reason, most flight controllers are purpose-built for the job. But element14’s Milos Rasic was building his own drone from scratch and found that the Arduino Nicla Vision board makes a great flight controller.

    To perform that critical job of keeping the drone stable, the flight controller needs precises information about the orientation of the drone and any movement in three-dimensional space. Luckily, the Nicla Vision has an integrated six-axis motion sensor that is perfect for the job. It has also a powerful STM32H7 microcontroller, a built-in camera for machine vision and learning tasks, onboard Wi-Fi and Bluetooth connectivity, and more. And because it is very small (22.86×22.86mm) and very light, it is a good choice for a drone.

    Rasic designed and made the entire drone from zero, using 8520 brushed DC motors and a 3D-printed frame. That is cool, but it isn’t uncommon. The Nicla Vision-based flight controller is what stands out the most.

    Rasic developed a custom PCB for the Nicla Vision that acts like a breakout board and contains a few other useful components, such as for regulating and boosting power. But it didn’t need much, as the Nicla Vision already has most of the necessary hardware. 

    While he could have turned to existing flight controller firmware, Rasic chose to develop his own and that is the most impressive part of this project. That necessitated the creation of three PID (proportional-integral-derivative) controller algorithms for balancing pitch, roll, and yaw. Those work with control inputs to let the drone hover and move stably. The control signals come from a PC over Wi-Fi, with the pilot providing input through a USB flight stick.

    The drone isn’t yet flying well, as PID tuning is a challenge for even the most experienced drone builders. But the foundation is there for Rasic to build on.

    [youtube https://www.youtube.com/watch?v=4CI2XqS5YiA?feature=oembed&w=500&h=281]

    The post Using an Arduino Nicla Vision as a drone flight controller appeared first on Arduino Blog.

    Website: LINK

  • This DIY standing desk controller provides luxury car-style memory settings

    This DIY standing desk controller provides luxury car-style memory settings

    Reading Time: 2 minutes

    One of the best features you’ll find on a fancy luxury car is seat position memory. Typically, there are at least two profiles that “save” the position of the seat. When switching drivers, the new seat occupant can simply push the button for their profile and the seat will automatically move to their saved position. Tired of adjusting it manually, Andy of Yeah Nah DIY implemented a similar memory function into the controller he built for his standing desk.

    There are a lot of motorized, adjustable standing desks on the market and some of them do have memory settings. But the model Andy owns didn’t have the functionality. Instead, it just had two buttons to raise or lower the desk. His DIY controller solves that problem, making the desk far more convenient to use from day to day.

    The original controller was very simple, with two buttons to activate the motor (one with reversed polarity). Basic limit switches disconnected power to prevent collisions.

    The new controller, controlled by an Arduino Nano Every board on a custom PCB, has similar buttons, but also three memory positions. To find those positions, the Arduino needs to know how high the desk is at any given time. Andy added an encoder to the elevation screw to count revolutions, which are then used to calculate distance and therefore height. With that feedback the Arduino controls power to the desk’s motors via relays and also monitors the limit switches.

    The Arduino and custom PCB fit into a nice, minimalist enclosure that mounts onto the front of the desk within easy reach. All of the 3D models and the Arduino sketch file are available for download if you have a similar desk and want to upgrade it in the same way.

    [youtube https://www.youtube.com/watch?v=RGp0JSYM98Q?feature=oembed&w=500&h=281]

    The post This DIY standing desk controller provides luxury car-style memory settings appeared first on Arduino Blog.

    Website: LINK

  • Arduino is at work to make bio-based PCBs!

    Arduino is at work to make bio-based PCBs!

    Reading Time: 4 minutes

    April 22 is Earth Day – a powerful reminder of our shared responsibility to preserve the planet for future generations. While the call for climate action grows louder, Arduino is committed to making sustainability an ongoing priority through concrete projects and global collaborations every day of the year.

    One of the most exciting steps in that direction is our work on bio-based printed circuit boards (PCBs) – announced by co-founder David Cuartielles during this year’s Arduino Days. It’s an effort to fundamentally rethink how electronics are made, used, and eventually disposed of.

    [youtube https://www.youtube.com/watch?v=5Gcxc4RyXN4?feature=oembed&w=500&h=281]

    Introducing the Desire4EU project

    Our bio-based PCB initiative is part of Desire4EU, a European project funded by the European Innovation Council (GA N°101161251). Running from 2024 to 2028, it brings together researchers and engineers from Sweden, Italy, Hungary, Belgium, and France. The goal: to design and test bio-based multilayer PCBs that reduce environmental impact, without compromising on functionality or performance.

    Partners include the Budapest University of Technology and Economics, CROMA at the Université Grenoble Alpes, the Catholic University of Leuven, and others. Arduino is proud to contribute both open hardware designs and real-world testing thanks to the Arduino community – hey, that’s you!

    The first working prototypes have already been manufactured using a new flame-retardant composite made from PLA-flax, instead of traditional fiberglass and epoxy. And yes, it actually works: the team has already successfully replicated Arduino Nano and UNO boards using this new bio-based substrate.

    A holistic approach for sustainability

    As Pascal Xavier (researcher at CROMA and professor at the Technology University Institute in Grenoble) pointed out during Arduino Days, making boards bio-compatible first and biodegradable second is a step forward in managing growing volumes of e-waste that collect on our planet. But benefits don’t stop there, because to make the most of the new materials, researchers had to lower soldering temperatures – leading to lower energy consumption during manufacturing. This helps reduce not just end-of-life waste, but the total environmental footprint of electronics production.

    According to a paper the team published on Nanotechnology in the early phases of the project, assembly with the new material is still compatible with standard surface mounted technology (SMT), meaning no expensive new infrastructure is needed. Also, the new boards use optimized layouts to improve yield and reliability – even with double-sided designs and through-hole vias.

    Looking beyond the board: full lifecycle impact matters

    All of these aspects (and more) are being considered to validate the environmental benefits of the project in a holistic perspective. A Life Cycle Assessment (LCA) is being conducted by the team at the Catholic University of Leuven, leveraging all the necessary data to quantify how much waste and CO? can be saved, the energy savings during production, and the potential for bio-leaching. The latter provides a way to recover high-purity copper from used PCBs using bacterial processes, instead of energy-intensive chemical treatments.

    At the moment, we estimate that 90% of the traditional FR4 substrate (the composite material made with woven fiberglass cloth and an epoxy resin binder traditionally used) can be replaced with sustainable materials – without altering the behavior of the board during use at extreme environmental conditions?.

    Designing with the planet in mind (and barely changing a thing)

    What changes when design meets bio-compatibility? Surprisingly little according to Attila Géczy (head researcher in bio-based electronics at the Budapest University of Technology and Economics), who took part in the Arduino Days announcement to provide interesting technical details. Most existing Arduino board designs can be adapted with minimal changes. A few layout tweaks – like teardrop pads and improved via structures – help ensure reliable manufacturing, but the overall workflow stays familiar to any embedded designer. That’s crucial if we want these technologies to be adopted widely, not just experimentally.

    Be part of the solution!

    As part of the Desire4EU project, we’ll be giving away 1,000 beta boards starting in April 2026 – built on this new sustainable substrate and featuring an open-source design with LoRa® wireless connectivity.

    We’re looking for testers, educators, and innovators to help us evaluate performance in real-world applications. If you’re interested in joining the program, stay tuned: we’ll share more in the coming months.

    In the meantime, you can explore the full scientific paper on the project, published in Nanotechnology in the early phases of research, as well as follow the project’s development on the official Desire4EU website

    Together, let’s build electronics that are smarter, more responsible – and built to last in every sense.

    The post Arduino is at work to make bio-based PCBs! appeared first on Arduino Blog.

    Website: LINK