Schlagwort: team
-

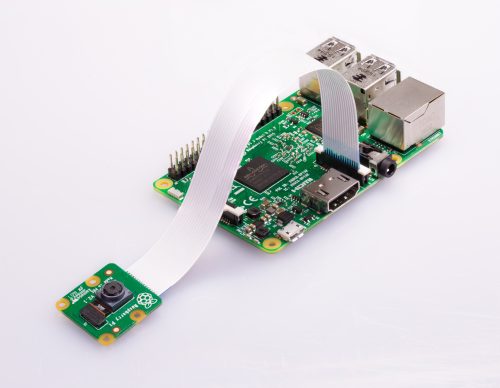
How to work from home with Raspberry Pi | The Magpi 93
Reading Time: 7 minutesIf you find yourself working or learning, or simply socialising from home, Raspberry Pi can help with everything from collaborative productivity to video conferencing. Read more in issue #92 of The MagPi, out now. 01 Install the camera If you’re using a USB webcam, you can simply insert it into a USB…
-

DIE TOM CLANCY’S RAINBOW SIX® PRO LEAGUE STARTET MORGEN BEIM INTEL® EXTREME MASTERS IN KATOWICE!
Reading Time: < 1 minuteUbisoft® kündigte an, dass die Season One der offiziellen Rainbow Six Pro League morgen beim Intel® Extreme Masters in Katowice startet. Zuschauer können Matches zwischen den besten acht PC-Teams aus Europa live verfolgen, während Besucher am Ubisoft Consumer-Stand die neuesten Inhalte von Rainbow Six Siege spielen können. Die Rainbow Six Pro…
-

Steam controllers will only be made by Valve
Reading Time: < 1 minuteValve’s Greg Coomer has revealed to IGN that only Valve will be manufacturing Steam Controllers due to the carefully tuned product they have. The controller is going to be a Valve product, we’re going to manufacture it. We’re going to supply all the people who are making third party Steam Machines…