Schlagwort: steampunk
-

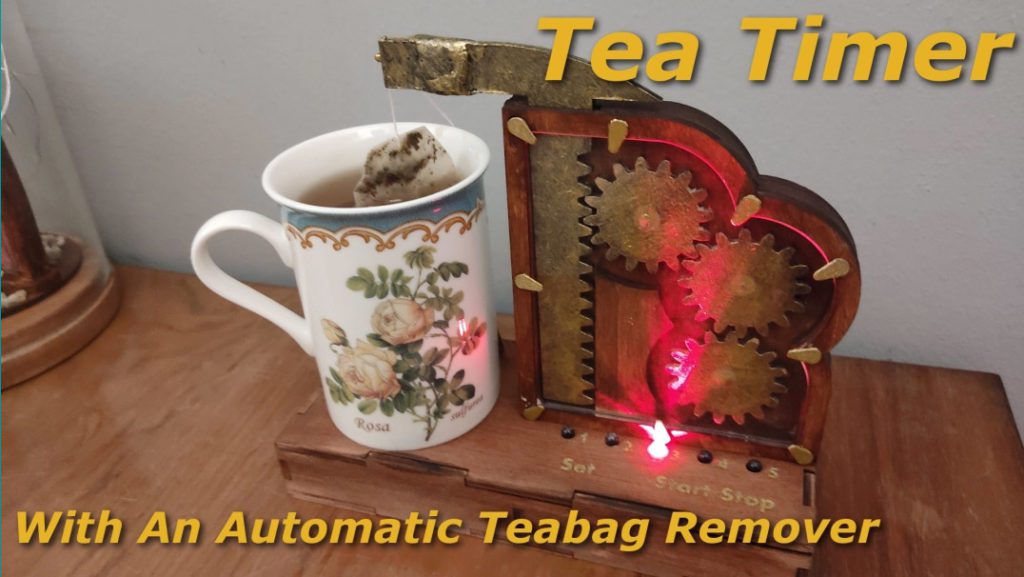
A splendid steampunk tea maker
Reading Time: 2 minutesArduino Team — April 14th, 2021 Prolific project maker and Arduino lover Alain Mauer has made a rather splendid tea maker project with a steampunk twist. Despite Mauer being based in Luxemburg, we’d have to say this feels like a very British Arduino application. Crumpets or Battenburg, anyone? Putting the “Tea” in…
-

Steampunk ‘Help is coming’ Raspberry Pi alert system
Reading Time: 3 minutesTom Lee decided to combine his household with his sister-in-law during lockdown so that she could help him make childcare more manageable. The problem was, Tom’s household was a smidge frantic in the mornings, as the family struggled to be up and ready in time for his sister-in-law’s arrival. Enter this Raspberry…
-

Steampunk-inspired Raspberry Pi enclosure | HackSpace magazine #20
Reading Time: 2 minutesWho doesn’t like a good-looking case for their Raspberry Pi? Exactly. We’ve seen many homemade cases over the years, from 3D-printed enclosures to LEGO, Altoid tins and gravity-defying Zelda-themed wonderments. We love them all as much as we love own — our own case being this one if you fancy one —…
-

Weekend Project: 3D Print Your Own Workshop-Ready Steampunk Goggles
Reading Time: 3 minutesMany steampunk cosplay items provide mechanical style and an aesthetic look. But these elaborate 3D printed steampunk goggles are equipped with prescription lenses and welding filters that will keep your eyes safe while you’re in the workshop. Inspired by historical science fiction and steam-powered machinery, the steampunk genre has blossomed into one…
-

Steampunk radio jukebox
Reading Time: 3 minutesSpyrul breathed new life into his great-grandparents’ 1930s Westinghouse with a Raspberry Pi, an amplifier HAT, Google Music, and some serious effort. The result is a really beautiful, striking piece. The radio With a background in radio electronics, Spyrul had always planned to restore his great-grandparents’ mid-30s Westinghouse radio. “I even found…
-

Derek Woodroffe’s steampunk tentacle hat
Reading Time: 3 minutesHalloween: that glorious time of year when you’re officially allowed to make your friends jump out of their skin with your pranks. For those among us who enjoy dressing up, Halloween is also the occasion to go all out with costumes. And so, dear reader, we present to you: a steampunk tentacle…
-

Step Inside ‘Truth,’ a Steampunk Coffee Shop in Cape Town, South Africa
Reading Time: 2 minutesFeatures on interior design here on Colossal are few and far between, there are times when a space is so wholly original it’s just too hard to pass up. Case in point: Truth Coffee Shop in Cape Town, South Africa. This radically designed steampunk-themed coffee shop was created by Heldane Martin who considered the form factor…