Schlagwort: solar power
-

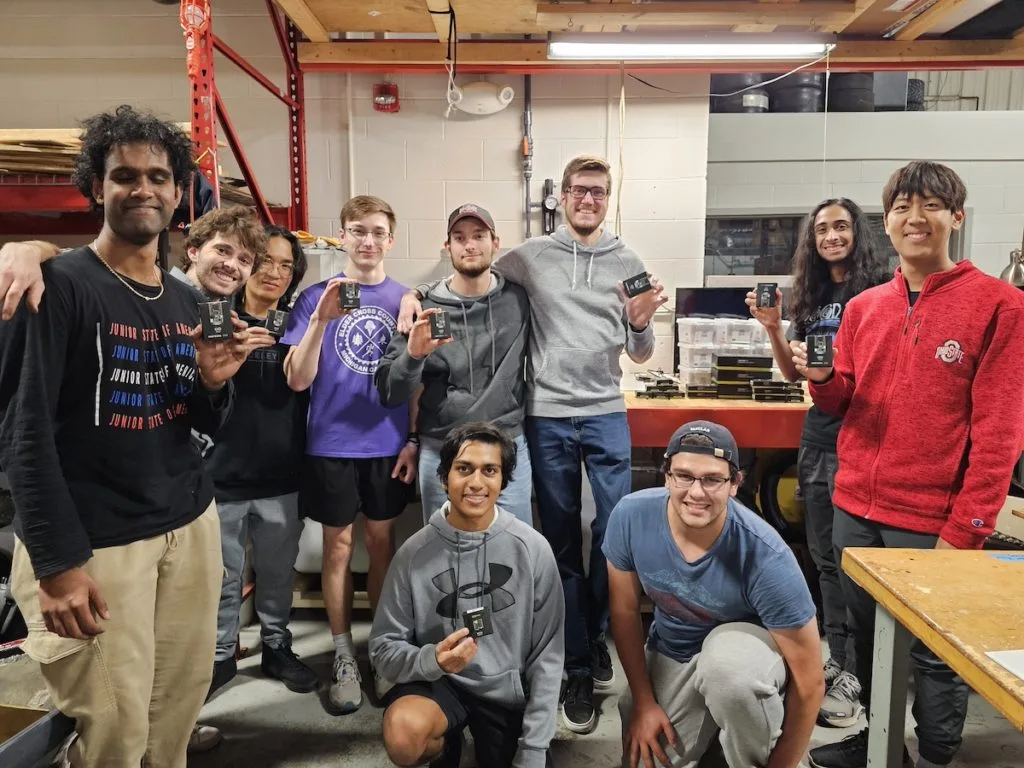
Empowering the transportation of the future, with the Ohio State Buckeye Solar Racing Team
Reading Time: 3 minutesArduino is ready to graduate its educational efforts in support of university-level STEM and R&D programs across the United States: this is where students come together to explore the solutions that will soon define their future, in terms of their personal careers and more importantly of their impact on the world. Case…
-

A simple single-axis sun tracker to maximize solar output
Reading Time: 2 minutesSolar power is awesome, but it takes a long to recoup the investment on hardware. The more output you can squeeze from a solar panel, the faster you’ll cross that line into actual monetary savings on energy. You can achieve decent output through most of the day with smart placement, but a…
-

Raspberry Pi listening posts ‘hear’ the Borneo rainforest
Reading Time: 2 minutesThese award-winning, solar-powered audio recorders, built on Raspberry Pi, have been installed in the Borneo rainforest so researchers can listen to the local ecosystem 24/7. The health of a forest ecosystem can often be gaged according to how much noise it creates, as this signals how many species are around. And you…
-

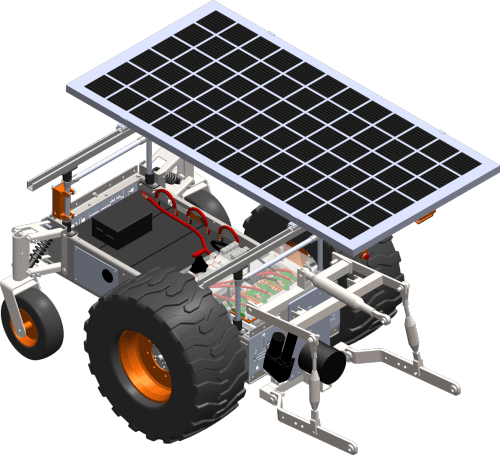
Raspberry Pi–powered robot farmers
Reading Time: 3 minutesWe love seeing Raspberry Pi being used to push industry forward. Here’s an example of how our tiny computers are making an impact in agriculture. Directed Machines is a small company on a mission to remove pollution and minimise human labour in land care. Their focus is to do more with less,…
-

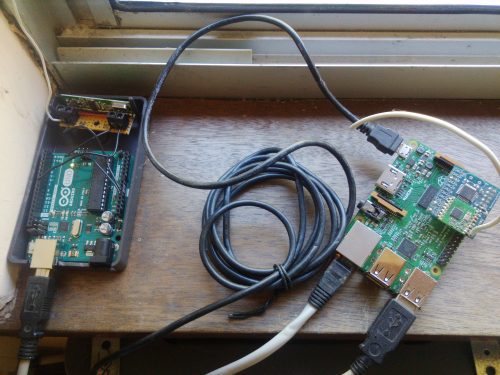
Monitoring bees with a Raspberry Pi and BeeMonitor
Reading Time: 4 minutesKeeping an eye on bee life cycles is a brilliant example of how Raspberry Pi sensors help us understand the world around us, says Rosie Hattersley The setup featuring an Arduino, RF receiver, USB cable and Raspberry Pi Getting to design and build things for a living sounds like a dream job,…
-
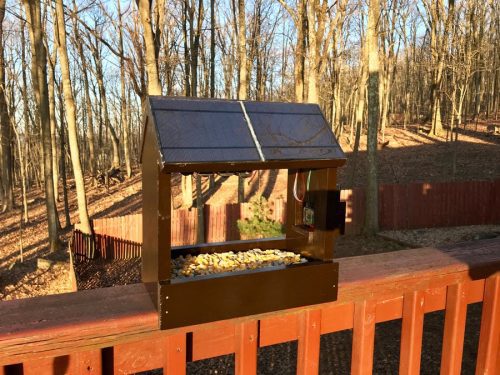
Build a solar-powered nature camera for your garden
Reading Time: 2 minutesSpring has sprung, and with it, sleepy-eyed wildlife is beginning to roam our gardens and local woodlands. So why not follow hackster.io maker reichley’s tutorial and build your own solar-powered squirrelhouse nature cam? Inspiration “I live half a mile above sea level and am SURROUNDED by animals…bears, foxes, turkeys, deer, squirrels, birds”, reichley explains…
-

World’s Second Largest Solar Power Plant in the Mojave
Reading Time: < 1 minute[mbYTPlayer url=“https://www.youtube.com/watch?v=VG0asFfmO-Y“ opacity=“.5″ quality=“medium“ ratio=“auto“ isinline=“false“ showcontrols=“false“ realfullscreen=“true“ printurl=“true“ autoplay=“true“ mute=“true“ loop=“true“ addraster=“true“ stopmovieonblur=“false“ gaTrack=“false“] Fully operational since December 2014, the Mojave Solar Project uses advanced parabolic trough technology that has made this 280 MegaWatt plant one of the most innovative projects in the country. The plant utilizes the desert’s solar…