Schlagwort: social media
-

Introducing raspberrypi.com
Reading Time: 2 minutesI am delighted to announce the launch of raspberrypi.com — a new website dedicated to Raspberry Pi computers and associated technologies. Head on over to find all about our low-cost, high-performance PCs, add-on boards or HATs, microcontrollers, accessories, and much more. As well as being able to learn about and purchase the…
-

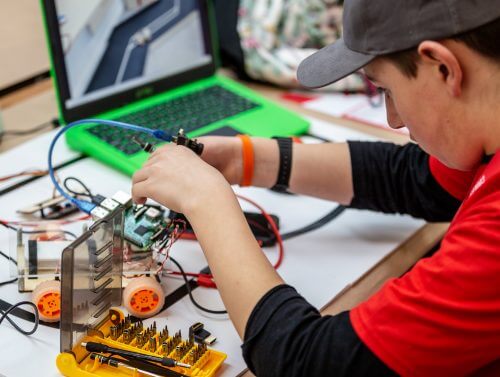
Your amazing Raspberry Pi projects #IUseMyRaspberryPiFor
Reading Time: 3 minutesYesterday, we asked you to share your Raspberry Pi builds on social media using the hashtag #IUseMyRaspberryPiFor. The result was amazing, with so many of you sharing some really interesting projects, inspiring both us, and others, to get creative. While we can’t share them all here today, we picked out some to…
-

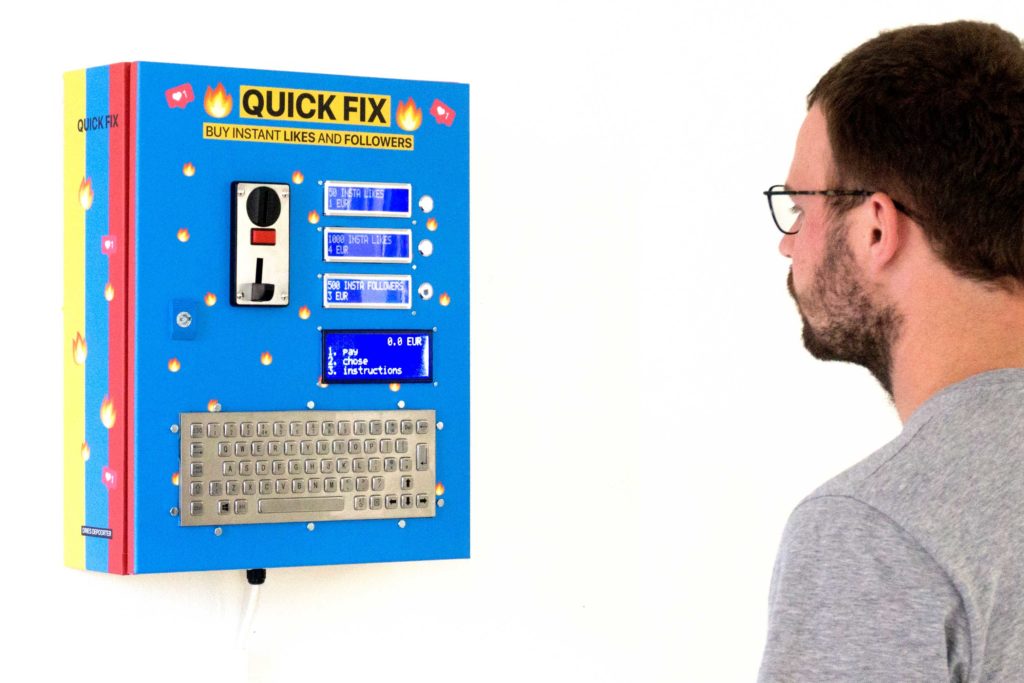
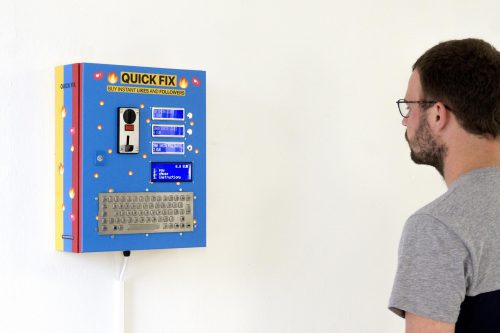
Quick Fix is a social media vending machine
Reading Time: 2 minutesQuick Fix is a social media vending machine Arduino Team — June 5th, 2019 Do you want to grow your popularity on social media? Sure, there are those online services that could give your audience a boost, but if you’d prefer something a bit more tangible, then the “Quick Fix” vending machine…
-

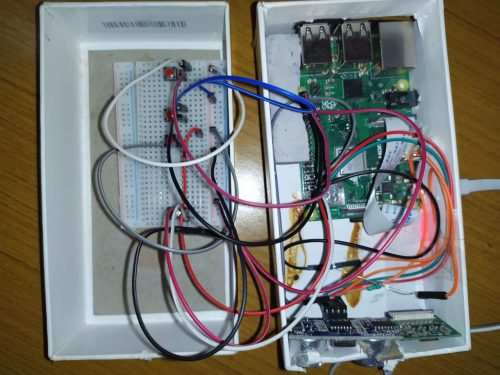
Quick Fix — a vending machine for likes and followers
Reading Time: 2 minutesSometimes we come across a project that just scores a perfect 10 on all fronts. This is one of them: an art installation using Raspberry Pi that has something interesting to say, does it elegantly, and is implemented beautifully (nothing presses our buttons like a make that’s got a professionally glossy finish…
-

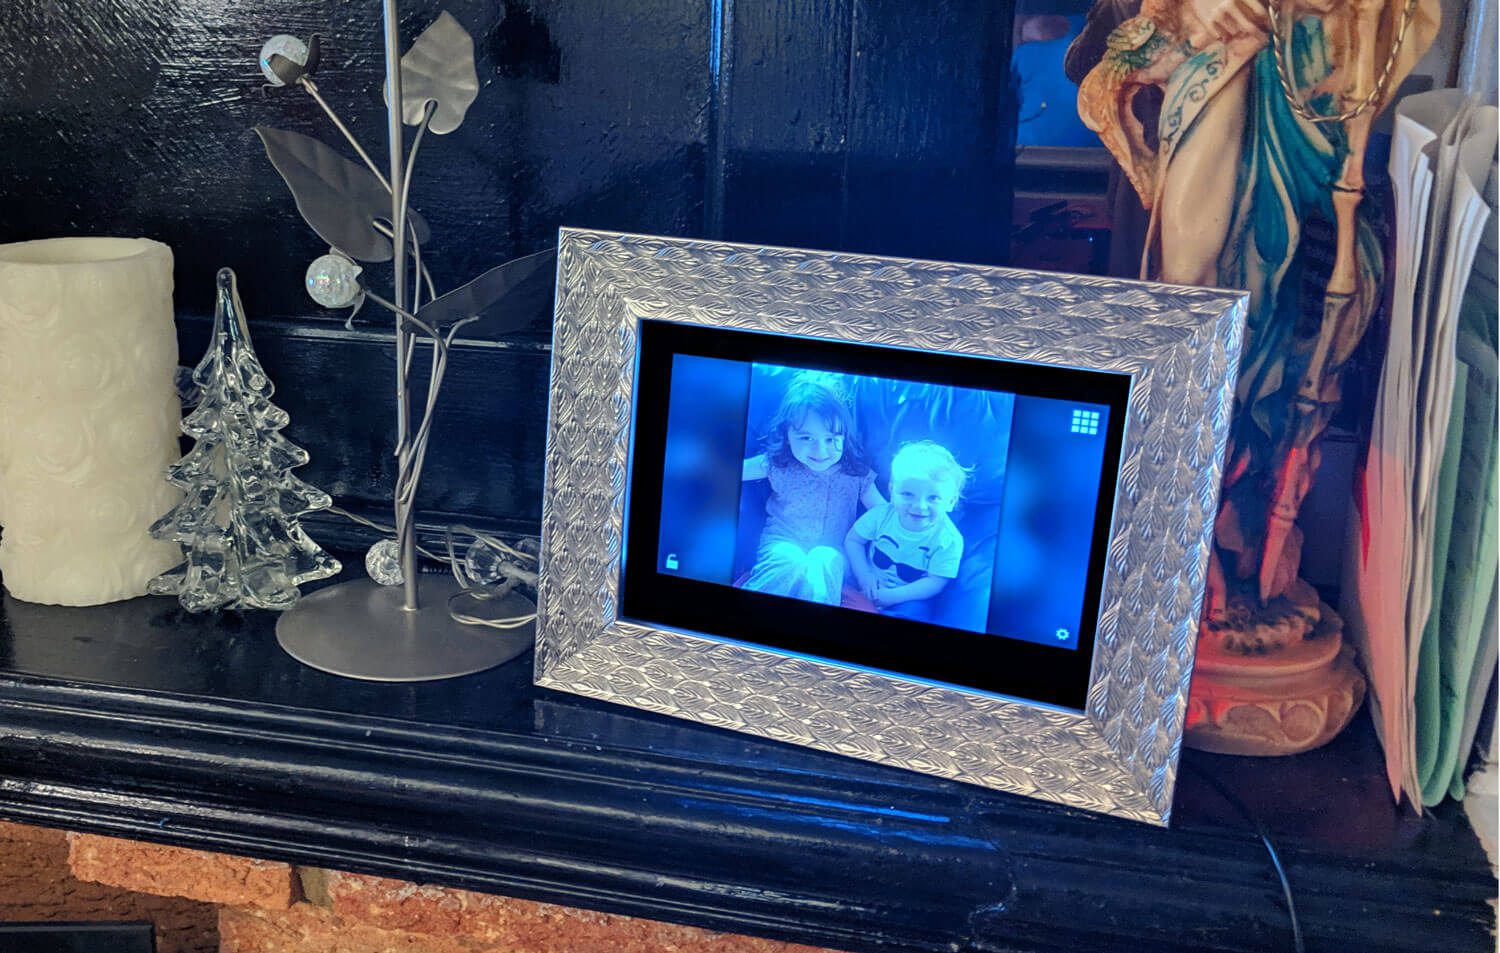
Instaframe: image recognition meets Instagram
Reading Time: 3 minutesBringing the digital photo frame into an even more modern age than the modern age it already resides in, Sean Tracey uses image recognition and social media to update his mother on the day-to-day happenings of her grandkids. Sharing social media content “Like every grandmother, my mum dotes on her grandchildren (the daughter…
-

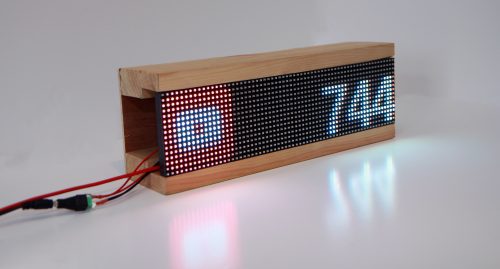
Build a social media follower counter
Reading Time: 9 minutesIn this tutorial from HackSpace magazine issue 9, Paul Freeman-Powell shows you how to keep track of your social media followers, and encourage subscribers, by building a live follower counter. Get your copy of HackSpace magazine in stores now, or download it as a free PDF here. Issues 10 of HackSpace magazine is available online…
-

Pi 3B+: 48 hours later
Reading Time: 5 minutesUnless you’ve been AFK for the last two days, you’ll no doubt be aware of the release of the brand-spanking-new Raspberry Pi 3 Model B+. With faster connectivity, more computing power, Power over Ethernet (PoE) pins, and the same $35 price point, the new board has been a hit across all our…