Schlagwort: sensor
-

Using historical data from sensors in Arduino Cloud
Reading Time: 4 minutesHistorical data can be essential to making your electronics and Arduino project work how you want them to. Data retention is one of the features that changes depending on which level of Arduino Cloud account you have. Here’s everything you need to know, so you can choose exactly the right Arduino Cloud…
-

Remote humidity detector
Reading Time: 3 minutesWe know crawl spaces are creepy, sweaty, and confining but, hear us out… You need to keep an eye on the humidity level in your crawl space, as it can seriously affect the whole house’s overall health. It’s ideal to be able to do this remotely (given the creepy, sweaty atmosphere of…
-

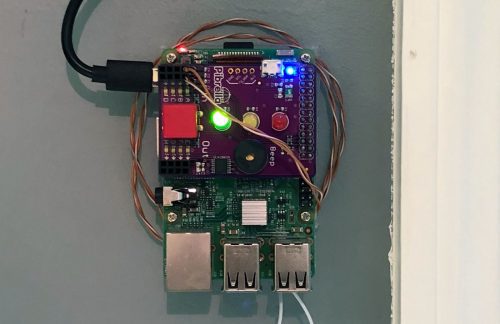
Tired of queuing for the office toilet? Meet Occu-Pi
Reading Time: 2 minutesThis is the story of Occu-Pi, or how a magnet, a Raspberry Pi, and a barrel bolt saved an office team from queuing for the toilet. The toil of toilet queuing When Brian W. Wolter’s employer moved premises, the staff’s main concern as the dearth of toilets at the new office, and…