Schlagwort: RFID
-

Storing ephemeral micropoetry on RFID cards for bite-sized readings
Reading Time: 2 minutesMost people don’t consume poetry in the same way that they do novels. Instead of reading a book of poetry from cover-to-cover over the course of a few sessions, the majority of people seem to prefer enjoying poetry in occasional little chunks. And unlike the epic poems of Greek antiquity, those tend…
-

Three September debuts on Project Hub, three top picks!
Reading Time: 3 minutesThe Project Hub is where Arduino users share their achievements to inspire, help others, and maybe show off a little. With thousands of projects already uploaded, in categories that run the gamut from “flying things” to “smart lighting,” we are proud to celebrate this community-boosting initiative by selecting three highlights every month…
-

Art class stinks! Learn with smell in art class using this olfactory display
Reading Time: 3 minutesBy Maria Nikoli, Interaction Designer, MSc., Malmö University Smelling is crucial to our everyday living. But how well do we really understand the role that smells play in our day-to-day? Ask someone who temporarily lost their sense of smell because of COVID-19. They’ll probably tell you about how incredibly boring eating became all…
-

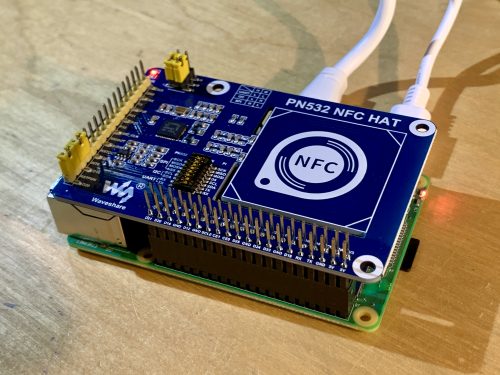
Read RFID and NFC tokens with Raspberry Pi | HackSpace 37
Reading Time: 4 minutesAdd a bit of security to your project or make things selectableby using different cards. In the latest issue of HackSpace magazine, PJ Evans goes contactless. The HAT is not hard on resources, so you can use many variants of Raspberry Pi NFC (near-field communication) is based on the RFID (radio-frequency identification)…
-

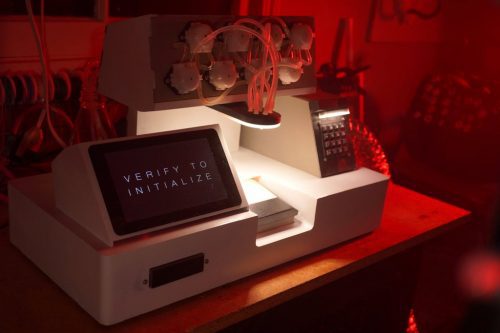
Raspberry Pi Off-World Bartender
Reading Time: 4 minutesThree things we like: Blade Runner, robots, and cocktails. That’s why we LOVE Donald Bell‘s Raspberry Pi–packed ‘VK-01 Off-World Bartender‘ cocktail making machine. [youtube https://www.youtube.com/watch?v=qc9lcwPjyWk?feature=oembed&w=500&h=281] This machine was due to be Donald’s entry into the Cocktail Robotics Grand Challenge, an annual event in San Francisco. By the time the event was cancelled, he…
-

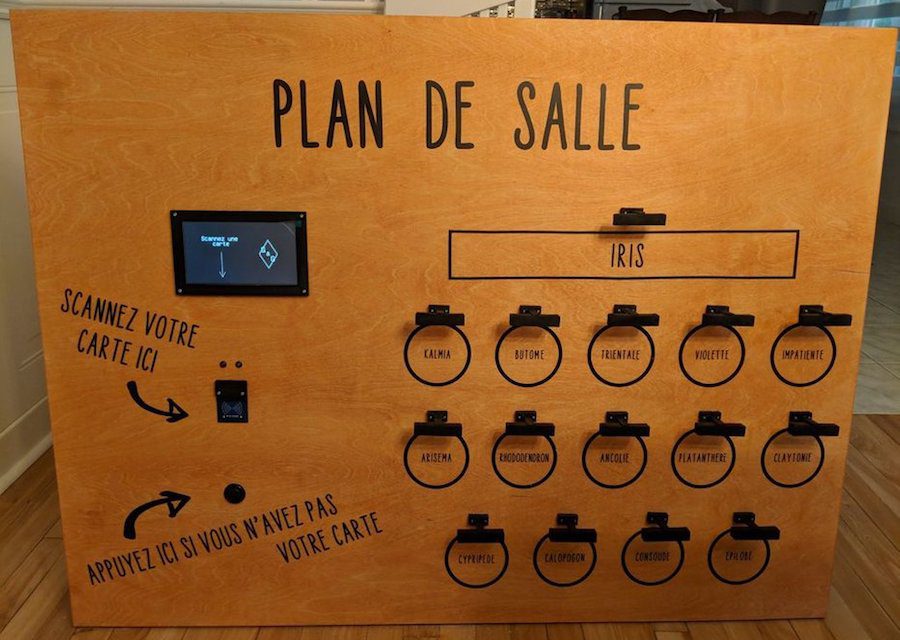
An RFID-powered seating chart for your wedding
Reading Time: 3 minutesSeating charts at weddings and other formal events are usually handled by small cards at each table, but Gabrielle Martinfortier had other plans. For her big event, she along with help from her now-husband and friends constructed a seating arrangement on a 3’ x 4’ wood canvas, equipped with a 7” TFT…
-

An Arduino-based RFID tag system perfect for escape rooms
Reading Time: < 1 minuteAn Arduino-based RFID tag system perfect for escape rooms Arduino Team — May 16th, 2018 As seen here, “Annaane!” has come up with what could form the guts of a very interesting escape room puzzle. Her build features four RFID card readers, which cause an Arduino Uno to release a door…