Schlagwort: retropie
-

Collection of Raspberry Pi retro tech projects
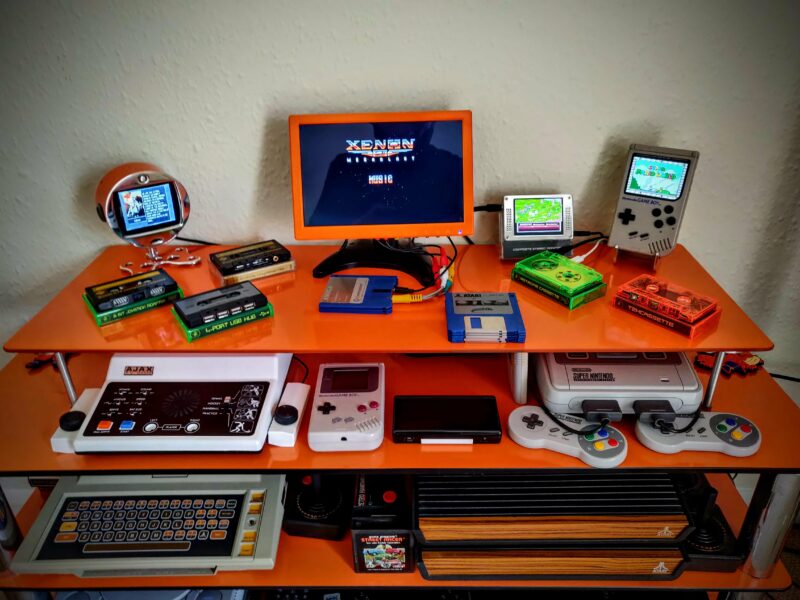
Reading Time: 5 minutesDuring lockdown, Stuart (aka JamHamster) wanted to keep busy whilst between jobs, and ended up building a mini empire of rescued retro systems. Cassette tapes, Game Boys, and floppy disks were all among the treasures he reclaimed. Stuart calls this the “shelf of deceit” – where nothing is what it appears to…
-

Hide a huge arcade machine in plain sight with Raspberry Pi
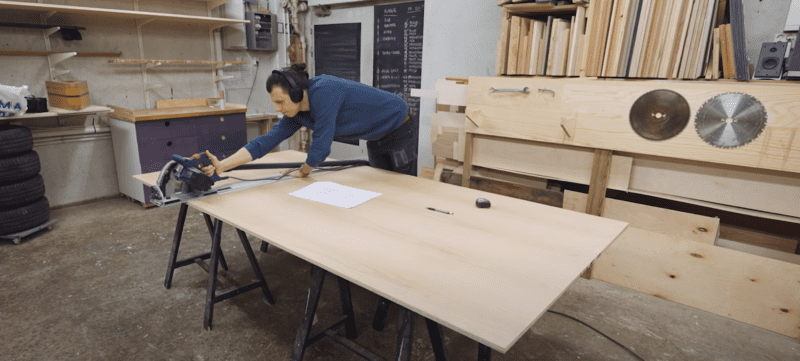
Reading Time: 3 minutesProblem: I really want an arcade machine at home, but I don’t have the space for it. Solution: Build Alexandre Chappel’s giant two-player machine, which is sleek and hidden in plain sight on your wall. [youtube https://www.youtube.com/watch?v=OB8VauGEvqg?feature=oembed&w=500&h=281] Subscribe to Alexandre’s YouTube channel Alexandre’s goal was to build something that looks like an…
-

RetroPie booze barrel
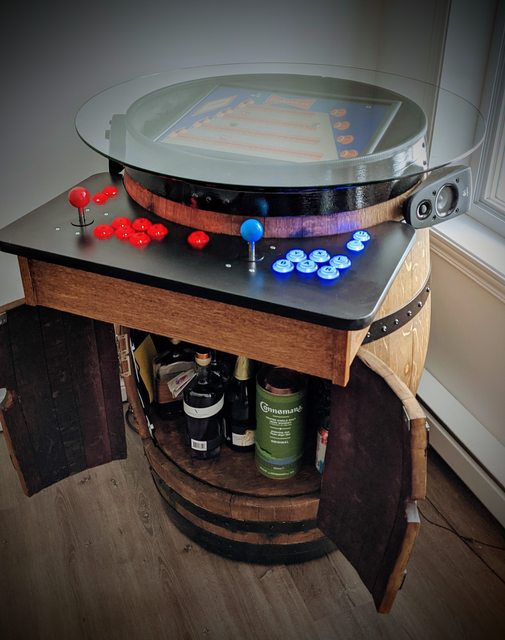
Reading Time: 2 minutesWhat do we want? Retro gaming, adult beverages, and our favourite Spotify playlist. When do we want them? All at the same time. Luckily, u/breadtangle took to reddit to answer our rum-soaked prayers with this beautifully crafted beer barrel-cum-arcade machine-cum-drinks cabinet. We approve of this drink selection The addition of a sneaky…
-

Build an arcade cabinet | Hackspace 35
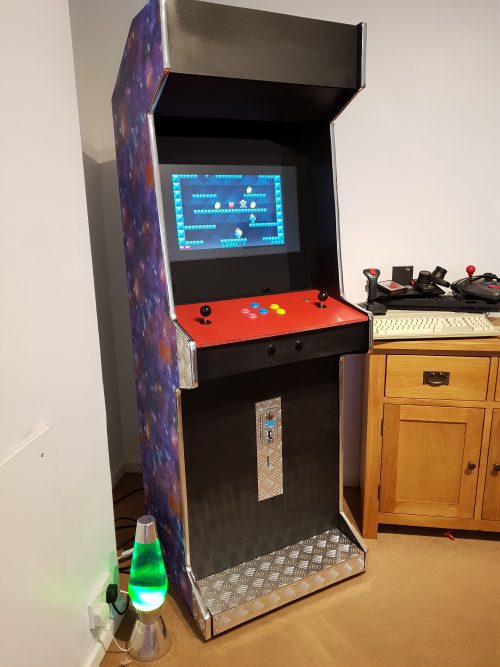
Reading Time: 5 minutesGames consoles might be fast and have great graphics, but they’re no match for the entertainment value of a proper arcade machine. In this month’s issue of Hackspace magazine, you’re invited to relive your misspent youth with this huge build project. There’s something special about the comforting solidity of a coin-eating video…
-

Turn a watermelon into a RetroPie games console
Reading Time: 3 minutesOK Cedrick, we don’t need to know why, but we have to know how you turned a watermelon into a games console. This has got to be a world first. What started out as a regular RetroPie project has blown up reddit due to the unusual choice of casing for the games…
-

Raspberry Pi retro gaming on Reddit
Reading Time: 2 minutesReddit was alive with the sound of retro gaming this weekend. First out to bat is this lovely minimalist, wall-mounted design built by u/sturnus-vulgaris, who states: I had planned on making a bar top arcade, but after I built the control panel, I kind of liked the simplicity. I mounted a frame of standard…
-

Make a retro console with RetroPie and a Raspberry Pi — part 2
Reading Time: 5 minutesHere’s part two of Lucy Hattersley’s wonderful retro games console tutorial. Part 1 of the tutorial lives here, for those of you who missed it. Choose the network locale RetroPie boots into EmulationStation, which is your starter interface. It’s currently displaying just the one option, RetroPie, which is used to set up…
-
Make a retro console with RetroPie and a Raspberry Pi — part 1
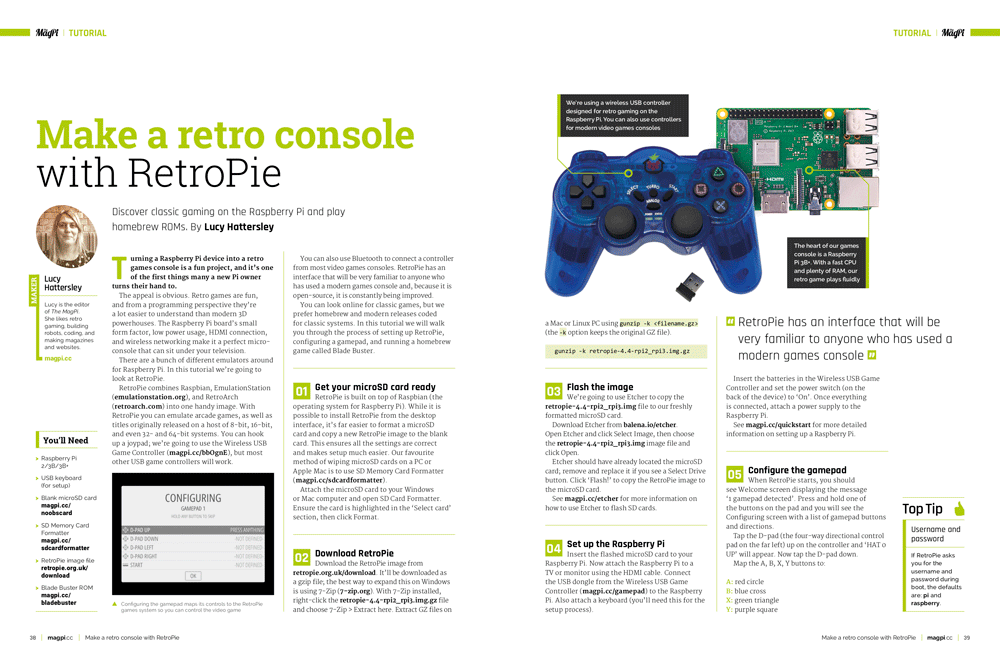
Reading Time: 5 minutesDiscover classic gaming on the Raspberry Pi and play homebrew ROMs, with this two-part tutorial from The MagPi Editor Lucy Hattersley. Raspberry Pi retro games console Turning a Raspberry Pi device into a retro games console is a fun project, and it’s one of the first things many a new Pi owner…
-

Zelda casemod with levitating Triforce
Reading Time: 2 minutesI know: you’ve seen a bajillion RetroPie implementations before, and a bajillion casemods to go with them. But this one’s so hopelessly, magnificently splendid that we felt we had to share. Magnetic levitation. It’s not just for trains and frogs. This Zelda casemod, covered with engraved pine from the forests of Hyrule…
-

Weekend Project: 3D Print Your Own RetroPie Nintendo Switch
Reading Time: 4 minutesThe Nintendo Switch games console is an undeniable success. But, retailing for a few hundred dollars, its does require a significant chunk of change. Why not build your own for a fraction of the cost instead? Here’s how (disclaimer: the PiSwitch will not play Nintendo Switch games). Home hackable gaming has never…
-

Use all your old-school game controllers with the turn of a dial
Reading Time: 2 minutesUse all your old-school game controllers with the turn of a dial Arduino Team — November 6th, 2017 IT professional (and Arduino cap fan) John Milner had a minor problem. While his retro gaming setup could emulate a wide variety of systems and games, it was still missing the tactile feedback of the…
-

Raspberry Pi 3 NES Classic Mini Project
Reading Time: 4 minutesThe Raspberry Pi 3 NES Classic Mini Project was in our mind from day one when the new New Classic Mini arrived 🙂 After so much time there is a company from new york making small pi cases looking like this: Perfect case for our project , so here is the full…