Schlagwort: retro gaming
-

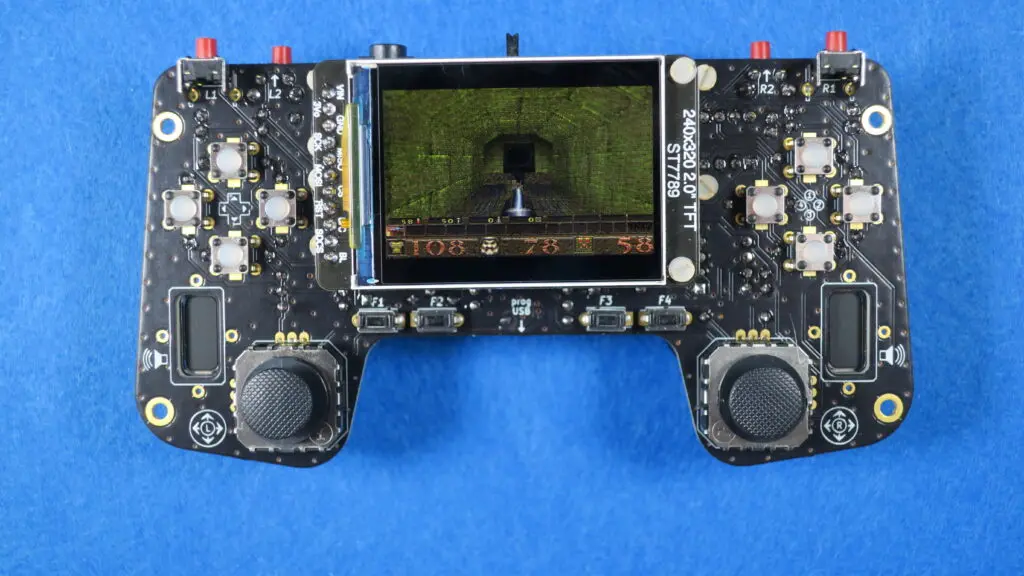
Bringing Quake to Arduino: a game-changing project by Nicola Wrachien
Reading Time: 2 minutesFollowing up on his successful Doom port last year, engineer Nicola Wrachien – who works at Silicon Labs, a leader in secure, intelligent wireless technology for a more connected world and long-time Arduino partner – has now tackled an even bigger challenge: porting Quake, the iconic 1990s’ first-person shooter, to an Arduino…
-

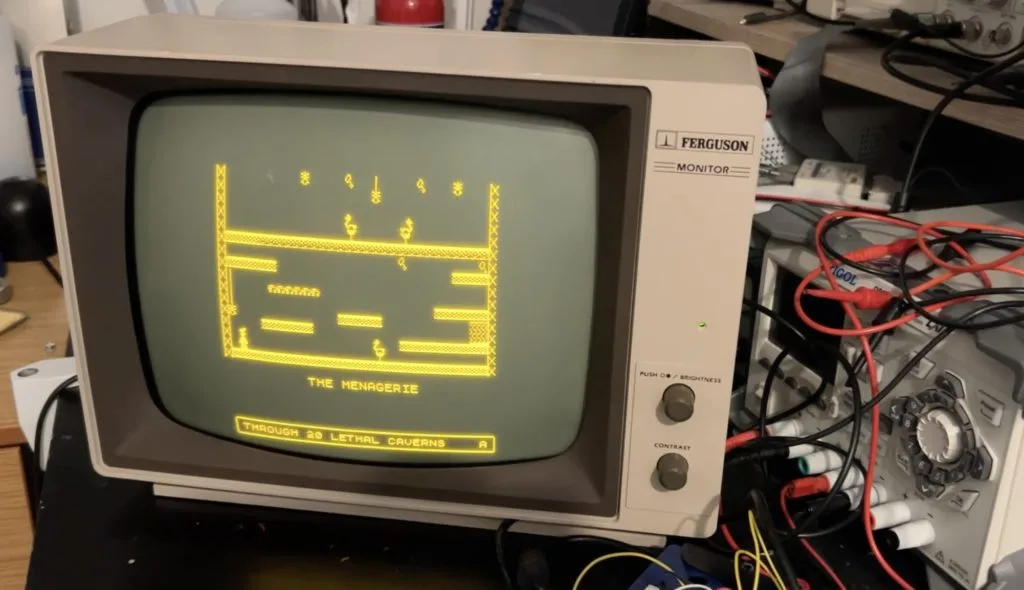
This new game engine runs Manic Miner on an Arduino UNO
Reading Time: 2 minutesFor owners of Sinclair ZX Spectrum computers in the ‘80s, few games were more desirable than Matthew Smith’s Manic Miner. It is very much a classic and has official and unofficial ports available for just about every console and computer released since. There was even a port made for Microsoft’s Zune MP3…
-

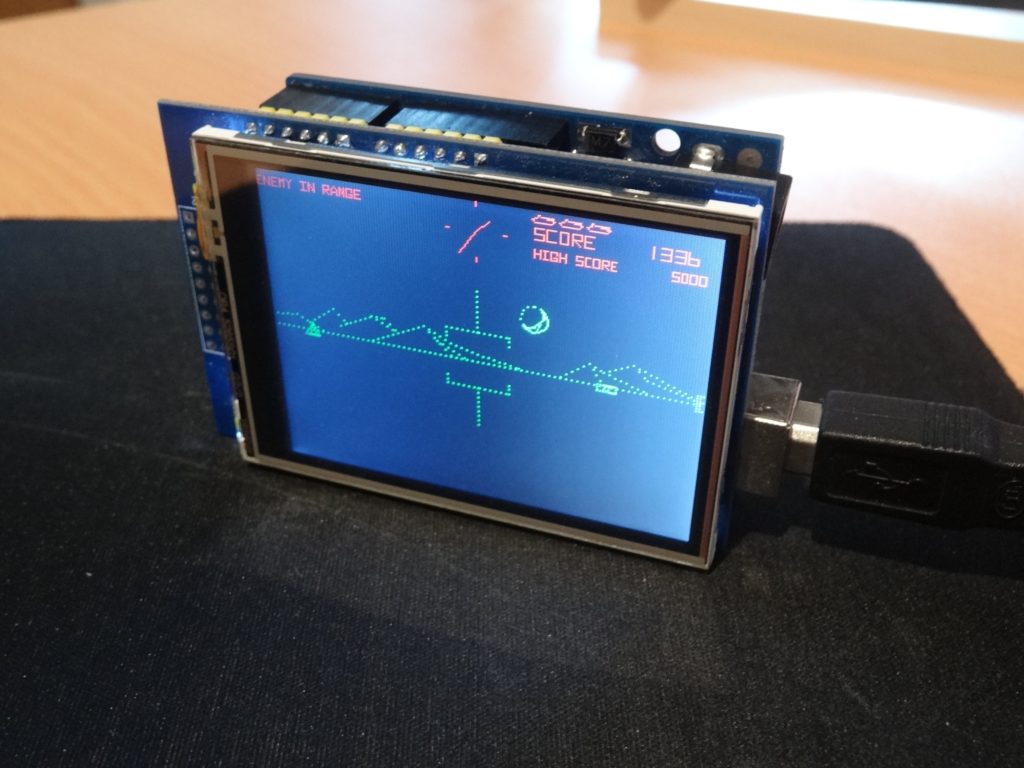
LittleZone is a tribute to the 1980 video game Battlezone
Reading Time: 2 minutesArduino Team — June 6th, 2022 Back in 1980, the video game Battlezone was released, and it marked a major advancement in the world of computer graphics since it was the first game with a 3D first-person perspective. In it, the player must pilot a tank around a battlefield and fire at…
-

Play your retro console on a modern TV
Reading Time: 3 minutesWant to connect your retro console to your modern TV? The latest issue of Wireframe magazine has the only guide you need, courtesy of My Life in Gaming’s Mark Duddleson. “Get a Raspberry Pi. Done.” It’s probably the most frequently recurring comment we get across all videos on the My Life in…
-

How not to code: a guide to concise programming
Reading Time: 3 minutesUpdating a 22-year-old game brought Andrew Gillett face to face with some very poor coding practices. Read more about it in this brilliant guest article from the latest issue of Wireframe magazine. In 1998, at the age of 17, I was learning how to write games in C. My first attempt, the…
-

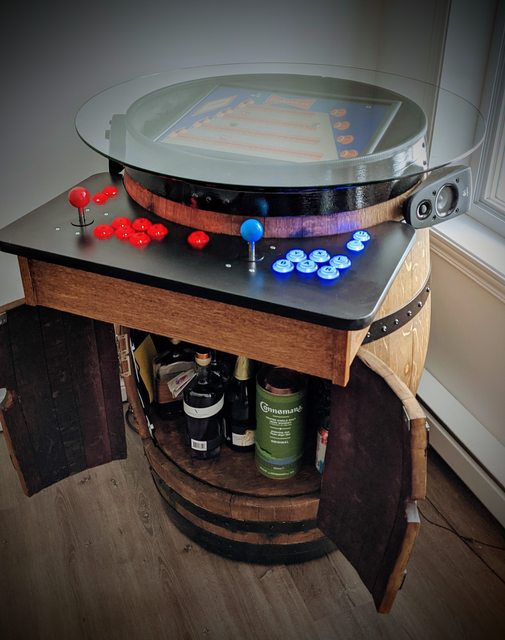
RetroPie booze barrel
Reading Time: 2 minutesWhat do we want? Retro gaming, adult beverages, and our favourite Spotify playlist. When do we want them? All at the same time. Luckily, u/breadtangle took to reddit to answer our rum-soaked prayers with this beautifully crafted beer barrel-cum-arcade machine-cum-drinks cabinet. We approve of this drink selection The addition of a sneaky…
-

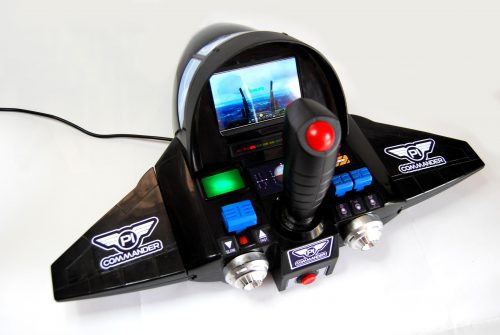
(Raspberry) Pi Commander | The MagPi 95
Reading Time: 4 minutesAdrien Castel’s idea of converting an old electronic toy into a retro games machine was no flight of fancy, as David Crookes discovers The 1980s was a golden era for imaginative electronic toys. Children would pester their parents for a Tomytronic 3D or a Nintendo Game & Watch. And they would enviously…
-

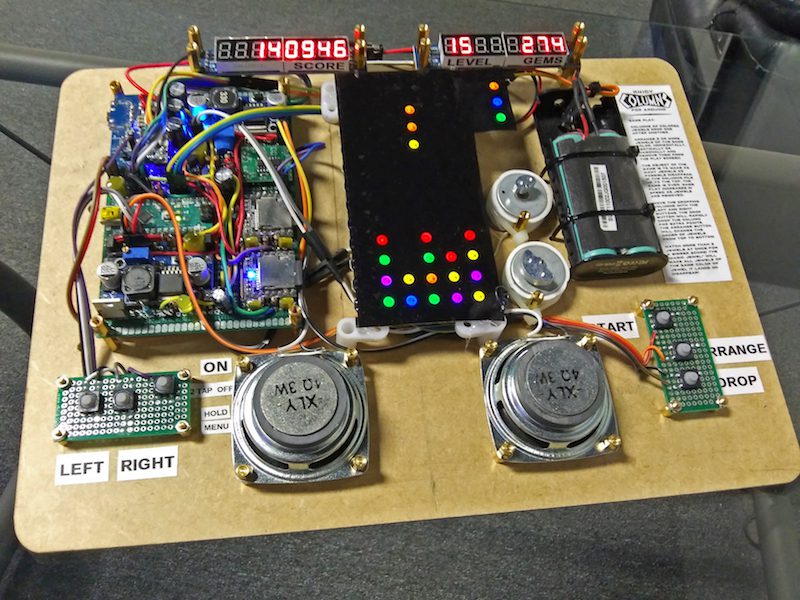
Recreating Sega’s Columns with Arduino!
Reading Time: 2 minutesRecreating Sega’s Columns with Arduino! Arduino Team — April 30th, 2020 In the early ’90s, Sega shipped its Game Gear console with a falling-block puzzle game called Columns. This Tetris-like game invited users to match colored “jewels” on the ground with lines of three new colors that drop from above. Michael A. Maynard envisioned…
-

Pre-order Code the Classics today!
Reading Time: 2 minutesToday, we are proud to announce Code the Classics, the latest (and long-awaited) publication from Raspberry Pi Press. Pre-order Code the Classics today Subscribe to our YouTube channel: http://rpf.io/ytsub Help us reach a wider audience by translating our video content: http://rpf.io/yttranslate Buy a Raspberry Pi from one of our Approved Resellers: http://rpf.io/ytproducts…
-

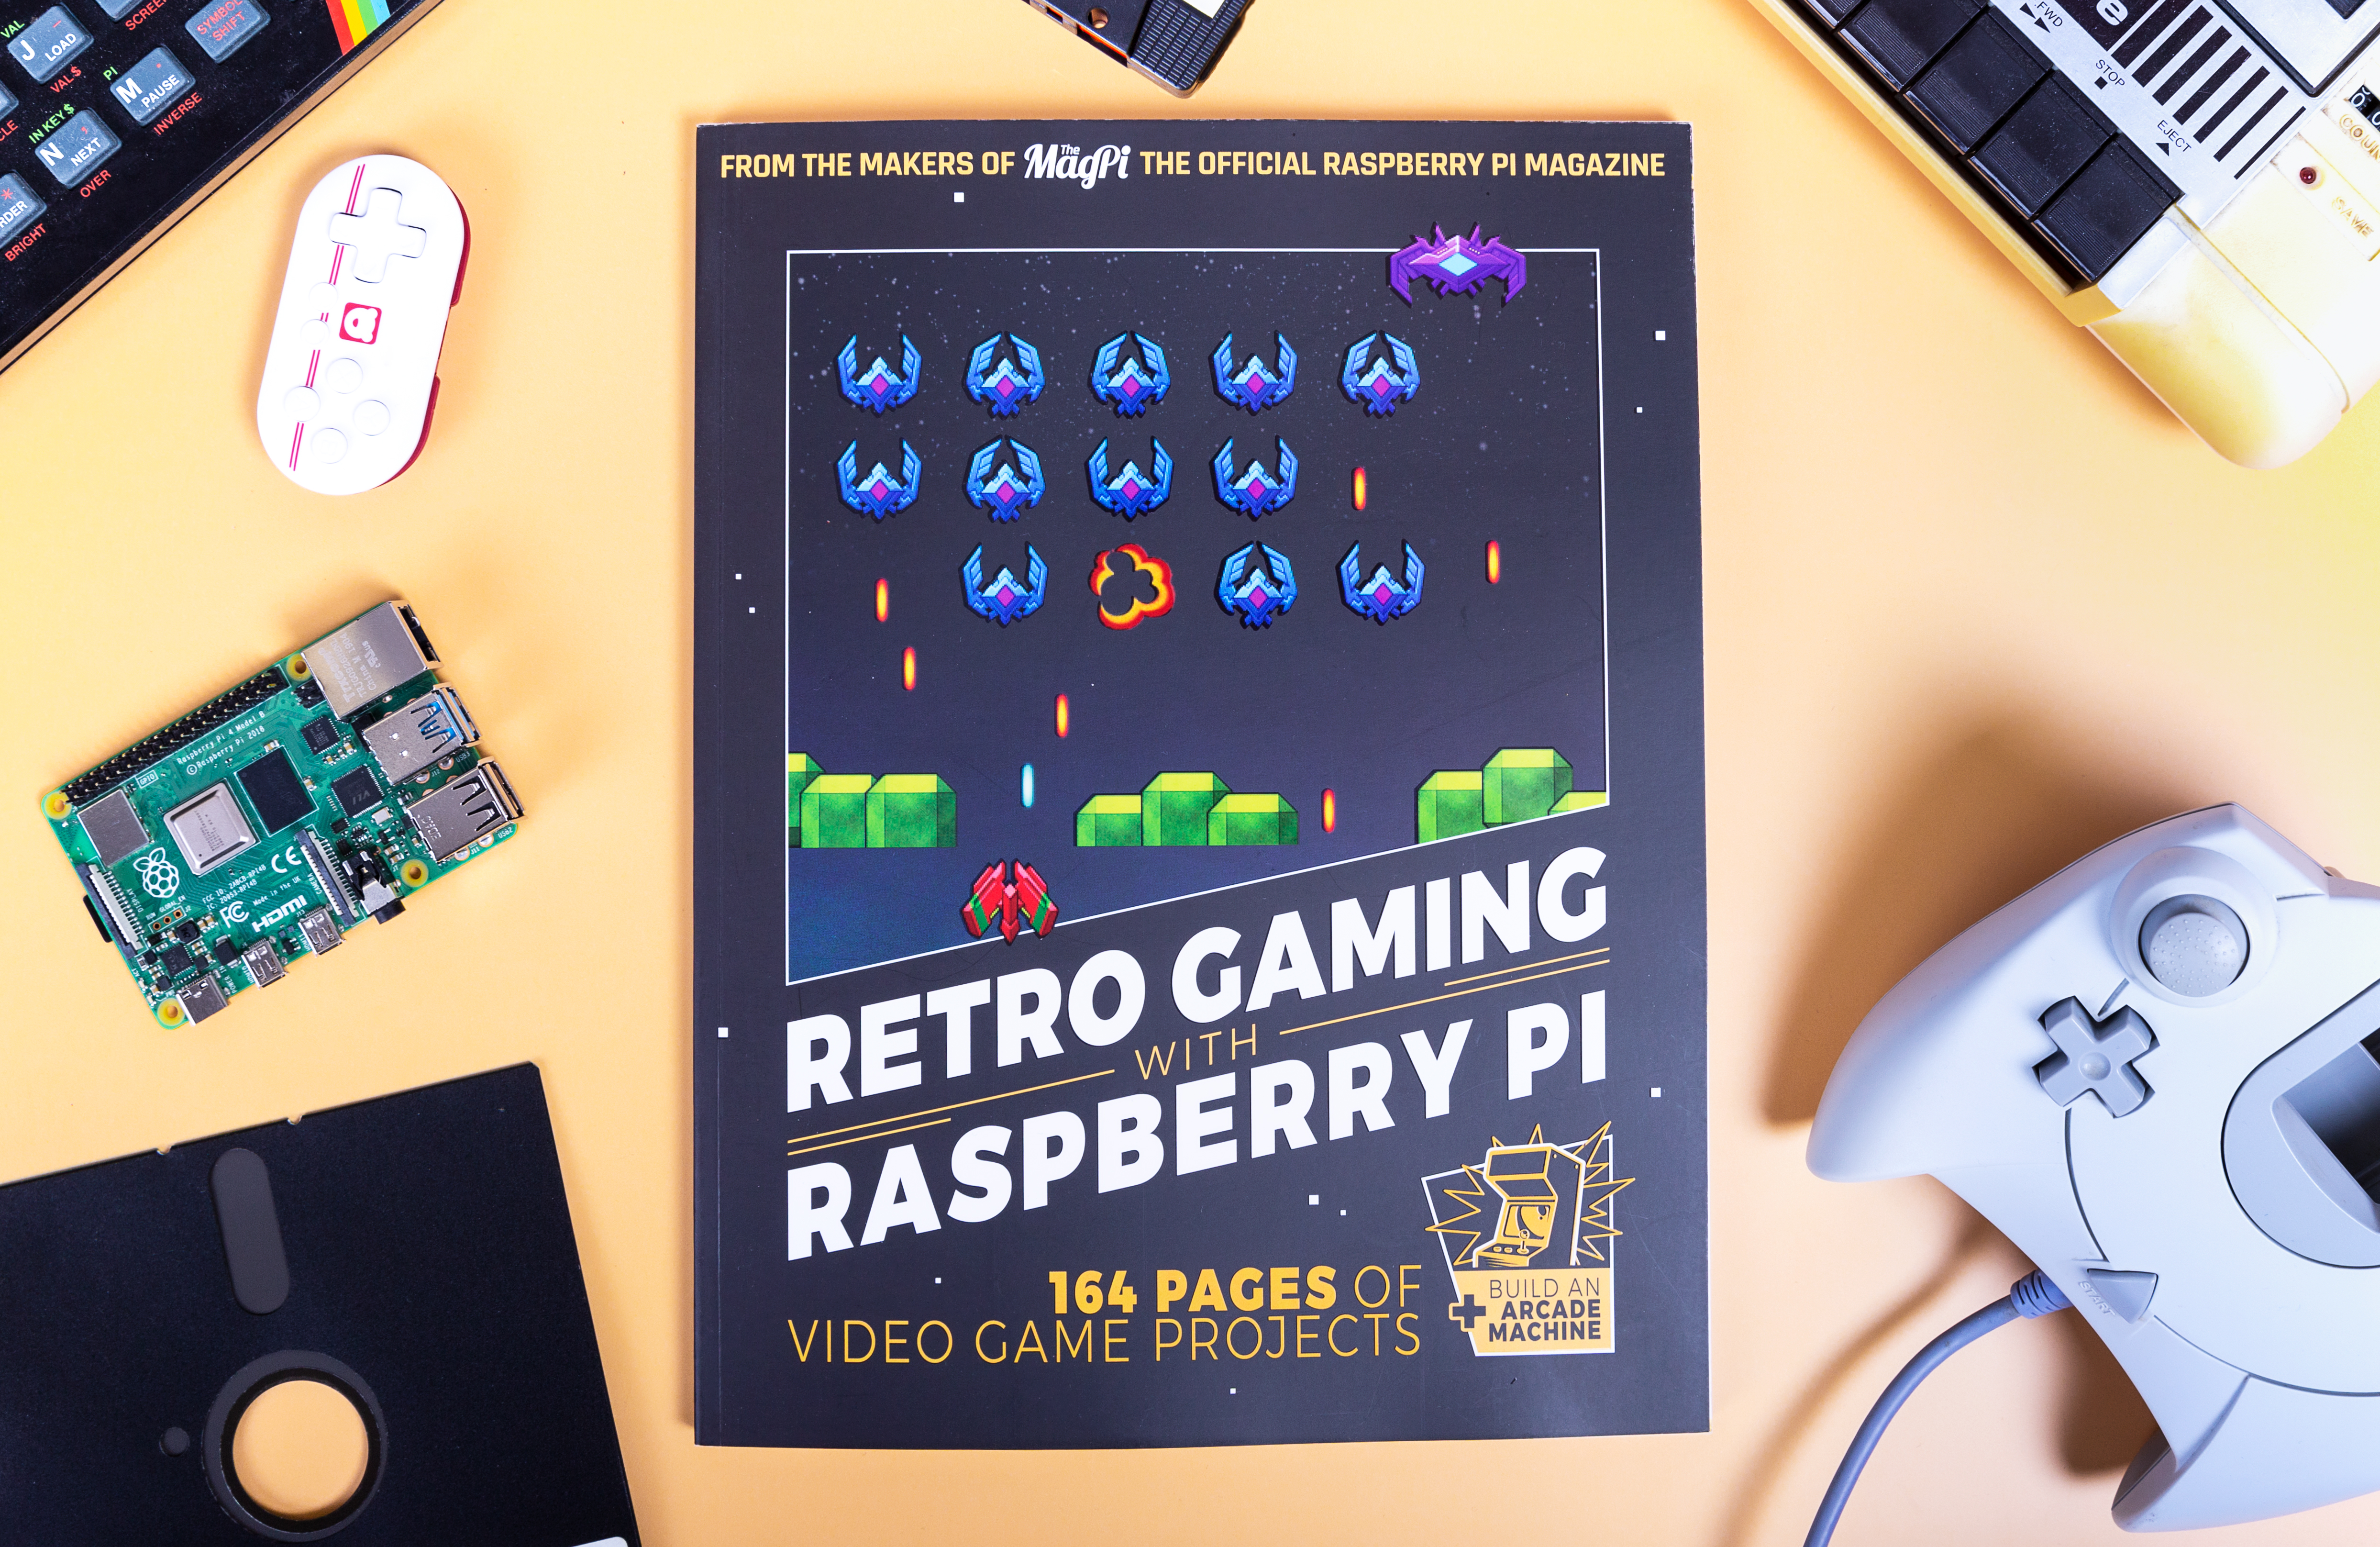
New book: Retro Gaming with Raspberry Pi
Reading Time: 2 minutesRaspberry Pi Press is delighted to announce the release of the latest addition to your bookshelf: Retro Gaming with Raspberry Pi! Retro Gaming with Raspberry Pi Subscribe to our YouTube channel: http://rpf.io/ytsub Help us reach a wider audience by translating our video content: http://rpf.io/yttranslate Buy a Raspberry Pi from one of our…
-

Raspberry Pi retro gaming on Reddit
Reading Time: 2 minutesReddit was alive with the sound of retro gaming this weekend. First out to bat is this lovely minimalist, wall-mounted design built by u/sturnus-vulgaris, who states: I had planned on making a bar top arcade, but after I built the control panel, I kind of liked the simplicity. I mounted a frame of standard…
-

Use all your old-school game controllers with the turn of a dial
Reading Time: 2 minutesUse all your old-school game controllers with the turn of a dial Arduino Team — November 6th, 2017 IT professional (and Arduino cap fan) John Milner had a minor problem. While his retro gaming setup could emulate a wide variety of systems and games, it was still missing the tactile feedback of the…
-

5 Cool Facts You May Not Know About the Unreleased Super Nintendo PlayStation
Reading Time: 3 minutesThe SNES-CD, aka Super Nintendo PlayStation, refers to an unreleased peripheral for the Super Nintendo Entertainment System (SNES). The device and the format were to build upon the functionality of the cartridge-based SNES by adding support for higher capacity compact discs. The SNES-CD platform was developed in a partnership between Nintendo and…