Schlagwort: Retro Computers
-

Adding a turbo readout to a vintage PC case
Reading Time: 2 minutesIf you are young, you may not remember the turbo buttons of the 1990s. These existed for backwards-compatibility with older games and software that wouldn’t run properly at the blazing-fast processor clock speeds of the time. The turbo button simply told the CPU to run at a slower clock speed that would…
-

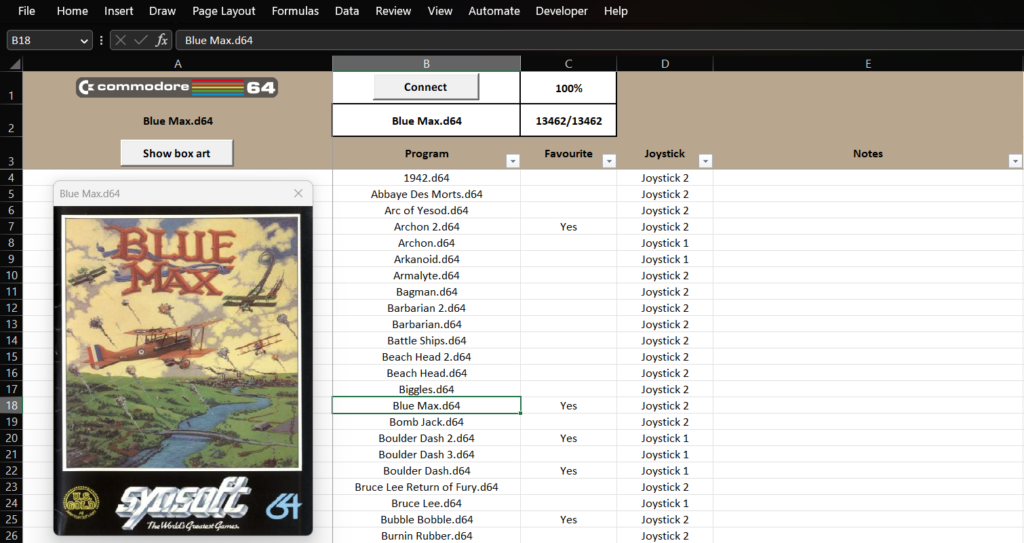
Use Excel to load Commodore 64 software
Reading Time: 2 minutesLoading software on a vintage computer, such as a Commodore 64, is a pain. Early eight-bit computers almost never contained any onboard persistent storage, so users had to load software from external media like cassette tapes. To make retro computing far more convenient, RaspberryPioneer developed a method for loading Commodore 64 software…
-

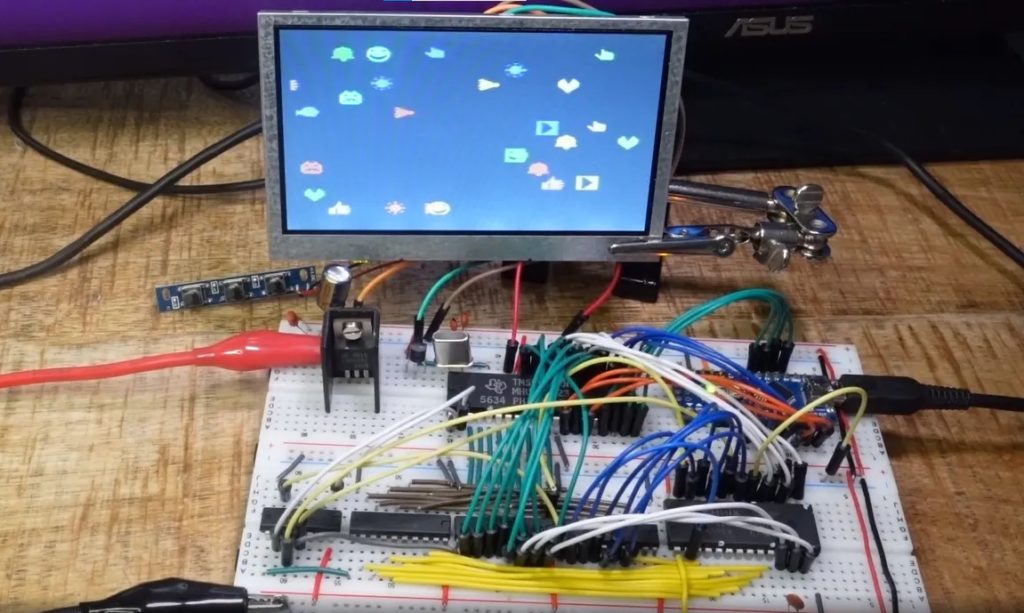
Experiment with ’80s graphics using this breadboard setup
Reading Time: 2 minutesExperiment with ’80s graphics using this breadboard setup Arduino Team — April 19th, 2022 Before standardized video cards came along, computer and video game console designers utilized video chips. Those simplified the design process and offloaded much of the work from the processor. Those video chips had hardcoded graphical building blocks and…
-

Emulate the legendary Altair 8800 on your Arduino Mega
Reading Time: 2 minutesArduino Team — August 25th, 2021 The Altair 8800 is one of the most important machines in computer history and many consider it to be the first personal computer. But not many computer users today would recognize it as such. At release, it couldn’t even output video and users could only interact…