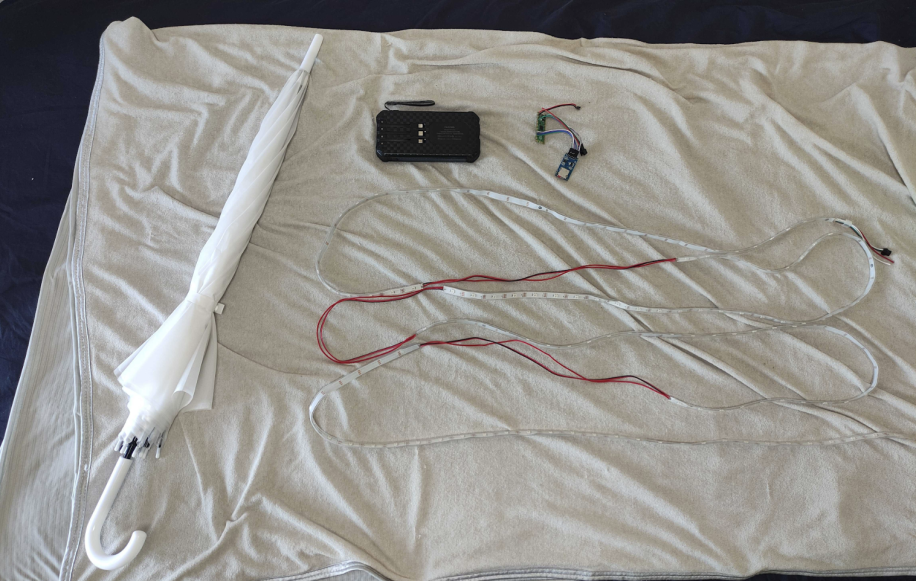
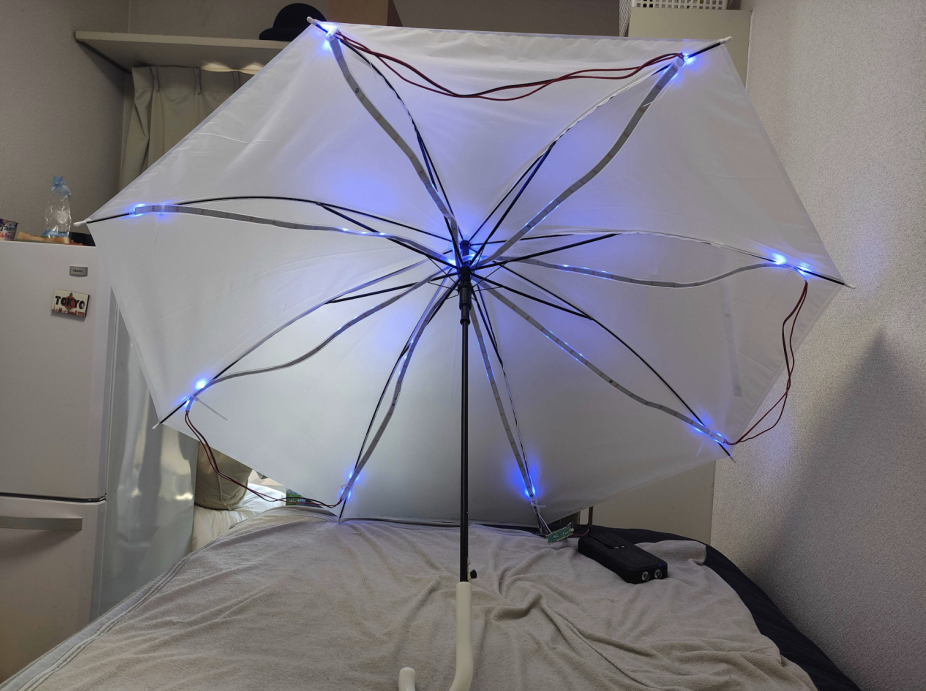
Thomas Killus has created such a brolly using a Raspberry Pi Pico microcontroller board. It sends instructions to strips of standard WS2812b addressable RGB LEDs that run along the ribs of an umbrella, and this in turn brightly disperses light across the adjoining panels. The umbrella would certainly shine bright in a crowd and maybe even prevent it being left behind on the bus. But it’s also, curiously, the first step towards something bigger.
“I have always been fascinated with beautiful light installations,” Thomas says. “My dream is to someday build a complete LED suit that can either be pre-programmed or made to interact with the environment through sensors. It would be nothing practical, but I hope to bring a smile to the people around me and myself. I thought an umbrella would be a small step into this direction.”
Brolly good
Planning the umbrella was straightforward enough. “Get an umbrella, get LEDs and put them together,” Thomas explains. In the past he had tended to use an ESP32 microcontroller for his hardware projects and Python for his pure software projects. “But one day I saw a Raspberry Pi Pico microcontroller in a store and I recognised the great potential of finally using Python in my hardware projects, so I knew I had to give it a try,” he explains.
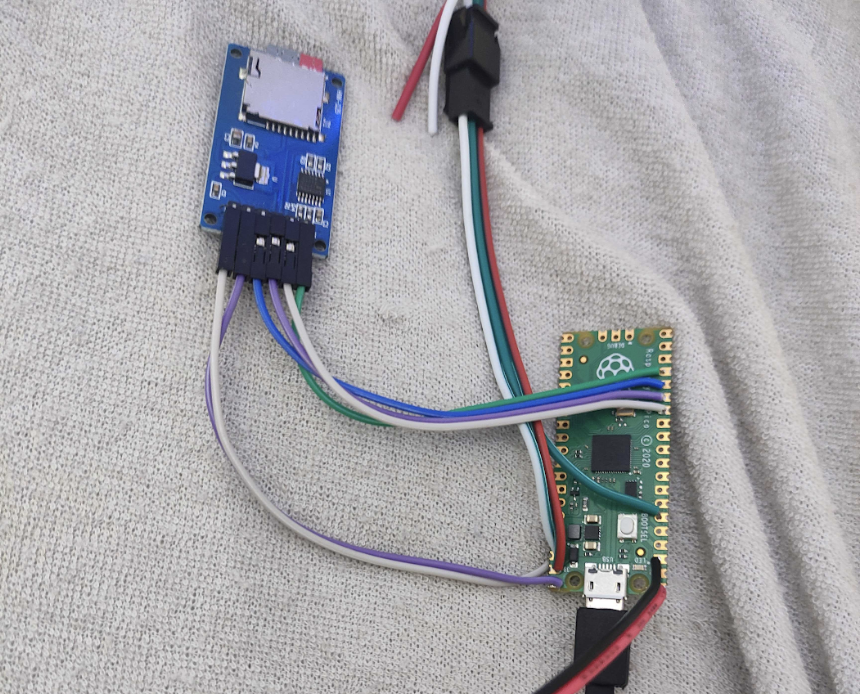
The idea was to create a set of pre-programmed animations that could be easily skipped through by simply pressing a button. These animations were created on a PC using a simulator Thomas had developed in Pygame. They were then saved to an SD card which plugged into the umbrella. “Raspberry Pi Pico can read the animation data and control the LEDs accordingly,” he explains. “I thought this way, I wouldn’t have to limit the animations by the computer power or memory limitations of Raspberry Pi Pico.”
Development went reasonably well. “It didn’t cause me major headaches,” Thomas says. “But in the beginning, I had some issues with reading the animation commands fast enough from the SD card while displaying them live but I eventually figured it out using byte files.”
Shine a light
There are some features he would like to implement, though. Thomas originally planned to also add an MPU9250 nine-axis motion tracking sensor to measure acceleration, rotation and orientation. “I wanted to add features which will make the umbrella change its lights when you spin it, jump or turn into a different direction and I hoped it would give the user more interactions with the umbrella,” he says.
Thomas also wants to reduce the number of visible cables and make the underneath “sparkle with the same joy,” as he puts it. “LED light isn’t diffused on this side and it takes away a lot of the effect,” he laments. Even so, the umbrella has gone down well among the Raspberry Pi community even though many say it has no practical use. “I guess they are right,” he says. “But I enjoyed building it, I learned some things and it made me smile when it lit up for the first time.”
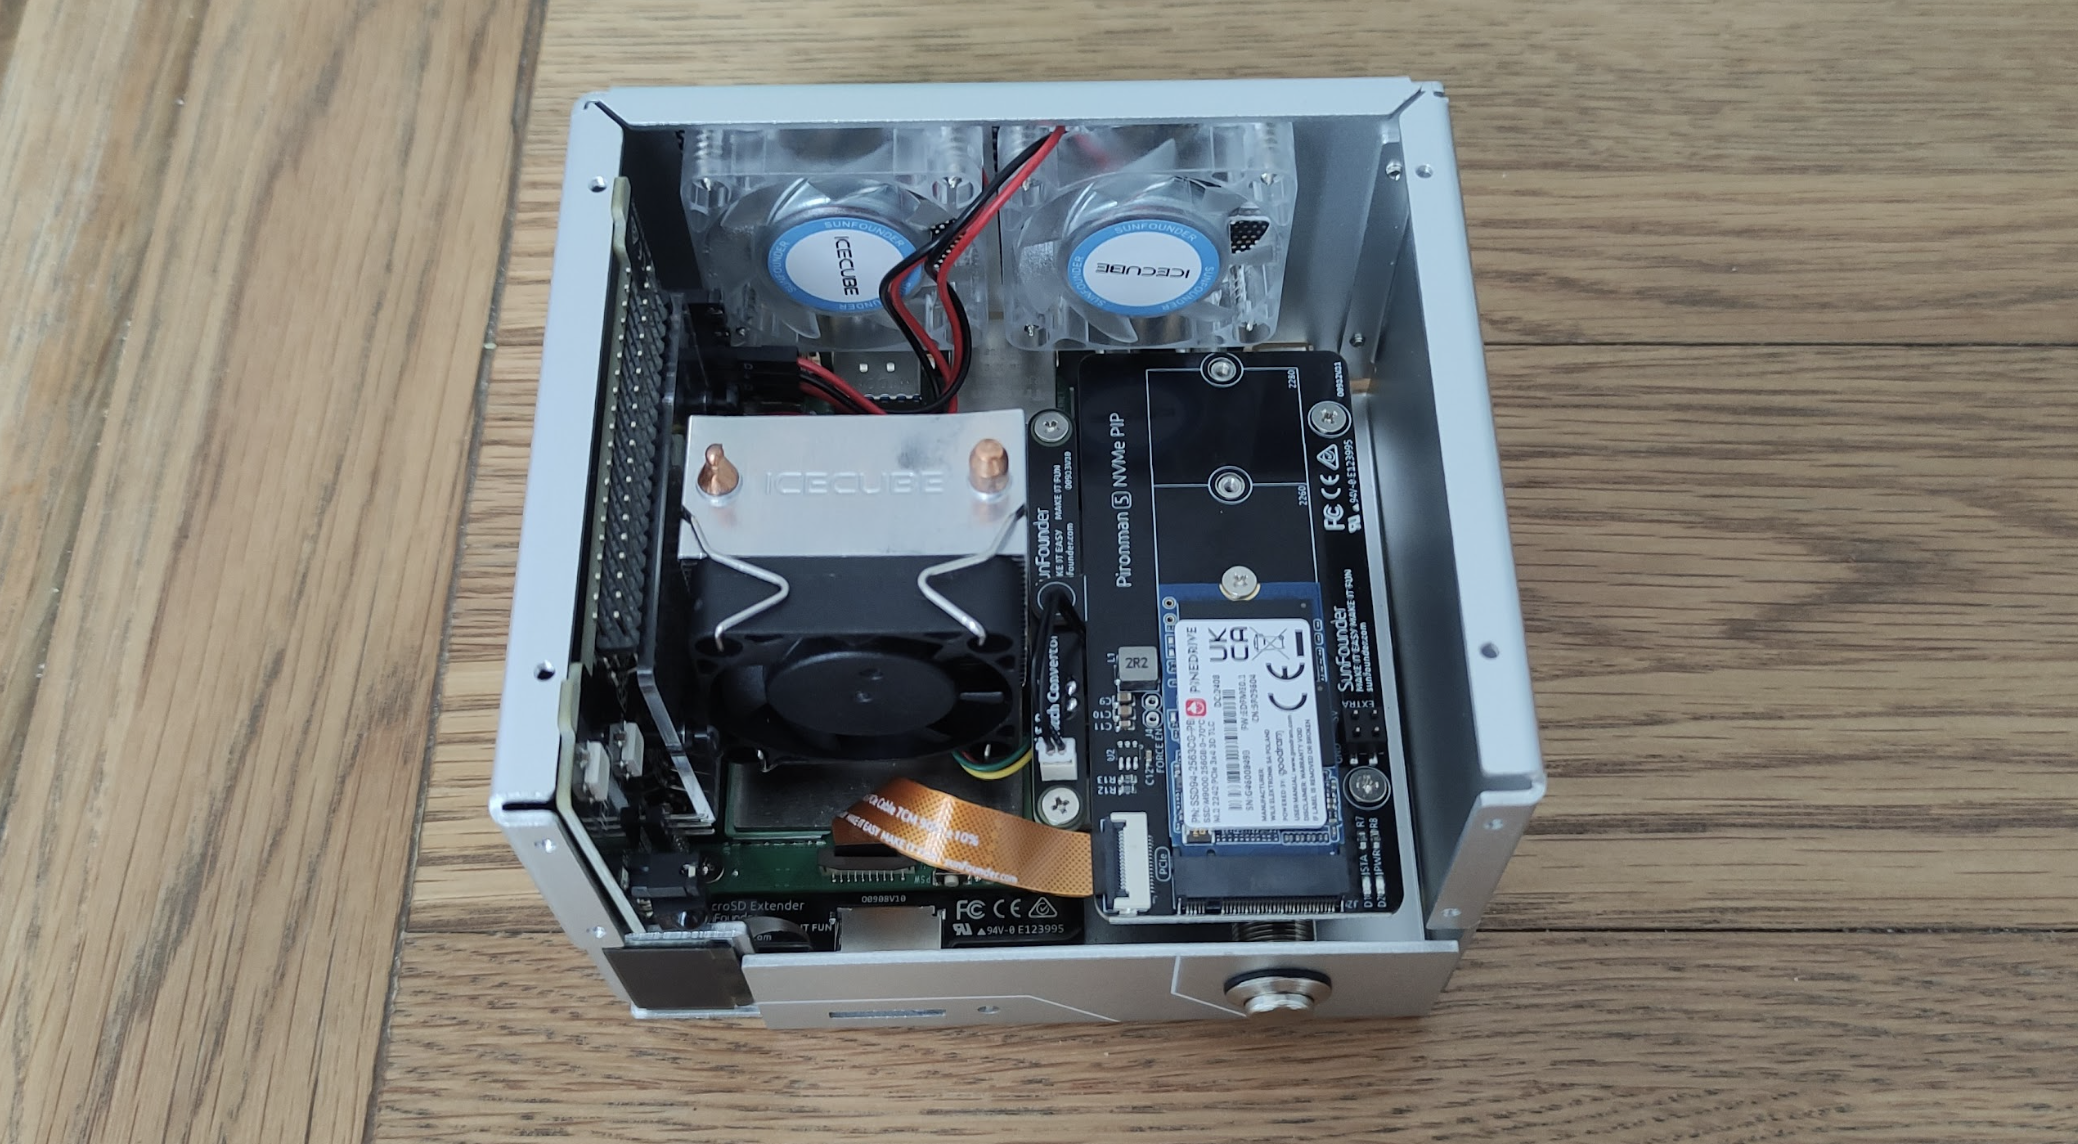
You don’t have to use this little dock mechanism – we can definitely imagine 3D-printing an enclosure that sticks to the back of the lid with a few cables between the laptop and Raspberry Pi. However you choose to connect your Raspberry Pi though, it doesn’t require any extra software setup and is immediately good to go, which is very nice.
Take it with you
As there are no computer parts inside the shell, the whole thing is very light, even with a Raspberry Pi attached to it (although it does throw off the balance a little). The heaviest part of the assembly is probably the 5,000mAh battery, which charges nice and quickly, although only with the included DC barrel jack. With a Raspberry Pi plugged in the battery lasts for a couple of hours just fine with fairly normal use, and you can also check the battery with a touch of a button.
Perhaps due to either how light it is, or the materials used in construction, but the Note does feel a little bit flimsy while using it. The mousepad is fine, however the physical clicks for right and left click feel clunky and only work near the bottom of the touchpad. Compared to other normal laptops the keyboard is actually pretty good though, and is nice to type on – it has an extra bit of resistance that makes the keys satisfying to use.
Multi-purpose
We didn’t find much use for it with our other PCs – although we don’t have any mini PCs like a Mac Mini or such around, which seems like a good fit for the CrowView. It’s quite nice for watching videos from a phone though, especially if you’re travelling and don’t want to lug a regular, heavier laptop around with you.
However, it’s as a Raspberry Pi dock that it really shines for us, and despite our concerns with the build quality and awkwardness of the provided dock system, it works more than well enough that we’re definitely going to be using it in the future instead of juggling cables on monitors and PSUs. We might use a Bluetooth mouse though.
Verdict
9/10
There are some minor build quality issues but the product itself is fantastic and does exactly what you’d want it do.
Specs
Display: 14-inch IPS, 1920×1080
Battery: 5000mAh
I/O: Keyboard, touchpad, mouse, webcam, USB A, USB-C, speakers, 3.5mm headphone jack, mini HDMI in
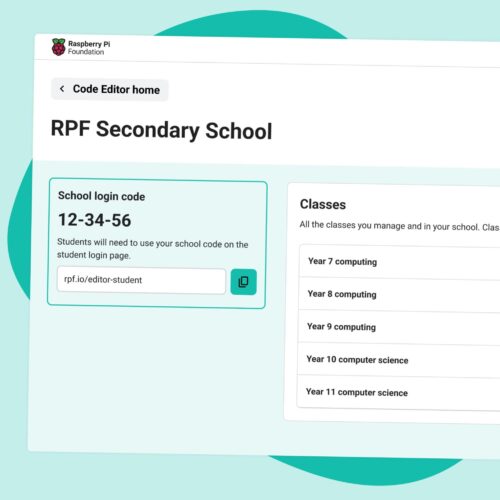
Since we first launched the Code Editor, a free online tool designed to support young people as they learn text-based programming, we’ve been excited to hear how educators have been trying it out in their classrooms.
“I used the Code Editor with my computer science students yesterday and it worked a dream! Students were able to write and run code without any issues.”
– Head of Computer Science
The Code Editor is designed for learning, rather than for professional use, and is informed by our understanding of pedagogy and computing education. It can be accessed from a web browser without installing any additional software.
Earlier this year, we announced that we’d be introducing classroom management features and we’re now pleased to confirm that we’ve launched the beta version of Code Editor for Education with school accounts.You can be the first to try out the new features, together with the many schools who have chosen to pre-register their school accounts.
Simple and easy classroom management
We’ve kept the educator interface clean, simple, and easy to use. School owners can invite other teachers to join, add students, organise students into classes, and help students reset their passwords quickly. Educators can create coding projects to share with students and view their work.
All features, totally free
We’ve added these classroom management features because one of the key problems we’ve seen educators face over the past months has been the lack of an affordable tool to teach text-based coding in the classroom. We will always provide the Code Editor and all of its features to educators and students for free.
Safe and private by design
We take safeguarding seriously, providing visibility of student work at all times, as well as features such as the ability to report a concern. In line with best practices protecting children online, we minimise data capture so that we have just enough to keep students safe.
Future developments
As the platform is currently in beta, we’d love to hear what you think of the new classroom management features — please send us your feedback.
We’ll be actively looking to develop new features over the coming months. Such features are set to include an extended set of Python libraries,custom instructions that sit alongside starter code projects and teacher-to-student feedback capabilities. All new developments will be informed by ongoing educator feedback.
This little device includes a mechanical keyboard that, Michael says: was his primary motivation for making his retro marvel. Having first cut his teeth learning BASIC on a Sharp PC-1260, he quickly became a fan of portable computers and snapped up many more. But when, in recent years, he sought to revive his interest in such machines, he said he’s been left disappointed.
“I have tried Raspberry Pi and Linux-compatible portables and laptops but I’ve never been really satisfied with their keyboards,” he says, name-checking the Pocket C.H.I.P, Devterm and uConsole projects. “Even at work I used a mechanical keyboard with the company laptop so I started to search for smaller keyboards and portable Raspberry Pi projects. I then found ZeroWriter.”
Key to success
ZeroWriter is an open e-ink typewriter with a Raspberry Pi Zero 2 W board at its heart. Michael decided to create one for himself, and ordered the Vortex Core 40% keyboard while swapping out the WaveShare 4.2-inch e-paper display with a Waveshare five-inch monitor. “As there was still space, I added a speaker to the side,” he adds. “But the project was limited in terms of the Python audio effects development I wanted to pursue.”
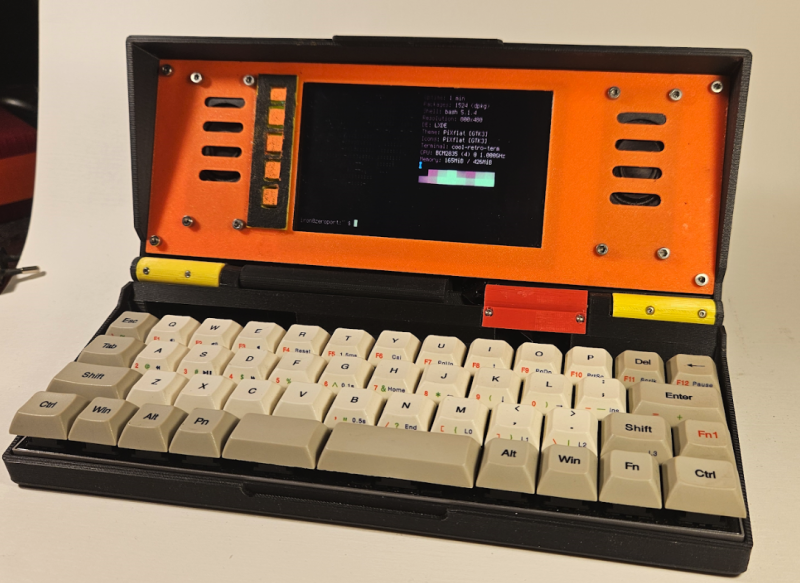
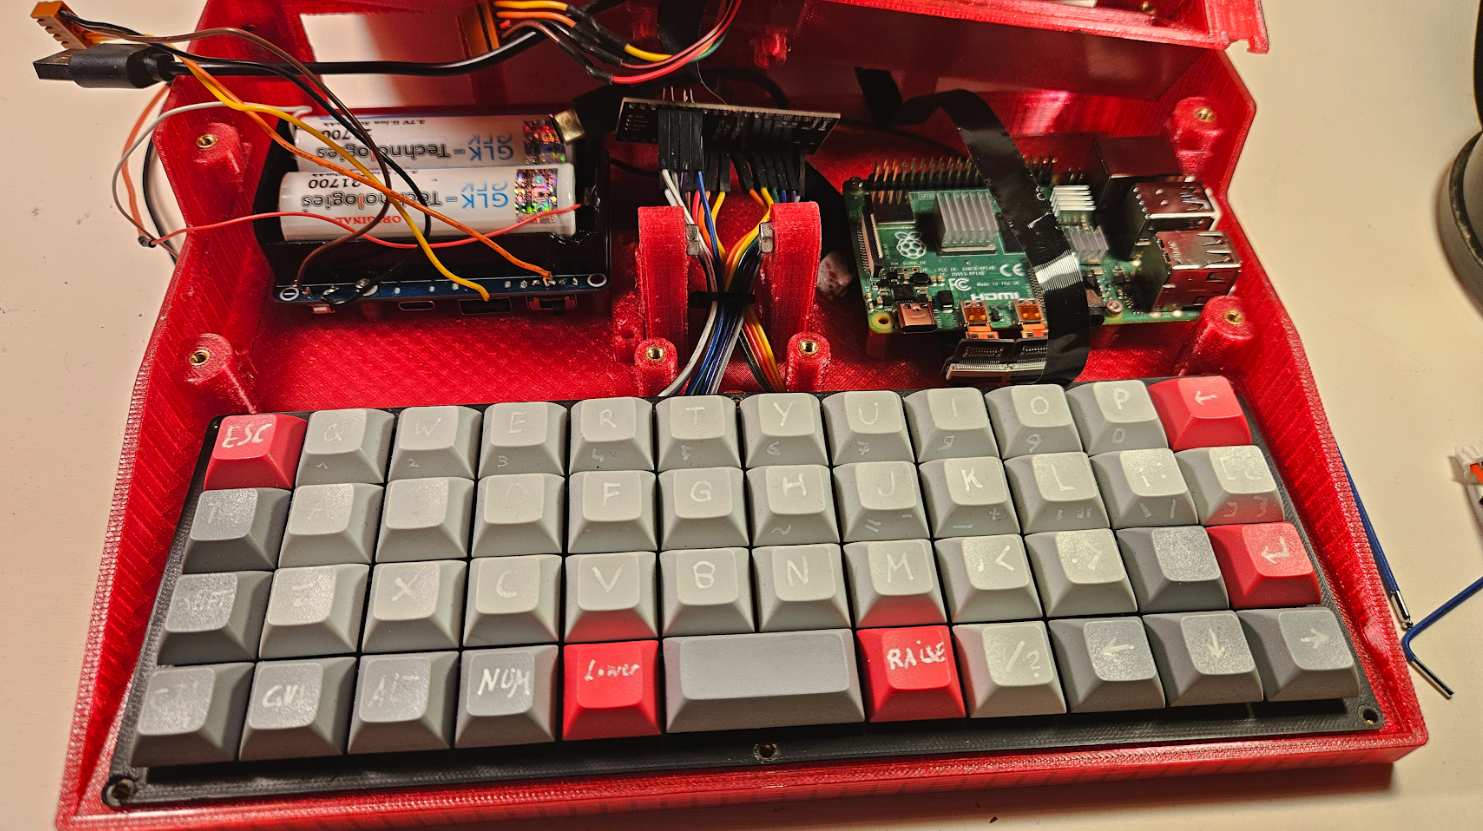
Michael decided to take the project to another level, hence the use of Raspberry Pi 4. “With the experience of my first build, it was clear that I should go bigger and I also searched for another keyboard,” he says. Looking on pcbway.com, he found the Happy Keyboard, a 47-key, 40% ortholinear mechanical keyboard that uses a Raspberry Pi Pico development board running KMK firmware. It formed the basis of the design for the entire project.
“I started with the keyboard because it was the single largest part of the build,” he explains, adding that the next step was to find a display. “I searched for a screen with vertical resolution bigger than 400 or 480, and found a 9.3-inch display by Waveshare with a funky resolution of 1600×600 which fitted perfectly to the 40% keyboard.” This setup dictated the design of the project’s case, and it helped that every Waveshare screen comes with a CAD file and audio amplifier.
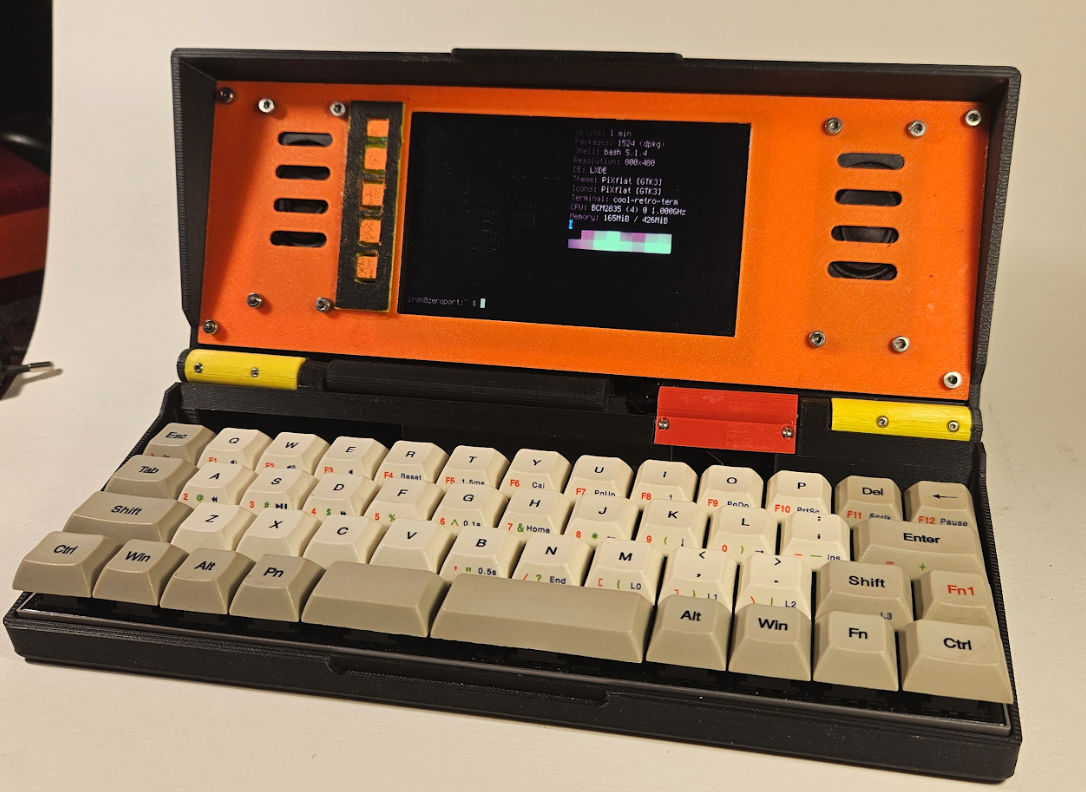
“It was all natural and fell into place because of the size of the components and the requirement that the keyboard should be as low as possible,” Michael says. “Somehow I loved the wide display more than a normal 16:9 display, so this may be the reason for the centred screen.”
A great case
Other design considerations needed to be considered. “It was clear in the beginning that the Raspberry Pi 4 and the battery would have to sit behind the keyboard,” Michael says, having decided to place them in a sizable rear compartment. The Raspberry Pi Pico development board also needed to be moved because there wasn’t sufficient room on the main keyboard PCB.
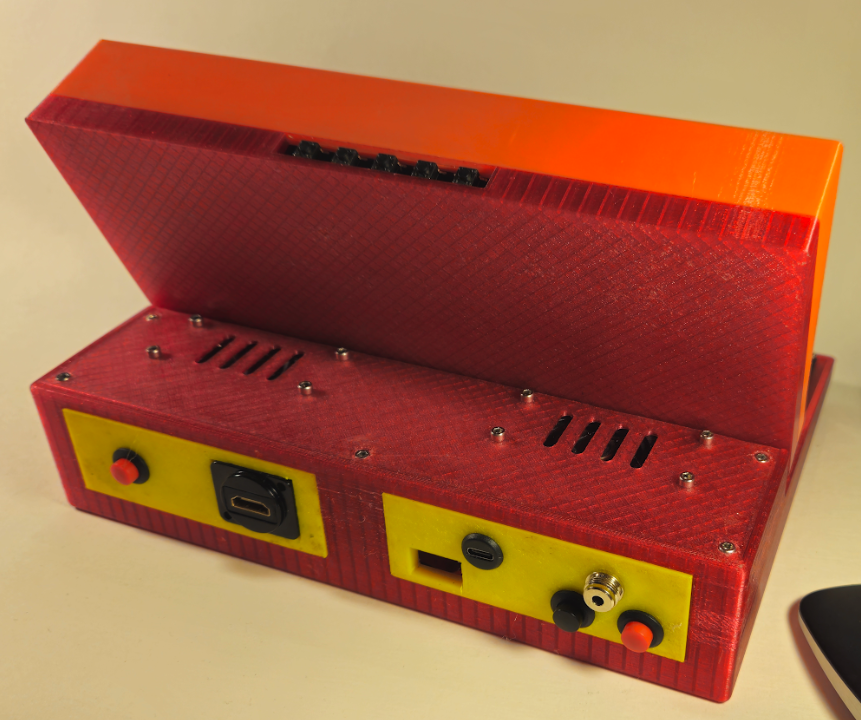
In extending the back section by up to two centimetres and increasing its height to match that of the screen and keyboard, Michael found space to fit audio speakers. He worked on ways of being able to use the USB ports, too, by creating insert panels on the back of the case for flexibility. “Instead of having to print an entire case, taking tens of hours, every time I decided I’d want to reconfigure the ports, I could just print new panels, which takes about an hour,” he explains.
Even so, there were other issues to contend with. Michael had trouble with the HDMI connection being on top of the screen. “I had to rotate it, and it took me some time to figure out how to flip the screen,” he says. “The display’s on-screen menu is still the wrong way around and this can’t be fixed, but I think that’s a Waveshare issue.”
The biggest headache, however, was power – the system draws juice from a pair of 21700 batteries connected to a UPS HAT. “I tried several battery boards but I was getting random reboots and other issues,” he says. “I then recognised that the cables I used to connect to the Raspberry Pi 4 computer were too thin. After I used better cables it worked fine. There were still some power warnings after two hours but it’s not bad.”
Powering up
Battery issues are why he decided against using a Raspberry Pi 5 board, for now at least. “If I could find a battery able to power it, I’d use Raspberry Pi 5,” he says. Michael also wants to be able to move the Raspberry Pi computer away from the side and make a side panel. “This would make it possible to use more single-board computers in the future, and help to connect the screen and keyboard to Raspberry Pi internally,” he says.
But he’s more than happy with the result so far and he says it’s a build that has fulfilled his requirements. “It’s also been a good way to learn FreeCAD which was fun most of the time – there was a lot of cursing before understanding, though.” He uses the device for programming and watching streams and finds it to be very convenient. “It’s easy to fetch and can be placed on the couch or kitchen table without taking up much room,” he says. And that, in a nutshell, is what a portable computer should be like.
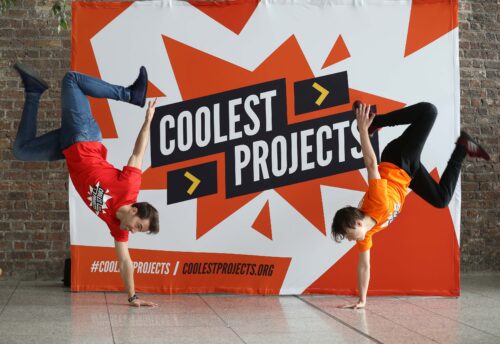
Coolest Projects celebrates young digital creators and the amazing things they make with technology. Today, we’re sharing the impact that taking part in Coolest Projects showcases has on young people’s motivation and confidence, as well as announcing dates for Coolest Projects 2025.
Coolest Projects in 2024
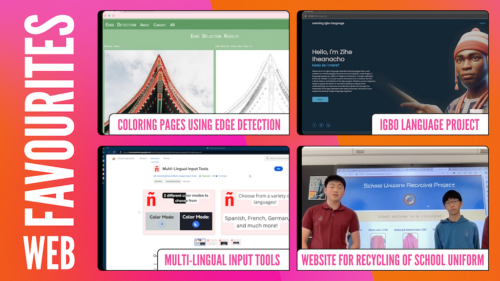
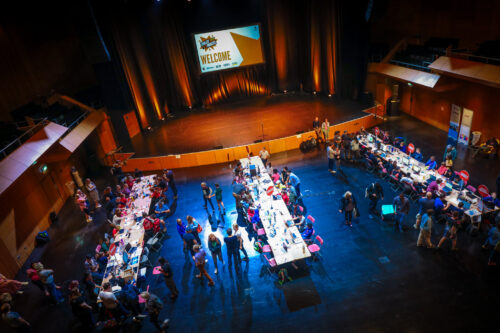
This year, 7197 young people across 4678 projects took part in our global Coolest Projects online showcase, with participants from 43 countries. All of these projects were shared in our online showcase gallery, and we hosted a live-streamed event celebrating the judges’ favourites watched by over 1000 people.
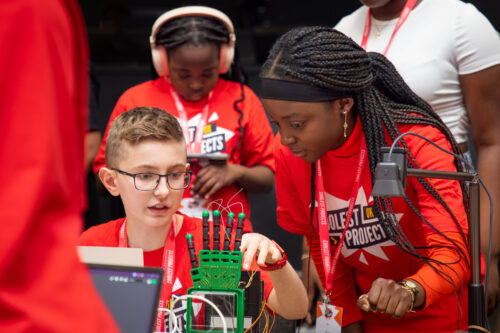
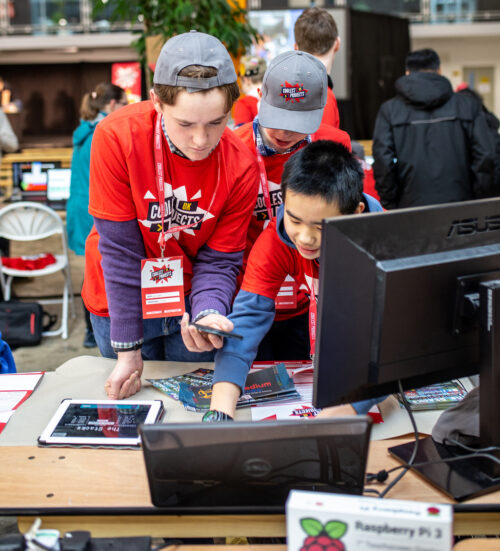
At the 2024 in-person Coolest Projects events in Ireland and the UK, 192 young people shared 120 projects. At these events, the young creators presented their projects to other attendees and our team of judges. They also took part in other activities, including a digital escape room.
We wanted to understand how Coolest Projects impacts young people, and so we collected the following data:
For the online showcase, mentors and tech creators filled in a survey when they completed their project registration, and we ran focus groups with mentors, who are adults that support the tech creators
At the UK and Ireland in-person events, creators completed a survey, other event attendees completed feedback cards, and we also interviewed creators.
Online showcase: Impact on skills and confidence
In the survey, mentors and young people told us that taking part in the Coolest Projects online showcase had a positive impact:
91% of young people and 87% of mentors agreed or strongly agreed that taking part in Coolest Projects online inspired them or their team to continue to participate in computing and technology
89% of young people and 86% of mentors agreed or strongly agreed that taking part in Coolest Projects online increased their or their team’s confidence in coding and digital making
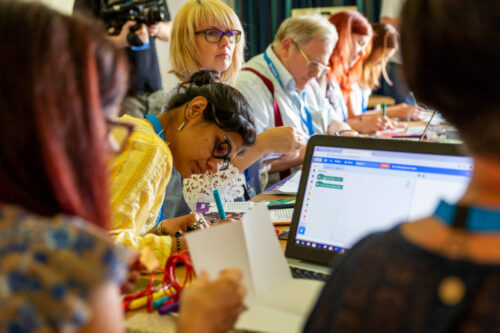
Mentors told us that the community built by the online showcase gallery played an important role in making young people want to participate, and improving their confidence. One mentor said that “[being part of the online showcase] motivates them actually to do something innovative and… [the] global community motivates them to think out of the box.”
They also reported that the online community inspired young people to solve real-world problems. One mentor said, “the wonderful thing is the kids create so many things which are solutions to world problems.” Others told us that young people feel a great deal of pride that their solutions are available for others to see online and that they get ideas from other projects on how to solve problems. One mentor from India told us about a young person who created a boat to clean rivers and then was inspired to learn to program micro:bit devices, having seen similar projects in the gallery.
Focus on ‘growth, not competition’
The phrase ‘growth, not competition’ came from the mentors in the focus group, and we love this description.
“[With] Coolest Projects… the only agenda is to grow. Grow with the coding, nurture your skills, creativity.” – Focus group attendee.
In he focus group, mentors told us they really valued the way the Coolest Projects online showcase allows all young people to participate, including those who were less experienced tech creators. One mentor told us that because everyone’s project is displayed in the gallery the “beauty is that everybody is encouraged individually… regarding the experience. … They can start with very small things. And they have [the] opportunity to upload it on the platform.”
One mentor who supports young people in remote locations in India spoke about the way Coolest Projects offers a level playing field where his students can be included and participate to the same extent as less remote places: “students never feel left behind.”
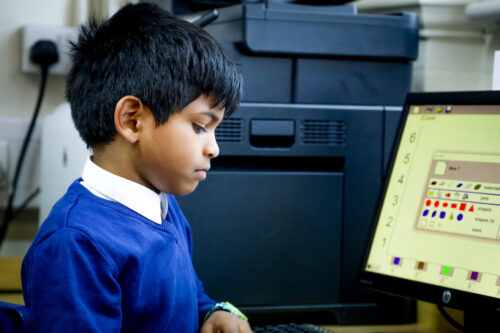
The in-person events also reflected the diversity of young people’s experience of digital making. Of those creators who answered surveys, 35% said it was their first time making this kind of project, while 37% said they had made similar projects before. This mix of experience was also reflected in the interviews, with some young people creating something for the first time and having only started learning coding recently, while others had been developing their projects for a long time. Many creators told us they felt inspired by the opportunity to show their projects to others, regardless of their experience level.
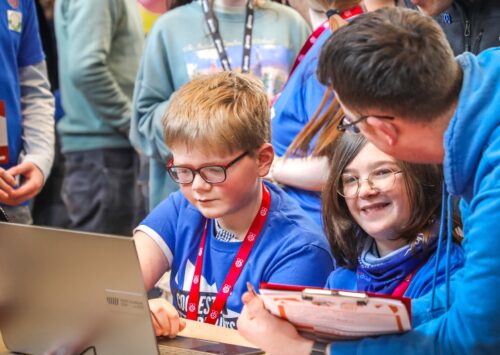
In-person events: Building a community of digital creators
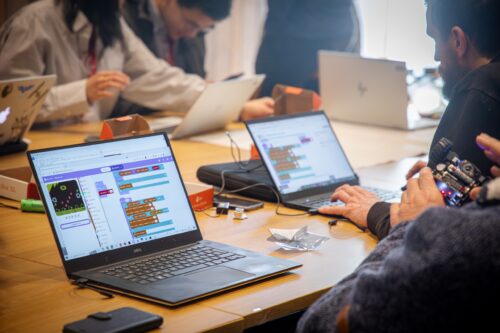
Attendees at both Coolest Projects UK and Ireland commented on the sense of community and the excitement that was generated by being around other young people. One young person spoke about how much they enjoyed being “surrounded by people who like coding too”. They really valued seeing other creators’ projects and speaking with their peers.
The young people we spoke to reflected on the positive impact of this sense of community and belonging. They told us that seeing others’ projects inspired them to develop their ideas and learn new skills. One young person described how the in-person event allowed them to “get inspired and socialise.” A second said, “that’s why I’m here — to get inspired.”
Another clear theme was how much young people valued the opportunity to show their projects to others. This gave them confidence in their own ability to build things. One creator at Coolest Projects UK spoke about the sense of achievement they felt after building something themselves and then being able to present it to others.
Young people at both events spoke about their plans for what they wanted to do next, talking about trying new technology such as building games, learning Python, and creating mobile apps. At both events, creators described how they wanted to continue to develop and build on their existing ideas with the possibility of showcasing them again.
What we want to learn next
We are continuing to look for ways to improve the Coolest Projects experience for young people and their mentors. As part of this, we are conducting user experience research to understand how we can improve the registration process for the online Coolest Projects showcase.
We were delighted to hear from mentors in this year’s focus group how much they valued the online showcase gallery, and we want to understand the impact of this resource better as part of Coolest Projects 2025. If you want to find out more about Coolest Projects, we highly recommend taking a look at the amazing projects made by young people around the world.
Dates for Coolest Projects 2025
We’re so pleased that so many young people around the world loved taking part in Coolest Projects this year. And we’re very excited that Coolest Projects will be back and bigger than ever before in 2025!
The Coolest Projects online showcase is open to any young person up to age 18, based anywhere in the world. Registration opens 14 January, and we’ll host a celebratory livestream on 25 June.
Coolest Projects in-person events will also be popping up around the world. In-person events are open to everyone up to age 18 in the host country. Family and friends are very welcome to come along too.
Save the date for:
Coolest Projects Ireland, 1 March 2025
Coolest Projects USA, 5 April 2025
Coolest Projects Belgium, 20 April 2025
Coolest Projects UK, 17 May 2025
Coolest Projects Belgium, date to be confirmed (TBC)
Coolest Projects Ghana, date TBC
Coolest Projects India, date TBC
Coolest Projects Malaysia, date TBC
Coolest Projects South Africa, date TBC
Keep an eye on the Coolest Projects website for more event dates and details coming soon.
It’s never too early to start making and saving digital projects to showcase next year. We can’t wait to see what the world’s young tech creators will make!
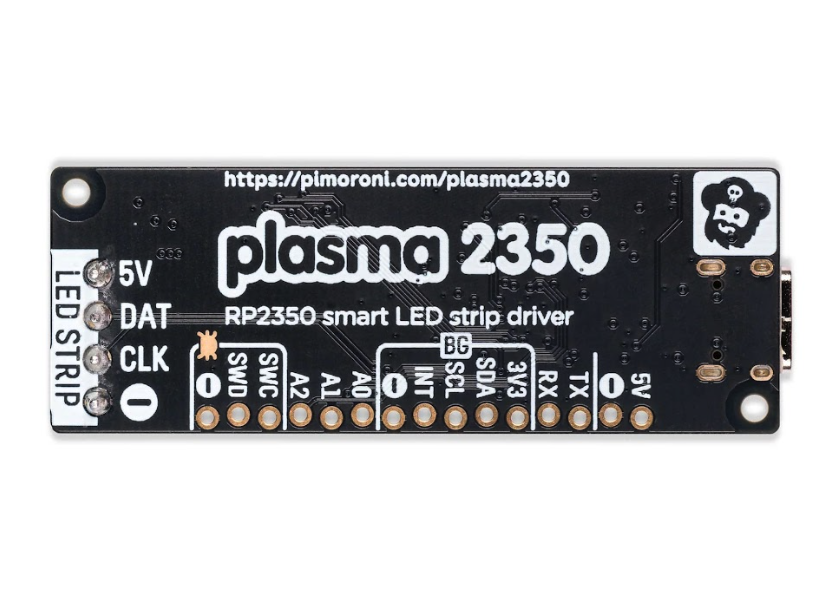
You can buy the Plasma 2350 board on its own or in a Starter Kit (£34.50 / $38) with a USB-A to USB-C cable and 10m string of 66 individually addressable frosted LED stars. These look superb when lit up, and are a great way of showcasing the capabilities of the Plasma 2350. We also tried out a long 300-LED strip and there was easily enough current (up to 3A) from the USB-C power connection to light them all.
Wired for light
Connecting your LED string or strip to the board is simple. As on the Plasma 2040, there are four screw terminals on one end: for 5V power, data, clock, and ground. While WS2812/NeoPixel LED strips have only three wires, omitting the clock connection, the latter is needed for DotStar LEDs. A little care needs to be taken to make sure each wire is in the correct terminal and that they’re screwed securely.
Despite coming in a slimmer ‘gum stick’ form factor than the Plasma RP2040, the board manages to cram in many useful features. There’s an unpopulated header down one long edge to break out selected GPIO pins, offering access to UART and I2C interfaces, along with analogue inputs, PWM outputs, and PIO state machines. There’s also a Qwiic/STEMMA QT connector for breakout boards, as well as Pimoroni’s new proprietary SP/CE (Serial Peripheral / Connector Evolution) port – an eight-pin JST-PH connector including four pins for SPI.
Buttons for everything
One slight downside of the SP/CE’s inclusion is that there’s no room for a B user button next to the A one (as on the Plasma 2040), although the Boot button doubles as a user input. There’s also a handy Reset button, to save repeatedly disconnecting and connecting the USB-C power. An on-board RGB LED is a nice touch, too.
Before you can start programming some light patterns, you’ll need to install MicroPython. In its RP2350 GitHub repo, Pimoroni provides a custom UF2 file for the Plasma 2350. To install it, connect the board to your computer via USB while holding the Boot button, to mount it as a drive, then drag the file over to it. Alternatively, if you prefer CircuitPython, with which you can utilise Adafruit’s excellent LED Animation library, there’s also a UF2 image for that.
Using MicroPython in the Thonny IDE, we tried out some code examples from Pimoroni’s GitHub repo, altering the constant for the number of LEDs to match our string. While there are only a few examples there – including a nice ‘rainbow’ colour-cycling effect – we found that most of the ones for the Plasma 2040 and Plasma Stick 2040 W still work. Impressive lighting effects include alternating/random blinkies, sparkles, snowfall, fire, pulsing and a lovely rainbow sweeping across the string of LEDs.
Since the Plasma 2350 lacks on-board Wi-Fi, you can’t get your LEDs to react to data from the network, but you could always connect a breakout input such as a temperature sensor.
Verdict
9/10
An easy way to control NeoPixel/DotStar LED strings with programmable effects, with extra processing power if you need it.
Features
Features: RP2350A processor; Boot, Reset, and user buttons; on-board RGB LED
LED compatibility: 5V WS2812/NeoPixel, APA102/DotStar
Connections: 4 × screw terminals, USB-C port for power/programming, Qwiic/STEMMA QT, SP/CE, unpopulated 15-pin GPIO header
Across continents and cultural contexts, our free Computing Curriculum serves as a common thread that connects educators. Read the stories of 3 educators who share their thoughts on the curriculum’s application, adaptability, and the impact it’s had on their educational settings.
I’m Freda, and I co-founded a non-profit organisation called Waloyo in South Africa.
Coming from a background of technology consulting, I know the value of computing education. I have a real drive to teach young kids coding so they can get ahead and find jobs in our digital economy.
Our role at Waloyo is to work with non-profit organisations that work with young people and want to expand their services to include computing skills training. Waloyo trains non-profit facilitators, who in turn teach computing skills to youth between the ages of 6 and 18. A unique challenge is that the majority of facilitators we train don’t have any previous computing experience. The resources we use need to be clear and easy to follow.
What I really love about The Computing Curriculum resources is the facilitator guides.
Our initial plan was to run the training programmes after school and outside the school curriculum, but we were getting requests from schools to support them too. South Africa doesn’t have a national computing curriculum, so there aren’t many subject specialist teachers. So we looked for curriculum resources from other countries to support our work and that’s how we found The Computing Curriculum.
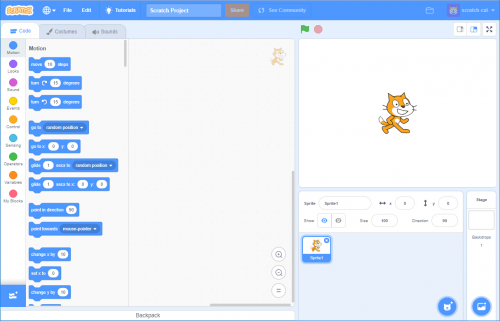
In rural Africa where we work, students have low levels of exposure to computers and computing. So whether they are 6 or 18 years old, we usually start with Scratch. The younger kids then continue with Scratch and the older kids move quickly on to Python as they build confidence.
What I really love about The Computing Curriculum resources is the facilitator guides. They fit in well with our process of training NGO facilitators to work directly with the kids. I love the comprehensiveness and flexibility of what your curriculum provides to enable this method of delivery.
So far we’ve launched 3 programmes in communities in South Africa, impacting around 150 young people, and it’s worked beautifully. It’s phenomenal to see how excited the kids get when the computer does what they want it to do!
I’m Al, and I’ve been a secondary science teacher since 1991.
For the past 13 years, I’ve taught in international schools. Two years ago, I decided to retrain in teaching computing. My wife and I are currently teaching in Kazakhstan. I now teach at primary level but still handle some secondary classes. For primary, there’s significant time pressure, especially with extra lessons for the local language, making it challenging to fit computing into the schedule.
The private schools where I work are starting to implement the UK computer science curriculum. At one of the schools, they have a robotics course which has given rise to a misconception that everything in computing is about robotics! My role, therefore, involves expanding the concept of robotics to include a broader range of computing activities and finding efficient ways to integrate these new materials into the curriculum with minimal effort from the staff. I focus on selecting appropriate units to fit into what the schools are already doing rather than implementing a comprehensive new program.
The Raspberry Pi Foundation’s curriculum resources are valuable because they provide comprehensive lists of programs and ideas that I can adapt for my colleagues. I adapt resources to make them more accessible for primary teachers, simplifying and customising them for ease of use.
The Raspberry Pi Foundation’s curriculum resources are valuable because they provide comprehensive lists of programs and ideas that I can adapt for my colleagues.
Once students understand that computing is a tool for developing skills rather than just passive consumption, they take ownership of their learning which boosts their confidence. Culturally relevant materials are particularly effective, especially in diverse international classrooms. Adapting resources to be culturally relevant and incorporating students’ examples enhances their usefulness and impact. The resources are excellent, but by tailoring them, they can be even more effective, particularly in an international context with diverse nationalities and learning concepts.
Head of ICT at an international school in Egypt
As Head of Department, I am responsible for what all the different age groups learn, from year 1 to year 12. We use the Cambridge International (CIE) curriculum, so I was looking for supplementary resources that build from the basics, have a clear progression map, and complement the resources we already had.
With The Computing Curriculum, it is easy to pick out individual lesson resources to use. I love that it doesn’t need a licence and that the students don’t face any problems when they download it to practise at home. I’m covering curriculums for both computing and digital literacy, so I use resources that are relevant to my curriculum maps.
With The Computing Curriculum, it is easy to pick out individual lesson resources to use.
In some schools, their idea of an ICT lesson is getting students to play games, use Word documents, make PowerPoint presentations, and that’s it. But this generation of students love coding and making their own games. So instead of playing the game, we teach them how to develop a game and how to add the characters themselves.
From year 1 to year 2, students take part in a wide range of computing activities and develop a lot of new skills. They find these skills amazing. It makes them feel engaged, excited, and that they are doing something valuable.
Using The Computing Curriculum
These educators’ stories show how easy it is to adapt our Computing Curriculum to your unique context, enhancing students’ technical skills and inspiring creativity, critical thinking, and a passion for problem-solving. We look forward to continuing this journey with these and other educators as they transform computing education for their learners.
KG revisits the classics from gaming horror’s great 1990s golden age this month. Spattered with gore, and overcome by a desperate urge to prove that computer games weren’t just for families. Discover how to hook up a modern Blu-ray drive to Raspberry Pi 5 and play Halloween classics like Alone in the Dark, Phantasmagoria, and Viel of Darkness.
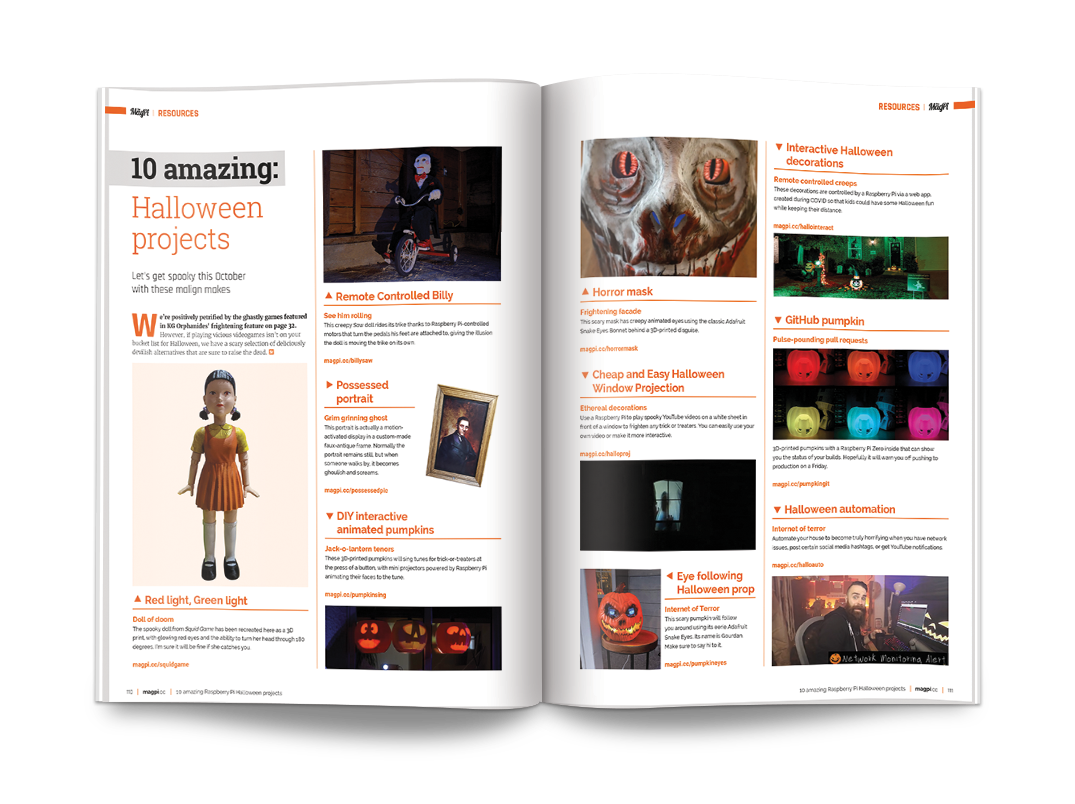
10 amazing Halloween projects
Get spooky this October with Rob’s malign makes. This month you’ll unearth a Doll of Doom, remote-controlled Saw dolls, possessed portraits, animated pumpkins, and much more. Take your haunted house up to another level with these devilishly good makes.
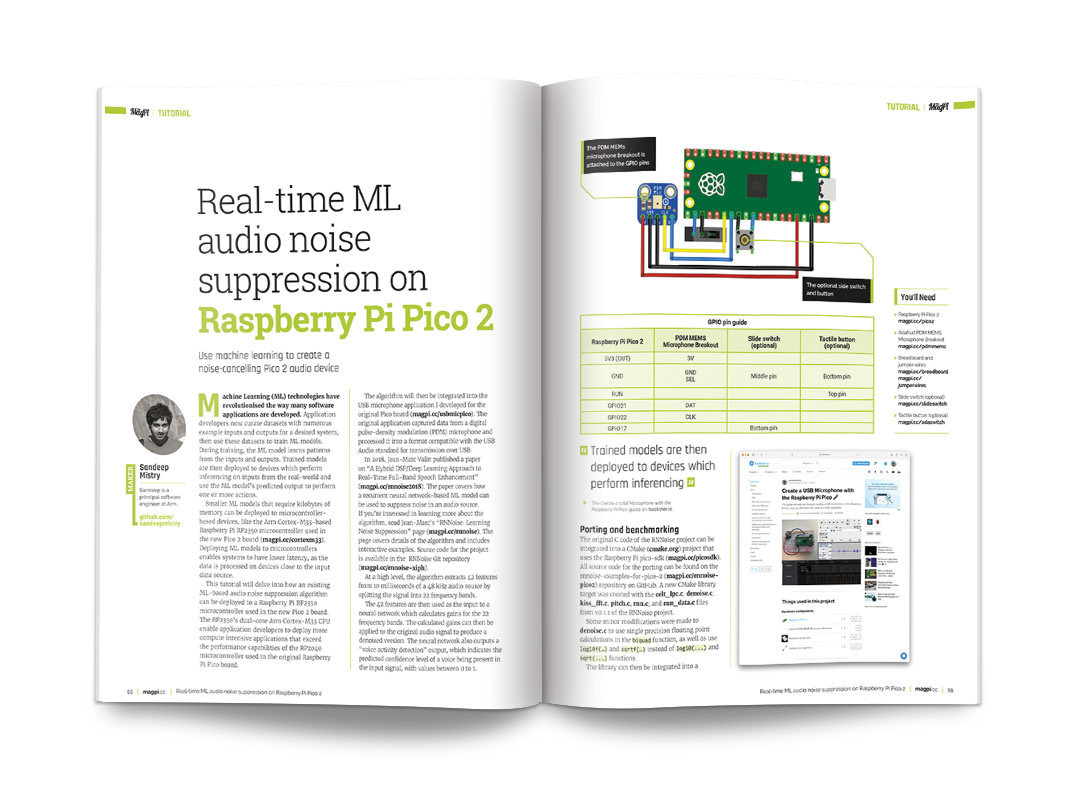
Real-time ML audio noise suppression
Arm’s Sandeep Mistry has used machine learning on Pico 2 to create a noise-cancelling audio device. This detailed tutorial explains how machine learning technology can be rained and deployed on Pico 2.
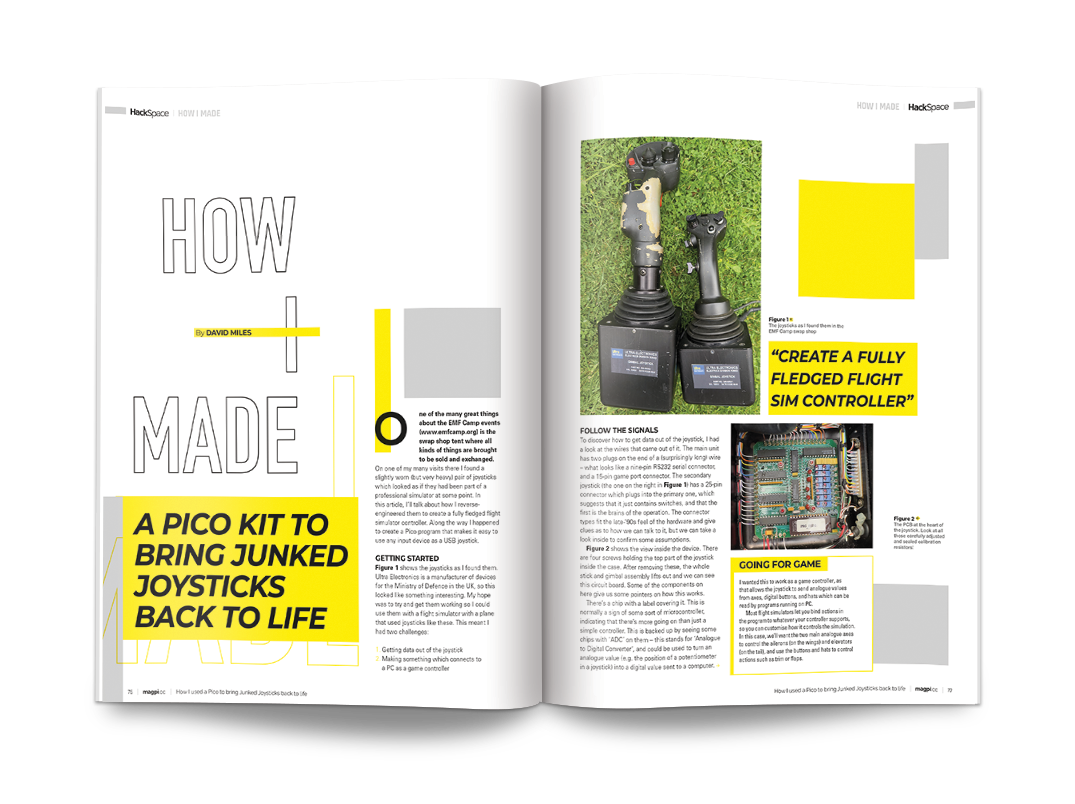
Bringing Junked Joysticks back to life
HackSpace’s David Miles has brought a heavy pair of flight joysticks and brought them back to life with Raspberry Pi Pico. These look like they belonged originally in a professional flight simulator, and have been reverse-engineered into fully-fledged flight simulator controllers that are recognised as USB joysticks.
Incredible Projects
This month’s magazine is packed with projects to discover and build, coding and making techniques to explore and learn, and the very best of the Raspberry Pi community. Pick up a copy in-store today [you can’t miss it; we splashed out on some fluorescent orange paint for the cover – Ed] or get a copy from The Raspberry Pi Press online store.
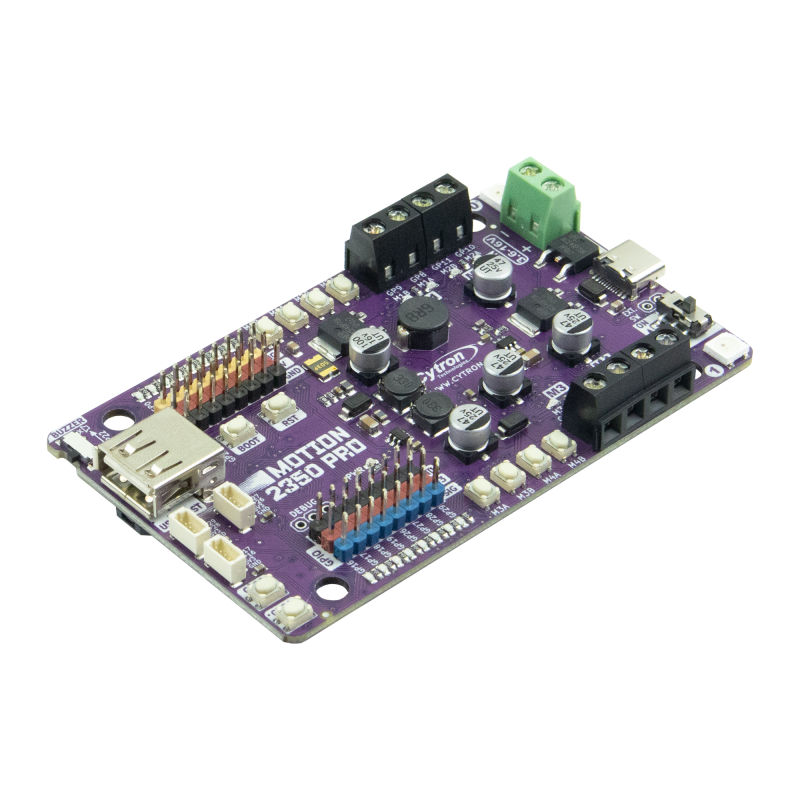
We love Raspberry Pi robots, and Raspberry Pi Pico has become a fantastic addition to the world of hobby robotics. With the release of Pico 2 and RP2350, their ability to pilot automatons has only grown. Scroll down below to win one of the brand new robotics controllers that makes use of RP2350, the MOTION 2350 Pro
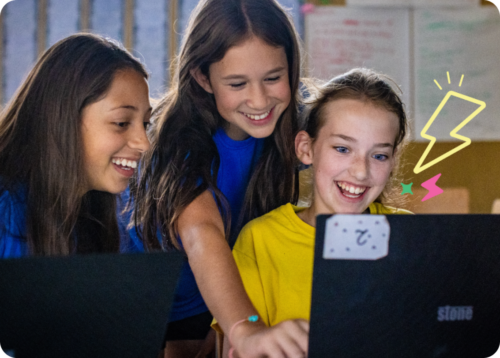
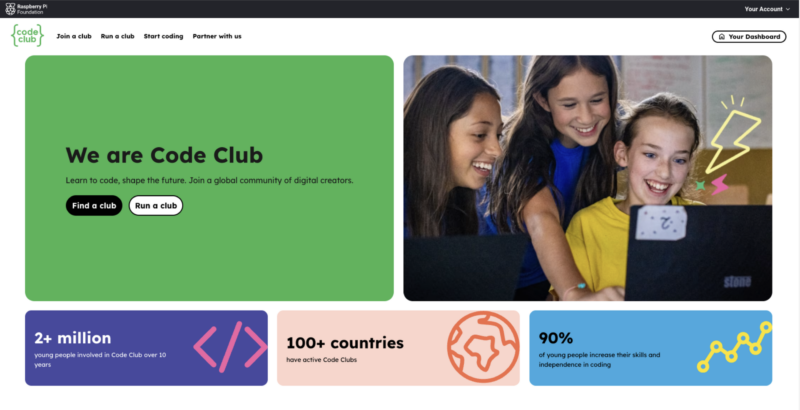
Today we’re unveiling a fresh look and feel for Code Club, along with a new ambition to inspire 10 million more young people to get creative with technology over the next decade.
Code Club is a network of free coding clubs where young people learn how to create with technology. Founded in the UK in 2012, it has grown to be a global movement that has already inspired more than 2 million young people to learn how to build their own apps, games, animations, websites, and so much more.
We know that Code Club works. Independent evaluations have demonstrated that attending a Code Club helps young people develop their programming skills as well as wider life skills like confidence, resilience, and skills in problem-solving and communication. This impact is a result of the positive learning environment created by the teachers and volunteers that run Code Clubs, with young people enjoying the activities and developing skills independently and collaboratively — including young people who sometimes struggle in a formal classroom setting.
Just as important, we know that Code Clubs inspire young people from all backgrounds, including girls and young people from communities that are underrepresented in the technology sector.
What’s changing and why
While we are incredibly proud of the impact that Code Club has already achieved, we want to see many more young people benefiting, and that led us to set the ambitious goal to reach 10 million more young people over the next decade.
To help us figure out how to reach that ambition, we spent a lot of time this year listening to the community as well as engaging with parents, teachers, and young people who aren’t yet involved in Code Club. All of the changes we’ve made have been informed by those conversations and are designed to make it easier for educators and volunteers all over the world to set up and run Code Clubs.
The biggest change is that we are making Code Club a more flexible model that can be adapted to reflect your local context and culture to ensure that it is as meaningful as possible for the young people in your community.
That means you can host a Code Club in a school or a community venue, like a library or makerspace; you can choose the age range and rhythm of meetings that make sense for your setting; and you can tailor the activities that you offer to the interests and skills of the young people you are serving. In order for the movement to be as inclusive as possible, you don’t even need to be called ‘Code Club’ to be an ‘Official Raspberry Pi Foundation Code Club’ and benefit from all the support we offer.
To support this change, we have developed a Code Club Charter that we ask all club leaders and mentors to sign up to. This sets out the principles that are shared by all Code Clubs, along with the commitments that the Raspberry Pi Foundation is making about our support to you.
We have launched a new website that makes it easier for you to find the information you need to set up and run your Code Club, along with an updated and simplified club leader guide. In a few weeks time, we are launching a new online course with guidance on how to run a successful club, and we will be adding to our programme of online community calls, webinars, and training to support a growing community of club leaders and mentors.
One of the most important parts of our support for Code Clubs is the projects that help young people learn how to bring their ideas to life using a wide range of hardware and software. As they are created by experienced educators, based on research, rigorously tested, and translated into dozens of languages, you can have confidence that these projects lead to meaningful and lasting learning outcomes for the young people attending your club. Code Club projects enable young people to learn independently, meaning that mentors don’t need technical skills.
What this means for CoderDojos
Alongside Code Club, the Foundation supports CoderDojo, a network of coding clubs that started life in Cork, Ireland in 2011 and merged with the Raspberry Pi Foundation in 2017.
In order to reduce duplication and make it easier for anyone to set up and run a coding club, we have decided to bring together the resources and support for all club leaders and mentors under one website, which is the new Code Club website.
There is no need for existing CoderDojos to change their name or anything about the way they operate. All registered CoderDojos will be able to manage their club in exactly the same way through the new website, and to access all of the support and resources that we offer to all coding clubs. New clubs will be able to register as CoderDojos.
The ethos, experiences, and lessons from the CoderDojo community have been a vital part of the development of the new Code Club. We have worked hard to make sure that all existing CoderDojos feel that their values are reflected in the Charter, and that the guidance and resources we offer address their circumstances.
CoderDojos will very much remain part of this community, and the Raspberry Pi Foundation will continue to celebrate and learn from the amazing work of CoderDojos all over the world.
Code Club in the age of artificial intelligence
With AI already transforming so many parts of our lives, it’s not surprising that some people are starting to ask whether young people even need to learn to code anymore.
We’ve got a lot to say on this subject — so watch this space — but the short version is that learning how to create with technology has never been more important. The way that humans give instructions to computers is changing, and Code Club provides a way for young people to experiment with new technologies like AI in a safe environment. Over the next couple of weeks, we’ll be launching new Code Club projects that support young people to learn about AI technologies, including generative AI, and we’ll be providing support for club leaders and mentors on the topic too.
Thank you and get involved
I want to end by saying a huge thank you to everyone who has been part of the Code Club journey so far, and particularly to everyone who has worked so hard on this project over the past year — far too many people to name here, but you know who you are. I also want to thank all of the parents, teachers, mentors, and partners who have provided the feedback and ideas that have shaped these changes.
Code Club and CoderDojo were both founded in the early 2010s by individuals who wanted to give more young people the opportunity to be digital creators, not just consumers. From that first Dojo in Cork, Ireland, and the first Code Clubs in London, UK, we’ve built a global movement that has empowered millions of young people to engage confidently with a world that is being transformed by digital technologies.
It’s never been a better time to get involved with Code Club, so please take a look and get in touch if you need any help or support to get started.
Since they became publicly available at the end of 2022, generative AI tools have been hotly discussed by educators: what role should these tools for generating human-seeming text, images, and other media play in teaching and learning?
Two years later, the one thing most people agree on is that, like it or not, generative AI is here to stay. And as a computing educator, you probably have your learners and colleagues looking to you for guidance about this technology. We’re sharing how educators like you are approaching generative AI in issue 25 of Hello World, out today for free.
Generative AI and teaching
Since our ‘Teaching and AI’ issue a year ago, educators have been making strides grappling with generative AI’s place in their classroom, and with the potential risks to young people. In this issue, you’ll hear from a wide range of educators who are approaching this technology in different ways.
For example:
Laura Ventura from Gwinnett County Public Schools (GCPS) in Georgia, USA shares how the GCPS team has integrated AI throughout their K–12 curriculum
Mark Calleja from our team guides you through using the OCEAN prompt process to reliably get the results you want from an LLM
Kip Glazer, principal at Mountain View High School in California, USA shares a framework for AI implementation aimed at school leaders
Stefan Seegerer, a researcher and educator in Germany, discusses why unplugged activities help us focus on what’s really important in teaching about AI
This issue also includes practical solutions to problems that are unique to computer science educators:
Graham Hastings in the UK shares his solution to tricky crocodile clips when working with micro:bits
Riyad Dhuny shares his case study of home-hosting a learning management system with his students in Mauritius
And there is lots more for you to discover in issue 25.
Whether or not you use generative AI as part of your teaching practice, it’s important for you to be aware of AI technologies and how your young people may be interacting with it. In his article “A problem-first approach to the development of AI systems”, Ben Garside from our team affirms that:
“A big part of our job as educators is to help young people navigate the changing world and prepare them for their futures, and education has an essential role to play in helping people understand AI technologies so that they can avoid the dangers.
Our approach at the Raspberry Pi Foundation is not to focus purely on the threats and dangers, but to teach young people to be critical users of technologies and not passive consumers. […]
Our call to action to educators, carers, and parents is to have conversations with your young people about generative AI. Get to know their opinions on it and how they view its role in their lives, and help them to become critical thinkers when interacting with technology.”
Share your thoughts & subscribe to Hello World
Computing teachers are being asked again to teach something that they didn’t study. With generative AI as with all things computing, we want to support your teaching and share your successes. We hope you enjoy this issue of Hello World, and please get in touch with your article ideas or what you would like to see in the magazine.
We’d like to thank Oracle for supporting this issue.
Signing up for Tindie is pretty trivial. You need a basic account to be able to buy from Tindie, and every account has all the options to start selling. Your need to give your store a name, then set up a verified PayPal account, and then you are ready to list your first product. A couple of things to note about Tindie is that you must have an image of your actual product on the product page, you can’t have a render of a product that you will make if you get an order. Neither can you list a product that you plan to make, so you can’t use Tindie to act as a pre-order system.
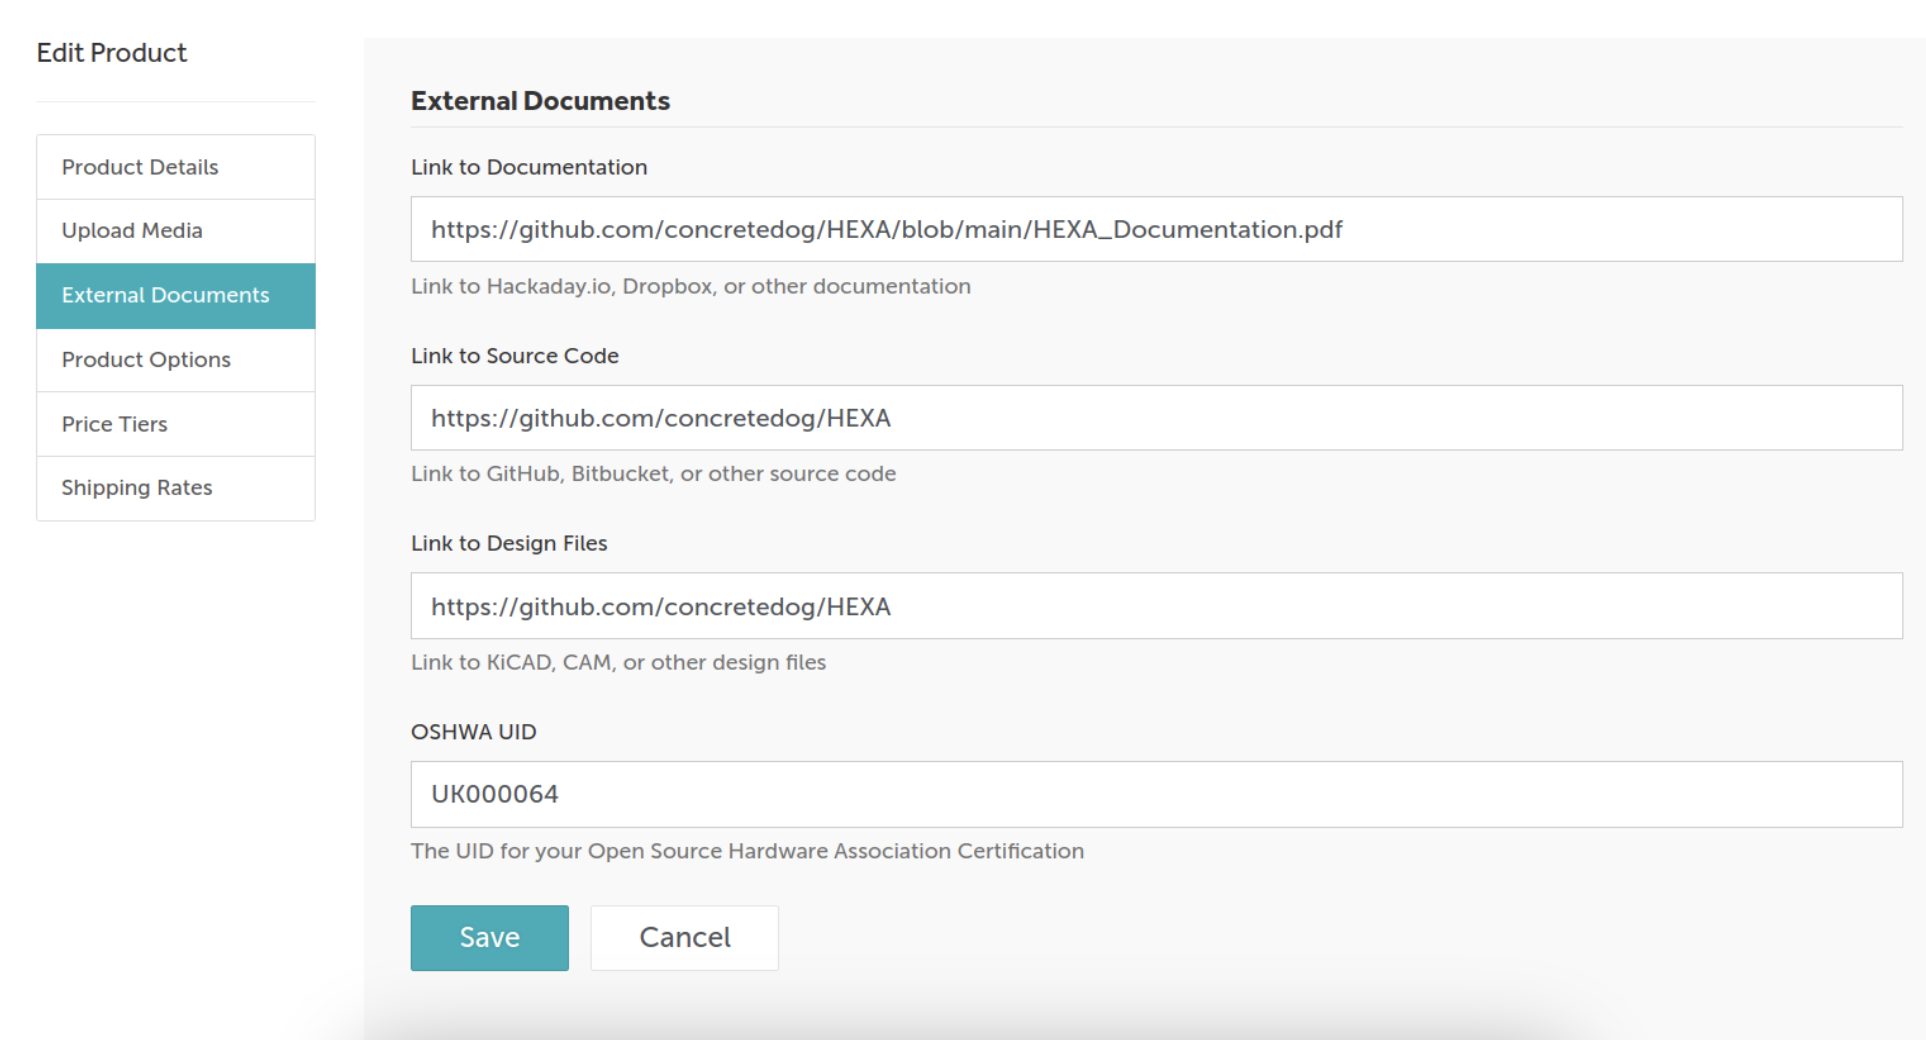
Listing a product is pretty straightforward: you fill in some details about the product, then supply links to any documentation and any source files you are sharing. Brilliantly, Tindie is also set up to promote open-source hardware projects well, so there are dialogue options to add OSHWA certification numbers, see Figure 1. You can add multiple images and also links to videos which automatically embed in the bottom of the project page. Save your product listing as a draft, and you can preview the page and check your work; it’s very similar to creating a blog post. When you are ready to launch the product you submit the product for approval and the Tindie team will take a look before setting it live on the site.
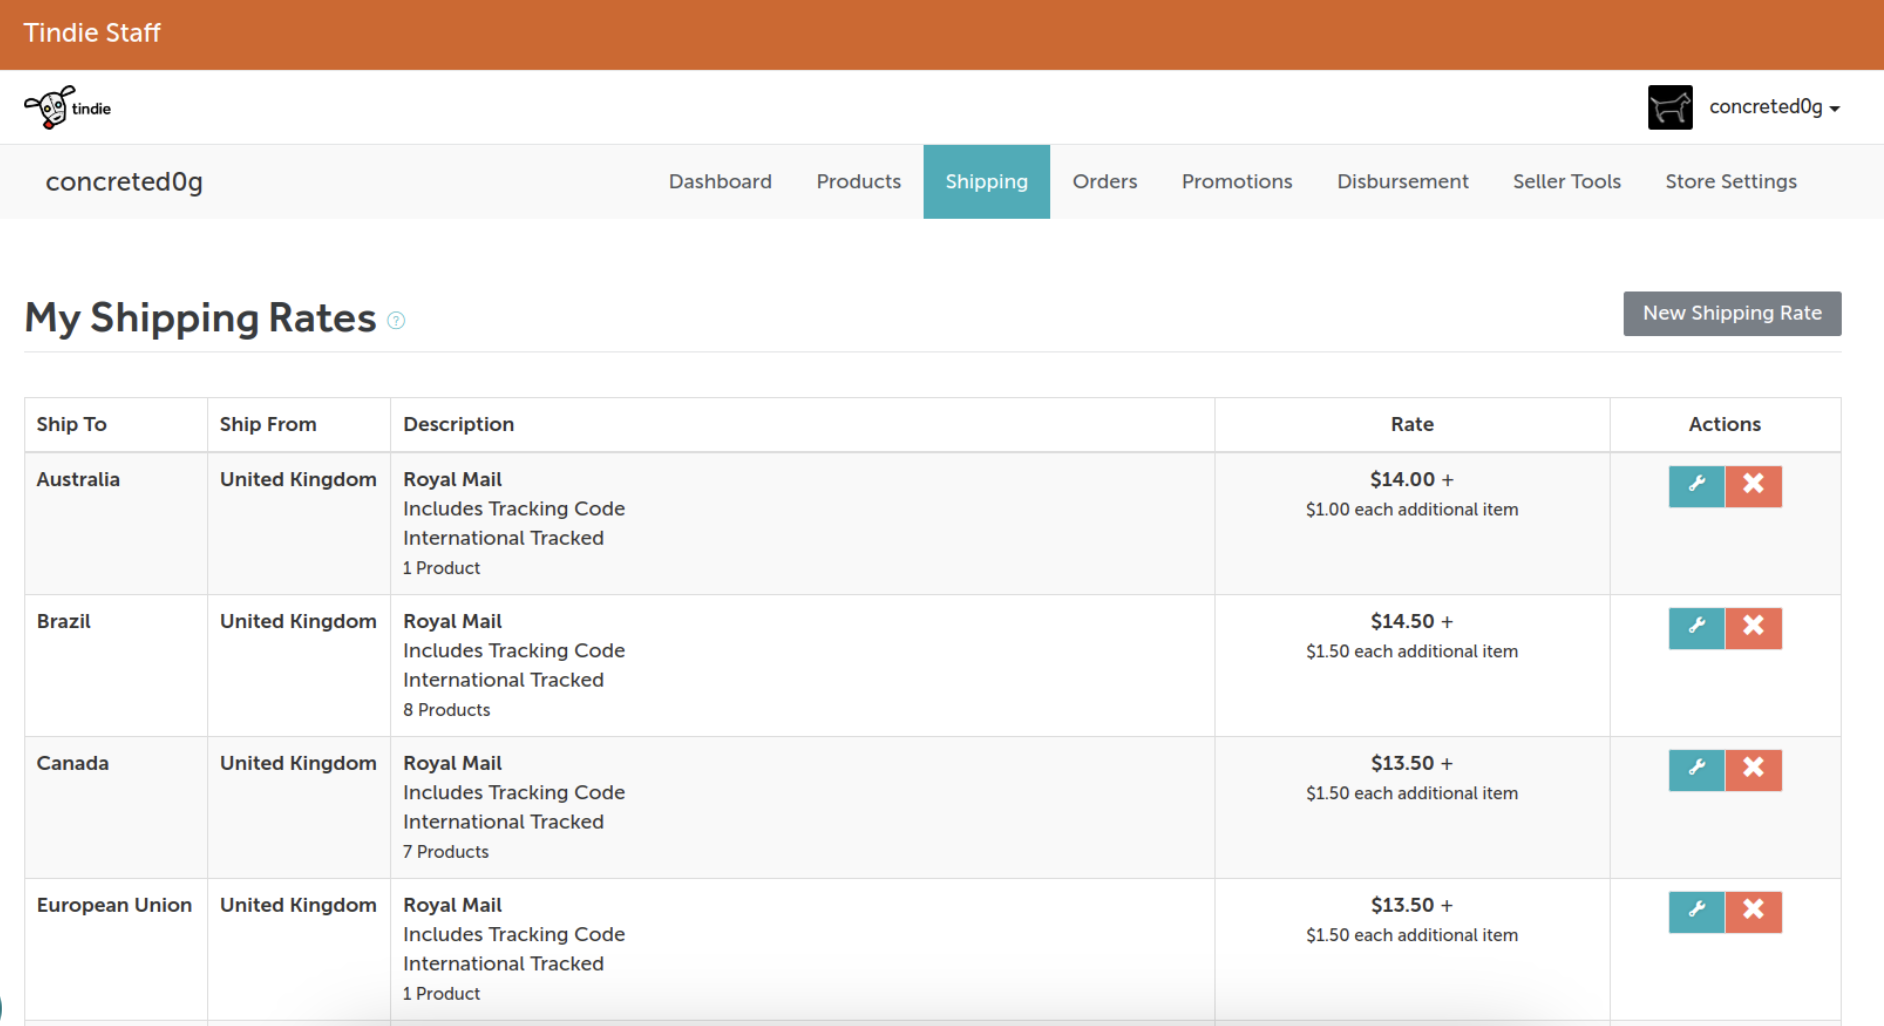
When someone orders your product you get a notification in your store menu and an email to your registered email address. You have two weeks from the time of order to ship the item and mark it as such. If you don’t ship it in that time then Tindie will refund the buyer and cancel the order. On Tindie you can add shipping options for different regions and services and then assign them to different products. This makes for a very flexible system. For example, many of my products can ship within the UK as a large letter weighing under 100 grams so can set up that postal option and then assign it to numerous products as in Figure 2.
Each shipping option has an “additional item cost,” so you can add an extra charge for additional packaging. You can use this functionality to push a postage option into a different service, so for example if someone buys one item they pay for a 100g large letter, but the additional item costs mean that if they buy three items which would weigh over 100g then the additional item cost has raised the postage price so that it covers the 250g large letter option. It takes a little thinking about, and trial and error, but it becomes pretty straightforward after a few sales. I tend to use tracked services so that items are insured and that delivery to the person is somewhat guaranteed; this perhaps loses me some sales as my shipping rates are higher, but keeps the stress levels lower! The majority of my sales are to the UK or the US but occasionally I will get a notification that someone has requested a shipping option for a product to a new region. This doesn’t guarantee a sale, but you can research shipping options to the destination and set up an option in response and the potential customer will be notified.
Yet another consideration around postage, which may be a little less obvious, is packaging and the storage of packaging. Often this can be tricky and you may well need to allocate more space than you need to store your product packaging. Many of the products I sell are small electronics, and as such the actual kit is packed into small anti-static packaging which can be shipped in a very small padded envelope. Some of the larger products require a bigger envelope, and sometimes products require a range of padded mailer envelopes to accommodate the range of options.
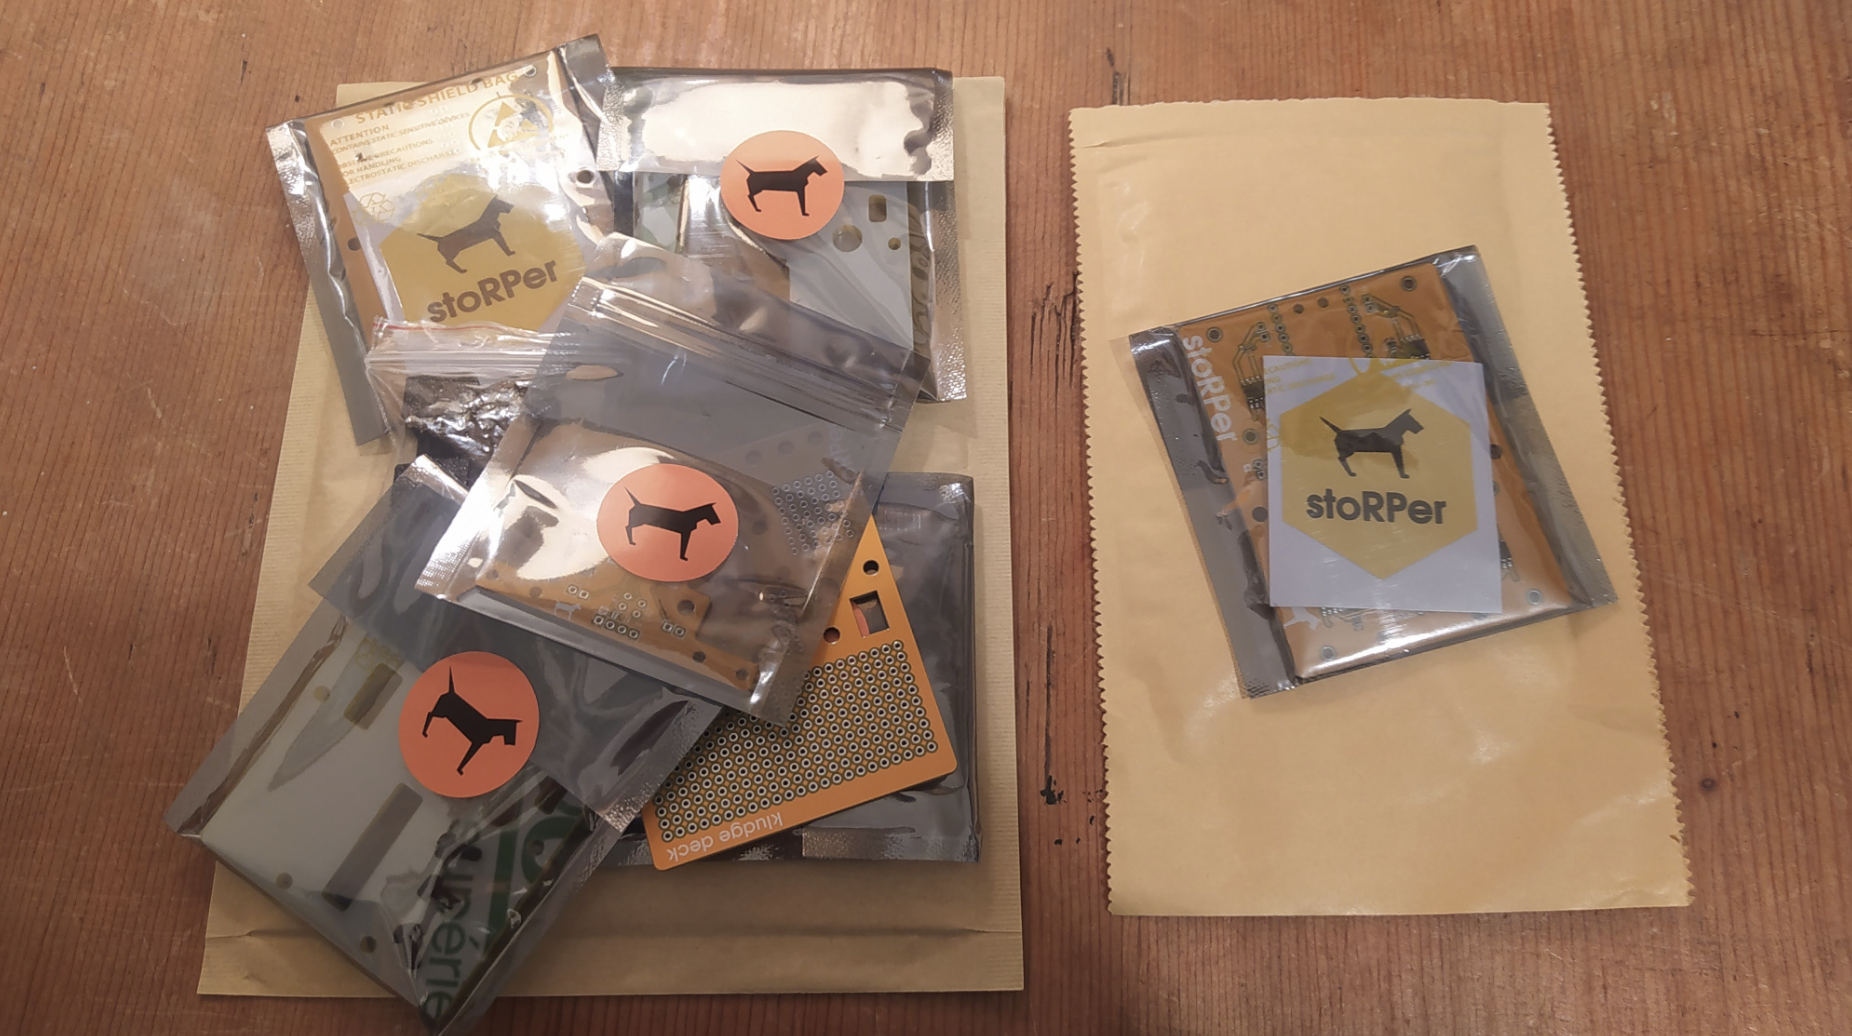
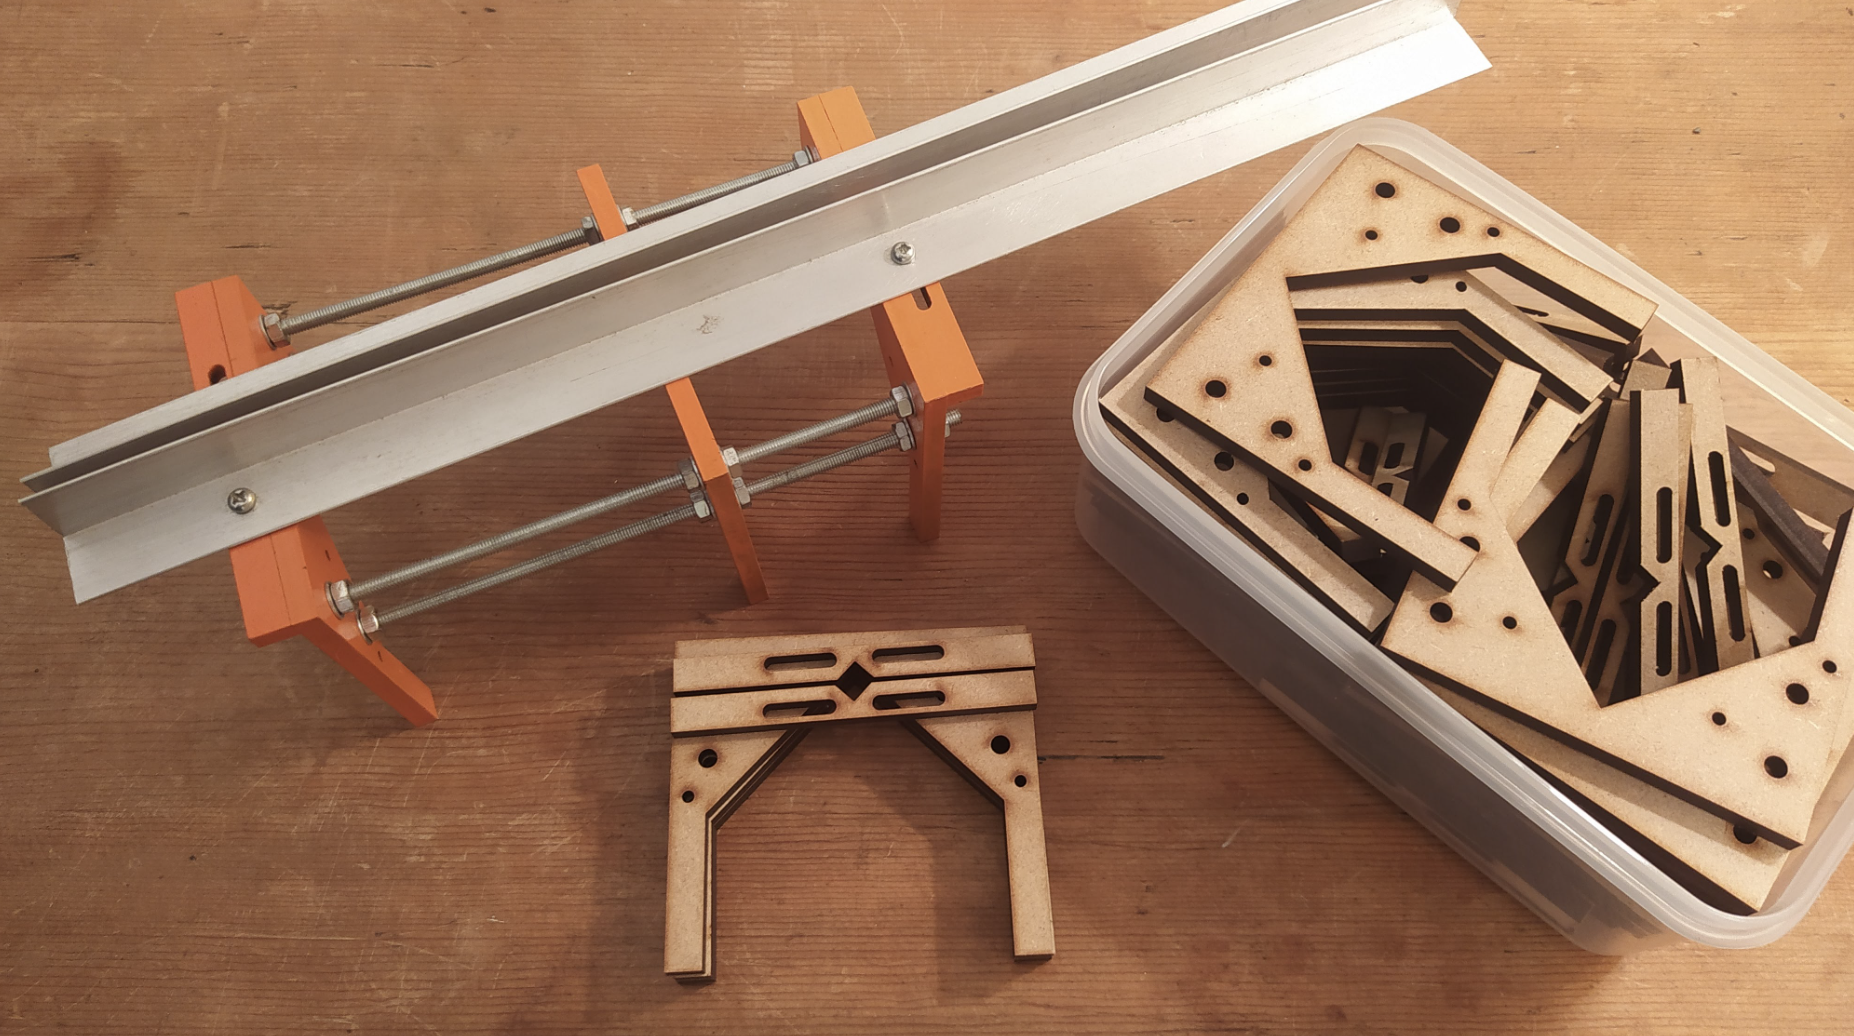
As an example I can send a basic PCB and header kit of the StoRPer robot PCB in a size 000 small padded mailer, but if I need to add 3D-printed motor mounts and a laser cut ‘deck’ as add-on options then I often need to jump to a larger envelope. If I packed the items in the smaller mailer it becomes too wide for the ‘large letter’ service, see Figure 3. It also makes sense to bulk buy your shipping packaging, and for my range of products this means the shipping packaging takes up at least as much storage space as the actual stock items, as in Figure 4.
StoRPer: Genesis Within the stock subject there are a couple of things worth considering. The first is how much stock are you capable of making and storing. I live in a pretty small and packed old Welsh mining cottage and I have physical limitations on how much space I can give to stock. When I first started and just had some of the early products like my rocketry screw switches and centre of pressure and gravity stickers, everything could fit in a shoe box. As I added products and product options this has grown somewhat. Stock storage and also stock value have affected how products and designs are sold. An example of mine is the Laser Cut Fin Jig Short Kit. The Fin Jig product is a tool that once assembled allows rocket builders to position fins onto rocket body tubes incredibly accurately. Getting fins on straight and vertical and well aligned is a key concept in getting a rocket to perform well. The jig has numerous laser cut parts and also quite a bit of metalwork in the form of longish 90° angle aluminium sections and 5mm threaded rod sections plus lots of nuts and bolts. A full kit with all the metalwork included would be heavy and costly to post, and would require me to stock and warehouse lots of long metal sections. The threaded rods and angle sections are the type of thing that can be found in most parts of the world but perhaps not everyone has access to a laser cutter. The solution therefore was the ‘short kit’ in Figure 5, which just offers the laser-cut MDF parts from which you can build the whole tool. I am sure this approach has lost me some customers, but it means that I can at least do something with the design and it has become a reasonably well sold item. I can keep around a year’s worth of stock in a shoe box and the postage is pretty affordable.
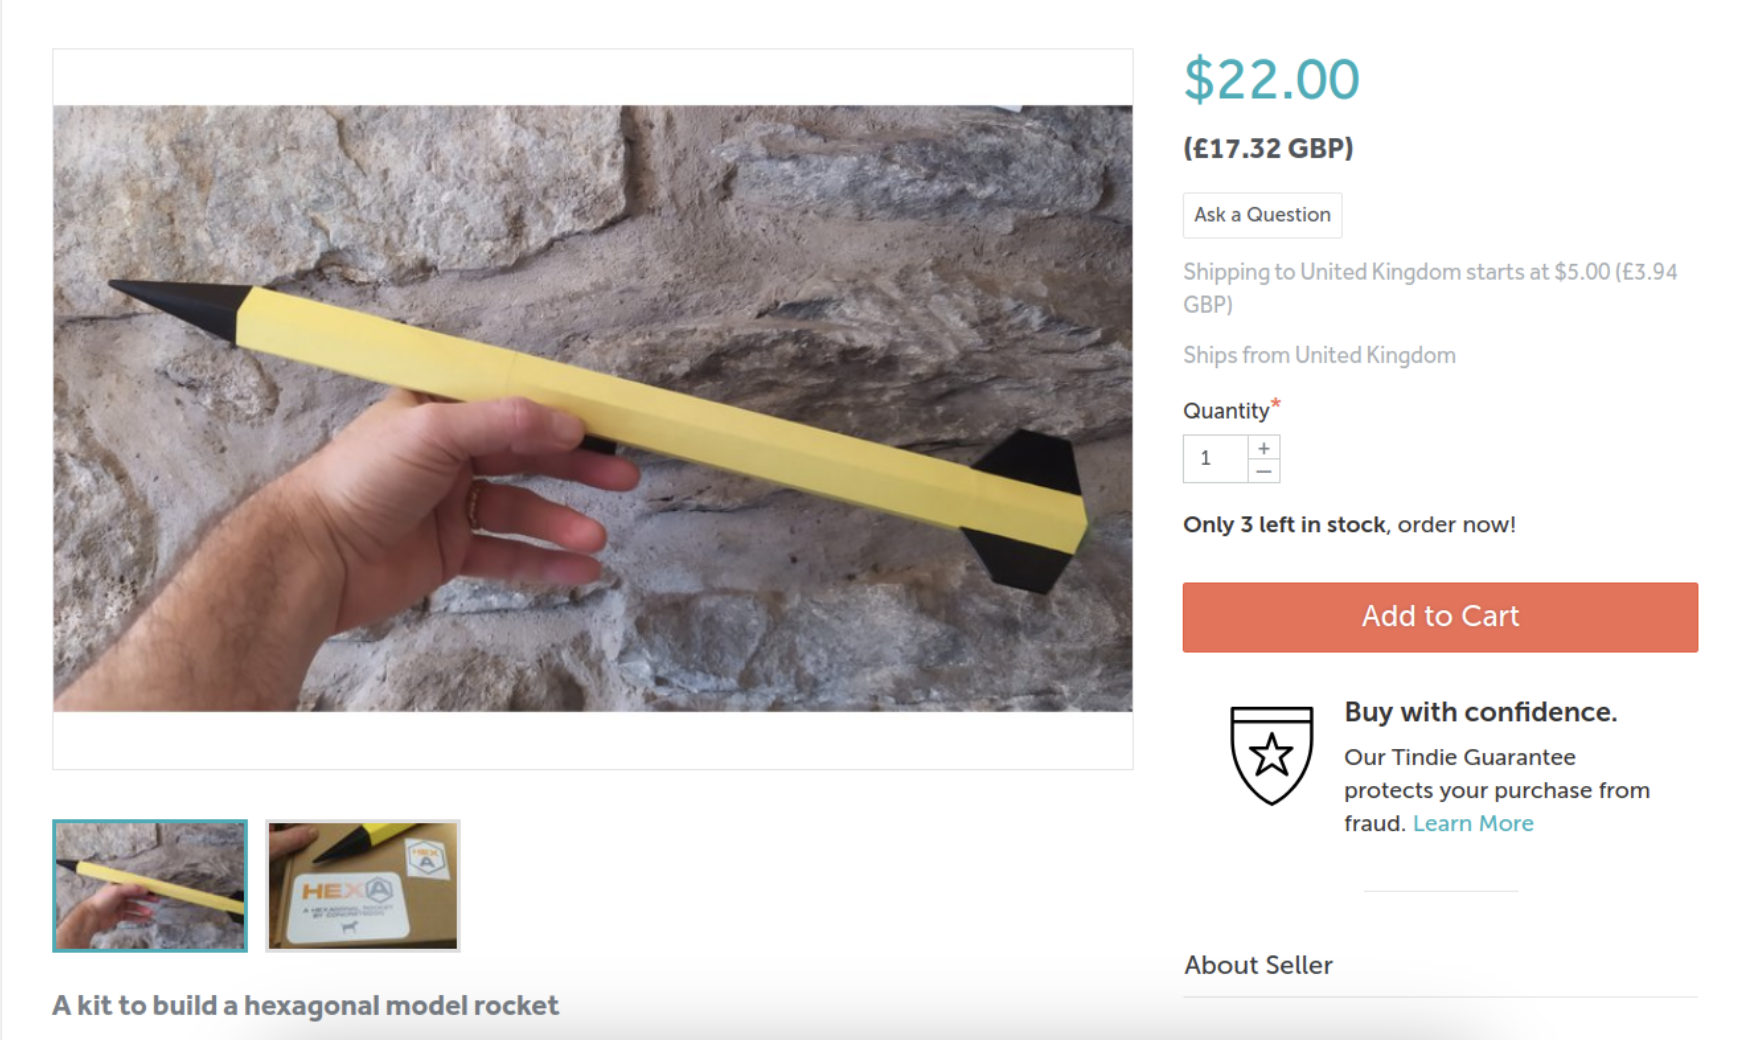
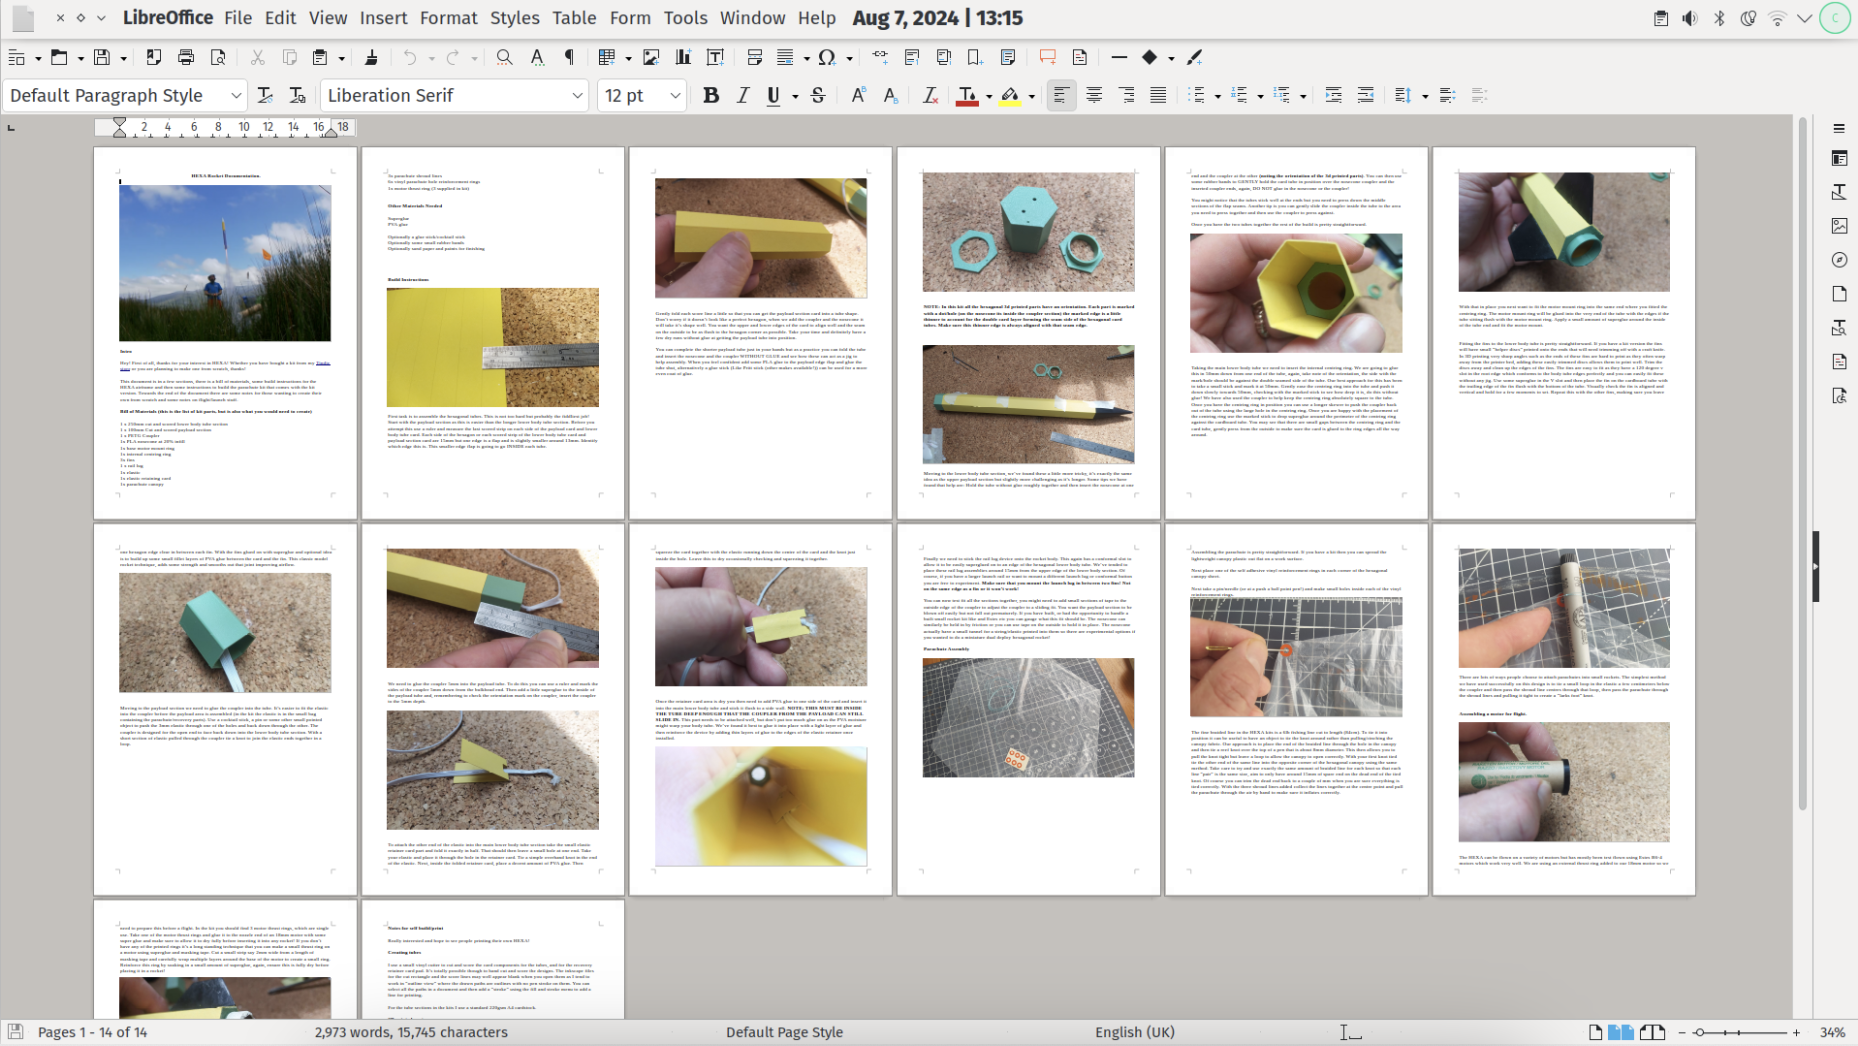
Aside from developing an item to the point you feel confident it is a quality product, documentation is a key bit of work that you need to do. Documentation has a couple of roles in a maker business. First and foremost it needs to explain the product and give the technical information that a customer might need. It also though is crucial in terms of making a sale. If there are parts of a product that seem unclear and unexplained and the potential customer can’t find an answer quickly then it is much less likely they will purchase the product. The level of documentation a product needs is hugely variable. For example I haven’t felt the need to document things like my centre of pressure and centre of gravity stickers, but the recently launched HEXA model rocket kit has a 14-page PDF about the assembly of the kit and usage, as in Figure 6.
One thing I have noticed is that you need to repeatedly make content about items that you sell to keep bringing them to the attention of potential customers. I am not particularly good at this, as I tend to really immerse myself in creating projects and products and then move on to the next idea. The people who excel at building business in this sector are those who can create content that regularly shows new features or applications of products. Wonderfully, sometimes people talk about their build of your product online, and this can serve to generate interest in your designs. This is one reason why considering open-source approaches may help, as others may be more inclined to use your project and share it.
In the Night market
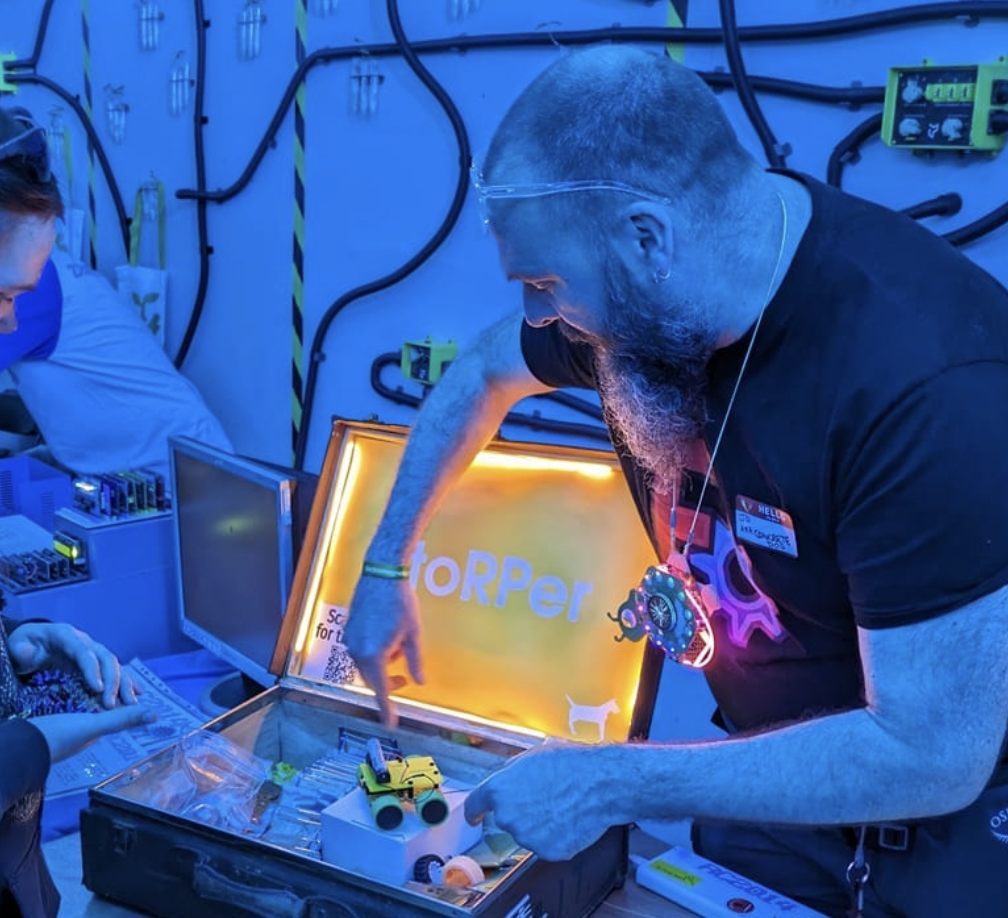
While this article has predominantly looked at Tindie and online sales, you can of course find places and events where you can sell directly to customers. If your products are less specific than mine and appeal to a general population then, of course, craft fairs and markets are a great potential source of sales. I recently applied for and was allocated space at EMF Camp’s excellent solar-punk themed night market in the Null Sector area of the festival. Even at a festival full of hacker types it’s unlikely I would do that well selling niche high-power rocketry parts, so I opted to just take StoRPer, my modular, open-source, Raspberry Pi Pico-powered robot platform. Getting into the theme, I even modified a vintage travel case to contain stock, be branded and lit: it’s in Figure 7.
I felt it was important to have a few examples of the robot built up, and you have to be prepared to talk a lot about your product and the design choices you have made. You also need to work out how you can receive money from sales – a small amount of customers will carry and use cash, but it’s far more common for people to use contactless payment. There are a few contactless reader options available for small businesses and it’s worth looking around them all. You may even find that you can manage contactless payments using a smartphone. I opted for a common solution from Sumup, where I bought a Sumup Air card reader for £40 as a one-off expense.
Sumup, and other similar services, set you up with an account and charge a small transaction fee. Contactless payments are first transferred into the Sumup account and you can then transfer the money out to whatever bank account you prefer. The card reader device connects to the Sumup application on my phone via Bluetooth, and you can quickly set up a charge/transaction in-app. This works excellently. As a side note, if you have less than perfect data coverage or Wi-Fi at an event it isn’t totally critical, so long as the contactless transaction has completed it will be logged in the application and everything will pass through when connectivity is re-established. Similarly, this means that, perhaps with the help of a USB powerbank, you can be totally off-grid!
I hope this article has inspired you to have a go at selling some of your creations. It can be challenging but also rewarding, sometimes financially, but often it’s the fact that people enjoy using your designs and product that really motivates you to make and sell more. It’s also a great way to connect and communicate with like-minded makers who are interested in similar projects to yourself.
To empower every educator to confidently bring AI into their classroom, we’ve created a new online training course called ‘Understanding AI for educators’ in collaboration with Google DeepMind. By taking this course, you will gain a practical understanding of the crossover between AI tools and education. The course includes a conceptual look at what AI is, how AI systems are built, different approaches to problem-solving with AI, and how to use current AI tools effectively and ethically.
In this post, I will share our approach to designing the course and some of the key considerations behind it — all of which you can apply today to teach your learners about AI systems.
Design decisions: Nurturing knowledge and confidence
We know educators have different levels of confidence with AI tools — we designed this course to help create a level playing field. Our goal is to uplift every educator, regardless of their prior experience, to a point where they feel comfortable discussing AI in the classroom.
AI literacy is key to understanding the implications and opportunities of AI in education. The course provides educators with a solid conceptual foundation, enabling them to ask the right questions and form their own perspectives.
As with all our AI learning materials that are part of Experience AI, we’ve used specific design principles for the course:
Choosing language carefully: We never anthropomorphise AI systems, replacing phrases like “The model understands” with “The model analyses”. We do this to make it clear that AI is just a computer system, not a sentient being with thoughts or feelings.
Accurate terminology: We avoid using AI as a singular noun, opting instead for the more accurate ‘AI tool’ when talking about applications or ‘AI system’ when talking about underlying component parts.
Ethics: The social and ethical impacts of AI are not an afterthought but highlighted throughout the learning materials.
Three main takeaways
The course offers three main takeaways any educator can apply to their teaching about AI systems.
1. Communicating effectively about AI systems
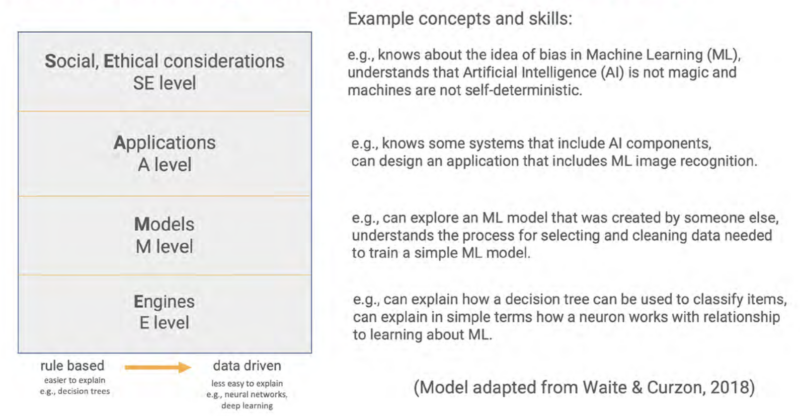
Deciding the level of detail to use when talking about AI systems can be difficult — especially if you’re not very confident about the topic. The SEAME framework offers a solution by breaking down AI into 4 levels: social and ethical, application, model, and engine. Educators can focus on the level most relevant to their lessons and also use the framework as a useful structure for classroom discussions.
You might discuss the impact a particular AI system is having on society, without the need to explain to your learners how the model itself has been trained or tested. Equally, you might focus on a specific machine learning model to look at where the data used to create it came from and consider the effect the data source has on the output.
2. Problem-solving approaches: Predictive vs. generative AI
AI applications can be broadly separated into two categories: predictive and generative. These two types of AI model represent two vastly different approaches to problem-solving.
People create predictive AI models to make predictions about the future. For example, you might create a model to make weather forecasts based on previously recorded weather data, or to recommend new movies to you based on your previous viewing history. In developing predictive AI models, the problem is defined first — then a specific dataset is assembled to help solve it. Therefore, each predictive AI model usually is only useful for a small number of applications.
Rick Payne and team / Better Images of AI / Ai is… Banner / CC-BY 4.0
Generative AI models are used to generate media (such as text, code, images, or audio). The possible applications of these models are much more varied because people can use media in many different kinds of ways. You might say that the outputs of generative AI models could be used to solve — or at least to partially solve — any number of problems, without these problems needing to be defined before the model is created.
3. Using generative AI tools: The OCEAN process
Generative AI systems rely on user prompts to generate outputs. The OCEAN process, outlined in the course, offers a simple yet powerful framework for prompting AI tools like Gemini, Stable Diffusion or ChatGPT.
Yasmine Boudiaf & LOTI / Better Images of AI / Data Processing / CC-BY 4.0
The first three steps of the process help you write better prompts that will result in an output that is as close as possible to what you are looking for, while the last two steps outline how to improve the output:
Objective: Clearly state what you want the model to generate
Context: Provide necessary background information
Examples: Offer specific examples to fine-tune the model’s output
Assess: Evaluate the output
Negotiate: Refine the prompt to correct any errors in the output
The final step in using any generative AI tool should be to closely review or edit the output yourself. These tools will very quickly get you started but you’ll always have to rely on your own human effort to ensure the quality of your work.
Helping educators to be critical users
We believe the knowledge and skills our ‘Understanding AI for educators’ course teaches will help any educator determine the right AI tools and concepts to bring into their classroom, regardless of their specialisation. Here’s what one course participant had to say:
“From my inexperienced viewpoint, I kind of viewed AI as a cheat code. I believed that AI in the classroom could possibly be a real detriment to students and eliminate critical thinking skills.
After learning more about AI [on the course] and getting some hands-on experience with it, my viewpoint has certainly taken a 180-degree turn. AI definitely belongs in schools and in the workplace. It will take time to properly integrate it and know how to ethically use it. Our role as educators is to stay ahead of this trend as opposed to denying AI’s benefits and falling behind.” – ‘Understanding AI for educators’ course participant
All our Experience AI resources — including this online course and the teaching materials — are designed to foster a generation of AI-literate educators who can confidently and ethically guide their students in navigating the world of AI.
You can sign up to the course for free here:
A version of this article also appears in Hello World issue 25, which will be published on Monday 23 September and will focus on all things generative AI and education.
As discussions of how artificial intelligence (AI) will impact teaching, learning, and assessment proliferate, I was thrilled to be able to add one of my own research projects to the mix. As a research scientist at the Raspberry Pi Foundation, I’ve been working on a pilot research study in collaboration with Jane Waite to explore the topic of program error messages (PEMs).
PEMs can be a significant barrier to learning for novice coders, as they are often confusing and difficult to understand. This can hinder troubleshooting and progress in coding, and lead to frustration.
Recently, various teams have been exploring how generative AI, specifically large language models (LLMs), can be used to help learners understand PEMs. My research in this area specifically explores secondary teachers’ views of the explanations of PEMs generated by a LLM, as an aid for learning and teaching programming, and I presented some of my results in our ongoing seminar series.
Understanding program error messages is hard at the start
I started the seminar by setting the scene and describing the current background of research on novices’ difficulty in using PEMs to fix their code, and the efforts made to date to improve these. The three main points I made were that:
PEMs are often difficult to decipher, especially by novices, and there’s a whole research area dedicated to identifying ways to improve them.
Recent studies have employed LLMs as a way of enhancing PEMs. However, the evidence on what makes an ‘effective’ PEM for learning is limited, variable, and contradictory.
There is limited research in the context of K–12 programming education, as well as research conducted in collaboration with teachers to better understand the practical and pedagogical implications of integrating LLMs into the classroom more generally.
My pilot study aims to fill this gap directly, by reporting K–12 teachers’ views of the potential use of LLM-generated explanations of PEMs in the classroom, and how their views fit into the wider theoretical paradigm of feedback literacy.
What did the teachers say?
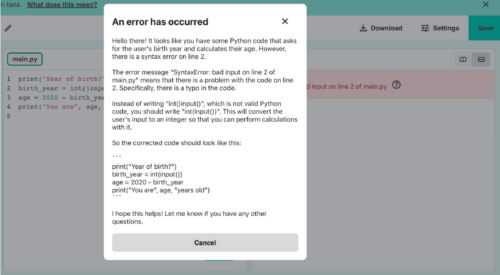
To conduct the study, I interviewed eight expert secondary computing educators. The interviews were semi-structured activity-based interviews, where the educators got to experiment with a prototype version of the Foundation’s publicly available Code Editor. This version of the Code Editor was adapted to generate LLM explanations when the question mark next to the standard error message is clicked (see Figure 1 for an example of a LLM-generated explanation). The Code Editor version called the OpenAI GPT-3.5 interface to generate explanations based on the following prompt: “You are a teacher talking to a 12-year-old child. Explain the error {error} in the following Python code: {code}”.
Figure 1: The Foundation’s Code Editor with LLM feedback prototype.
Fifteen themes were derived from the educators’ responses and these were split into five groups (Figure 2). Overall, the educators’ views of the LLM feedback were that, for the most part, a sensible explanation of the error messages was produced. However, all educators experienced at least one example of invalid content (LLM “hallucination”). Also, despite not being explicitly requested in the LLM prompt, a possible code solution was always included in the explanation.
Figure 2: Themes and groups derived from teachers’ responses.
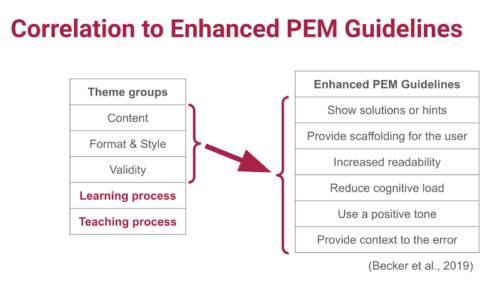
Matching the themes to PEM guidelines
Next, I investigated how the teachers’ views correlated to the research conducted to date on enhanced PEMs. I used the guidelines proposed by Brett Becker and colleagues, which consolidate a lot of the research done in this area into ten design guidelines. The guidelines offer best practices on how to enhance PEMs based on cognitive science and educational theory empirical research. For example, they outline that enhanced PEMs should provide scaffolding for the user, increase readability, reduce cognitive load, use a positive tone, and provide context to the error.
Out of the 15 themes identified in my study, 10 of these correlated closely to the guidelines. However, the 10 themes that correlated well were, for the most part, the themes related to the content of the explanations, presentation, and validity (Figure 3). On the other hand, the themes concerning the teaching and learning process did not fit as well to the guidelines.
Figure 3: Correlation between teachers’ responses and enhanced PEM design guidelines.
Does feedback literacy theory fit better?
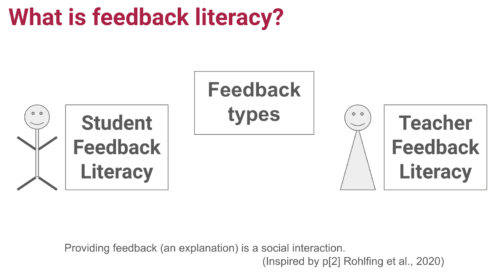
However, when I looked at feedback literacy theory, I was able to correlate all fifteen themes — the theory fits.
Feedback literacy theory positions the feedback process (which includes explanations) as a social interaction, and accounts for the actors involved in the interaction — the student and the teacher — as well as the relationships between the student, the teacher, and the feedback. We can explain feedback literacy theory using three constructs: feedback types, student feedback literacy, and teacher feedback literacy (Figure 4).
Figure 4: Feedback literacy at the intersection between feedback types, student feedback literacy, and teacher feedback literacy.
From the feedback literacy perspective, feedback can be grouped into four types: telling, guiding, developing understanding, and opening up new perspectives. The feedback type depends on the role of the student and teacher when engaging with the feedback (Figure 5).
From the student perspective, the competencies and dispositions students need in order to use feedback effectively can be stated as: appreciating the feedback processes, making judgements, taking action, and managing affect. Finally, from a teacher perspective, teachers apply their feedback literacy skills across three dimensions: design, relational, and pragmatic.
In short, according to feedback literacy theory, effective feedback processes entail well-designed feedback with a clear pedagogical purpose, as well as the competencies students and teachers need in order to make sense of the feedback and use it effectively.
This theory therefore provided a promising lens for analysing the educators’ perspectives in my study. When the educators’ views were correlated to feedback literacy theory, I found that:
Educators prefer the LLM explanations to fulfil a guiding and developing understanding role, rather than telling. For example, educators prefer to either remove or delay the code solution from the explanation, and they like the explanations to include keywords based on concepts they are teaching in the classroom to guide and develop students’ understanding rather than tell.
Related to students’ feedback literacy, educators talked about the ways in which the LLM explanations help or hinder students to make judgements and action the feedback in the explanations. For example, they talked about how detailed, jargon-free explanations can help students make judgments about the feedback, but invalid explanations can hinder this process. Therefore, teachers talked about the need for ways to manage such invalid instances. However, for the most part, the educators didn’t talk about eradicating them altogether. They talked about ways of flagging them, using them as counter-examples, and having visibility of them to be able to address them with students.
Finally, from a teacher feedback literacy perspective, educators discussed the need for professional development to manage feedback processes inclusive of LLM feedback (design) and address issues resulting from reduced opportunities to interact with students (relational and pragmatic). For example, if using LLM explanations results in a reduction in the time teachers spend helping students debug syntax errors from a pragmatic time-saving perspective, then what does that mean for the relationship they have with their students?
Conclusion from the study
By correlating educators’ views to feedback literacy theory as well as enhanced PEM guidelines, we can take a broader perspective on how LLMs might not only shape the content of the explanations, but the whole social interaction around giving and receiving feedback. Investigating ways of supporting students and teachers to practise their feedback literacy skills matters just as much, if not more, than focusing on the content of PEM explanations.
This study was a first-step exploration of eight educators’ views on the potential impact of using LLM explanations of PEMs in the classroom. Exactly what the findings of this study mean for classroom practice remains to be investigated, and we also need to examine students’ views on the feedback and its impact on their journey of learning to program.
If you want to hear more, you can watch my seminar:
If any of these ideas resonated with you as an educator, student, or researcher, do reach out — we’d love to hear from you. You can contact me directly at veronica.cucuiat@raspberrypi.org or drop us a line in the comments below.
Join our next seminar
The focus of our ongoing seminar series is on teaching programming with or without AI. Check out the schedule of our upcoming seminars.
To take part in the next seminar, click the button below to sign up, and we will send you information about how to join. We hope to see you there.
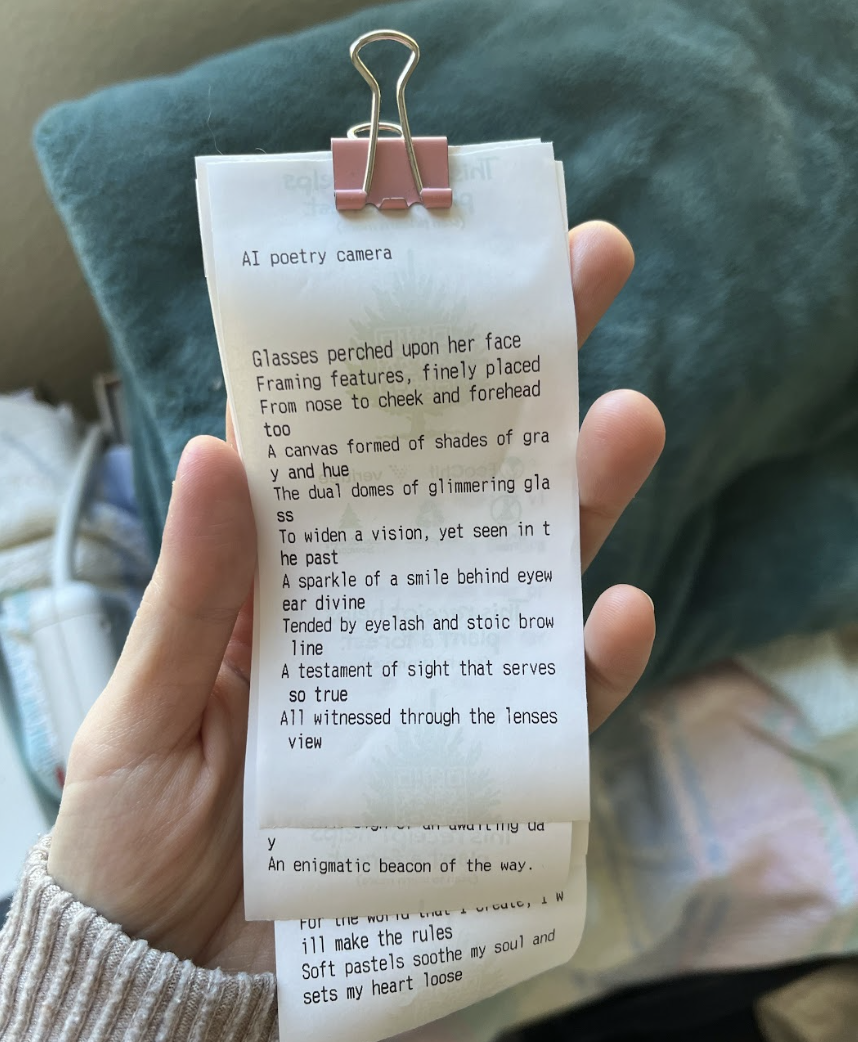
The Poetry Camera began life as an ‘AI classifier’ and was partly inspired by Kelin’s friend Susi Fu’s Artist and Machine performances examining how artists and computers can learn from each other. “Susie would draw sketches of the person standing in front of her, while a machine – using Raspberry Pi – printed out AI-drawn sketches of the same subject.”
An MIT computer science graduate turned digital product designer, Kelin took charge of the Raspberry Pi prototyping, learning how to solder, plus some basic electronics, while designing her first PCB (a HAT for Raspberry Pi). The initial cardboard design took only a few days to complete.
Industrial designer Ryan, meanwhile, has worked as a toy designer and in a creative technologist-type design role at Google where he learned “Javascript and a bit of Python,” and was introduced to Raspberry Pi for prototyping, which he’d “definitely recommend” for anyone who wants to build hardware prototypes that need a logic layer.
He was “ecstatic to create something from scratch, and prototype it on his home 3D printer”. Having started out as pen and paper sketches, Poetry Camera’s form was created and iterated on in Rhino.
Power play
As “the brain of the whole device,” Raspberry Pi Zero 2 W connects to a Camera Module 3 and a thermal printer via UART. It calls on remote AI models via an API for pointers on poem writing. The idea was that they’d get faster responses this way, but this approach necessitates connecting to Wi-Fi hotspots, which could be challenging depending on where they took Poetry Camera out and about. “In ideal conditions, it works like a well-oiled machine but Wi-Fi networks can be very spotty, especially at crowded events where there’s a lot of signal interference”. Six AA batteries keep everything powered (the thermal printer can drain batteries fast) with a buck converter to step down the voltage for Raspberry Pi. Kelin and Ryan chose Raspberry Pi for its wireless connectivity and the volume of tutorials on how to interface with cameras and thermal printers, starting with Raspberry Pi 3B+ before switching to Zero 2 W “since it hits a sweet spot in terms of small size and fast processing power”. They made use of Adafruit’s Python Thermal Printer library and found ChatGPT “very well versed” – pun hopefully intended – for creating code. “We were able to ask a question in our own naive way and get a custom tailored response that often works right out of the box, instantly.”
The pair are constantly tweaking and updating Poetry Camera. It’s already on version 4, and its creators have been delighted by how well it’s been received. “In the future, we’re looking forward to letting people customise their cameras’ outputs – by updating the poem prompts, or adding images, or using their own servers.”
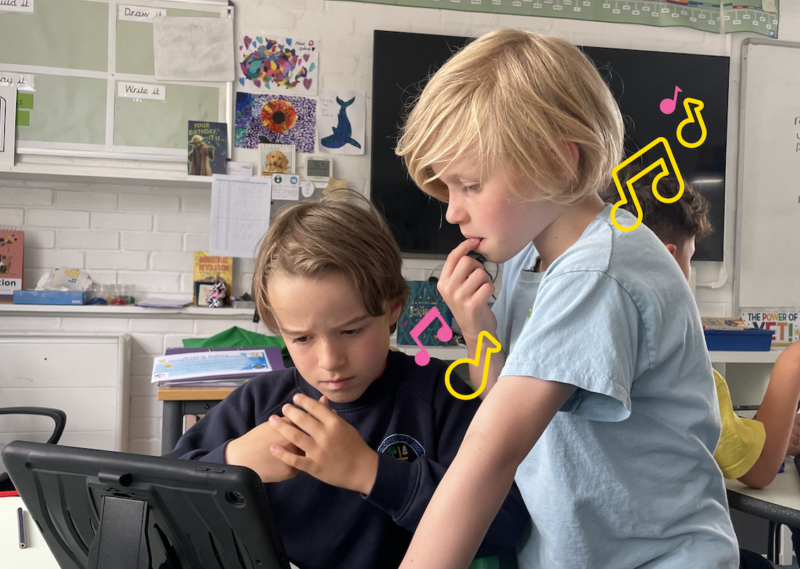
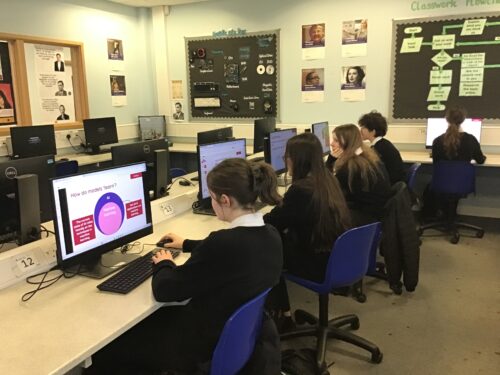
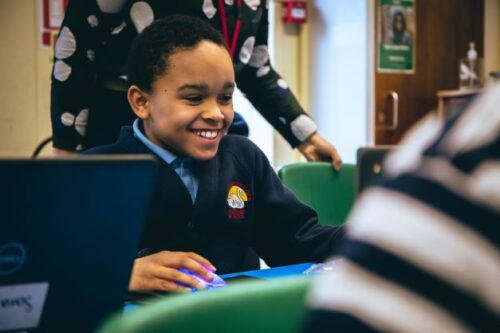
“I’ve enjoyed actually learning about what AI is and how it works, because before I thought it was just a scary computer that thinks like a human,” a student learning with Experience AI at King Edward’s School, Bath, UK, told us.
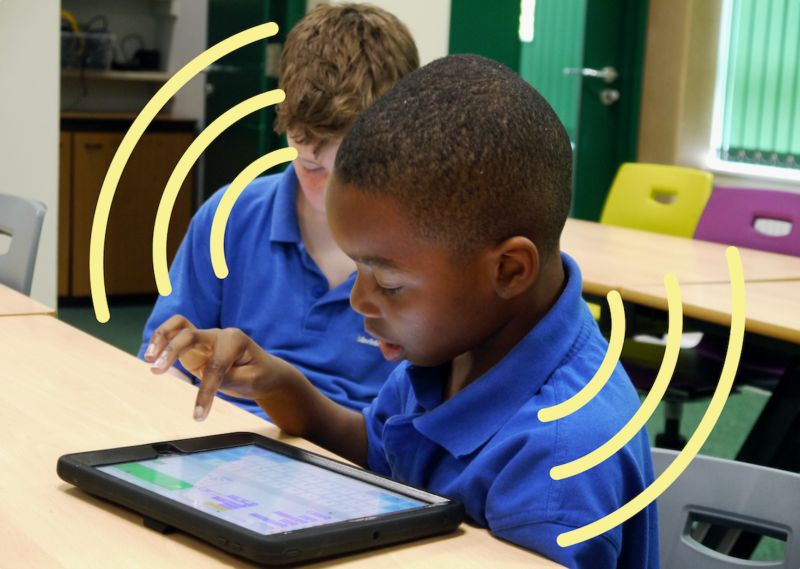
This is the essence of what we aim to do with our Experience AI lessons, which demystify artificial intelligence (AI) and machine learning (ML). Through Experience AI, teachers worldwide are empowered to confidently deliver engaging lessons with a suite of resources that inspire and educate 11- to 14-year-olds about AI and the role it could play in their lives.
“I learned new things and it changed my mindset that AI is going to take over the world.” – Student, Malaysia
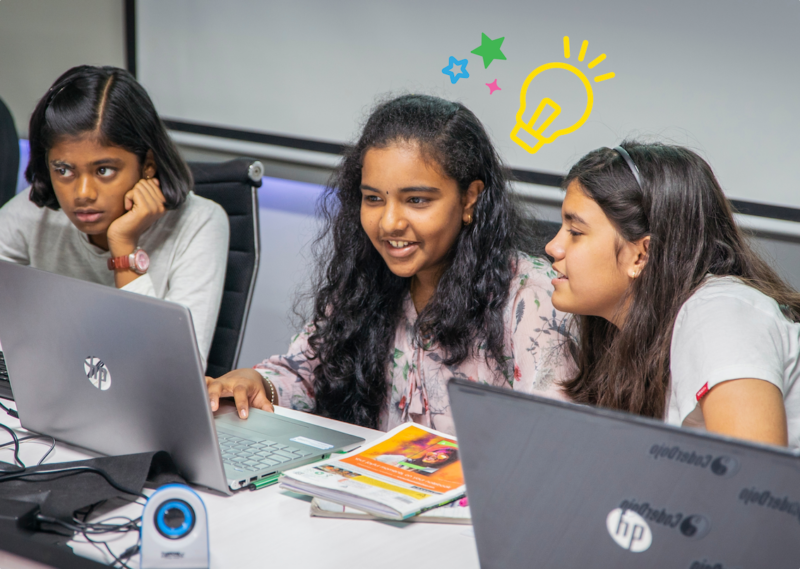
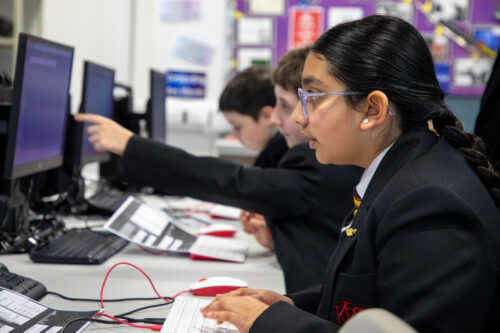
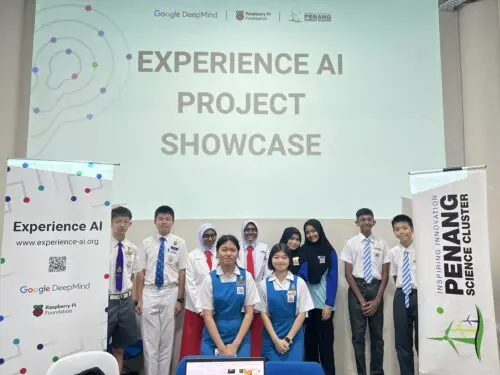
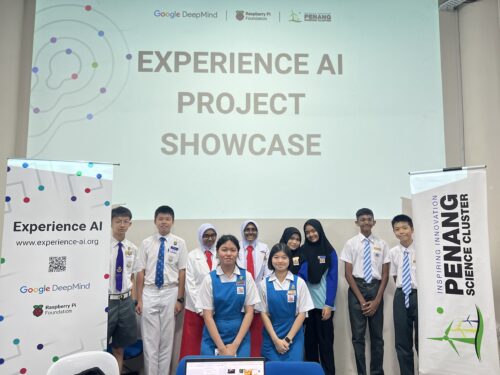
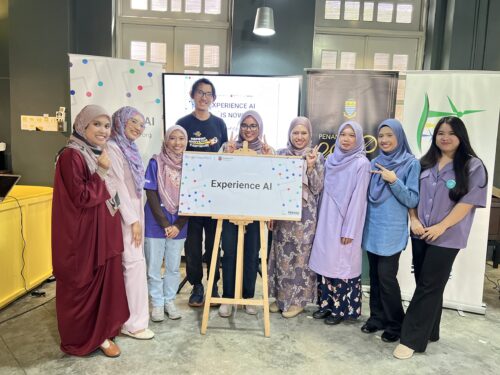
Experience AI students in Malaysia
Developed by us with Google DeepMind, our first set of Experience AI lesson resources was aimed at a UK audience and launched in April 2023. Next we released tailored versions of the resources for 5 other countries, working in close partnership with organisations in Malaysia, Kenya, Canada, Romania, and India. Thanks to new funding from Google.org, we’re now expanding Experience AI for 16 more countries and creating new resources on AI safety, with the aim of providing leading-edge AI education for more than 2 million young people across Europe, the Middle East, and Africa.
In this blog post, you’ll hear directly from students and teachers about the impact the Experience AI lessons have had so far.
Case study: Experience AI in Malaysia
Penang Science Cluster in Malaysia is among the first organisations we’ve partnered with for Experience AI. Speaking to Malaysian students learning with Experience AI, we found that the lessons were often very different from what they had expected.
Launch of Experience AI in Malaysia
“I actually thought it was going to be about boring lectures and not much about AI but more on coding, but we actually got to do a lot of hands-on activities, which are pretty fun. I thought AI was just about robots, but after joining this, I found it could be made into chatbots or could be made into personal helpers.” – Student, Malaysia
“Actually, I thought AI was mostly related to robots, so I was expecting to learn more about robots when I came to this programme. It widened my perception on AI.” – Student, Malaysia.
The Malaysian government actively promotes AI literacy among its citizens, and working with local education authorities, Penang Science Cluster is using Experience AI to train teachers and equip thousands of young people in the state of Penang with the understanding and skills to use AI effectively.
“We envision a future where AI education is as fundamental as mathematics education, providing students with the tools they need to thrive in an AI-driven world”, says Aimy Lee, Chief Operating Officer at Penang Science Cluster. “The journey of AI exploration in Malaysia has only just begun, and we’re thrilled to play a part in shaping its trajectory.”
Giving non-specialist teachers the confidence to introduce AI to students
“Our Key Stage 3 Computing students now feel immensely more knowledgeable about the importance and place that AI has in their wider lives. These lessons and activities are engaging and accessible to students and educators alike, whatever their specialism may be.” – Dave Cross, North Liverpool Academy, UK
“The feedback we’ve received from both teachers and learners has been overwhelmingly positive. They consistently rave about how accessible, fun, and hands-on these resources are. What’s more, the materials are so comprehensive that even non-specialists can deliver them with confidence.” – Storm Rae, The National Museum of Computing, UK
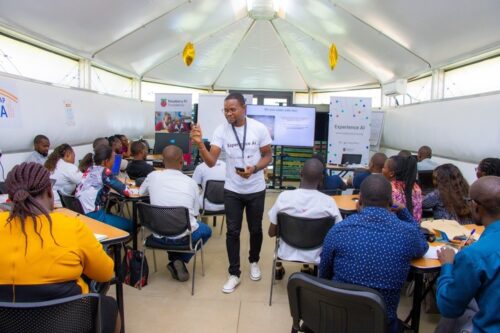
Experience AI teacher training in Kenya
“[The lessons] go above and beyond to ensure that students not only grasp the material but also develop a genuine interest and enthusiasm for the subject.” – Teacher, Changamwe Junior School, Mombasa, Kenya
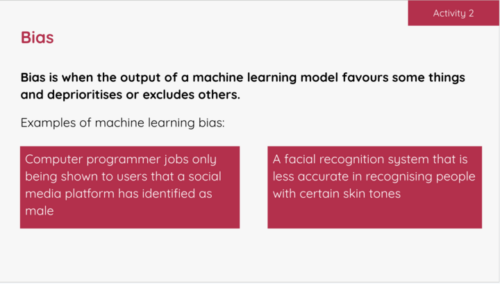
Sparking debates on bias and the limitations of AI
When learners gain an understanding of how AI works, it gives them the confidence to discuss areas where the technology doesn’t work well or its output is incorrect. These classroom debates deepen and consolidate their knowledge, and help them to use AI more critically.
“Students enjoyed the practical aspects of the lessons, like categorising apples and tomatoes. They found it intriguing how AI could sometimes misidentify objects, sparking discussions on its limitations. They also expressed concerns about AI bias, which these lessons helped raise awareness about. I didn’t always have all the answers, but it was clear they were curious about AI’s implications for their future.” – Tracey Mayhead, Arthur Mellows Village College, Peterborough, UK
Experience AI students in UK
“The lessons that we trialled took some of the ‘magic’ out of AI and started to give the students an understanding that AI is only as good as the data that is used to build it.” – Jacky Green, Waldegrave School, UK
“I have enjoyed learning about how AI is actually programmed, rather than just hearing about how impactful and great it could be.” – Student, King Edward’s School, Bath, UK
“It has changed my outlook on AI because now I’ve realised how much AI actually needs human intelligence to be able to do anything.” – Student, Arthur Mellows Village College, Peterborough, UK
“I didn’t really know what I wanted to do before this but now knowing more about AI, I probably would consider a future career in AI as I find it really interesting and I really liked learning about it.” – Student, Arthur Mellows Village College, Peterborough, UK
If you’d like to get involved with Experience AI as an educator and use our free lesson resources with your class, you can start by visiting experience-ai.org.
A microSD slot extender enables easy access, while an adapter board extends Raspberry Pi 5’s USB-C power port and converts its micro-HDMI outputs to full-size HDMI ones. It also houses a button battery for the real-time clock.
An IO expander board extends the GPIO pins, powers the two RGB fans, and connects the mini OLED. Then there’s an NVMe board to add an SSD (not supplied), and a power converter connected to a metal button that permits easy shutdown.
Power and control
Upon first power up, the fans spin continually. For full control of these and the RGB LEDs, you need to install the Pironman 5 software. This then creates a handy web dashboard for detailed system monitoring and the option to switch between several fan modes. Key stats are also shown on the mini OLED.
Cooling performance is impressive: in a five-minute stress test of all four cores, the CPU temperature maxed out at just above 60°C. Wi-Fi signal strength and quality does suffer a little due to the metal parts of the case, but it’s fine when kept reasonably close to the router.
Verdict
9/10
Quality components and detailed documentation make for a robust, beautiful cooling case with excellent performance.
Features
Tower cooler with PWM fan, 2 × RGB fans with dust filters, 0.96-inch OLED, NVMe M.2 SSD board, 2 × full-size HDMI ports, power button, RTC battery.
Registration is now open for the European Astro Pi Challenge 2024/25! The Astro Pi Challenge, an ESA Education project run in collaboration with us here at the Raspberry Pi Foundation, offers young people the incredible opportunity to write computer programs that will run in space.
Young people can take part in two exciting missions for beginners and more experienced coders, and send their code to run on special Raspberry Pi computers, called Astro Pis, on board the International Space Station (ISS).
Meet the new Astro Pi ambassador, Sławosz Uznański
Sławosz UznańskiSławosz Uznański at the European Space Agency
We are delighted that new ESA project astronaut Sławosz Uznański will be the ambassador for this year’s Astro Pi Challenge. Sławosz, born in Poland in 1984, has a background in space systems engineering and has conducted research in radiation effects. He recently served as the Engineer in Charge of CERN’s largest accelerator, the Large Hadron Collider.
Mission Zero: Send your pixel art into space
In Mission Zero, young people create beautiful pixel art to display on the Astro Pis’ LED screens. This mission requires no prior experience of Python coding, and it can be completed in around an hour.
Pixel art examples by Mission Zero 2023/24 participants
To take part, young people design and code pixel art inspired by nature on Earth and beyond, to display on the Astro Pi computers for the astronauts on the ISS to see as they go about their daily tasks.
Using our step-by-step Mission Zero project guide, young people will learn to create simple Python programs in which they will code with variables and use the colour sensors on the Astro Pis to change the background colour in their images. To help your teams create their designs, check out the examples from teams that took part in Mission Zero in 2023/24 in the project guide.
Young people can create their Mission Zero programs individually or in teams of up to 4 people, and this year, we have added a save function for young people as they code. This will make it easier for mentors to run Mission Zero over more than one session, and also means that young people can finish their projects at home. They will need to use your classroom code and their team name to load their saved projects.
Mission Space Lab: Calculate the speed of the ISS
Mission Space Lab asks teams to solve a real-world scientific task in space. It is ideally suited to young people who would like to learn more about space science and stretch their programming skills.
A photo of Mexico taken using an Astro Pi computer during a team’s experiment in Mission Space Lab 2023/24
In Mission Space Lab this year, the task for teams of 2 to 6 young people is to calculate the speed at which the International Space Station is travelling — as accurately as possible. Teams need to write a Python program that:
Collects data from the Astro Pi computers’ sensors or cameras about the orientation and motion of the ISS as it orbits the Earth, and
Uses this data to calculate the travel speed
The Astro Pi computers at a window in the International Space Station.
This year we have created a new way for teams to test their programs, with an online version of the Astro Pi Replay tool. All teams need to do is select their program and run it in Astro Pi Replay, which will create a real-time simulation of the program running on the ISS, using historical data and images. Astro Pi Replay will also show program outputs and report errors. This means teams can code their program in their preferred code editor, then test with an internet browser. However, if they wish, teams can still run the Astro Pi Replay tool offline with Thonny.
Important dates for your diary
16 September 2024: Registration is now open for Mission Zero and Mission Space Lab!
24 February 2025: Mission Space Lab submissions close
24 March 2025: Mission Zero submissions close
April–May 2025: Astro Pi programs run on the International Space Station
June 2025: Astro Pi teams receive their certificates
Register today
Both missions are open to young people up to age 19 from eligible countries — all ESA Member States and beyond. To find out more and register, visit astro-pi.org.
Look out for updates and resources being shared on the Astro Pi website, including a Mission Zero video codealong and Mission Space Lab live streams. You can also keep up-to-date with all the Astro Pi news on the Astro Pi X account, our Facebook, LinkedIn, and Instagram, or by signing up to the newsletter at astro-pi.org.
Since we launched the Experience AI learning programme in the UK in April 2023, educators in 130 countries have downloaded Experience AI lesson resources. They estimate reaching over 630,000 young people with the lessons, helping them to understand how AI works and to build the knowledge and confidence to use AI tools responsibly. Just last week, we announced another exciting expansion of Experience AI: thanks to $10 million in funding from Google.org, we will be able to work with local partner organisations to provide research-based AI education to an estimated over 2 million young people across Europe, the Middle East and Africa.
Experience AI teacher training in Kenya
This blog post explains how we use research to continue to shape our Experience AI resources, including the new AI safety resources we are developing.
The beginning of Experience AI
Artificial intelligence (AI) and machine learning (ML) applications are part of our everyday lives — we use them every time we scroll through social media feeds organised by recommender systems or unlock an app with facial recognition. For young people, there is more need than ever to gain the skills and understanding to critically engage with AI technologies.
We wanted to design free lesson resources to help teachers in a wide range of subjects confidently introduce AI and ML to students aged 11 to 14 (Key Stage 3). This led us to develop Experience AI, in collaboration with Google DeepMind, offering materials including lesson plans, slide decks, videos (both teacher- and student-facing), student activities, and assessment questions.
SEAME: The research-based framework behind Experience AI
The Experience AI resources were built on rigorous research from the Raspberry Pi Computing Education Research Centre as well as from other researchers, including those we hosted at our series of seminars on AI and data science education. The Research Centre’s work involved mapping and categorising over 500 resources used to teach AI and ML, and found that the majority were one-off activities, and that very few resources were tailored to a specific age group.
An example activity in the Experience AI lessons where students learn about bias.
To analyse the content that existing AI education resources covered, the Centre developed a simple framework called SEAME. The framework gives you an easy way to group concepts, knowledge, and skills related to AI and ML based on whether they focus on social and ethical aspects (SE), applications (A), models (M), or engines (E, i.e. how AI works.)
Through Experience AI, learners also gain an understanding of the models underlying AI applications, and the processes used to train and test ML models.
An example activity in the Experience AI lessons where students learn about classification.
Our Experience AI lessons cover all four levels of SEAME and focus on applications of AI that are relatable for young people. They also introduce learners to AI-related issues such as privacy or bias concerns, and the impact of AI on employment.
The six foundation lessons of Experience AI
What is AI?: Learners explore the current context of AI and how it is used in the world around them. Looking at the differences between rule-based and data-driven approaches to programming, they consider the benefits and challenges that AI could bring to society.
How computers learn: Focusing on the role of data-driven models in AI systems, learners are introduced to ML and find out about three common approaches to creating ML models. Finally they explore classification, a specific application of ML.
Bias in, bias out: Students create their own ML model to classify images of apples and tomatoes. They discover that a limited dataset is likely to lead to a flawed ML model. Then they explore how bias can appear in a dataset, resulting in biased predictions produced by a ML model.
Decision trees: Learners take their first in-depth look at a specific type of ML model: decision trees. They see how different training datasets result in the creation of different ML models, experiencing first-hand what the term ‘data-driven’ means.
Solving problems with ML models: Students are introduced to the AI project lifecycle and use it to create a ML model. They apply a human-focused approach to working on their project, train a ML model, and finally test their model to find out its accuracy.
Model cards and careers: Learners finish the AI project lifecycle by creating a model card to explain their ML model. To complete the unit, they explore a range of AI-related careers, hear from people working in AI research at Google DeepMind, and explore how they might apply AI and ML to their interests.
We also offer two additional stand-alone lessons: one on large language models, how they work, and why they’re not always reliable, and the other on the application of AI in ecosystems research, which lets learners explore how AI tools can be used to support animal conservation.
New AI safety resources: Empowering learners to be critical users of technology
We have also been developing a set of resources for educator-led sessions on three topics related to AI safety, funded by Google.org.
AI and your data: With the support of this resource, young people reflect on the data they have already provided to AI applications in their daily lives, and think about how the prevalence of AI tools might change the way they protect their data.
Media literacy in the age of AI: This resource highlights the ways AI tools can be used to perpetuate misinformation and how AI applications can help people combat misleading claims.
Using generative AI responsibly: With this resource, young people consider their responsibilities when using generative AI, and their expectations of developers who release Experience AI tools.
Other research principles behind our free teaching resources
As well as using the SEAME framework, we have incorporated a whole host of other research-based concepts in the design principles for the Experience AI resources. For example, we avoid anthropomorphism — that is, words or imagery that can lead learners to wrongly believe that AI applications have sentience or intentions like humans do — and we instead promote the understanding that it’s people who design AI applications and decide how they are used. We also teach about data-driven application design, which is a core concept in computational thinking 2.0.
Share your feedback
We’d love to hear your thoughts and feedback about using the Experience AI resources. Your comments help us to improve the current materials, and to develop future resources. You can tell us what you think using this form.
And if you’d like to start using the Experience AI resources as an educator, you can download them for free at experience-ai.org.
At a workshop for the study, teachers collaborated to identify adaptations to Computing lessons
We used a set of ten areas of opportunity to scaffold and prompt teachers to look for ways that Computing resources could be adapted, including making changes to the content or the context of lessons, and using pedagogical techniques such as collaboration and open-ended tasks.
Today’s blog lays out our findings about how teachers can bring students’ identities into the classroom as an entry point for culturally responsive Computing teaching.
Collaborating with teachers
A group of twelve primary teachers, from schools spread across England, volunteered to participate in the study. The primary objective was for our research team to collaborate with these teachers to adapt two units of work about creating digital images and vector graphics so that they better aligned with the cultural contexts of their students. The research team facilitated an in-person, one-day workshop where the teachers could discuss their experiences and work in small groups to adapt materials that they then taught in their classrooms during the following term.
A shared focus on identity
As the workshop progressed, an interesting pattern emerged. Despite the diversity of schools and student populations represented by the teachers, each group independently decided to focus on the theme of identity in their adaptations. This was not a directive from the researchers, but rather a spontaneous alignment of priorities among the teachers.
An example of an adapted Computing activity to create a vector graphic emoji.
The focus on identity manifested in various ways. For some teachers, it involved adding diverse role models so that students could see themselves represented in computing, while for others, it meant incorporating discussions about students’ own experiences into the lessons. However, the most compelling commonality across all groups was the decision to have students create a digital picture that represented something important about themselves. This digital picture could take many forms — an emoji, a digital collage, an avatar to add to a game, or even creating fantastical animals. The goal of these activities was to provide students with a platform to express aspects of their identity that were significant to them whilst also practising the skills to manipulate vector graphics or digital images.
Funds of identity theory
After the teachers had returned to their classrooms and taught the adapted lessons to their students, we analysed the digital pictures created by the students using funds of identity theory. This theory explains how our personal experiences and backgrounds shape who we are and what makes us unique and individual, and argues that our identities are not static but are continuously shaped and reshaped through interactions with the world around us.
Funds of identity framework, drawing on work by Esteban-Guitart and Moll (2014) and Poole (2017).
In the context of our study, this theory argues that students bring their funds of identity into their Computing classrooms, including their cultural heritage, family traditions, languages, values, and personal interests. Through the image editing and vector graphics activities, students were able to create what the funds of identity theory refers to as identity artefacts. This allowed them to explore and highlight the various elements that hold importance in their lives, illuminating different facets of their identities.
Students’ funds of identity
The use of the funds of identity theory provided a robust framework for understanding the digital artefacts created by the students. We analysed the teachers’ descriptions of the artefacts, paying close attention to how students represented their identities in their creations.
1. Personal interests and values
One significant aspect of the analysis centered around the personal interests and values reflected in the artefacts. Some students chose to draw on their practical funds of identity and create images about hobbies that were important to them, such as drawing or playing football. Others focused on existential funds of identity and represented values that were central to their personalities, such as cool, chatty, or quiet.
2. Family and community connections
Many students also chose to include references to their family and community in their artefacts. Social funds of identity were displayed when students featured family members in their images. Some students also drew on their institutional funds, adding references to their school, or geographical funds, by showing places such as the local area or a particular country that held special significance for them. These references highlighted the importance of familial and communal ties in shaping the students’ identities.
3. Cultural representation
Another common theme was the way students represented their cultural backgrounds. Some students chose to highlight their cultural funds of identity, creating images that included their heritage, including their national flag or traditional clothing. Other students incorporated ideological aspects of their identity that were important to them because of their faith, including Catholicism and Islam. This aspect of the artefacts demonstrated how students viewed their cultural heritage as an integral part of their identity.
Implications for culturally responsive Computing teaching
The findings from this study have several important implications. Firstly, the spontaneous focus on identity by the teachers suggests that identity is a powerful entry point for culturally responsive Computing teaching. Secondly, the application of the funds of identity theory to the analysis of student work demonstrates the diverse cultural resources that students bring to the classroom and highlights ways to adapt Computing lessons in ways that resonate with students’ lived experiences.
An example of an identity artefact made by one of the students in the culturally adapted lesson on vector graphics.
However, we also found that teachers often had to carefully support students to illuminate their funds of identity. Sometimes students found it difficult to create images about their hobbies, particularly if they were from backgrounds with fewer social and economic opportunities. We also observed that when teachers modelled an identity artefact themselves, perhaps to show an example for students to aim for, students then sometimes copied the funds of identity revealed by the teacher rather than drawing on their own funds. These points need to be taken into consideration when using identity artefact activities.
Finally, these findings relate to lessons about image editing and vector graphics that were taught to students aged 8- to 10-years old in England, and it remains to be explored how students in other countries or of different ages might reveal their funds of identity in the Computing classroom.
Moving forward with cultural responsiveness
The study demonstrated that when Computing teachers are given the opportunity to collaborate and reflect on their practice, they can develop innovative ways to make their teaching more culturally responsive. The focus on identity, as seen in the creation of identity artefacts, provided students with a platform to express themselves and connect their learning to their own lives. By understanding and valuing the funds of identity that students bring to the classroom, teachers can create a more equitable and empowering educational experience for all learners.
We would like to thank all the researchers who worked on this project, including our collaborations with Lynda Chinaka from the University of Roehampton, and Alex Hadwen-Bennett from King’s College London. Finally, we are grateful to Cognizant for funding this academic research, and to the cohort of primary Computing teachers for their enthusiasm, energy, and creativity, and their commitment to this project.
While the company also produces PLCs based on Arduino and ESP32 microcontrollers, the model reviewed here is one of the Raspberry Pi-based range and therefore benefits from superior processing power – an advantage when handling multiple real-time processes – and the ability to run a full Linux operating system, the familiar Raspberry Pi OS, by default. You can connect the unit to a monitor via HDMI if needed, but in most cases operators will SSH in from another computer.
Raspberry Pi power
The PLC 38R model is based around a standard Raspberry Pi 4 (with 2GB, 4GB, or 8GB RAM), with the optional addition of up to two extra communications boards such as 4G cellular and LoRA. Naturally, Wi-Fi and Bluetooth are built-in, thanks to Raspberry Pi 4, along with dual Ethernet ports (the board’s built-in port plus an extra one).
Raspberry Pi 4 is secreted inside a robust plastic case with a large metal heatsink on the base. The whole unit weighs 711g and is mountable on a DIN rail. The ambient operating temperature is 0 to 50°C, with a humidity level of 10 to 90%, while the case has a shockproof resistance of 80m/s2 in the X, Y, and Z axes.
Cutouts in the case provide access to Raspberry Pi 4’s USB and Ethernet ports on one side and – in a recess – micro-HDMI ports and the USB-C power port. You can’t power the whole unit that way, however: instead you’ll need to connect a 12–24V DC supply via two screw terminals, making sure the polarity is correct. Industrial Shields offers a suitable DIN rail power supply for €25.
To protect the electronics and avoid data corruption during sudden voltage drops in the event of a power outage, the PLC 38R has an integrated UPS shield. When the UPS kicks in, the outputs maintain their last activation state until the unit is rebooted. A real-time clock is also included, powered by a button battery – easily replaceable by removing a plastic panel. Insulation resistance is provided to the tune of 20mΩ at 500VDC between the AC terminals and protective earth terminal. Dialectic strength is rated as 2300 VAC at 50/60Hz for one minute with a maximum leakage current of 10mA.
Pinned to the ground
The most important feature of any PLC is its range of I/Os. Raspberry Pi PLC 38R is absolutely loaded with them, divided into zones and connectable via removable screw terminal blocks. On the right-hand side of the unit are sets of analogue (0 to 10V) and digital/PWM outputs. Underneath, there’s a long row of I/O and power/ground pins covering standard protocols such as SPI, I2C, and RS485, plus a couple of direct GPIO pin connections.
The remainder of that side is taken up by ten sets of relay switch connections. Another six are found on the left side of the unit, along with opto-isolator protected digital/analogue inputs, configurable by two sets of four dip switches. Note that other Raspberry Pi PLC models feature varying numbers of I/Os and relays, so you can choose the one that best suits your requirements.
The downloadable documentation is fairly detailed and features examples of how to use pre-installed Bash scripts to read various inputs, and trigger outputs and relays, so it’s fairly easy to get started.
Verdict
9/10
Protected by a robust case, this PLC is packed with I/Os and relays, making it suitable for a wide variety of industrial applications.
Specs
Processing: Raspberry Pi 4 with 2GB, 4GB, or 8GB RAM
Um dir ein optimales Erlebnis zu bieten, verwenden wir Technologien wie Cookies, um Geräteinformationen zu speichern und/oder darauf zuzugreifen. Wenn du diesen Technologien zustimmst, können wir Daten wie das Surfverhalten oder eindeutige IDs auf dieser Website verarbeiten. Wenn du deine Einwillligung nicht erteilst oder zurückziehst, können bestimmte Merkmale und Funktionen beeinträchtigt werden.
Funktional
Immer aktiv
Die technische Speicherung oder der Zugang ist unbedingt erforderlich für den rechtmäßigen Zweck, die Nutzung eines bestimmten Dienstes zu ermöglichen, der vom Teilnehmer oder Nutzer ausdrücklich gewünscht wird, oder für den alleinigen Zweck, die Übertragung einer Nachricht über ein elektronisches Kommunikationsnetz durchzuführen.
Vorlieben
Die technische Speicherung oder der Zugriff ist für den rechtmäßigen Zweck der Speicherung von Präferenzen erforderlich, die nicht vom Abonnenten oder Benutzer angefordert wurden.
Statistiken
Die technische Speicherung oder der Zugriff, der ausschließlich zu statistischen Zwecken erfolgt.Die technische Speicherung oder der Zugriff, der ausschließlich zu anonymen statistischen Zwecken verwendet wird. Ohne eine Vorladung, die freiwillige Zustimmung deines Internetdienstanbieters oder zusätzliche Aufzeichnungen von Dritten können die zu diesem Zweck gespeicherten oder abgerufenen Informationen allein in der Regel nicht dazu verwendet werden, dich zu identifizieren.
Marketing
Die technische Speicherung oder der Zugriff ist erforderlich, um Nutzerprofile zu erstellen, um Werbung zu versenden oder um den Nutzer auf einer Website oder über mehrere Websites hinweg zu ähnlichen Marketingzwecken zu verfolgen.