Schlagwort: prop
-

Working Eye of Agamotto from Doctor Strange (excluding time travel)
Reading Time: 2 minutesArduino Team — August 25th, 2021 We’ve not released a time travel shield for Arduino yet. But when we do, this Eye of Agamotto project will be a perfect fit. So even though it may not bend time yet, it does everything else we’ve seen in Doctor Strange. Eye of Arduino. Er……
-

Stay busy in your Vault with a Raspberry Pi Zero Pipboy
Reading Time: 2 minutesWhile being holed up in the Vaults living off our stash of Nuke cola, we’ve come across this mammoth junk-build project, which uses Raspberry Pi Zero W to power a working Pipboy. Pipboy scrap build No Description UK-based JustBuilding went full Robert House and, over several months, built the device’s body by…
-

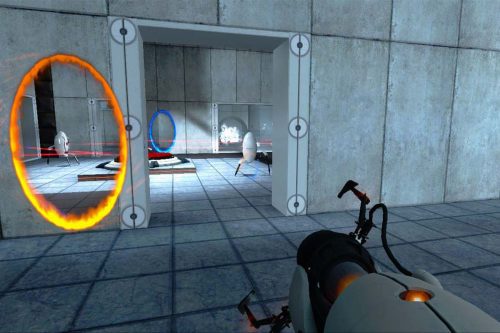
Build your own animatronic GLaDOS
Reading Time: 2 minutesIt’s 11 years since Steam’s Orange Box came out, which is probably making you feel really elderly. Portal was the highlight of the game bundle for me — cue giant argument in the comments — and it still holds up brilliantly. It’s even in the Museum of Modern Art’s collection; there’s nothing…
-

Watch Game of Thrones with a Raspberry Pi-powered Drogon
Reading Time: 2 minutesChannel your inner Targaryen by building this voice-activated, colour-changing, 3D-printed Drogon before watching the next episode of Game of Thrones. Winter has come This is a spoiler-free zone! I’ve already seen the new episode of season 8, but I won’t ruin anything, I promise. Even if you’ve never watched an episode of…
-

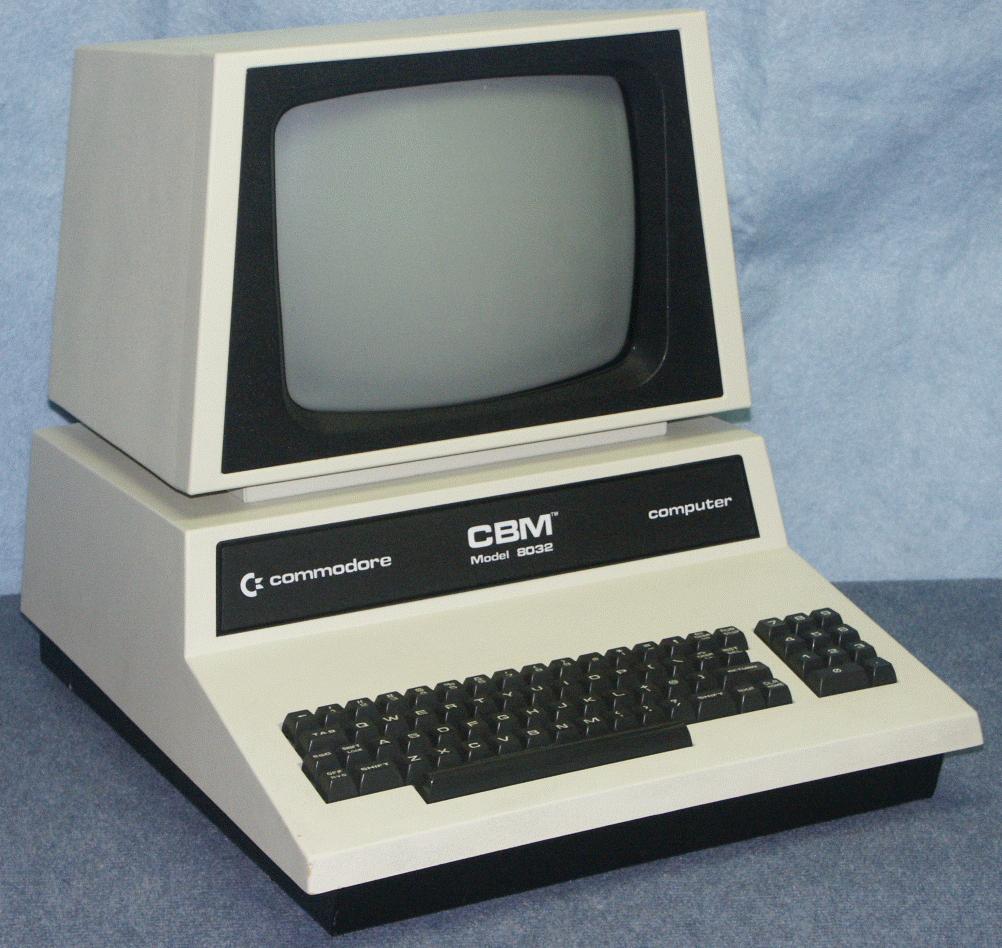
Build your own Commodore PET model 8032
Reading Time: 2 minutesBuild a mini version of one of history’s most iconic personal computers with Lorenzo ‘Tin Cat’ Herrera and his Commodore PET Mini, which is based on the Commodore PET model 8032. Commodore PET Mini Retrowave intro 3D Print your own Commodore PET Mini retro computer with a Raspberry Pi and Retropie for retro gaming…
-

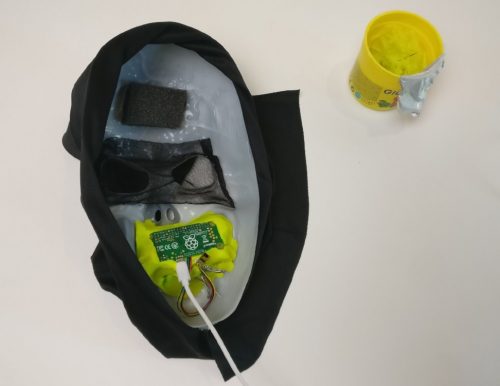
Halloween voice-changer using Raspberry Pi Zero
Reading Time: 2 minutesOlivier Ros has put together a short and sweet tutorial for creating your own voice-changing mask for Halloween. Voice changer with Raspberry Pi Zero for Halloween How to make a voice changer with Raspberry Pi Zero for Halloween Buy MIC+ sound card on Amazon : goo.gl/VDFzu7 tutorial here: https://www.instructables.com/id/Halloween-Voice-Changer-With-Raspberry-Pi/ https://www.raspiaudio.com/halloween Halloween: we…