Schlagwort: Projects
-

Introducing new artificial intelligence and machine learning projects for Code Clubs
Reading Time: 4 minutesWe’re pleased to share a new collection of Code Club projects designed to introduce creators to the fascinating world of artificial intelligence (AI) and machine learning (ML). These projects bring the latest technology to your Code Club in fun and inspiring ways, making AI and ML engaging and accessible for young people.…
-

Kick off the Monaco Grand Prix weekend with these Formula 1-inspired Arduino projects
Reading Time: 6 minutesThe Monaco Grand Prix is just days away and will likely be one of the most exciting races of the season. While most fans can’t participate directly — except as spectators — they can celebrate their passion through DIY projects. That’s why we’ve scoured the community to find the best of those…
-

5 ways to use Arduino with kids
Reading Time: 5 minutesOne of the great things about making is that it really is for everyone — every budget, every skill level, and every age group. Children are one of the groups that can benefit the most from Arduino. Getting exposed to making and home automation from an early age can be enormously beneficial…
-

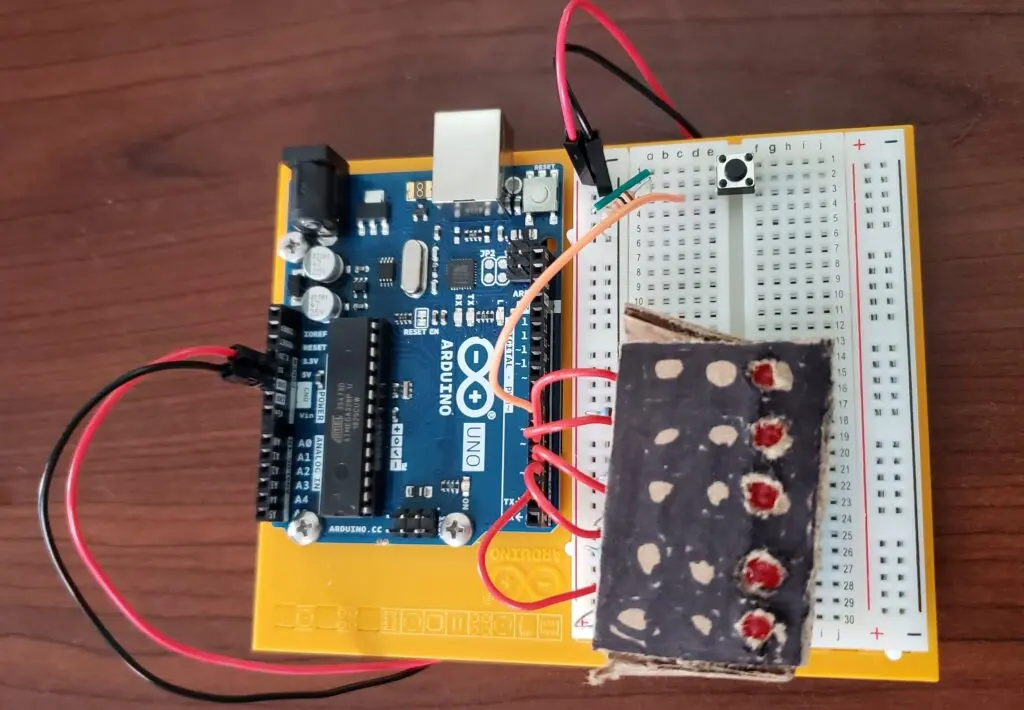
How to make energy saving really work
Reading Time: 4 minutesConserving energy is something every animal does, and we humans are no exception. Especially when energy costs are high — something many of us have been uncomfortably aware of in recent years — figuring out ways to live life without burning through excess fuel (and polluting the environment) is a serious priority.…
-

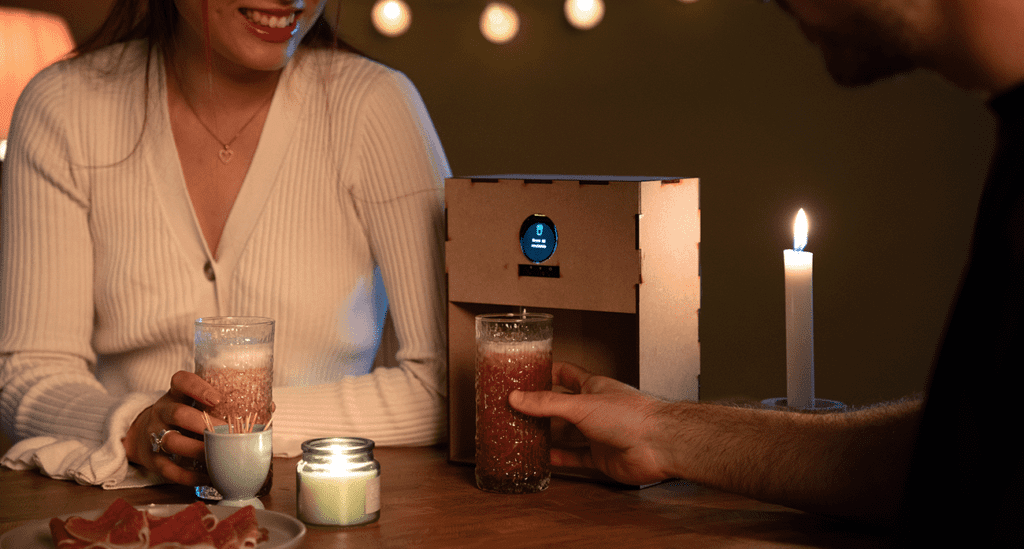
Old school meets new energy in Project Hub’s latest highlights!
Reading Time: 3 minutesIt’s back to school! Whether you are a student or not, Arduino’s Project Hub is a great place to never stop learning, thanks to the wealth of knowledge, experiments, and plain cool ideas our community so generously shares. The three highlights we’ve selected among the projects uploaded in June indeed all have…
-
Meet the next top three Project Hub entries — anything is possible!
Reading Time: 2 minutesThis is the third time that we’ve selected three outstanding projects in the Arduino Project of the Month competition, highlighting the wide range of our users’ contributions to our growing Project Hub. For April we go from tanks to tunes – because why not? Anything is possible with just a few components,…
-

The weird and wonderful history of chess-playing robots
Reading Time: 4 minutesWho said robots had to be all work and no play? For many years, people have been designing and building robots not just to help with chores, but to help us win games. Possibly the most famous examples of this are the robots that play chess. In this article, we’ll take a…
-

A history of robotic pets (and how to make your own)
Reading Time: 4 minutesHumans have domesticated animals since the dawn of time. Dogs (our oldest furry friends) were owned by humans as far back as 30,000 years ago, and since then we’ve formed bonds with all kinds of different creatures. It was only in the last century, though, that we started to actually build our…
-
Vineyard pest monitoring with Arduino Pro
Reading Time: 7 minutesThe challenge Pest monitoring is essential for the proper management of any vineyard as it allows for the early detection and management of any potential pest infestations. By regularly monitoring the vineyard, growers can identify pests at early stages and take action to prevent further damage. Monitoring can also provide valuable data…
-
Get More Out of Your Smartphone with Arduino
Reading Time: 5 minutesOur smartphones go pretty much everywhere with us, and we use them for more things than we even realize. From literally the very moment we’re startled into life in the morning, until the one final doom scroll through social media before bed, our phones are with us. It makes sense, then, to…
-
Arduino Project Hub: Share and compete in Project of the Month!
Reading Time: 2 minutesAfter the successful launch of the new Project Hub at the end of last year, we are ready for a new challenge and the opportunity for you to be rewarded for your awesome work. Starting February 1st, we are launching a new ‘Arduino Project of the Month’ competition for everyone in our…
-

Update your ESP32 boards over-the-air (OTA) with Arduino Cloud
Reading Time: 3 minutesThe Arduino Cloud is Arduino’s integrated platform to develop, deploy, monitor, and control IoT devices with minimal effort. It enables makers, IoT enthusiasts, and professionals to build easily connected projects based on a wide range of hardware including not only Arduino boards, but also ESP32 and ESP8266 boards. Arduino is committed to…
-

Get kids creating webpages with HTML and CSS
Reading Time: 8 minutesWith our new free ‘Introduction to web development’ path, young people are able to learn HTML and create their own webpages on topics that matter to them. The path is made up of six projects that show children and teenagers how to structure pages using HTML, and style them using CSS. With…
-
Arduino and iconic outdoor brand K-Way, with the support of Edge Impulse, launch a call for developers
Reading Time: 3 minutesFollowing the announcement of our K-Way collaboration during Maker Faire Rome, today officially opens the competition for developers based on the Nicla Sense ME, with the support of Edge Impulse. Imagine what could happen if you could put your hands on the most iconic rain jacket, paired with a Nicla Sense, and…
-

Transform the way you organize your home with Arduino
Reading Time: 4 minutesOne of the wonderful things about living in the modern world is having full cupboards, pantries, and wardrobes. But this privilege also comes with downsides — managing all the various items we own can be a headache and can lead to confusion and stress. The good news is that storage doesn’t have…
-
40+ Ideas For Your Next Home Automation Project with Arduino Cloud
Reading Time: 3 minutesArduino Team — September 2nd, 2022 Home automation has increasingly become a need in our lives. Without even noticing it we have been adding connected elements to our homes and buildings to make our lives easier and nowadays we are surrounded by electronic devices that monitor our environment, control our lighting systems…
-
Say “aye” to Code Club in Scotland
Reading Time: 5 minutesSince joining the Raspberry Pi Foundation as a Code Club Community Manager for Scotland earlier this year, I have seen first-hand the passion, dedication, and commitment of the Scottish community to support the digital, personal, and social skills of young people. Code Club launched in schools in 2012 to give opportunities to…
-

Top 10 Arduino blog posts of 2021
Reading Time: 4 minutesArduino Team — December 31st, 2021 To say it’s been another challenging year would be an understatement, but it’s reassuring to see that the top 10 Arduino blog posts of 2021 show us that makers have persevered, undaunted. As we sprint headlong into 2022 with hope for a return to normality (whatever…
-
This Arduino project is counting to a billion
Reading Time: 3 minutesGood design counts for everything Designer Che-Wei Wang built a simple Arduino project that’s counting to a billion, and has been doing so for over 10 years. Could this be the longest continually running Arduino project in the world? Che-Wei has a background in art, architecture and industrial design. He now runs…
-
Share your Arduino projects on EDUvision
Reading Time: 2 minutesArduino Team — May 6th, 2021 We’re on the lookout for the most creative and innovative Arduino projects made by you – our EDUvision viewers! Each week, we’ll feature the projects we think should be put in the spotlight. If your project is featured, we’ll send you a selection of some super…
-

The DIY force is strong with these 10 Arduino Star Wars projects
Reading Time: 3 minutesHokey religions and ancient weapons might not be a match for a good blaster, but Arduino Star Wars projects certainly are. To celebrate May the 4th (also known as Star Wars Day), we’ve put together a list of inspired builds from a galaxy far, far away that you can make yourself. So…