Schlagwort: photo
-

This low-cost motion control rig helps capture high-quality shots
Reading Time: 2 minutesArduino Team — May 25th, 2021 Being a camera operator is tough. Having to move the camera and maintain a smooth motion can be tricky, and the speed at which it’s done is never consistent. That’s what prompted Andy to create his own motorized robotic camera rig that can move in up to four different axes…
-

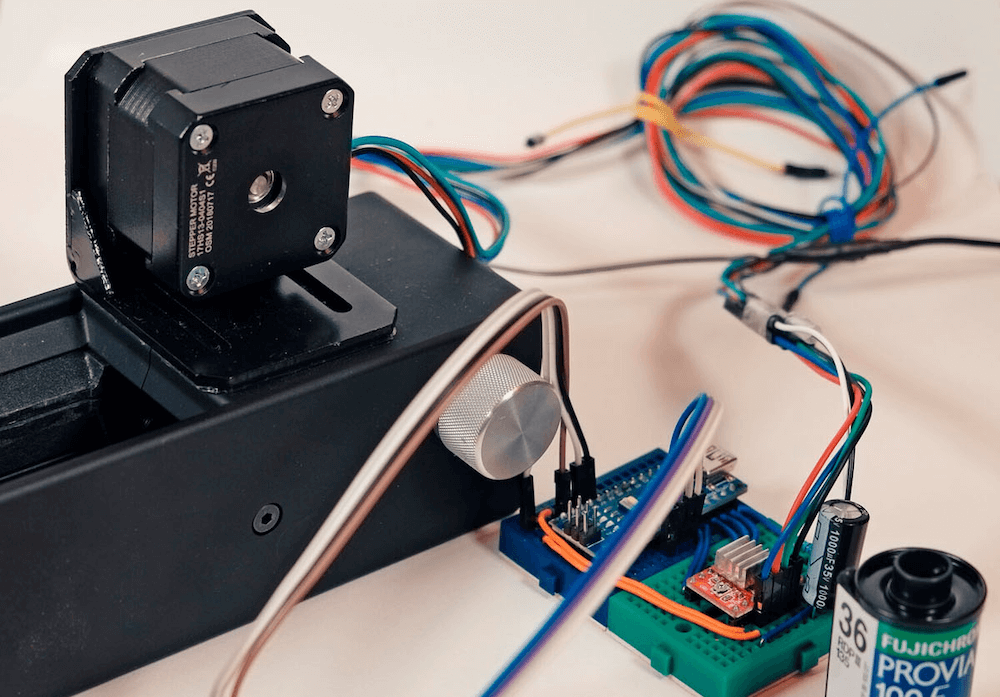
Automate 35mm film scanning with Arduino and Python
Reading Time: < 1 minuteAutomate 35mm film scanning with Arduino and Python Arduino Team — September 24th, 2020 While taking photos today is normally a digital affair, there is a wealth of visual information stored on film negatives. Digitization is possible, but it tends to be rather time-intensive, so photographer/hacker Seckin Sinan Isik decided to automate…
-

Build your own tracking and GoTo mount for DSLR astrophotography
Reading Time: < 1 minuteBuild your own tracking and GoTo mount for DSLR astrophotography Arduino Team — December 18th, 2019 Astrophotography can be challenging, in a large part because your subject matter — or your base, the Earth rather — is constantly moving. In order to take excellent long exposures of far-off objects, Redditor intercipere…
-

Microscopic gigapixel photography with this X/Y stage setup
Reading Time: 2 minutesMicroscopic gigapixel photography with this X/Y stage setup Arduino Team — June 17th, 2019 Normally the 10-50 gigapixels of a DSLR are good enough for nearly any photo you can imagine, but if you need more—and don’t want to spend many thousands of dollars—then this clever setup by Jon Bumstead may be…
-

SONY Action Cam LIVE Demo – Game City 2014 – BLOGDOTTV
Reading Time: < 1 minute[mbYTPlayer url=“https://www.youtube.com/watch?v=6Fz20QRtFEQ“ opacity=“.5″ quality=“medium“ ratio=“auto“ isinline=“false“ showcontrols=“false“ realfullscreen=“true“ printurl=“true“ autoplay=“true“ mute=“true“ loop=“true“ addraster=“true“ stopmovieonblur=“false“ gaTrack=“false“]