Schlagwort: Our Staff
-

The answers to your questions for Eben Upton
Reading Time: 6 minutesBefore Easter, we asked you to tell us your questions for a live Q & A with Raspberry Pi Trading CEO and Raspberry Pi creator Eben Upton. The variety of questions and comments you sent was wonderful, and while we couldn’t get to them all, we picked a handful of the most…
-

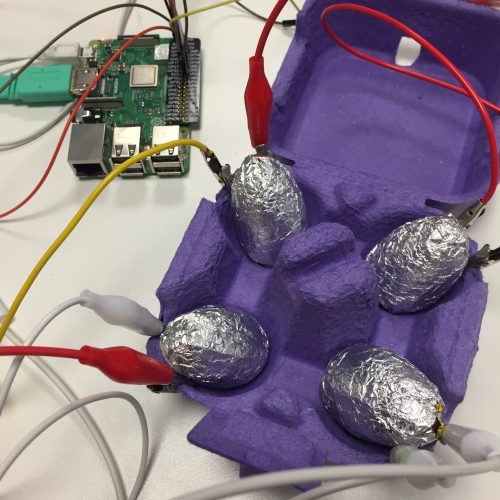
Alex’s quick and easy digital making Easter egg hunt
Reading Time: 3 minutesLooking to incorporate some digital making into your Easter weekend? You’ve come to the right place! With a Raspberry Pi, a few wires, and some simple code, you can take your festivities to the next level — here’s how! If you logged in to watch our Instagram live-stream yesterday, you’ll have seen…
-

Coding is for girls
Reading Time: 5 minutesLess than four years ago, Magda Jadach was convinced that programming wasn’t for girls. On International Women’s Day, she tells us how she discovered that it definitely is, and how she embarked on the new career that has brought her to Raspberry Pi as a software developer. “Coding is for boys”, “in…
-

Digital making for new parents
Reading Time: 4 minutesSolving problems that are meaningful to us is at the core of our approach to teaching and learning about technology here at the Raspberry Pi Foundation. Over the last eight months, I’ve noticed that the types of digital making projects that motivate and engage me have changed (can’t think why). Always looking…
-

The Pi Towers Secret Santa Babbage
Reading Time: 6 minutesTired of pulling names out of a hat for office Secret Santa? Upgrade your festive tradition with a Raspberry Pi, thermal printer, and everybody’s favourite microcomputer mascot, Babbage Bear. The name’s Santa. Secret Santa. It’s that time of year again, when the cosiness gets turned up to 11 and everyone starts thinking…
-

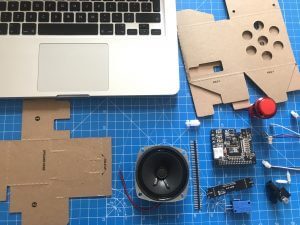
What do you want your button to do?
Reading Time: 4 minutesHere at Raspberry Pi, we know that getting physical with computing is often a catalyst for creativity. Building a simple circuit can open up a world of making possibilities! This ethos of tinkering and invention is also being used in the classroom to inspire a whole new generation of makers too, and…
-

piwheels: making “pip install” fast
Reading Time: 6 minutesTL;DR pip install numpy used to take ages, and now it’s super fast thanks to piwheels. The Python Package Index (PyPI) is a package repository for Python modules. Members of the Python community publish software and libraries in it as an easy method of distribution. If you’ve ever used pip install, PyPI…