Schlagwort: OpenCV

  • LEGO-firing turret targets tender tootsies

    LEGO-firing turret targets tender tootsies

    Reading Time: 2 minutes

    Arduino TeamAugust 4th, 2022

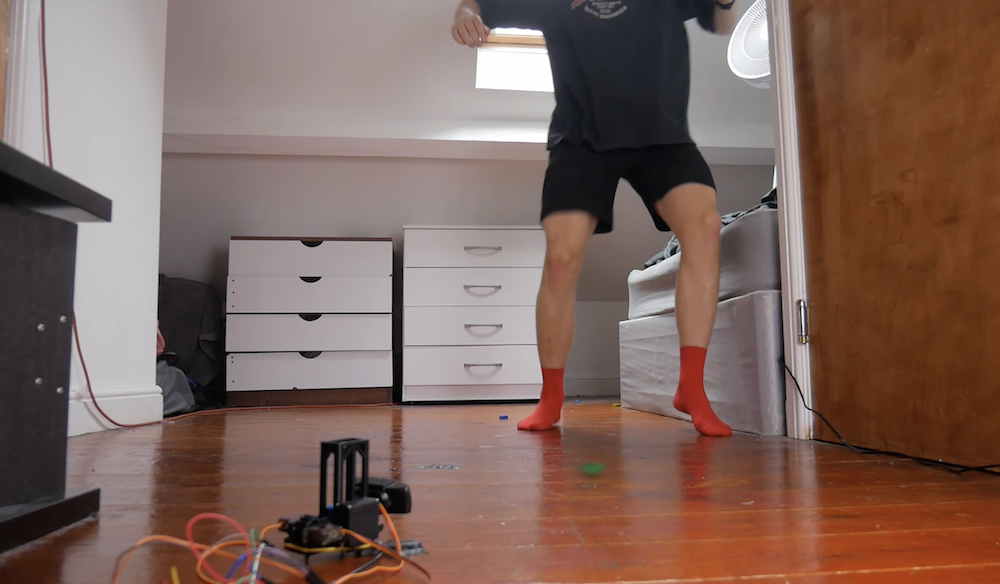
    Stepping on LEGO bricks is a meme for a reason: it really @#$%&! hurts. LEGO brick design is ingenious, but the engineers did not consider the ramifications of their minimalist construction system. We’ve seen people do crazy things for Internet points, such as walk across a bed of LEGO like they’re hot coals — or in Adam Beedle’s case, build a LEGO-firing turret specifically to shoot plastic bricks under a person’s feet.

    This project consists of two distinct sub-systems: the mechanical turret that launches the LEGO bricks and the targeting system that recognizes feet. For the former, Beedle devised a clever rubber band-based mechanism that cranks into position with a rack and pinion. An Arduino Uno rotates the pinion with a continuous-rotation servo motor. The pinion gear has a few teeth missing, so it releases the rubber bands and flings the loaded LEGO brick after a few rotations. Another brick then drops down from a hopper and the cycle repeats, resulting in automatic firing.

    Beedle 3D-printed all of the turret’s parts and used a second turret motor to provide rotation. The turret also has a webcam mount, which is how the targeting system finds feet. Beedle doesn’t provide much detail on this system, but we assume that he used something like OpenCV running on a PC to detect feet. The PC would then send a command to the Arduino through the serial port telling it to rotate the turret in the proper direction until the detected foot is centered in the video feed. When it gets close, it starts spinning the pinion to shoot LEGO bricks.

    [youtube https://www.youtube.com/watch?v=I6gpKFjL6_8?feature=oembed&w=500&h=281]

    From what we can see in the video, it seems that the turret worked as intended. That is to say that Beedle successfully built something that would force him to step on painful LEGO bricks.

    Website: LINK

  • Nandu’s lockdown Raspberry Pi robot project

    Nandu’s lockdown Raspberry Pi robot project

    Reading Time: 2 minutes

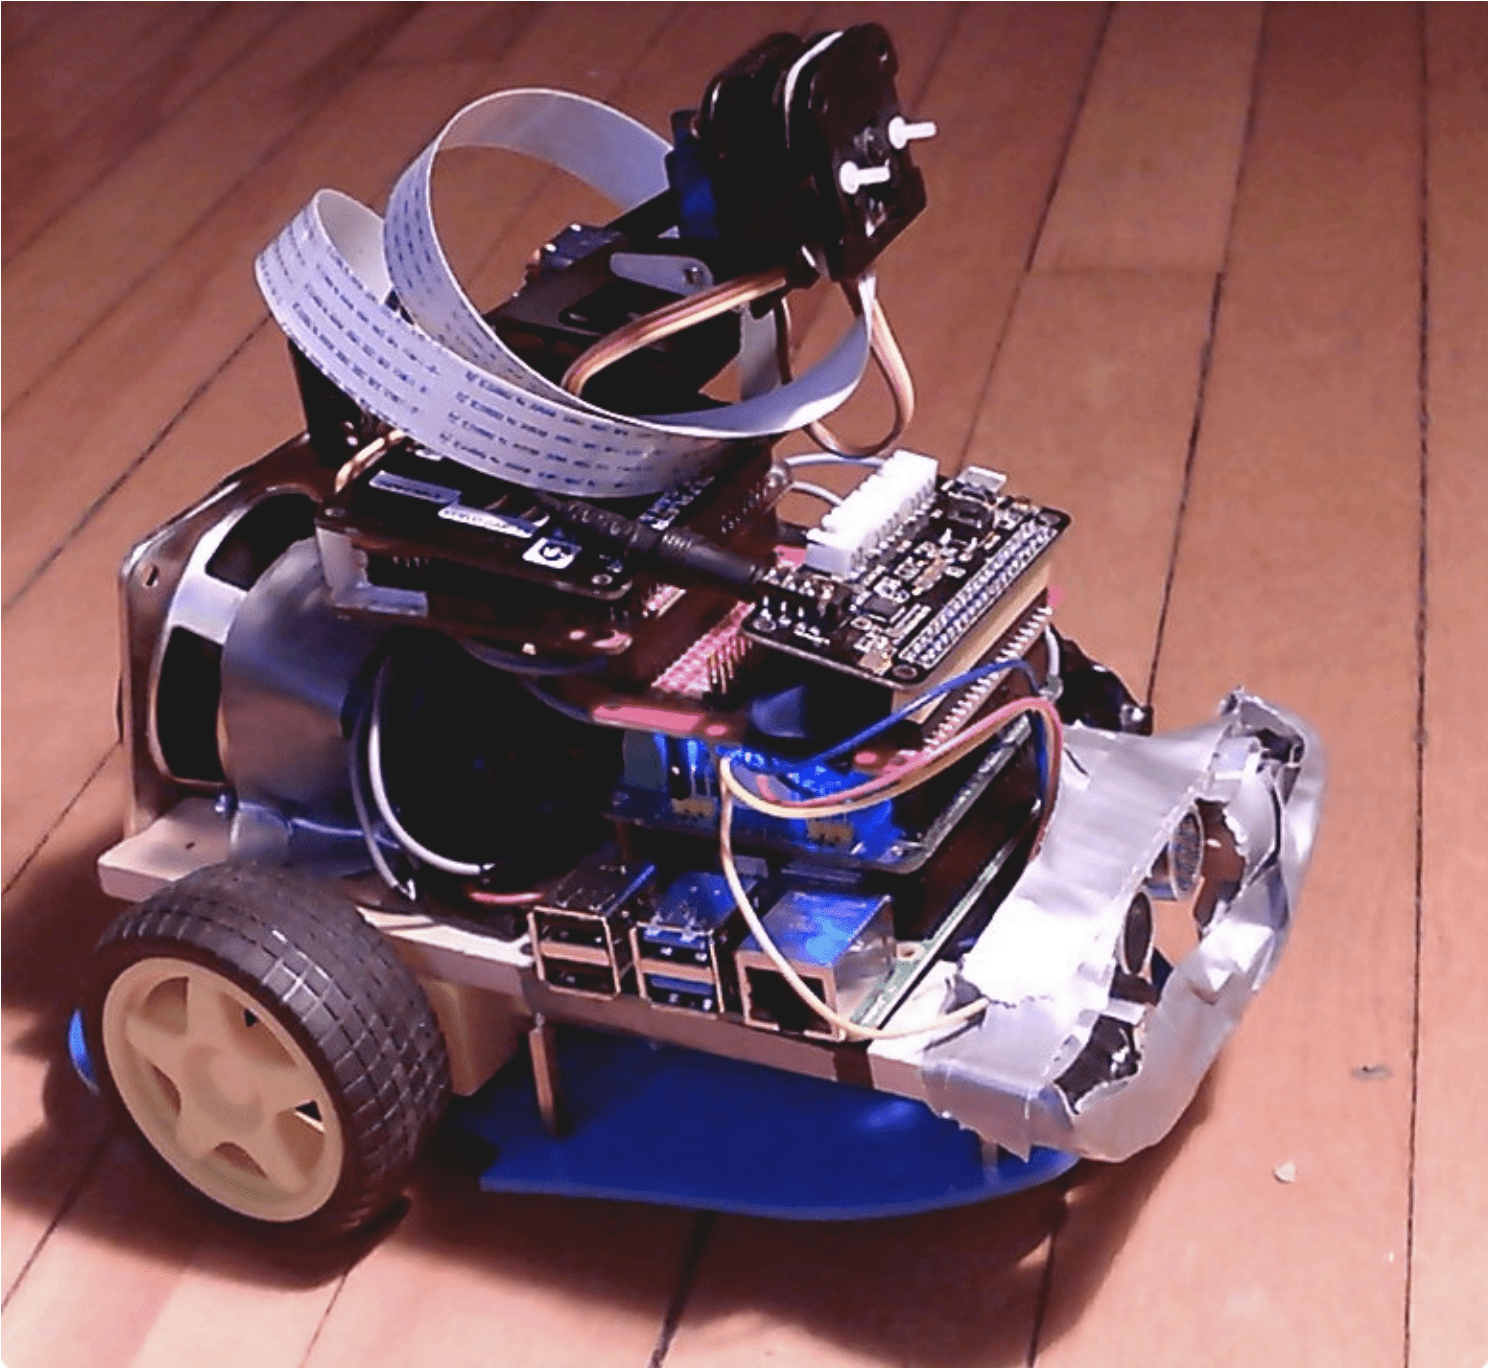
    Nandu Vadakkath was inspired by a line-following robot built (literally) entirely from salvage materials that could wait patiently and purchase beer for its maker in Tamil Nadu, India. So he set about making his own, but with the goal of making it capable of slightly more sophisticated tasks.

    [youtube https://www.youtube.com/watch?v=Y5zBCSHnulc?feature=oembed&w=500&h=281]

    “Robot, can you play a song?”

    Hardware

    [youtube https://www.youtube.com/watch?v=7HJzhZYlHhU?feature=oembed&w=500&h=281]

    Robot comes when called, and recognises you as its special human

    Software

    Nandu had ambitious plans for his robot: navigation, speech and listening, recognition, and much more were on the list of things he wanted it to do. And in order to make it do everything he wanted, he incorporated a lot of software, including:

    [youtube https://www.youtube.com/watch?v=KTHh8QU70nc?feature=oembed&w=500&h=281]

    Robot shares Nandu’s astrological chart
    • Python 3
    • virtualenv, a tool for creating isolating virtual Python environments
    • the OpenCV open source computer vision library
    • the spaCy open source natural language processing library
    • the TensorFlow open source machine learning platform
    • Haar cascade algorithms for object detection
    • A ResNet neural network with the COCO dataset for object detection
    • DeepSpeech, an open source speech-to-text engine
    • eSpeak NG, an open source speech synthesiser
    • The MySQL database service

    So how did Nandu go about trying to make the robot do some of the things on his wishlist?

    Context and intents engine

    The engine uses spaCy to analyse sentences, classify all the elements it identifies, and store all this information in a MySQL database. When the robot encounters a sentence with a series of possible corresponding actions, it weighs them to see what the most likely context is, based on sentences it has previously encountered.

    Getting to know you

    The robot has been trained to follow Nandu around but it can get to know other people too. When it meets a new person, it takes a series of photos and processes them in the background, so it learns to remember them.

    Nandu's home made robot
    There she blows!

    Speech

    Nandu didn’t like the thought of a basic robotic voice, so he searched high and low until he came across the MBROLA UK English voice. Have a listen in the videos above!

    Object and people detection

    The robot has an excellent group photo function: it looks for a person, calculates the distance between the top of their head and the top of the frame, then tilts the camera until this distance is about 60 pixels. This is a lot more effort than some human photographers put into getting all of everyone’s heads into the frame.

    Nandu has created a YouTube channel for his robot companion, so be sure to keep up with its progress!

    Website: LINK

  • Raspberry Pi retro player

    Raspberry Pi retro player

    Reading Time: 2 minutes

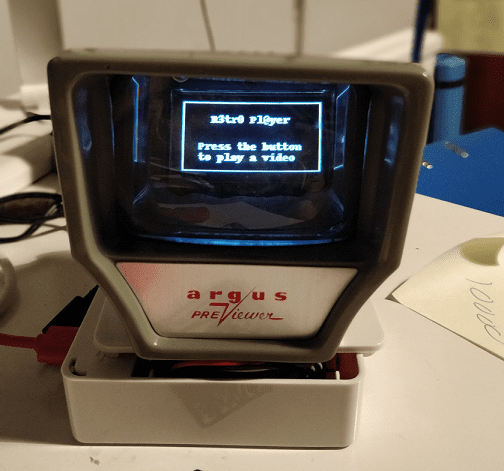
    We found this project at TeCoEd and we loved the combination of an OLED display housed inside a retro Argus slide viewer. It uses a Raspberry Pi 3 with Python and OpenCV to pull out single frames from a video and write them to the display in real time.​

    TeCoEd names this creation the Raspberry Pi Retro Player, or RPRP, or – rather neatly – RP squared. The Argus viewer, he tells us, was a charity-shop find that cost just 50p.  It sat collecting dust for a few years until he came across an OLED setup guide on hackster.io, which inspired the birth of the RPRP.

    [youtube https://www.youtube.com/watch?v=sOkLrHYF0rQ?feature=oembed&w=500&h=281]

    Timelapse of the build and walk-through of the code

    At the heart of the project is a Raspberry Pi 3 which is running a Python program that uses the OpenCV computer vision library.  The code takes a video clip and breaks it down into individual frames. Then it resizes each frame and converts it to black and white, before writing it to the OLED display. The viewer sees the video play in pleasingly retro monochrome on the slide viewer.

    Tiny but cute, like us!

    TeCoEd ran into some frustrating problems with the OLED display, which, he discovered, uses the SH1106 driver, rather than the standard SH1306 driver that the Adafruit CircuitPython library expects. Many OLED displays use the SH1306 driver, but it turns out that cheaper displays like the one in this project use the SH1106. He has made a video to spare other makers this particular throw-it-all-in-the-bin moment.

    [youtube https://www.youtube.com/watch?v=LdOKXUDw2NY?feature=oembed&w=500&h=281]

    Tutorial for using the SH1106 driver for cheap OLED displays

    If you’d like to try this build for yourself, here’s all the code and setup advice on GitHub.

    Wiring diagram

    TeCoEd is, as ever, our favourite kind of maker – the sharing kind! He has collated everything you’ll need to get to grips with OpenCV, connecting the SH1106 OLED screen over I2C, and more. He’s even told us where we can buy the OLED board.

    Website: LINK

  • DSLR Motion Capture with Raspberry Pi and OpenCV

    DSLR Motion Capture with Raspberry Pi and OpenCV

    Reading Time: 3 minutes

    One of our favourite makers, Pi & Chips (AKA David Pride), wanted to see if they could trigger a DSLR camera to take pictures by using motion detection with OpenCV on Raspberry Pi.

    You could certainly do this with a Raspberry Pi High Quality Camera, but David wanted to try with his swanky new Lumix camera. As well as a Raspberry Pi and whichever camera you’re using, you’ll also need a remote control. David sourced a cheap one from Amazon, since he knew full well he was going to be… breaking it a bit.

    Breaking the remote a bit

    When it came to the “breaking” part, David explains: “I was hoping to be able to just re-solder some connectors to the button but it was a dual function button depending on depth of press. I therefore got a set of probes out and traced which pins on the chip were responsible for the actual shutter release and then *carefully* managed to add two fine wires.”

    Further breaking

    Next, David added Dupont cables to the ends of the wires to allow access to the breadboard, holding the cables in place with a blob of hot glue. Then a very simple circuit using an NPN transistor to switch via GPIO gave remote control of the camera from Python.

    Raspberry Pi on the right, working together with the remote control’s innards on the left

    David then added OpenCV to the mix, using this tutorial on PyImageSearch. He took the basic motion detection script and added a tiny hack to trigger the GPIO when motion was detected.

    He needed to add a delay to the start of the script so he could position stuff, or himself, in front of the camera with time to spare. Got to think of those angles.

    David concludes: “The camera was set to fully manual and to a really nice fast shutter speed. There is almost no delay at all between motion being detected and the Lumix actually taking pictures, I was really surprised how instantaneous it was.”

    The whole setup mounted on a tripod ready to play

    Here are some of the visuals captured by this Raspberry Pi-powered project…

    Take a look at some more of David’s projects over at Pi & Chips.

    Website: LINK

  • This clock really, really doesn’t want to tell you the time

    This clock really, really doesn’t want to tell you the time

    Reading Time: 2 minutes

    What’s worse than a clock that doesn’t work? One that makes an “unbearably loud screeching noise” every minute of every day is a strong contender.

    That was the aural nightmare facing YouTuber Burke McCabe. But rather than just fix the problem, he decided, in true Raspberry Pi community fashion, to go one step further. Because why not?

    The inventor of the clock holds it with the back facing the camera to show us how it works and is looking down at it.

    Burke showing YouTube viewers his invention

    On the back of the clock, alongside the built-in mechanism controlling the clock’s arms, Burke added a Raspberry Pi to control a motor, which he hooked up to a webcam. The webcam was programmed using open computer vision library OpenCV to detect whenever a human face comes into view. Why would a clock need to know when someone looks at it? We’ll come to that.

    First up, more on how that webcam works. OpenCV detects when a pair of eyes is in view of the webcam for three consecutive frames. You have to be really looking at it, not just passing it – that is, you have to be trying to tell the time. When this happens, the Raspberry Pi rotates the attached motor 180 degrees and back again.

    But why? Well:

    A clock that falls off the wall when you look at it

    hello #invention #robot #raspberrypi

    Burke has created a clock which, when you look at it to tell the time, falls off the wall.

    We know: you want your own. So do we. Thankfully, Burke responded to calls in the comments on his original video for a more detailed technical walkthrough, and, boy, did he deliver.

    How I made A clock that falls off the wall when you look at it

    I dunno why I sounded depressed in this video Original Video – https://www.youtube.com/watch?v=R3HUuf6LGQE&t=41s The Code – https://github.com/SmothDragon/Fa…

    In his walkthrough video, you get a good look at Burke’s entire setup, including extra batteries to make sure your Raspberry Pi gets enough juice, advice on how to get to grips with the code, and even the slots your different coloured wires need to go in. And so very, very much duct tape. Who’s going to start a GoFundMe to get Burke the glue gun sticks he so desperately needs? And hit subscribe for his YouTube channel while you’re at it!

    Website: LINK

  • Take the Wizarding World of Harry Potter home with you

    Take the Wizarding World of Harry Potter home with you

    Reading Time: 3 minutes

    If you’ve visited the Wizarding World of Harry Potter and found yourself in possession of an interactive magic wand as a souvenir, then you’ll no doubt be wondering by now, “What do I do with it at home though?”

    While the wand was great for setting off window displays at the park itself, it now sits dusty and forgotten upon a shelf. But it still has life left in it — let Jasmeet Singh show you how.

    Real Working Harry Potter Wand With Computer Vision and ML

    A few months back my brother visited Japan and had real wizarding experience in the Wizarding World of Harry Potter at the Universal Studios made possible through the technology of Computer Vision. At the Wizarding World of Harry Potter in Universal Studios the tourists can perform “real magic” at certain locations(where the motion capture system is installed) using specially made wands with retro-reflective beads at the tip.

    How do Harry Potter interactive wands work?

    The interactive displays at Universal Studios’ Wizarding World of Harry Potter have infrared cameras in place, which are ready to read the correct movements of retroflector-tipped wands. Move your wand in the right way, and the cameras will recognise your spell and set window displays in motion. Oooooo…magic!

    How do I know this? Thanks to William Osman and Allen Pan, who used this Wizarding World technology to turn cheap hot dogs into their own unique wands! Those boys…

    Hacking Wands at Harry Potter World

    How to make your very own mostly-functional interactive wand. Please don’t ban me from Universal Studios. Links on my blog: http://www.williamosman.com/2017/12/hacking-harry-potter-wands.html Allen’s Channel: https://www.youtube.com/channel/UCVS89U86PwqzNkK2qYNbk5A Support us on Patreon: https://www.patreon.com/williamosman Website: http://www.williamosman.com/ Facebook: https://www.facebook.com/williamosmanscience/ InstaHam: https://www.instagram.com/crabsandscience/ CameraManJohn: http://www.johnwillner.com/

    For his Raspberry Pi-enabled wand project, Jasmeet took that same Wizarding World concept to create a desktop storage box that opens and closes in response to the correct flicks of a wand.

    A simple night vision camera can be used as our camera for motion capture as they also blast out infrared light which is not visible to humans but can be clearly seen with a camera that has no infrared filter.

    So, the video stream from the camera is fed into a Raspberry Pi which has a Python program running OpenCV which is used for detecting, isolating and tracking the wand tip. Then we use SVM (Simple Vector Machine) algorithm of machine learning to recognize the pattern drawn and accordingly control the GPIOs of the raspberry pi to perform some activities.

    For more information on the project, including all the code needed to get started, head over to hackster.io to find Jasmeet’s full tutorial.

    Website: LINK

  • Playback your favourite records with Plynth

    Playback your favourite records with Plynth

    Reading Time: 2 minutes

    Use album artwork to trigger playback of your favourite music with Plynth, the Raspberry Pi–powered, camera-enhanced record stand.

    Plynth Demo

    This is “Plynth Demo” by Plynth on Vimeo, the home for high quality videos and the people who love them.

    Record playback with Plynth

    Plynth uses a Raspberry Pi and Pi Camera Module to identify cover artwork and play the respective album on your sound system, via your preferred streaming service or digital library.

    As the project’s website explains, using Plynth is pretty simple. Just:

    • Place a n LP, CD, tape, VHS, DVD, piece of artwork – anything, really – onto Plynth
    • Plynth uses its built-in camera to scan and identify the work
    • Plynth starts streaming your music on your connected speakers or home stereo system

    As for Plynth’s innards? The stand houses a Raspberry Pi 3B+ and Camera Module, and relies on “a combination of the Google Vision API and OpenCV, which is great because there’s a lot of documentation online for both of them”, states the project creator, sp_cecamp, on Reddit.

    Other uses

    Some of you may wonder why you wouldn’t have your records with your record player and, as such, use that record player to play those records. If you are one of these people, then consider, for example, the beautiful Damien Rice LP I own that tragically broke during a recent house move. While I can no longer play the LP, its artwork is still worthy of a place on my record shelf, and with Plynth I can still play the album as well.

    In addition, instead of album artwork to play an album, you could use photographs, doodles, or type to play curated playlists, or, as mentioned on the website, DVDs to play the movies soundtrack, or CDs to correctly select the right disc in a disc changer.

    Convinced or not, I think what we can all agree on is that Plynth is a good-looking bit of kit, and at Pi Towers look forward to seeing where they project leads.

    Website: LINK

  • Sean Hodgins’ Haunted Jack in the Box

    Sean Hodgins’ Haunted Jack in the Box

    Reading Time: 3 minutes

    After making a delightful Bitcoin lottery using a Raspberry Pi, Sean Hodgins brings us more Pi-powered goodness in time for every maker’s favourite holiday: Easter! Just kidding, it’s Halloween. Check out his hair-raising new build, the Haunted Jack in the Box.

    Haunted Jack in the Box – DIY Raspberry Pi Project

    This project uses a raspberry pi and face detection using the pi camera to determine when someone is looking at it. Plenty of opportunities to scare people with it. You can make your own!

    Haunted jack-in-the-box?

    Imagine yourself wandering around a dimly lit house. Your eyes idly scan a shelf. Suddenly, out of nowhere, a twangy melody! What was that? You take a closer look…there seems to be a box in jolly colours…with a handle that’s spinning by itself?!

    Sidling up to Sean Hodgins' Haunted Jack in the Box

    What’s…going on?

    You freeze, unable to peel your eyes away, and BAM!, out pops a maniacally grinning clown. You promptly pee yourself. Happy Halloween, courtesy of Sean Hodgins.

    Clip of Sean Hodgins' Haunted Jack in the Box

    Eerie disembodied voice: You’re welco-o-o-ome!

    How has Sean built this?

    Sean purchased a jack-in-the-box toy and replaced its bottom side with one that would hold the necessary electronic components. He 3D-printed this part, but says you could also just build it by hand.

    The bottom of the box houses a Raspberry Pi 3 Model B and a servomotor which can turn the windup handle. There’s also a magnetic reed switch which helps the Pi decide when to trigger the Jack. Sean hooked up the components to the Pi’s GPIO pins, and used an elastic band as a drive belt to connect the pulleys on the motor and the handle.

    Film clip showing the inside of Sean Hodgin's Haunted Jack in the Box

    Sean explains that he has used a lot of double-sided tape and superglue in this build. The bottom and top are held together with two screws, because, as he describes it, “the Jack coming out is a little violent.”

    In addition to his video walk-through, he provides build instructions on Instructables, Hackaday, Hackster, and Imgur — pick your poison. And be sure to subscribe to Sean’s YouTube channel to see what he comes up with next.

    Wait, how does the haunted part work?

    But if I explain it, it won’t be scary anymore! OK, fiiiine.

    With the help of a a Camera Module and OpenCV, Sean implemented facial recognition: Jack knows when someone is looking at his box, and responds by winding up and popping out.

    View of command line output of the Python script for Sean Hodgins' Haunted Jack in the Box

    Testing the haunting script

    Sean’s Python script is available here, but as he points out, there are many ways in which you could adapt this code, and the build itself, to be even more frightening.

    So very haunted

    What would you do with this build? Add creepy laughter? Soundbites from It? Lighting effects? Maybe even infrared light and a NoIR Camera Module, so that you can scare people in total darkness? There are so many possibilities for this project — tell us your idea in the comments.

    Website: LINK