Schlagwort: Nano 33 IoT
-

Tecnoseta revives the silk industry with open-source innovation
Reading Time: 3 minutesThe silk industry has a rich history in Italy, but modern challenges have brought this centuries-old tradition to the brink of decline. Once a cornerstone of the rural economy in Italy, with a strong presence in Zagarolo, Rome, silk production has dwindled in the country due to industrial developments, synthetic fibers’ growing…
-

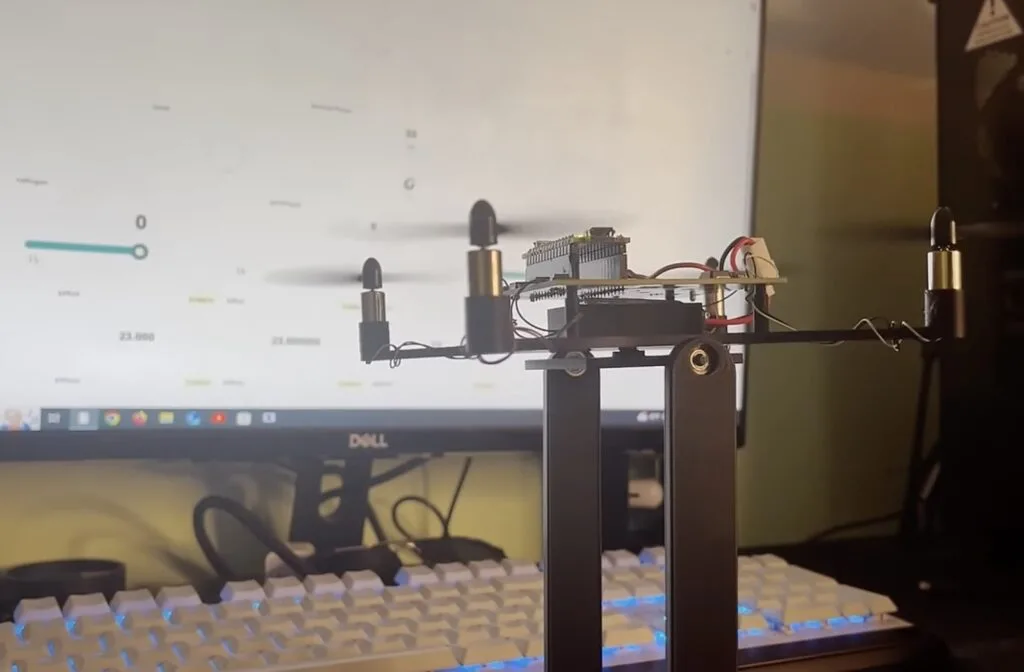
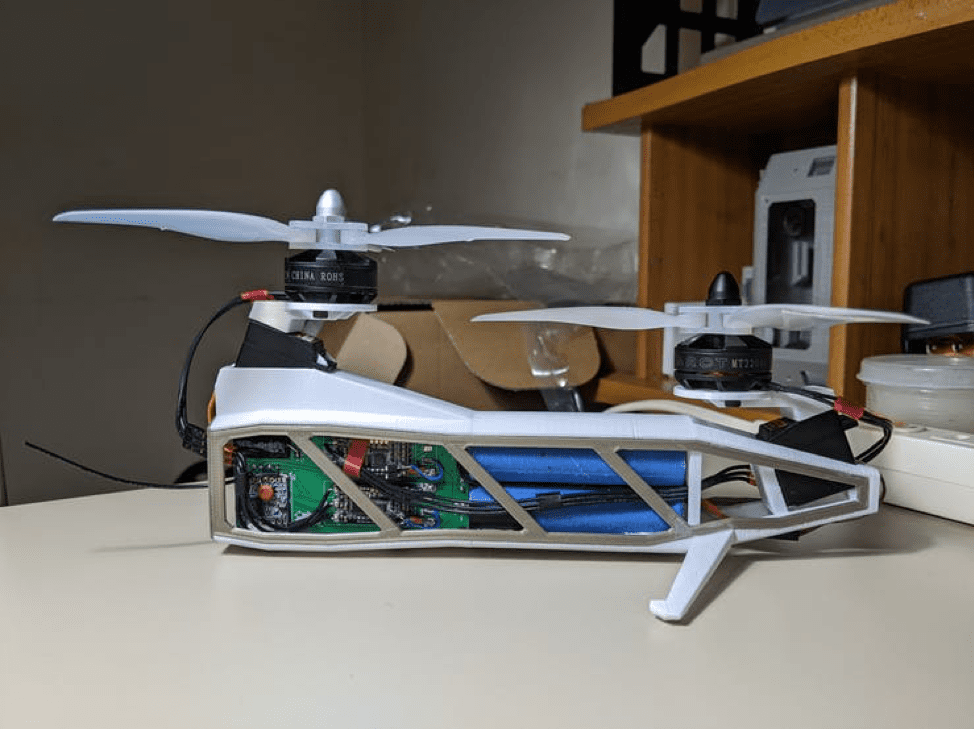
This maker designed a custom flight controller for his supercapacitor-powered drone
Reading Time: 2 minutesBasic drones are very affordable these days—you can literally find some for less than the cost of a fast food drive-thru meal. But that doesn’t mean drones are easy to control. That is actually quite difficult, but manufacturers are able to work off of established reference designs. In a video that perfectly…
-

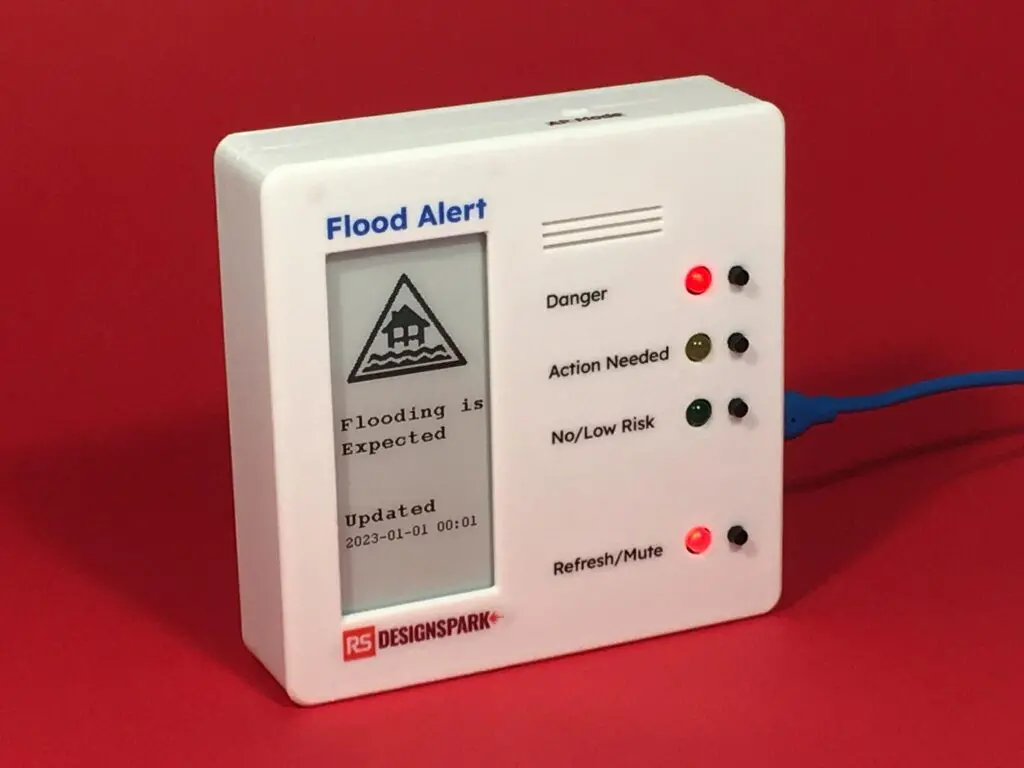
Get notified of impending floods with this Arduino Nano 33 IoT-based display
Reading Time: 2 minutesAs climate change continues to worsen, events such as heavy rains, hurricanes, and atmospheric rivers have only intensified, and with them, large amounts of flooding that pose serious risks to life and property. Jude Pullen and Pete Milne, therefore, have responded by creating a “physical app” that can show the potential for flood dangers…
-

BrainPatch.AI: How a British neurotech startup built a working prototype fast, using Arduino Nano 33 IoT
Reading Time: 3 minutesThe field of neurotechnology has been advancing rapidly in recent years, opening up to safe and effective non-invasive interfaces that can deliver tiny milliamp currents to the right stimulation location on the head, neck or body. One example of the new players in this field is BrainPatch.AI, a Cambridge-based neurotech startup, which…
-

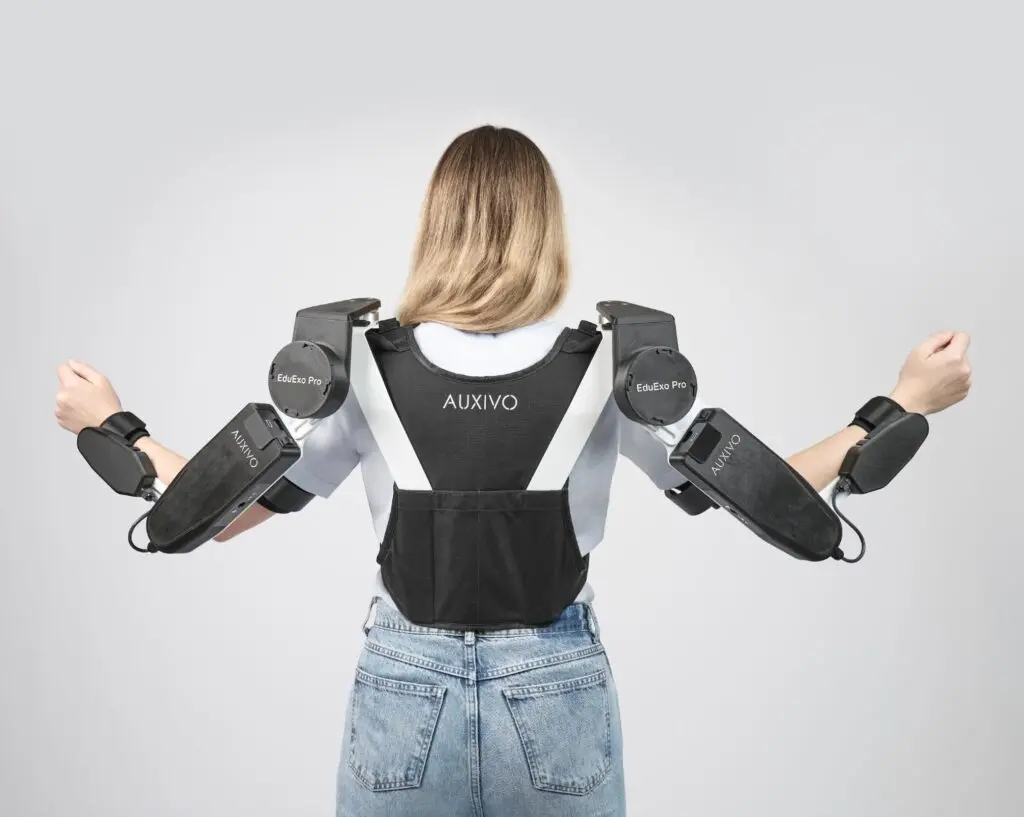
The new Auxivo EduExo Pro helps students with exoskeleton research
Reading Time: 2 minutesEmerging technologies initially develop at a slow pace and that is due in large part to the lack of resources available to students. Complex technology is built on existing knowledge and higher education students need the tools to gain hands-on experience. To help educate the next generation of exoskeleton engineers, Auxivo has…
-
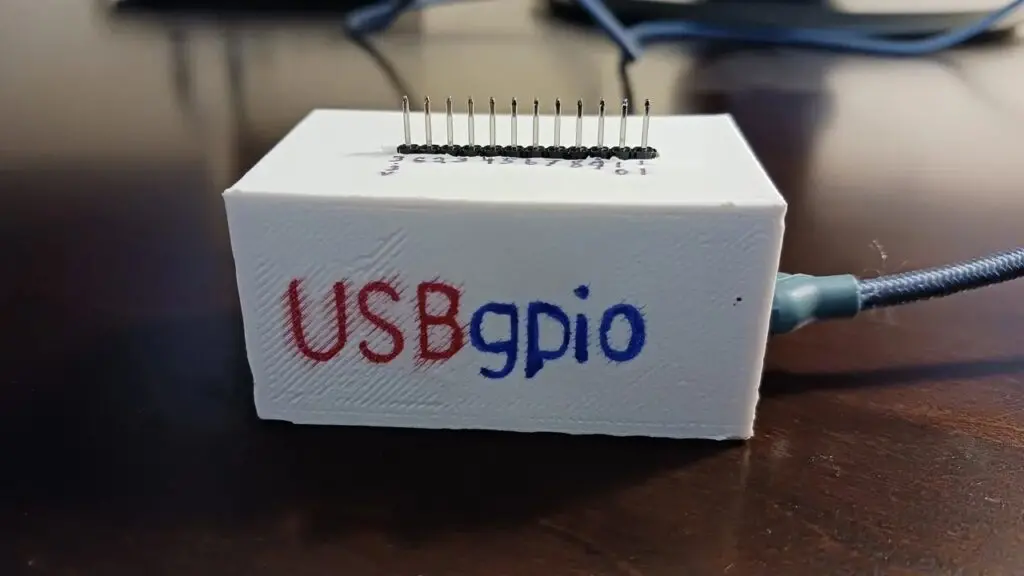
Easily add Python-controlled GPIO pins to any computer
Reading Time: 2 minutesLet’s say that, hypothetically, you wanted to use your computer to blink an LED or read the state of a button. Could you? Almost certainly not — at least not without additional hardware. Most modern computers don’t provide any interface for direct interaction with low-level components. That’s why Nick Bild developed a…
-

Off-grid remote generator starter helps avoid trekking outside in bad weather
Reading Time: 2 minutesLiving off the grid is a dream for many people, but it also presents unique challenges that are otherwise absent in our urban-centric lifestyles. One of the largest adjustments one has to make is the lack of readily available power, as it typically comes from renewable wind/solar or generator setups. In element14 Presents…
-

A DIY autonomous lane keeping system on a budget
Reading Time: 2 minutesDespite overconfident proclamations from high-profile players in the tech and automotive industries, we’re still a long way from fully autonomous self-driving cars. Current prototypes work well under ideal conditions, but are easily thwarted by everyday real world anomalies. Lane keeping, however, is a much more approachable challenge and Computerphile was able add…
-

This internet uptime indicator reduces frustration
Reading Time: 2 minutesBandwidth may have increased dramatically over the past couple of decades, but internet connections are often still quite unreliable. For people with unreliable connections, it becomes a chore to check a browser over and over again to find out when the internet is back up. To avoid that hassle, Emily Velasco built…
-

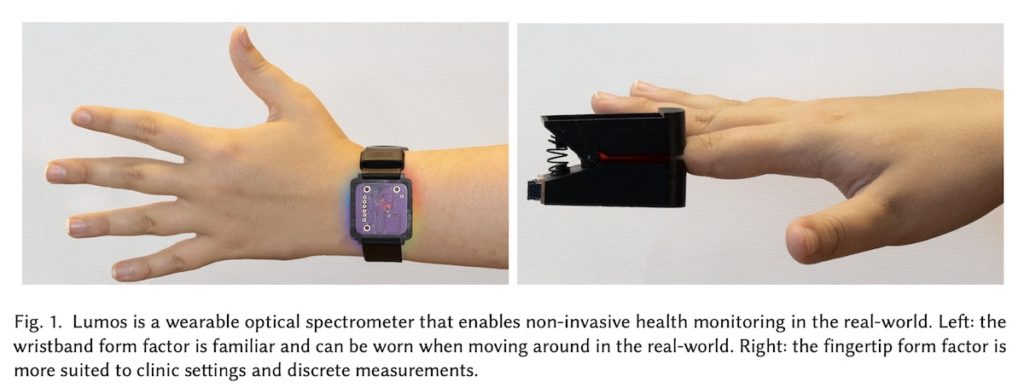
Lumos finally enables wearable spectroscopy research
Reading Time: 2 minutesSpectroscopy is a field of study that utilizes the measurement of electromagnetic radiation (often visible light) as it reflects off of or passes through a substance. It can, for instance, help researchers determine the composition of a material, as that composition influences how the material reflects light. Spectroscopy is also used in…
-
Arduino brings birthday cake to life
Reading Time: 2 minutesA good birthday cake is all about the decoration. Usually that comes in the form of fancy frosting, fondant flourishes, and crazy candles. But what if you got electronics involved? That’s the question Natasha Dzurny answered when she used an Arduino to bring a birthday cake to life with epic LED lighting.…
-
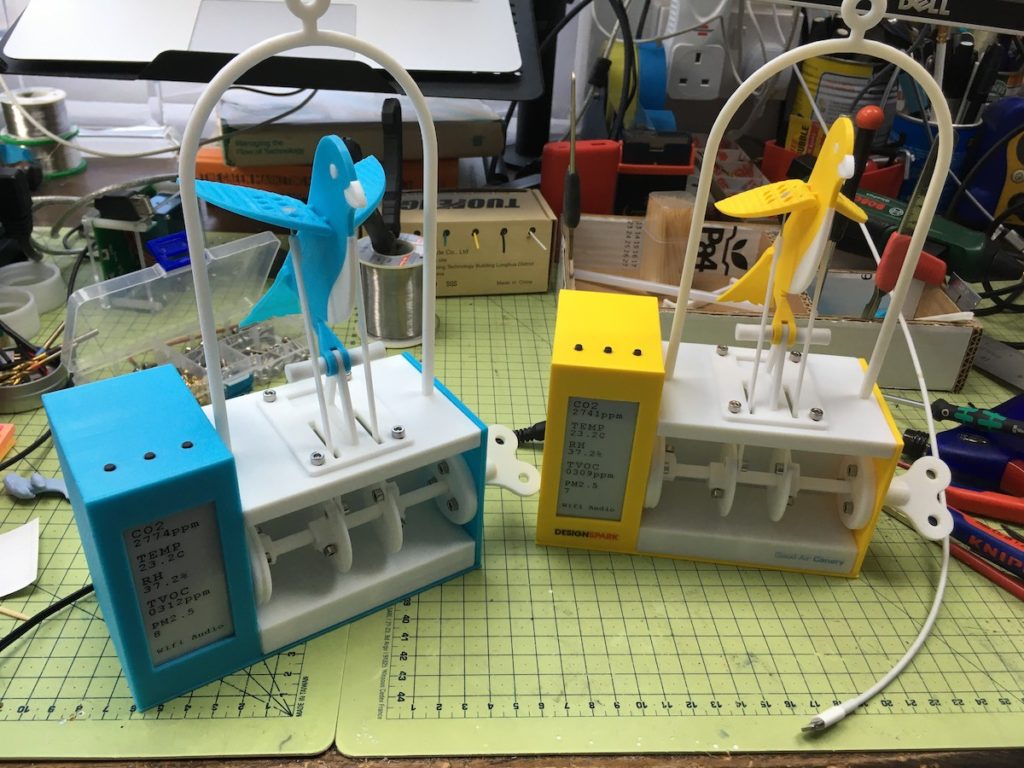
Monitoring environmental pollution with the Arduino MKR WAN 1300
Reading Time: 2 minutesThe scourge of air pollution claims several million lives globally each year, with industrial processes and energy production accounting for much of it. Because of its harmful nature, governments often set up air quality monitoring stations, although they have to cover large areas and yield low resolution data. To monitor the air…
-
Robo-fish filters microplastics like a whale with krill
Reading Time: 3 minutesThe world’s collective waste plastics don’t always stay in landfills. They often break down into microplastics that fill our oceans, then end up in our air, water supply, and food. According to an Orb Media study, 83% of the tested water samples from metropolitan areas all over the globe contained plastic fibers.…
-

The Airio Explorer 1 is a Nano 33 IoT-based indoor gas monitor
Reading Time: 2 minutesThe environments we reside in can have massive effects on our health, as poor air quality, crowded spaces, or uncomfortable temperatures can all lead to certain illnesses. Of these metrics, Tindie seller AppliedSBC has focused on air quality since too much CO2 or too little oxygen quickly impact health with sometimes grave consequences.…
-
The UV Budgie shows IoT alerts in a fun way
Reading Time: 2 minutesArduino Team — September 14th, 2022 The Internet of Things (IoT) is now well-established and households around the world contain many IoT devices. Most of them were designed to blend as seamlessly as possible into their owners’ lives, which means that they tend to be unobtrusive. But “unobtrusive” is the last adjective…
-

Make your own motorcycle monitor for the race track with a Nano 33 IoT
Reading Time: 2 minutesArduino Team — August 17th, 2022 If you’ve ever had the pleasure of riding a motorcycle on a track, then you know that it quickly becomes competitive — even if the competition is yourself. You want to cut your lap times, increase your lean angle, brake later after a straight, and accelerate…
-

Get connected to your Nano with the Screw Terminal Adapter
Reading Time: 3 minutesThe brand new Nano Screw Terminal Adapter turns up the speed on your prototyping efforts by giving you a fast, reliable way to hook up your boards. This awesome add-on is exactly what seasoned makers have been crying out for, and is now available from the Arduino Store. Let’s take a look…
-

Designing a DIY watch with a brass ‘cyberpunk-y’ aesthetic
Reading Time: 2 minutesDesigning a DIY watch with a brass ‘cyberpunk-y’ aesthetic Arduino Team — June 20th, 2022 The cyberpunk aesthetic, like several other genres, often takes the form of heavy and metallic body modifications or devices that are meant to signify a more futuristic society. Inspired by the video game Deus Ex, Redditor Star_11 had…
-
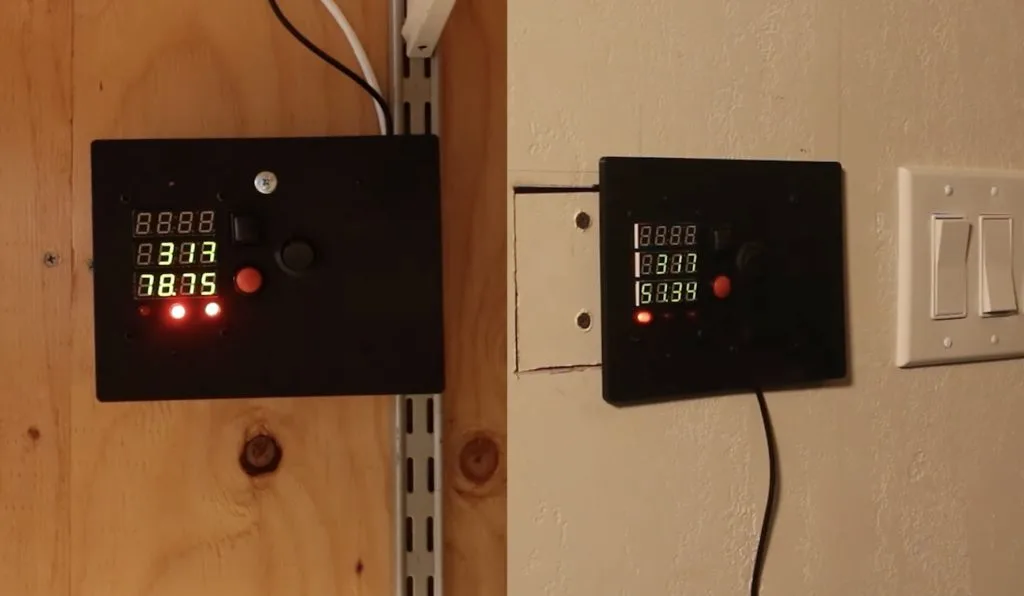
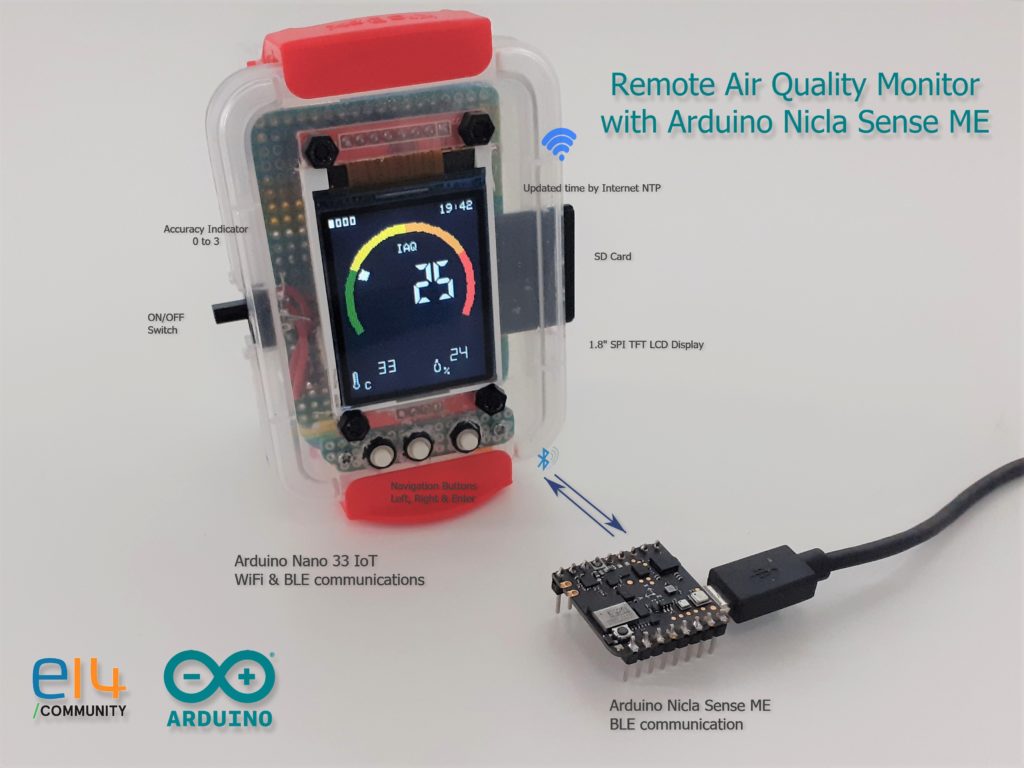
Remote indoor air quality monitoring with the Arduino Nicla Sense ME and Nano 33 IoT
Reading Time: 2 minutesArduino Team — May 26th, 2022 Most air quality-sensing devices integrate their sensors into the same enclosure as the display, which can make getting an accurate reading tough since the viewer is directly next to the unit and could potentially skew the values. This is why one element14 community member Enrique Albertos…
-

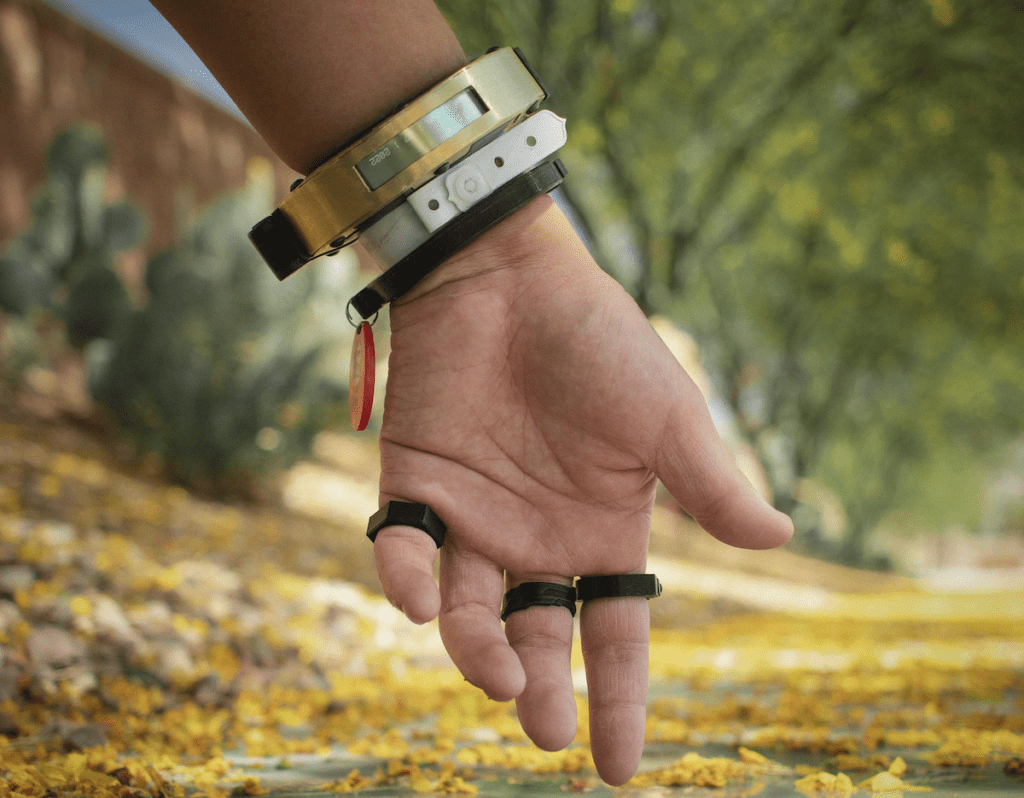
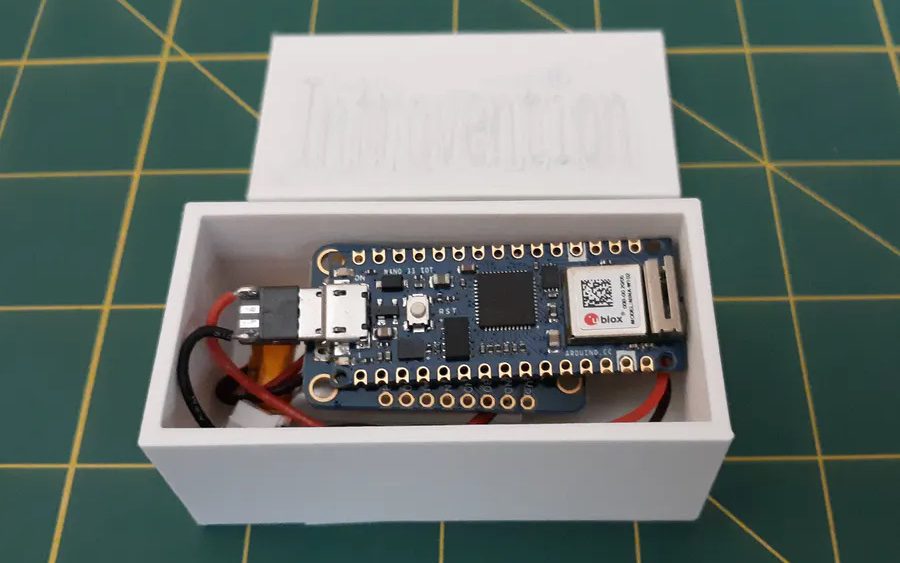
Introvention is a wearable device that can help diagnose movement disorders early
Reading Time: 2 minutesArduino Team — May 17th, 2022 Conditions such as Parkinson’s disease and essential tremors often present themselves as uncontrollable movements or spasms, especially near the hands. By recognizing when these troubling symptoms appear, earlier treatments can be provided and improve the prognosis for the patient compared to later detection. Nick Bild had the…
-
Golf Ace helps you learn how to putt like the pros using tinyML
Reading Time: 2 minutesArduino Team — May 9th, 2022 Fancy golfing simulators are excellent for learning the best techniques such as balance and how to hold a club properly. However, their large cost puts them out of the reach of most people, so Nick Bild decided to create a far cheaper alternative that can still be beneficial.…
-

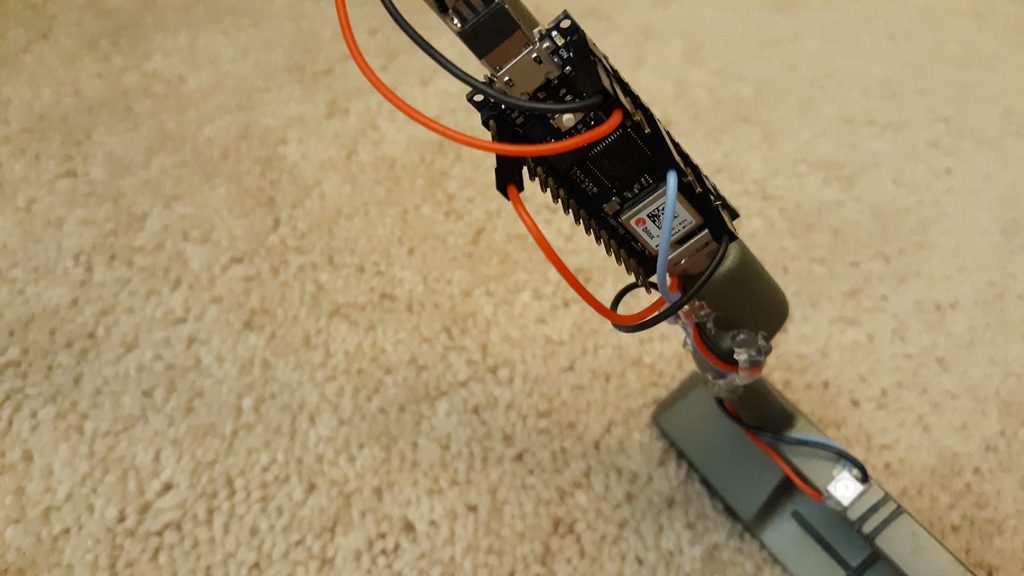
This Nano 33 IoT-controlled bicopter uses a pair of rotors to achieve stable flight
Reading Time: 2 minutesArduino Team — February 14th, 2022 The classic helicopter design that everyone is familiar with features a large central rotor that produces lift and a much smaller one towards the back, which prevents the helicopter from spiraling out of control. However, Redditor CCCanyon decided to take inspiration from Boeing’s CH-47 Chinook that leverages a pair of…