Schlagwort: Nano
-

This machine lets you practice baseball solo, similar to Topgolf
Reading Time: 2 minutesTopgolf has a pretty brilliant business model: let golfers do the fun stuff (driving balls at max power), without any of the complications, time commitments, or logistics of running through a full 18-hole course. Batting cages exist to do something similar for baseball, but Pete LeMaster didn’t want to practice batting —…
-

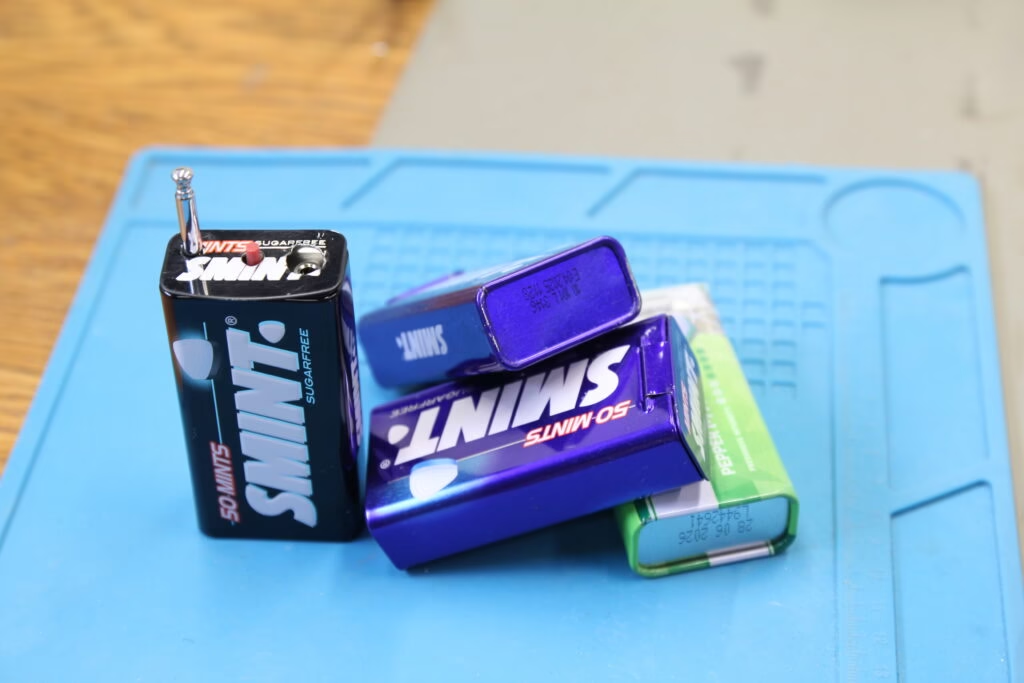
This mint tin radio is a fresh take on emergency communication
Reading Time: 2 minutesMost of us get our news via the internet these days, which is only natural given the convenience and availability. But during an emergency, such as weather extreme enough to cause power or network outages, the internet may be inaccessible. How do you learn vital information in that scenario? The answer is…
-

This robot picks locks using brains instead of brawn
Reading Time: 2 minutesA physical lock, like what secures your front door, has a finite and calculable number of combinations, just like a digital keypad does. There are a set number of pins in the lock and each can be one of a set number of lengths. Each of those numbers varies based on manufacturer…
-

Building a Wi-Fi robot controller that accepts voice commands
Reading Time: 2 minutesThe whole point of a robot is that it can operate without direct control input from an operator. Except there are many exceptions and it isn’t uncommon for roboticists and operators to require direct control. The Tinkering Techie needed to add that capability to his rover robot and built his own Wi-Fi…
-

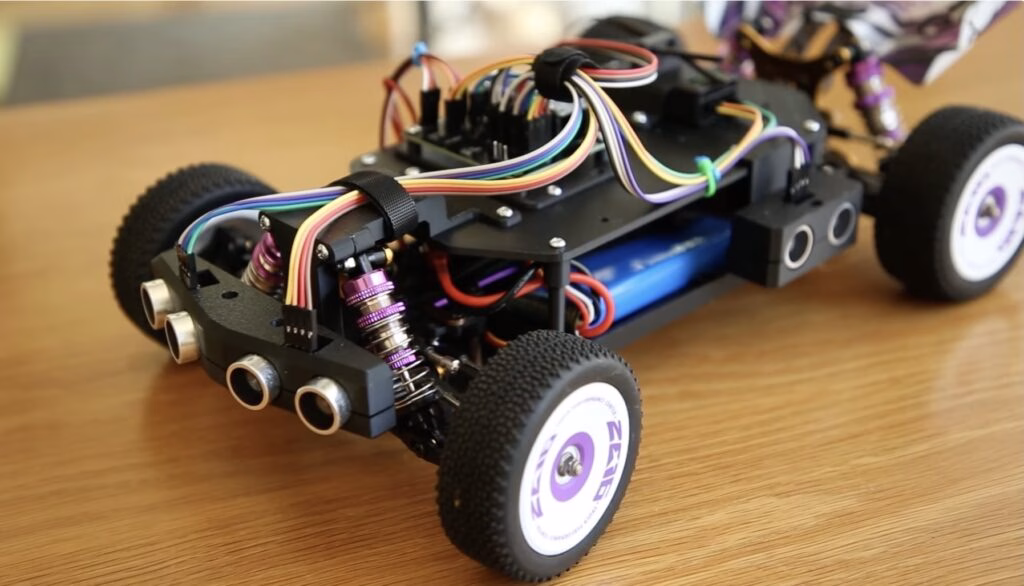
This automatic emergency braking system protects RC cars
Reading Time: 2 minutesIt is a story as old as time (or at least the 1960s): kid gets an RC car for Christmas and excitedly takes it for spin, but crashes it into a wall within five minutes and tears ensue. The automotive industry has cut down on accidents by implementing automatic emergency braking safety…
-

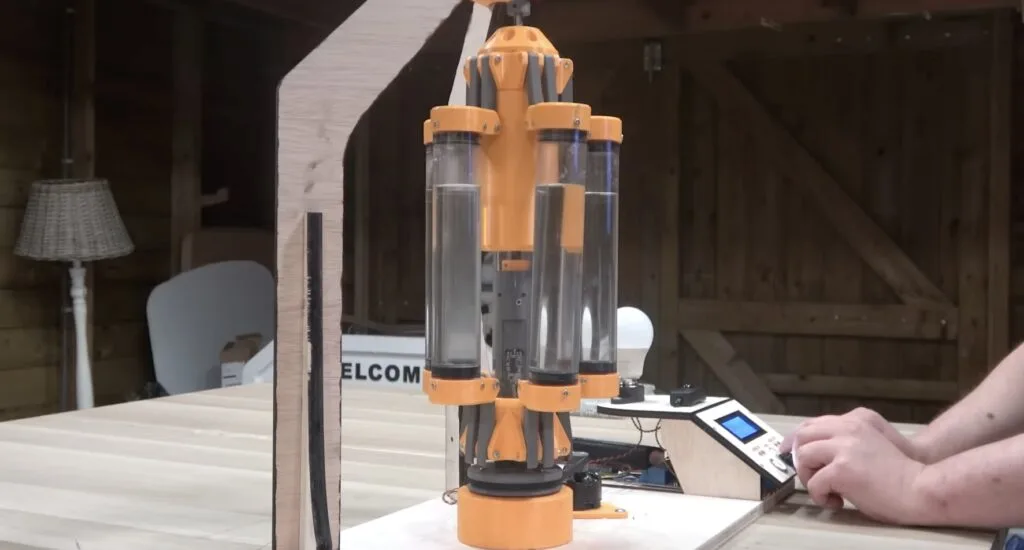
This spinning water contraption is actually a functional battery
Reading Time: 2 minutesIf you ask someone to think of a battery, they’re probably going to picture a chemical battery, like a AA alkaline or a rechargeable lithium-ion battery. But there are other kinds of batteries that store energy without any fancy chemistry at all. If you find a way to save energy for later,…
-

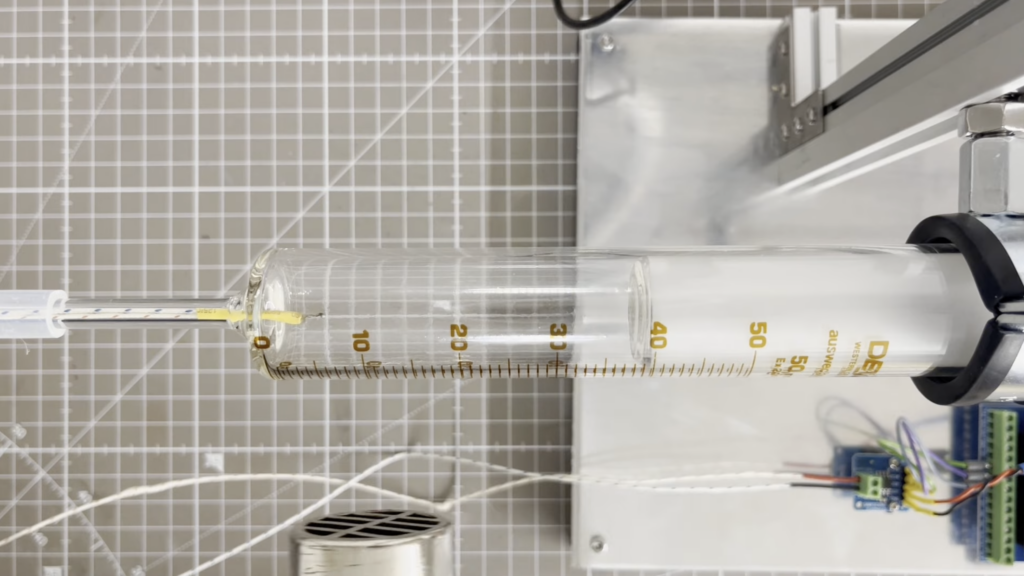
This machine helps to experimentally find an estimation of absolute zero
Reading Time: 2 minutesHow can we ever really know anything? If you listen to the anti-science types, you might believe that we can’t. But if you get past Plato’s Allegory of the Cave, you can start identifying basic truths, through logic and experiments, on which to build upon. One important foundational building block is absolute…
-

Solar upgrades the Nebulophone synthesizer to enhance playability
Reading Time: 2 minutesWoodwinds and brass are so 19th century. We’re living in the future and now it is synthesizers all the way down. There are many to choose from and the Bleep Labs Nebulophone is a neat example that was sold from 2012 to 2016, with the design files now available on GitHub for…
-

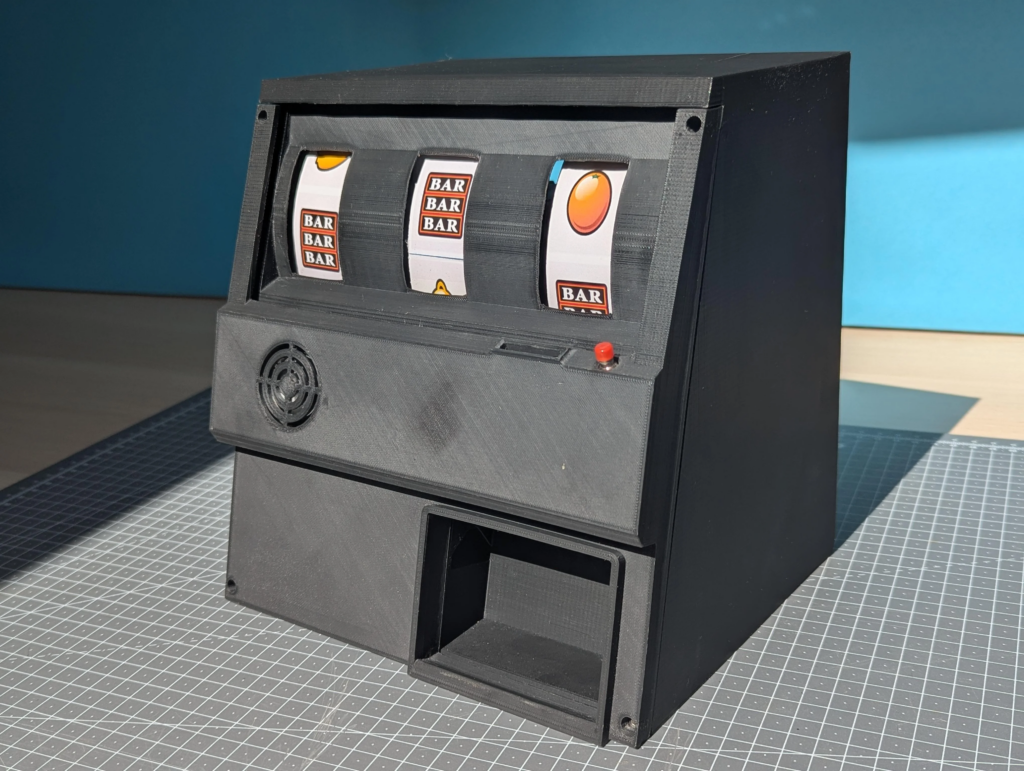
This student made his own odds with a DIY slot machine
Reading Time: 2 minutesToday’s digital slot machines are anything but “fair,” in the way that most of us understand that word. There is tight regulation in most places, but the machines can still adjust their odds of payout in order to maintain a specific profit margin. If the machine thinks it has paid out too…
-
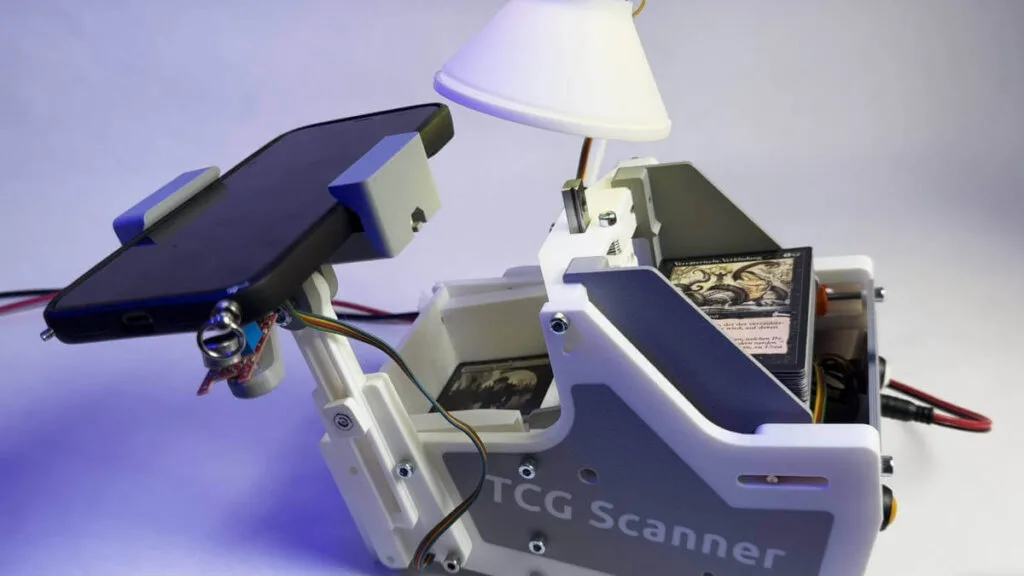
Quickly digitize your Magic deck with this 3D-printable scanning rig
Reading Time: 2 minutesWe call them “deck builders” for a reason: because players end up with huge piles of trading cards. They can get difficult to manage, which is why the ManaBox app exists for Magic: The Gathering. It lets collectors scan and log their decks, which is handy for everything from finding market values to…
-

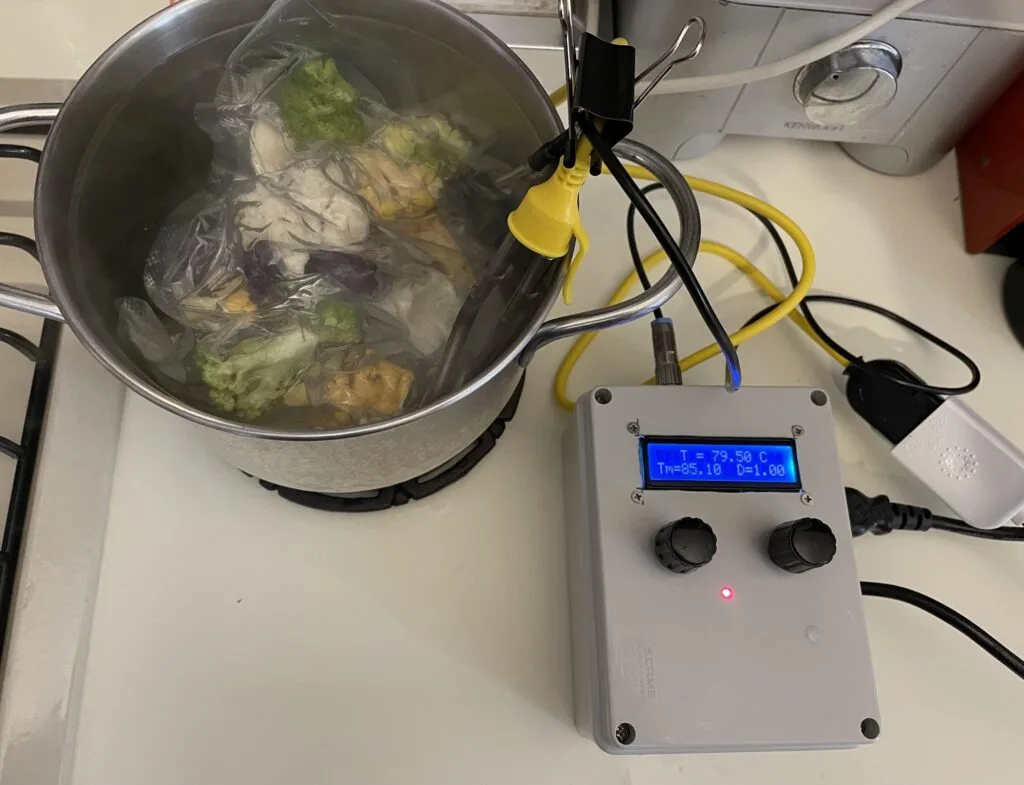
A DIY sous vide cooker for making the perfect steak
Reading Time: 2 minutesSous vide (which means “under vacuum” in French) is a cooking technique in which food is sealed in a plastic bag (or another container) and immersed in warm water for a long period of time. It is great for meat, like steak, because it ensures the food is an even temperature throughout.…
-

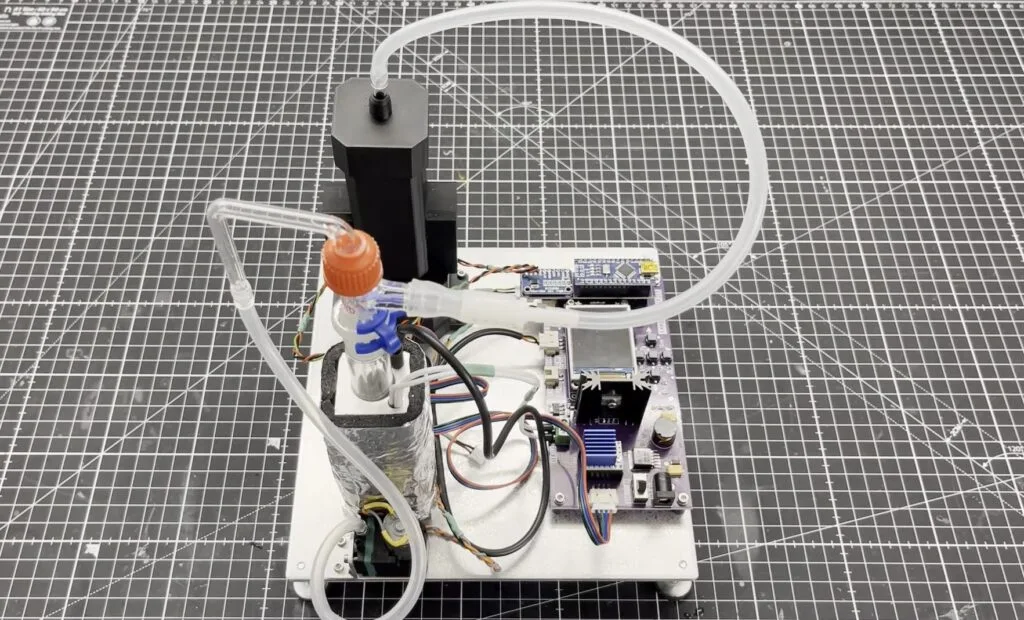
DIY micro lab analyzes ammonia levels in blood and urine
Reading Time: 2 minutesCirrhosis of the liver is an extremely serious condition that requires extensive medical monitoring and often intervention. Progression of the condition can be fatal, so even if caught early it must be monitored closely. But, like most things in medicine, that gets expensive. That’s why Marb built his own DIY “micro lab”…
-

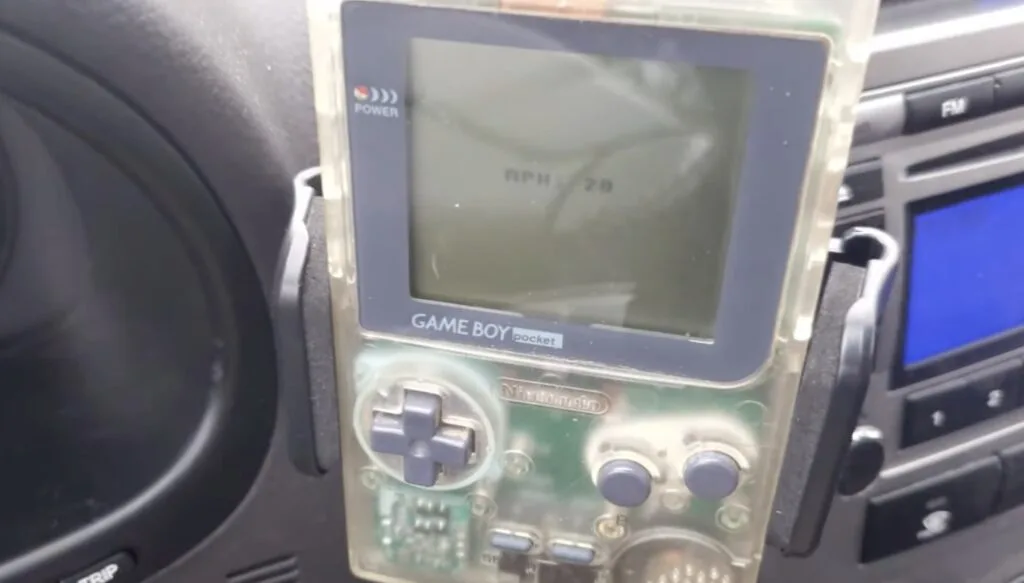
A Game Boy is the worst and best option for a car’s dash
Reading Time: 2 minutesIf your car was made in the last decade, its dash probably has several displays, gauges, and indicator lights. But how many of those do you actually look at on a regular basis? Likely only one or two, like the speedometer and gas gauge. Knowing that, John Sutley embraced minimalism to use…
-

This telescope can intelligently point itself anywhere in the sky
Reading Time: 2 minutesKnown by their characteristic mounting solution, Dobsonian telescopes are the standard in amateur astronomy due to their lower cost and ease-of-use. But after seeing how some of the larger, motorized telescopes at observatories can simply pivot to a target of interest, one member from the FabLab at Orange Digital Center Morocco wanted to…
-

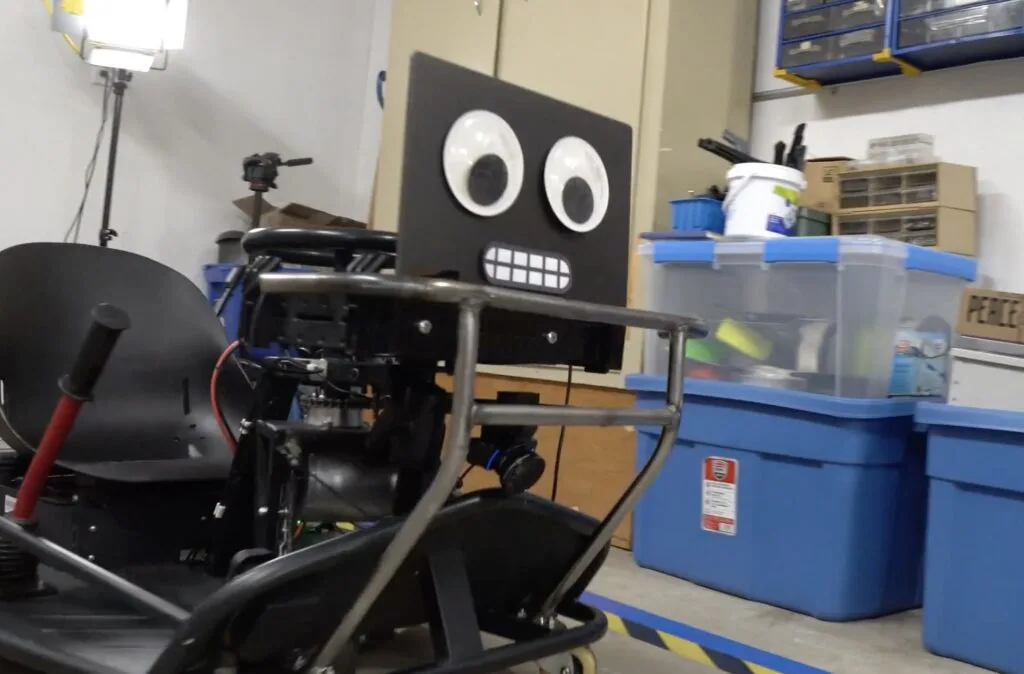
This autonomous go-kart only needs a camera to navigate a workshop circuit
Reading Time: 2 minutesAutonomous vehicles, and self-driving cars in particular, are probably one of the most enticing technologies of the 21st century. But despite a great deal of R&D and even more speculation, we have yet to see a self-driving car that can actually operate on real public roads without any human oversight at all.…
-

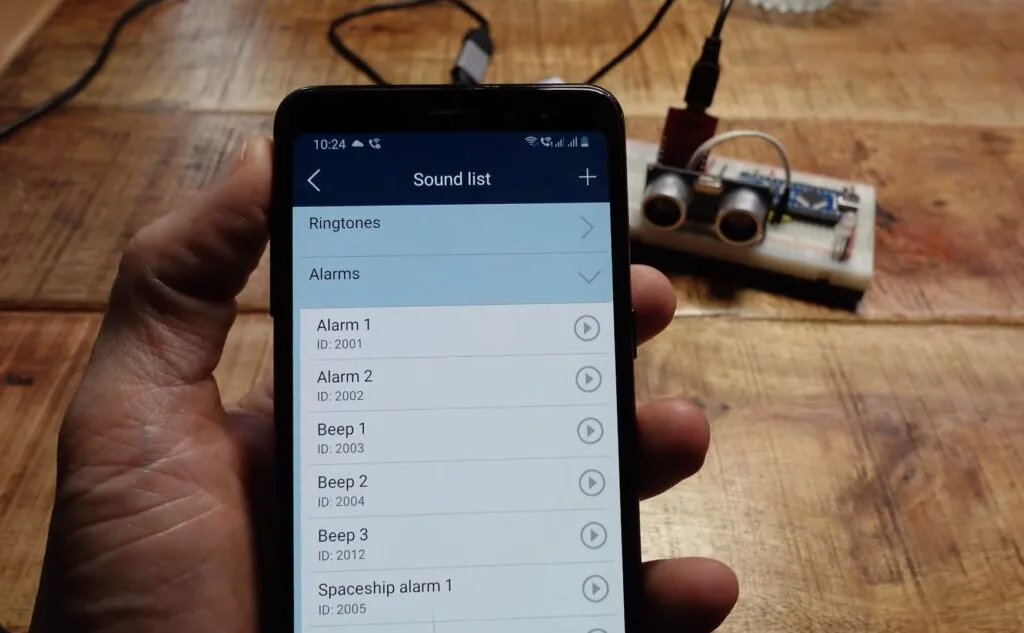
Turn your old Android smartphone into an Arduino screen with the RemoteXY app
Reading Time: 2 minutesEach component you add to your Arduino project increases its complexity and the opportunity for mistakes. But most projects require some “auxiliary” hardware — components that you use to interact with the Arduino or to help it do the job you’re asking of it. Buttons and displays are great examples. But as…
-

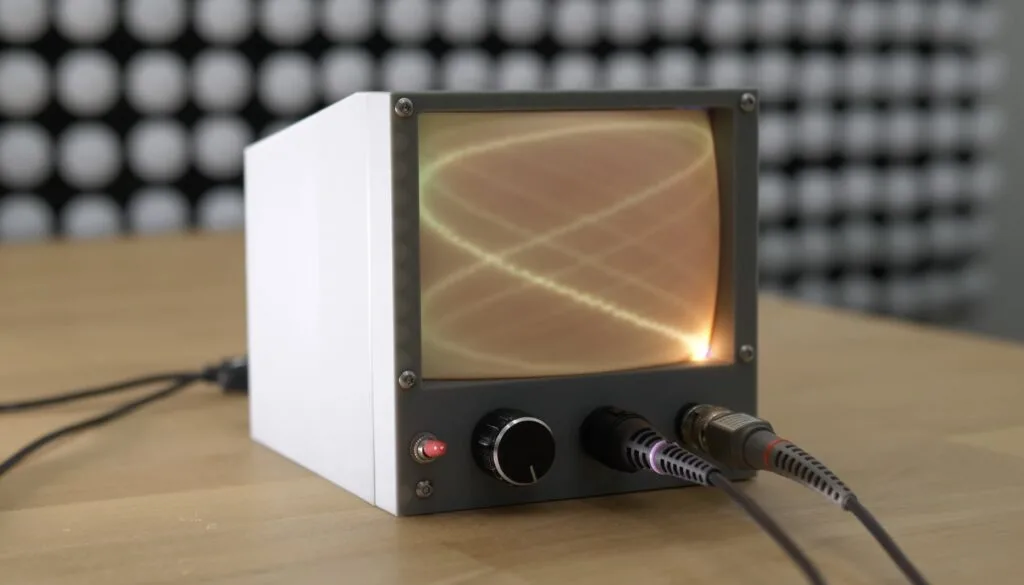
This fake CRT TV works using lasers and UV magic
Reading Time: 2 minutesUntil the 21st century, cathode-ray tube (CRT) TVs were pretty much the only option. As such, media was made to suit them. Retro video game consoles in particular look best on CRT TVs. But those old TVs are getting hard to find and desirable models are now quite expensive. So, bitluni built his…
-
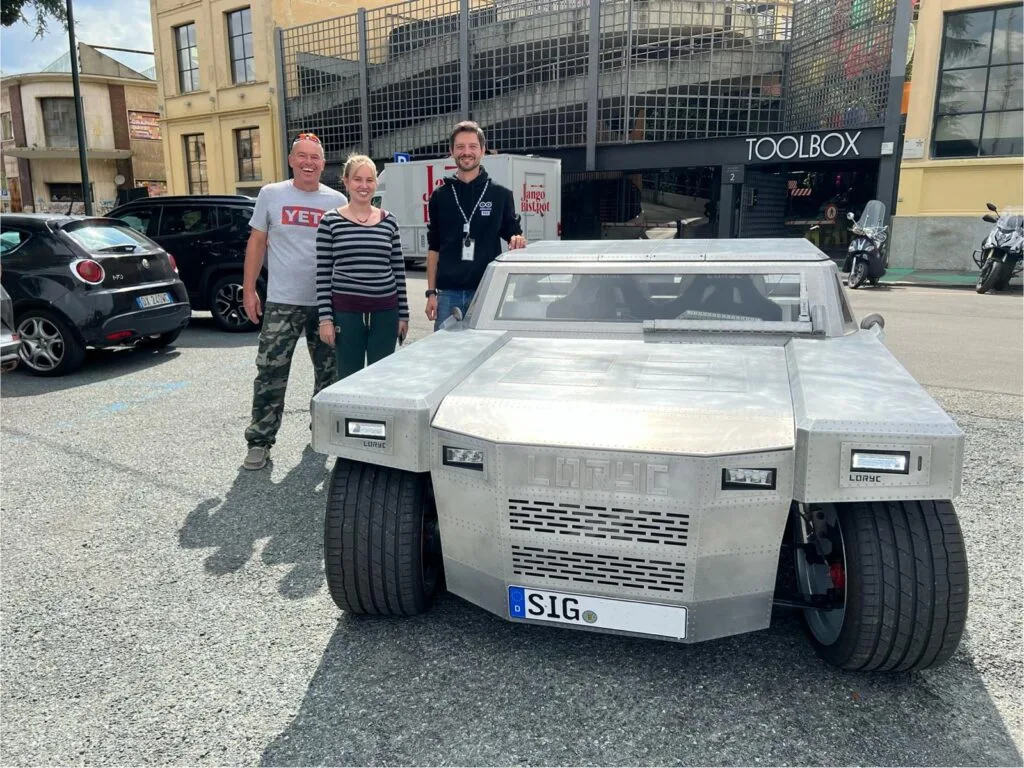
It’s silver, it’s green, it’s the Batteryrunner! An Arduino-powered, fully custom electric car
Reading Time: 5 minutesInventor Charly Bosch and his daughter Leonie have crafted something truly remarkable: a fully electric, Arduino-powered car that’s as innovative as it is sustainable. Called the Batteryrunner, this vehicle is designed with a focus on environmental impact, simplicity, and custom craftsmanship. Get ready to be inspired by a car that embodies the…
-

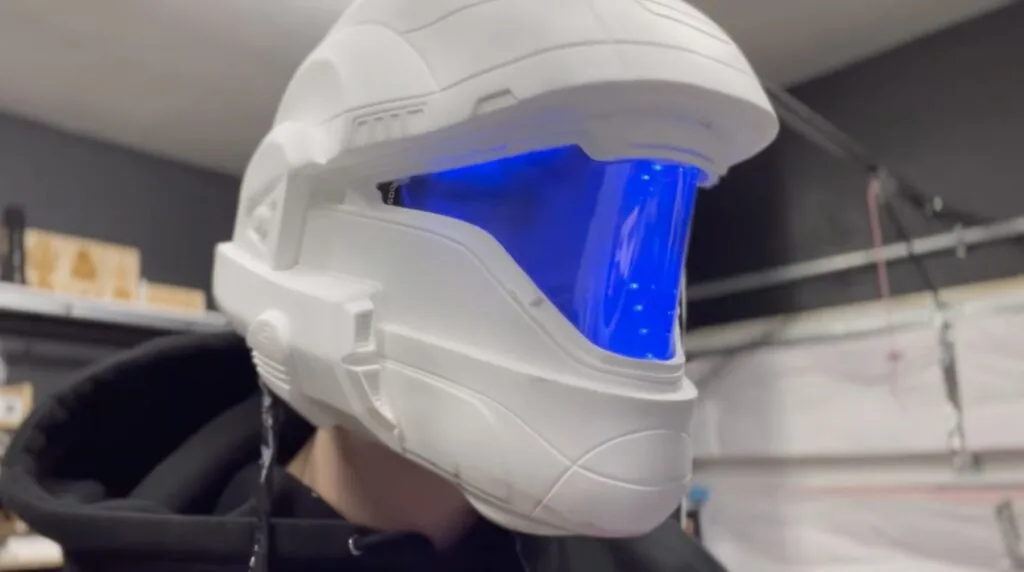
This Halo helmet features an adjustable-transparency RGB-backlit visor
Reading Time: 2 minutesThe Halo franchise is full of iconic designs, from vehicles like the Warthog to weapons like the Needler. But the armor, such as the Spartan armor worn by Master Chief, is arguably the most recognizable. The helmets are especially cool, and LeMaster Tech put his own unique spin on an ODST-style helmet by adding…
-
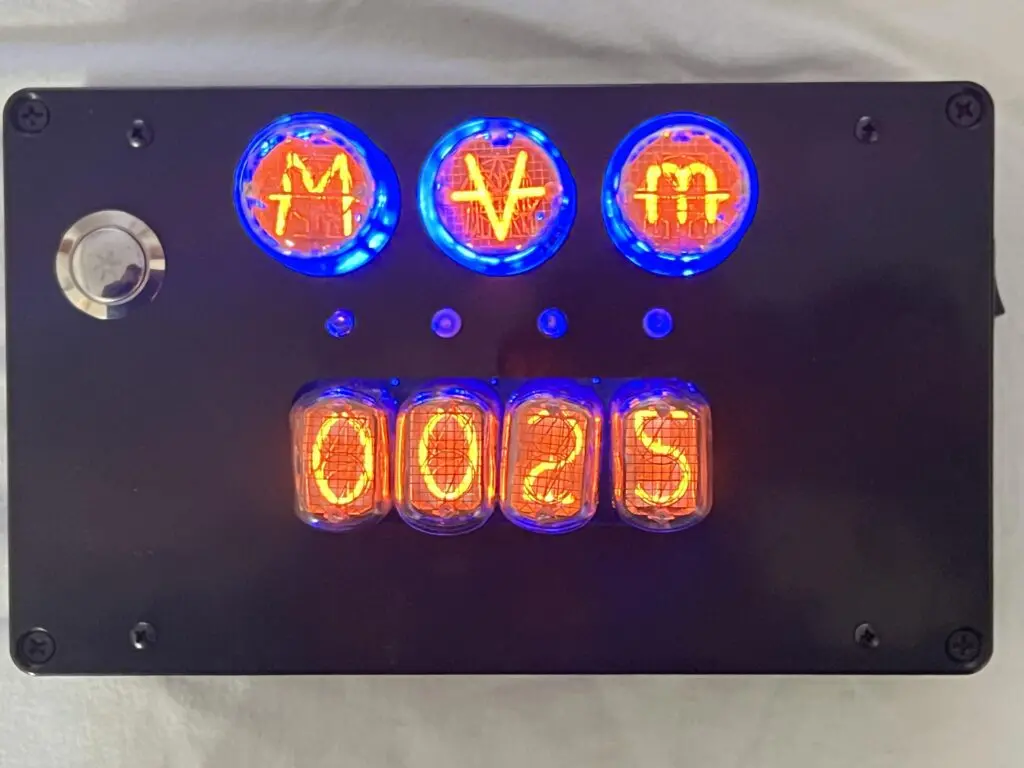
Slot machine game harnesses the beauty of Nixie tubes
Reading Time: 2 minutesEveryone loves the look of Nixie tubes, with their glowing orange characters made of curvy filament. But we usually only see makers using Nixie tubes for one purpose: clocks. That’s unfortunate, because they have a lot more potential, as illustrated by Bob Cascisa’s Nixie tube slot machine game. This is a really…
-

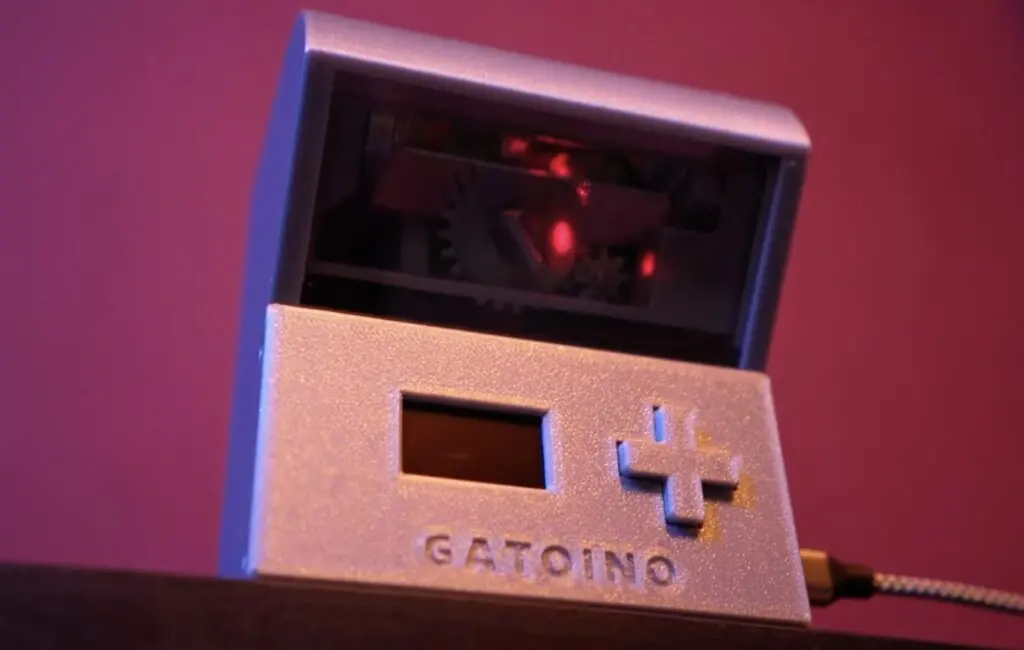
This automatic laser turret keeps the cats entertained for hours
Reading Time: 2 minutesCats may be adorable, but they evolved to be predators. Unfortunately, responsible owners keep their cats indoors to avoid decimating the local wildlife population and that means Mr. Whiskers and Ms. Socks don’t get much opportunity to express their hunting urges. That’s why Sascha at Small Batch Factory designed Gatoino, which is…
-

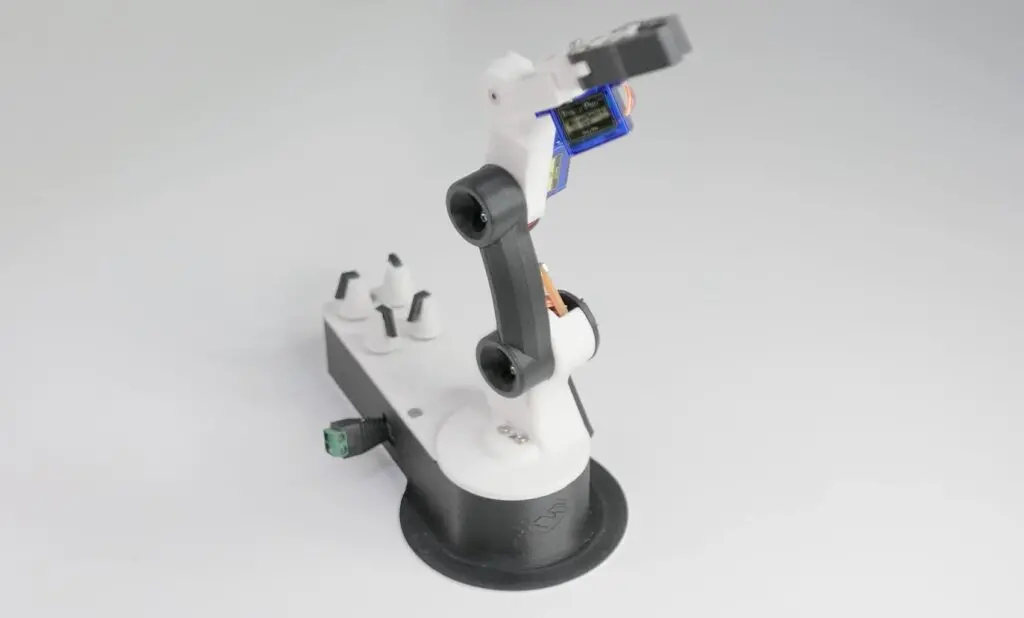
This 3D-printed robotic arm can be built with just a few inexpensive components
Reading Time: 2 minutesRobotics is already an intimidating field, thanks to the complexity involved. And the cost of parts, such as actuators, only increases that feeling of inaccessibility. But as FABRI Creator shows in their most recent video, you can build a useful robotic arm with just a handful of inexpensive components. This is pint-sized…