Schlagwort: MKR1000
-

DIY sequential gear shifter for sim racing
Reading Time: 2 minutesA sequential transmission is one that only allows you to move up or down by a single gear at a time. They’ve always been the norm for motorcycles, because they’re lightweight and compact. And Formula One cars have sequential transmissions for the same reasons. But unlike motorcycles, which require manual shifting, Formula…
-

Google’s Arduino-powered devices provide soothing signals
Reading Time: 2 minutesGoogle’s Arduino-powered devices provide soothing signals Arduino Team — April 20th, 2022 Our days are full of devices trying their best to grab our attention, from a computer dinging when a new email hits to a smartphones vibrating every time an app wants to sell something. If you’re like most people, the…
-

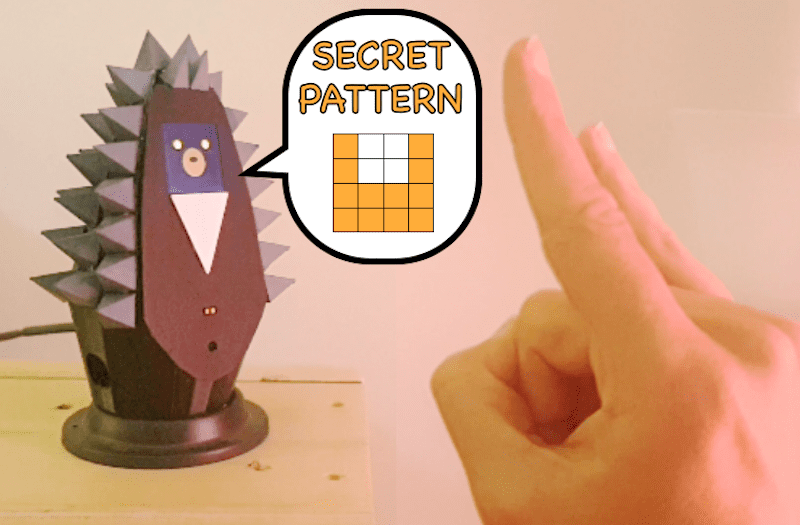
Meet Grumpy Hedgehog, an adorable gesture-sensing companion
Reading Time: 2 minutesArduino Team — November 3rd, 2021 Detecting shapes and gestures has traditionally been performed by camera systems due to their large arrays of pixels. However, Jean Peradel has come up with a method that uses cheap time-of-flight (ToF) sensors to sense both objects and movement over time. Better yet, his entire project is housed within a…
-

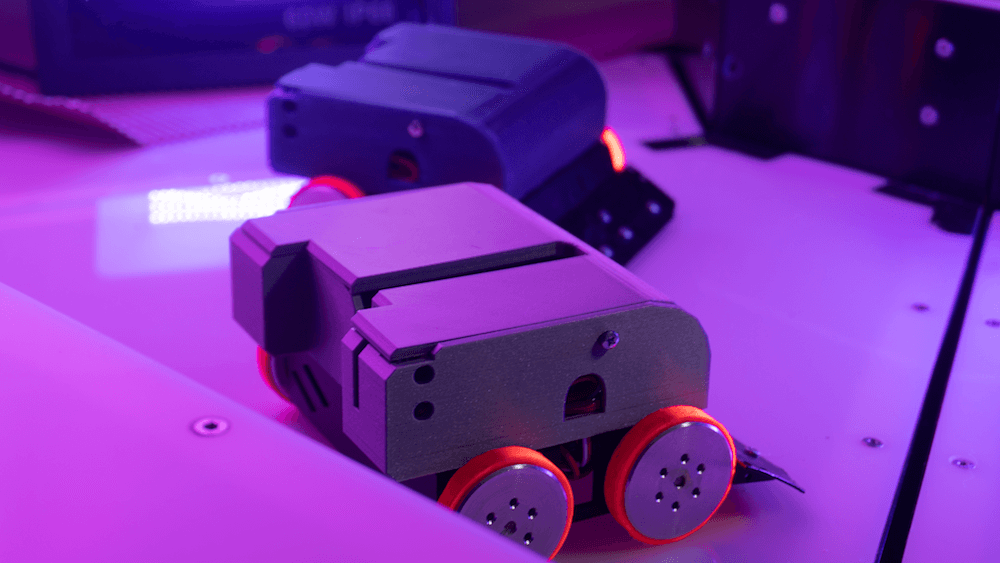
Using the MKR IoT Carrier board as a game console
Reading Time: 2 minutesArduino Team — July 21st, 2021 One of the first things many makers try to do when they receive a new piece of cool hardware is write a game for it. This is exactly what Johan Halmén did with his Breakout console that uses the Arduino MKR IoT Carrier board and an MKR1000 to…
-

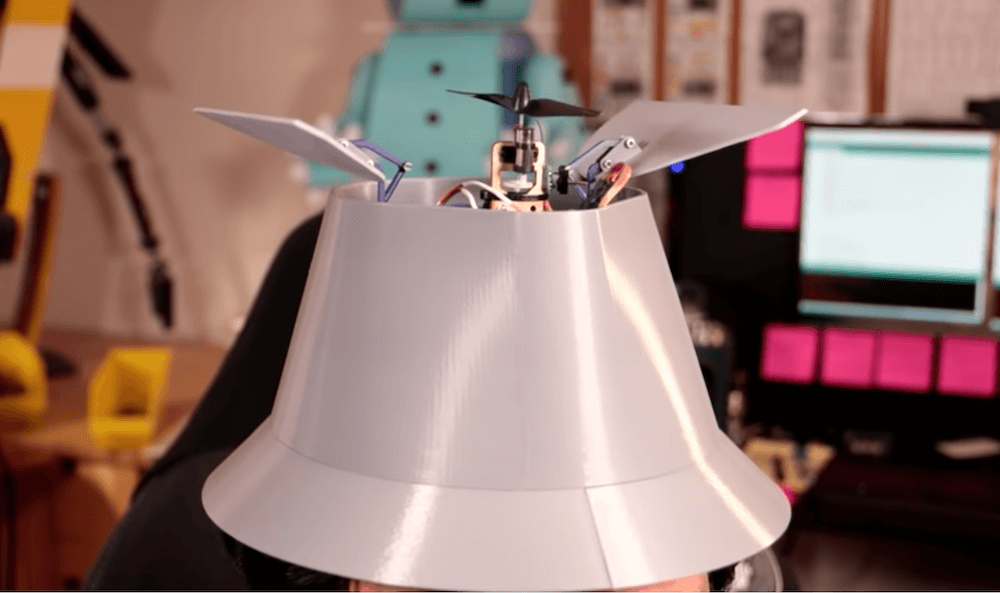
This Inspector Gadget hat actually responds to voice commands
Reading Time: 2 minutesThis Inspector Gadget hat actually responds to voice commands Arduino Team — October 31st, 2020 If you ever watched the 1980s Inspector Gadget cartoon, you undoubtedly wanted a hat like his, which can pop out all kinds of useful tools under voice control. Although it won’t allow you to fly off after…
-
![Light[s]well is a voice-controlled custom lighting installation](data:image/svg+xml;charset=utf-8,%3Csvg xmlns%3D'http%3A%2F%2Fwww.w3.org%2F2000%2Fsvg' viewBox%3D'0 0 1024 783'%2F%3E)
Light[s]well is a voice-controlled custom lighting installation
Reading Time: < 1 minuteLight[s]well is a voice-controlled custom lighting installation Arduino Team — September 30th, 2020 Designed by Brian Harms of NSTRMNT, Light[s]well is a beautifully crafted 4’x8′ light installation for a triple-height living room that’s voice-responsive thanks to the Arduino Alexa skill. Light[s]well is constructed out of 80/20 extrusions and fasteners, with individually…
-

Announcing the Touch Less, Do More Challenge
Reading Time: 4 minutes[youtube https://www.youtube.com/watch?v=wkvsczf9h0Q?feature=oembed&w=500&h=281] The COVID-19 pandemic has changed the way we interact with people, things, and the world around us. We’re calling on the community to use an Arduino Nano or MKR board to build solutions that can help us practice better social distancing, improve queue management, or enable touch-free technologies. Stepping out from…
-
Creating an online robot fighting game using Arduino MKR1000 WiFi
Reading Time: 7 minutesThis is a guest post from Surrogate, a team of developers building games that people play in real-life over the internet. We introduced this concept last year, and have launched three games so far. Our final game of 2019 was SumoBots Battle Royale — where players from anywhere in the world can…
-
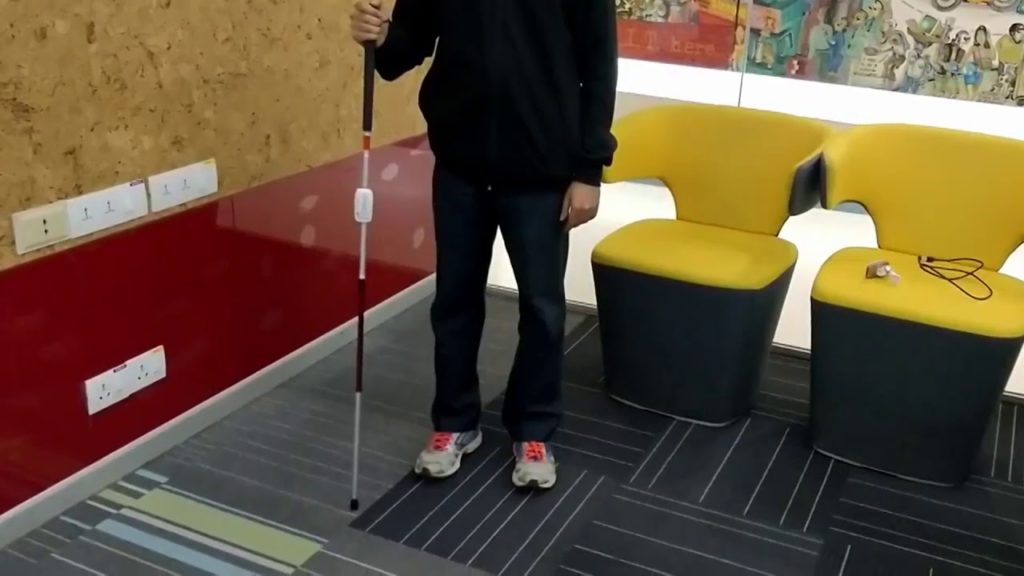
GesturePod is a clip-on smartphone interface for the visually impaired
Reading Time: 2 minutesGesturePod is a clip-on smartphone interface for the visually impaired Arduino Team — November 6th, 2019 Smartphones have become a part of our day-to-day lives, but for those with visual impairments, accessing one can be a challenge. This can be especially difficult if one is using a cane that must be put…
-

Getting started with the Arduino IoT Cloud
Reading Time: 2 minutesGetting started with the Arduino IoT Cloud Arduino Team — February 22nd, 2019 As previously announced, the Arduino IoT Cloud is an easy to use Internet of Things application platform that enables developers to go from unboxing their board to a working device in just minutes. To help you get started, we’ve…
-
InfiniTouch: Interact with both sides of your smartphone
Reading Time: 2 minutesInfiniTouch: Interact with both sides of your smartphone Arduino Team — October 19th, 2018 Besides, perhaps a longer battery life, what would make your smartphone experience better? If you said a more versatile interaction method than poking one side with your thumb, researchers in Germany may have just the thing. InfiniTouch morphs…
-

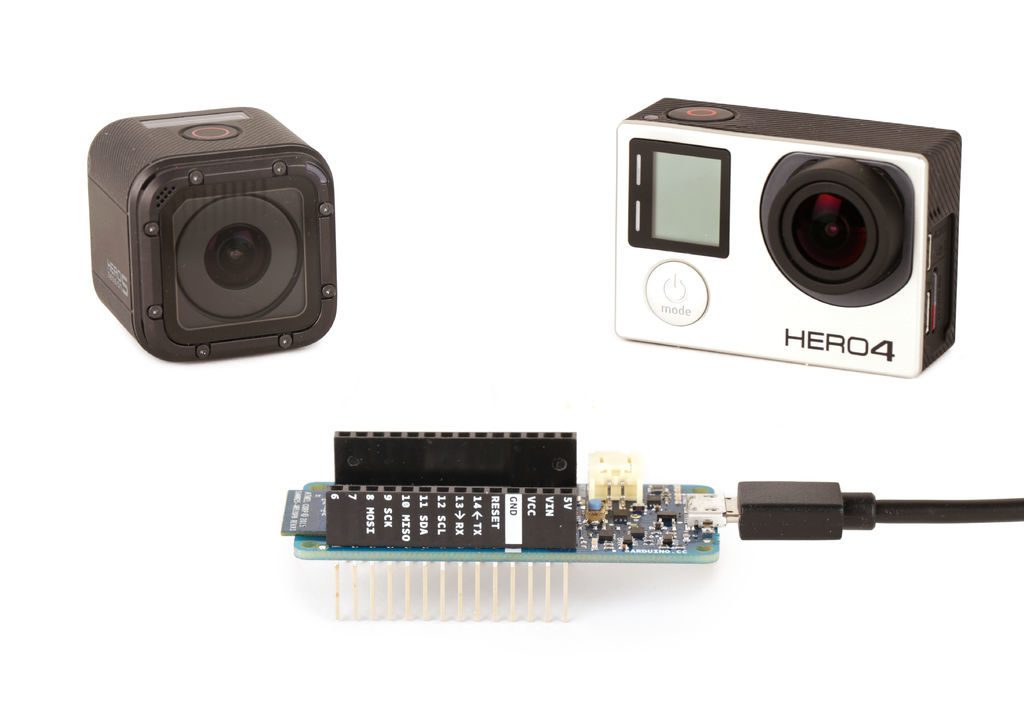
Control your GoPro wirelessly with an Arduino MKR1000
Reading Time: < 1 minuteControl your GoPro wirelessly with an Arduino MKR1000 Arduino Team — July 2nd, 2018 As Arduino boards have revolutionized what people can make at home, you might say that GoPros have done the same thing for portable cameras. Later generations of these devices even feature WiFi capabilities, so with the proper…
-

Arduino goes to college with the new Arduino Engineering Kit!
Reading Time: 3 minutesArduino goes to college with the new Arduino Engineering Kit! Arduino Team — May 12th, 2018 We’re excited to announce the Arduino Engineering Kit, the first product released as a result of our new partnership with MathWorks, to reinforce the importance of Arduino at the university level in the fields of engineering,…
-

Expanding Death Star lamp with MKR1000
Reading Time: < 1 minuteExpanding Death Star lamp with MKR1000 Arduino Team — April 27th, 2018 What could be better than a lamp that expands with the pull of a control cord? How about one that looks like the Death Star and is controlled with your voice? That’s exactly what maker Adi Singh created using…


![Light[s]well is a voice-controlled custom lighting installation](https://www.blogdot.tv/wp-content/uploads/2020/10/lightswell-is-a-voice-controlled-custom-lighting-installation.jpg)