Schlagwort: Jennifer Fox

  • Safety first: a Raspberry Pi safety helmet

    Safety first: a Raspberry Pi safety helmet

    Reading Time: 3 minutes

    Jennifer Fox is back, this time with a Raspberry Pi Zero–controlled impact force monitor that will notify you if your collision is a worth a trip to the doctor.

    Make an Impact Force Monitor!

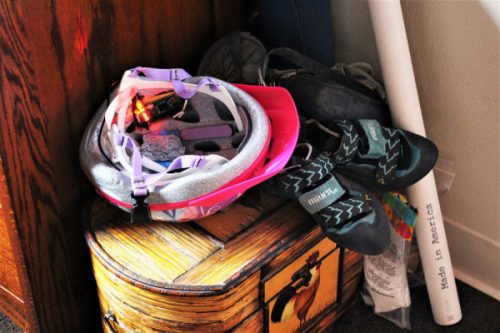
    Check out my latest Hacker in Residence project for SparkFun Electronics: the Helmet Guardian! It’s a Pi Zero powered impact force monitor that turns on an LED if your head/body experiences a potentially dangerous impact. Install in your sports helmets, bicycle, or car to keep track of impact and inform you when it’s time to visit the doctor.

    Concussion

    We’ve all knocked our heads at least once in our lives, maybe due to tripping over a loose paving slab, or to falling off a bike, or to walking into the corner of the overhead cupboard door for the third time this week — will I ever learn?! More often than not, even when we’re seeing stars, we brush off the accident and continue with our day, oblivious to the long-term damage we may be doing.

    Force of impact

    After some thorough research, Jennifer Fox, founder of FoxBot Industries, concluded that forces of 4 to 6 G sustained for more than a few seconds are dangerous to the human body. With this in mind, she decided to use a Raspberry Pi Zero W and an accelerometer to create helmet with an impact force monitor that notifies its wearer if this level of G-force has been met.

    Jennifer Fox Raspberry Pi Impact Force Monitor

    Obviously, if you do have a serious fall, you should always seek medical advice. This project is an example of how affordable technology can be used to create medical and citizen science builds, and not a replacement for professional medical services.

    Setting up the impact monitor

    Jennifer’s monitor requires only a few pieces of tech: a Zero W, an accelerometer and breakout board, a rechargeable USB battery, and an LED, plus the standard wires and resistors for these components.

    After installing Raspbian, Jennifer enabled SSH and I2C on the Zero W to make it run headlessly, and then accessed it from a laptop. This allows her to control the Pi without physically connecting to it, and it makes for a wireless finished project.

    Jen wired the Pi to the accelerometer breakout board and LED as shown in the schematic below.

    Jennifer Fox Raspberry Pi Impact Force Monitor

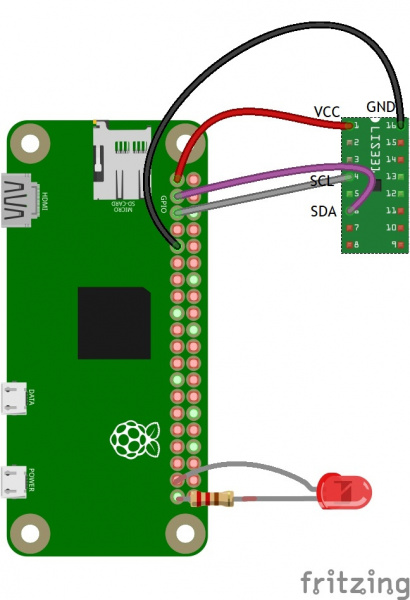
    The LED acts as a signal of significant impacts, turning on when the G-force threshold is reached, and not turning off again until the program is reset.

    Jennifer Fox Raspberry Pi Impact Force Monitor

    Make your own and more

    Jennifer’s full code for the impact monitor is on GitHub, and she’s put together a complete tutorial on SparkFun’s website.

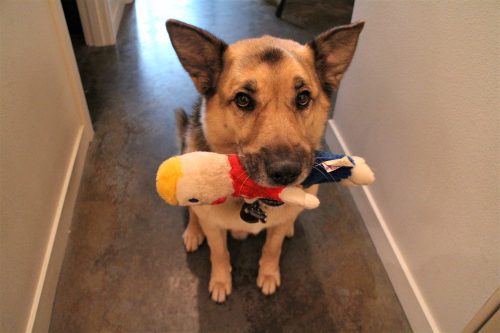
    For more tutorials from Jennifer Fox, such as her ‘Bark Back’ IoT Pet Monitor, be sure to follow her on YouTube. And for similar projects, check out Matt’s smart bike light and Amelia Day’s physical therapy soccer ball.

    Website: LINK

  • This IoT Pet Monitor barks back

    This IoT Pet Monitor barks back

    Reading Time: 3 minutes

    Jennifer Fox, founder of FoxBot Industries, uses a Raspberry Pi pet monitor to check the sound levels of her home while she is out, allowing her to keep track of when her dog Marley gets noisy or agitated, and to interact with the gorgeous furball accordingly.

    Bark Back Project Demo

    A quick overview and demo of the Bark Back, a project to monitor and interact with Check out the full tutorial here: https://learn.sparkfun.com/tutorials/bark-back-interactive-pet-monitor For any licensing requests please contact licensing@break.com

    Marley, bark!

    Using a Raspberry Pi 3, speakers, SparkFun’s MEMS microphone breakout board, and an analogue-to-digital converter (ADC), the IoT Pet Monitor is fairly easy to recreate, all thanks to Jennifer’s full tutorial on the FoxBot website.

    Building the pet monitor

    In a nutshell, once the Raspberry Pi and the appropriate bits and pieces are set up, you’ll need to sign up at CloudMQTT — it’s free if you select the Cute Cat account. CloudMQTT will create an invisible bridge between your home and wherever you are that isn’t home, so that you can check in on your pet monitor.

    Screenshot CloudMQTT account set-up — IoT Pet Monitor Bark Back Raspberry Pi

    Image c/o FoxBot Industries

    Within the project code, you’ll be able to calculate the peak-to-peak amplitude of sound the microphone picks up. Then you can decide how noisy is too noisy when it comes to the occasional whine and bark of your beloved pup.

    MEMS microphone breakout board — IoT Pet Monitor Bark Back Raspberry Pi

    The MEMS microphone breakout board collects sound data and relays it back to the Raspberry Pi via the ADC.
    Image c/o FoxBot Industries

    Next you can import sounds to a preset song list that will be played back when the volume rises above your predefined threshold. As Jennifer states in the tutorial, the sounds can easily be recorded via apps such as Garageband, or even on your mobile phone.

    Using the pet monitor

    Whenever the Bark Back IoT Pet Monitor is triggered to play back audio, this information is fed to the CloudMQTT service, allowing you to see if anything is going on back home.

    A sitting dog with a doll in its mouth — IoT Pet Monitor Bark Back Raspberry Pi

    *incoherent coos of affection from Alex*
    Image c/o FoxBot Industries

    And as Jennifer recommends, a update of the project could include a camera or sensors to feed back more information about your home environment.

    If you’ve created something similar, be sure to let us know in the comments. And if you haven’t, but you’re now planning to build your own IoT pet monitor, be sure to let us know in the comments. And if you don’t have a pet but just want to say hi…that’s right, be sure to let us know in the comments.

    Website: LINK