Schlagwort: IKEA
-

Control your IKEA smart blinds with an IR remote
Reading Time: < 1 minuteControl your IKEA smart blinds with an IR remote Arduino Team — May 5th, 2020 Hacker “replayreb” recently obtained some IKEA FYRTUR motorized blackout shades, but wasn’t satisfied with the stock remote control that comes with them. Instead he wanted to be able to open and shut the blinds with the…
-

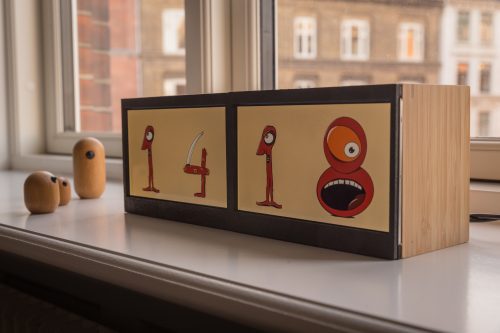
Instaclock | The Magpi 92
Reading Time: 4 minutesDesigned to celebrate a new home, Instaclock uses two Raspberry Pi computers to great visual effect. Rosie Hattersley introduces maker Riccardo Cereser’s eyecatching build in issue #92 of The MagPi, out now. There is nothing like a deadline to focus the mind! Copenhagen-based illustrator and UX designer Riccardo Cereser was about to…
-

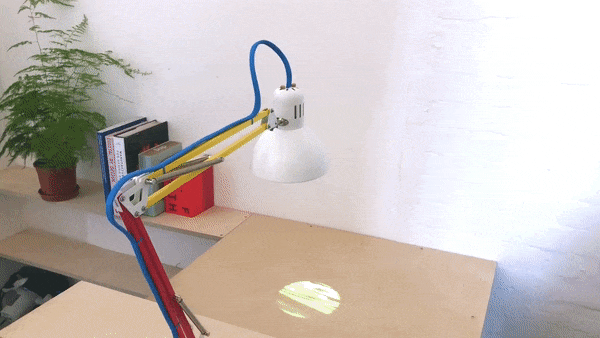
Augmented-reality projection lamp with Raspberry Pi and Android Things
Reading Time: 3 minutesIf your day has been a little fraught so far, watch this video. It opens with a tableau of methodically laid-out components and then shows them soldered, screwed, and slotted neatly into place. Everything fits perfectly; nothing needs percussive adjustment. Then it shows us glimpses of an AR future just like the…
-

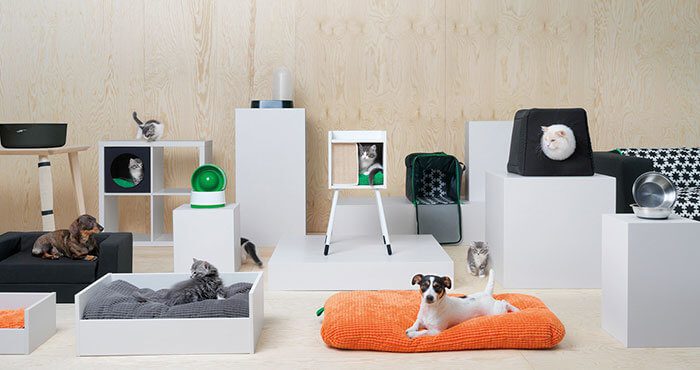
IKEA Offers an Entire Line of Pet Furniture
Reading Time: < 1 minuteIKEA offers computer desks, television stands, and now, an entire line of pet furniture. It’s called the „Lurvig“ collection, and for those wondering, the word means hairy is Swedish. The lineup includes dog beds, pet carriers, couch covers, cat tunnels, and even scratching posts. You’ll be able to find the pieces…