Schlagwort: how to

  • Code your own pinball game | Wireframe #53

    Code your own pinball game | Wireframe #53

    Reading Time: 4 minutes

    Get flappers flapping and balls bouncing off bumpers. Mark Vanstone has the code in the new issue of Wireframe magazine, available now.

    There are so many pinball video games that it’s become a genre in its own right. For the few of you who haven’t encountered pinball for some reason, it originated as an analogue arcade machine where a metal ball would be fired onto a sloping play area and bounce between obstacles. The player operates a pair of flippers by pressing buttons on each side of the machine, which will in turn ping the ball back up the play area to hit obstacles and earn points. The game ends when the ball falls through the exit at the bottom of the play area.

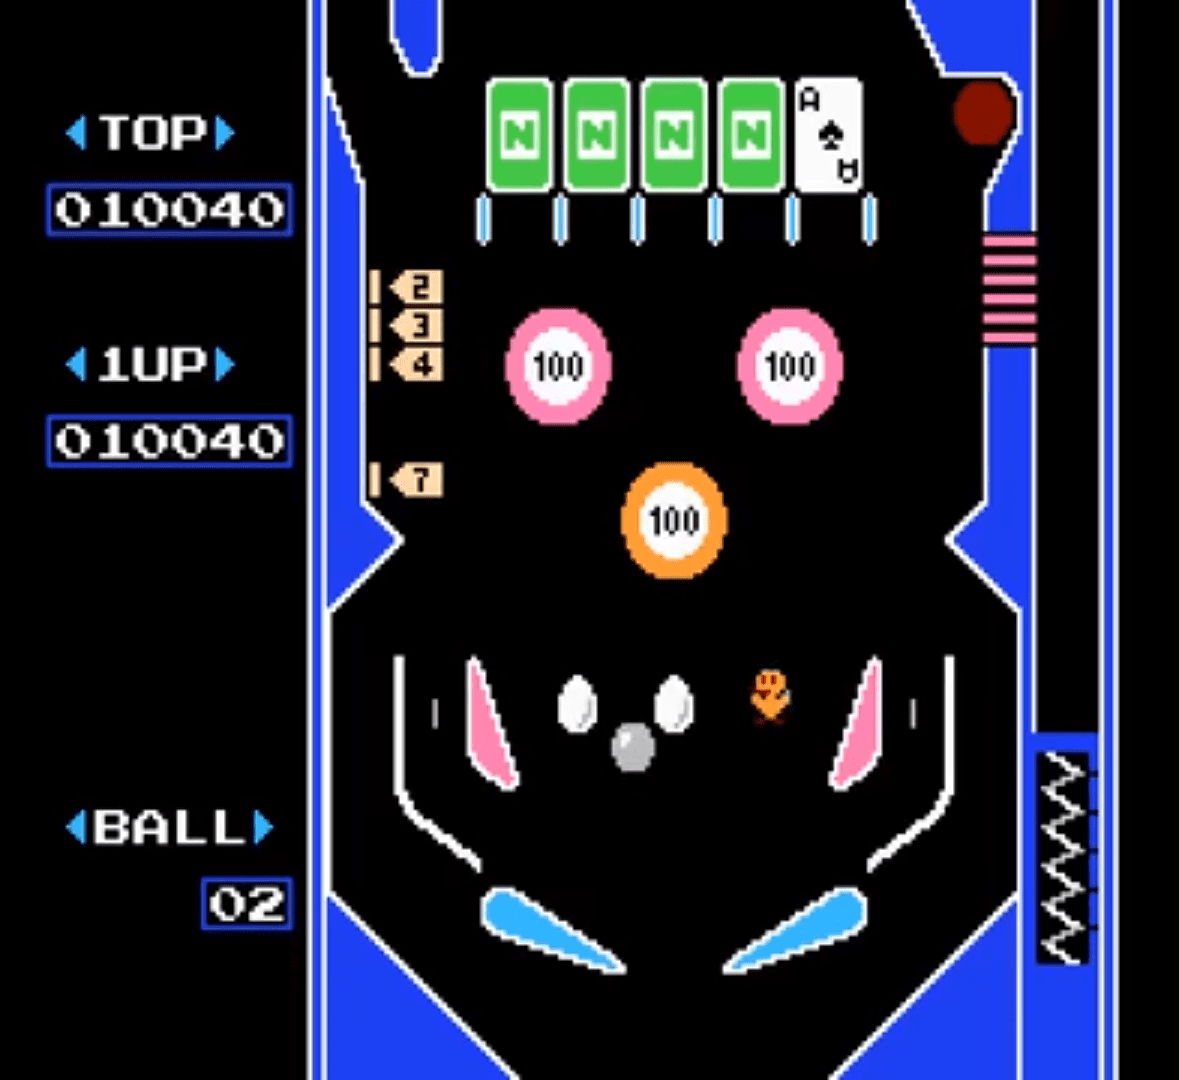
    NES Pinball
    One of the earliest pinball video games – it’s the imaginatively-named Pinball on the NES.

    Recreating pinball machines for video games

    Video game developers soon started trying to recreate pinball, first with fairly rudimentary graphics and physics, but with increasingly greater realism over time – if you look at Nintendo’s Pinball from 1984, then, say, Devil’s Crush on the Sega Mega Drive in 1990, and then 1992’s Pinball Dreams on PC, you can see how radically the genre evolved in just a few years. In this month’s Source Code, we’re going to put together a very simple rendition of pinball in Pygame Zero. We’re not going to use any complicated maths or physics systems, just a little algebra and trigonometry.

    Let’s start with our background. We need an image which has barriers around the outside for the ball to bounce off, and a gap at the bottom for the ball to fall through. We also want some obstacles in the play area and an entrance at the side for the ball to enter when it’s first fired. In this case, we’re going to use our background as a collision map, too, so we need to design it so that all the areas that the ball can move in are black.

    Pinball in Python
    Here it is: your own pinball game in less than 100 lines of code.

    Next, we need some flippers. These are defined as Actors with a pivot anchor position set near the larger end, and are positioned near the bottom of the play area. We detect left and right key presses and rotate the angle of the flippers by 20 degrees within a range of -30 to +30 degrees. If no key is pressed, then the flipper drops back down. With these elements in place, we have our play area and an ability for the player to defend the exit.

    All we need now is a ball to go bouncing around the obstacles we’ve made. Defining the ball as an Actor, we can add a direction and a speed parameter to it. With these values set, the ball can be moved using a bit of trigonometry. Our new x-coordinate will move by the sin of the ball direction multiplied by the speed, and the new y-coordinate will move by the cos of the ball direction multiplied by speed. We need to detect collisions with objects and obstacles, so we sample four pixels around the ball to see if it’s hit anything solid. If it has, we need to make the ball bounce.

    Get the code

    Here’s Mark’s pinball code. To get it working on your system, you’ll need to install Pygame Zero. And to download the full code and assets, head here.

    If you wanted more realistic physics, you’d calculate the reflection angle from the surface which has been hit, but in this case, we’re going to use a shortcut which will produce a rough approximation. We work out what direction the ball is travelling in and then rotate either left or right by a quarter of a turn until the ball no longer collides with a wall. We could finesse this calculation further to create a more accurate effect, but we’ll keep it simple for this sample. Finally, we need to add some gravity. As the play area is tilted downwards, we need to increase the ball speed as it travels down and decrease it as it travels up.

    All of this should give you the bare bones of a pinball game. There’s lots more you could add to increase the realism, but we’ll leave you to discover the joys of normal vectors and dot products…

    Get your copy of Wireframe issue 53

    You can read more features like this one in Wireframe issue 53, available directly from Raspberry Pi Press — we deliver worldwide.

    And if you’d like a handy digital version of the magazine, you can also download issue 53 for free in PDF format.

    Website: LINK

  • Recreate Gradius’ rock-spewing volcanoes | Wireframe #52

    Recreate Gradius’ rock-spewing volcanoes | Wireframe #52

    Reading Time: 4 minutes

    Code an homage to Konami’s classic shoot-’em-up, Gradius. Mark Vanstone has the code in the new edition of Wireframe magazine, available now.

    Released by Konami in 1985, Gradius – also known as Nemesis outside Japan – brought a new breed of power-up system to arcades. One of the keys to its success was the way the player could customise their Vic Viper fighter craft by gathering capsules, which could then be ‘spent’ on weapons, speed-ups, and shields from a bar at the bottom of the screen.

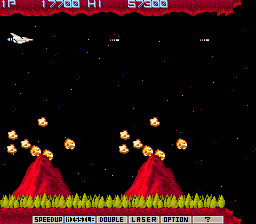
    Gradius screenshot
    The Gradius volcanoes spew rocks at the player just before the end-of-level boss ship arrives.

    Flying rocks

    A seminal side-scrolling shooter, Gradius was particularly striking thanks to the variety of its levels: a wide range of hazards were thrown at the player, including waves of aliens, natural phenomena, and boss ships with engine cores that had to be destroyed in order to progress. One of the first stage’s biggest obstacles was a pair of volcanoes that spewed deadly rocks into the air: the rocks could be shot for extra points or just avoided to get through to the next section. In this month’s Source Code, we’re going to have a look at how to recreate the volcano-style flying rock obstacle from the game.

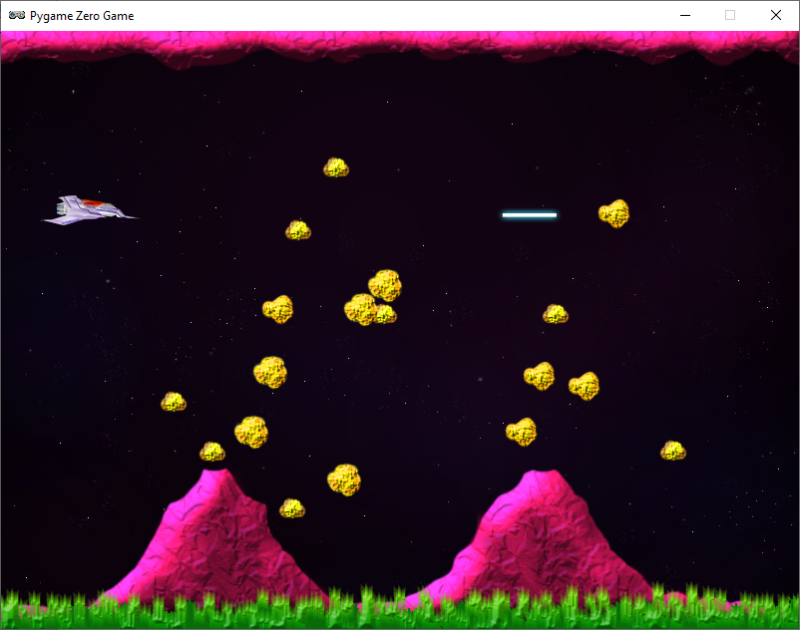
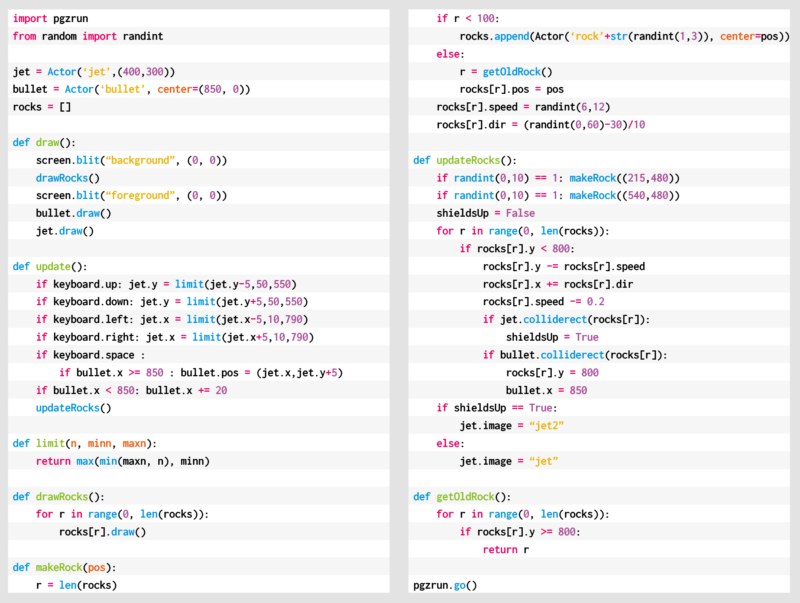
    Our sample uses Pygame Zero and the randint function from the random module to provide the variations of trajectory that we need our rocks to have. We’ll need an actor created for our spaceship and a list to hold our rock Actors. We can also make a bullet Actor so we can make the ship fire lasers and shoot the rocks. We build up the scene in layers in our draw() function with a star-speckled background, then our rocks, followed by the foreground of volcanoes, and finally the spaceship and bullets.

    Dodge and shoot the rocks in our homage to the classic Gradius.

    Get the ship moving

    In the update() function, we need to handle moving the ship around with the cursor keys. We can use a limit() function to make sure it doesn’t go off the screen, and the SPACE bar to trigger the bullet to be fired. After that, we need to update our rocks. At the start of the game our list of rocks will be empty, so we’ll get a random number generated, and if the number is 1, we make a new rock and add it to the list. If we have more than 100 rocks in our list, some of them will have moved off the screen, so we may as well reuse them instead of making more new rocks. During each update cycle, we’ll need to run through our list of rocks and update their position. When we make a rock, we give it a speed and direction, then when it’s updated, we move the rock upwards by its speed and then reduce the speed by 0.2. This will make it fly into the air, slow down, and then fall to the ground. 

    Collision detection

    From this code, we can make rocks appear just behind both of the volcanoes, and they’ll fly in a random direction upwards at a random speed. We can increase or decrease the number of rocks flying about by changing the random numbers that spawn them. We should be able to fly in and out of the rocks, but we could add some collision detection to check whether the rocks hit the ship – we may also want to destroy the ship if it’s hit by a rock. In our sample, we have an alternative, ‘shielded’ state to indicate that a collision has occurred. We can also check for collisions with the bullets: if a collision’s detected, we can make the rock and the bullet disappear by moving them off-screen, at which point they’re ready to be reused.

    That’s about it for this month’s sample, but there are many more elements from the original game that you could add yourself: extra weapons, more enemies, or even an area boss.

    Here’s Mark’s volcanic code. To get it working on your system, you’ll need to install Pygame Zero. And to download the full code and assets, head here.

    Get your copy of Wireframe issue 52

    You can read more features like this one in Wireframe issue 52, available directly from Raspberry Pi Press — we deliver worldwide.

    Wireframe issue 52's cover

    And if you’d like a handy digital version of the magazine, you can also download issue 52 for free in PDF format.

    Website: LINK

  • Recreate Exerion’s pseudo-3D landscape | Wireframe #51

    Recreate Exerion’s pseudo-3D landscape | Wireframe #51

    Reading Time: 4 minutes

    Swoop over mountains in our homage to Jaleco’s shooter. Mark Vanstone has the code in the latest issue of Wireframe magazine, out now.

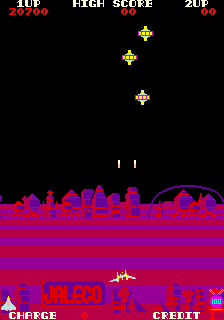
    Taking the shooting action of Galaxian from a few years earlier, Japanese developer Jaleco released Exerion in 1983. What helped Exerion stand out from other shoot-’em-ups of the period, though, was its pseudo-3D background, which used both a scrolling landscape and moving background elements to create the illusion of depth. This was quite an achievement considering the hardware of the day, and it’s still an eye-catching effect even now.

    Exerion’s pseudo-3D effect helped the game stand out from the crowd of other shooters packed into arcades at the time.

    Three main elements

    To recreate Exerion’s scrolling in Pygame Zero, we need to break the effect down into three main elements. The first is the scrolling stripes that form the landscape’s base layer. These are followed by the elements that roll over the landscape as it scrolls down the screen. Then thirdly, there’s the player’s movement, which affects both the other two elements. Let’s start with the scrolling landscape, which is made of alternating coloured stripes. To give the sense of perspective, they start very thin on the horizon and, as they move down the screen, they grow in thickness. We can create this with a list that contains the heights of each stripe, increasing as we go through the list. Then in our draw() function, we run through the list, drawing the stripes downwards from the horizon using the heights in our list. Then we increase the height of each stripe. When the first stripe reaches a certain height, we take the last one off the end of the list and add it to the beginning, resetting its height to the smallest. 

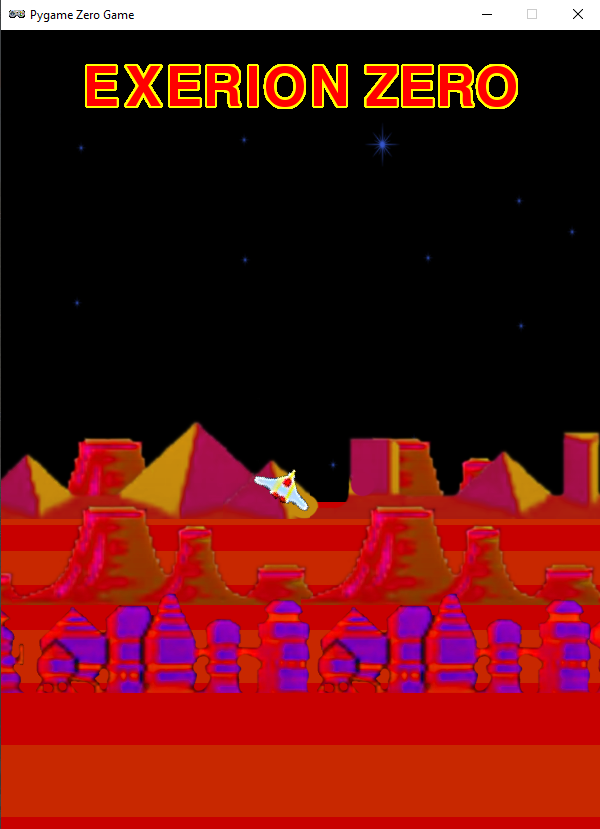
    Our homage to Exerion. You can’t tell from a static image, but the illusion of depth is amazing. Honest. 

    Landscape details

    The next items to code are the landscape details. These are buildings and hills that we want to move with the stripes so that it looks as though the player’s flying over them as they scroll by. We need to do this in two sections as some will be drawn behind the stripes as they’re over the horizon, while others will be in front of the stripes. We’ll give each landscape item an index which ties it to a stripe, but we’ll give items that are beyond the horizon negative indexes, and those in front, positive.

    All the landscape items will start with a negative index to indicate that they all start beyond the horizon. So in the draw() function, we have an initial loop to draw all the items behind the horizon, and then while we’re drawing the stripes, we also draw the items which have the same index as the stripes, so they appear in front. Once we have these two parts, we’ll have a continuous carousel of stripes and landscape items.

    Player aircraft

    Now we need the player aircraft. We can move it around using the arrow keys, but we want to have the background graphics moving to give the impression of a 3D landscape: if the player moves upwards, we move the horizon down, and do the opposite if the player moves downwards. We then apply a parallax effect to the landscape items. The way we do this is by moving the items at the back a small amount in the opposite direction from the player’s movement, and as we work down through the items, they move more and more. This enhances the impression of depth. 

    Once we’ve added a tilt to the aircraft as it turns, we have the makings of an Exerion clone. All that needs to be added are the aliens to shoot at – if you want to add these, then you could take the Galaxian routine from last month’s Source Code. 

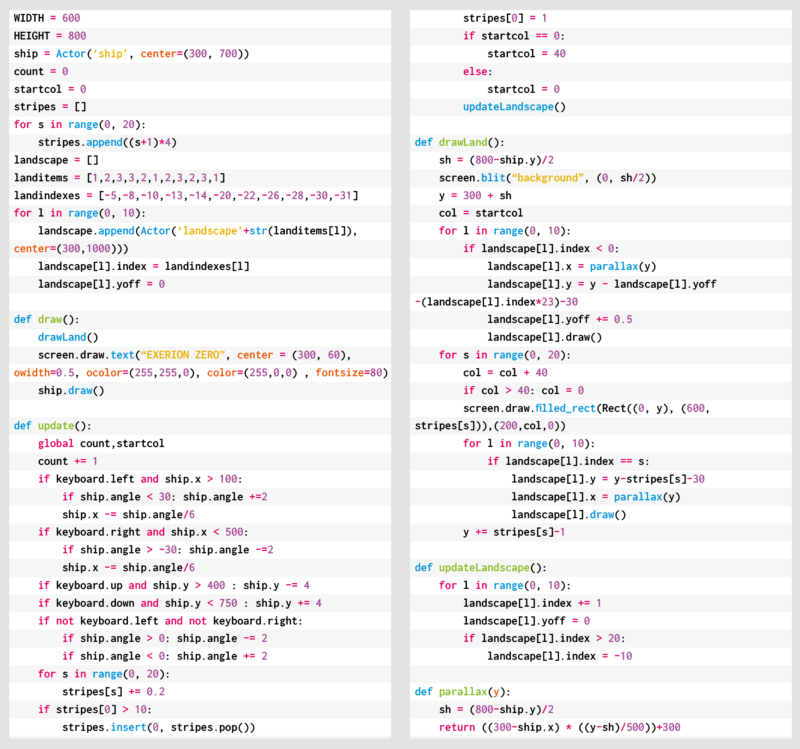
    Here’s Mark’s code for an Exerion-style, pseudo-3D background. To get it working on your system, you’ll need to install Pygame Zero. And to download the full code and assets, head here.

    Get your copy of Wireframe issue 51

    You can read more features like this one in Wireframe issue 51, available directly from Raspberry Pi Press — we deliver worldwide.

    And if you’d like a handy digital version of the magazine, you can also download issue 51 for free in PDF format.

    Website: LINK

  • Recreate Galaxian’s iconic attack patterns | Wireframe #50

    Recreate Galaxian’s iconic attack patterns | Wireframe #50

    Reading Time: 4 minutes

    Blast dive-bombing aliens in our salute to Namco’s classic. Mark Vanstone has the code

    Aliens swoop down towards the player, bombing as they go. Back in 1979, this was a big step forward from Taito’s Space Invaders.

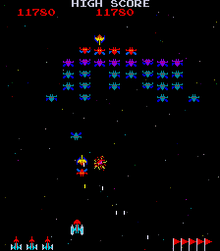
    Hot on the heels of the original Space Invaders, Galaxian emerged as a rival space shooter in 1979. Released by Namco, Galaxian brought new colour and unpredictable motion to the alien enemy, who would swoop down on the defending player. Galaxian was so popular in arcades that Namco released a sequel, Galaga, two years later – that game complicated the attack patterns even more. It’s difficult to say how many ports and clones have been made of Galaxian, as there are several versions of similar games for almost every home platform.

    The player’s role in Galaxian is similar to Space Invaders, in that they pilot a ship and need to destroy a fleet of aliens. With Galaxian, however, the aliens have a habit of breaking formation and swooping down towards the player’s ship, and dive-bombing it. The aim is to destroy all the enemy ships and move on to the next wave. The subsequent waves of enemies get more difficult as the player progresses. For this sample, we’re going to look at that swooping mechanic, and make the bare nuts and bolts of a Galaxian game with Pygame Zero.

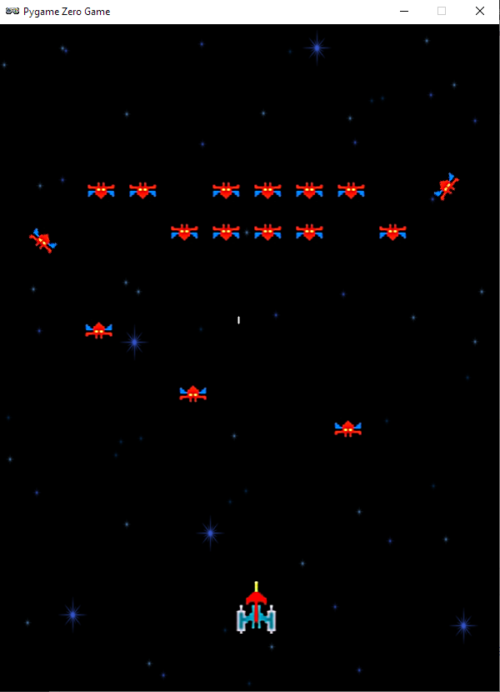
    Our Galaxian homage up and running in Pygame Zero.
    Our homage to the classic Galaxian, with angry aliens that love to break formation.

    First, Galaxian has a portrait display, so we can set the play area’s width and height to be 600 and 800 respectively. Next, we can create a scrolling backdrop of stars using a bitmap that we blit to the screen and move downwards every update. We need a second blit of the stars to fill in the space that the first one leaves as it scrolls down, and we could also have another static background image behind them, which will provide a sense of depth.

    Next, we set up the player ship as an Actor, and we’ll capture the left and right arrow keys in the update() function to move the ship left and right on the screen. We can also fire off a bullet with the SPACE bar, which will travel up the screen until it hits an alien or goes off the top of the screen. As in the original Galaxian, you can only shoot one bullet at a time, so we only need one Actor for this.

    The aliens are arranged in rows and move left and right across the screen together. We’ll stick to just one type of alien for this sample, but draw two rows of them. You could add extra types and any number of rows. When we create the alien Actors, we can also add a status flag, and we need to determine which side of the row they’re on as when they break formation, the two sides fly in opposite directions. In this case, there’ll be four aliens on the left of each row and four on the right. Once they’re set up in a list, we can iterate through the list on each update and move them backwards and forwards. While we’re moving our aliens, we can also check to see if they’ve collided with a bullet or the player ship. If the collision is with a bullet, the alien cycles through a few frames of an explosion using the status flag, and then, when their status reaches five, they’re no longer drawn. If the collision is with the player, then the player dies and the game’s over. We can also check a random number to see if the alien will start a bombing run; if so, we set the status to one, which will start calls to the flyAlien() function. This function checks which side the alien’s on and starts changing the alien’s angle, depending on the side. It also alters the x and y coordinates, depending on the angle. We’ve written this section in longhand for clarity, but this could be collapsed down a bit with the use of some multiplier variables for the x coordinates and the angles.

    There we have it: the basics of Galaxian. Can you flesh it out into a full game?

    Here’s Mark’s code for a Galaxian-style shooter with attacking groups of aliens. To get it working on your system, you’ll need to install Pygame Zero. And to download the full code and assets, head here.

    Get your copy of Wireframe issue 50

    You can read more features like this one in Wireframe issue 50, available directly from Raspberry Pi Press — we deliver worldwide.

    And if you’d like a handy digital version of the magazine, you can also download issue 50 for free in PDF format.

    Website: LINK

  • Remake Manic Miner’s collapsing platforms | Wireframe #49

    Remake Manic Miner’s collapsing platforms | Wireframe #49

    Reading Time: 4 minutes

    Traverse a crumbly cavern in our homage to a Spectrum classic. Mark Vanstone has the code

    One of the most iconic games on the Sinclair ZX Spectrum featured a little man called Miner Willy, who spent his days walking and jumping from platform to platform collecting the items needed to unlock the door on each screen. Manic Miner’s underground world featured caverns, processing plants, killer telephones, and even a forest featuring little critters that looked suspiciously like Ewoks.

    Written by programmer Matthew Smith and released by Bug-Byte in 1983, the game became one of the most successful titles on the Spectrum. Smith was only 16 when he wrote Manic Miner and even constructed his own hardware to speed up the development process, assembling the code on a TRS-80 and then downloading it to the Spectrum with his own hand-built interface. The success of Manic Miner was then closely followed by Jet Set Willy, featuring the same character, and although they were originally written for the Spectrum, the games very soon made it onto just about every home computer of the time.

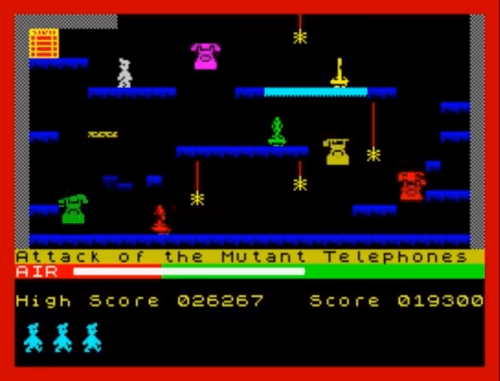
    Miner Willy makes his way to the exit, avoiding those vicious eighties telephones.

    Both Manic Miner and Jet Set Willy featured unstable platforms which crumbled in Willy’s wake, and it’s these we’re going to try to recreate this month. In this Pygame Zero example, we need three frames of animation for each of the two directions of movement. As we press the arrow keys we can move the Actor left and right, and in this case, we’ll decide which frame to display based on a count variable, which is incremented each time our update() function runs. We can create platforms from a two-dimensional data list representing positions on the screen with 0 meaning a blank space, 1 being a solid platform, and 2 a collapsible platform. To set these up, we run through the list and make Actor objects for each platform segment.

    For our draw() function, we can blit a background graphic, then Miner Willy, and then our platform blocks. During our update() function, apart from checking key presses, we also need to do some gravity calculations. This will mean that if Willy isn’t standing on a platform or jumping, he’ll start to fall towards the bottom of the screen. Instead of checking to see if Willy has collided with the whole platform, we only check to see if his feet are in contact with the top. This means he can jump up through the platforms but will then land on the top and stop. We set a variable to indicate that Willy’s standing on the ground so that when the SPACE bar is pressed, we know if he can jump or not. While we’re checking if Willy’s on a platform, we also check to see if it’s a collapsible one, and if so, we start a timer so that the platform moves downwards and eventually disappears. Once it’s gone, Willy will fall through. The reason we have a delayed timer rather than just starting the platform heading straight down is so that Willy can run across many tiles before they collapse, but his way back will quickly disappear. The disappearing platforms are achieved by changing the image of the platform block as it moves downward.

    As we’ve seen, there were several other elements to each Manic Miner screen, such as roaming bears that definitely weren’t from Star Wars, and those dastardly killer telephones. We’ll leave you to add those.

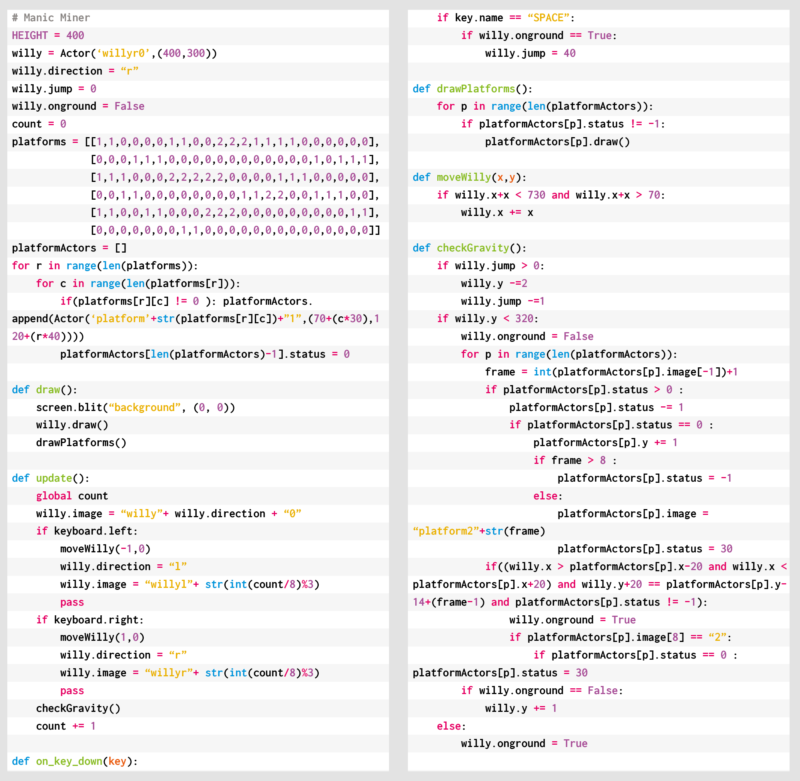
    Here’s Mark’s code for a Manic Miner-style platformer. To get it working on your system, you’ll need to install Pygame Zero. And to download the full code and assets, head here.

    Get your copy of Wireframe issue 49

    You can read more features like this one in Wireframe issue 49, available directly from Raspberry Pi Press — we deliver worldwide.

    And if you’d like a handy digital version of the magazine, you can also download issue 49 for free in PDF format.

    Website: LINK

  • Swing into action with an homage to Pitfall! | Wireframe #48

    Swing into action with an homage to Pitfall! | Wireframe #48

    Reading Time: 4 minutes

    Grab onto ropes and swing across chasms in our Python rendition of an Atari 2600 classic. Mark Vanstone has the code

    Whether it was because of the design brilliance of the game itself or because Raiders of the Lost Ark had just hit the box office, Pitfall Harry became a popular character on the Atari 2600 in 1982.

    His hazardous attempts to collect treasure struck a chord with eighties gamers, and saw Pitfall!, released by Activision, sell over four million copies. A sequel, Pitfall II: The Lost Caverns quickly followed the next year, and the game was ported to several other systems, even making its way to smartphones and tablets in the 21st century.

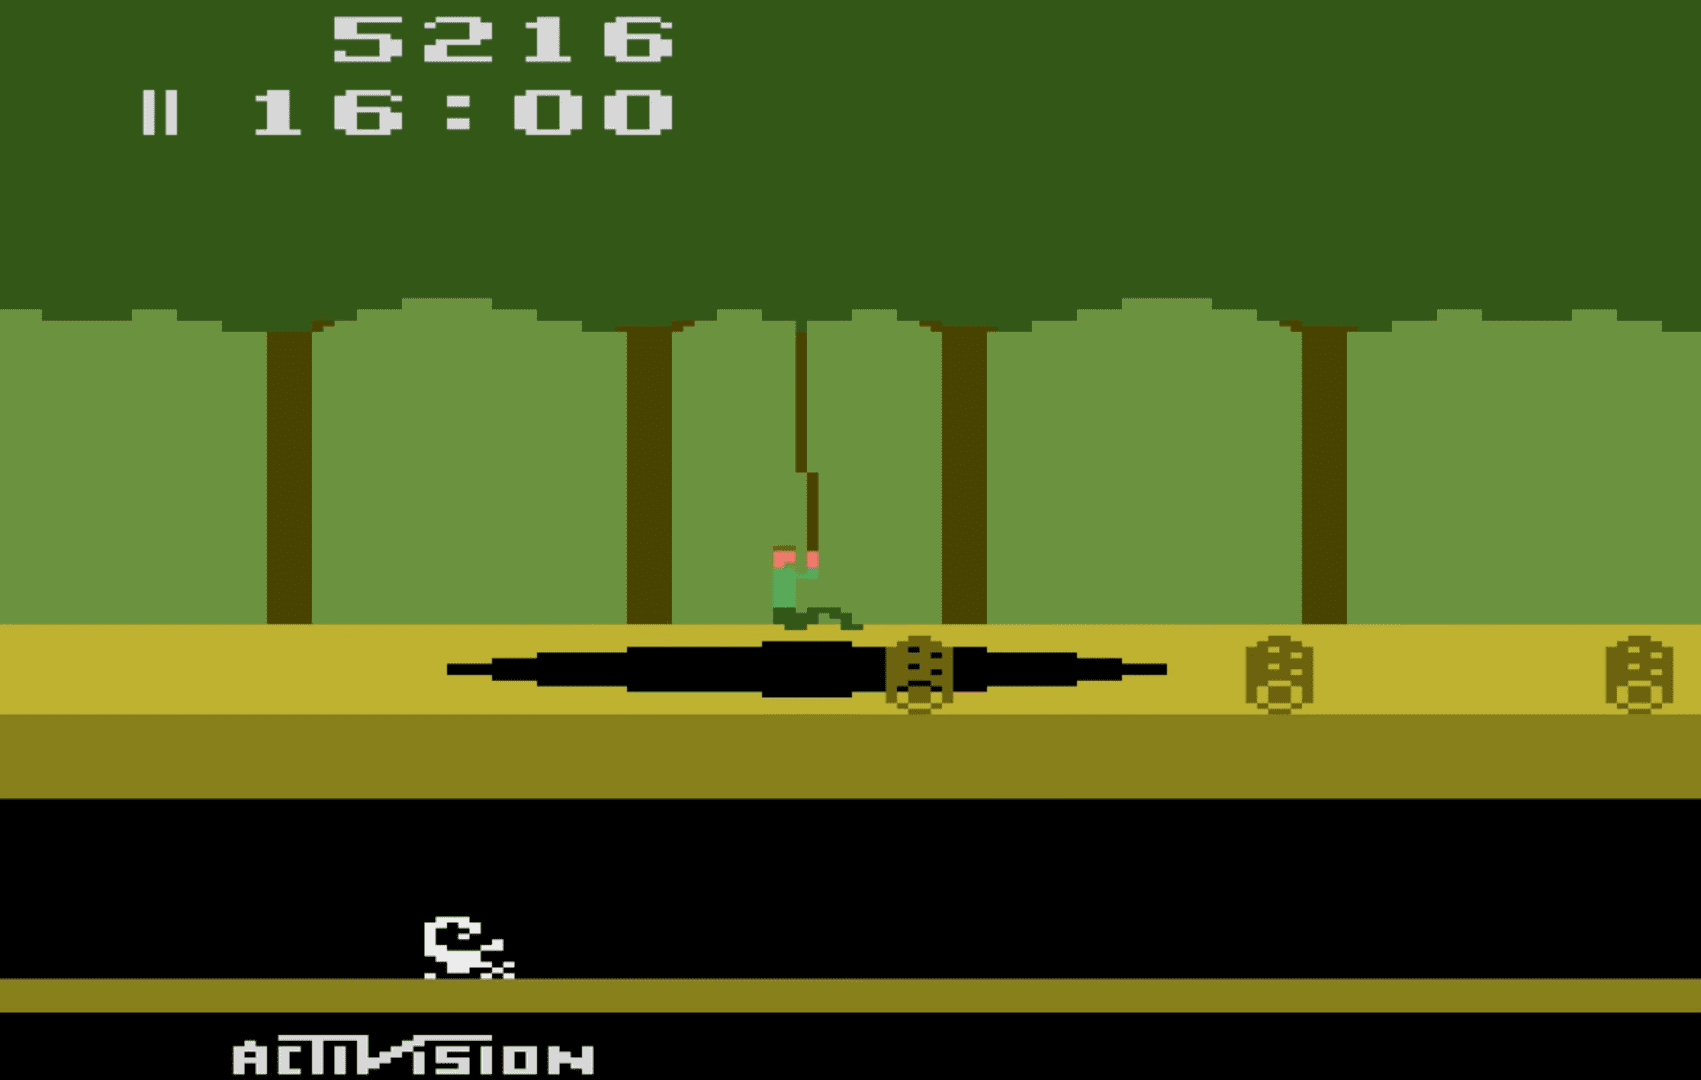
    Pitfall

    Designed by David Crane, Pitfall! was released for the Atari 2600 and published by Activision in 1982

    The game itself is a quest to find 32 items of treasure within a 20-minute time limit. There are a variety of hazards for Pitfall Harry to navigate around and over, including rolling logs, animals, and holes in the ground. Some of these holes can be jumped over, but some are too wide and have a convenient rope swinging from a tree to aid our explorer in getting to the other side of the screen. Harry must jump towards the rope as it moves towards him and then hang on as it swings him over the pit, releasing his grip at the other end to land safely back on firm ground.

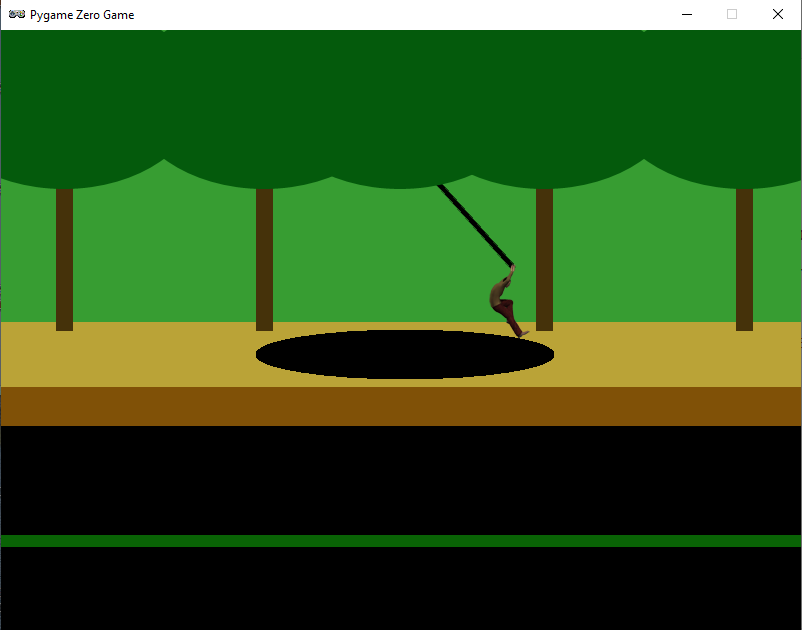
    For this code sample, we’ll concentrate on the rope swinging (and catching) mechanic. Using Pygame Zero, we can get our basic display set up quickly. In this case, we can split the background into three layers: the background, including the back of the pathway and the tree trunks, the treetops, and the front of the pathway. With these layers we can have a rope swinging with its pivot point behind the leaves of the trees, and, if Harry gets a jump wrong, it will look like he falls down the hole in the ground. The order in which we draw these to the screen is background, rope, tree-tops, Harry, and finally the front of the pathway.

    Now, let’s get our rope swinging. We can create an Actor and anchor it to the centre and top of its bounding box. If we rotate it by changing the angle property of the Actor, then it will rotate at the top of the Actor rather than the mid-point. We can make the rope swing between -45 degrees and 45 degrees by increments of 1, but if we do this, we get a rather robotic sort of movement. To fix this, we add an ‘easing’ value which we can calculate using a square root to make the rope slow down as it reaches the extremes of the swing.

    Our homage to the classic Pitfall! Atari game. Can you add some rolling logs and other hazards?

    Our Harry character will need to be able to run backwards and forwards, so we’ll need a few frames of animation. There are several ways of coding this, but for now, we can take the x coordinate and work out which frame to display as the x value changes. If we have four frames of running animation, then we would use the %4 operator and value on the x coordinate to give us animation frames of 0, 1, 2, and 3. We use these frames for running to the right, and if he’s running to the left, we just mirror the images. We can check to see if Harry is on the ground or over the pit, and if he needs to be falling downward, we add to his y coordinate. If he’s jumping (by pressing the SPACE bar), we reduce his y coordinate.

    We now need to check if Harry has reached the rope, so after a collision, we check to see if he’s connected with it, and if he has, we mark him as attached and then move him with the end of the rope until the player presses the SPACE bar and he can jump off at the other side. If he’s swung far enough, he should land safely and not fall down the pit. If he falls, then the player can have another go by pressing the SPACE bar to reset Harry back to the start.

    That should get Pitfall Harry over one particular obstacle, but the original game had several other challenges to tackle – we’ll leave you to add those for yourselves.

    Pitfall Python code

    Here’s Mark’s code for a Pitfall!-style platformer. To get it working on your system, you’ll need to  install Pygame Zero.  And to download the full code and assets, head here.

    Get your copy of Wireframe issue 48

    You can read more features like this one in Wireframe issue 48, available directly from Raspberry Pi Press — we deliver worldwide.
    Wireframe issue 48
    And if you’d like a handy digital version of the magazine, you can also download issue 48 for free in PDF format.
    A banner with the words "Be a Pi Day donor today"
    Website: LINK
  • Code a Light Cycle arcade minigame | Wireframe #47

    Code a Light Cycle arcade minigame | Wireframe #47

    Reading Time: 4 minutes

    Speed around an arena, avoiding walls and deadly trails in this Light Cycle minigame. Mark Vanstone has the code.

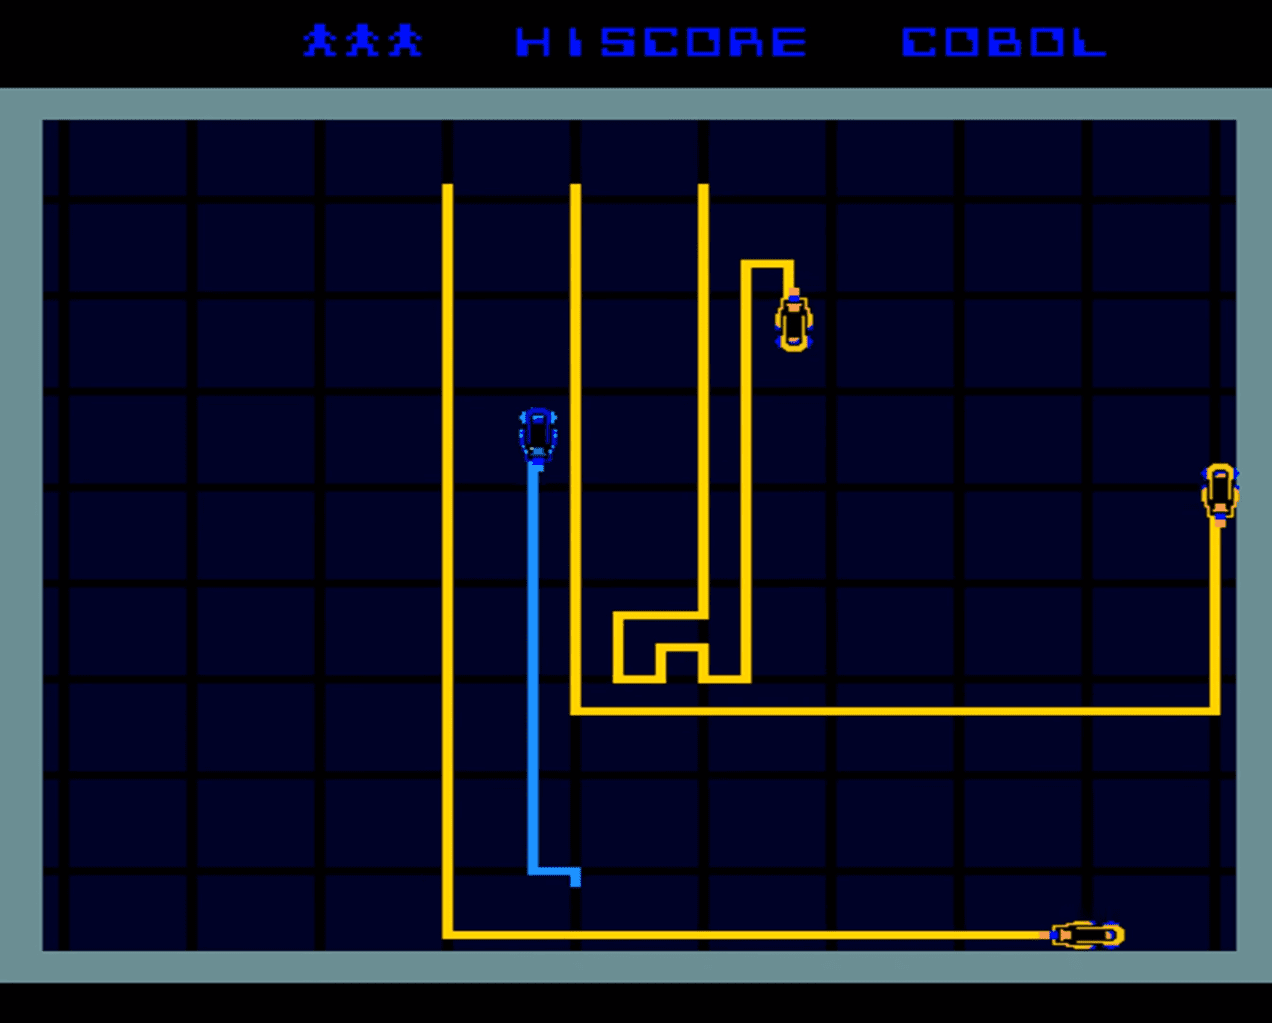
    Battle against AI enemies in the original arcade classic.

    At the beginning of the 1980s, Disney made plans for an entirely new kind of animated movie that used cutting-edge computer graphics. The resulting film was 1982’s TRON, and it inevitably sparked one of the earliest tie-in arcade machines.

    The game featured several minigames, including one based on the Light Cycle section of the movie, where players speed around an arena on high-tech motorbikes, which leave a deadly trail of light in their wake. If competitors hit any walls or cross the path of any trails, then it’s game over.

    Players progress through the twelve levels which were all named after programming languages. In the Light Cycle game, the players compete against AI players who drive yellow Light Cycles around the arena. As the levels progress, more AI Players are added.

    The TRON game, distributed by Bally Midway, was well-received in arcades, and even won Electronic Games Magazine’s (presumably) coveted Coin-operated Game of the Year gong.

    Although the arcade game wasn’t ported to home computers at the time, several similar games – and outright clones – emerged, such as the unsubtly named Light Cycle for the BBC Micro, Oric, and ZX Spectrum.

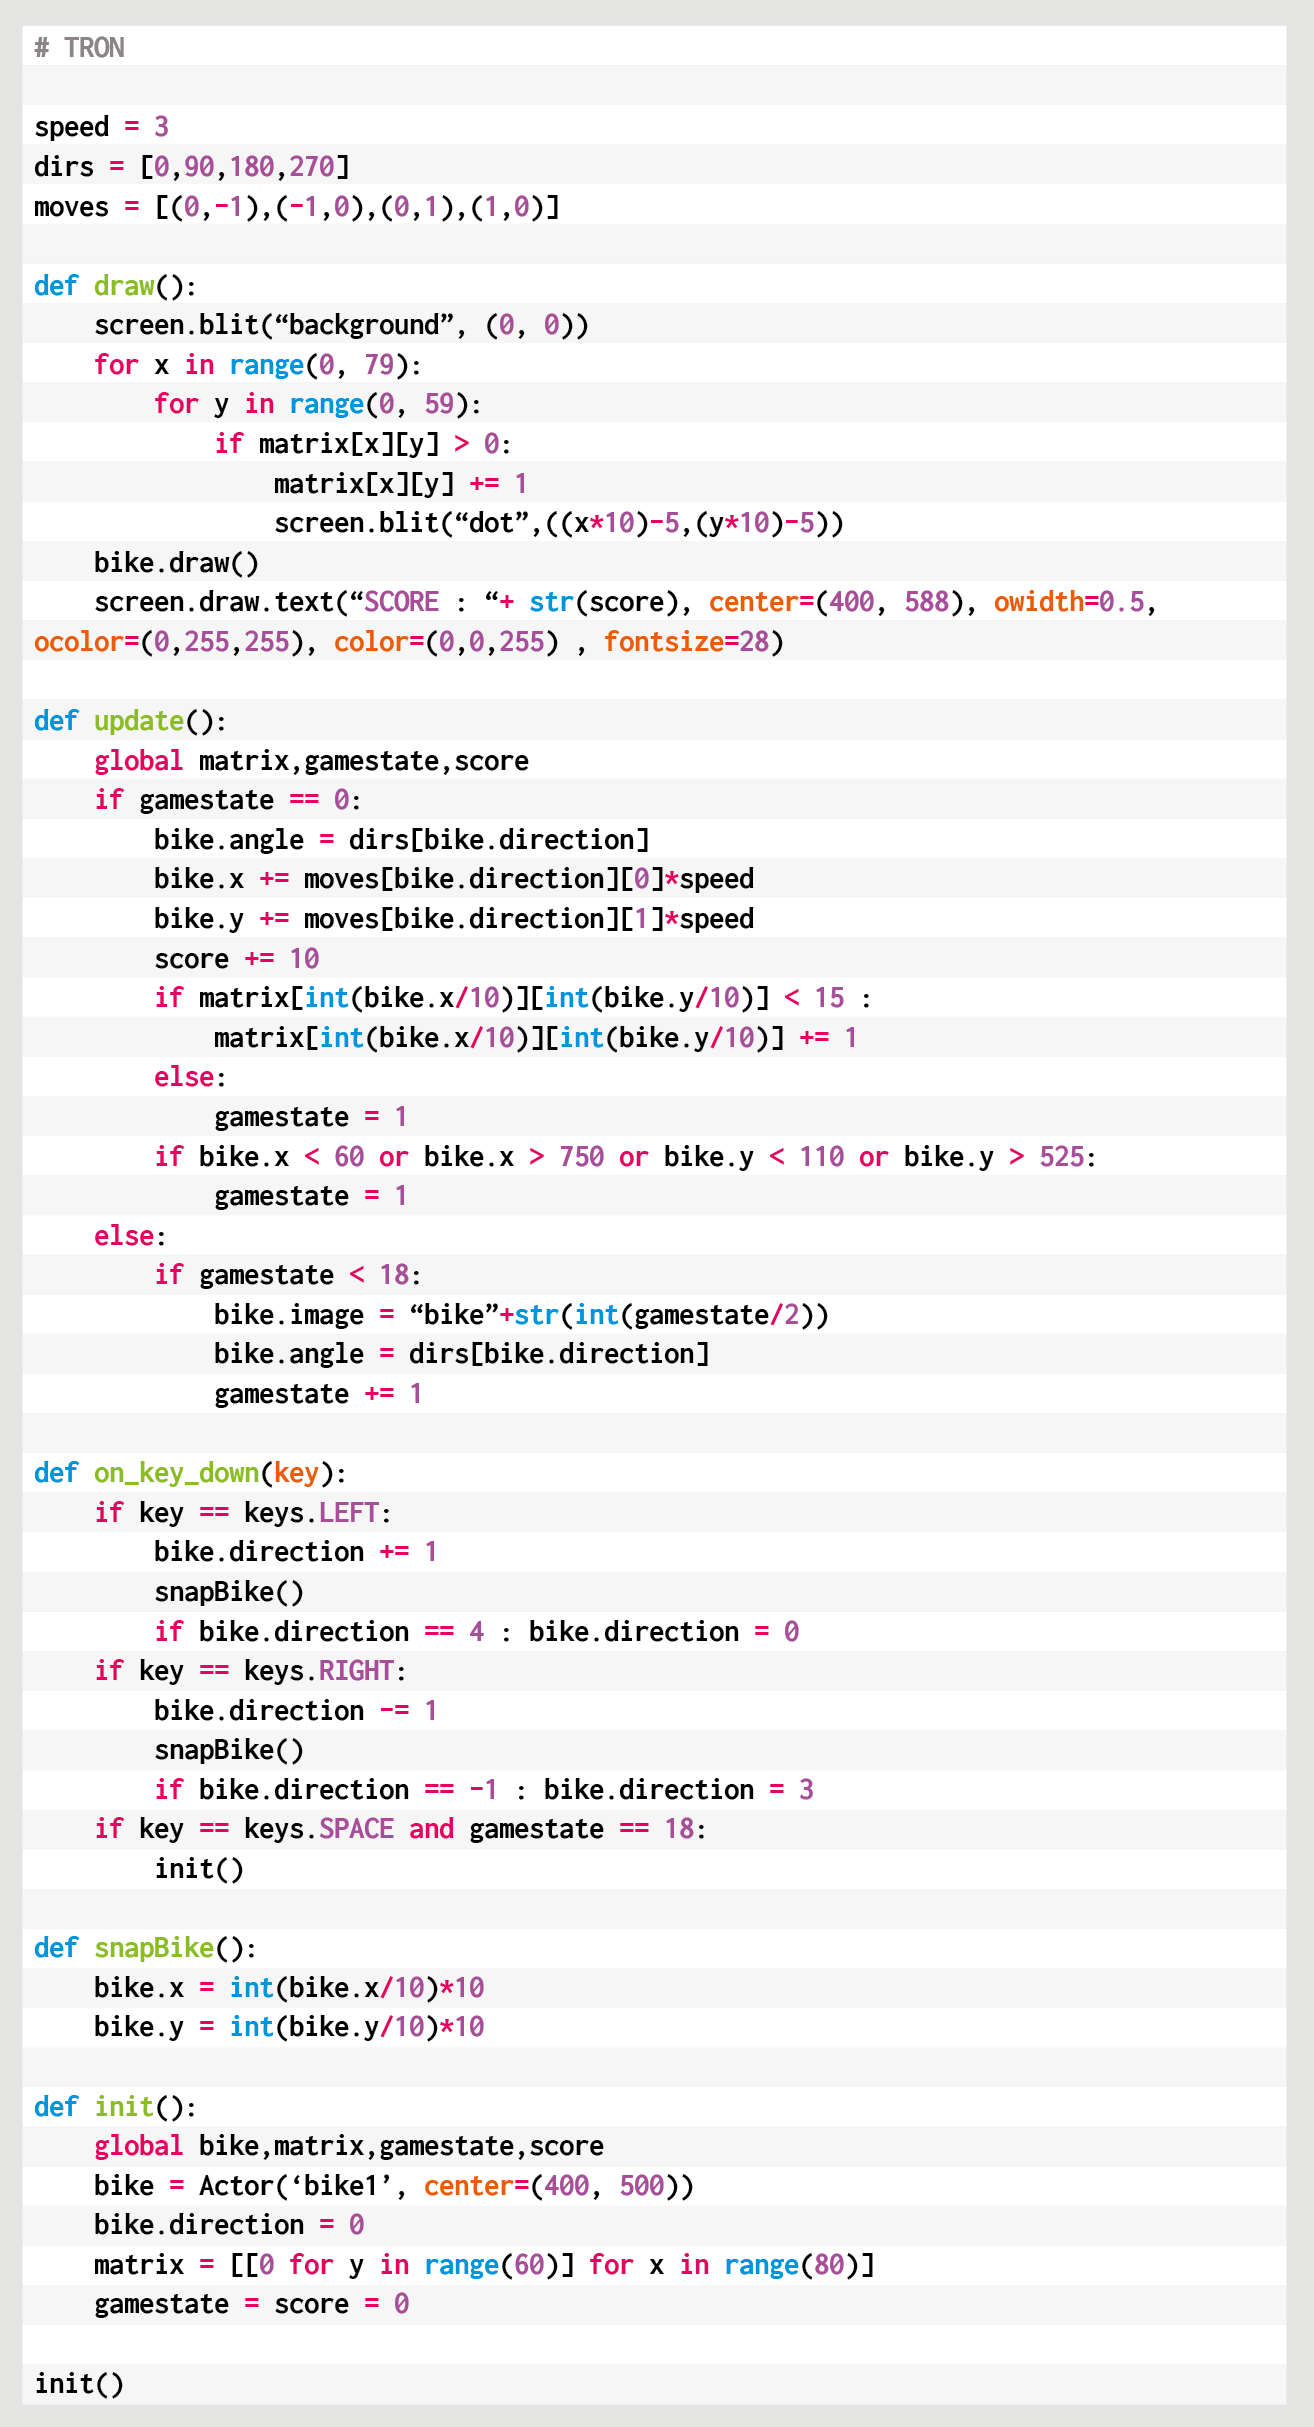
    The Light Cycle minigame is essentially a variation on Snake, with the player leaving a trail behind them as they move around the screen. There are various ways to code this with Pygame Zero.

    In this sample, we’ll focus on the movement of the player Light Cycle and creating the trails that are left behind as it moves around the screen. We could use line drawing functions for the trail behind the bike, or go for a system like Snake, where blocks are added to the trail as the player moves.

    In this example, though, we’re going to use a two-dimensional list as a matrix of positions on the screen. This means that wherever the player moves on the screen, we can set the position as visited or check to see if it’s been visited before and, if so, trigger an end-game event.

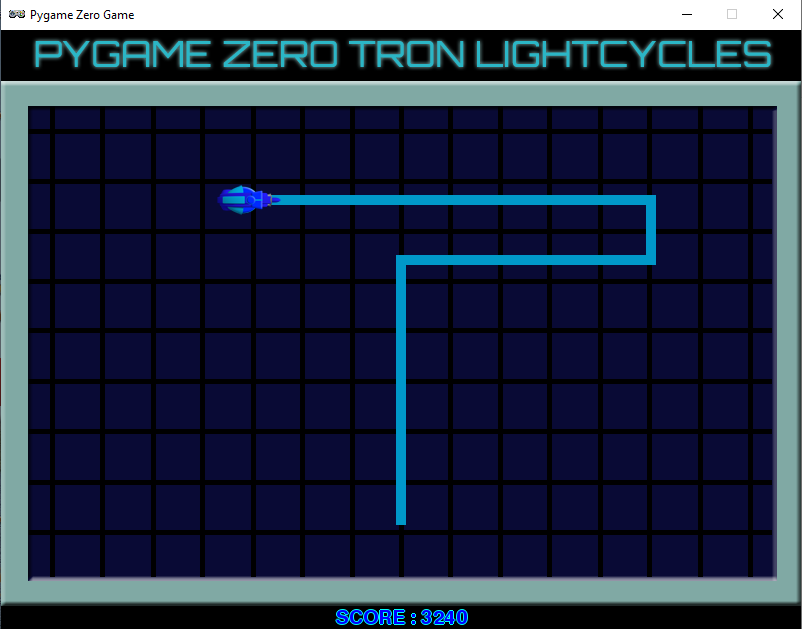
    Our homage to the TRON Light Cycle classic arcade game.

    For the main draw() function, we first blit our background image which is the cross-hatched arena, then we iterate through our two-dimensional list of screen positions (each 10 pixels square) displaying a square anywhere the Cycle has been. The Cycle is then drawn and we can add a display of the score.

    The update() function contains code to move the Cycle and check for collisions. We use a list of directions in degrees to control the angle the player is pointing, and another list of x and y increments for each direction. Each update we add x and y coordinates to the Cycle actor to move it in the direction that it’s pointing multiplied by our speed variable.

    We have an on_key_down() function defined to handle changing the direction of the Cycle actor with the arrow keys. We need to wait a while before checking for collisions on the current position, as the Cycle won’t have moved away for several updates, so each screen position in the matrix is actually a counter of how many updates it’s been there for.

    We can then test to see if 15 updates have happened before testing the square for collisions, which gives our Cycle enough time to clear the area. If we do detect a collision, then we can start the game-end sequence.

    We set the gamestate variable to 1, which then means the update() function uses that variable as a counter to run through the frames of animation for the Cycle’s explosion. Once it reaches the end of the sequence, the game stops.

    We have a key press defined (the SPACE bar) in the on_key_down() function to call our init() function, which will not only set up variables when the game starts but sets things back to their starting state.

    Here’s Mark’s code for a TRON-style Light Cycle minigame. To get it working on your system, you’ll need to install Pygame Zero. And to download the full code and assets, head here.

    So that’s the fundamentals of the player Light Cycle movement and collision checking. To make it more like the original arcade game, why not try experimenting with the code and adding a few computer-controlled rivals?

    Get your copy of Wireframe issue 47

    You can read more features like this one in Wireframe issue 47, available directly from Raspberry Pi Press — we deliver worldwide.

    And if you’d like a handy digital version of the magazine, you can also download issue 47 for free in PDF format.

    Website: LINK
  • Code your own Pipe Mania puzzler | Wireframe #46

    Code your own Pipe Mania puzzler | Wireframe #46

    Reading Time: 4 minutes

    Create a network of pipes before the water starts to flow in our re-creation of a classic puzzler. Jordi Santonja shows you how.

    A screen grab of the game in motion
    Pipe Mania’s design is so effective, it’s appeared in various guises elsewhere – even as a minigame in BioShock.

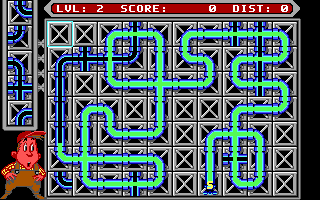
    Pipe Mania, also called Pipe Dream in the US, is a puzzle game developed by The Assembly Line in 1989 for Amiga, Atari ST, and PC, and later ported to other platforms, including arcades. The player must place randomly generated sections of pipe onto a grid. When a counter reaches zero, water starts to flow and must reach the longest possible distance through the connected pipes.

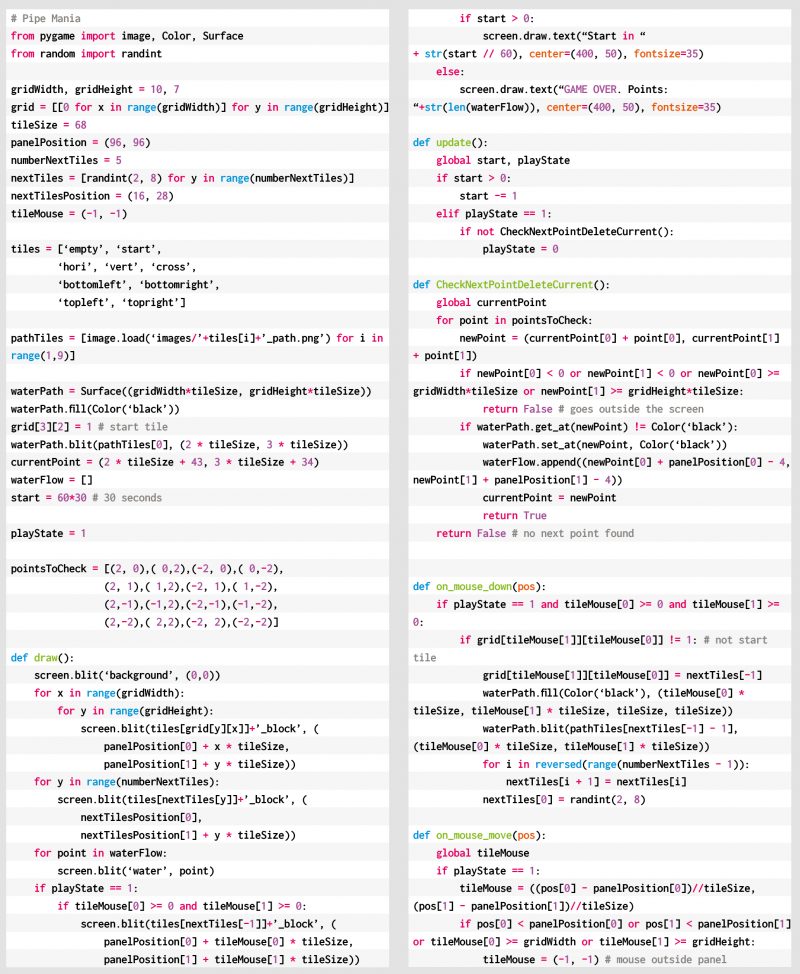
    Let’s look at how to recreate Pipe Dream in Python and Pygame Zero. The variable start is decremented at each frame. It begins with a value of 60*30, so it reaches zero after 30 seconds if our monitor runs at 60 frames per second. In that time, the player can place tiles on the grid to build a path. Every time the user clicks on the grid, the last tile from nextTiles is placed on the play area and a new random tile appears at the top of the next tiles. randint(2,8) computes a random value between 2 and 8.

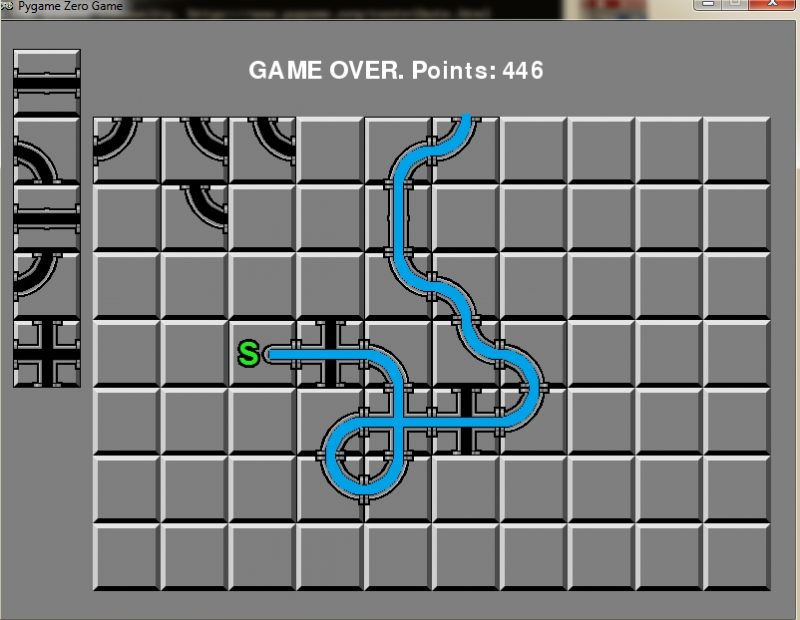
    Our Pipe Mania homage. Build a pipeline before the water escapes, and see if you can beat your own score.

    grid and nextTiles are lists of tile values, from 0 to 8, and are copied to the screen in the draw function with the screen.blit operation. grid is a two-dimensional list, with sizes gridWidth=10 and gridHeight=7. Every pipe piece is placed in grid with a mouse click. This is managed with the Pygame functions on_mouse_move and on_mouse_down, where the variable pos contains the mouse position in the window. panelPosition defines the position of the top-left corner of the grid in the window. To get the grid cell, panelPosition is subtracted from pos, and the result is divided by tileSize with the integer division //. tileMouse stores the resulting cell element, but it is set to (-1,-1) when the mouse lies outside the grid.

    The images folder contains the PNGs with the tile images, two for every tile: the graphical image and the path image. The tiles list contains the name of every tile, and adding to it _block or _path obtains the name of the file. The values stored in nextTiles and grid are the indexes of the elements in tiles.

    wfmag46code
    Here’s Jordi’s code for a Pipemania-style puzzler. To get it working on your system, you’ll need to install Pygame Zero. And to download the full code and assets, head here.

    The image waterPath isn’t shown to the user, but it stores the paths that the water is going to follow. The first point of the water path is located in the starting tile, and it’s stored in currentPoint. update calls the function CheckNextPointDeleteCurrent, when the water starts flowing. That function finds the next point in the water path, erases it, and adds a new point to the waterFlow list. waterFlow is shown to the user in the draw function.

    pointsToCheck contains a list of relative positions, offsets, that define a step of two pixels from currentPoint in every direction to find the next point. Why two pixels? To be able to define the ‘cross’ tile, where two lines cross each other. In a ‘cross’ tile the water flow must follow a straight line, and this is how the only points found are the next points in the same direction. When no next point is found, the game ends and the score is shown: the number of points in the water path, playState is set to 0, and no more updates are done.

    Get your copy of Wireframe issue 46

    You can read more features like this one in Wireframe issue 46, available directly from Raspberry Pi Press — we deliver worldwide.

    wfcover

    And if you’d like a handy digital version of the magazine, you can also download issue 46 for free in PDF format.

    Website: LINK

  • Recreate Tiger-Heli’s bomb mechanic | Wireframe #45

    Recreate Tiger-Heli’s bomb mechanic | Wireframe #45

    Reading Time: 4 minutes

    Code an explosive homage to Toaplan’s classic blaster. Mark Vanstone has the details

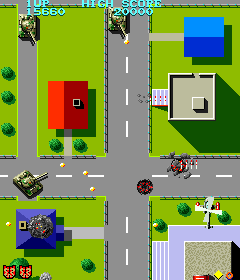
    Tiger-Heli was developed by Toaplan and published in Japan by Taito and by Romstar in North America.

    Released in 1985, Tiger-Heli was one of the earliest games from Japanese developer Toaplan: a top-down shoot-’em-up that pitted a lone helicopter against relentless waves of enemy tanks and military installations. Toaplan would go on to refine and evolve the genre through the eighties and nineties with such titles as Truxton and Fire Shark, so Tiger-Heli served as a kind of blueprint for the studio’s legendary blasters.

    Tiger-Heli featured a powerful secondary weapon, too: as well as a regular shot, the game’s attack helicopter could also drop a deadly bomb capable of destroying everything within its blast radius. The mechanic was one that first appeared as far back as Atari’s Defender in 1981, but Toaplan quickly made it its own, with variations on the bomb becoming one of the signatures in the studio’s later games.

    For our Tiger-Heli-style Pygame Zero code, we’ll concentrate on the unique bomb aspect, but first, we need to get the basic scrolling background and helicopter on the screen. In a game like this, we’d normally make the background out of tiles that can be used to create a varied but continuous scrolling image. For this example, though, we’ll keep things simple and have one long image that we scroll down the screen and then display a copy above it. When the first image goes off the screen, we just reset the co-ordinates to display it above the second image copy. In this way, we can have an infinitely scrolling background.

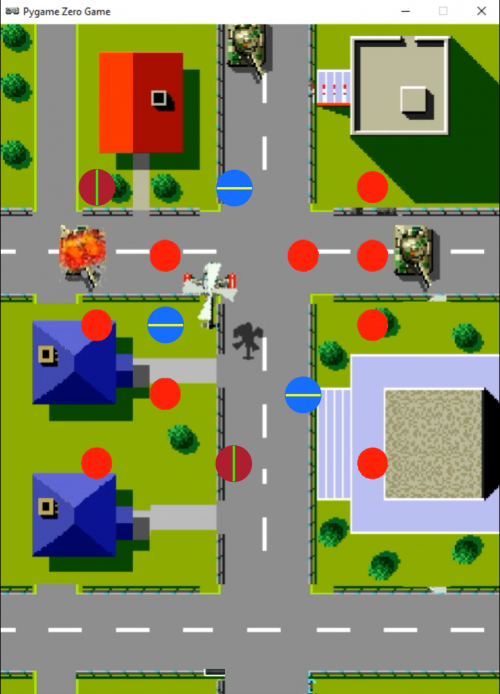
    Our Tiger-Heli homage in Python. Fly over the military targets, firing missiles and dropping bombs.

    The helicopter can be set up as an Actor with just two frames for the movement of the rotors. This should look like it’s hovering above the ground, so we blit a shadow bitmap to the bottom right of the helicopter. We can set up keyboard events to move the Actor left, right, up, and down, making sure we don’t allow it to go off the screen.

    Now we can go ahead and set up the bombs. We can predefine a list of bomb Actors but only display them while the bombs are active. We’ll trigger a bomb drop with the SPACE bar and set all the bombs to the co-ordinates of the helicopter. Then, frame by frame, we move each bomb outwards in different directions so that they spread out in a pattern. You could try adjusting the number of bombs or their pattern to see what effects can be achieved. When the bombs get to frame 30, we start changing the image so that we get a flashing, expanding circle for each bomb.

    Here’s Mark’s code for a Tiger-Heli-style shooter. To get it working on your system, you’ll need to install Pygame Zero. And to download the full code and assets, head here.

    It’s all very well having bombs to fire, but we could really do with something to drop them on, so let’s make some tank Actors waiting on the ground for us to destroy. We can move them with the scrolling background so that they look like they’re static on the ground. Then if one of our bombs has a collision detected with one of the tanks, we can set an animation going by cycling through a set of explosion frames, ending with the tank disappearing.

    We can also add in some sound effects as the bombs are dropped, and explosion sounds if the tanks are hit. And with that, there you have it: the beginnings of a Tiger-Heli-style blaster.

    Get your copy of Wireframe issue 45

    You can read more features like this one in Wireframe issue 45, available directly from Raspberry Pi Press — we deliver worldwide.

    And if you’d like a handy digital version of the magazine, you can also download issue 45 for free in PDF format.

    Baldur’s Gate III: our cover star for Wireframe #45.

    Make sure to follow Wireframe on Twitter and Facebook for updates and exclusive offers and giveaways. Subscribe on the Wireframe website to save up to 72% compared to newsstand pricing!

    Website: LINK

  • Code your own Artillery-style tank game | Wireframe #44

    Code your own Artillery-style tank game | Wireframe #44

    Reading Time: 4 minutes

    Fire artillery shells to blow up the enemy with Mark Vanstone’s take on a classic two-player artillery game

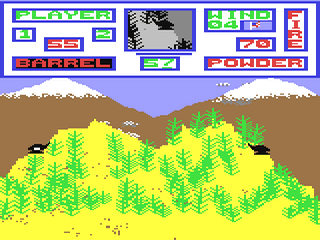
    Artillery Duel was an early example of the genre, and appeared on such systems as the Bally Astrocade and Commodore 64 (pictured).

    To pick just one artillery game is difficult since it’s a genre in its own right. Artillery simulations and games have been around for almost as long as computers, and most commonly see two players take turns to adjust the trajectory of their tank’s turret and fire a projectile at their opponent. The earliest versions for microcomputers appeared in the mid-seventies, and the genre continued to develop; increasingly complex scenarios appeared involving historical settings or, as we saw from the mid-90s on, even offbeat ideas like battles between factions of worms.

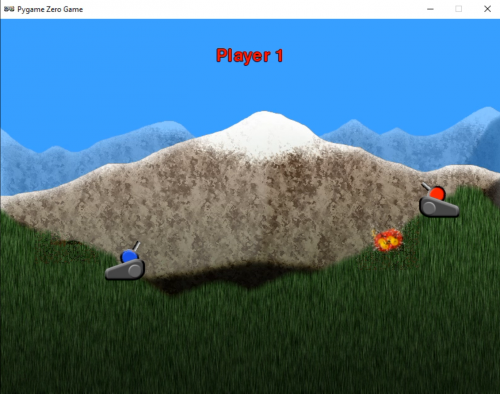
    To code the basics of an artillery game, we’ll need two tanks with turrets, a landscape, and some code to work out who shot what, in which direction, and where said shot landed. Let’s start with the landscape. If we create a landscape in two parts – a backdrop and foreground – we can make the foreground destructible so that when a missile explodes it damages part of the landscape. This is a common effect used in artillery games, and sometimes makes the gameplay more complicated as the battle progresses. In our example, we have a grass foreground overlaid on a mountain scene. We then need a cannon for each player. In this case, we’ve used a two-part image, one for the base and one for the turret, which means the latter can be rotated using the up and down keys.

    Our homage to the artillery game genre. Fire away at your opponent, and hope they don’t hit back first.

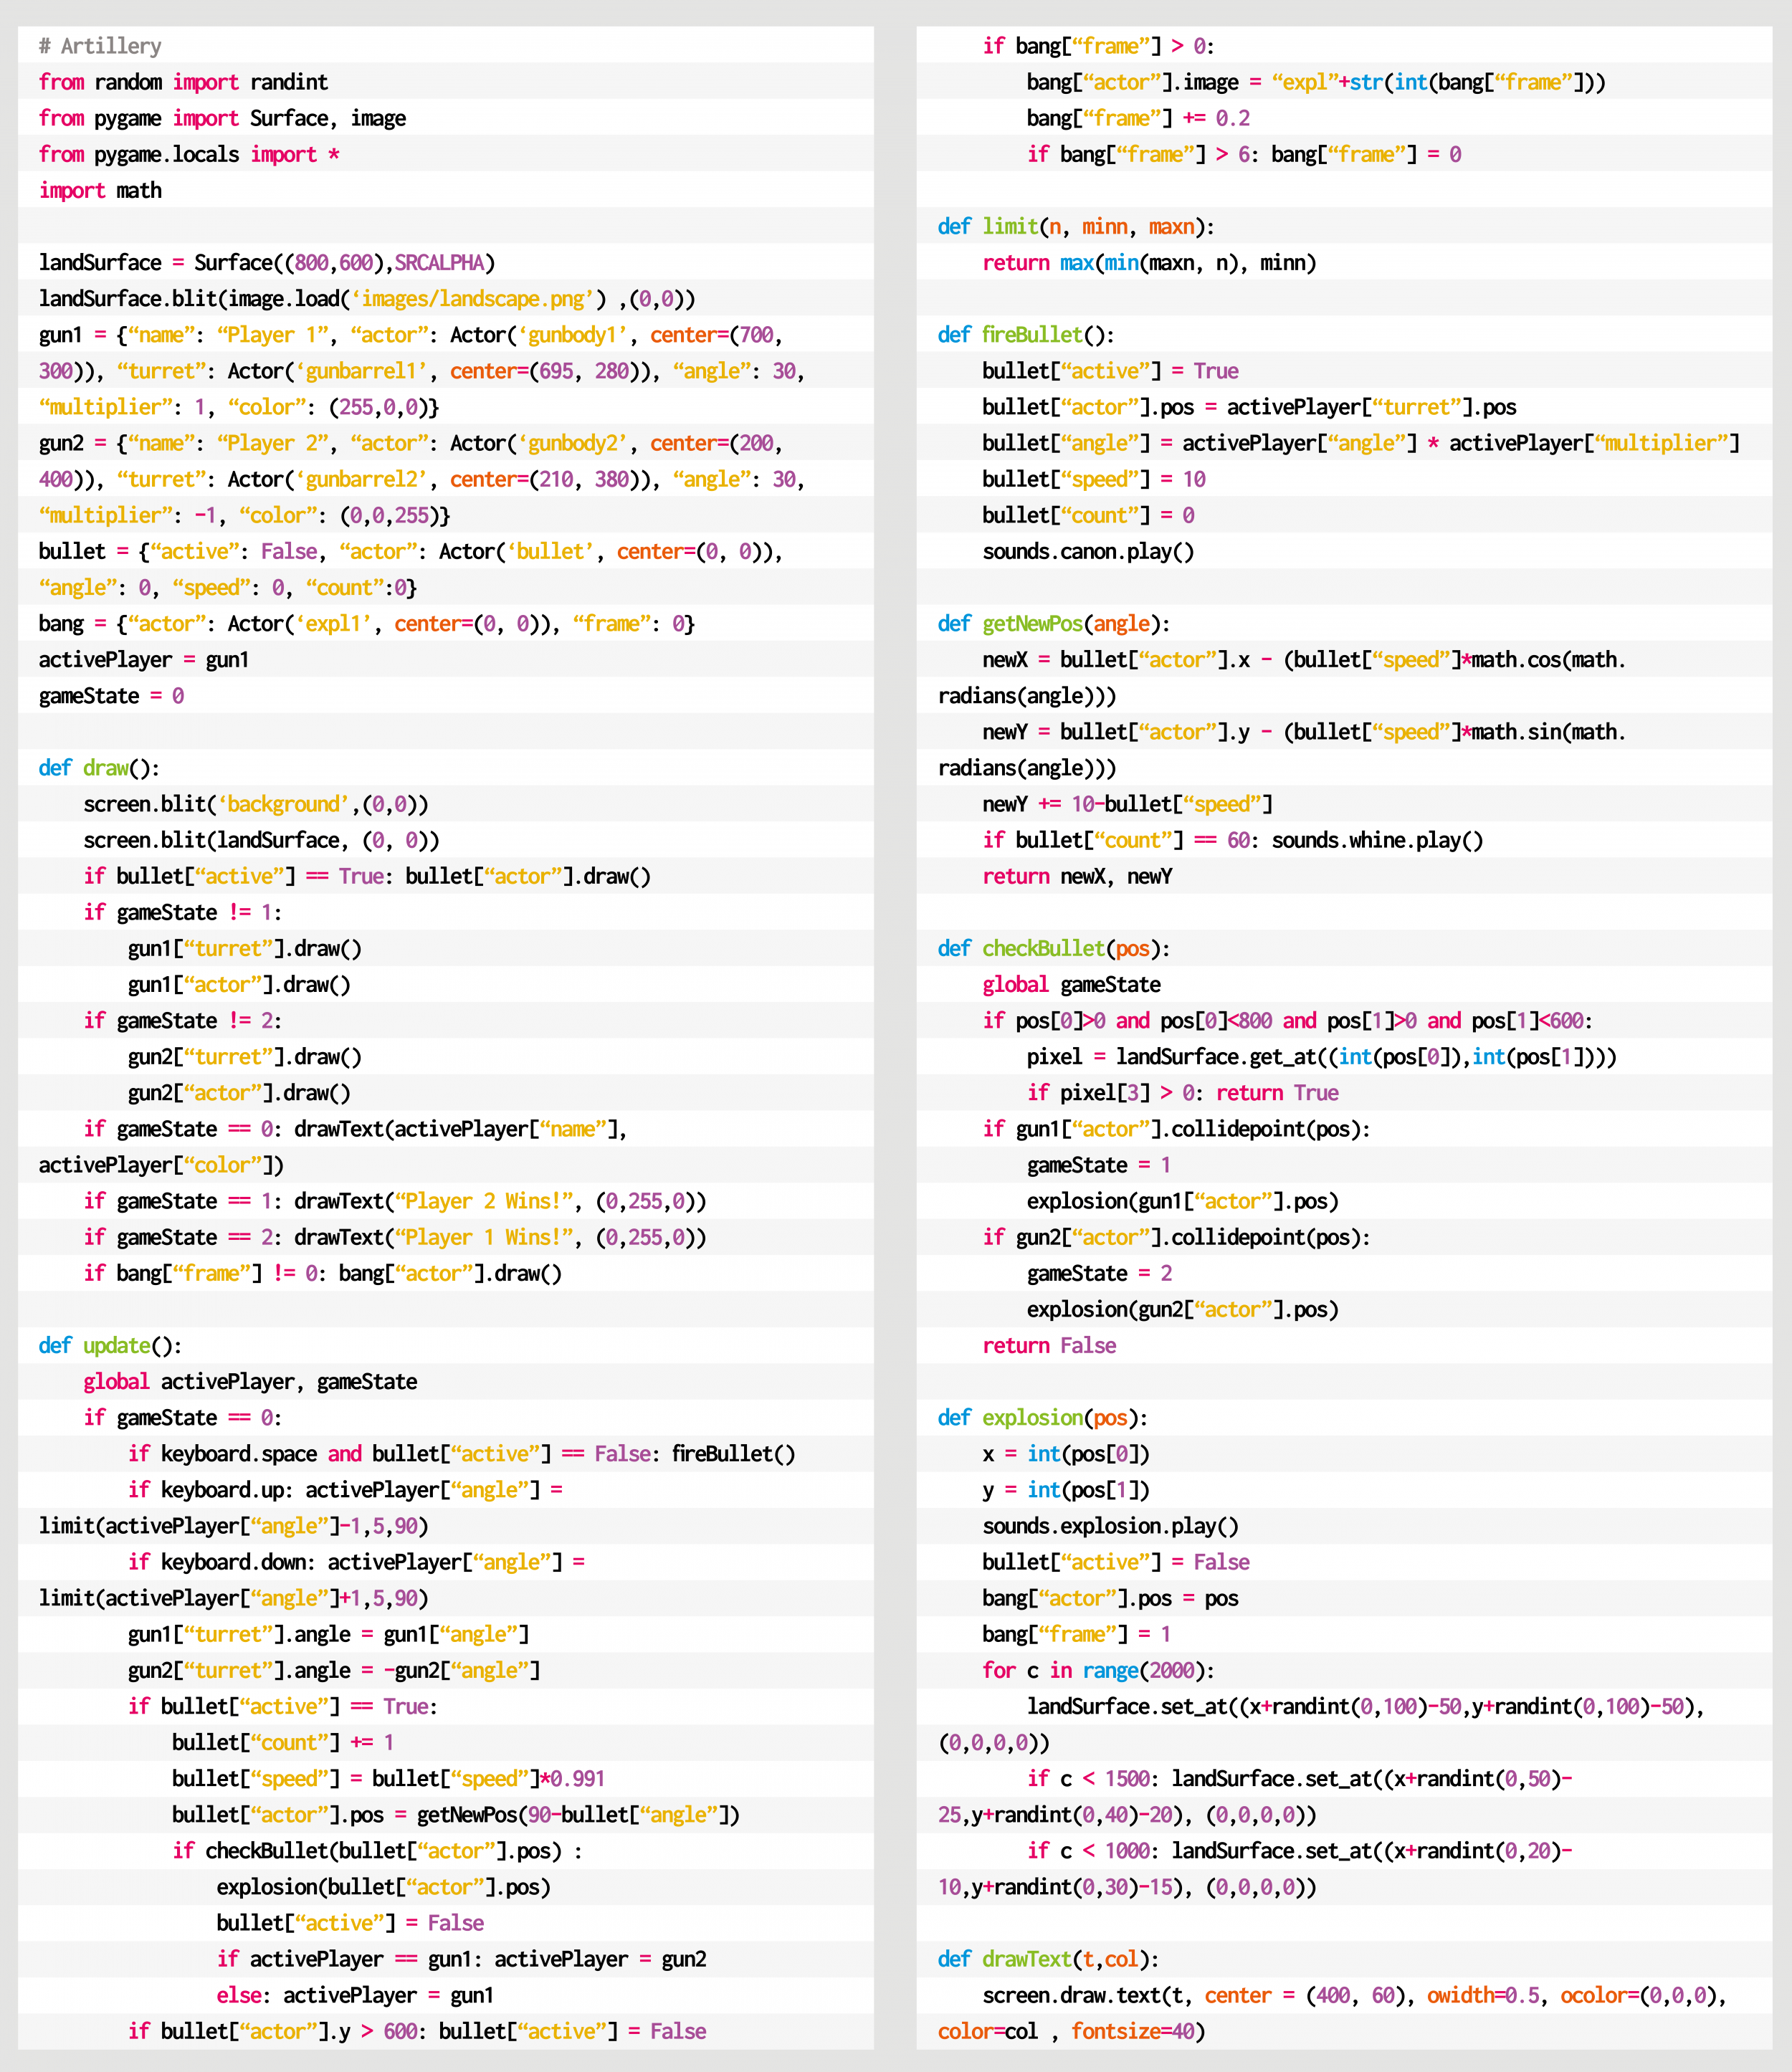
    For this code example, we can use the Python dictionary to store several bits of data about the game objects, including the Actor objects. This makes the data handling tidy and is quite similar to the way that JSON is used in JavaScript. We can use this method for the two cannons, the projectile, and an explosion object. As this is a two-player game, we’ll alternate between the two guns, allowing the arrow keys to change the angle of the cannon. When the SPACE bar is pressed, we call the firing sequence, which places the projectile at the same position as the gun firing it. We then move the missile through the air, reducing the speed as it goes and allowing the effects of gravity to pull it towards the ground.

    We can work out whether the bullet has hit anything with two checks. The first is to do a pixel check with the foreground. If this comes back as not transparent, then it has hit the ground, and we can start an explosion. To create a hole in the foreground, we can write transparent pixels randomly around the point of contact and then set off an explosion animation. If we test for a collision with a gun, we may find that the bullet has hit the other player and after blowing up the tank, the game ends. If the impact only hit the landscape, though, we can switch control over to the other player and let them have a go.

    So that’s your basic artillery game. But rest assured there are plenty of things to add – for example, wind direction, power of the shot, variable damage depending on proximity, or making the tanks fall into holes left by the explosions. You could even change the guns into little wiggly creatures and make your own homage to Worms.

    Here’s Mark’s code for an artillery-style tank game. To get it working on your system, you’ll need to install Pygame Zero. And to download the full code and assets, head here.

    Get your copy of Wireframe issue 44

    You can read more features like this one in Wireframe issue 44, available directly from Raspberry Pi Press — we deliver worldwide.

    And if you’d like a handy digital version of the magazine, you can also download issue 44 for free in PDF format.

    Wireframe #44, bringing the past and future of Worms to the fore.

    Make sure to follow Wireframe on Twitter and Facebook for updates and exclusive offers and giveaways. Subscribe on the Wireframe website to save up to 72% compared to newsstand pricing!

    Website: LINK

  • Code a Rally-X-style mini-map | Wireframe #43

    Code a Rally-X-style mini-map | Wireframe #43

    Reading Time: 4 minutes

    Race around using a mini-map for navigation, just like the arcade classic, Rally-X. Mark Vanstone has the code

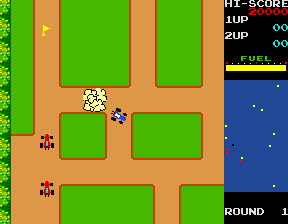
    In Namco’s original arcade game, the red cars chased the player relentlessly around each level. Note the handy mini-map on the right.

    The original Rally-X arcade game blasted onto the market in 1980, at the same time as Pac‑Man and Defender. This was the first year that developer Namco had exported its games outside Japan thanks to the deal it struck with Midway, an American game distributor. The aim of Rally-X is to race a car around a maze, avoiding enemy cars while collecting yellow flags – all before your fuel runs out.

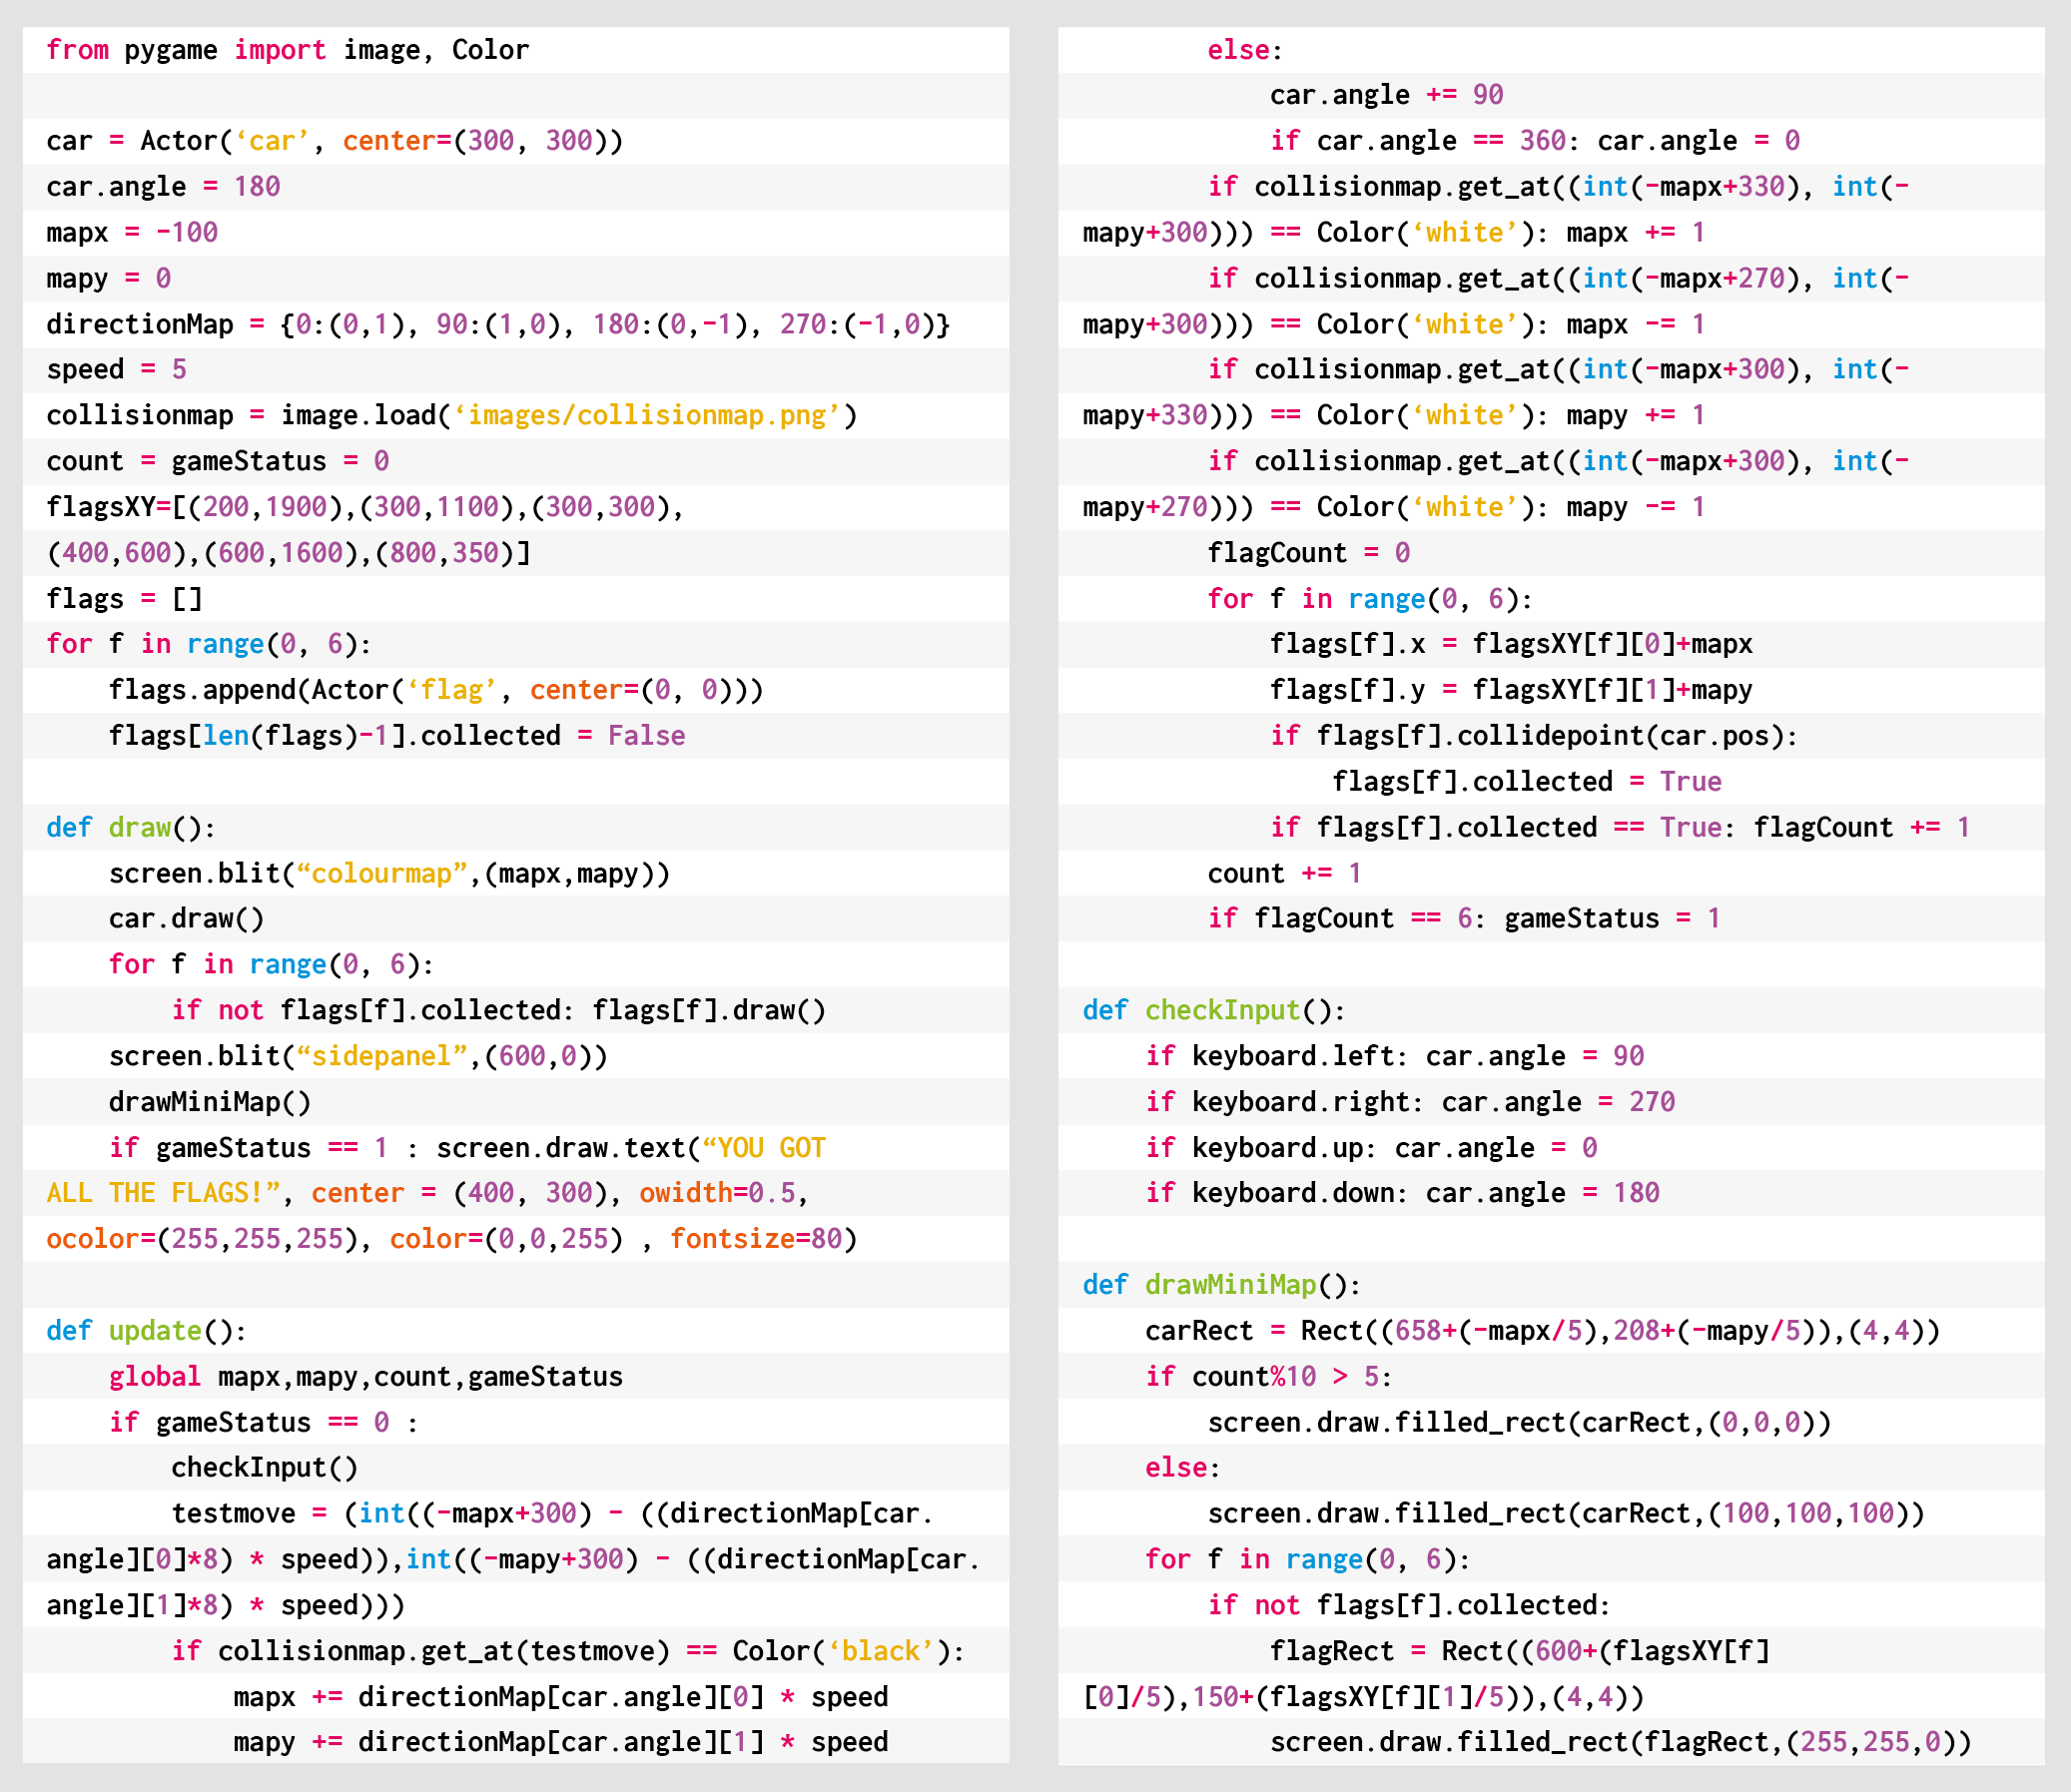
    The aspect of Rally-X that we’ll cover here is the mini-map. As the car moves around the maze, its position can be seen relative to the flags on the right of the screen. The main view of the maze only shows a section of the whole map, and scrolls as the car moves, whereas the mini-map shows the whole size of the map but without any of the maze walls – just dots where the car and flags are (and in the original, the enemy cars). In our example, the mini-map is five times smaller than the main map, so it’s easy to work out the calculation to translate large map co‑ordinates to mini-map co-ordinates.

    To set up our Rally-X homage in Pygame Zero, we can stick with the default screen size of 800×600. If we use 200 pixels for the side panel, that leaves us with a 600×600 play area. Our player’s car will be drawn in the centre of this area at the co-ordinates 300,300. We can use the in-built rotation of the Actor object by setting the angle property of the car. The maze scrolls depending on which direction the car is pointing, and this can be done by having a lookup table in the form of a dictionary list (directionMap) where we define x and y increments for each angle the car can travel. When the cursor keys are pressed, the car stays central and the map moves.

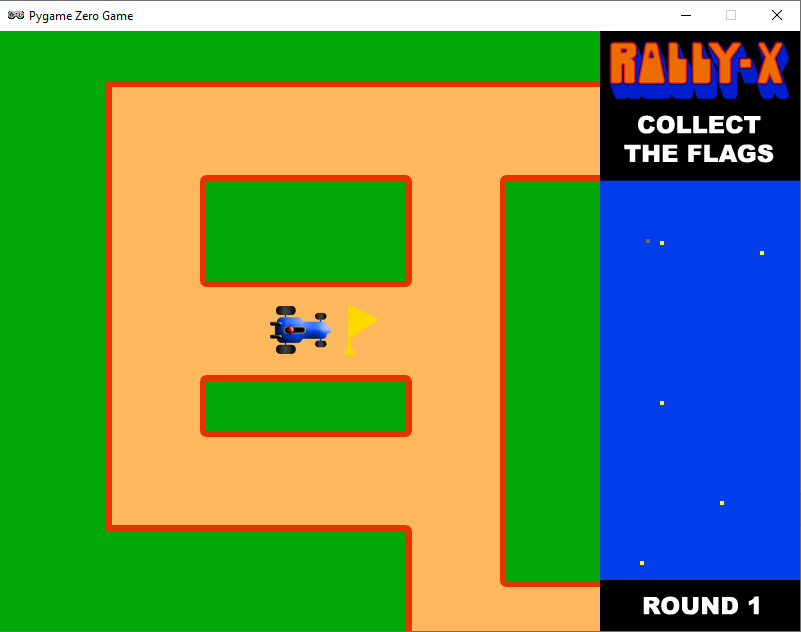
    A screenshot of our Rally-X homage running in Pygame Zero

    Roam the maze and collect those flags in our Python homage to Rally-X.

    To detect the car hitting a wall, we can use a collision map. This isn’t a particularly memory-efficient way of doing it, but it’s easy to code. We just use a bitmap the same size as the main map which has all the roads as black and all the walls as white. With this map, we can detect if there’s a wall in the direction in which the car’s moving by testing the pixels directly in front of it. If a wall is detected, we rotate the car rather than moving it. If we draw the side panel after the main map, we’ll then be able to see the full layout of the screen with the map scrolling as the car navigates through the maze.

    We can add flags as a list of Actor objects. We could make these random, but for the sake of simplicity, our sample code has them defined in a list of x and y co-ordinates. We need to move the flags with the map, so in each update(), we loop through the list and add the same increments to the x and y co‑ordinates as the main map. If the car collides with any flags, we just take them off the list of items to draw by adding a collected variable. Having put all of this in place, we can draw the mini-map, which will show the car and the flags. All we need to do is divide the object co-ordinates by five and add an x and y offset so that the objects appear in the right place on the mini-map.

    And those are the basics of Rally-X! All it needs now is a fuel gauge, some enemy cars, and obstacles – but we’ll leave those for you to sort out…

    Here’s Mark’s code for a Rally-X-style driving game with mini-map. To get it running on your system, you’ll need to install Pygame Zero. And to download the full code and assets, head here.

    Get your copy of Wireframe issue 43

    You can read more features like this one in Wireframe issue 43, available directly from Raspberry Pi Press — we deliver worldwide.

    And if you’d like a handy digital version of the magazine, you can also download issue 43 for free in PDF format.

    Wireframe #43, with the gorgeous Sea of Stars on the cover.

    Make sure to follow Wireframe on Twitter and Facebook for updates and exclusive offers and giveaways. Subscribe on the Wireframe website to save up to 49% compared to newsstand pricing!

    Website: LINK

  • Recreate Q*bert’s cube-hopping action | Wireframe #42

    Recreate Q*bert’s cube-hopping action | Wireframe #42

    Reading Time: 4 minutes

    Code the mechanics of an eighties arcade hit in Python and Pygame Zero. Mark Vanstone shows you how

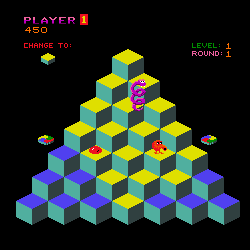
    Players must change the colour of every cube to complete the level.

    Late in 1982, a funny little orange character with a big nose landed in arcades. The titular Q*bert’s task was to jump around a network of cubes arranged in a pyramid formation, changing the colours of each as they went. Once the cubes were all the same colour, it was on to the next level; to make things more interesting, there were enemies like Coily the snake, and objects which helped Q*bert: some froze enemies in their tracks, while floating discs provided a lift back to the top of the stage.

    Q*bert was designed by Warren Davis and Jeff Lee at the American company Gottlieb, and soon became such a smash hit that, the following year, it was already being ported to most of the home computer platforms available at the time. New versions and remakes continued to appear for years afterwards, with a mobile phone version appearing in 2003. Q*bert was by far Gottlieb’s most popular game, and after several changes in company ownership, the firm is now part of Sony’s catalogue – Q*bert’s main character even made its way into the 2015 film, Pixels.

    Q*bert uses isometric-style graphics to draw a pseudo-3D display – something we can easily replicate in Pygame Zero by using a single cube graphic with which we make a pyramid of Actor objects. Starting with seven cubes on the bottom row, we can create a simple double loop to create the pile of cubes. Our Q*bert character will be another Actor object which we’ll position at the top of the pile to start. The game screen can then be displayed in the draw() function by looping through our 28 cube Actors and then drawing Q*bert.

    Our homage to Q*bert. Try not to fall into the terrifying void.

    We need to detect player input, and for this we use the built-in keyboard object and check the cursor keys in our update() function. We need to make Q*bert move from cube to cube so we can move the Actor 32 pixels on the x-axis and 48 pixels on the y-axis. If we do this in steps of 2 for x and 3 for y, we will have Q*bert on the next cube in 16 steps. We can also change his image to point in the right direction depending on the key pressed in our jump() function. If we use this linear movement in our move() function, we’ll see the Actor go in a straight line to the next block. To add a bit of bounce to Q*bert’s movement, we add or subtract (depending on the direction) the values in the bounce[] list. This will make a bit more of a curved movement to the animation.

    Now that we have our long-nosed friend jumping around, we need to check where he’s landing. We can loop through the cube positions and check whether Q*bert is over each one. If he is, then we change the image of the cube to one with a yellow top. If we don’t detect a cube under Q*bert, then the critter’s jumped off the pyramid, and the game’s over. We can then do a quick loop through all the cube Actors, and if they’ve all been changed, then the player has completed the level. So those are the basic mechanics of jumping around on a pyramid of cubes. We just need some snakes and other baddies to annoy Q*bert – but we’ll leave those for you to add. Good luck!

    Here’s Mark’s code for a Q*bert-style, cube-hopping platform game. To get it running on your system, you’ll need to install Pygame Zero. And to download the full code and assets, head here.

    Get your copy of Wireframe issue 42

    You can read more features like this one in Wireframe issue 42, available directly from Raspberry Pi Press — we deliver worldwide.

    And if you’d like a handy digital version of the magazine, you can also download issue 42 for free in PDF format.

    Make sure to follow Wireframe on Twitter and Facebook for updates and exclusive offers and giveaways. Subscribe on the Wireframe website to save up to 49% compared to newsstand pricing!

    Website: LINK

  • Recreate Time Pilot’s free-scrolling action | Wireframe #41

    Recreate Time Pilot’s free-scrolling action | Wireframe #41

    Reading Time: 4 minutes

    Fly through the clouds in our re-creation of Konami’s classic 1980s shooter. Mark Vanstone has the code

    Arguably one of Konami’s most successful titles, Time Pilot burst into arcades in 1982. Yoshiki Okamoto worked on it secretly, and it proved so successful that a sequel soon followed. In the original, the player flew through five eras, from 1910, 1940, 1970, 1982, and then to the far future: 2001. Aircraft start as biplanes and progress to become UFOs, naturally, by the last level.

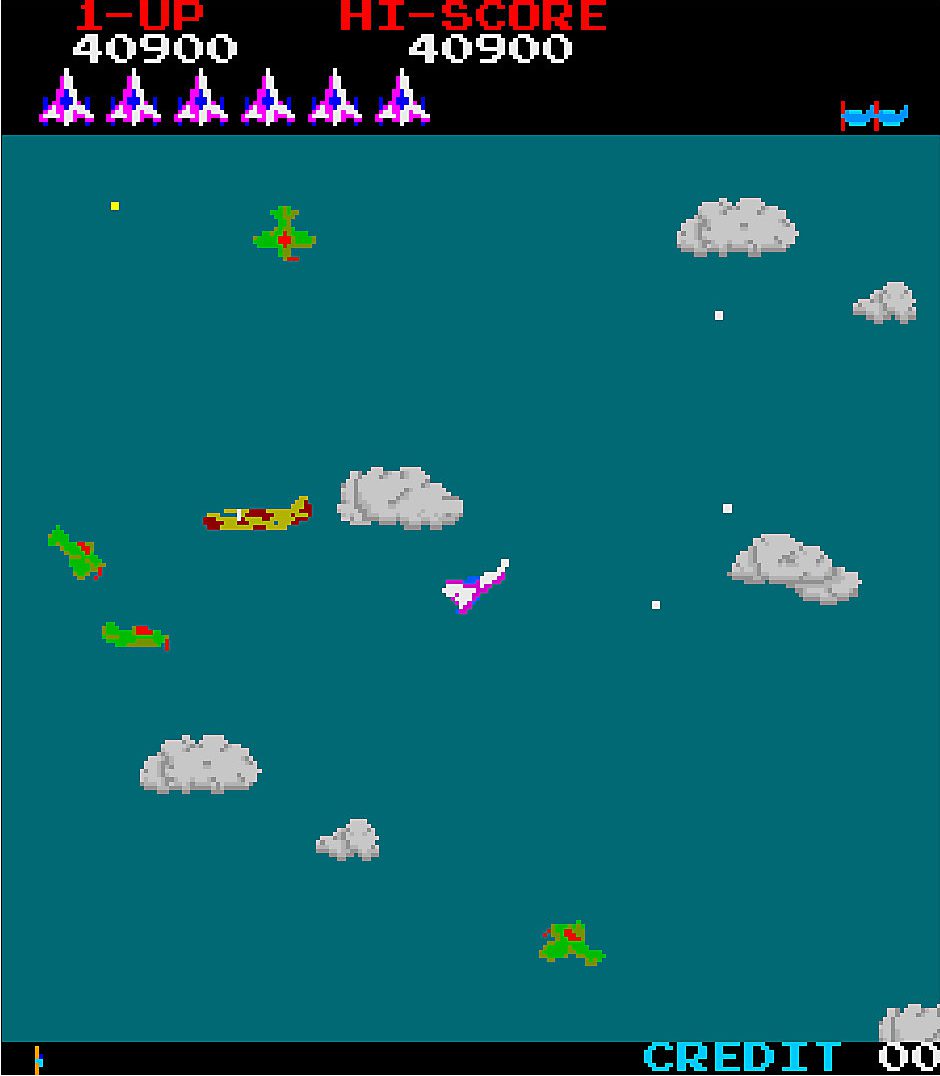
    Players also rescue other pilots by picking them up as they parachute from their aircraft. The player’s plane stays in the centre of the screen while other game objects move around it. The clouds that give the impression of movement have a parallax style to them, some moving faster than others, offering an illusion of depth.

    To make our own version with Pygame Zero, we need eight frames of player aircraft images – one for each direction it can fly. After we create a player Actor object, we can get input from the cursor keys and change the direction the aircraft is pointing with a variable which will be set from zero to 7, zero being the up direction. Before we draw the player to the screen, we set the image of the Actor to the stem image name, plus whatever that direction variable is at the time. That will give us a rotating aircraft.

    To provide a sense of movement, we add clouds. We can make a set of random clouds on the screen and move them in the opposite direction to the player aircraft. As we only have eight directions, we can use a lookup table to change the x and y coordinates rather than calculating movement values. When they go off the screen, we can make them reappear on the other side so that we end up with an ‘infinite’ playing area. Add a level variable to the clouds, and we can move them at different speeds on each update() call, producing the parallax effect. Then we need enemies. They will need the same eight frames to move in all directions. For this sample, we will just make one biplane, but more could be made and added.

    Our Python homage to Konami’s arcade classic.

    To get the enemy plane to fly towards the player, we need a little maths. We use the math.atan2() function to work out the angle between the enemy and the player. We convert that to a direction which we set in the enemy Actor object, and set its image and movement according to that direction variable. We should now have the enemy swooping around the player, but we will also need some bullets. When we create bullets, we need to put them in a list so that we can update each one individually in our update(). When the player hits the fire button, we just need to make a new bullet Actor and append it to the bullets list. We give it a direction (the same as the player Actor) and send it on its way, updating its position in the same way as we have done with the other game objects.

    The last thing is to detect bullet hits. We do a quick point collision check and if there’s a match, we create an explosion Actor and respawn the enemy somewhere else. For this sample, we haven’t got any housekeeping code to remove old bullet Actors, which ought to be done if you don’t want the list to get really long, but that’s about all you need: you have yourself a Time Pilot clone!

    Get your copy of Wireframe issue 41

    You can read more features like this one in Wireframe issue 41, available directly from Raspberry Pi Press — we deliver worldwide.

    And if you’d like a handy digital version of the magazine, you can also download issue 41 for free in PDF format.

    Make sure to follow Wireframe on Twitter and Facebook for updates and exclusive offers and giveaways. Subscribe on the Wireframe website to save up to 49% compared to newsstand pricing!

    Website: LINK

  • Code Jetpac’s rocket building action | Wireframe #40

    Code Jetpac’s rocket building action | Wireframe #40

    Reading Time: 4 minutes

    Pick up parts of a spaceship, fuel it up, and take off in Mark Vanstone’s Python and Pygame Zero rendition of a ZX Spectrum classic

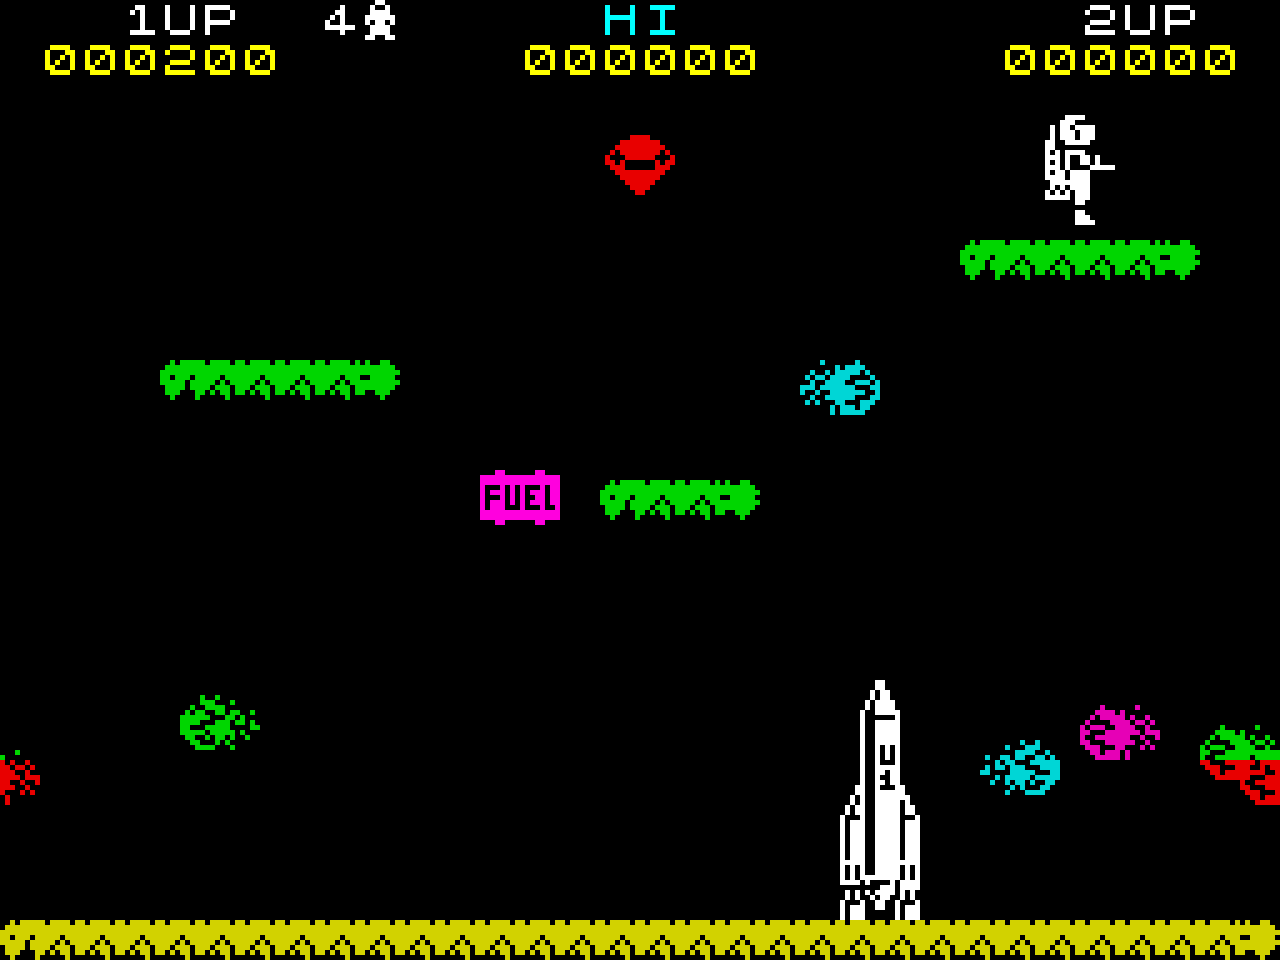
    The original Jetpac, in all its 8-bit ZX Spectrum glory

    For ZX Spectrum owners, there was something special about waiting for a game to load, with the sound of zeros and ones screeching from the cassette tape player next to the computer. When the loading screen – an image of an astronaut and Ultimate Play the Game’s logo – appeared, you knew the wait was going to be worthwhile. Created by brothers Chris and Tim Stamper in 1983, Jetpac was one of the first hits for their studio, Ultimate Play the Game. The game features the hapless astronaut Jetman, who must build and fuel a rocket from the parts dotted around the screen, all the while avoiding or shooting swarms of deadly aliens.

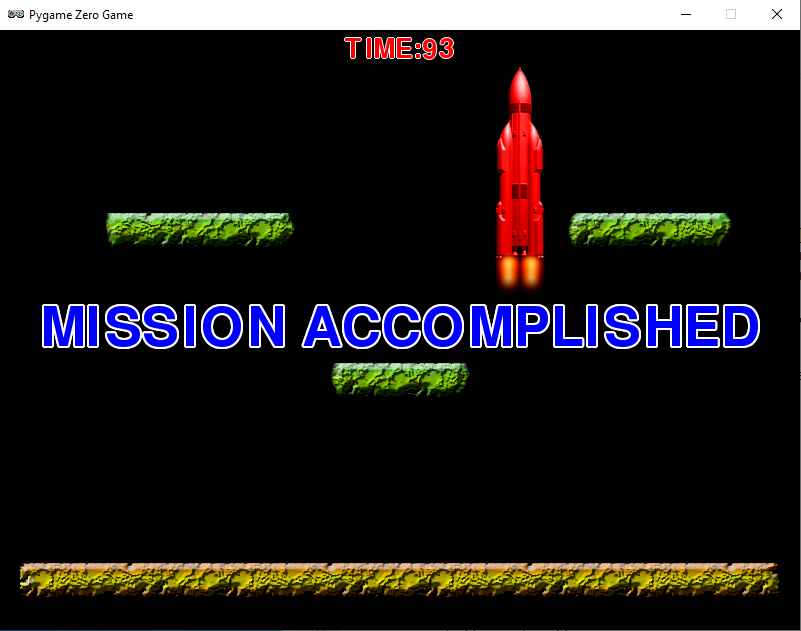
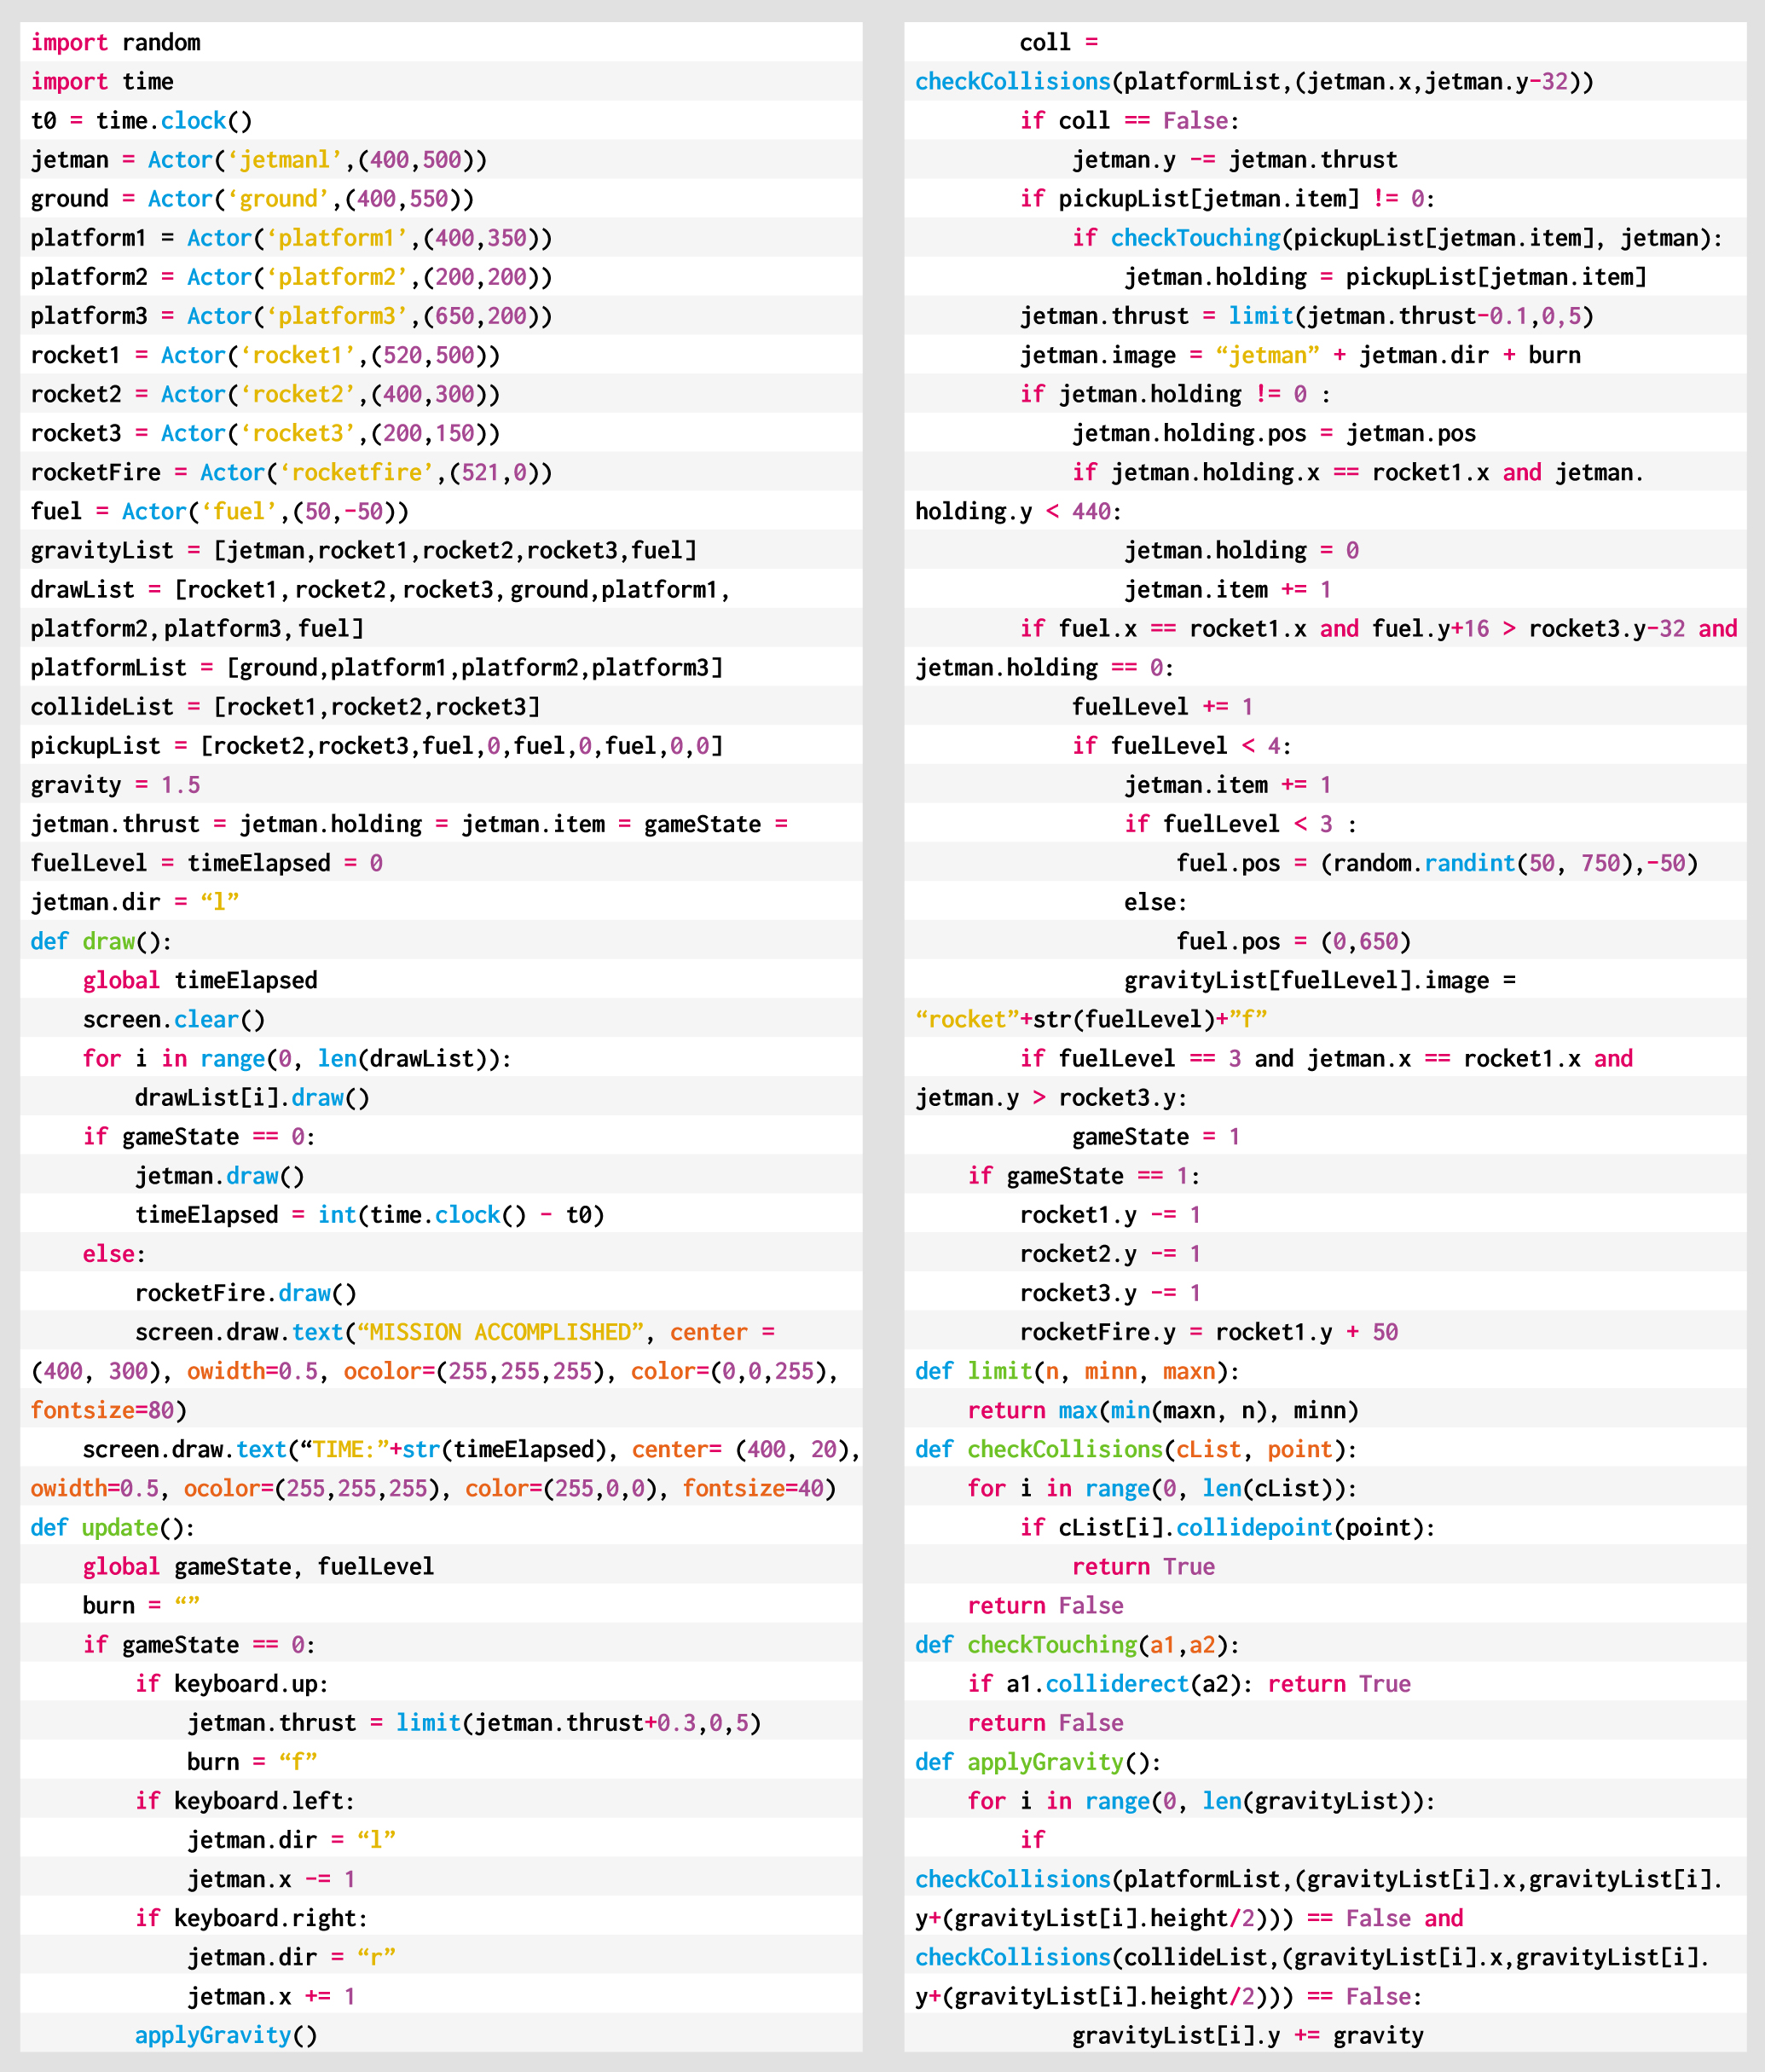
    This month’s code snippet will provide the mechanics of collecting the ship parts and fuel to get Jetman’s spaceship to take off.  We can use the in-built Pygame Zero Actor objects for all the screen elements and the Actor collision routines to deal with gravity and picking up items. To start, we need to initialise our Actors. We’ll need our Jetman, the ground, some platforms, the three parts of the rocket, some fire for the rocket engines, and a fuel container. The way each Actor behaves will be determined by a set of lists. We have a list for objects with gravity, objects that are drawn each frame, a list of platforms, a list of collision objects, and the list of items that can be picked up.

    Jetman jumps inside the rocket and is away. Hurrah!

    Our draw() function is straightforward as it loops through the list of items in the draw list and then has a couple of conditional elements being drawn after. The update() function is where all the action happens: we check for keyboard input to move Jetman around, apply gravity to all the items on the gravity list, check for collisions with the platform list, pick up the next item if Jetman is touching it, apply any thrust to Jetman, and move any items that Jetman is holding to move with him. When that’s all done, we can check if refuelling levels have reached the point where Jetman can enter the rocket and blast off.

    If you look at the helper functions checkCollisions() and checkTouching(), you’ll see that they use different methods of collision detection, the first being checking for a collision with a specified point so we can detect collisions with the top or bottom of an actor, and the touching collision is a rectangle or bounding box collision, so that if the bounding box of two Actors intersect, a collision is registered. The other helper function applyGravity() makes everything on the gravity list fall downward until the base of the Actor hits something on the collide list.

    So that’s about it: assemble a rocket, fill it with fuel, and lift off. The only thing that needs adding is a load of pesky aliens and a way to zap them with a laser gun.

    Here’s Mark’s Jetpac code. To get it running on your system, you’ll need to install Pygame Zero. And to download the full code and assets, head here.

    Get your copy of Wireframe issue 40

    You can read more features like this one in Wireframe issue 40, available directly from Raspberry Pi Press — we deliver worldwide.

    And if you’d like a handy digital version of the magazine, you can also download issue 40 for free in PDF format.

    Make sure to follow Wireframe on Twitter and Facebook for updates and exclusive offers and giveaways. Subscribe on the Wireframe website to save up to 49% compared to newsstand pricing!

    Website: LINK

  • Code Gauntlet’s four-player co-op mode | Wireframe #39

    Code Gauntlet’s four-player co-op mode | Wireframe #39

    Reading Time: 4 minutes

    Four players dungeon crawling at once? Mark Vanstone shows you how to recreate Gauntlet’s co-op mode in Python and Pygame Zero.

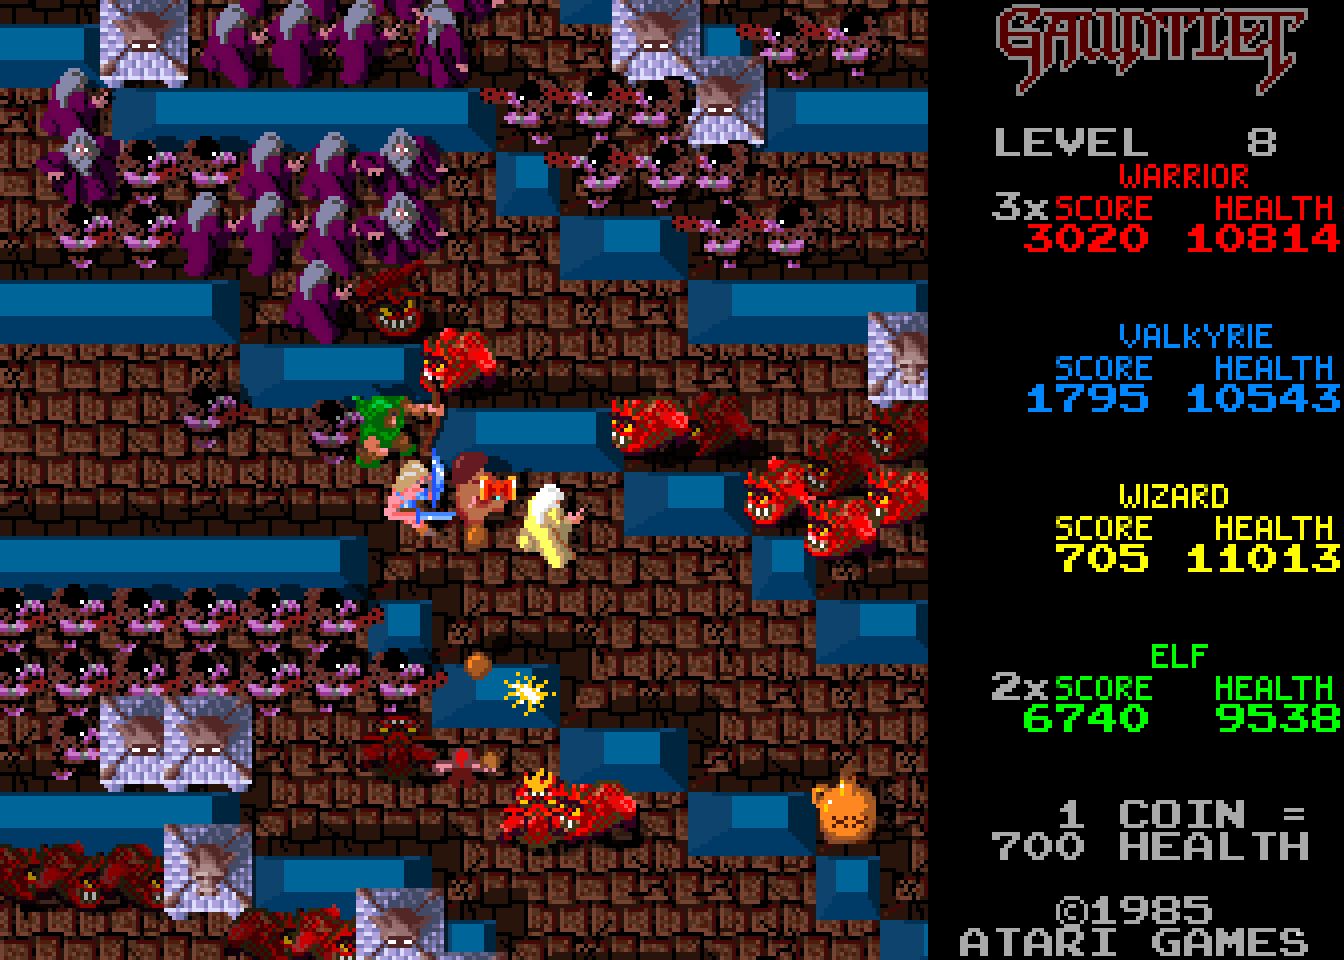
    Players collected items while battling their way through dungeons. Shooting food was a definite faux pas.

    Atari’s Gauntlet was an eye-catching game, not least because it allowed four people to explore its dungeons together. Each player could choose one of four characters, each with its own abilities – there was a warrior, a Valkyrie, a wizard, and an elf – and surviving each dungeon required slaughtering enemies and the constant gathering of food, potions, and keys that unlocked doors and exits.

    Designed by Ed Logg, and loosely based on the tabletop RPG Dungeons & Dragons, as well as John Palevich’s 1983 dungeon crawler, Dandy, Gauntlet was a big success. It was ported to most of the popular home systems at the time, and Atari released a sequel arcade machine, Gauntlet II, in 1986.

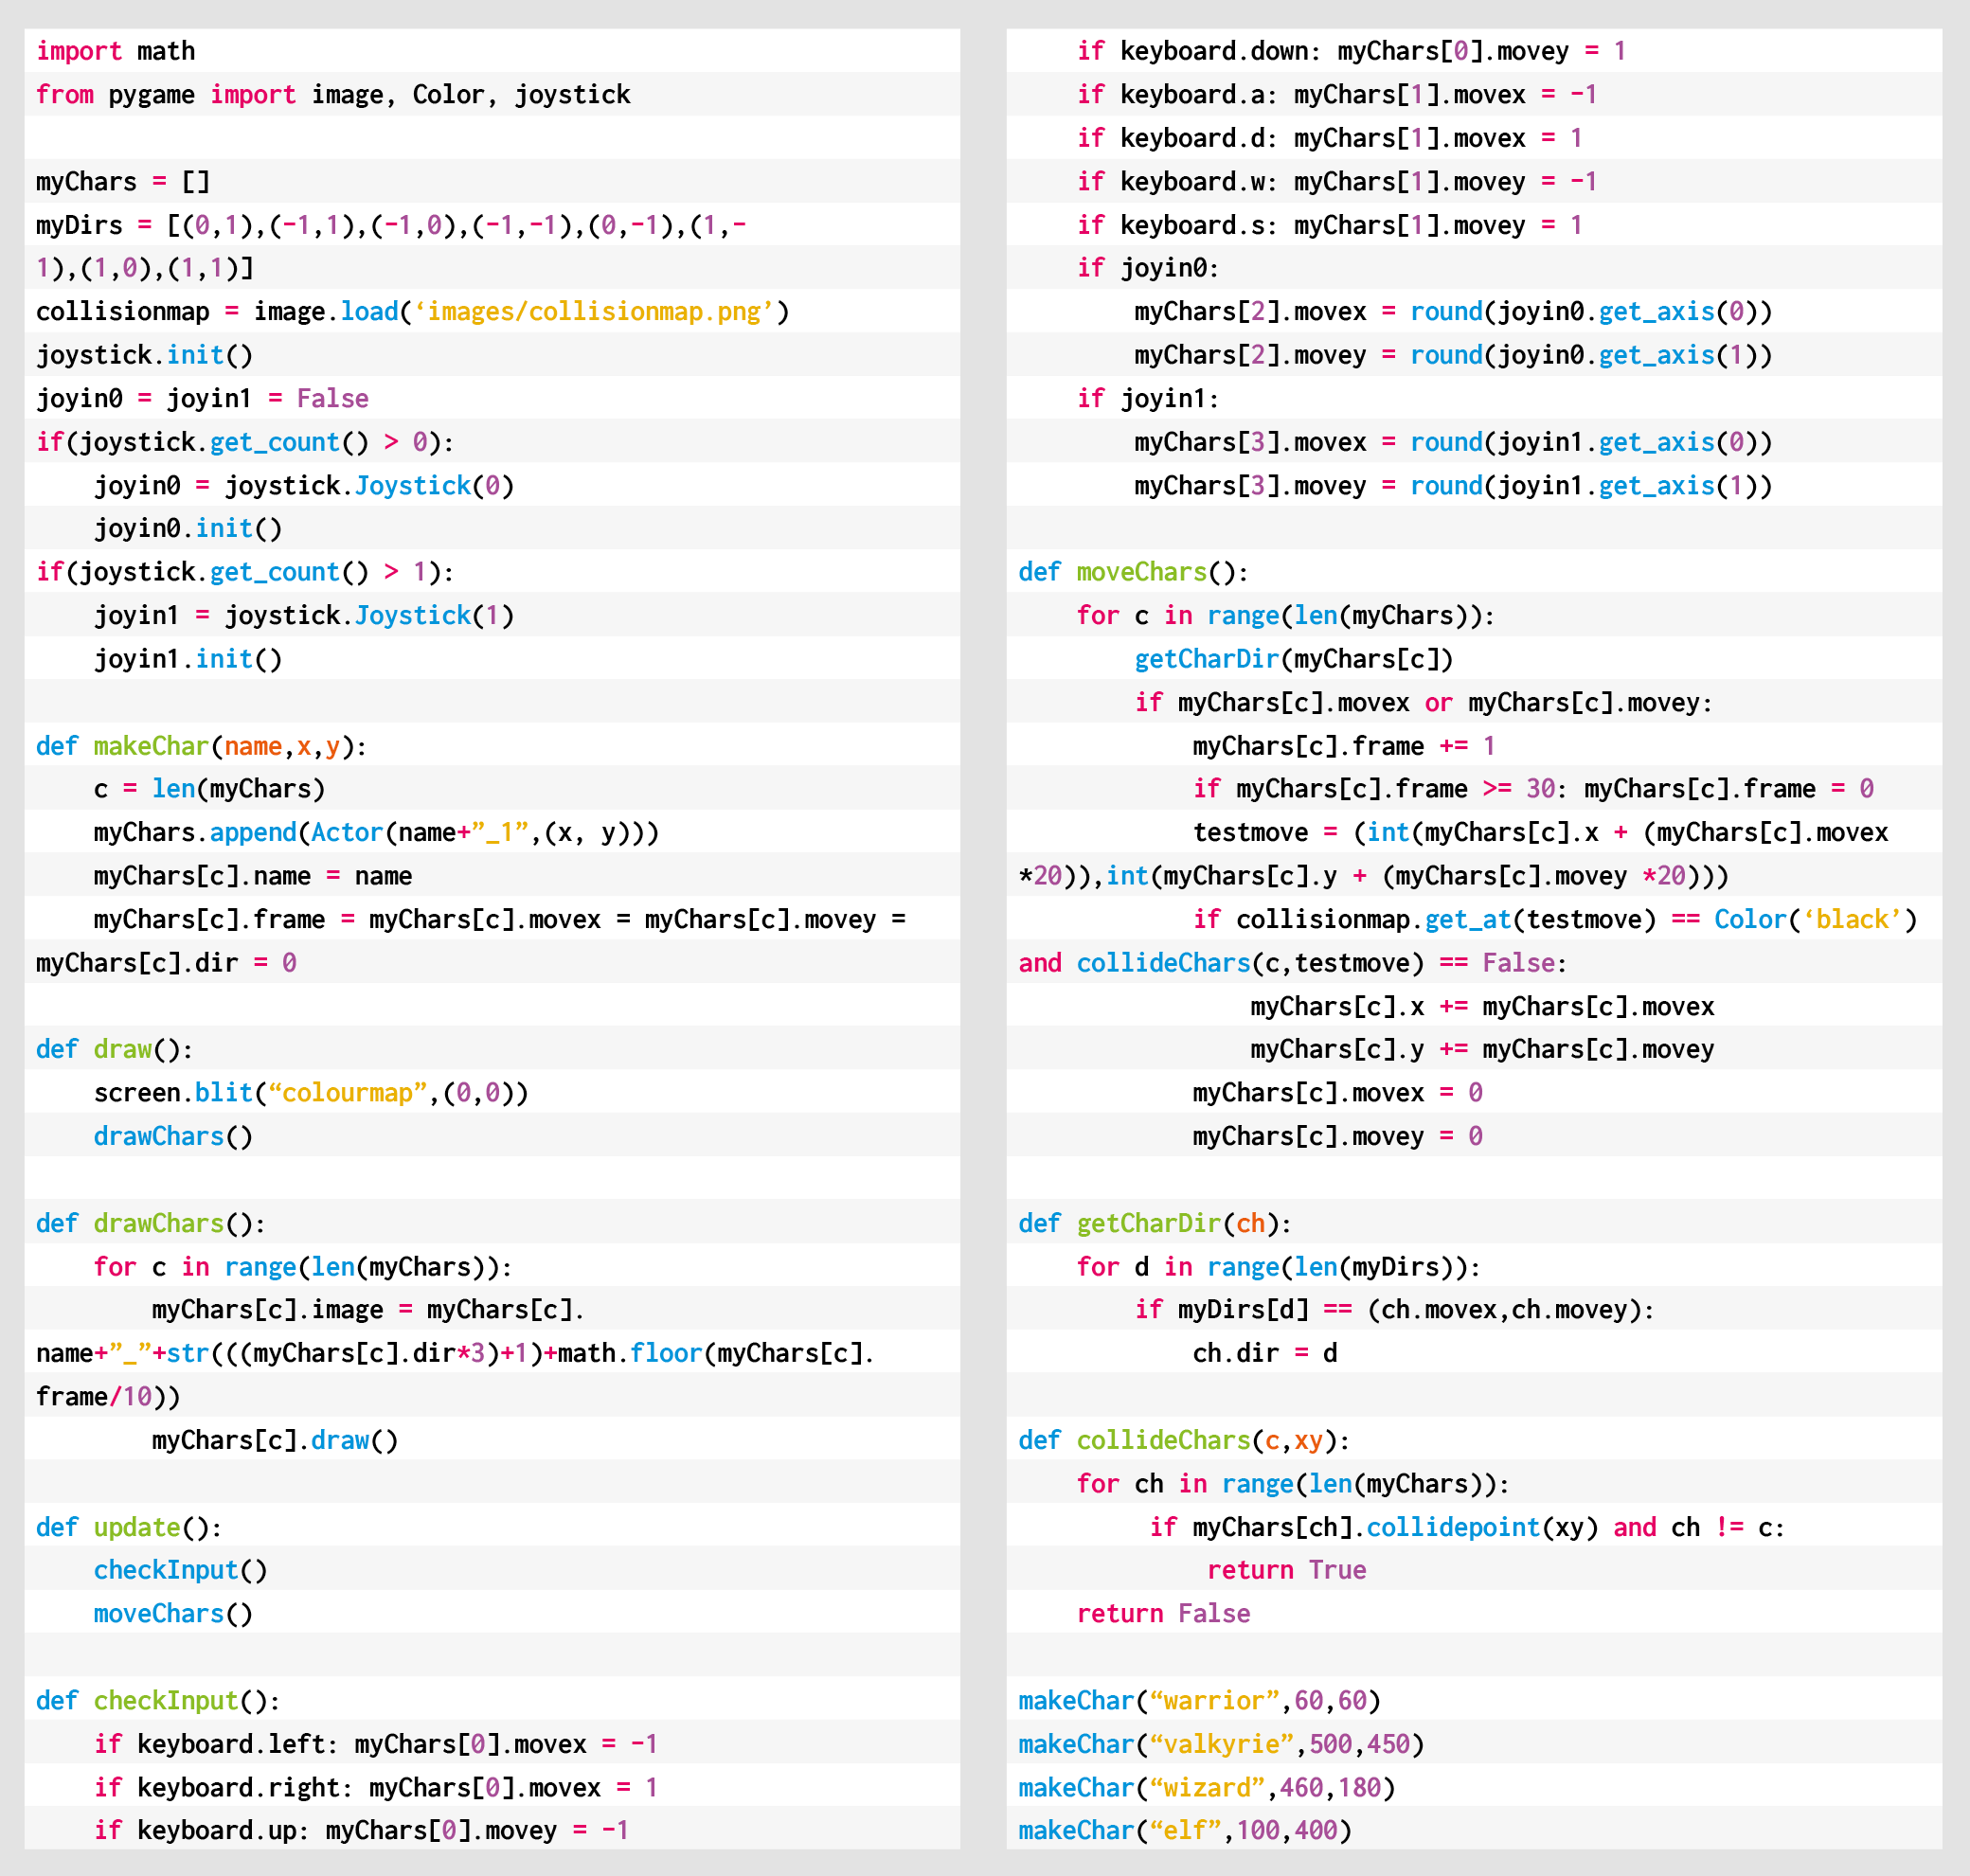
    Atari’s original arcade machine featured four joysticks, but our example will mix keyboard controls and gamepad inputs. Before we deal with the movement, we’ll need some characters and dungeon graphics. For this example, we can make our dungeon from a large bitmap image and use a collision map to prevent our characters from clipping through walls. We’ll also need graphics for the characters moving in eight different directions. Each direction has three frames of walking animation, which makes a total of 24 frames per character. We can use a Pygame Zero Actor object for each character and add a few extra properties to keep track of direction and the current animation frame. If we put the character Actors in a list, we can loop through the list to check for collisions, move the player, or draw them to the screen.

    We now test input devices for movement controls using the built-in Pygame keyboard object to test if keys are pressed. For example, keyboard.left will return True if the left arrow key is being held down. We can use the arrow keys for one player and the WASD keys for the other keyboard player. If we register x and y movements separately, then if two keys are pressed – for example, up and left – we can read that as a diagonal movement. In this way, we can get all eight directions of movement from just four keys.

    For joystick or gamepad movement, we need to import the joystick module from Pygame. This provides us with methods to count the number of joystick or gamepad devices that are attached to the computer, and then initialise them for input. When we check for input from these devices, we just need to get the x-axis value and the y- axis value and then make it into an integer. Joysticks and gamepads should return a number between -1 and 1 on each axis, so if we round that number, we will get the movement value we need.

    We can work out the direction (and the image we need to use) of the character with a small lookup table of x and y values and translate that to a frame number cycling through those three frames of animation as the character walks. Then all we need to do before we move the character is check they aren’t going to collide with a wall or another character. And that’s it – we now have a four-player control system. As for adding enemy spawners, loot, and keys – well, that’s a subject for another time.

    Here’s Mark’s code snippet. To get it working on your system, you’ll need to install Pygame Zero. And to download the full code and assets, go here.

    Get your copy of Wireframe issue 39

    You can read more features like this one in Wireframe issue 39, available directly from Raspberry Pi Press — we deliver worldwide.

    And if you’d like a handy digital version of the magazine, you can also download issue 39 for free in PDF format.

    Make sure to follow Wireframe on Twitter and Facebook for updates and exclusive offers and giveaways. Subscribe on the Wireframe website to save up to 49% compared to newsstand pricing!

    Website: LINK

  • Code Robotron: 2084’s twin-stick action | Wireframe #38

    Code Robotron: 2084’s twin-stick action | Wireframe #38

    Reading Time: 5 minutes

    News flash! Before we get into our Robotron: 2084 code, we have some important news to share about Wireframe: as of issue 39, the magazine will be going monthly.

    The new 116-page issue will be packed with more in-depth features, more previews and reviews, and more of the guides to game development that make the magazine what it is. The change means we’ll be able to bring you new subscription offers, and generally make the magazine more sustainable in a challenging global climate.

    As for existing subscribers, we’ll be emailing you all to let you know how your subscription is changing, and we’ll have some special free issues on offer as a thank you for your support.

    The first monthly issue will be out on 4 June, and subsequent editions will be published on the first Thursday of every month after that. You’ll be able to order a copy online, or you’ll find it in selected supermarkets and newsagents if you’re out shopping for essentials.

    We now return you to our usual programming…

    Move in one direction and fire in another with this Python and Pygame re-creation of an arcade classic. Raspberry Pi’s own Mac Bowley has the code.

    Robotron: 2084 is often listed on ‘best game of all time’ lists, and has been remade and re-released for numerous systems over the years.

    Robotron: 2084

    Released back in 1982, Robotron: 2084 popularised the concept of the twin-stick shooter. It gave players two joysticks which allowed them to move in one direction while also shooting at enemies in another. Here, I’ll show you how to recreate those controls using Python and Pygame. We don’t have access to any sticks, only a keyboard, so we’ll be using the arrow keys for movement and WASD to control the direction of fire.

    The movement controls use a global variable, a few if statements, and two built-in Pygame functions: on_key_down and on_key_up. The on_key_down function is called when a key on the keyboard is pressed, so when the player presses the right arrow key, for example, I set the x direction of the player to be a positive 1. Instead of setting the movement to 1, instead, I’ll add 1 to the direction. The on_key_down function is called when a button’s released. A key being released means the player doesn’t want to travel in that direction anymore and so we should do the opposite of what we did earlier – we take away the 1 or -1 we applied in the on_key_up function.

    We repeat this process for each arrow key. Moving the player in the update() function is the last part of my movement; I apply a move speed and then use a playArea rect to clamp the player’s position.

    The arena background and tank sprites were created in Piskel. Separate sprites for the tank allow the turret to rotate separately from the tracks.

    Turn and fire

    Now for the aiming and rotating. When my player aims, I want them to set the direction the bullets will fire, which functions like the movement. The difference this time is that when a player hits an aiming key, I set the direction directly rather than adjusting the values. If my player aims up, and then releases that key, the shooting will stop. Our next challenge is changing this direction into a rotation for the turret.

    Actors in Pygame can be rotated in degrees, so I have to find a way of turning a pair of x and y directions into a rotation. To do this, I use the math module’s atan2 function to find the arc tangent of two points. The function returns a result in radians, so it needs to be converted. (You’ll also notice I had to adjust mine by 90 degrees. If you want to avoid having to do this, create a sprite that faces right by default.)

    To fire bullets, I’m using a flag called ‘shooting’ which, when set to True, causes my turret to turn and fire. My bullets are dictionaries; I could have used a class, but the only thing I need to keep track of is an actor and the bullet’s direction.

    Here’s Mac’s code snippet, which creates a simple twin-stick shooting mechanic in Python. To get it working on your system, you’ll need to install Pygame Zero. And to download the full code and assets, go here.

    You can look at the update function and see how I’ve implemented a fire rate for the turret as well. You can edit the update function to take a single parameter, dt, which stores the time since the last frame. By adding these up, you can trigger a bullet at precise intervals and then reset the timer.

    This code is just a start – you could add enemies and maybe other player weapons to make a complete shooting experience.

    Get your copy of Wireframe issue 38

    You can read more features like this one in Wireframe issue 38, available directly from Raspberry Pi Press — we deliver worldwide.

    And if you’d like a handy digital version of the magazine, you can also download issue 38 for free in PDF format.

    Make sure to follow Wireframe on Twitter and Facebook for updates and exclusive offers and giveaways. Subscribe on the Wireframe website to save up to 49% compared to newsstand pricing!

    Website: LINK

  • Code a homage to Lunar Lander | Wireframe #37

    Code a homage to Lunar Lander | Wireframe #37

    Reading Time: 4 minutes

    Shoot for the moon in our Python version of the Atari hit, Lunar Lander. Mark Vanstone has the code.

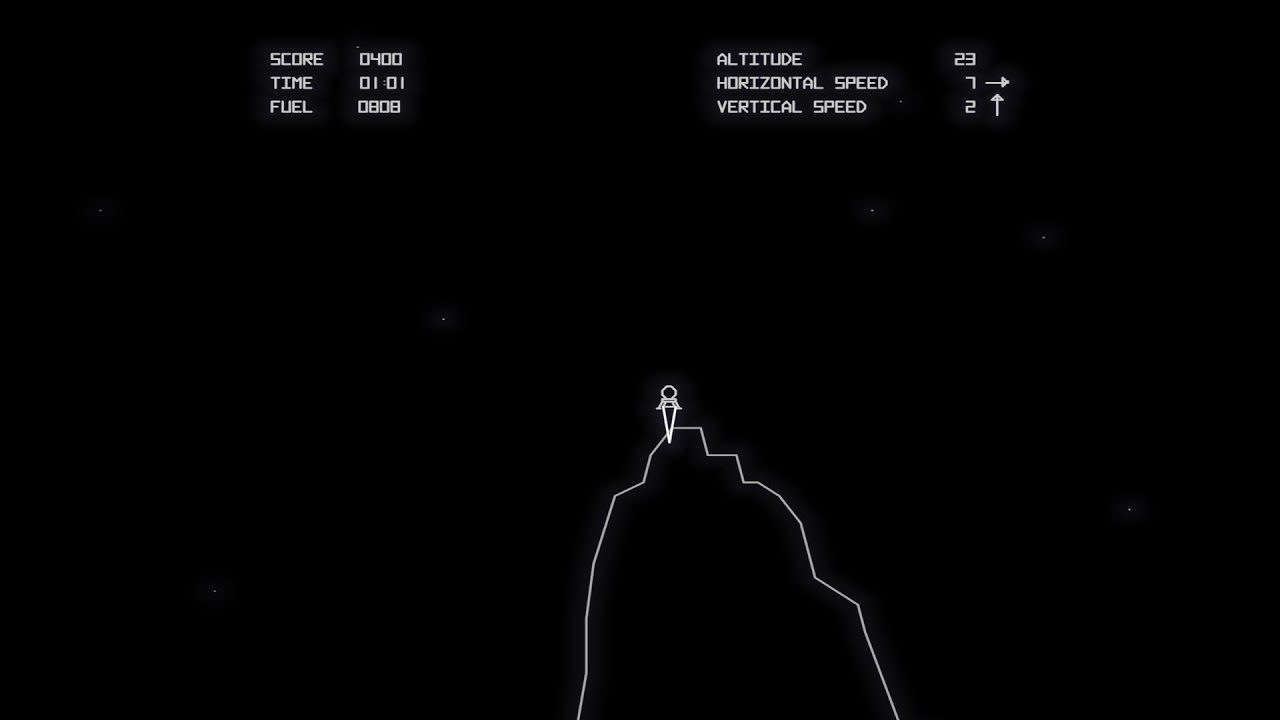
    Atari’s cabinet featured a thrust control, two buttons for rotating, and an abort button in case it all went horribly wrong.

    Lunar Lander

    First released in 1979 by Atari, Lunar Lander was based on a concept created a decade earlier. The original 1969 game (actually called Lunar) was a text-based affair that involved controlling a landing module’s thrust to guide it safely down to the lunar surface; a later iteration, Moonlander, created a more visual iteration of the same idea on the DEC VT50 graphics terminal.

    Given that it appeared at the height of the late-seventies arcade boom, though, it was Atari’s coin-op that became the most recognisable version of Lunar Lander, arriving just after the tenth anniversary of the Apollo 11 moon landing. Again, the aim of the game was to use rotation and thrust controls to guide your craft, and gently set it down on a suitably flat platform. The game required efficient control of the lander, and extra points were awarded for parking successfully on more challenging areas of the landscape.

    The arcade cabinet was originally going to feature a normal joystick, but this was changed to a double stalked up-down lever providing variable levels of thrust. The player had to land the craft against the clock with a finite amount of fuel with the Altitude, Horizontal Speed, and Vertical Speed readouts at the top of the screen as a guide. Four levels of difficulty were built into the game, with adjustments to landing controls and landing areas.

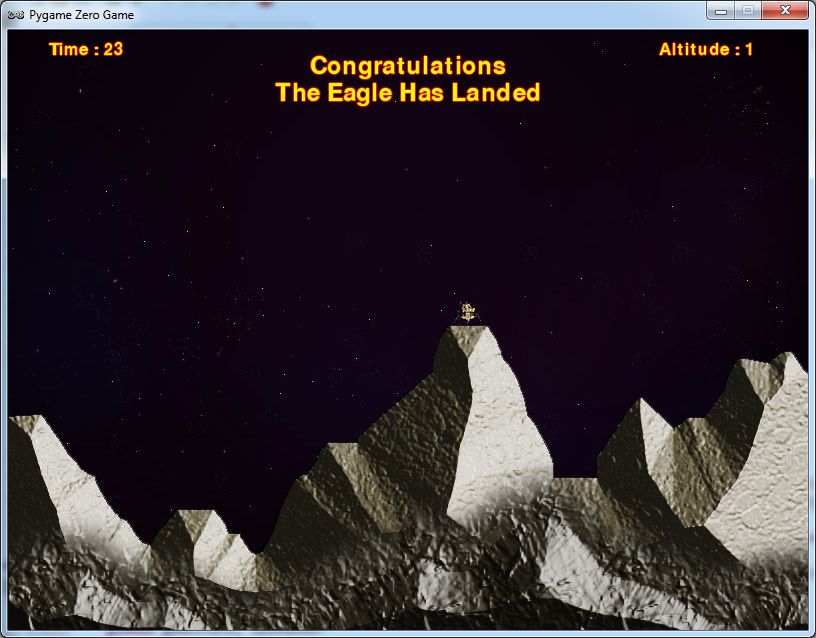
    Our homage to the classic Lunar Lander. Can you land without causing millions of dollars’ worth of damage?

    Making the game

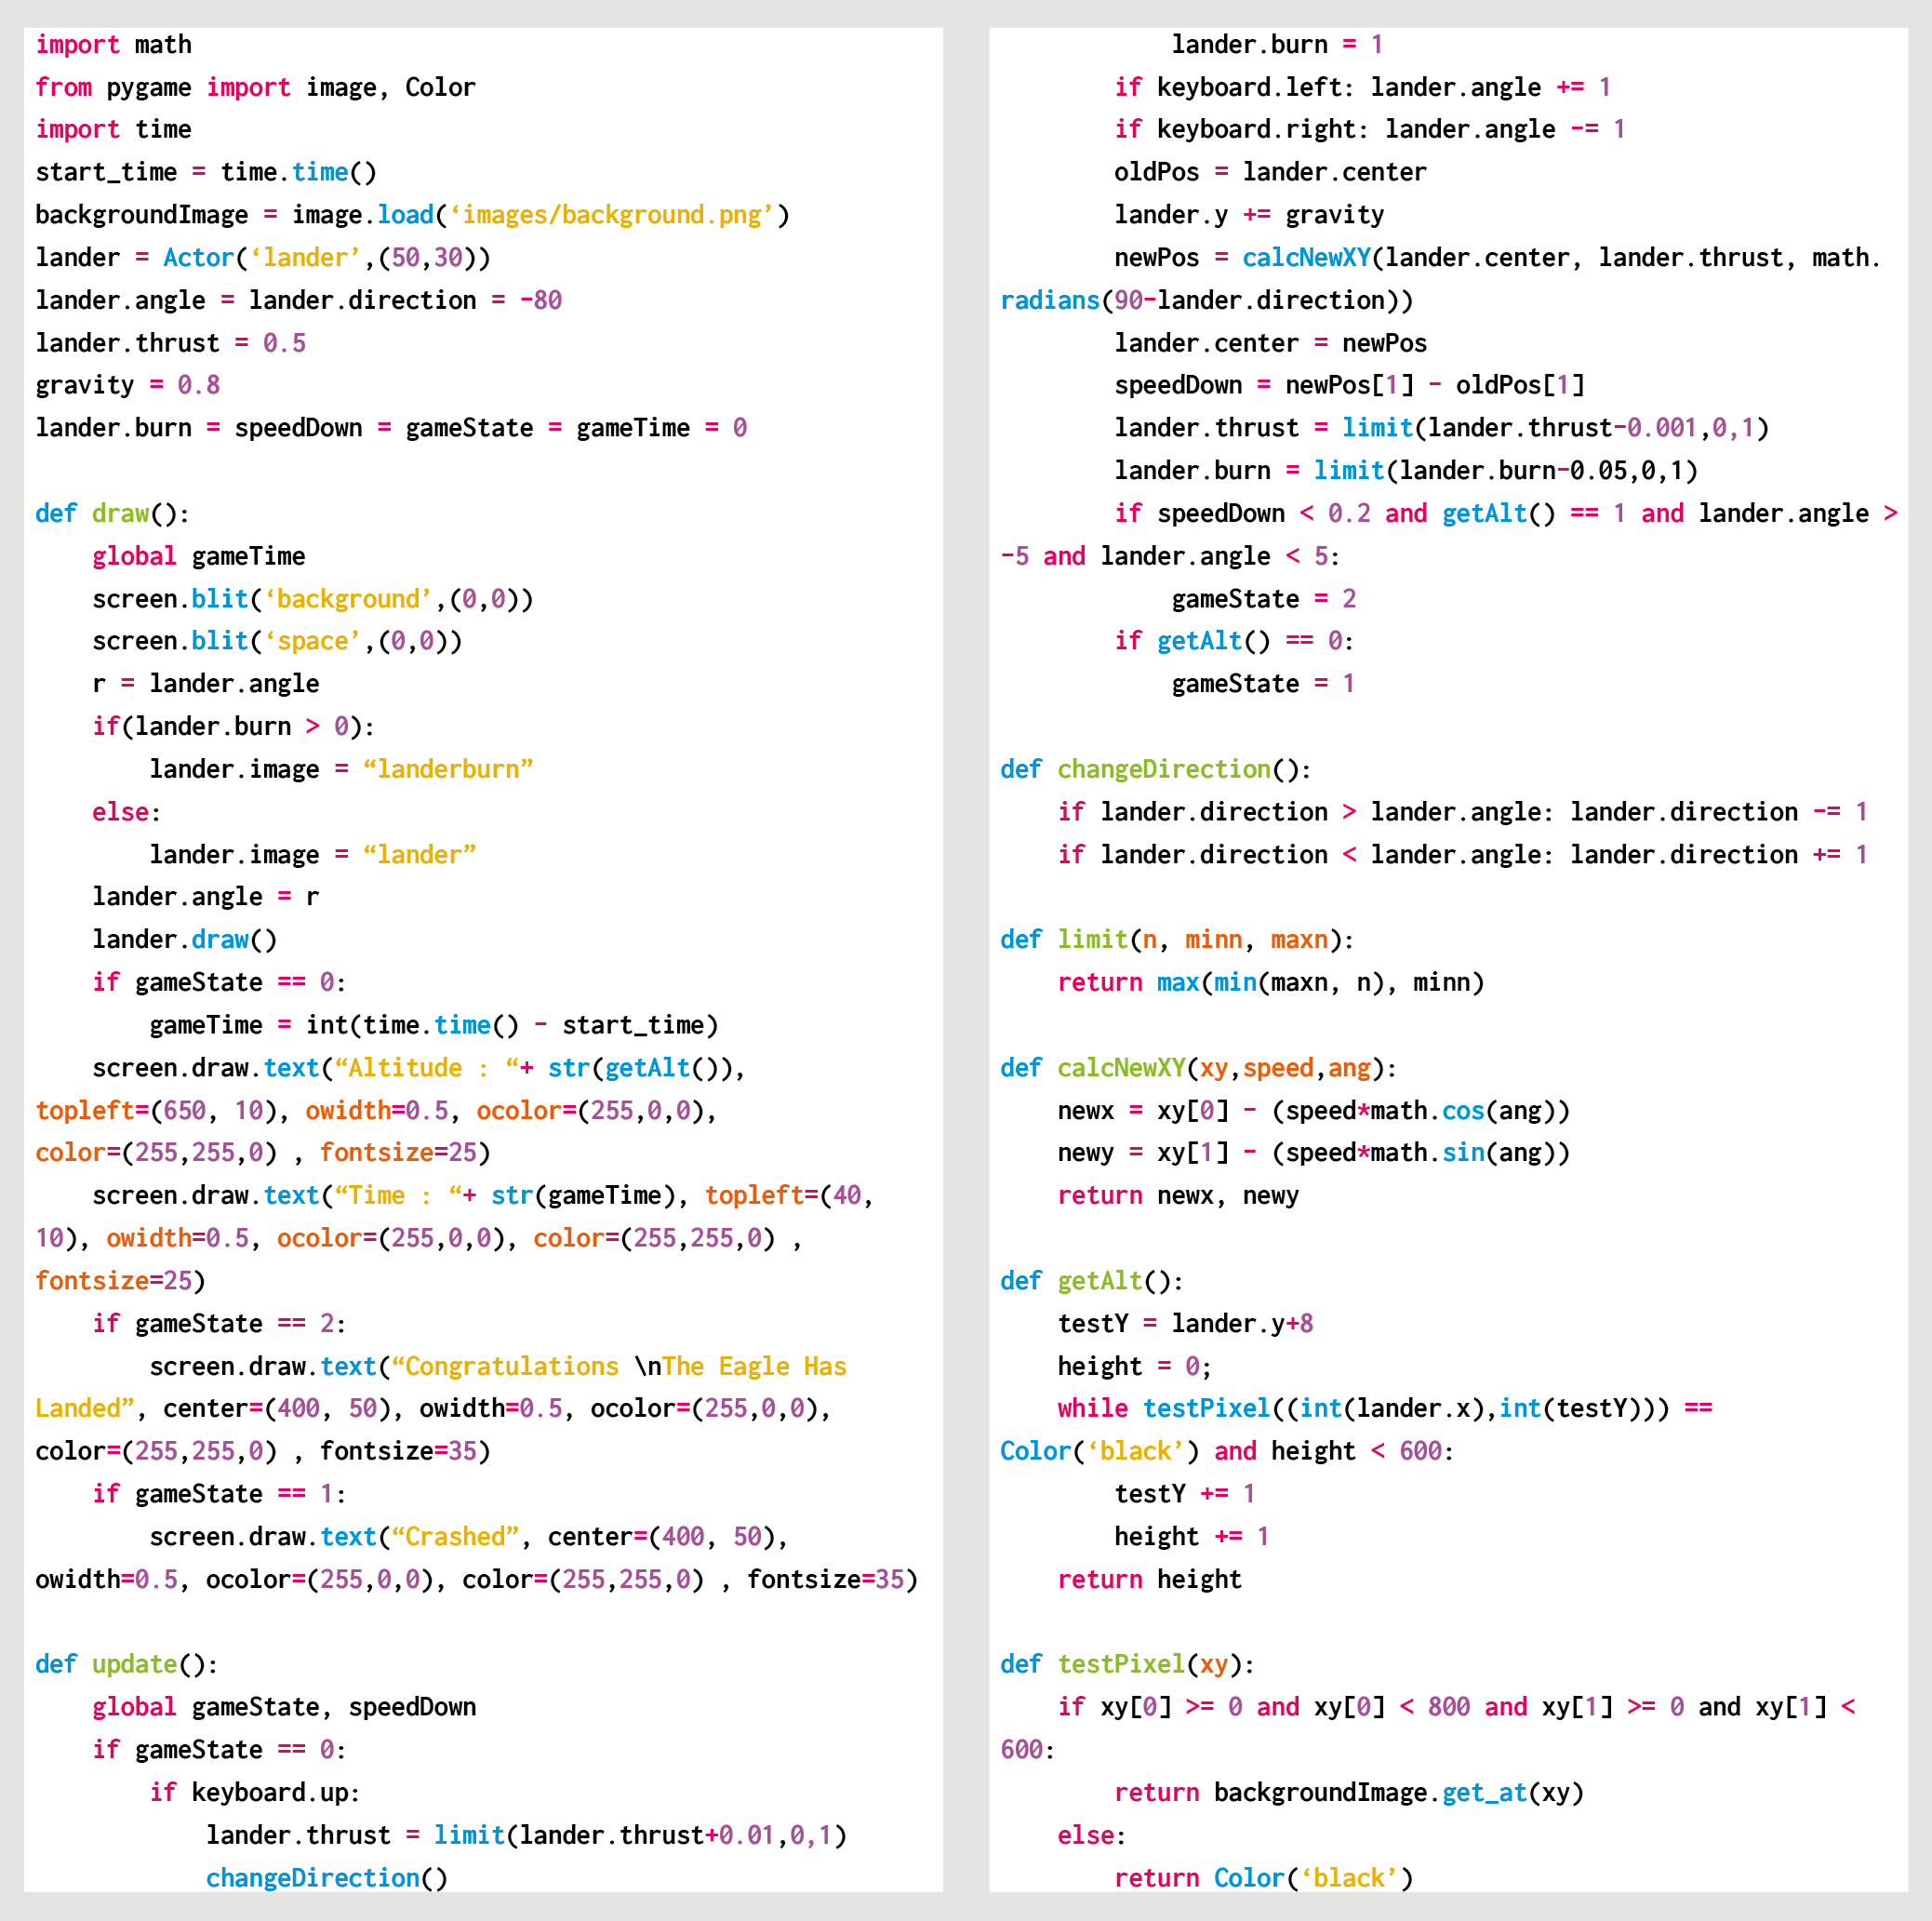
    To write a game like Lunar Lander with Pygame Zero, we can replace the vector graphics with a nice pre-drawn static background and use that as a collision detection mechanism and altitude meter. If our background is just black where the Lander can fly and a different colour anywhere the landscape is, then we can test pixels using the Pygame function image.get_at() to see if the lander has landed. We can also test a line of pixels from the Lander down the Y-axis until we hit the landscape, which will give us the lander’s altitude.

    The rotation controls of the lander are quite simple, as we can capture the left and right arrow keys and increase or decrease the rotation of the lander; however, when thrust is applied (by pressing the up arrow) things get a little more complicated. We need to remember which direction the thrust came from so that the craft will continue to move in that direction even if it is rotated, so we have a direction property attached to our lander object. A little gravity is applied to the position of the lander, and then we just need a little bit of trigonometry to work out the movement of the lander based on its speed and direction of travel.

    To judge if the lander has been landed safely or rammed into the lunar surface, we look at the downward speed and angle of the craft as it reaches an altitude of 1. If the speed is sufficiently slow and the angle is near vertical, then we trigger the landed message, and the game ends. If the lander reaches zero altitude without these conditions met, then we register a crash. Other elements that can be added to this sample are things like a limited fuel gauge and variable difficulty levels. You might even try adding the sounds of the rocket booster noise featured on the original arcade game.

    Engage

    The direction of thrust could be done in several ways. In this case, we’ve kept it simple, with one directional value which gradually moves in a new direction when an alternative thrust is applied. You may want to try making an X- and Y-axis direction calculation for thrust so that values are a combination of the two dimensions. You could also add joystick control to provide variable thrust input.

    Here’s Mark’s code snippet, which creates a simple shooting game in Python. To get it working on your system, you’ll need to install Pygame Zero. And to download the full code and assets, go here.

    Get your copy of Wireframe issue 36

    You can read more features like this one in Wireframe issue 37, available directly from Raspberry Pi Press — we deliver worldwide.

    And if you’d like a handy digital version of the magazine, you can also download issue 37 for free in PDF format.

    Make sure to follow Wireframe on Twitter and Facebook for updates and exclusive offers and giveaways. Subscribe on the Wireframe website to save up to 49% compared to newsstand pricing!

    Website: LINK

  • Make a Side Pocket-esque pool game | Wireframe #36

    Make a Side Pocket-esque pool game | Wireframe #36

    Reading Time: 7 minutes

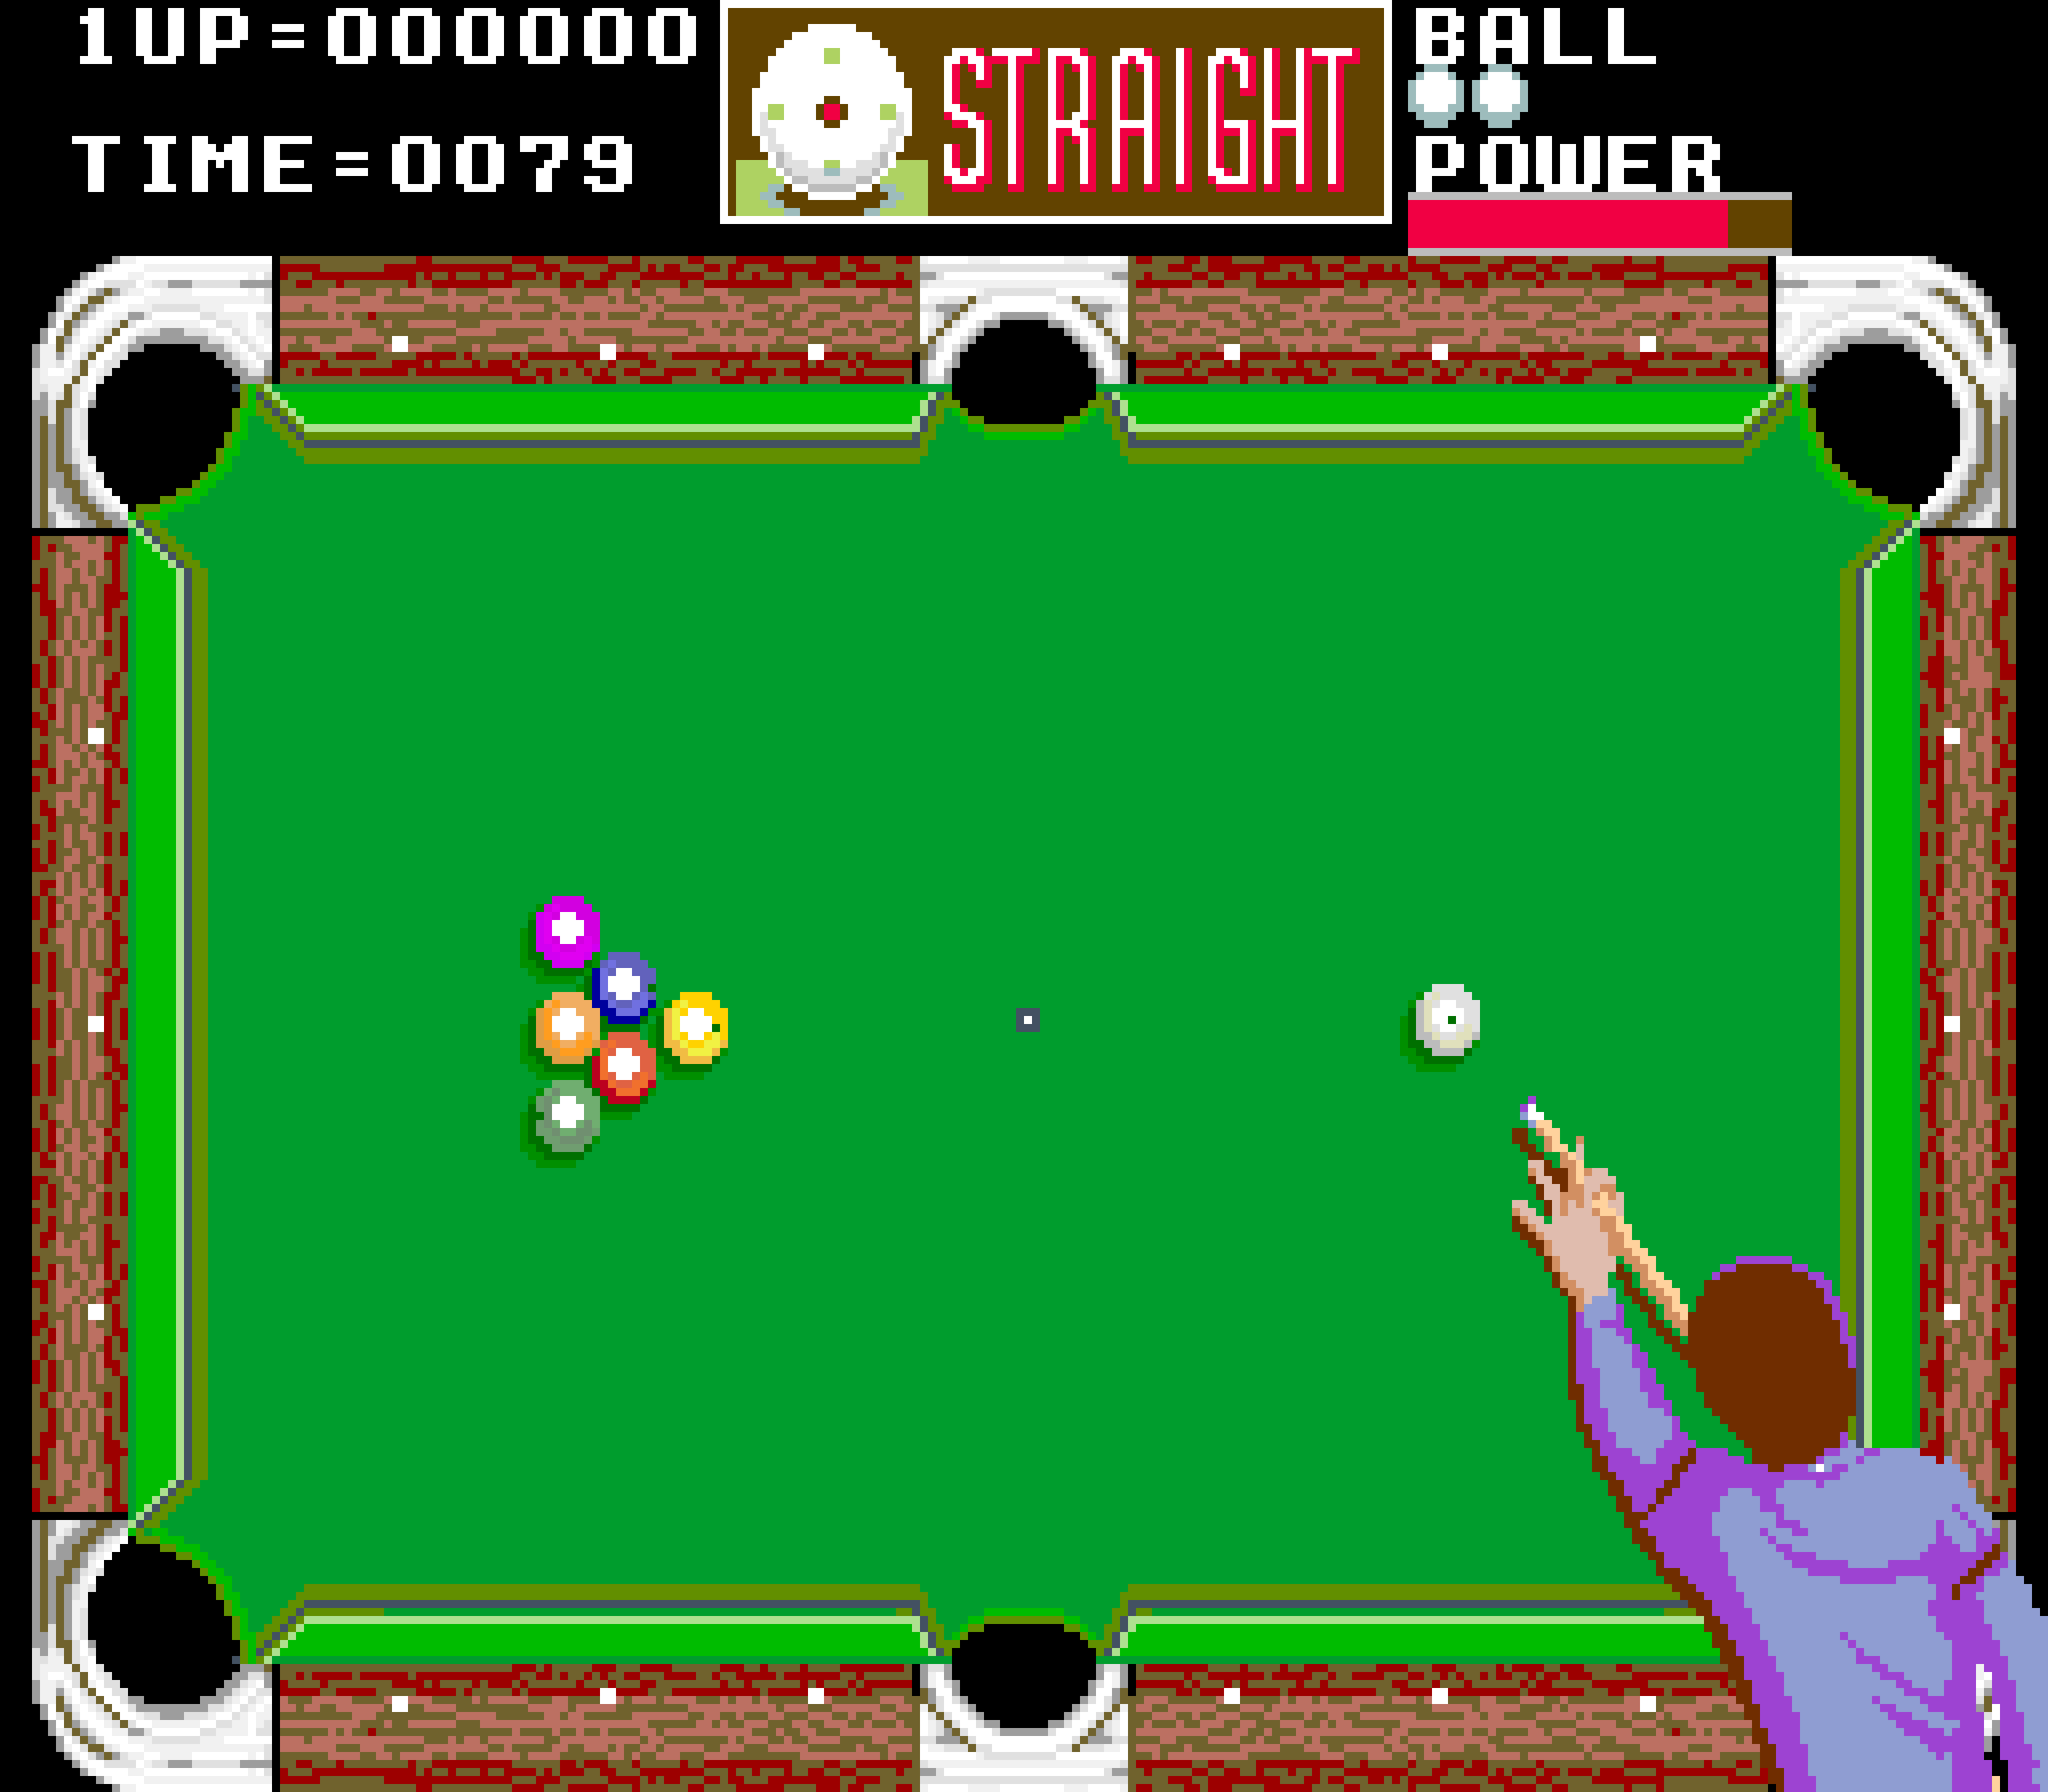
    Recreate the arcade pool action of Data East’s Side Pocket. Raspberry Pi’s own Mac Bowley has the code.

    In the original Side Pocket, the dotted line helped the player line up shots, while additional functions on the UI showed where and how hard you were striking the cue ball.

    Created by Data East in 1986, Side Pocket was an arcade pool game that challenged players to sink all the balls on the table and achieve a minimum score to progress. As the levels went on, players faced more balls in increasingly difficult locations on the table.

    Here, I’ll focus on three key aspects from Side Pocket: aiming a shot, moving the balls, and handling collisions for balls and pockets. This project is great for anyone who wants to dip their toe into 2D game physics. I’m going to use the Pygame’s built-in collision system as much as possible, to keep the code readable and short wherever I can.

    Making a pool game

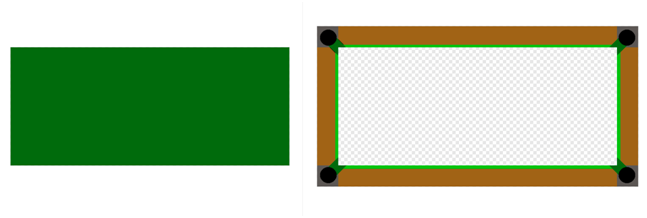
    Before thinking about aiming and moving balls, I need a table to play on. I created both a border and a play area sprite using piskelapp.com; originally, this was one sprite, and I used a rect to represent the play area (see Figure 1). Changing to two sprites and making the play area an actor made all the collisions easier to handle and made everything much easier to place.

    Figure 1: Our table with separate border. You could add some detail to your own table, or even adapt a photograph to make it look even more realistic.

    For the balls, I made simple 32×32 sprites in varying colours. I need to be able to keep track of some information about each ball on the table, such as its position, a sprite, movement, and whether it’s been pocketed or not – once a ball’s pocketed, it’s removed from play. Each ball will have similar functionality as well – moving and colliding with each other. The best way to do this is with a class: a blueprint for each ball that I will make copies of when I need a new ball on the table.

    class Ball:
    def __init__(self, image, pos):
    self.actor = Actor(image, center=pos, anchor=(“center”, “center”))
    self.movement = [0, 0]
    self.pocketed = False

    def move(self):
    self.actor.x += self.movement[0]
    self.actor.y += self.movement[1]
    if self.pocketed == False:
    if self.actor.y < playArea.top + 16 or self.actor.y > playArea.bottom-16:
    self.movement[1] = -self.movement[1]
    self.actor.y = clamp(self.actor.y, playArea.top+16, playArea.bottom-16)
    if self.actor.x < playArea.left+16 or self.actor.x > playArea.right-16:
    self.movement[0] = -self.movement[0]
    self.actor.x = clamp(self.actor.x, playArea.left+16, playArea.right-16)
    else:
    self.actor.x += self.movement[0]
    self.actor.y += self.movement[1]
    self.resistance()

    def resistance(self):
    # Slow the ball down
    self.movement[0] *= 0.95
    self.movement[1] *= 0.95

    if abs(self.movement[0]) + abs(self.movement[1]) < 0.4:
    self.movement = [0, 0]

    The best part about using a class is that I only need to make one piece of code to move a ball, and I can reuse it for every ball on the table. I’m using an array to keep track of the ball’s movement – how much it will move each frame. I also need to make sure it bounces off the sides of the play area if it hits them. I’ll use an array to hold all the balls on the table.

    To start with, I need a cue ball:

    balls = []
    cue_ball = Ball(“cue_ball.png”, (WIDTH//2, HEIGHT//2))
    balls.append(cue_ball)

    Aiming the shot

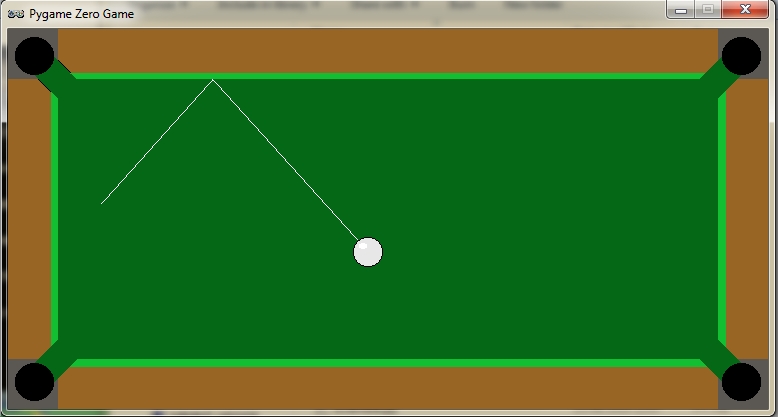
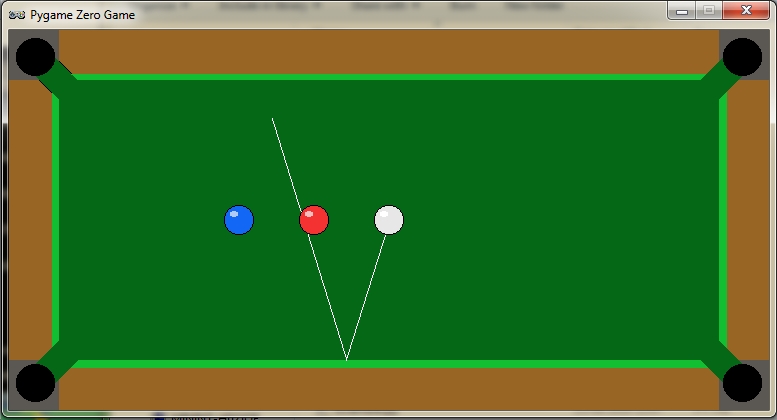
    In Side Pocket, players control a dotted line that shows where the cue ball will go when they take a shot. Using the joystick or arrow buttons rotated the shot and moved the line, so players could aim to get the balls in the pockets (see Figure 2). To achieve this, we have to dive into our first bit of maths, converting a rotation in degrees to a pair of x and y movements. I decided my rotation would be at 0 degrees when pointing straight up; the player can then press the right and left arrow to increase or decrease this value.

    Figure 2: The dotted line shows the trajectory of the ball. Pressing the left or right arrows rotates the aim.

    Pygame Zero has some built-in attributes for checking the keyboard, which I’m taking full advantage of.

    shot_rotation = 270.0 # Start pointing up table
    turn_speed = 1
    line = [] # To hold the points on my line
    line_gap = 1/12
    max_line_length = 400
    def update():
    global shot_rotation

    ## Rotate your aim
    if keyboard[keys.LEFT]:
    shot_rotation -= 1 * turn_speed
    if keyboard[keys.RIGHT]:
    shot_rotation += 1 * turn_speed

    # Make the rotation wrap around
    if shot_rotation > 360:
    shot_rotation -= 360
    if shot_rotation < 0:
    shot_rotation += 360

    At 0 degrees, my cue ball’s movement should be 0 in the x direction and -1 in y. When the rotation is 90 degrees, my x movement would be 1 and y would be zero; anything in between should be a fraction between the two numbers. I could use a lot of ‘if-elses’ to set this, but an easier way is to use sin and cos on my angle – I sin the rotation to get my x value and cos the rotation to get the y movement.

    # The in-built functions need radian
    rot_radians = shot_rotation * (math.pi/180)

    x = math.sin(rot_rads)
    y = -math.cos(rot_rads)
    if not shot:
    current_x = cue_ball.actor.x
    current_y = cue_ball.actor.y
    length = 0
    line = []
    while length < max_line_length:
    hit = False
    if current_y < playArea.top or current_y > playArea.bottom:
    y = -y
    hit = True
    if current_x < playArea.left or current_x > playArea.right:
    x = -x
    hit = True
    if hit == True:
    line.append((current_x-(x*line_gap), current_y-(y*line_gap)))
    length += math.sqrt(((x*line_gap)**2)+((y*line_gap)**2) )
    current_x += x*line_gap
    current_y += y*line_gap
    line.append((current_x-(x*line_gap), current_y-(y*line_gap)))

    I can then use those x and y co-ordinates to create a series of points for my aiming line.

    Shooting the ball

    To keep things simple, I’m only going to have a single shot speed – you could improve this design by allowing players to load up a more powerful shot over time, but I won’t do that here.

    shot = False
    ball_speed = 30


    ## Inside update
    ## Shoot the ball with the space bar
    if keyboard[keys.SPACE] and not shot:
    shot = True
    cue_ball.momentum = [x*ball_speed, y*ball_speed]

    When the shot variable is True, I’m going to move all the balls on my table – at the beginning, this is just the cue ball – but this code will also move the other balls as well when I add them.

    # Shoot the ball and move all the balls on the table
    else:
    shot = False
    balls_pocketed = []
    collisions = []
    for b in range(len(balls)):
    # Move each ball
    balls[b].move()
    if abs(balls[b].momentum[0]) + abs(balls[b].momentum[1]) > 0:
    shot = True

    Each time I move the balls, I check whether they still have some movement left. I made a resistance function inside the ball class that will slow them down.

    Collisions

    Now for the final problem: getting the balls to collide with each other and the pockets. I need to add more balls and some pocket actors to my game in order to test the collisions.

    balls.append(Ball(“ball_1.png”, (WIDTH//2 - 75, HEIGHT//2)))
    balls.append(Ball(“ball_2.png”, (WIDTH//2 - 150, HEIGHT//2)))

    pockets = []
    pockets.append(Actor(“pocket.png”, topleft=(playArea.left, playArea.top), anchor=(“left”, “top”)))
    # I create one of these actors for each pocket, they are not drawn

    Each ball needs to be able to collide with the others, and when that happens, the direction and speed of the balls will change. Each ball will be responsible for changing the direction of the ball it has collided with, and I add a new function to my ball class:

    def collide(self, ball):
    collision_normal = [ball.actor.x - self.actor.x, ball.actor.y - self.actor.y]
    ball_speed = math.sqrt(collision_normal[0]**2 + collision_normal[1]**2)
    self_speed = math.sqrt(self.momentum[0]**2 + self.momentum[1]**2)
    if self.momentum[0] == 0 and self.momentum[1] == 0:
    ball.momentum[0] = -ball.momentum[0]
    ball.momentum[1] = -ball.momentum[1]
    elif ball_speed > 0:
    collision_normal[0] *= 1/ball_speed
    collision_normal[1] *= 1/ball_speed
    ball.momentum[0] = collision_normal[0] * self_speed
    ball.momentum[1] = collision_normal[1] * self_speed

    When a collision happens, the other ball should move in the opposite direction to the collision. This is what allows you to line-up slices and knock balls diagonally into the pockets. Unlike the collisions with the edges, I can’t just reverse the x and y movement. I need to change its direction, and then give it a part of the current ball’s speed. Above, I’m using a normal to find the direction of the collision. You can think of this as the direction to the other ball as they collide.

    Our finished pool game. See if you can expand it with extra balls and maybe a scoring system.

    Handling collisions

    I need to add to my update loop to detect and store the collisions to be handled after each set of movement.

    # Check for collisions
    for other in balls:
    if other != b and b.actor.colliderect(other.actor):
    collisions.append((b, other))
    # Did it sink in the hole?
    in_pocket = b.actor.collidelistall(pockets)
    if len(in_pocket) > 0 and b.pocketed == False:
    if b != cue_ball:
    b.movement[0] = (pockets[in_pocket[0]].x - b.actor.x) / 20
    b.movement[1] = (pockets[in_pocket[0]].y - b.actor.y) / 20
    b.pocket = pockets[in_pocket[0]]
    balls_pocketed.append(b)
    else:
    b.x = WIDTH//2
    b.y = HEIGHT//2

    First, I use the colliderect() function to check if any of the balls collide this frame – if they do, I add them to a list. This is so I handle all the movement first and then the collisions. Otherwise, I’m changing the momentum of balls that haven’t moved yet. I detect whether a pocket was hit as well; if so, I change the momentum so that the ball heads towards the pocket and doesn’t bounce off the walls anymore.

    When all my balls have been moved, I can handle the collisions with both the other balls and the pockets:

    for col in collisions:
    col[0].collide(col[1])
    if shot == False:
    for b in balls_pocketed:
    balls.remove(b)

    And there you have it: the beginnings of an arcade pool game in the Side Pocket tradition. You can get the full code and assets right here.

    Get your copy of Wireframe issue 36

    You can read more features like this one in Wireframe issue 36, available directly from Raspberry Pi Press — we deliver worldwide. And if you’d like a handy digital version of the magazine, you can also download issue 36 for free in PDF format.

    Make sure to follow Wireframe on Twitter and Facebook for updates and exclusive offers and giveaways. Subscribe on the Wireframe website to save up to 49% compared to newsstand pricing!

    Website: LINK
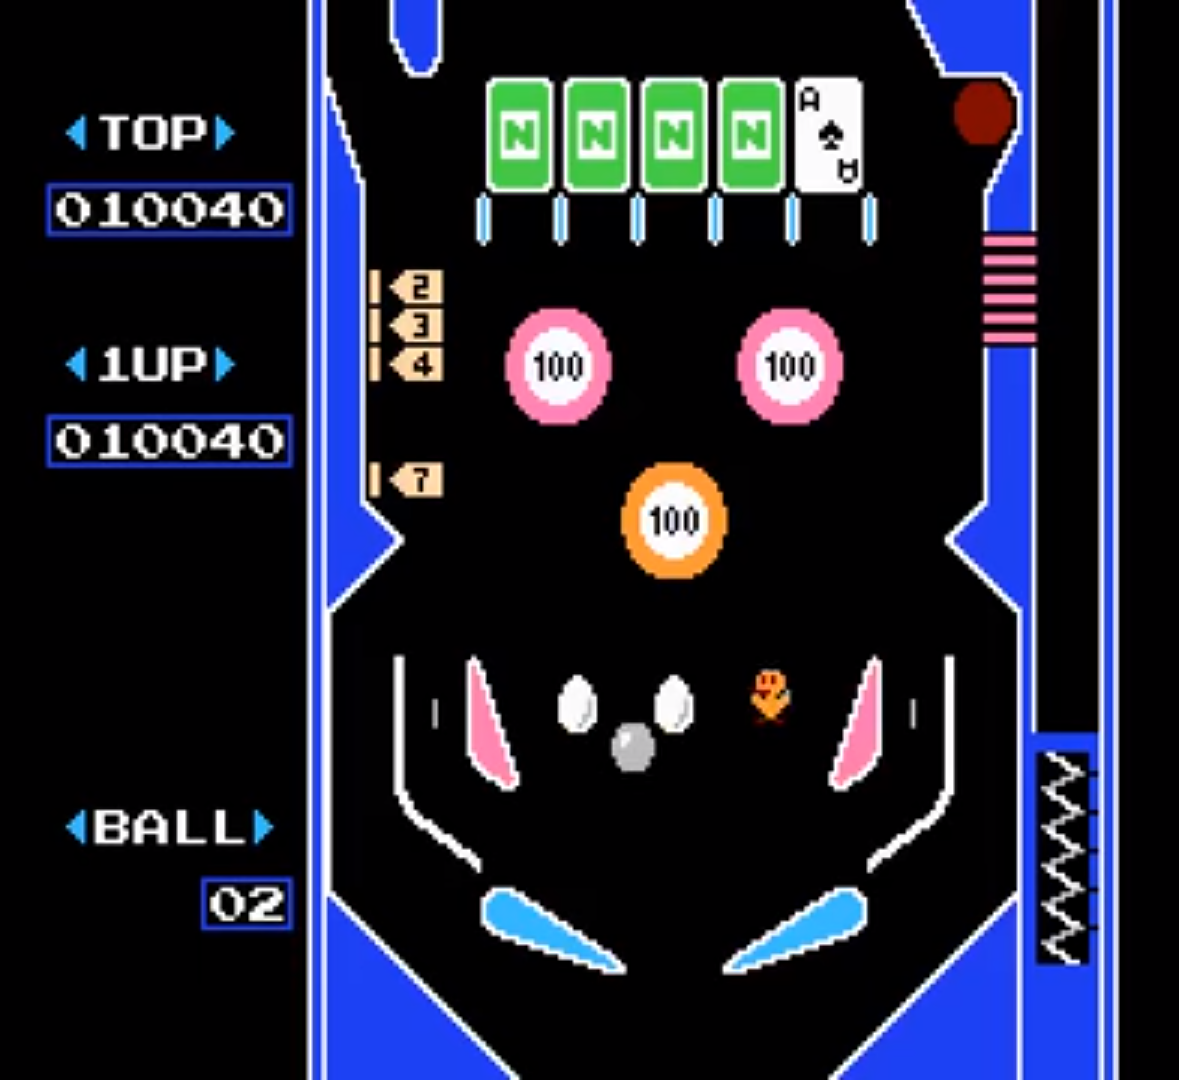
  • Code Hyper Sports’ shooting minigame | Wireframe #35

    Code Hyper Sports’ shooting minigame | Wireframe #35

    Reading Time: 4 minutes

    Gun down the clay pigeons in our re-creation of a classic minigame from Konami’s Hyper Sports. Take it away, Mark Vanstone

    Hyper Sports

    Hyper Sports’ Japanese release was tied in with the 1984 Summer Olympics.

    Hyper Sports

    Konami’s sequel to its 1983 arcade hit, Track & Field, Hyper Sports offered seven games – or events – in which up to four players could participate. Skeet shooting was perhaps the most memorable game in the collection, and required just two buttons: fire left and fire right.

    The display showed two target sights, and each moved up and down to come into line with the next clay disc’s trajectory. When the disc was inside the red target square, the player pressed the fire button, and if their timing was correct, the clay disc exploded. Points were awarded for being on target, and every now and then, a parrot flew across the screen, which could be gunned down for a bonus.

    Making our game

    To make a skeet shooting game with Pygame Zero, we need a few graphical elements. First, a static background of hills and grass, with two clay disc throwers each side of the screen, and a semicircle where our shooter stands – this can be displayed first, every time our draw() function is called.

    We can then draw our shooter (created as an Actor) in the centre near the bottom of the screen. The shooter has three images: one central while no keys are pressed, and two for the directions left and right when the player presses the left or right keys. We also need to have two square target sights to the left and right above the shooter, which we can create as Actors.

    When the clay targets appear, the player uses the left and right buttons to shoot either the left or right target respectively.

    To make the clay targets, we create an array to hold disc Actor objects. In our update() function we can trigger the creation of a new disc based on a random number, and once created, start an animation to move it across the screen in front of the shooter. We can add a shadow to the discs by tracking a path diagonally across the screen so that the shadow appears at the correct Y coordinate regardless of the disc’s height – this is a simple way of giving our game the illusion of depth. While we’re in the update() function, looping around our disc object list, we can calculate the distance of the disc to the nearest target sight frame, and from that, work out which is the closest.

    When we’ve calculated which disc is closest to the right-hand sight, we want to move the sight towards the disc so that their paths intersect. All we need to do is take the difference of the Y coordinates, divide by two, and apply that offset to the target sight. We also do the same for the left-hand sight. If the correct key (left or right arrows) is pressed at the moment a disc crosses the path of the sight frame, we register a hit and cycle the disc through a sequence of exploding frames. We can keep a score and display this with an overlay graphic so that the player knows how well they’ve done.

    And that’s it! You may want to add multiple players and perhaps a parrot bonus, but we’ll leave that up to you.

    Here’s Mark’s code snippet, which creates a simple shooting game in Python. To get it working on your system, you’ll need to install Pygame Zero. And to download the full code and assets, go here.

    Get your copy of Wireframe issue 35

    You can read more features like this one in Wireframe issue 35, available now at Tesco, WHSmith, and all good independent UK newsagents.

    Or you can buy Wireframe directly from Raspberry Pi Press — delivery is available worldwide. And if you’d like a handy digital version of the magazine, you can also download issue 35 for free in PDF format.

    Make sure to follow Wireframe on Twitter and Facebook for updates and exclusive offers and giveaways. Subscribe on the Wireframe website to save up to 49% compared to newsstand pricing!

    Website: LINK

  • Recreate Flappy Bird’s flight mechanic | Wireframe #29

    Recreate Flappy Bird’s flight mechanic | Wireframe #29

    Reading Time: 3 minutes

    From last year’s issue 29 of Wireframe magazine: learn how to create your own version of the simple yet addictive side-scroller Flappy Bird. Raspberry Pi’s Rik Cross shows you how.

    Flappy Bird: ridiculously big in 2014, at least for a while.

    Flappy Bird was released by programmer Dong Nguyen in 2013, and made use of a straightforward game mechanic to create an addictive hit. Tapping the screen provided ‘lift’ to the main character, which is used strategically to navigate through a series of moving pipes. A point is scored for each pipe successfully passed. The idea proved so addictive that Nguyen eventually regretted his creation and removed it from the Google and Apple app stores. In this article, I’ll show you how to recreate this simple yet time-consuming game, using Python and Pygame Zero.

    The player’s motion is very similar to that employed in a standard platformer: falling down towards the bottom of the screen under gravity. See the article, Super Mario-style jumping physics in Wireframe #7 for more on creating this type of movement. Pressing a button (in our case, the SPACE bar) gives the player some upward thrust by setting its velocity to a negative value (i.e. upwards) larger than the value of gravity acting downwards. I’ve adapted and used two different images for the sprite (made by Imaginary Perception and available on opengameart.org), so that it looks like it’s flapping its wings to generate lift and move upwards.

    Pressing the SPACE bar gives the bird ‘lift’ against gravity, allowing it to navigate through moving pipes.

    Sets of pipes are set equally spaced apart horizontally, and move towards the player slowly each frame of the game. These pipes are stored as two lists of rectangles, top_pipes and bottom_pipes, so that the player can attempt to fly through gaps between the top and bottom pipes. Once a pipe in the top_pipes list reaches the left side of the screen past the player’s position, a score is incremented and the top and corresponding bottom pipes are removed from their respective lists. A new set of pipes is created at the right edge of the screen, creating a continuous challenge for the player. The y-position of the gap between each newly created pair of pipes is decided randomly (between minimum and maximum limits), which is used to calculate the position and height of the new pipes.

    The game stops and a ‘Game over’ message appears if the player collides with either a pipe or the ground. The collision detection in the game uses the player.colliderect() method, which checks whether two rectangles overlap. As the player sprite isn’t exactly rectangular, it means that the collision detection isn’t pixel-perfect, and improvements could be made by using a different approach. Changing the values for GRAVITY, PIPE_GAP, PIPE_SPEED, and player.flap_velocity through a process of trial and error will result in a game that has just the right amount of frustration! You could even change these values as the player’s score increases, to add another layer of challenge.

    Here’s Rik’s code, which gets an homage to Flappy Bird running in Python. To get it working on your system, you’ll first need to install Pygame Zero. And to download the full code, go here.

    If you’d like to read older issues of Wireframe magazine, you can find the complete back catalogue as free PDF downloads.

    The latest issue of Wireframe is available in print to buy online from the Raspberry Pi Press store, with older physical issues heavily discounted too. You can also find Wireframe at local newsagents, but we should all be staying home as much as possible right now, so why not get your copy online and save yourself the trip?

    Make sure to follow Wireframe on Twitter and Facebook for updates and exclusive offers and giveaways. And subscribe on the Wireframe website to save up to 49% compared to newsstand pricing!

    Website: LINK

  • Code a homage to Marble Madness | Wireframe #34

    Code a homage to Marble Madness | Wireframe #34

    Reading Time: 4 minutes

    Code the map and movement basics of the innovative marble-rolling arcade game. Mark Vanstone shows you how.

    The original Marble Madness

    Each of Marble Madness’ six levels got progressively harder to navigate and had to be completed within a time limit.

    Marble Madness

    Hitting arcades in 1984, Atari’s Marble Madness presented a rather different control mechanism than other games of the time. The original arcade cabinet provided players with a trackball controller rather than a conventional joystick, and the aim was to guide a marble through a three-dimensional course in the fastest possible time. This meant that a player could change the angle and speed of the marble as it rolled and avoid various obstacles and baddies.

    During development, designer Mark Cerny had to shelve numerous ideas for Marble Madness, since the hardware just wasn’t able to achieve the level of detail and interaction he wanted. The groundbreaking 3D display was one idea that made it through to the finished game: its pre-rendered, ray-traced isometric levels.

    Marble Madness was the first game to use Atari’s System 1 upgradeable hardware platform, and also boasted the first use of an FM sound chip produced by Yamaha to create its distinctive stereo music. The game was popular in arcades to start with, but interest appeared to drop off after a few months – something Cerny attributed to the fact that the game didn’t take long to play. Marble Madness’s popularity endured in the home market, though, with ports made for most computers and consoles of the time – although inevitably, most of these didn’t support the original’s trackball controls.

    Our Python version of Marble Madness

    In our sample level, you can control the movement of the marble using the left and right arrow keys.

    Making our game

    For our version of Marble Madness, we’re going to use a combination of a rendered background and a heightmap in Pygame Zero, and write some simple physics code to simulate the marble rolling over the terrain’s flats and slopes. We can produce the background graphic using a 3D modelling program such as Blender. The camera needs to be set to Orthographic to get the forced perspective look we’re after. The angle of the camera is also important, in that we need an X rotation of 54.7 degrees and a Y rotation of 45 degrees to get the lines of the terrain correct. The heightmap can be derived from an overhead view of the terrain, but you’ll probably want to draw the heights of the blocks in a drawing package such as GIMP to give you precise colour values on the map.

    The ball rolling physics are calculated from the grey-shaded heightmap graphic. We’ve left a debug mode in the code; by changing the debug variable to True, you can see how the marble moves over the terrain from the overhead viewpoint of the heightmap. The player can move the marble left and right with the arrow keys – on a level surface it will gradually slow down if no keys are pressed. If the marble is on a gradient on the heightmap, it will increase speed in the direction of the gradient. If the marble hits a section of black on the heightmap, it falls out of play, and we stop the game.

    That takes care of the movement of the marble in two dimensions, but now we have to translate this to the rendered background’s terrain. The way we do this is to translate the Y coordinate of the marble as if the landscape was all at the same level – we multiply it by 0.6 – and then move it down the screen according to the heightmap data, which in this case moves the marble down 1.25 pixels for each shade of colour. We can use an overlay for items the marble always rolls behind, such as the finish flag. And with that, we have the basics of a Marble Madness level.

    The code you'll need to make Marble Madness

    Here’s Mark’s code snippet, which creates a Marble Madness level in Python. To get it working on your system, you’ll need to install Pygame Zero. And to download the full code, go here.

    Module Madness

    We use the image module from Pygame to sample the colour of the pixel directly under the marble on the heightmap. We also take samples from the left diagonal and the right diagonal to see if there is a change of height. We are only checking for left and right movement, but this sample could be expanded to deal with the two other directions and moving up the gradients, too. Other obstacles and enemies can be added using the same heightmap translations used for the marble, and other overlay objects can be added to the overlay graphic.

    Get your copy of Wireframe issue 34

    You can read more features like this one in Wireframe issue 34, available now at Tesco, WHSmith, all good independent UK newsagents, and the Raspberry Pi Store, Cambridge.

    Or you can buy Wireframe directly from Raspberry Pi Press — delivery is available worldwide. And if you’d like a handy digital version of the magazine, you can also download issue 34 for free in PDF format.

    Wireframe #34

    Make sure to follow Wireframe on Twitter and Facebook for updates and exclusive offers and giveaways. Subscribe on the Wireframe website to save up to 49% compared to newsstand pricing!

    Website: LINK
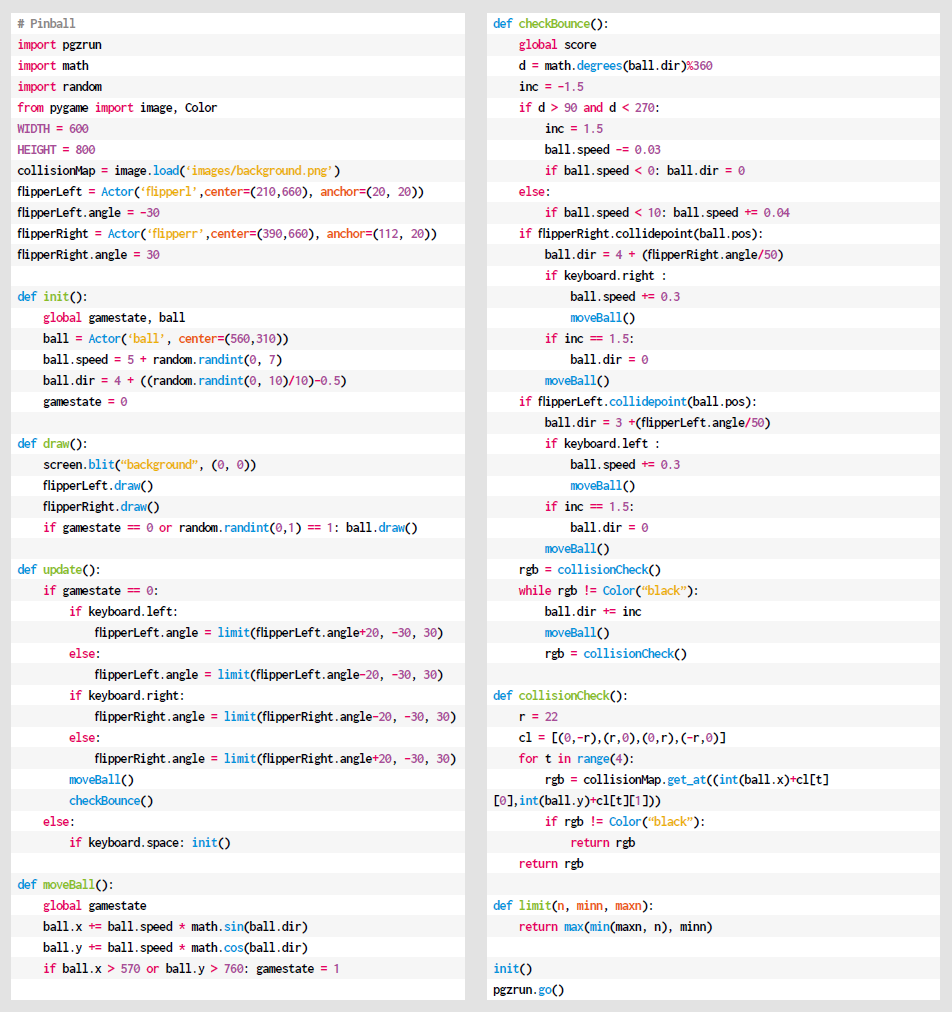
  • Code a Zaxxon-style axonometric level | Wireframe #33

    Code a Zaxxon-style axonometric level | Wireframe #33

    Reading Time: 4 minutes

    Fly through the space fortress in this 3D retro forced scrolling arcade sample. Mark Vanstone has the details

    A shot from Sega's arcade hit, Zaxxon

    Zaxxon was the first arcade game to use an axonometric viewpoint, which made it look very different from its 2D rivals.

    Zaxxon

    When Zaxxon was first released by Sega in 1982, it was hailed as a breakthrough thanks to its pseudo-3D graphics. This axonometric projection ensured that Zaxxon looked unlike any other shooter around in arcades.

    Graphics aside, Zaxxon offered a subtly different twist on other shooting games of the time, like Defender and Scramble; the player flew over either open space or a huge fortress, where they had to avoid obstacles of varying heights. Players could tell how high they were flying with the aid of an altimeter, and also the shadow beneath their ship (shadows were another of Zaxxon’s innovations). The aim of the game was to get to the end of each level without running out of fuel or getting shot down; if the player did this, they’d encounter an area boss called Zaxxon. Points were awarded for destroying gun turrets and fuel silos, and extra lives could be gained as the player progressed through the levels.

    A shot of our Pygame version of Zaxxon

    Our Zaxxon homage running in Pygame Zero: fly the spaceship through the fortress walls and obstacles with your cursor keys.

    Making our level

    For this code sample, we can borrow some of the techniques used in a previous Source Code article about Ant Attack (see Wireframe issue 15) since it also used an isometric display. Although the way the map display is built up is very similar, we’ll use a JSON file to store the map data. If you’ve not come across JSON before, it’s well worth learning about, as a number of web and mobile apps use it, and it can be read by Python very easily. All we need to do is load the JSON file, and Python automatically puts the data into a Python dictionary object for us to use.

    In the sample, there’s a short run of map data 40 squares long with blocks for the floor, some low walls, higher walls, and a handful of fuel silos. To add more block types, just add data to the blocktypes area of the JSON file. The codes used in the map data are the index numbers of the blocktypes, so the first blocktypes is index 0, the next index 1, and so on. Our drawMap() function takes care of rendering the data into visual form and blits blocks from the top right to the bottom left of the screen. When the draw loop gets to where the ship is, it draws first the shadow and then the ship a little higher up the screen, depending on the altitude of the ship. The equation to translate the ship’s screen coordinates to a block position on the map is a bit simplistic, but in this case, it does the job well enough.

    Cursor keys guide the movement of the spaceship, which is limited by the width of the map and a height of 85 pixels. There’s some extra code to display the ship if it isn’t on the map – for example, at the start, before it reaches the map area. To make the code snippet into a true Zaxxon clone, you’ll have to add some laser fire and explosions, a fuel gauge, and a scoring system, but this code sample should provide the basis you’ll need to get started.

    Code for our Zaxxon homage

    Here’s Mark’s code snippet, which creates a side-scrolling beat-’em-up in Python. To get it working on your system, you’ll need to install Pygame Zero. And to download the full code, go here.

    Get your copy of Wireframe issue 33

    You can read more features like this one in Wireframe issue 33, available now at Tesco, WHSmith, all good independent UK newsagents, and the Raspberry Pi Store, Cambridge.
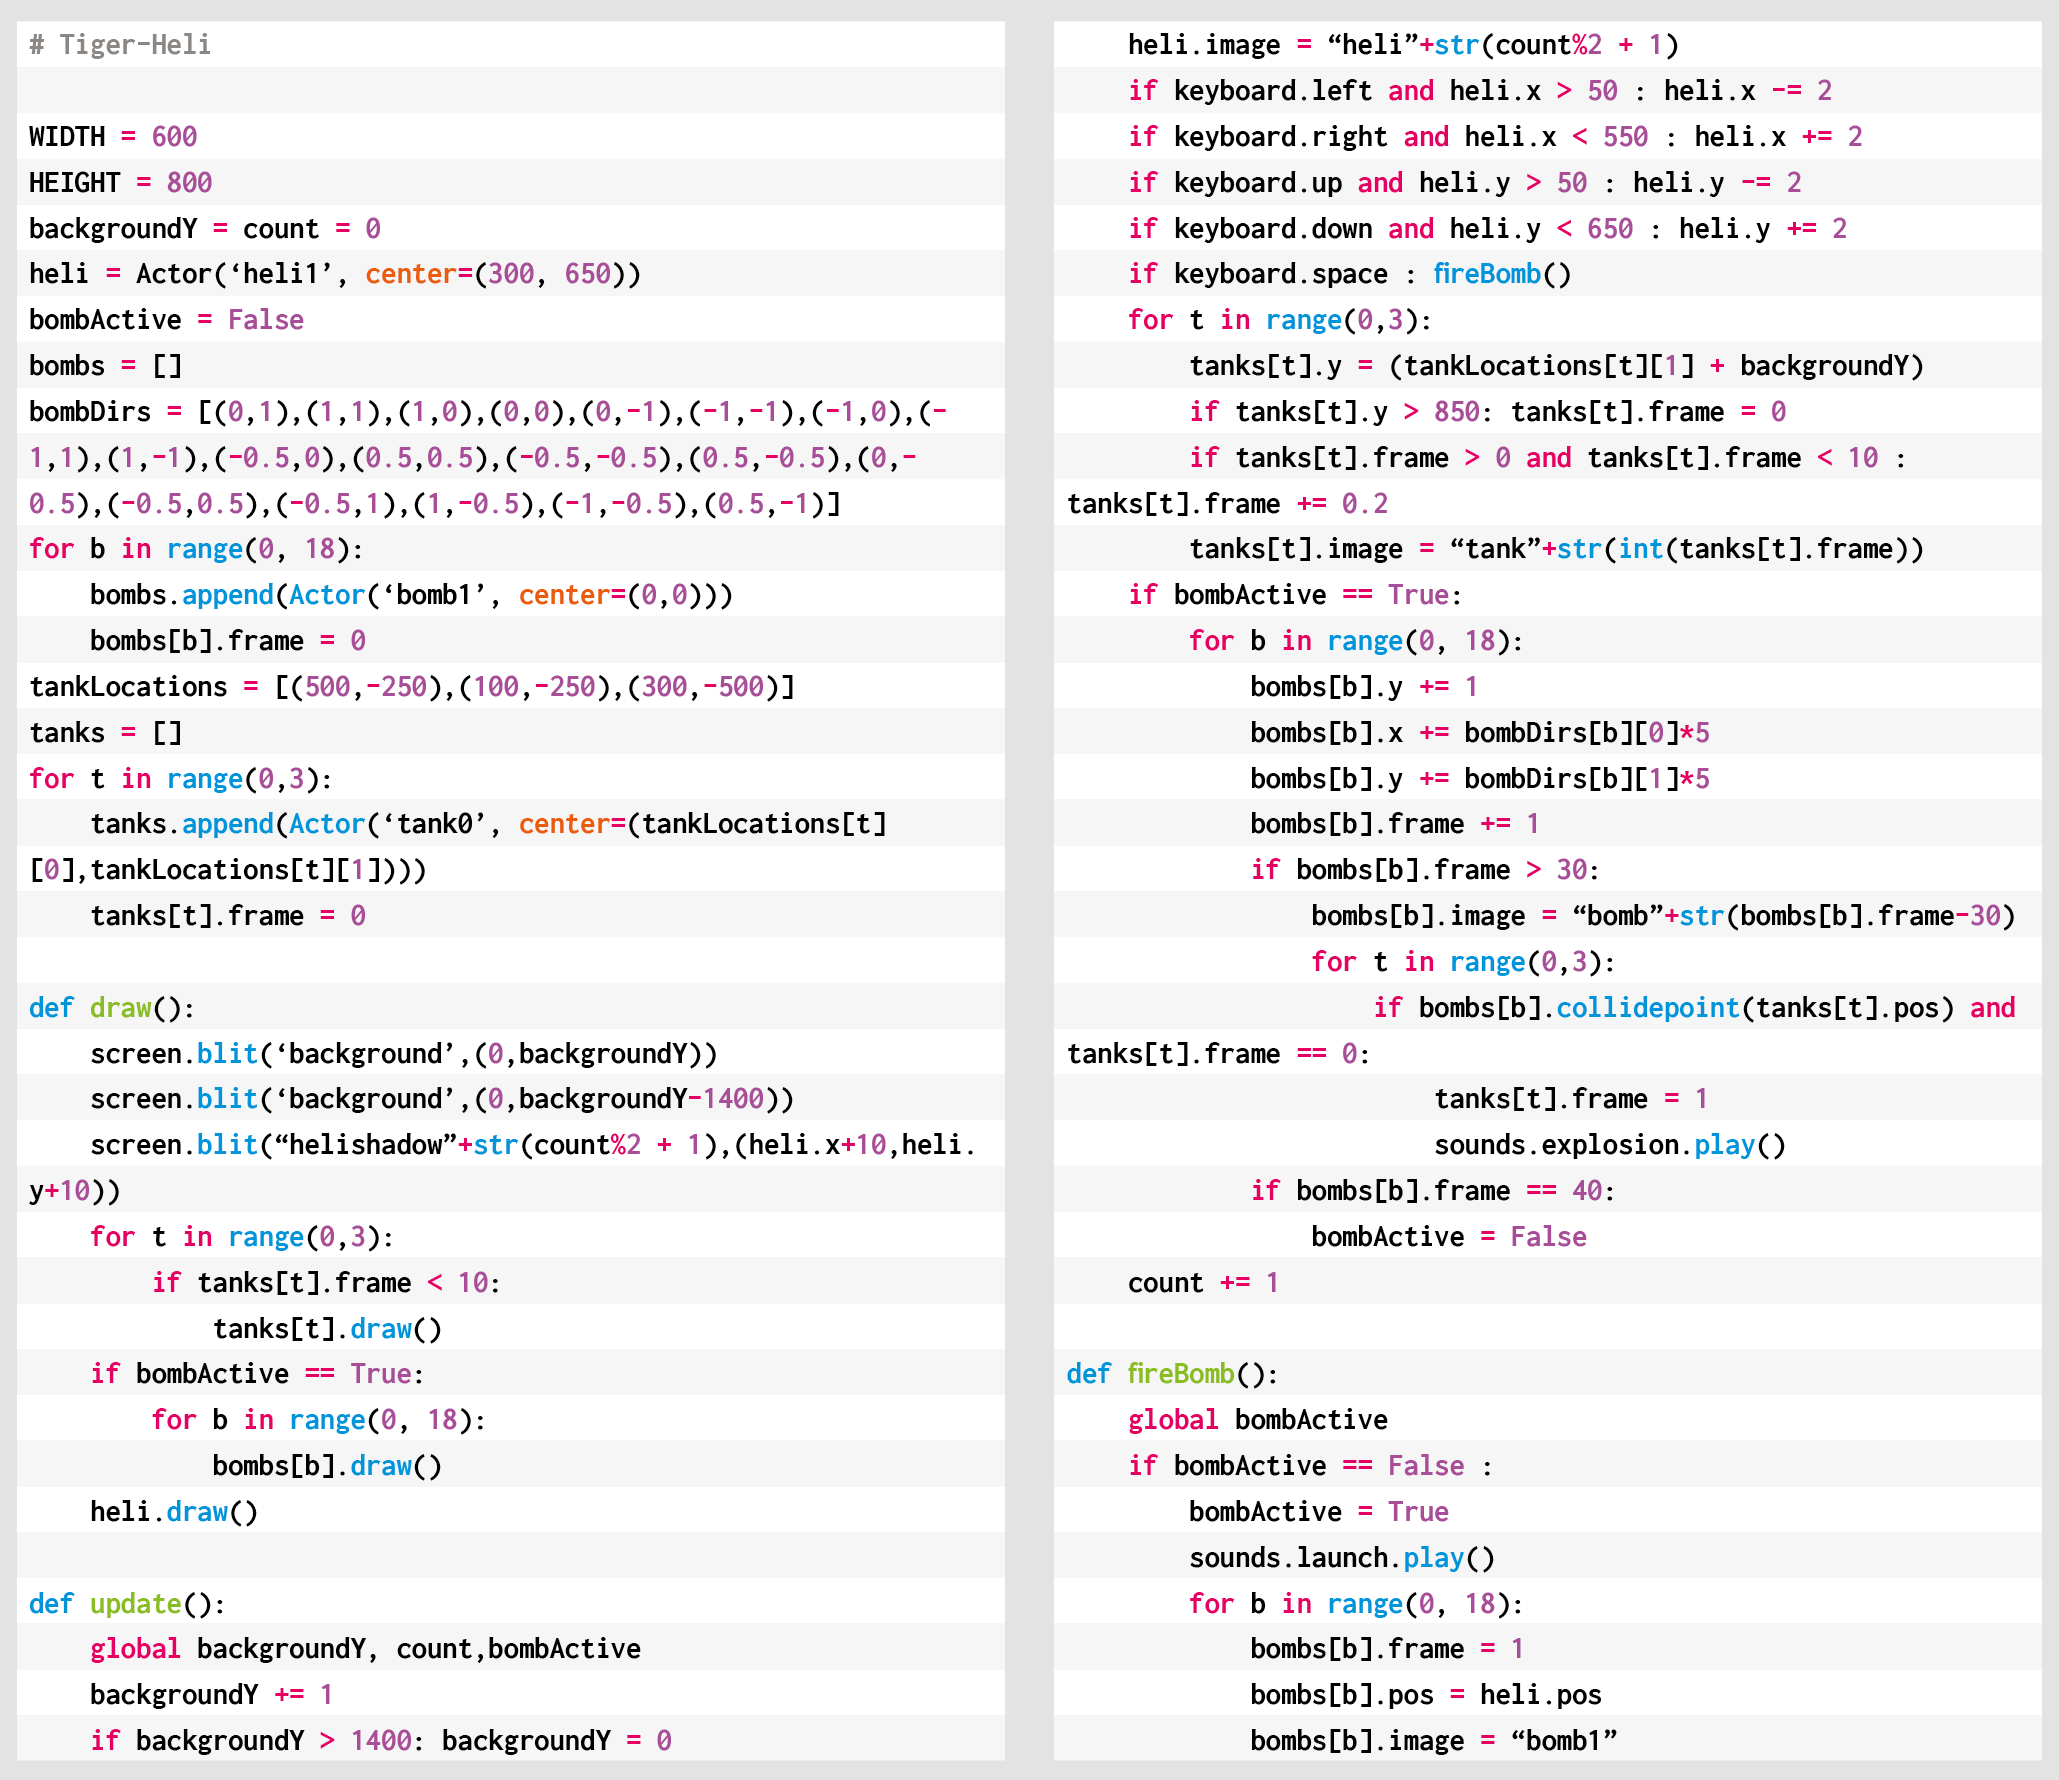
    Or you can buy Wireframe directly from Raspberry Pi Press — delivery is available worldwide. And if you’d like a handy digital version of the magazine, you can also download issue 33 for free in PDF format.

    Make sure to follow Wireframe on Twitter and Facebook for updates and exclusive offers and giveaways. Subscribe on the Wireframe website to save up to 49% compared to newsstand pricing!

    Website: LINK