Schlagwort: education

  • Arduino here, there, and at all the EDU faires!

    Arduino here, there, and at all the EDU faires!

    Reading Time: 6 minutes

    Arduino All Over

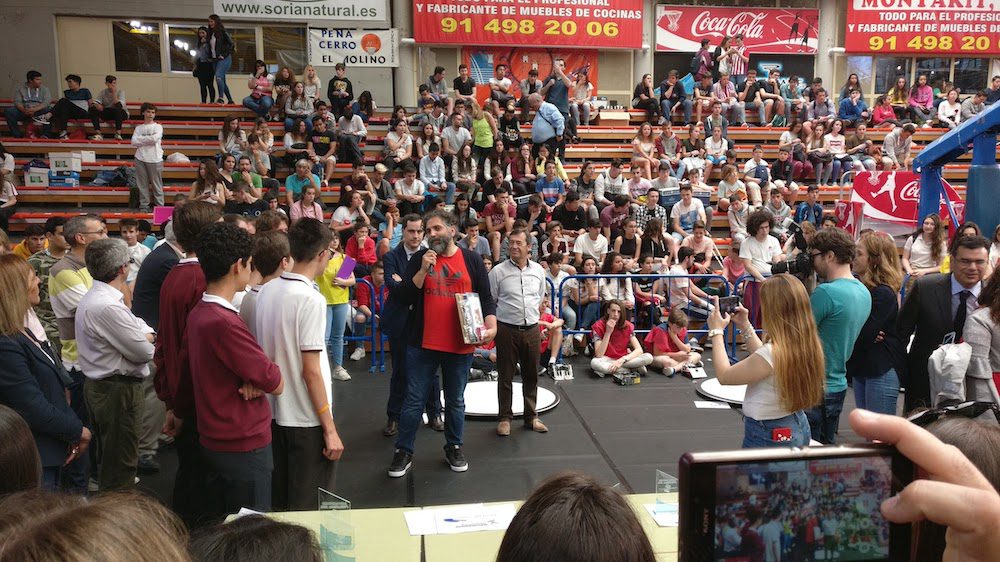
    With the arrival of Spring, just prior to the ending of the academic year in Spain, teachers and education initiatives have been celebrating STEAM events all over the country. I personally attended RoboCampeones in Fuenlabrada, a small city outside Madrid, but there were a lot more: Robolot, FanTec, Cantabrobot, Granabot, ROByCAD, and even the technology and education conference PR3D.

    Arduino has been present in all of the above-mentioned events, as reported by many of the students, teachers, parents, regional representatives, and distributors, that were on hand. I had the opportunity of interviewing a whole lot of students at RoboCampeones as well as Victor, one of the organizers of many of the 15 editions of the event, and Mati, a teacher from one of the schools participating.

    Since the interviews were in Spanish and while I consider putting some work in making the subtitles to the videos, I have already published some of the interviews to the  Arduino EDU LiveCast playlist, which you could find here.

    This is the interview made to Victor, the main organizer. In one sentence he said that RoboCampeones is the largest event of its type in Spain (CTC Catalunya 2018 had more students, but not coming from all over the country as in RoboCampeones).

    [youtube https://www.youtube.com/watch?v=HxiQpF_EKiY?feature=oembed&w=500&h=281]

    Mati, from the IES Sefarad in Toledo, comments about here experience and about how much students get motivated in making better projects year after year.

    [youtube https://www.youtube.com/watch?v=LeFdk2rfhl0?feature=oembed&w=500&h=281]

    Robocampeones in Numbers

    2018’s RoboCampeones represents the 15th edition of the event. It has not always been in Fuenlabrada, as it was an itinerating event for a while, and it has not always been having so much Arduino involved. In Victor’s words, it started as a Lego competition, but in 2011 through the intervention of Mati and her college Julio from the IES Sefarad school in Toledo, RoboCampeones added the “open category” to the competition. This category was not only opening up for the participants to use other technologies in the competition (which consisted of the traditional sumo, line following, and rescue challenges), but also brought in a couple of years later the possibility for students to present whatever project they had done in a faire-like environment.

    This year’s event had 2,000 participants, plus 1,000 kids that came just to watch. This is, in my opinion, an interesting trend that I have seen at the CTC Faires as well: not only do kids come to showcase their projects or to compete in challenges of different nature, they also come to see what others have done. It is certainly fun to observe some of the projects, see the robots fight on the tatami, and engage in endless conversations about how this or that has been built.

    There were over 100 projects in the open category, which took a substantial portion of Fuenlabrada’s Fernando Martin basketball court (where the event took place), 176 Arduino sumo robots, and more than 20 different prizes. You can check out the pictures taken by one of our historical moderators to the Spanish forum and contributor to many open projects in Spain, Juan Manuel Amuedo aka @ColePower.

    The Competition

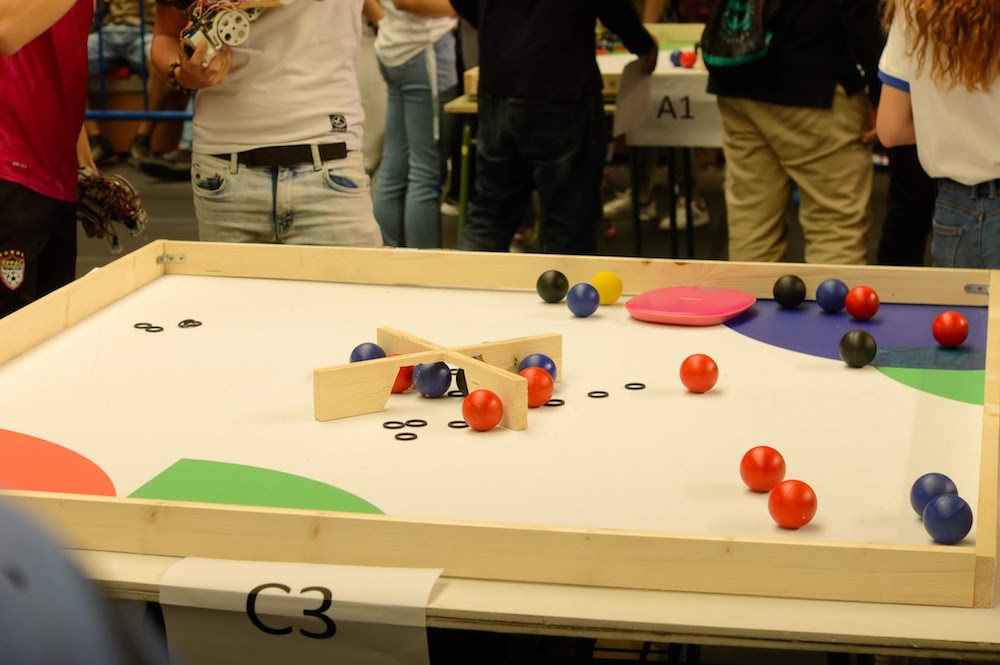
    At RoboCampeones, participants compete in getting the most points from the audience, in addition to being the best in the competition. The 2018 edition included a special challenge where teams had to build and command two teleoperated robots (using Bluetooth from cell phones) to compete in moving a certain amount of colored balls from the center to a corner of a squared tatami. Just imagine two teams, two robots per team (thus four players) and 16 balls of different colors rolling on the tatami… messy and fun at the same time!
    The other categories were: sumo, rescue, 3D printing, and the open category. I was invited to deliver the prize to the best Arduino project in the open category based on my opinion (yes, I had the chance to judge for a project all by myself!). It was a hard competition, something you can see from the videos. I loved a candy delivering box made by a bunch of 11-year-old kids from Jaenthe eco-friendly shower by three girls from the region, or the funny robot head for dancing at events by yet another couple from Madrid. However, if I have to choose a project that displays excellence in its execution, I voted for the solar airplane-drone designed to fly with a 2kg cargo. It had two different Arduino boards controlling different parts of the operation of the drone: telemetry + flight control, and battery management. They made their own PCBs, installed telemetry equipment, and even implemented a text to speech mechanism so that anyone with a walkie-talkie in the 433Mhz band could connect to the drone and listen to it saying aloud all of the sensor data. See here the interview I made to Julian, one of the boys in the team.

    [youtube https://www.youtube.com/watch?v=c-w5hq_w6Ds?feature=oembed&w=500&h=281]

    The Trick: Open Your Lab After Lunch

    When asking teachers and students how they managed to get so many incredibly relevant projects made during the formal education time, I got a uniform response from them: you (teacher) need to change you class’ methodology and follow PBL centred one. Furthermore, the lab needs extra opening hours. According to the educators, kids demand the technology class (or dedicated lab) to be opened after lunch time, once the class-day has come to an end, for them to continue experimenting and building their projects. Different schools figured out different ways to make it happen: teachers spend some administration hours sitting in the lab and let the kids do, teachers delegate responsibility in older students that want to volunteer and help their schoolmates, the lab management was included in the school’s library management that had to be opened anyway, etc.

    This is again something we have experienced with CTC. Technology needs to become much more transversal and become part of different subjects, labs have to be open longer, we need to re-think the management of creative spaces at schools, and the school management has to integrate these activities as part of the overall pedagogic plan of the school. Technology is an important part of our lives, and at school it has to play the same role and have resources at the same level as gymnastics, physics, or other classes in the need for experimental settings.

    Other Events

    There were other events happening throughout Spain over the last couple of weeks. The following list should give you an idea as to how relevant empirical technology classes are becoming:

    • Robolot: A two-day robotics festival now in its 17th edition, which took place in Olot, and included robotics competition, a STEAM area, had workshops, lectures, and other side events.
    • FanTec: The technology teachers association from Andalucia celebrated the 3rd edition of their faire at the Faculty of Telecommunications and Informatics at the University of Malaga. They have an extensive program with a long selection process, prizes, and visits to museums. 
    • ROByCAD: Cadiz, also in Andalucia, hosted its first robotics day on May 25th. 
    • Granabot: Once more in Andalucia, a couple of enthusiast teachers arranged two days of activities including Arduino Day. 
    • Cantabrobot: In northern Spain, a small robotics festival in Colindres, Cantabria gathered 700 enthusiasts.

    To the question of who paid for all of these, typically teachers arrange the events on a volunteer basis, get donated spaces from the regional or local governments, prizes contributed by companies, and sometimes even received grants to help those having to travel long distances to participate in the event.

    Credits 
    All the images featured in this blog are courtesy of ColePower. 

    Website: LINK

  • Join us at the Education Summit at PyCon UK 2018

    Join us at the Education Summit at PyCon UK 2018

    Reading Time: 3 minutes

    PyCon UK 2018 will take place on Saturday 15 September to Wednesday 19 September in the splendid Cardiff City Hall, just a few miles from the Sony Technology Centre where the vast majority of Raspberry Pis is made. We’re pleased to announce that we’re curating this year’s Education Summit at the conference, where we’ll offer opportunities for young people to learn programming skills, and for educators to undertake professional development!

    PyCon UK Education Summit logo

    PyCon UK 2018 is your chance to be welcomed into the wonderful Python community. At the Education Summit, we’ll put on a young coders’ day on the Saturday, and an educators’ day on the Sunday.

    Saturday — young coders’ day

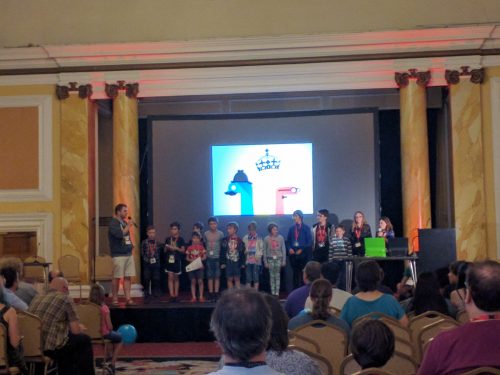
    On Saturday we’ll be running a CoderDojo full of workshops on Raspberry Pi and micro:bits for young people aged 7 to 17. If they wish, participants will get to make a project and present it to the conference on the main stage, and everyone will be given a free micro:bit to take home!

    Kids’ tickets at just £6 will be available here soon.

    Kids on a stage at PyCon UK

    Kids presenting their projects to the conference

    Sunday — educators’ day

    PyCon UK has been bringing developers and educators together ever since it first started its education track in 2011. This year’s Sunday will be a day of professional development: we’ll give teachers, educators, parents, and coding club leaders the chance to learn from us and from each other to build their programming, computing, and digital making skills.

    Educator workshop at PyCon UK

    Professional development for educators

    Educators get a special entrance rate for the conference, starting at £48 — get your tickets now. Financial assistance is also available.

    Call for proposals

    We invite you to send in your proposal for a talk and workshop at the Education Summit! We’re looking for:

    • 25-minute talks for the educators’ day
    • 50-minute workshops for either the young coders’ or the educators’ day

    If you have something you’d like to share, such as a professional development session for educators, advice on best practice for teaching programming, a workshop for up-skilling in Python, or a fun physical computing activity for the CoderDojo, then we’d love to hear about it! Please submit your proposal by 15 June.

    After the Education Summit, the conference will continue for two days of talks and a final day of development sprints. Feel free to submit your education-related talk to the main conference too if you want to share it with a wider audience! Check out the PyCon UK 2018 website for more information.

    We’re looking forward to seeing you in September!

    Website: LINK

  • Puerto Rico’s First Raspberry Pi Educator Workshop

    Puerto Rico’s First Raspberry Pi Educator Workshop

    Reading Time: 3 minutes

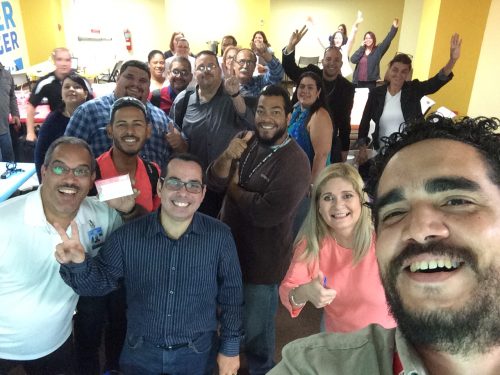
    Earlier this spring, an excited group of STEM educators came together to participate in the first ever Raspberry Pi and Arduino workshop in Puerto Rico.

    Their three-day digital making adventure was led by MakerTechPR’s José Rullán and Raspberry Pi Certified Educator Alex Martínez. They ran the event as part of the Robot Makers challenge organized by Yees! and sponsored by Puerto Rico’s Department of Economic Development and Trade to promote entrepreneurial skills within Puerto Rico’s education system.

    Over 30 educators attended the workshop, which covered the use of the Raspberry Pi 3 as a computer and digital making resource. The educators received a kit consisting of a Raspberry Pi 3 with an Explorer HAT Pro and an Arduino Uno. At the end of the workshop, the educators were able to keep the kit as a demonstration unit for their classrooms. They were enthusiastic to learn new concepts and immerse themselves in the world of physical computing.

    In their first session, the educators were introduced to the Raspberry Pi as an affordable technology for robotic clubs. In their second session, they explored physical computing and the coding languages needed to control the Explorer HAT Pro. They started off coding with Scratch, with which some educators had experience, and ended with controlling the GPIO pins with Python. In the final session, they learned how to develop applications using the powerful combination of Arduino and Raspberry Pi for robotics projects. This gave them a better understanding of how they could engage their students in physical computing.

    “The Raspberry Pi ecosystem is the perfect solution in the classroom because to us it is very resourceful and accessible.” – Alex Martínez

    Computer science and robotics courses are important for many schools and teachers in Puerto Rico. The simple idea of programming a microcontroller from a $35 computer increases the chances of more students having access to more technology to create things.

    Puerto Rico’s education system has faced enormous challenges after Hurricane Maria, including economic collapse and the government’s closure of many schools due to the exodus of families from the island. By attending training like this workshop, educators in Puerto Rico are becoming more experienced in fields like robotics in particular, which are key for 21st-century skills and learning. This, in turn, can lead to more educational opportunities, and hopefully the reopening of more schools on the island.

    “We find it imperative that our children be taught STEM disciplines and skills. Our goal is to continue this work of spreading digital making and computer science using the Raspberry Pi around Puerto Rico. We want our children to have the best education possible.” – Alex Martínez

    After attending Picademy in 2016, Alex has integrated the Raspberry Pi Foundation’s online resources into his classroom. He has also taught small workshops around the island and in the local Puerto Rican makerspace community. José is an electrical engineer, entrepreneur, educator and hobbyist who enjoys learning to use technology and sharing his knowledge through projects and challenges.

    Website: LINK

  • Arduino goes to college with the new Arduino Engineering Kit!

    Arduino goes to college with the new Arduino Engineering Kit!

    Reading Time: 3 minutes

    Arduino goes to college with the new Arduino Engineering Kit!

    Arduino TeamMay 12th, 2018

    We’re excited to announce the Arduino Engineering Kit, the first product released as a result of our new partnership with MathWorks, to reinforce the importance of Arduino at the university level in the fields of engineering, Internet of Things, and robotics.

    The Arduino Engineering Kit, which will be available for purchase starting today on the Arduino online store, consists of three cutting-edge, Arduino-based projects and will teach students how to build modern electronic devices – challenging them intellectually and helping them develop physical engineering skills that will better prepare them to enter the commercial market following graduation. In addition to the hardware, after registering online, students and educators will have access to a dedicated e-learning platform and other learning materials. The kit also includes a one-year individual license for MATLAB and Simulink, providing the user with hands-on experience in system modeling and embedded algorithm development.

    Following the global success of Arduino CTC 101, a program tailored for upper secondary schools, the Arduino Engineering Kit enables college students and educators to incorporate core engineering concepts like control systems, inertial sensing, signal and imaging processing, and robotics with the support of MATLAB and Simulink programming. These software packages are the base of industry-standard tools for algorithm development, system modeling, and simulation, all of which will be required in their future careers.

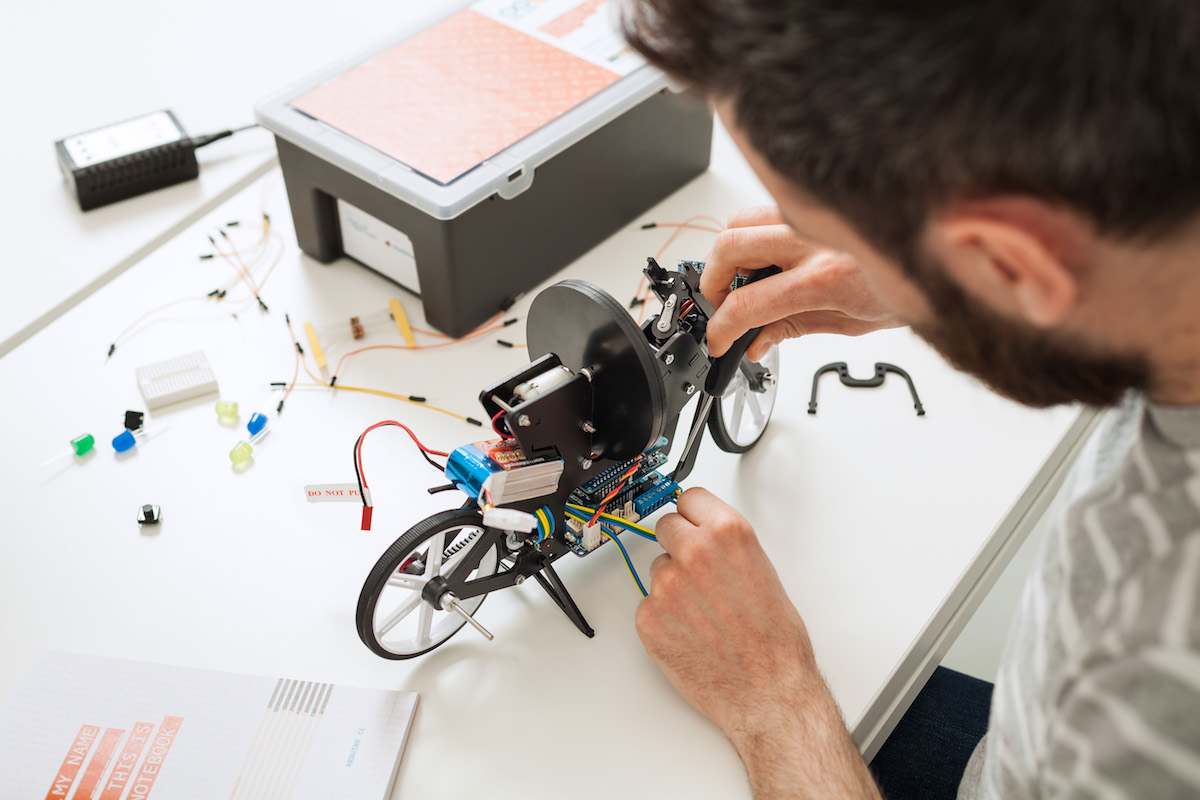
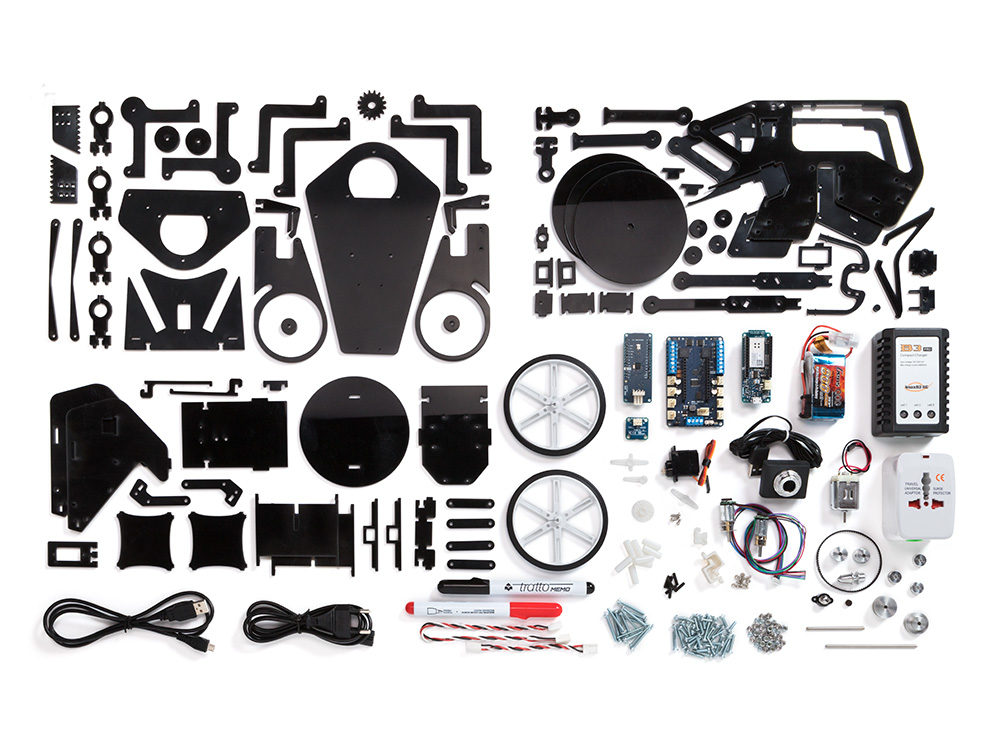
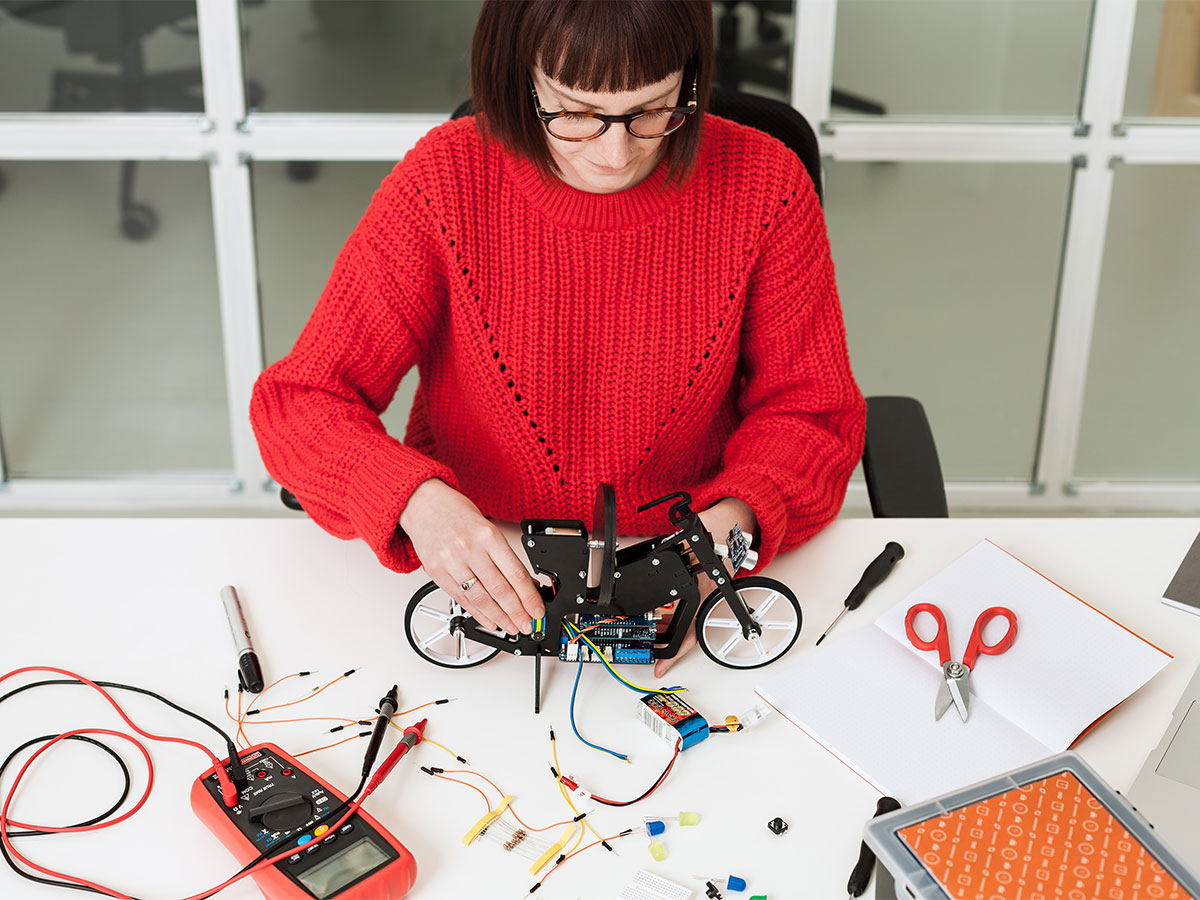
    Each Arduino Engineering Kit comes with a durable and stackable plastic toolbox for easy storage and years of reuse. Inside the box is an Arduino MKR1000 board, several customized parts, and a complete set of electrical and mechanical components needed to assemble all three projects:

    • Self-Balancing Motorcycle: This motorcycle will maneuver on its own on various terrains and remain upright using a flywheel for balance.
    • Mobile Rover: This vehicle can navigate between given reference points, move objects with a forklift, and much more.
    • Whiteboard Drawing Robot: This amazing robot can take a drawing it’s given and replicate it on a whiteboard.

    “We designed the Arduino Engineering Kit the way we would have liked to have learned mechatronics, control algorithms, state machines, and complex sensing when we were in our first years of engineering school: in a fun and challenging way,” said David Cuartielles, Arduino co-founder and Arduino Education CTO. “It’s all about hands-on activities built on top of well-grounded theoretical concepts. But more importantly, after finishing the basic materials, there’s plenty of flexibility to experiment, for the students to deviate and test their engineering creativity.”

    [youtube https://www.youtube.com/watch?v=pymRl7FCV0A]


    Website: LINK

  • Now students can create their own VR toursNow students can create their own VR toursDaydream Software Engineer

    Now students can create their own VR toursNow students can create their own VR toursDaydream Software Engineer

    Reading Time: 2 minutes

    Editor’s note: For Teacher Appreciation Week, we’re highlighting a few ways Google is supporting teachers—including Tour Creator, which we launched today to help schools create their own VR tours. Follow along on Twitter throughout the week to see more on how we’re celebrating Teacher Appreciation Week.

    Since 2015, Google Expeditions has brought more than 3 million students to places like the Burj Khalifa, Antarctica, and Machu Picchu with virtual reality (VR) and augmented reality (AR). Both teachers and students have told us that they’d love to have a way to also share their own experiences in VR. As Jen Zurawski, an educator with Wisconsin’s West De Pere School District, put it: “With Expeditions, our students had access to a wide range of tours outside our geographical area, but we wanted to create tours here in our own community.“  

    That’s why we’re introducing Tour Creator, which enables students, teachers, and anyone with a story to tell, to make a VR tour using imagery from Google Street View or their own 360 photos. The tool is designed to let you produce professional-level VR content without a steep learning curve. “The technology gets out of the way and enables students to focus on crafting fantastic visual stories,” explains Charlie Reisinger, a school Technology Director in Pennsylvania.

    Once you’ve created your tour, you can publish it to Poly, Google’s library of 3D content. From Poly, it’s  easy to view. All you need to do is open the link in your browser or view in Google Cardboard. You can also embed it on your school’s website for more people to enjoy. Plus, later this year, we’ll add the ability to import these tours into the Expeditions application.

    Website: LINK

  • Hello World Issue 5: Engineering

    Hello World Issue 5: Engineering

    Reading Time: 2 minutes

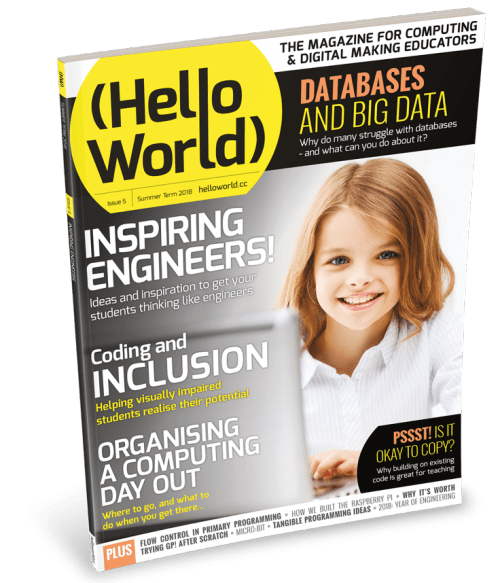
    Join us as we celebrate the Year of Engineering in the newest issue of Hello World, our magazine for computing and digital making educators.

    Inspiring future engineers

    We’ve brought together a wide range of experts to share their ideas and advice on how to bring engineering to your classroom — read issue 5 to find out the best ways to inspire the next generation.

    Plus we’ve got plenty on GP and Scratch, we answer your latest questions, and we bring you our usual collection of useful features, guides, and lesson plans.

    Highlights of issue 5 include:

    • The bluffers’ guide to putting together a tech-themed school trip
    • Inclusion, and coding for the visually impaired
    • Getting students interested in databases
    • Why copying may not always be a bad thing

    How to get Hello World #5

    Hello World is available as a free download under a Creative Commons license for everyone in world who is interested in computer science and digital making education. Get the latest issue as a PDF file straight from the Hello World website.

    We’re currently offering free print copies of the magazine to serving educators in the UK. This offer is open to teachers, Code Club and CoderDojo volunteers, teaching assistants, teacher trainers, and others who help children and young people learn about computing and digital making. Subscribe to have your free print magazine posted directly to your home, or subscribe digitally — 20000 educators have already signed up to receive theirs!

    Get in touch!

    You could write for us about your experiences as an educator, and share your advice with the community. Wherever you are in the world, get in touch by emailing our editorial team about your article idea — we would love to hear from you!

    Hello World magazine is a collaboration between the Raspberry Pi Foundation and Computing At School, which is part of the British Computing Society.

    Website: LINK

  • A look back at CTC Valencia Fair 2018

    A look back at CTC Valencia Fair 2018

    Reading Time: 7 minutes

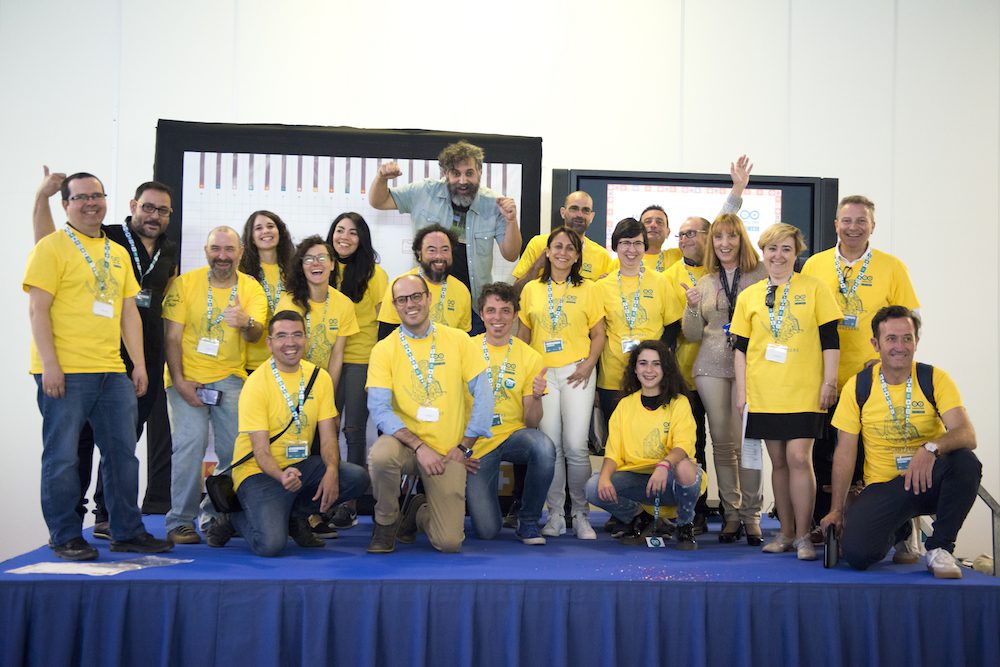
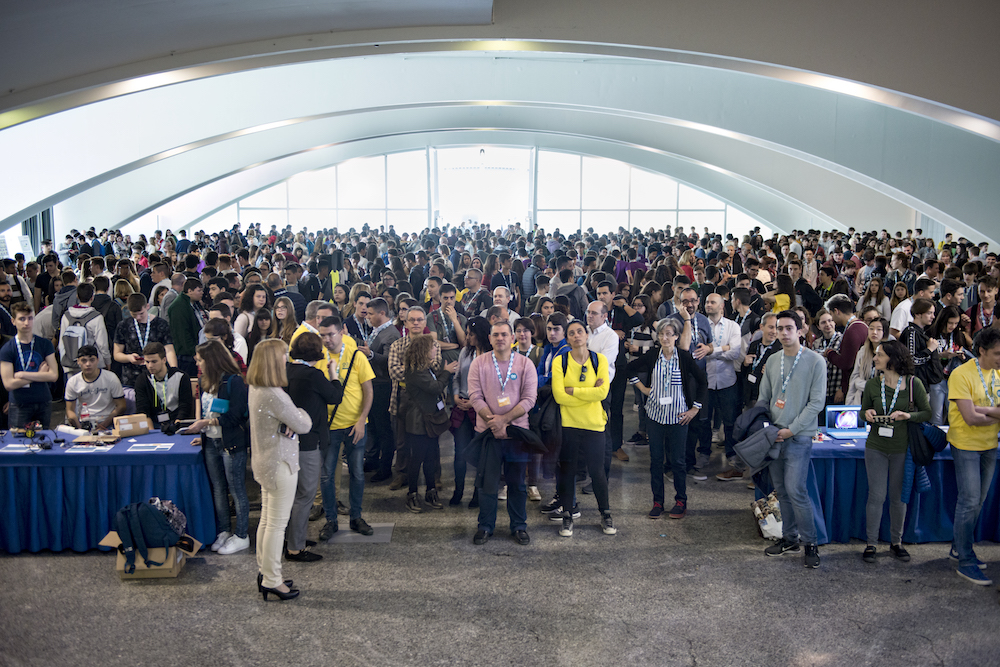
    On April 18th, a team from Arduino Education made it to the museum Ciudad de las Artes y las Ciencias in Valencia to participate in the CTC Valencia Fair. A total of 1,200 students (out of 1,500 people in attendance) participated in the five-hour-long event where the students exhibited what they had been producing over the last couple of months.

    CTC, the Creative Technologies in the Classroom initiative

    CTC started as a project in the region of Castilla La Mancha in Spain. I was asked what kind of process could be implemented in order to bring teachers and school up to speed with new educational technologies. Back then, in 2012, I had been teaching students from many different disciplines, mostly at the university level: interaction design, medicine, engineering, product design, mathematics, multimedia, fine arts… I had also been working with upper secondary school teachers from Spain, Argentina, and Sweden in the creation of small curriculums introducing interactive technologies a part of more transversal teaching in subjects like science and design.

    When asked by the people in charge at the regional centre for educators in Castilla La Mancha, I suggested a quick iterative design process that began with a collective survey to teachers in 25 schools and followed by a curriculum suggestion on topics that they considered relevant. The most complex aspect in this process was how to design interventions in the way of implementing this programme so that I could incorporate the teachers’ as well as the students’ opinions and debug the content as we went. CTC has over 25 different mid-size experiments designed to help a class get acquainted to work in a project-based learning methodology through an iterative process.

    The first CTC fair brought together over 400 students from all over Castilla La Mancha that presented 100-plus projects. Almost five years later, we have witnessed yet another incredible fair with very nice results, only this time in Valencia.

    What has changed

    CTC now includes experiments with wireless technology, accelerometers, capacitive sensing, motors, lights, and other interesting tricks, thanks to using the Arduino 101 board that comes with BLE, an IMU, and some other goodies. Students are introduced to programming using Processing and the Arduino IDE. But not everything is coding, given our pedagogic approach, they learn how to work in groups, search for technical information, organize time, and present their results…

    On the Arduino side, we have jumped from having a good old WordPress site to enable communication between the students, to a full-fledged platform that is being augmented with new materials and courses on a yearly basis. The content works for both the classic IDE and the more modern Create IDE. At the same time, we have implemented a hotline where teachers can ask questions directly to Arduino’s support specialists. Of course, there is a forum just for teachers to talk to one another and the Arduino forum still supporting them; but we have learned that teachers like one-to-one communication because each school is somehow different in terms of equipment, network facilities, classrooms and policies, and social environment–teachers, students, and their families.

    We have learned about complex deployments; for example, in Valencia there is a special Linux distribution called Lliurex that we had to hack in order to get the IDE running properly. During a previous project in Andalucia, teachers had no administration password to the computers! Well, we did figure things out and got the project to work. So big kudos to our support team that had to get out the hacker hoodie and code a clever solution!

    Also, for the CTC webinars we make on a bi-weekly basis, we have changed our online seminar backend to have a much more efficient one. Now our calls allow full interaction with the participants that can be invited to talk and share screens when needed instead of simply having a chat line back.

    Valencia is cool, isn’t it?

    We had a CTC fair at the Ciudad de las Artes y las Ciencias, a museum by Santiago Calatrava in the shape of a huge boat put upside-down. There are fountains surrounding the building, the weather was amazing (remember I am coming from Sweden, where we just had the worst winter in 10 years, so anything over 15°C is good at this point), the organizers from CEFIRE (the teacher organization in Valencia’s region) made a great preparation of the location, schools arrived on time, the show went fine-great-FABULOUS… so yes, Valencia is cool, and the so was the CTC fair.

    On stage we could see almost 30 projects being presented by the students, while we conducted a two and a half-hour livecast for those interested in seeing the projects from anywhere in the world. We held 15 interviews, but unfortunately we couldn’t show everything happening, considering that there were a more than 150 projects on display!

    The following video is a summary of livestream from the museum; for your benefit, we have chosen some highlights of the broadcast I conducted throughout the day.

    [youtube https://www.youtube.com/watch?v=mX3bvJ1RYT8?feature=oembed&w=500&h=281]

    The interviews were conducted in Spanish, which is another reason for the summary; but if you are interested in the actual interviews, check out the following video.

    [youtube https://www.youtube.com/watch?v=mC0elmjF0W4?feature=oembed&w=500&h=281]

    Some seriously nice projects

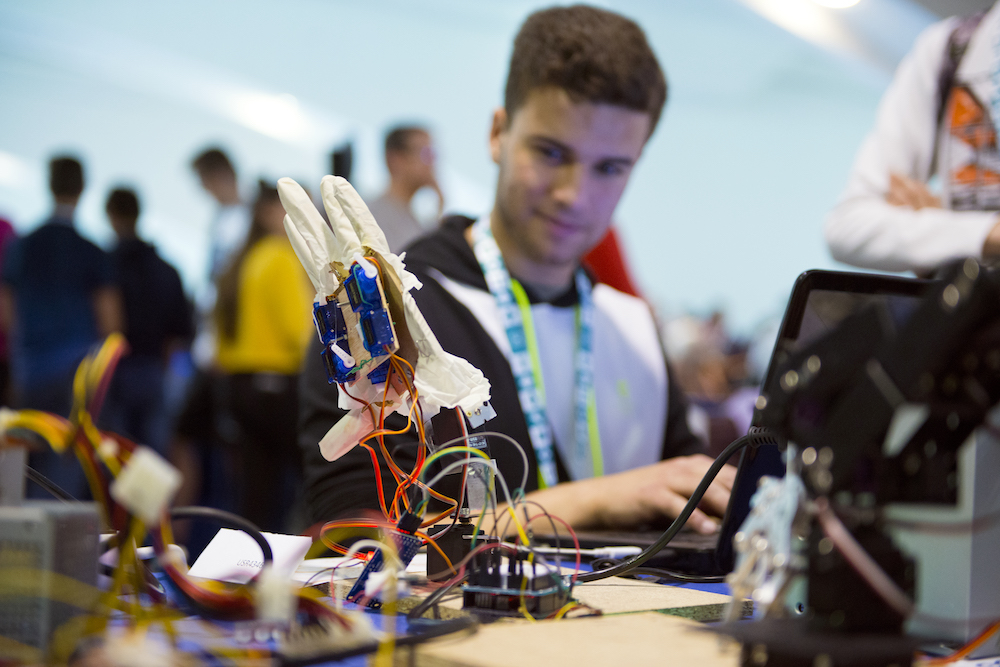
    I cannot stop being surprised by the amount of creativity students show when making projects. Even if I attend an average of five events of this nature per year, I keep on finding projects that make an impression in me. Students are always challenging any pre-conceptions I might have about what could be done with something as simple as an Arduino board. The one thing teachers keep on saying again and again is that it was them, the students, that pushed the process forward, that once they got started with the course, it was hard not to get carried away by the students initiative. The role of the teachers is playing the realist, trying to make sure the projects come to an end. That said, here some of the things I saw while walking around in the fair.

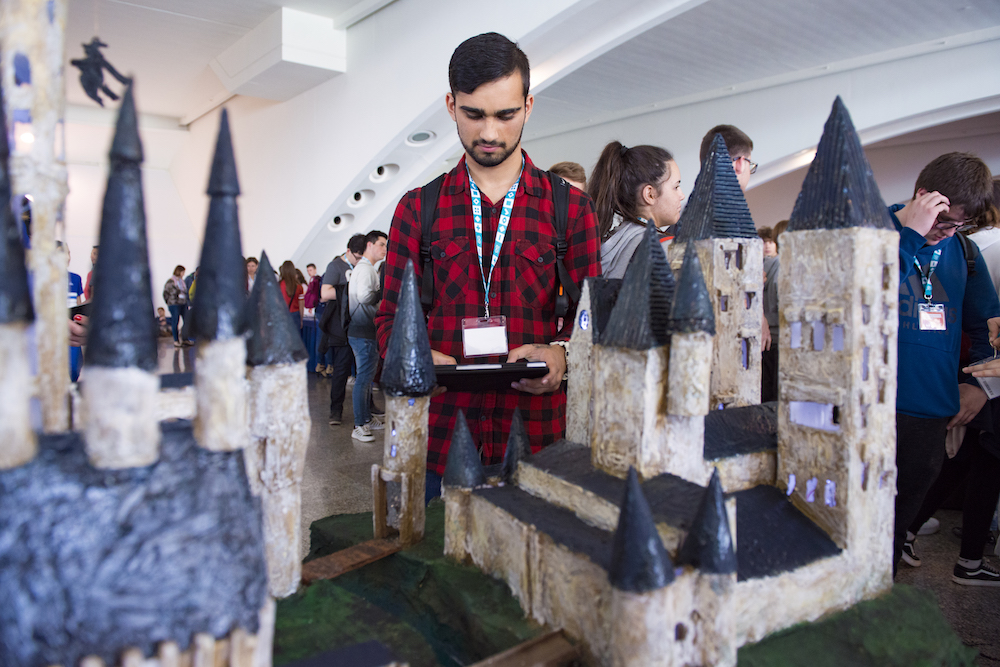
    Probably the most impressive project I came across was a model of the Hogwart’s castle inspired by the Harry Potter movies. It took the students four months to build the entire project. It was a replica of the castle, so heavy that it needed four people to carry it around. It had dragons flying around one tower, the lights could be turned on and off… there was even a fountain with running water! The whole mode could be controlled via Bluetooth from an Android tablet. In total, the model took three months to construct, the students said, while making the electronics and software work took one month.

    On the other side of the spectrum, I could play with a small arm wrestling toy made by a single student that took only 5 hours to build. You can check out the interview with the student in the above-posted videos. While the project seems to be simple, it is clear that the student had become quite knowledgeable in the craft of making projects, since he had figured everything for the project on his own without any external help.

    One last project I would like to talk about was a small drawing machine comprised of mechanics from DVD drives that could replicate small drawings (less than 10x10cm big) using a pen. The students explained that it barely worked the night before, but that they finally figured out the calibration process minutes before leaving for the fair. The results, as you can see on the video interviews, are quite remarkable. They can export drawings using the open source program Inkscape in a format (G-code) their machine can understand, this allows them to trace any kind of vectorized drawing and reproduce it with their machine.

    There were a lot more projects, take a look at the videos and pictures in this blog post. We will be presenting some others as part of the Arduino Livecast series in the the future. If you want to know more, just subscribe to Arduino’s YouTube channel and you will get weekly notifications on our videos.

    Acknowledgements

    The CTC Valencia project has been possible thanks to the generous contribution of EduCaixa, the on-site collaboration of the technical body at CEFIRE, the kind support of the regional government of Valencia – the Generalitat -, and the help of our old friend Ultralab.

    From everyone involved in the project, big thanks to Ismael and Oscar, who believed in the project and pushed for it. Personally I want to thank Nerea who coordinated the project, and Roxana who was there making it happen from Arduino on a weekly basis; also Carla and Carlos who covered up when needed. Finally to Laura, who worked long evenings on top of everything else to make all of graphics needed for the fair.

    At a more technical level, we have a new revision to the look and feel of the CTC project site coming, and it is looking awesome. Marcus, Gabrielle, Luca and everyone working with the UX in Arduino are creating one of the best-looking educational experiences ever. If not only the content is good, but if it feels good and looks good, then the experience will be excellent!

    Do you want CTC in your world?

    If you want to be part of the CTC initiative, visit Arduino Education’s website, subscribe to the Arduino Education Newsletter [at the bottom of that site], or send us a request for more information via email: ctc.101@arduino.cc.

    [Photos by Pablo Ortuño]


    Website: LINK

  • MIT and Boeing Collaborate on Additive Manufacturing Education

    MIT and Boeing Collaborate on Additive Manufacturing Education

    Reading Time: 2 minutes

    With the expiration of key patents, availability of advanced digital modeling software, and improved hardware, additive manufacturing is on the verge of radically changing how products are designed, made and maintained. But a lack of understanding of its fundamental principles, applications, and business implications is proving to be a barrier to broader adoption.

    To help professionals and organizations realize the potential of 3D printing — and perhaps accelerate its use — the Massachusetts Institute of Technology and aerospace company Boeing are collaborating on a new online course for professionals. It’s called “Additive Manufacturing for Innovative Design and Production”.

    “Our educational collaboration with MIT encourages employees to grow professionally and develop new manufacturing skills,” says Michael Richey, chief learning scientist at Boeing.

    “Through a combination of industry and academic expertise, the additive manufacturing curriculum will equip employees with knowledge of the fundamentals of 3D printing, which has the potential to catalyze widespread change across the manufacturing industry.”

    The nine-week course will teach critical skills that prepare employees to implement AM in their organizations. The course explains leading AM technologies for polymers, metals, and advanced materials; addresses design for AM via both engineering principles and computational design; and includes quantitative models for assessing the cost and value of components made by AM.

    MIT and Boeing Hope to Jumpstart Career Learners in AM Processes

    Mike Vander Wel, a production engineering chief engineer at Boeing, says the company has been involved in AM for nearly three decades. They regularly use it to prototype, test, and manufacture small parts for some aircraft.

    While new graduates are entering the workforce with a basic knowledge of AM technology, more experienced employees have little or no exposure to it. The MIT-Boeing collaboration is designed to jumpstart career learners on AM processes, applications, and analyses.

    Aside from its benefits to business, MIT and Boeing view AM as an opportunity to improve job satisfaction as well.

    “To me, accomplishment equates to job satisfaction,” says Vander Wel. “Upon completion of the course, learners will be able to develop additive applications and work collaboratively to solve problems, which will be deeply gratifying.”

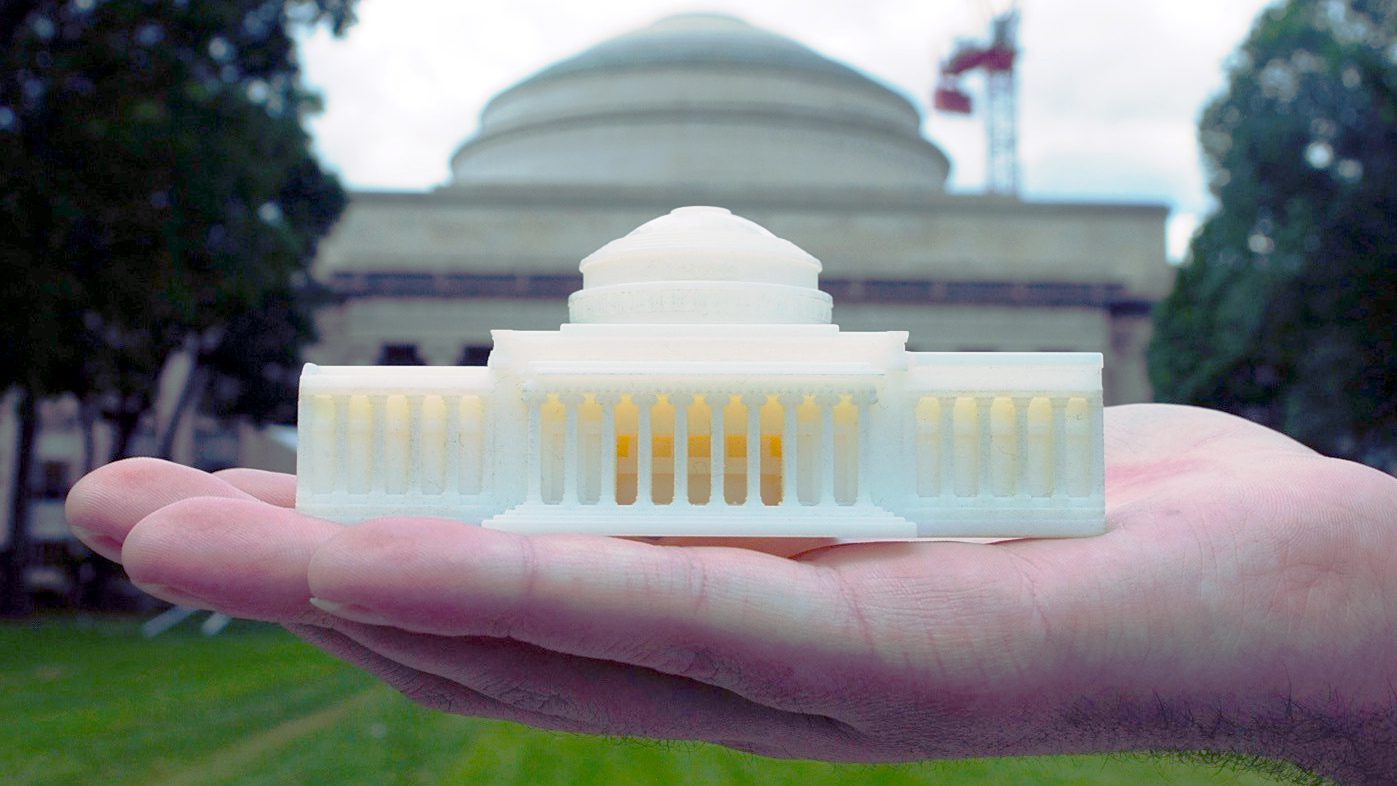
    Also part of the course from MIT and Boeing is a 3D printed kit used to enrich the learning experience. Similar to a textbook, the kit is used as a reference throughout the course. The kit has metal and polymer parts made by industry-relevant 3D printing processes, including stereolithography, multijet fusion, and direct metal laser sintering. The parts interlock to form a model of MIT’s iconic Building 10 dome.

    The Additive Manufacturing for Innovative Design and Production course starts on 30 April, and registration is open now. For more information, visit the course website.

    Website: LINK

  • Tackling climate change and helping the community

    Tackling climate change and helping the community

    Reading Time: 3 minutes

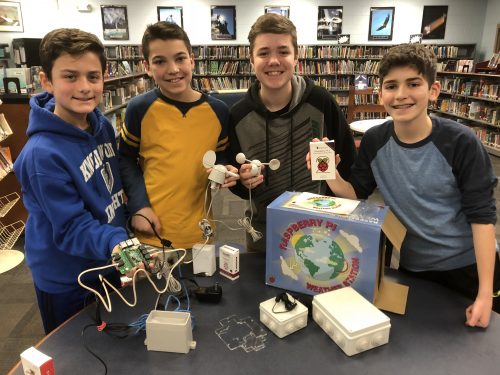
    In today’s guest post, seventh-grade students Evan Callas, Will Ross, Tyler Fallon, and Kyle Fugate share their story of using the Raspberry Pi Oracle Weather Station in their Innovation Lab class, headed by Raspberry Pi Certified Educator Chris Aviles.

    Raspberry Pi Certified Educator Chris Aviles Innovation Lab Oracle Weather Station

    United Nations Sustainable Goals

    The past couple of weeks in our Innovation Lab class, our teacher, Mr Aviles, has challenged us students to design a project that helps solve one of the United Nations Sustainable Goals. We chose Climate Action. Innovation Lab is a class that gives students the opportunity to learn about where the crossroads of technology, the environment, and entrepreneurship meet. Everyone takes their own paths in innovation and learns about the environment using project-based learning.

    Raspberry Pi Certified Educator Chris Aviles Innovation Lab Oracle Weather Station

    Raspberry Pi Oracle Weather Station

    For our climate change challenge, we decided to build a Raspberry Pi Oracle Weather Station. Tackling the issues of climate change in a way that helps our community stood out to us because we knew with the help of this weather station we can send the local data to farmers and fishermen in town. Recent changes in climate have been affecting farmers’ crops. Unexpected rain, heat, and other unusual weather patterns can completely destabilize the natural growth of the plants and destroy their crops altogether. The amount of labour output needed by farmers has also significantly increased, forcing farmers to grow more food on less resources. By using our Raspberry Pi Oracle Weather Station to alert local farmers, they can be more prepared and aware of the weather, leading to better crops and safe boating.

    Raspberry Pi Certified Educator Chris Aviles Innovation Lab Oracle Weather Station

    Growing teamwork and coding skills

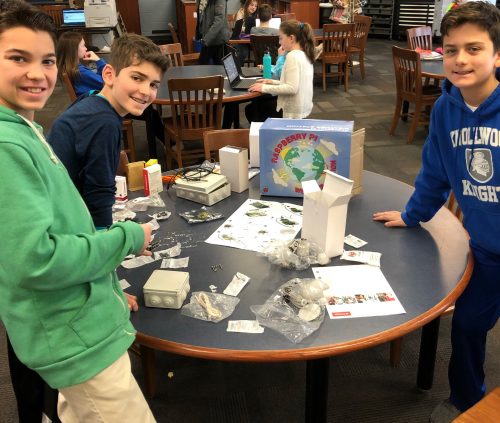
    The process of setting up our weather station was fun and simple. Raspberry Pi made the instructions very easy to understand and read, which was very helpful for our team who had little experience in coding or physical computing. We enjoyed working together as a team and were happy to be growing our teamwork skills.

    Once we constructed and coded the weather station, we learned that we needed to support the station with PVC pipes. After we completed these steps, we brought the weather station up to the roof of the school and began collecting data. Our information is currently being sent to the Initial State dashboard so that we can share the information with anyone interested. This information will also be recorded and seen by other schools, businesses, and others from around the world who are using the weather station. For example, we can see the weather in countries such as France, Greece and Italy.

    Raspberry Pi Certified Educator Chris Aviles Innovation Lab Oracle Weather Station

    Raspberry Pi allows us to build these amazing projects that help us to enjoy coding and physical computing in a fun, engaging, and impactful way. We picked climate change because we care about our community and would like to make a substantial contribution to our town, Fair Haven, New Jersey. It is not every day that kids are given these kinds of opportunities, and we are very lucky and grateful to go to a school and learn from a teacher where these opportunities are given to us. Thanks, Mr Aviles!

    To see more awesome projects by Mr Avile’s class, you can keep up with him on his blog and follow him on Twitter.

    Website: LINK
  • Announcing Coolest Projects North America

    Announcing Coolest Projects North America

    Reading Time: 2 minutes

    The Raspberry Pi Foundation loves to celebrate people who use technology to solve problems and express themselves creatively, so we’re proud to expand the incredibly successful event Coolest Projects to North America. This free event will be held on Sunday 23 September 2018 at the Discovery Cube Orange County in Santa Ana, California.

    Coolest Projects North America logo Raspberry Pi CoderDojo

    What is Coolest Projects?

    Coolest Projects is a world-leading showcase that empowers and inspires the next generation of digital creators, innovators, changemakers, and entrepreneurs. The event is both a competition and an exhibition to give young digital makers aged 7 to 17 a platform to celebrate their successes, creativity, and ingenuity.

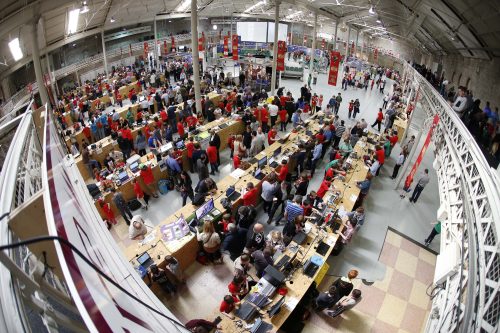
    showcase crowd — Coolest Projects North America

    In 2012, Coolest Projects was conceived as an opportunity for CoderDojo Ninjas to showcase their work and for supporters to acknowledge these achievements. Week after week, Ninjas would meet up to work diligently on their projects, hacks, and code; however, it can be difficult for them to see their long-term progress on a project when they’re concentrating on its details on a weekly basis. Coolest Projects became a dedicated time each year for Ninjas and supporters to reflect, celebrate, and share both the achievements and challenges of the maker’s journey.

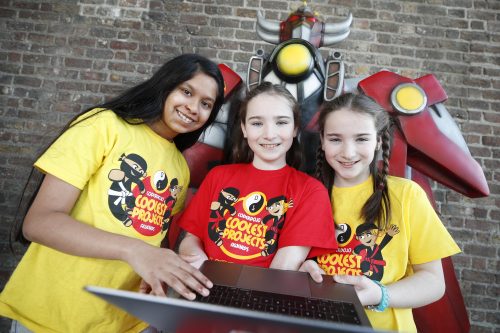
    three female coolest projects attendees — Coolest Projects North America

    Coolest Projects North America

    Not only is Coolest Projects expanding to North America, it’s also expanding its participant pool! Members of our team have met so many amazing young people creating in all areas of the world, that it simply made sense to widen our outreach to include Code Clubs, students of Raspberry Pi Certified Educators, and members of the Raspberry Jam community at large as well as CoderDojo attendees.

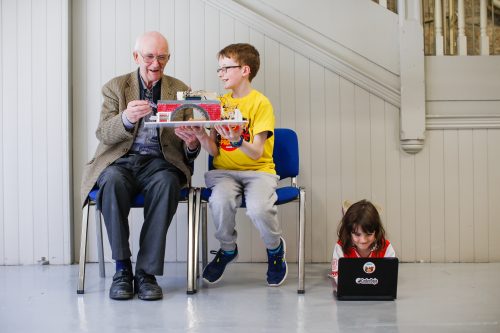
     a boy showing a technology project to an old man, with a girl playing on a laptop on the floor — Coolest Projects North America

    Exhibit and attend Coolest Projects

    Coolest Projects is a free, family- and educator-friendly event. Young people can apply to exhibit their projects, and the general public can register to attend this one-day event. Be sure to register today, because you make Coolest Projects what it is: the coolest.

    Website: LINK
  • Free-D is Helping Human Trafficking Victims Secure Jobs in the 3D Printing Workforce

    Free-D is Helping Human Trafficking Victims Secure Jobs in the 3D Printing Workforce

    Reading Time: 3 minutes

    The startup Free-D is helping human trafficking victims and underprivileged women in India obtain careers by teaching them 3D printing and design skills. The first nine-month pilot program is taking place in Mumbai, and will provide 10 women with extensive 3D printing training.

    Despite the technological and societal progress that humanity has made over time, millions of unfortunate human beings remain trapped under the despicable hand of human traffickers. According to the International Labour Organization (ILO), there are 24.9 million people in the world that suffer from modern-day slavery. Of that disgustingly large number, 71 percent of these human trafficking victims are women and girls.

    Without proper access to education, many of these underprivileged women lack job opportunities, which increases the risk of falling prey to human traffickers. But one startup is aiming to empower these victims and other disadvantaged females by teaching valuable skills that will help them gain a better career and overall life.

    Free-D wants to offer 3D printing training workshops to vulnerable women from all walks of life, including human trafficking survivors, as well as victims of domestic violence or homelessness. Founded in 2016 by Katherine Prescott and Siavash Mahdavi, the startup aims to provide skills training and job opportunities to help pull women out of slavery and poverty.

    “They don’t have a high level of skill or literacy skills, which means that job opportunities are really low, and it’s through the search of trying to find employment that many get taken advantage of,” Prescott recently told Forbes, describing the obstacles that keep underserved females from escaping their awful circumstances.


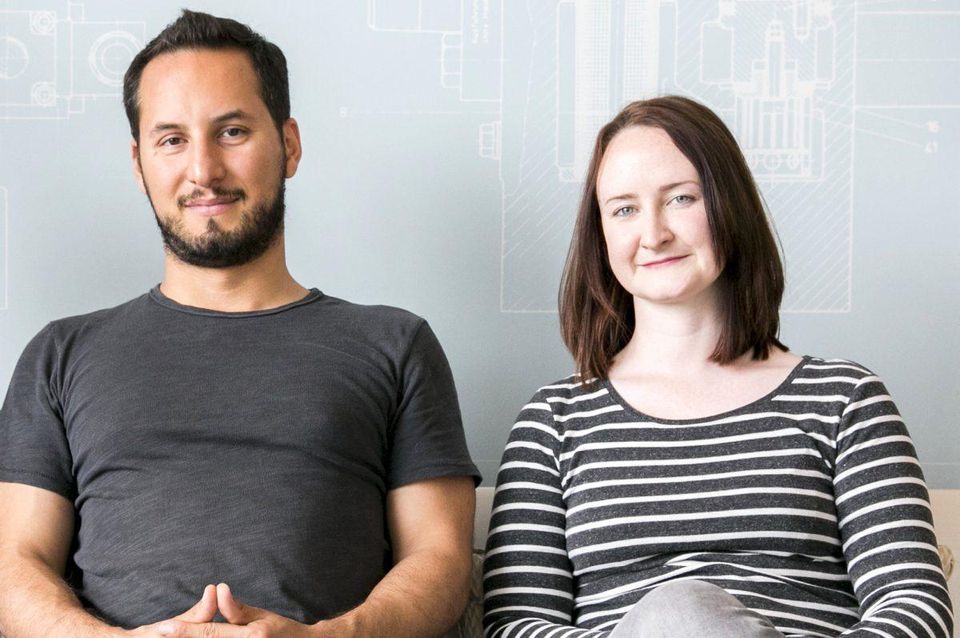
    Siavash Mahdavi (L) and Katherine Prescott (R), founders of Free-D.

    Free-D Aims to Help Underprivileged Indian Women Escape Modern-Day Slavery

    Originally started in London, the company is now heading to the Vodafone Institute’s Berlin-based female empowerment business accelerator F-Lane.

    Although they plan to expand the initiative globally, Free-D is starting off in India, a country where 14 million women currently live in slavery. Last year, the startup partnered with the Indian NGO Kshamata and Imaginarium, which is the largest 3D printing company in the country, to offer a series of one-to-three day workshops.

    Since then, Free-D has launched an extensive pilot program in Mumbai. The nine-month workshop will provide 10 underprivileged women with 3D printing training and psychological support. At the end of the program, the women will start internship positions with Imaginarium.

    Mahdavi is currently self-funding the company and pilot program with around £100,000 ($144,000), but will attempt to raise an additional £500,000 ($718,000) to help scale the business on a global level. Once the business is established, Free-D plans to obtain revenue from companies that are supporting the training of their future employees. Depending on the geographical location of future workshops, Prescott believes they can develop programs that utilize a “buy-one-fund-one model” to potential partners.

    By providing 3D printing education to disadvantaged females, Free-D hopes to empower the millions of human trafficking victims that are suffering across the world. In doing so, the company will also be adding resilient and deserving women to the additive manufacturing workforce.


    Source: Forbes / Free-D

    License: The text of „Free-D is Helping Human Trafficking Victims Secure Jobs in the 3D Printing Workforce“ by All3DP is licensed under a Creative Commons Attribution 4.0 International License.

    Subscribe to updates from All3DP

    You are subscribed to updates from All3DP

    Website: LINK
  • Thursday Night Live(cast) with your host David Cuartielles

    Thursday Night Live(cast) with your host David Cuartielles

    Reading Time: 7 minutes

    Why livecasting from Arduino Education

    About a month ago we started livecasting from Arduino’s YouTube channel. This is something I had been willing to do for quite some time, but I never figured out the way to make room in my agenda to fit the planning required to make it happen. Technology has changed a lot over the last couple of years and it is relatively easy to start broadcasting from anywhere given there is an Internet connection. Not only has the tech for transmission evolved, there are also several options on where to send the video so that others can watch it whether live or in its recorded form later.

    What we are excited about

    We want to reach you when you’re commuting to/from school and have some time to chat about things that matter in the field of tech and education. We want to test LIVE experiments made by others and see whether we get the same results. We want to showcase projects from the Arduino community that are relevant for those involved in education. We want to give a voice to makers from all over the world that we meet when traveling (something I do often). We want to fail on air, and get help from the chat to fix things. We want to have a more inclusive audience. Livecasting is a quick and honest way to approach all of this, minimizing the impact in terms of the amount of resources needed to put it in place.

    Our yearly livecasting plan

    Even if the livecasts will be super LoFi in nature, it doesn’t mean we will not be thinking carefully about the content to be presented in them. We have prepared a (preliminary) agenda all the way to 2019. While the exact topics of the livecasts are open to change, we will keep a balance between technical casts, interviews, project presentations, and basic introductory sessions for those starting. We will air in English on Thursdays at 7pm CEST (CET) unless there’s a holiday, in which case we’ll try on an earlier day that same week. Some weeks we might transmit more than once, like e.g. if we find ourselves at a conference or event where there might be something meaningful to inform you about.

    That said, follows an overview of the livecasts we have planned to make (along with those that have already taken place).

    In the program you will see how some of the livecasts are actually sponsored by the eCraft2Learn EU research project. This is a project we have been working with for over a year, where our role is to provide teachers interested in Arduino related topics with introductory tutorials to the technology. We call those livecasts “teacher tutorials.”

    List of Livecasts: past and (near) future

    Teacher Tutorial 1: Introduction to Arduino and the popular Arduino Uno board. (Please note that the audio was not good in this transmission, we have learned a lot since then.) 

    [youtube https://www.youtube.com/watch?v=TSYWDnfYjrc?feature=oembed&w=500&h=281]

    Hacking STEM 1:  A water quality sensor experiment, where we took one of the Microsoft Hacking STEM projects and replicated it. The building process went fine, but the sensor gave us some trouble because of some alligator clips.

    [youtube https://www.youtube.com/watch?v=xw5282zEumo?feature=oembed&w=500&h=281]

    Sensors Q&A 1: We are always receiving questions about how different sensors work. Here we devoted one session to test different temperature sensors… ah, and we threw an Arduino Uno into the frozen sea and proved it works (after drying up).

    [youtube https://www.youtube.com/watch?v=tEmuSuW3Tzc?feature=oembed&w=500&h=281]

    Live from Hackergarage GDL, Mexico: We interviewed a series of people from the Mexican maker scene. People from all over the country came to Guadalajara for an event and we managed to squeeze in a series of live interviews.

    [youtube https://www.youtube.com/watch?v=7ufWPH7qePY?feature=oembed&w=500&h=281]

    Live from Hacedores CDMX, Mexico: We went to Mexico City and interviewed the founder of the Hacedores MakerSpace, Antonio Quirarte, who could also be considered one of the founding parents of the Mexican make scene. We had a great talk and he showed some of the educational projects they have been working with for some time. Are you into weather stations? Then this is your podcast!

    [youtube https://www.youtube.com/watch?v=tbtgAHFFSJ0?feature=oembed&w=500&h=281]

    Teacher Tutorial 2: Learn about Arduino’s classic IDE and how it differs from the new online Create IDE. We also found out about the Microsoft OneDrive issue with the classic IDE (bug that will be solved in the next release).

    [youtube https://www.youtube.com/watch?v=wOkKWuqEejo?feature=oembed&w=500&h=281]

    April 18th (between 10AM and 12AM CEST) – Live from CTC Valencia Faire: We will be transmitting live from the museum Ciudad de las Artes y las Ciencias, showing projects made by students participating in the CTC initiative.

    April 19th – CTC Projects 1: We will dissect a CTC project made by students and try to replicate it, to some extent, with whatever materials we have in our office.

    April 26th – Microsoft Hacking STEM Project 2: Yet another project from the Microsoft Hacking STEM collection.

    May 3rd -Teacher Tutorial 3: Learn how to extend Arduino’s classic IDE, add libraries, use other cores, etc.

    May 10th – CTC Projects 2

    May 17th – Real World Applications: Let’s look at a project where Arduino is being used in the wild to see how it could inspire our students to think more about this kind of design cases.

    May 24th – Teacher Tutorial 4: Electronics and electricity basis

    May 31st – CTC Projects 3

    June 7th – Microsoft Hacking STEM Project 3

    June 14th – Summer Projects: What can you do with Arduino this summer?

    There is a full agenda, although it may be a bit too much to include in this blog post. We will update you with more details in the coming weeks, so stay tuned.

    The equipment

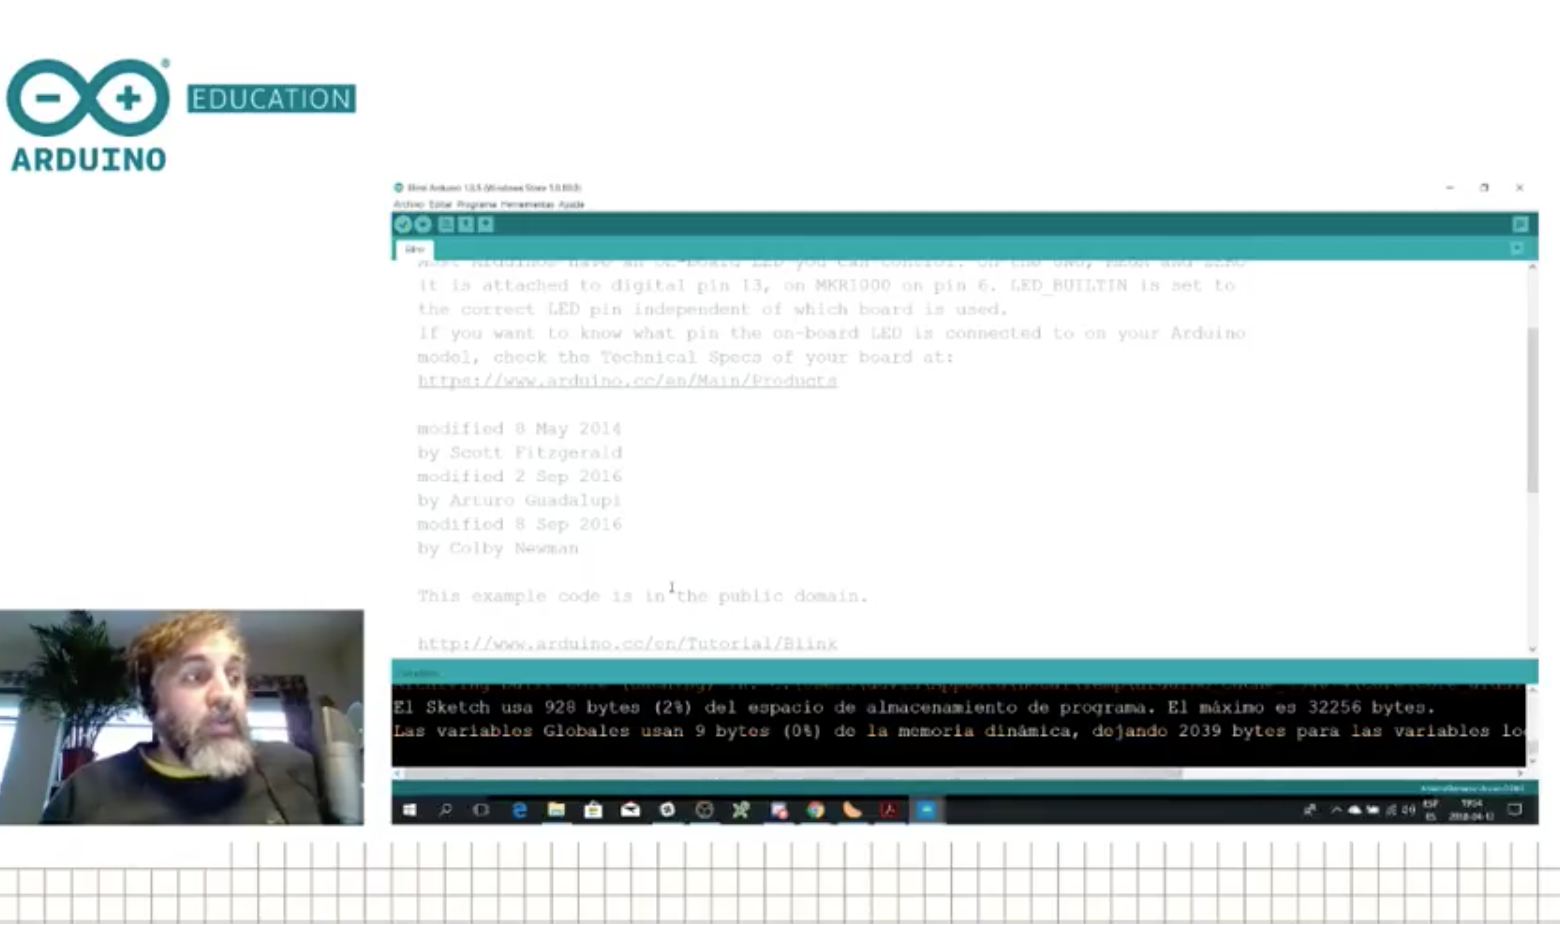
    As you could imagine, there are different techniques for livecasts. Since we are looking at a consistent experience over the programs, we have settled on using gamer computers (because of the graphics card), together with a couple of webcams, an external mixer board, and a good ambient mic. We have an extra HDD to record the programs should the bandwidth be so bad that we need to lower the quality beyond our own standards and a Zoom recorder because sound is sometimes troublesome. The software of choice is OBS that can push the stream directly into YouTube and uses the graphics card for real-time compression of the video, which is very helpful. This is the reason why we had to fall for MS Windows (those that know me know I’m a Linux guy), as OBS doesn’t support some of the extra features of the graphics card in the Linux operating system.

    In the studio, we have a stationary gaming PC with two screens; when on the road, I have a gamer laptop of similar characteristics. The other difference is that the stationary has a control panel made with an Arduino Leonardo operating as MIDI device, which sends keystrokes to OBS via an interfacing program. These are used to change between scenes, switch cameras, add overlays, etc. For the portable station, I got a control panel from El Gato that takes a lot less space.

    What has (and hasn’t) worked so far
    At the time of writing I’ve made six livecasts with different degrees of success. I have no problem admitting that we (I) are still learning how to prepare the system, switch scenes, and even select the content and write scripts. During our first transmission, the audio ended up having a terrible echo that we couldn’t figure out how to filter. For the second one, the sensors didn’t work even after a full day of preparations. In the third, there were times when I was talking about something but the screen was showing something unrelated. That day I came in the studio and someone had taken one of the monitors to use it in a lab experiment so I had to improvise and had no monitor to check whether I was doing it right or wrong.

    So far we have learned a lot, yet we still consider the livecasts to be in beta. We are having fun making them and will continue to do so. Also, we are nurturing a new chat community using Discord where people interact live during the programs making suggestions, adding links, and competenting the show. If you want to join the conversation, use the following link and join us on your computer or smartphone via the Discord app.

    Finally, do not forget subscribing to the Arduino YouTube channel. If we see a good response from the community, we will start making a lot more video content. Don’t discard seeing some other relevant members from the crew coming online, I will do my best to convince them!

    Other livecasts you can follow

    We didn’t invent livecasting, obviously, and there are other streams you can subscribe to if you want to learn more about the maker culture. Personally, I have to recommend two Spanish channels. First, La Hora Maker, run by Cesar, with whom I collaborate on making live Q&A sessions. Cesar is probably the most knowledgeable person in the maker culture in Spanish language. The other relevant channel is Programar Facil from Luis, where you will find a lot of sessions about projects made with Arduino and various programming techniques.


    Website: LINK
  • Start a CoderDojo with our free online training

    Start a CoderDojo with our free online training

    Reading Time: 3 minutes

    You can now sign up to our newest free online course Start a CoderDojo to learn more about CoderDojo and how you can easily set up one of these free coding clubs for young people in your area. With less than two weeks until the course begins, we wanted to tell you about the course’s content and why the course’s creator put it together for you.

    Start a CoderDojo || free online learning || Raspberry Pi Foundation

    Get support and advice on how to grow your confidence in coding and start a CoderDojo for young people in your area.

    What is CoderDojo?

    CoderDojo is a global network of free, volunteer-led, community-based programming clubs for young people aged 7 to 17. There are currently more than 1700 Dojos running regularly across 75 countries. All of these clubs were started by individuals who are passionate about giving young people the opportunity to learn to code. Some people assume you need technical skills to start a Dojo, but that’s not true. The most important thing is that you can bring people together for a shared goal.

    What is covered on the course?

    The course was developed by Philip, CoderDojo’s Educational Content Lead. It gives those who think empowering young people to be tech creators is important the resources and supports to achieve that goal by starting a Dojo. Divided over three weeks and running for about four hours in total, the course provides practical advice and resources on everything you need to know to plan and run a fun, social, and creative coding club for young people.

    “In the first week, you’ll look at what coding is, at the worldwide CoderDojo community of coding clubs, and at the creative approach CoderDojos take to helping young people learn to code. In week two, you’ll move on to setting up your Dojo with a team, a venue, and any needed materials. You’ll also look at how to find young people to attend. Week three wraps up the course by giving you sample plans for a Dojo session and a Dojo’s year, and we’ll be talking about how to grow and develop your Dojo over time as your attendees become better coders.”
    — Philip

    Who is the course for?

    Anyone interested in enabling young people to be tech creators should take this course. Parents, teachers, librarians, IT professionals, youth workers, and others have all started Dojos in their community. They say that “it’s an amazing experience that led [them] to expand [their] personal horizons”, and that they “find it really rewarding”.

    The course is free and open to all — if you’re interested, then sign up now.

    If you’re already mentoring at a Dojo, the course is a great opportunity to revise what you’ve learnt, and a chance to share your insights with newcomers in the discussion sections. Parents and guardians who wish to learn more about CoderDojo and are considering getting involved are also more than welcome to join.

    Website: LINK
  • 3D Printed Artefacts in the Classroom with Museum in a Box

    3D Printed Artefacts in the Classroom with Museum in a Box

    Reading Time: 3 minutes

    Bringing a new dimension to history and museum education, the Museum in a Box is a brilliant interactive learning experience. It uses 3D printed objects with NFC chips to trigger audio commentary, all managed by a Raspberry Pi.

    A field-trip to a museum is an integral part of every schoolkid’s education. It’s a rite of passage to bundle onto a coach, squabble all the way there and back, pay hardly any attention to the exhibits on display, and push your poor overworked teacher to the end of their tether.

    Also, to spend all of your lunch money on useless trinkets from the gift shop.

    But what if teachers were able to bring a whole museum into your classroom, instead? That would be quite fun, wouldn’t it? That’s the concept behind Museum in a Box.

    Powered by a Raspberry Pi and nestled inside a laser-cut plastic enclosure, this is a device that takes a radical new approach to conservation education using 3D printed objects enhanced with NFC (Near Field Communication) technology.

    How does it work? Simply pick up an artifact and plonk it on top of a Museum in a Box. The NFC tag on the underside of the object will be detected by the Raspberry Pi inside. This in turn triggers an audio commentary through a built-in speaker, explaining the history behind the object.

    And the items themselves are genuine historical artifacts. Thanks to the ‘Scan the World’ project, an ambitious initiative to archive objects of cultural significance using 3D scanning technologies, the Museum in a Box team has 3D printed miniature replicas of some of the world’s most recognizable statues and sculptures.

    museum in a box
    museum in a box

    Museum in a Box Addresses Real Challenges for Education

    Two of the biggest challenges facing museums in the 21st century are distance and space.

    For one thing, unless you live near a major city where museums are in abundance, you’re unlikely to see something like the Rosetta Stone in person. Instead, you have to make do with online photos or videos of these world-famous artifacts.

    For another, there’s the matter of storage. It’s estimated that only around 5 to 10% of museums’ overall collections are actually on show across the globe. The rest is boxed up and stored in warehouses, inaccessible to the public because of the risk of damage or simply due to lack of space.

    Museum in a Box is a fantastic solution, using modern maker tools like 3D printing and Raspberry Pi to bring museum collections and expert knowledge directly to the classroom.

    Moreover, using the same technology, students are encouraged to create their own box-sized museums. It can contain stories and research about their local area. In this way, Museum in a Box enables students to explore and classify their own local history.

    With interest in the project continuing to grow, the team behind Museum in a Box will soon be delivering ten boxes to the Smithsonian Libraries in the US for their Unstacked initiative.

    They’re also making a box for the British Museum to support their Iraq Scheme initiative, and another box will be heading to the V&A to support their See Red programme.

    Last but not least, the Museum in a Box team will be showcasing at Raspberry Fields. This is a new maker festival taking place on 30 June and 1 July 2018  in Cambridge, UK. Find out how to get your ticket here.

    License: The text of „3D Printed Artefacts in the Classroom with Museum in a Box“ by All3DP is licensed under a Creative Commons Attribution 4.0 International License.

    Subscribe to updates from All3DP

    You are subscribed to updates from All3DP

    Website: LINK
  • Autodesk Supporting Hip Hop Architecture Camps for Second Year

    Autodesk Supporting Hip Hop Architecture Camps for Second Year

    Reading Time: 3 minutes

    Now in its second year, Autodesk and the Urban Arts Collective continue their collaboration on Hip Hop Architecture Camps, inviting local middle and high school students to re-imagine their communities and introduce STEAM education through the lens of hip hop culture.

    The 3D printing industry isn’t the only place that’s suffering from a diversity problem. In the architecture profession, for example, only 4 percent of architects are black and only 0.3 percent are black women, according to the American Institute of Architects.

    Maker of computer aided design (CAD) software Autodesk — whose products are used in both architecture and 3D printing industries — seeks to bring about positive change through their sponsorship of the Hip Hop Architecture Camp. Now in its second year, the camp will travel to 17 American cities this spring and summer.

    Hip Hop Architecture Camp sprang from the Urban Arts Collective, an organization that teaches underrepresented communities about careers in science, technology, engineering, art and math (STEAM). The camps are targeted at select students aged between 10 and 17, where they’re introduced to architecture and concepts such as urban planning.

    The kids will study rap music for elements such as structure and rhythm, and then develop ideas for how they could inform designs. They’ll also get to use Tinkercad 3D modeling software, and 3D printing models for their projects. At the end of the camp, students present their projects by writing a rap. They stage a rap battle and the winner makes a music video.

    hip hop architecture
    hip hop architecture

    Hip Hop Architecture in Action in Detroit

    “My experience at The Hip Hop Architecture Camp showed me a variety of ways to help my community, and allowed me to connect with architects who want to see young people grow and design better communities for future generations,” says former camp participant Brianna White, now aged 18 years.

    “I’m now enrolled at the University of Houston as an early high school graduate and I’m having an amazing time learning new things and meeting amazing people as I prepare to start the architecture program this summer. The Hip Hop Architecture Camp helped me discover the impact I can have on my community and I’m looking forward to returning as a volunteer.”

    During a recent camp in Detroit, participants generated schemes in response to the Michigan Department of Transportation’s proposal to remove the I-375 highway and restore it to a surface street.

    The initial planning of I-375 was highly controversial as it was constructed through the historic African American neighborhood known as Black Bottom. The camp included special guests ranging from former residents of Black Bottom, local hip hop artists, and leadership of the city planning department.

    For more information on the camps, visit hiphoparchitecture.com, and see below for the list of 2018 locations:

    • Lake City, South Carolina: April 18, 2018
    • Kansas City, Missouri: April 26, 2018
    • Milwaukee, Wisconsin: April 28, 2018
    • Bronx, New York: May 17, 2018 – May 21, 2018
    • Cleveland, Ohio: June 11- June 15, 2018
    • Portland, Oregon: June 11- June 15, 2018
    • Detroit, Michigan: June 25 – June 29, 2018
    • Madison, Wisconsin: July 9 – July 14, 2018
    • Evansville, Indiana: July 9 – July 13, 2018
    • Toledo, Ohio: July 9 – 14, 2018
    • Toronto, Canada: July 16 – July 20, 2018
    • Oxon Hill, Maryland: July 23 – July 27, 2018
    • Dorchester, Massachusetts: July 23 – July 27, 2018
    • Chicago, Illinois: August 6 – August 10, 2018
    • Tempe, Arizona: August 6 – August 10, 2018
    • St. Louis, Missouri: July 30 – August 3, 2018
    • Vancouver, Canada: September 22, 2018

    Source: Autodesk

    License: The text of „Autodesk Supporting Hip Hop Architecture Camps for Second Year“ by All3DP is licensed under a Creative Commons Attribution 4.0 International License.

    Subscribe to updates from All3DP

    You are subscribed to updates from All3DP

    Website: LINK
  • CTC Classics: Finding books with frickin’ laser beams!

    CTC Classics: Finding books with frickin’ laser beams!

    Reading Time: 6 minutes

    CTC, a project from the 2015 edition

    CTC stands for Creative Technologies in the Classroom, an initiative from Arduino Education aimed at helping teachers get up to speed with 21st century skills in the context of STEAM. We have been working with CTC since 2013, with our first experience in Castilla La Mancha, Spain. During a varying period of time, teachers are introduced to project-based learning as they run a full course with their students. At the end, teachers and students meet with their partners at a technology faire to show the result of an open-ended innovation process.

    In this article series, I present projects made by students and exhibited at CTC faires. At those events, students come and pitch their experiments in front of hundreds of thousands of their peers from schools spanning all across their region. I select some of these projects and reinterpret them as a way to inspire other groups of students and their teachers in making new, interesting, user-centric, and thrilling projects.

    What is CTC Catalunya and what makes it different?

    CTC Catalunya is the longest of Arduino’s CTC projects, having had faires since 2015. Thanks to the generosity of the EduCaixa Foundation and the help from Cesire, Catalunya’s government department, we have reached out to as many as 200 public schools at the time of writing.

    In order to achieve this, we designed a plan where the educators of different regions of Catalunya were trained in becoming trainers themselves, so that they could constitute their own regional support teams as a way to make the project sustainable over time. You can imagine that, after four years, there are many familiar faces. People have grown to like this project, and the CTC faire has become part of the educational landscape to the point that many teachers plan for it within their annual agendas.

    What about the project I chose for this blog post 

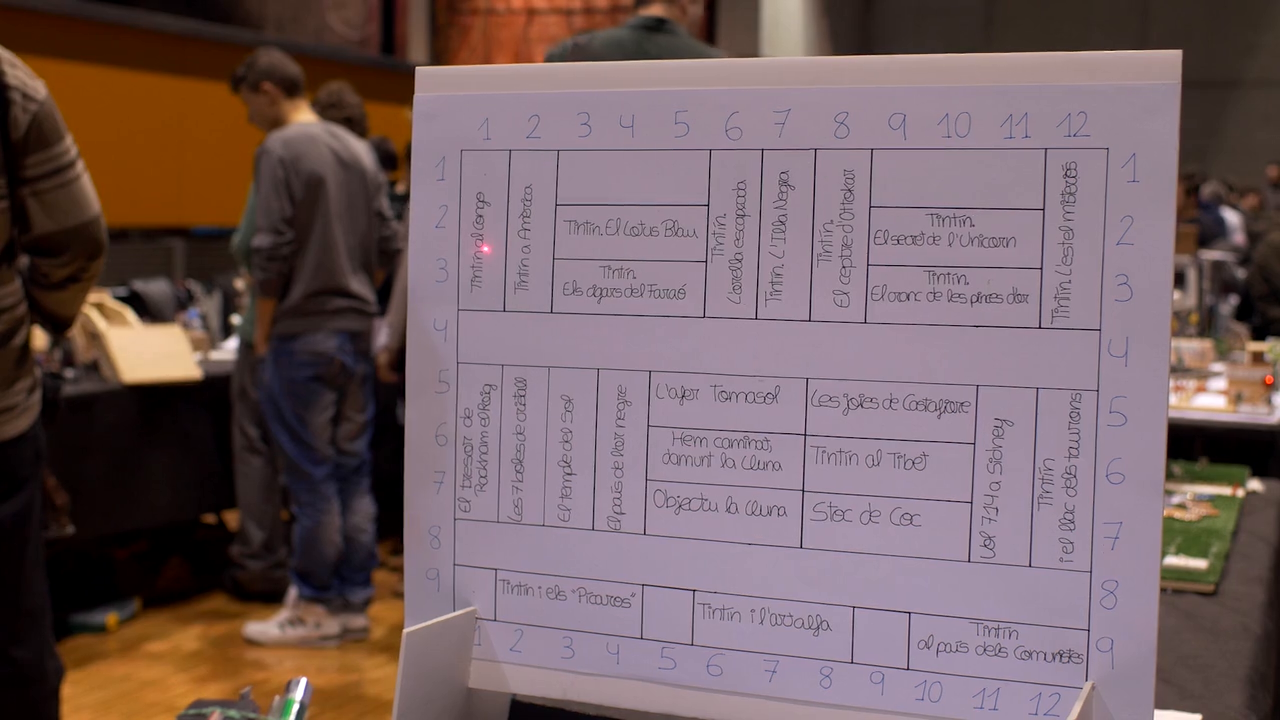
    One of my favorite projects of all-time is a system that enables you to look for books on the shelf by means of a laser pointer. Imagine you want to find that one novel; how many times have you had to browse through hundreds of your books and were unable to locate it for a while? Even if you have a database of all of your books, you would still have to make sure you place them in a certain location and need to go looking for it.

    Two students at the CTC Catalunya Faire 2015 conceived the idea of a database of books that connected to an Arduino-controlled laser, which would point to a particular book on the shelf.

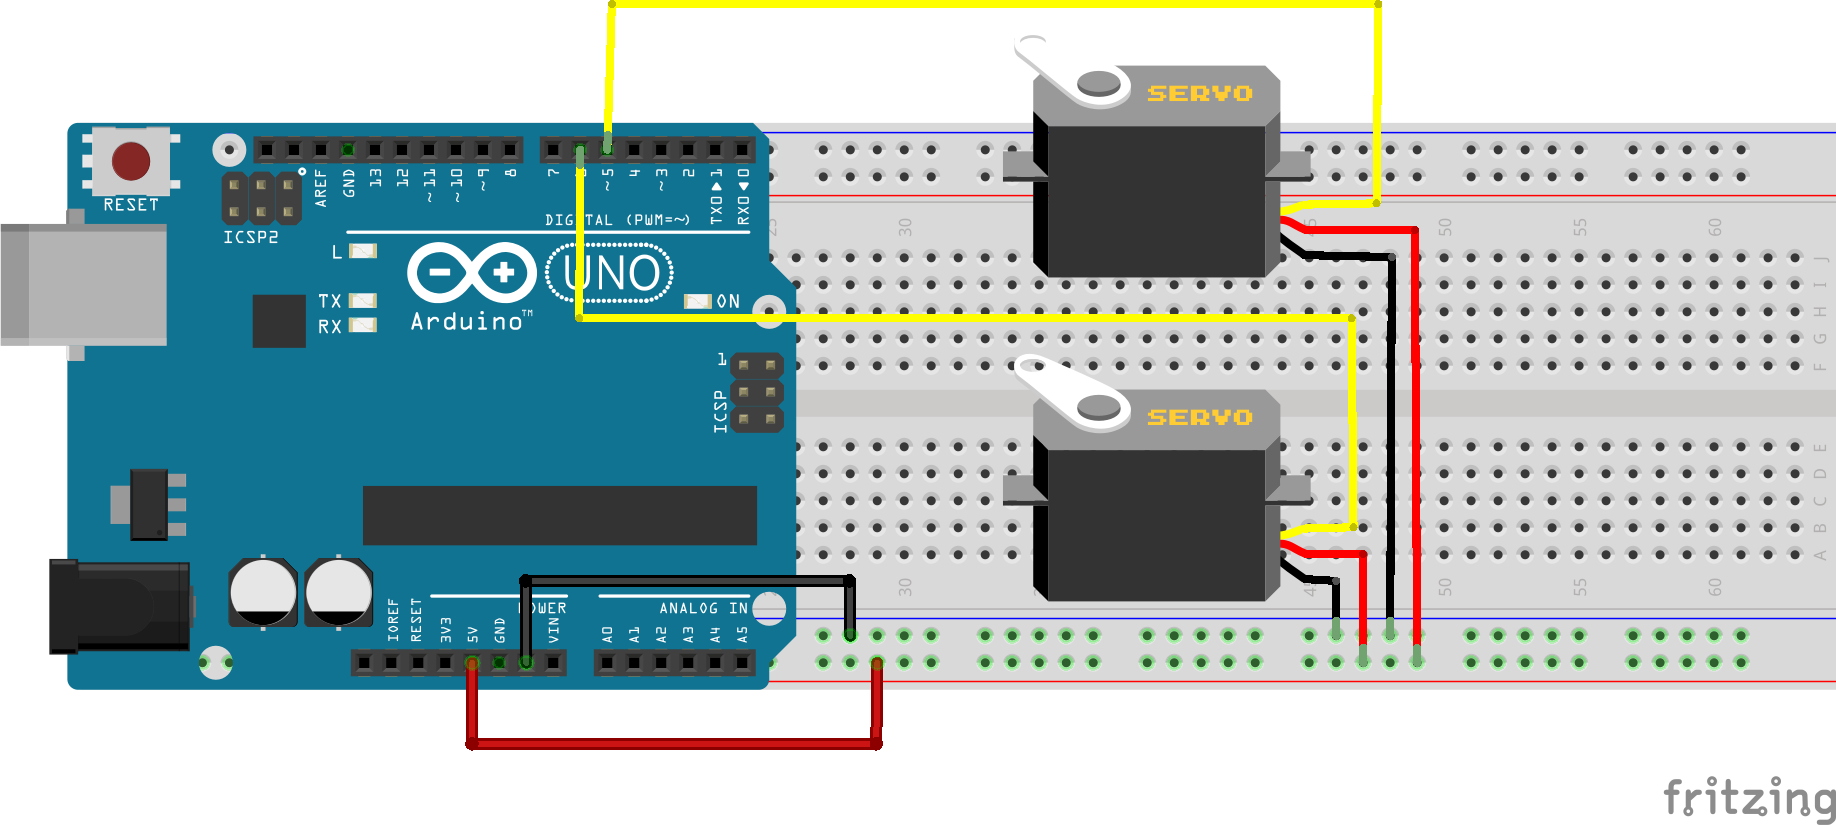
    Schematic diagram: lasers, servo motors, and some code

    As many years have passed since the project was presented, I don’t have documentation on how it was built. This is going to be a bit of the topic in this series. I am not looking at being super precise in replicating these projects; rather, my aim is provide some guidelines on how this could be made and inspire others to get the idea and improve it. If you want to see how I make things for real, I invite you to follow my livecast sessions every Thursday at 7pm CET. I’ll be implementing one project from scratch each month.

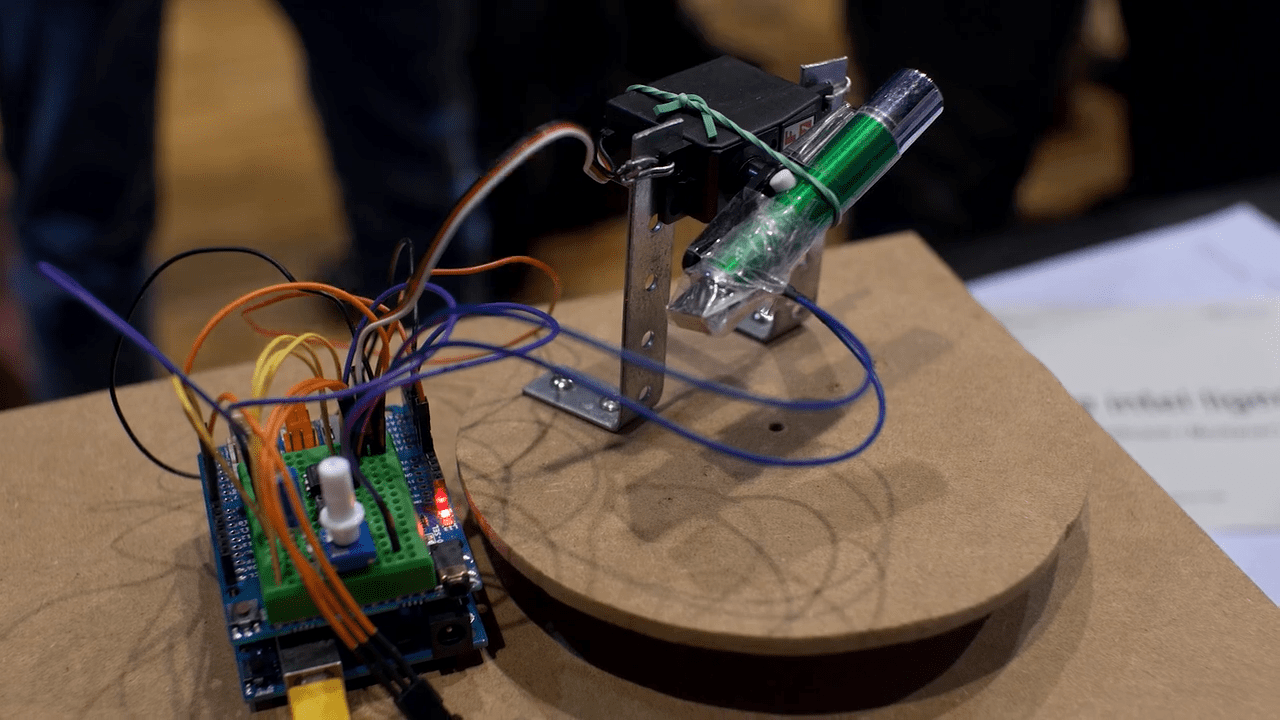
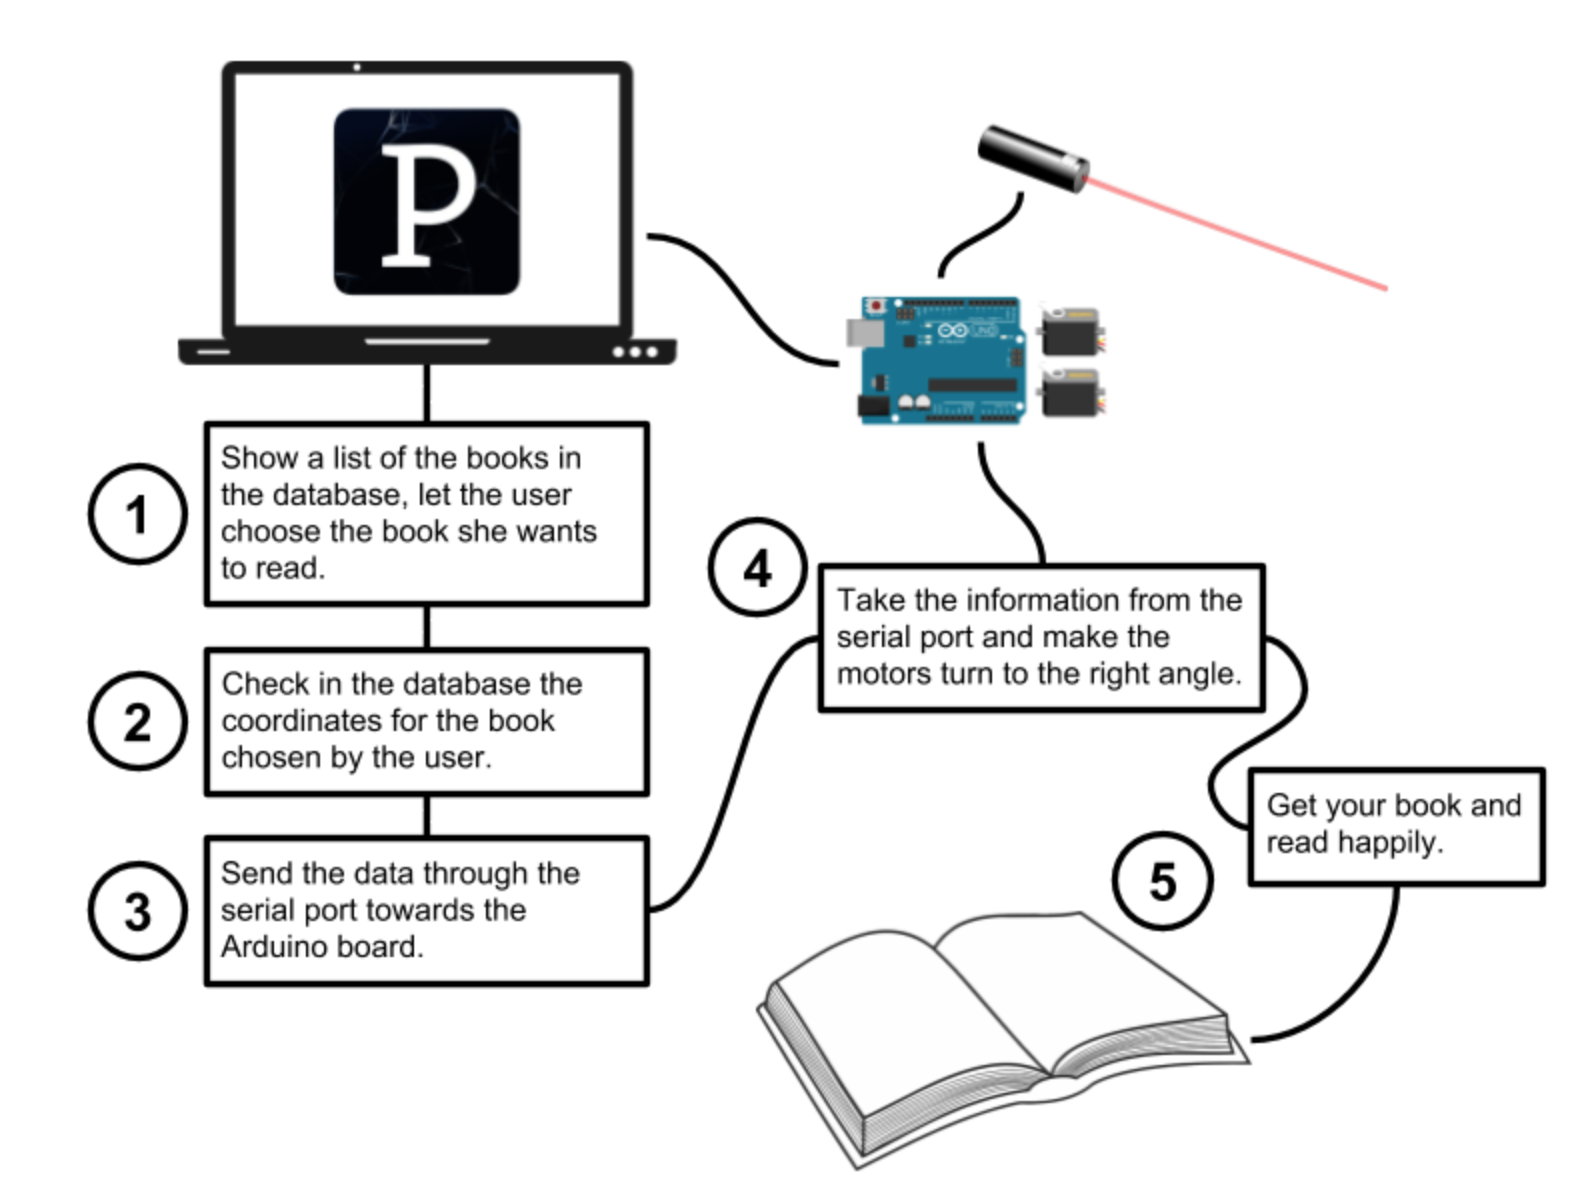
    When it comes to my understanding on how this project was built, it is clear that the students used an Arduino Uno board, a Processing sketch, two standard servo motors, and a laser pointer. I have prepared a schematic for you to see how it could work, as well as a diagram that explains the basic interactions between the Processing code and the Arduino one.

    (Here is where I have to apologize because of the diagram. I didn’t have a lot of time to enhance its appearance, but CC0 clipart images are your friend and let me make things quickly.)

    An idea of how it works

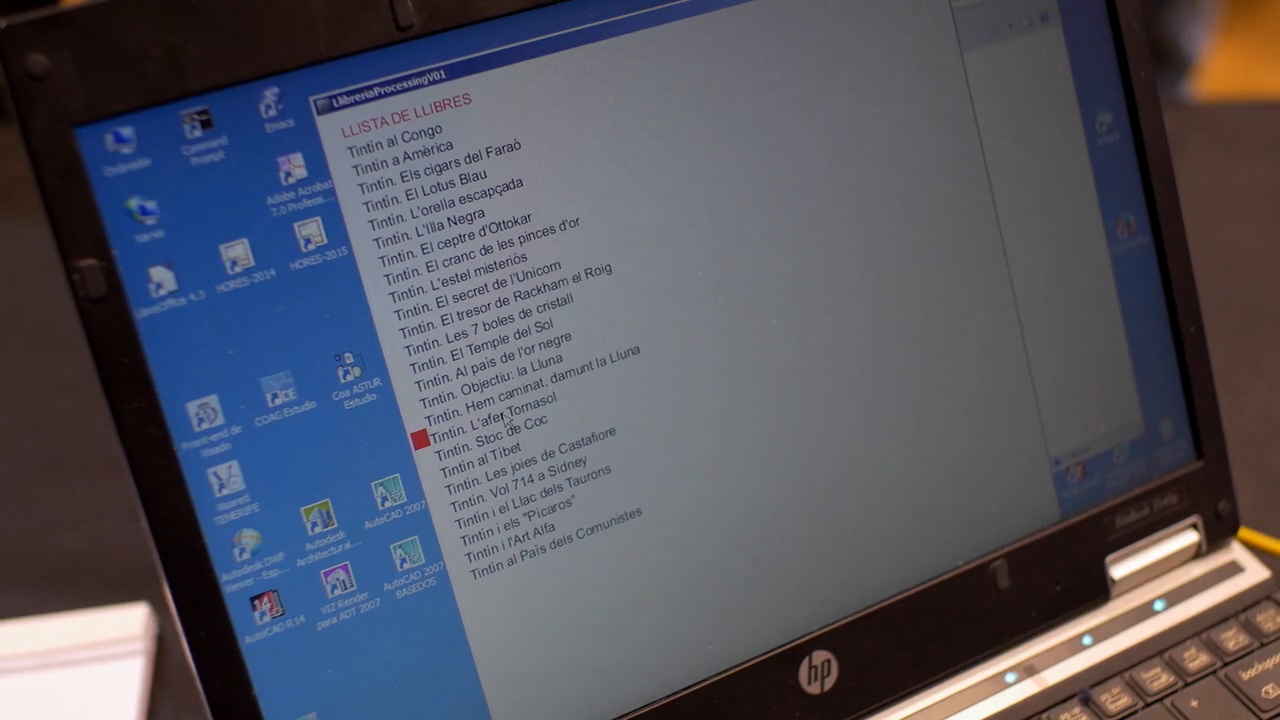
    Take a look at the flow chart above, which explains more about the project. The user will interact with the Processing sketch whenever he or she wants to search for a book. It is very likely the project that the students made had everything hardcoded in the program. In other words, the system was not letting you easily add new books to the database, but were stored in a text file that the Processing sketch would load upon boot.

    The books were presented in the form of a dropdown list for you to choose from. Once you selected one of the items in the list, the Processing sketch would send the coordinates to the servo motors. Those coordinates also had to be stored in the same text file as the names of the books. With the coordinates, that had to be the angles for each one of the servos, the pointer would be directed towards the shelves, highlighting the location of the book.

    Since this had to be shown at a faire where thousands of people would come by over a four-hour period, the students couldn’t prepare a much more complex presentation. This is why I have to make some assumptions about how far they went in their building. I also assume that they had to think through the ways to calibrate everything, since they didn’t have a lot of time to set up. The project worked flawlessly for the entire faire.

    This is why I like it so much

    At home we like books, we always have. When I was a kid, my parents had books in the living room, the dining room, mine and my brother’s room. As an adult, I have bought thousands of books and read every week. We own a 7m long bookshelf where books are sorted by color. When we discuss a project or think about possible ideas for what to build next, we look through our books. After a while, finding books is a time-consuming activity. I need one of these book-finding robots in my home!

    Other projects with lasers?

    You’ve likely seen at least one of the servo-controlled laser pointer projects for entertaining your cats here, here, or even here. Those are just one example of the fun things you can do with Arduino and lasers. In the context of CTC, there is actually a whole series of projects using laser diodes for creating music instruments. But that is an entirely different story, If you want to read about it, stay tuned for more adventures in CTC at the Arduino blog!

    The CTC Caire was supported by Cesire at the Generalitat de Catalunya and the EduCaixa foundation.


    Website: LINK
  • 3D Printed Tastebugs Challenge Children to Eat Insects

    3D Printed Tastebugs Challenge Children to Eat Insects

    Reading Time: 3 minutes

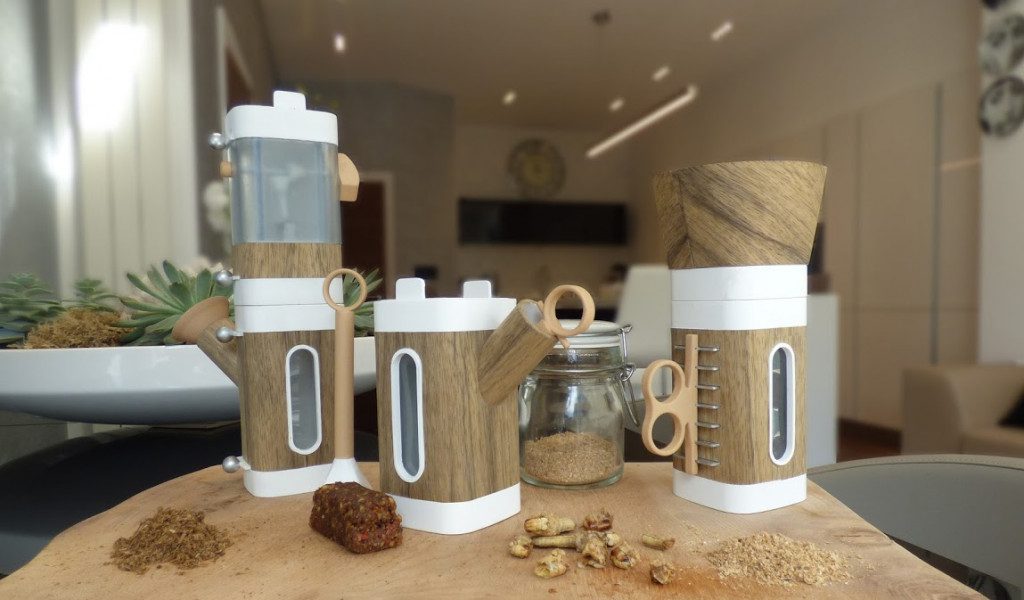
    Tastebugs is a 3D printed modular kitchen utensil to teach children about the benefits of eating insects. We may squirm now, but it’s likely that bugs will make it to our plates very soon. 

    Would you feed your children bugs? With consumers becoming more conscious of the impact of eating unsustainable food, it’s believed that we’ll soon begin turning to insects.

    However, there is still a long way to go in terms of normalizing eating bugs. But one student from Northumbria University in the UK is using 3D printing to get the next generation on side.

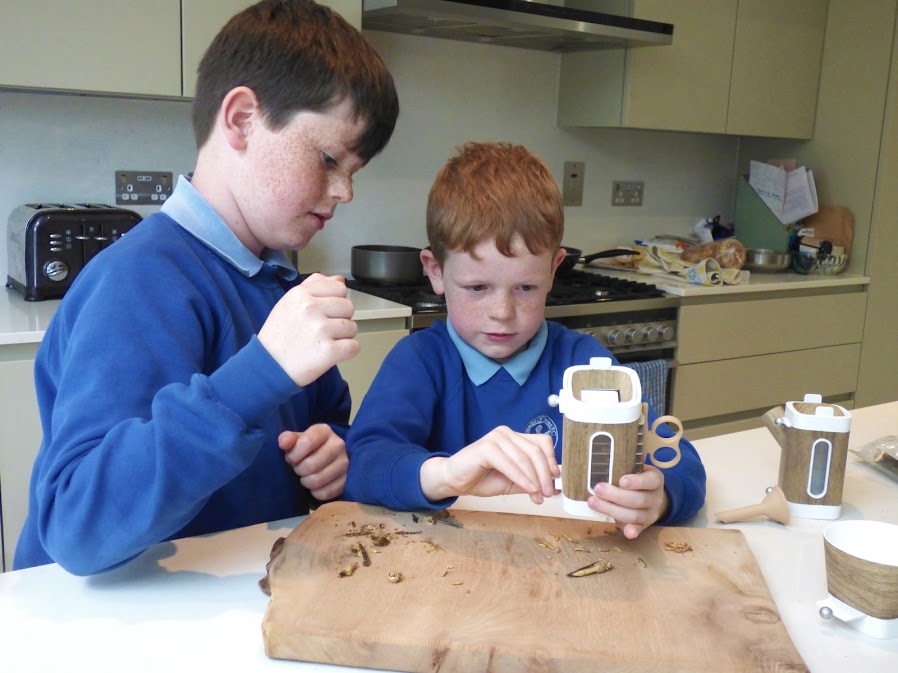
    Student Jay Cockrell entered his modular kitchen utensil, called Tastebugs, for the 3D Hubs Student Grant. The utensil’s purpose is to get children familiar with handling, preparing and eating insects. It’s also toy-like and easy for kids to use.

    Still wondering why you should try eating bugs? As well as being far more sustainable than beef (due to requiring less water and energy), insect powder is full of omega and amino acids, low in sugar and also up to 65%+ protein.

    Cockrell’s first step in creating Tastebugs was to work out how the utensil could be fun. He chose to go with a modular design, making the utensil stackable. 3D printing was used to create the design as it was affordable but also the best way to get the right geometries and final material finishes.

    Tastebugs
    Tastebugs

    TasteBugs for Breakfast…?

    Each component has a specific use for preparing bugs. For example, Cockrell designed dicer and mill to cut the insects, a funnel to get them in position, a compactor to make bug bars, and an infuser to create insect stock.

    Components can all be detached or attached, making it possible to dice your bugs then turn them into a bar. Or funnel them into position before milling them down.

    To create each module, Cockrell used a mixture of SLA and FDM printers. By using 3D printing it’s possible to make parts on demand. Better yet, Cockrell relied on 3D Hubs to source his parts and received 25% student discount.

    Each module’s main housing is made from Formlabs standard resin. This gives a smooth surface finish. The windows are made using DSM Somos Watershed. The final look has that of a tree, this was done using wood-look vinyl.

    The small accessories and handles were made using PLA filament. Finally, the 3D printed parts are assembled using internal metal components.

    Future plans for Tastebugs are to introduce the kit to schools and educate children about the benefits of eating bugs. Insects could be a staple on menus a lot sooner than we might expect.

    Source: 3D Hubs

    Tastebugs
    Tastebugs

    License: The text of „3D Printed Tastebugs Challenge Children to Eat Insects“ by All3DP is licensed under a Creative Commons Attribution 4.0 International License.

    Subscribe to updates from All3DP

    You are subscribed to updates from All3DP

    Website: LINK
  • Chromebook tablets for versatile learningChromebook tablets for versatile learningGroup Product Manager

    Chromebook tablets for versatile learningChromebook tablets for versatile learningGroup Product Manager

    Reading Time: < 1 minute

    This past January, students in Kristine Kuwano’s third grade classroom were buzzing with excitement at De Vargas Elementary School in Cupertino, California. Tasked with writing out math equations to upload to Google Classroom, the students grabbed their new tablets from the cart, pulled out the stylus, and logged into Chrome. “They love technology and they have grown up working with touch devices, so tablets are intuitive for them,” said Kuwano.

    Since their debut, schools have chosen Chromebooks because they are fast, easy-to-use and manage, shareable, secure and affordable. We’ve listened carefully to feedback from educators around the world, and one common theme is that they want all the benefits of Chromebooks in a tablet form.

    Starting today, with the new Acer Chromebook Tab 10, we’re doing just that. It’s the first education tablet made for Chrome OS, and gives schools the easy management and shareability of Chromebook laptops. With touch and stylus functionality, this lightweight device is perfect for students creating multimedia projects—and also comes with a world of immersive experiences with Google Expeditions AR.

    Website: LINK
  • Astro Pi upgrades launch today!

    Astro Pi upgrades launch today!

    Reading Time: 3 minutes

    Before our beloved SpaceDave left the Raspberry Pi Foundation to join the ranks of the European Space Agency (ESA) — and no, we’re still not jealous *ahem* — he kindly drafted us one final blog post about the Astro Pi upgrades heading to the International Space Station today! So here it is. Enjoy!

    We are very excited to announce that Astro Pi upgrades are on their way to the International Space Station! Back in September, we blogged about a small payload being launched to the International Space Station to upgrade the capabilities of our Astro Pi units.

    Astro Pi Raspberry Pi International Space Station

    Sneak peek

    For the longest time, the payload was scheduled to be launched on SpaceX CRS 14 in February. However, the launch was delayed to April and so impacted the flight operations we have planned for running Mission Space Lab student experiments.

    To avoid this, ESA had the payload transferred to Russian Soyuz MS-08 (54S), which is launching today to carry crew members Oleg Artemyev, Andrew Feustel, and Ricky Arnold to the ISS.

    Ricky Arnold on Twitter

    L-47 hours.

    You can watch coverage of the launch on NASA TV from 4.30pm GMT this afternoon, with the launch scheduled for 5.44pm GMT. Check the NASA TV schedule for updates.

    The upgrades

    The pictures below show the flight hardware in its final configuration before loading onto the launch vehicle.

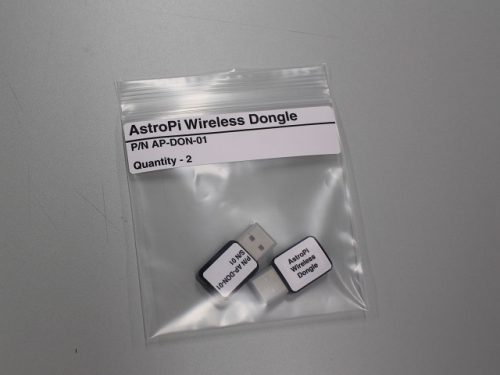
    Wireless dongle in bag — Astro Pi upgrades

    All access

    With the wireless dongle, the Astro Pi units can be deployed in ISS locations other than the Columbus module, where they don’t have access to an Ethernet switch.

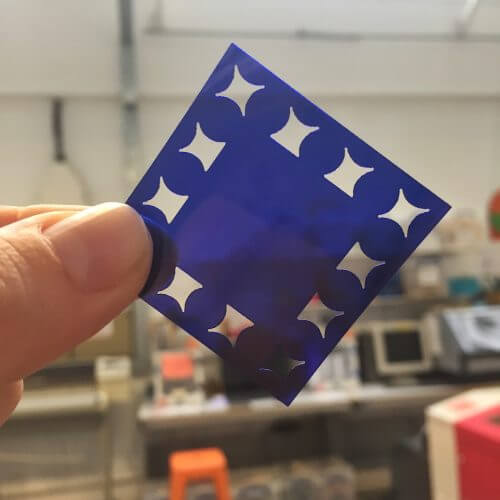
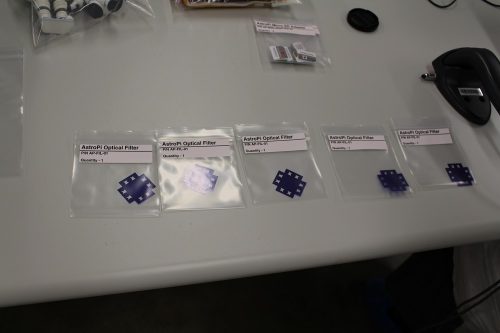
    We are also sending some flexible optical filters. These are made from the same material as the blue square which is shipped with the Raspberry Pi NoIR Camera Module.

    Optical filters in bag — Astro Pi upgrades

    #bluefilter

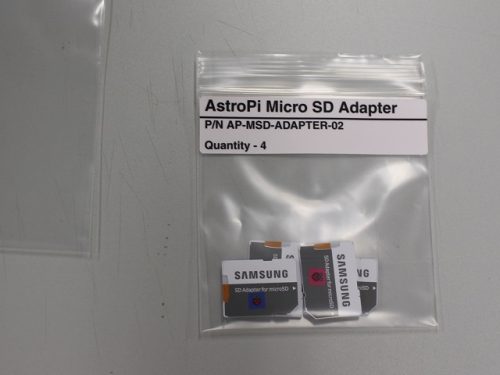
    So that future Astro Pi code will need to command fewer windows to download earth observation imagery to the ground, we’re also including some 32GB micro SD cards to replace the current 8GB cards.

    Micro SD cards in bag — Astro Pi upgrades

    More space in space

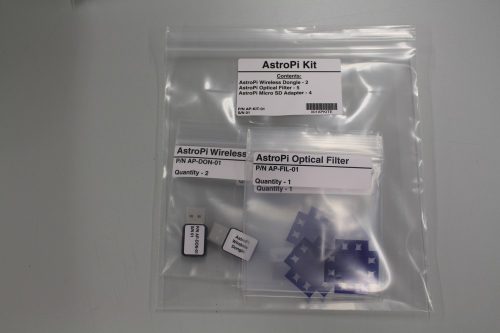
    Tthe items above are enclosed in a large 8″ ziplock bag that has been designated the “AstroPi Kit”.

    bag of Astro Pi upgrades

    It’s ziplock bags all the way down up

    Once the Soyuz docks with the ISS, this payload is one of the first which will be unpacked, so that the Astro Pi units can be upgraded and deployed ready to run your experiments!

    More Astro Pi

    Stay tuned for our next update in April, when student code is set to be run on the Astro Pi units as part of our Mission Space Lab programme. And to find out more about Astro Pi, head to the programme website.

    Website: LINK
  • Desafío STEM 2017/18 in Spain

    Desafío STEM 2017/18 in Spain

    Reading Time: 3 minutes

    Desafío STEM 2017/18 in Spain

    dcuartiellesMarch 20th, 2018

    Telefónica Educación Digital, the education branch of Spanish telecommunications company Telefónica, arranged a contest for students in the fields of Science, Technology, Engineering and Math (STEM) for the second year. While the 2016/17 edition of the contest was launched only in Spain, 2017/18’s took place in Latin America as well. Just a week ago, the jury came to the final result for the current Spanish edition.

    In the first edition, we in Arduino Education created an educational kit and content to assist a team of mentors that would in turn work with teachers all across Spain in helping them building projects within the limits of the contest. In the 2017/18 edition, we collaborated on a series of webinars for teachers hosted last fall. In both editions, I have acted as one of the jury members. The level of projects is pretty high in average. Considering that many of the participants come from secondary schools, it is quite impressive to see how they embrace the latest technological developments like IoT or VR and make meaningful projects out of those.

    The winners of the Spanish version of the contest are invited to a trip to CERN to visit the place where things happen in science: the particle accelerator. Over 1,500 innovations were presented by seven-member teams within the categories established by TED: IoT, Industry 4.0, e-health, digital education, cybersecurity, and other technological projects. From those 1,500, the jury had to work really hard to come up with the final results. If you are among the non-chosen ones, you should know that the gap between the top 50-or-so projects was incredibly tight.

    The following list highlights the four teams that were awarded by the jury. I have translated the information about the teams, but the videos from the students are only in Spanish. I hope you will find them as thrilling as I do!

    Project 1

    • Title: AGROTECH
    • Topic: Livestock automation system
    • Level: Advance (junior high and vocational education)
    • Theme: Industry 4.0
    • School: Instituto de Educación Secundaria LOS OLMOS
    • City: Albacete
    • Description: AGROTECH implements a prototype to automate the systems to manage livestock. Using Arduino and a series of sensors, it is possible to monitor and refill the livestock’s food and water, control the light and ventilation of the stables, report alarms like fire or intrusions and eliminate leftovers. All information is captured in real-time and displayed on a website.

    [youtube https://www.youtube.com/watch?v=tk5b5tKjl78?feature=oembed&w=500&h=281]

    Project 2

    • Title: Virtual Detective (Detective Virtual)
    • Topic: Virtual reality spaces
    • Level: High (upper secondary)
    • Theme: Digital education
    • School: Colegio María Virgen
    • City: Madrid
    • Description: Virtual Detective is a virtual, guided tour to the school. The students have hidden a series of challenges along the way that are related to different school subjects. The virtual space is a gamified version of the class that helps the kids learn in an alternative way.

    [youtube https://www.youtube.com/watch?v=DMHTDvR4wDM?feature=oembed&w=500&h=281]

    Project 3

    • Title: Recycling Is for Everyone (REPT, Reciclar Es Para Todos)
    • Topic: Other technological projects
    • Level: Junior (lower secondary)
    • Theme: Digital education
    • School: Colegio Santo Domingo
    • City: Santa Cruz de Tenerife
    • Description: REPT is a trash bin prototype that can classify the leftovers and will run a lottery among those recycling once the bin has been sent to the recycling station.

    [youtube https://www.youtube.com/watch?v=hW231DEPjSk?feature=oembed&w=500&h=281]

    Project 4

    • Title: ALPHAPSI
    • Topic: VR platform for the diagnosis and treatment of students with special educational needs
    • Level: Advance
    • Theme: Digital education
    • School: Colegio Calasancio Hispalense
    • City: Sevilla
    • Description: ALPHAPSI consists of an application made in Processing that connects to a VR head-mounted display capable of detecting the wearer’s head movements. Thanks to a series of tests consisting of tracking an object moving in the VR space, the system can follow the movements and will help generating a diagnosis and treating students with attention disorders.

    [youtube https://www.youtube.com/watch?v=lRjwn17-1u4?feature=oembed&w=500&h=281]

    The Desafío STEM project is an initiative of Telefonica Educacion Digital and their project STEMbyme


    Website: LINK
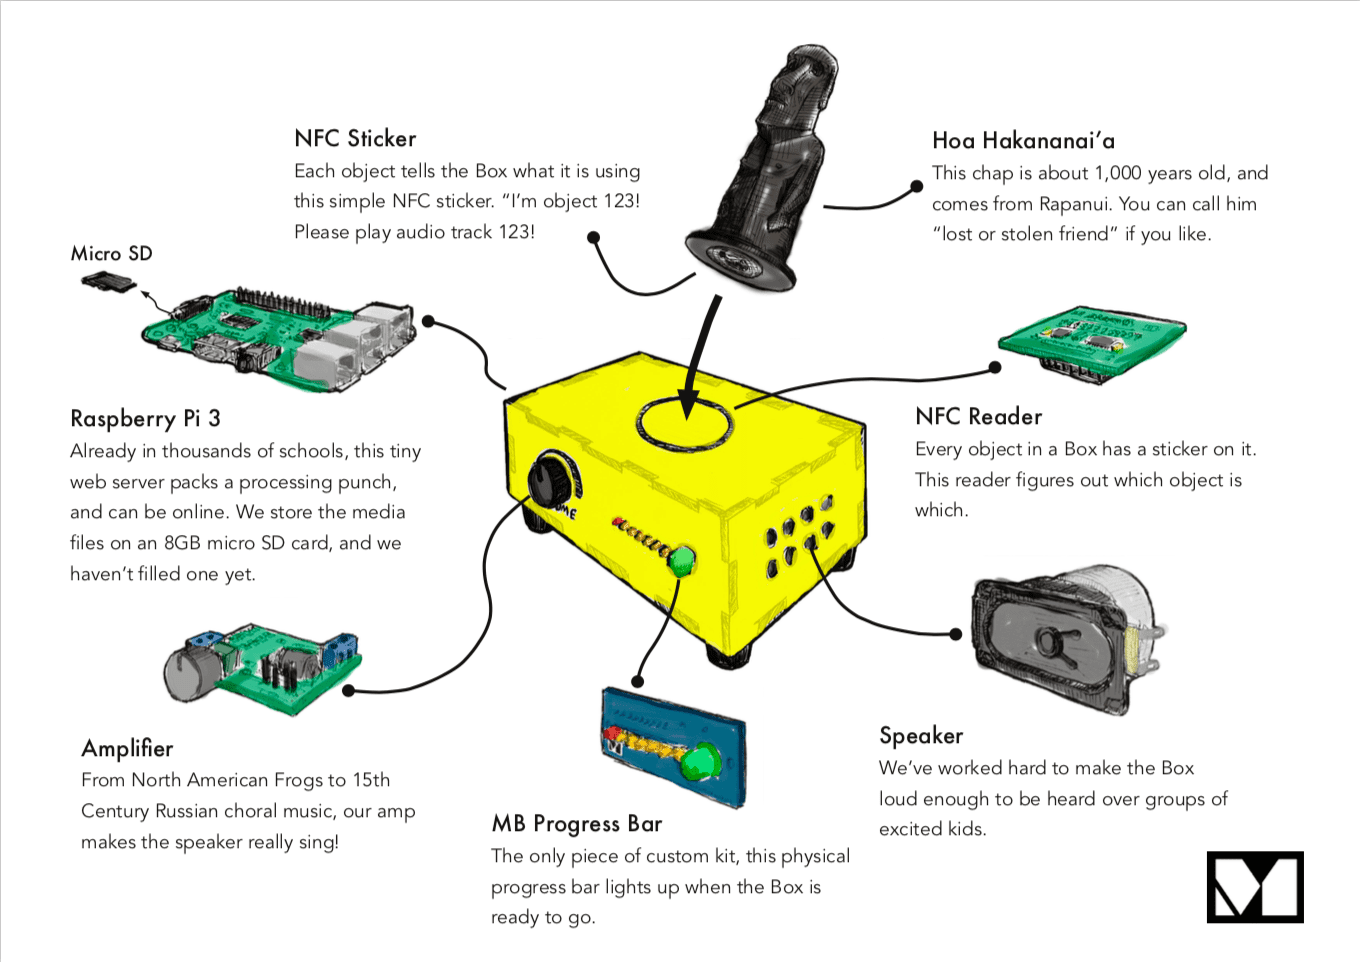
  • Our 2017 Annual Review

    Our 2017 Annual Review

    Reading Time: 3 minutes

    Each year we take stock at the Raspberry Pi Foundation, looking back at what we’ve achieved over the previous twelve months. We’ve just published our Annual Review for 2017, reflecting on the progress we’ve made as a foundation and a community towards putting the power of digital making in the hands of people all over the world.

    In the review, you can find out about all the different education programmes we run. Moreover, you can hear from people who have taken part, learned through making, and discovered they can do things with technology that they never thought they could.

    Growing our reach

    Our reach grew hugely in 2017, and the numbers tell this story.

    By the end of 2017, we’d sold over 17 million Raspberry Pi computers, bringing tools for learning programming and physical computing to people all over the world.

    Vibrant learning and making communities

    Code Club grew by 2964 clubs in 2017, to over 10000 clubs across the world reaching over 150000 9- to 13-year-olds.

    “The best moment is seeing a child discover something for the first time. It is amazing.”
    – Code Club volunteer

    In 2017 CoderDojo became part of the Raspberry Pi family. Over the year, it grew by 41% to 1556 active Dojos, involving nearly 40000 7- to 17-year-olds in creating with code and collaborating to learn about technology.

    Raspberry Jams continued to grow, with 18700 people attending events organised by our amazing community members.

    Supporting teaching and learning

    We reached 208 projects in our online resources in 2017, and 8.5 million people visited these to get making.

    “I like coding because it’s like a whole other language that you have to learn, and it creates something very interesting in the end.”
    – Betty, Year 10 student

    2017 was also the year we began offering online training courses. 19000 people joined us to learn about programming, physical computing, and running a Code Club.

    Over 6800 young people entered Mission Zero and Mission Space Lab, 2017’s two Astro Pi challenges. They created code that ran on board the International Space Station or will run soon.

    More than 600 educators joined our face-to-face Picademy training last year. Our community of Raspberry Pi Certified Educators grew to 1500, all leading digital making across schools, libraries, and other settings where young people learn.

    Being social

    Well over a million people follow us on social media, and in 2017 we’ve seen big increases in our YouTube and Instagram followings. We have been creating much more video content to share what we do with audiences on these and other social networks.

    The future

    It’s been a big year, as we continue to reach even more people. This wouldn’t be possible without the amazing work of volunteers and community members who do so much to create opportunities for others to get involved. Behind each of these numbers is a person discovering digital making for the first time, learning new skills, or succeeding with a project that makes a difference to something they care about.

    You can read our 2017 Annual Review in full over on our About Us page.

    Website: LINK
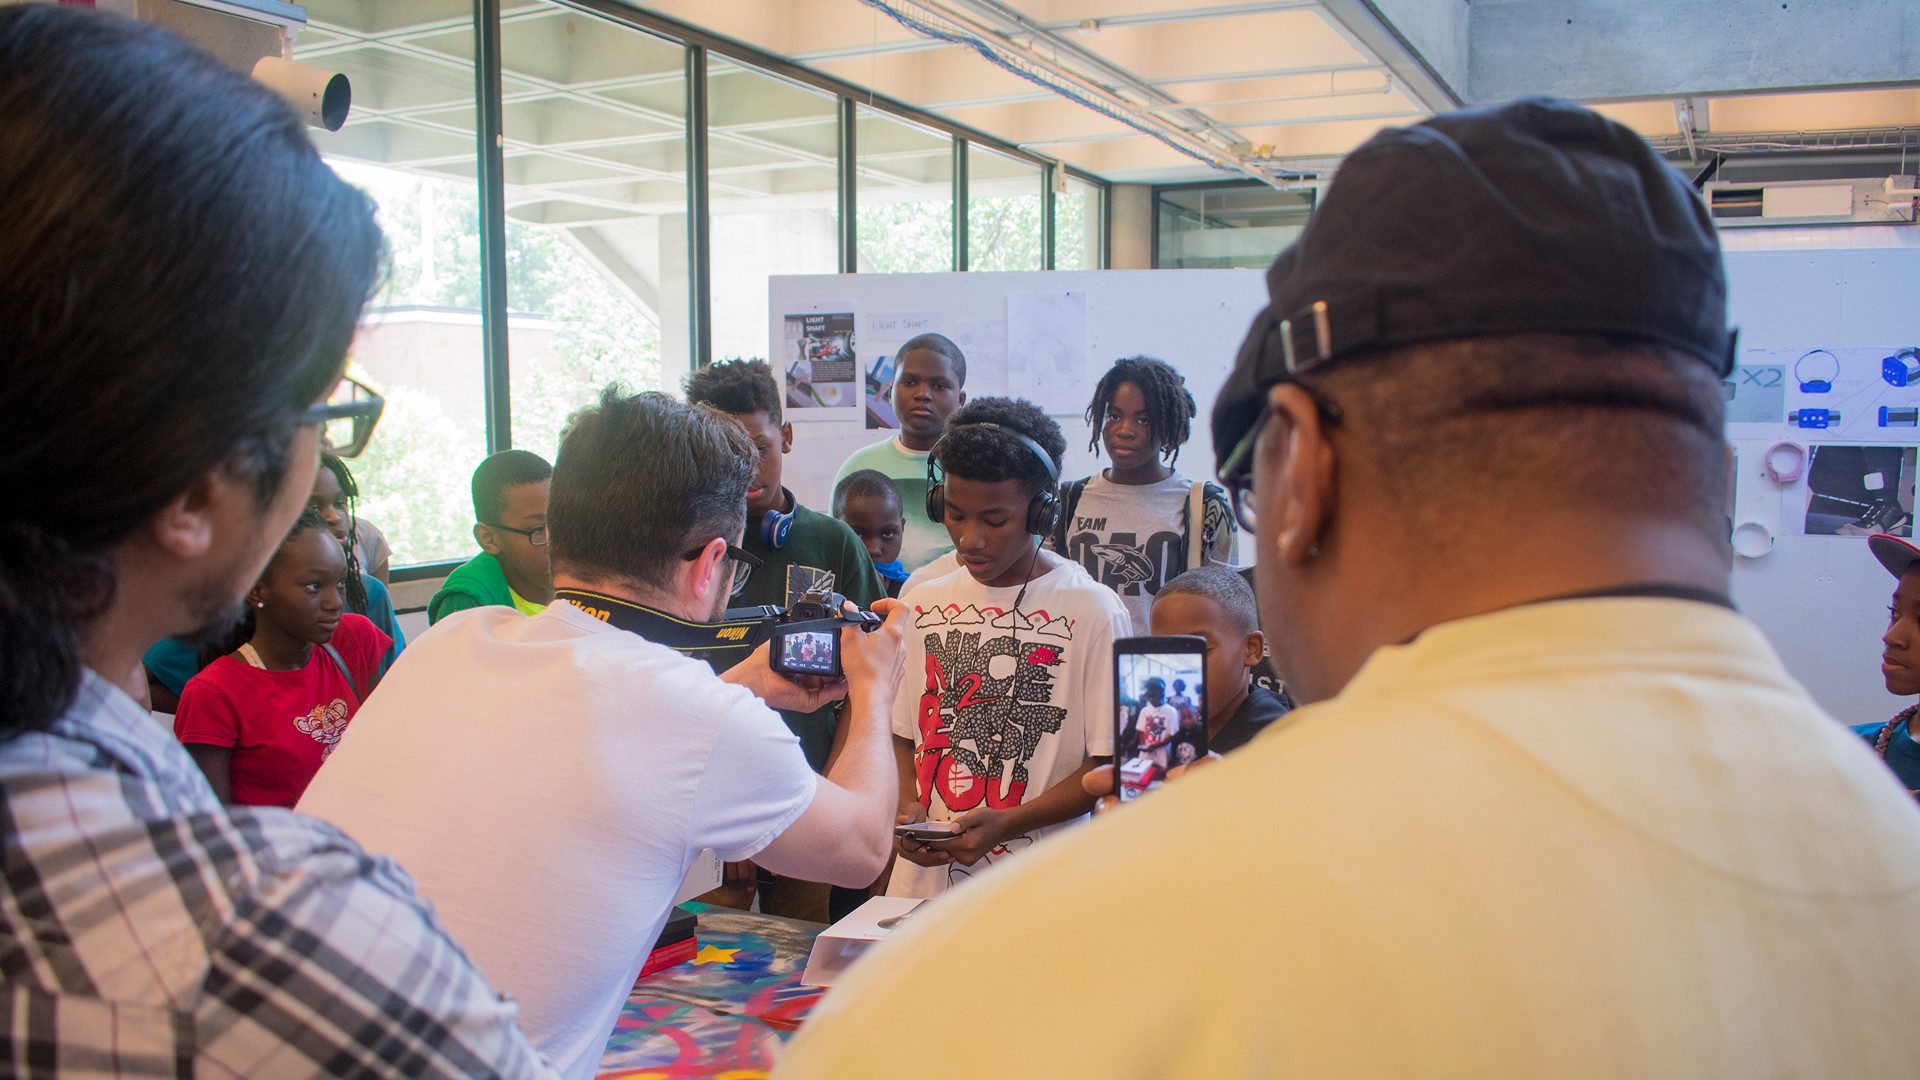
  • 3D Printing and Distributing the Fittle Puzzle to Help People in India Learn Braille

    3D Printing and Distributing the Fittle Puzzle to Help People in India Learn Braille

    Reading Time: 3 minutes

    Fittle is the world’s first 3D printed braille puzzle which is open source. It helps visually impaired people in India learn to read braille quickly and efficiently.

    In India, 22 million people are visually impaired and many of them can’t find work. The ability to read braille offers them a chance to be more independent. In fact, by learning how to read braille, a visually impaired person can triple their chance of higher education and employment.

    However, the tools to learn are expensive. A digital braille reading device can cost over $1,000 alone. This means the majority of people in developing countries go without or have to make do with outdated tools that are boring to the learner.

    A project in India has devised a braille learning tool which is more accessible, cost-effective, and engaging. It’s called Fittle and is the “world’s first 3D printed braille puzzle”. accessible

    To make the puzzle accessible to everyone, fittles are open source and freely available to download from the Fittle website. These files can then be printed for a cheap cost and are hollow to save on material usage.

    Fittle Puzzle Feedback is Overwhelmingly Positive

    How does Fittle work? Every part of the puzzle has a different letter, and connected parts spell out a complete word. But the ingenious thing is how the overall puzzle also takes the shape of what’s being spelled.

    Marks on the pieces help the learner know how to fit them together and once they’re in place, it’s possible to read and learn the word.

    Initially the first Fittle prototype was made from wood. However, 3D printing provided a cheaper alternative and enables people to more easily source the files for fabrication.

    Fittle is the work of Indian designer Tania Jain. He has been collaborating with LVPEI, India’s leading eye institute, Ravensburger, the German educational toy company, and Serviceplan, the independent global communication group.

    The puzzles are already being printed and distributed across India. Christoph Bohlender, Creative Director at Serviceplan Health & Life, says: “Feedback has been overwhelming so far. More and more children are learning braille better with Fittle.”

    Fittle 3D prints puzzles on Ultimaker 2+ 3D printers and then distributes them to LVPEI’s regional centers. Here, braille learners can enjoy using the puzzle.

    3D printing is saving a lot of money. For example, with $10,000 it’s possible to create 16,000 Fittle puzzles instead of only providing only 200 braille books or four digital braille readers.

    You can find out more about Fittle by visiting the website and help support their work through donations.

    Source: Ultimaker


    Fittle


    License: The text of „3D Printing and Distributing the Fittle Puzzle to Help People in India Learn Braille“ by All3DP is licensed under a Creative Commons Attribution 4.0 International License.

    Subscribe to updates from All3DP

    You are subscribed to updates from All3DP

    Website: LINK