Schlagwort: Door Lock
-

Three-factor authentication is the new two-factor authentication
Reading Time: 3 minutesTwo-factor authentication continues to provide our online selves with more security for our email and online banking. Meanwhile, in the physical world, protecting our valuables is now all about three-factor authentication. Not sure what I mean? Here’s a video from Switched On Network that demonstrates how to use a Raspberry Pi to build…
-

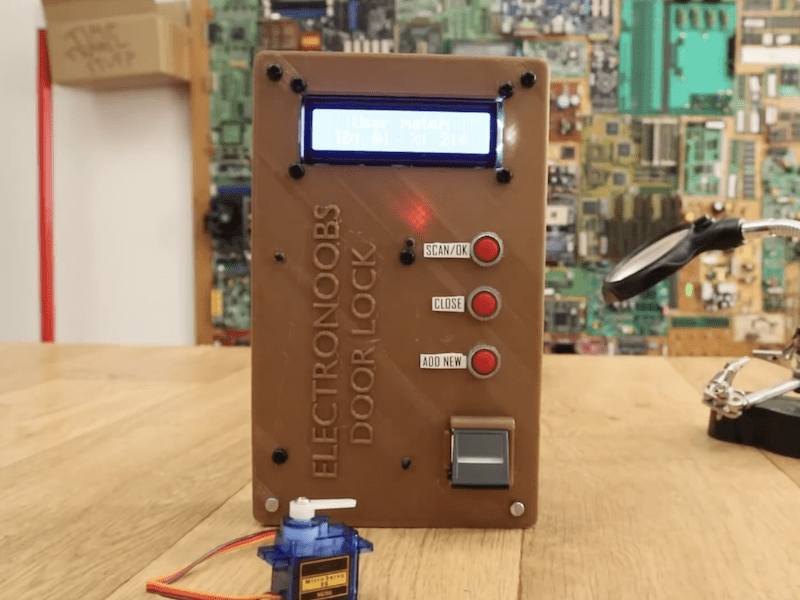
Build an Arduino Mega fingerprint door lock
Reading Time: 2 minutesBuild an Arduino Mega fingerprint door lock Arduino Team — September 13th, 2018 If you don’t want to carry keycard or memorize a passcode, this build from Electronoobs might be just the thing. The system uses a fingerprint reader to check to see if you have access, and if approved, the device’s…