Schlagwort: button

  • NASA control panel lights up kids’ imaginations

    NASA control panel lights up kids’ imaginations

    Reading Time: 2 minutes

    NASA control panel lights up kids’ imaginations

    Arduino TeamDecember 17th, 2020

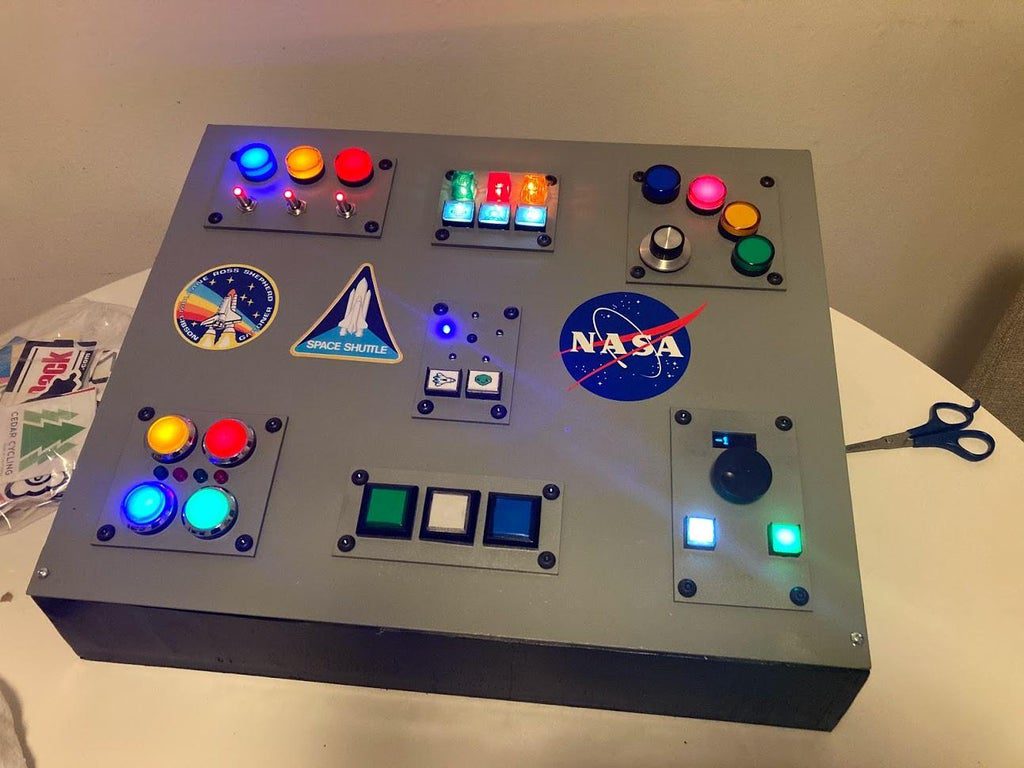
    As a gift for his sister-in-law who runs a daycare, “r570sv” built a NASA-inspired control panel for the kids there to use. She had enjoyed seeing an earlier – and perhaps less kid-friendly – version that he made, so this would seem to be a great Christmas present.

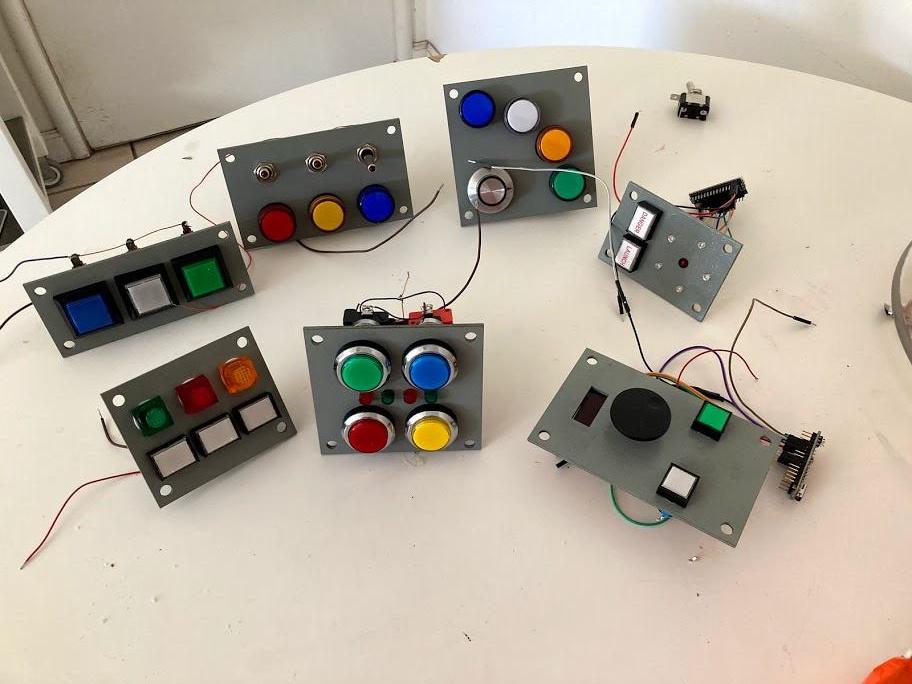
    The device is constructed out of plywood, painted, and decorated with various space emblems. Electronics are attached via six bolt-on panels, with four containing simple lights and switches, and the other two featuring individual Arduino boards. One of these flashes different LED patterns depending on which of its two buttons are pushed, and the other uses an encoder and screen to scroll through numbers.

    As shown in the video below, with a little child-like imagination, it would be perfect for all kinds of adventures!

    [youtube https://www.youtube.com/watch?v=a1cHrXZAL0c?feature=oembed&w=500&h=281]

    Website: LINK

  • 10 most popular modules and sensors for the Arduino UNO all on one board

    10 most popular modules and sensors for the Arduino UNO all on one board

    Reading Time: 2 minutes

    10 most popular modules and sensors for the Arduino UNO all on one board

    Arduino TeamDecember 1st, 2020

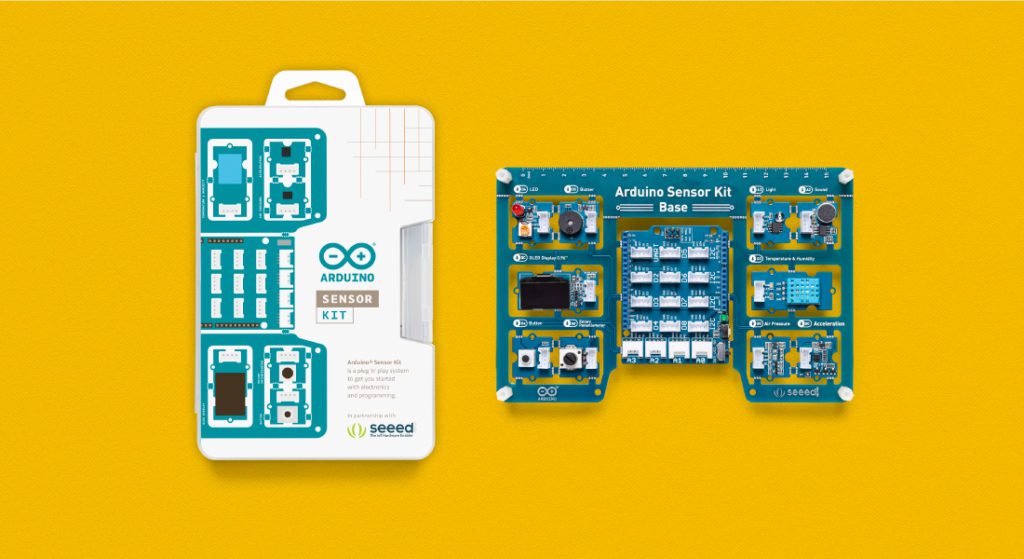
    Getting started with electronics and sensing the world around you is now easier than ever with the new all-in-one Arduino Sensor Kit from Arduino, in partnership with Seeed.   

    The 10 most popular modules and sensors for your Arduino UNO have been integrated onto a single board, providing plug-and-play convenience without the need for any soldering or wiring! Combining basic Grove sensors and actuators for the Arduino UNO, the kit contains a base shield featuring the following modules that can be connected either through the digital, analog, or I2C connectors:

    • An OLED screen
    • 4 digital modules (LED, button, buzzer and potentiometer)
    • 5 sensors (light, sound, air pressure, temperature, and accelerometer)

    Just plug the Arduino Sensor Kit into the Arduino UNO, then you’re ready to follow the Plug, Sketch & Play online lessons that make getting started a breeze.

    The kit is equipped with 16 Grove connectors, which when placed on the board, offer functionality to the various pins. With seven digital connections, four analog connections, four I2C connections, and a UART connection, the base shield can be easily mounted onto an Arduino UNO board and programmed through the Arduino IDE. 

    Now available from the Arduino Store, the Arduino Sensor Kit comes as a standalone kit for only €23.00 / US$23.00, or can be purchased with the Arduino UNO Rev3 board as a great value bundle for €38.70 / US$38.70. For more details, check out our website here.

    Website: LINK

  • How to use a button with a Raspberry Pi

    How to use a button with a Raspberry Pi

    Reading Time: < 1 minute

    Here’s our latest How to use video, showing you how to connect a button to your Raspberry Pi.

    HOW TO USE a BUTTON with Raspberry Pi

    Learn how to use a tactile button with your Raspberry Pi. They’re a great addition to any digital making project! Subscribe to our YouTube channel: http://rp…

    Connect a button to Raspberry Pi

    Attaching a button to your Raspberry Pi is a great way of introducing digital making into your coding experience. Use it to play music, turn lights on and off, or even shut down your device.

    Follow our other How to use videos to learn how to use a servo motor, LED, and Raspberry Pi camera module with your Raspberry Pi. Try linking them together to build something grander, such as a digital camera, a robot, or a music box.

    How to use Raspberry Pi

    You’ll find a full list of our current How to use videos here – be sure to subscribe to our channel for more content as we release it.

    Website: LINK

  • How to Remove Shut Down Button from Windows Vista and 7 Login Screens?

    How to Remove Shut Down Button from Windows Vista and 7 Login Screens?

    Reading Time: 2 minutes

    Here we start the tutorial:

    1. We’ll need to edit „%windir%\System32\authui.dll“ file. First copy authui.dll file from „System32“ folder to some other location for example Desktop.

    Note: here %windir% represents „Windows“ directory which can be found in the system drive where Windows is installed. In most of the cases its C:\Windows.

    2. Now open the new file in Resource Hacker.

    3. Now press „Ctrl+F“ keys or select „Find Text“ option from „View“ menu.

    4. Type Shutdown in Find what text box. Click on „Find Next“ button and it’ll go to following lines:

    <element id=“atom(ShutDownFrame)“ layout=“flowlayout()“>
    <button id=“atom(ShutDown)“ accname=“resstr(12128)“ tooltip=“true“/>
    <button id=“atom(ShutDownOptions)“ accname=“resstr(12131)“ accdesc=“resstr(12131)“ tooltip=“true“ shortcut=“115″/>

    5. Replace the last 2 lines of code with following:

    <element id=“atom(ShutDownFrame)“ layout=“flowlayout()“>
    <button id=“atom(ShutDown)“ accname=“resstr(12128)“ tooltip=“true“ layoutpos=“none“/>
    <button id=“atom(ShutDownOptions)“ accname=“resstr(12131)“ accdesc=“resstr(12131)“ tooltip=“true“ shortcut=“115″ layoutpos=“none“/>

    Guess what? We are only adding an extra string layoutpos=“none“ at the end of each line.

    6. That’s it, click on „Compile Script“ button and save the file.

    7. Now we’ll need to replace original authui.dll file present in „C:\Windows\System32\“ folder with our new authui.dll file which we saved at Desktop or some other location.

    7 a. First take ownership of „C:\Windows\System32\authui.dll“ file using following tutorial:

    Add Take Ownership Option in File / Folder Context Menu in Windows Vista and 7

    7 b. Now rename it to „authui_backup.dll“ or any other name.

    7 c. Now copy your new modified „authui.dll“ file from Desktop to „System32“ folder.

    PS: If you are using 64-bit Windows edition, you’ll also need to replace authui.dll file present in „C:\Windows\sysWOW64\“ folder.

    8. Restart your system and after restart Windows will start using your new modified file and you’ll not see the „Shutdown“ button on login screen.

    PS: Windows Vista „authui.dll“ file contains only a single instance of (ShutDown) string, so you’ll need to replace it only once using Step 3 and 4 but Windows 7 contains 3 instances of this string, so you’ll need to change all the 3 instances in the file.


    Official Source: http://www.askvg.com/how-to-remove-shutdown-button-from-windows-vista-and-7-login-screens/