Schlagwort: arduino

  • Arduino here, there, and at all the EDU faires!

    Arduino here, there, and at all the EDU faires!

    Reading Time: 6 minutes

    Arduino All Over

    With the arrival of Spring, just prior to the ending of the academic year in Spain, teachers and education initiatives have been celebrating STEAM events all over the country. I personally attended RoboCampeones in Fuenlabrada, a small city outside Madrid, but there were a lot more: Robolot, FanTec, Cantabrobot, Granabot, ROByCAD, and even the technology and education conference PR3D.

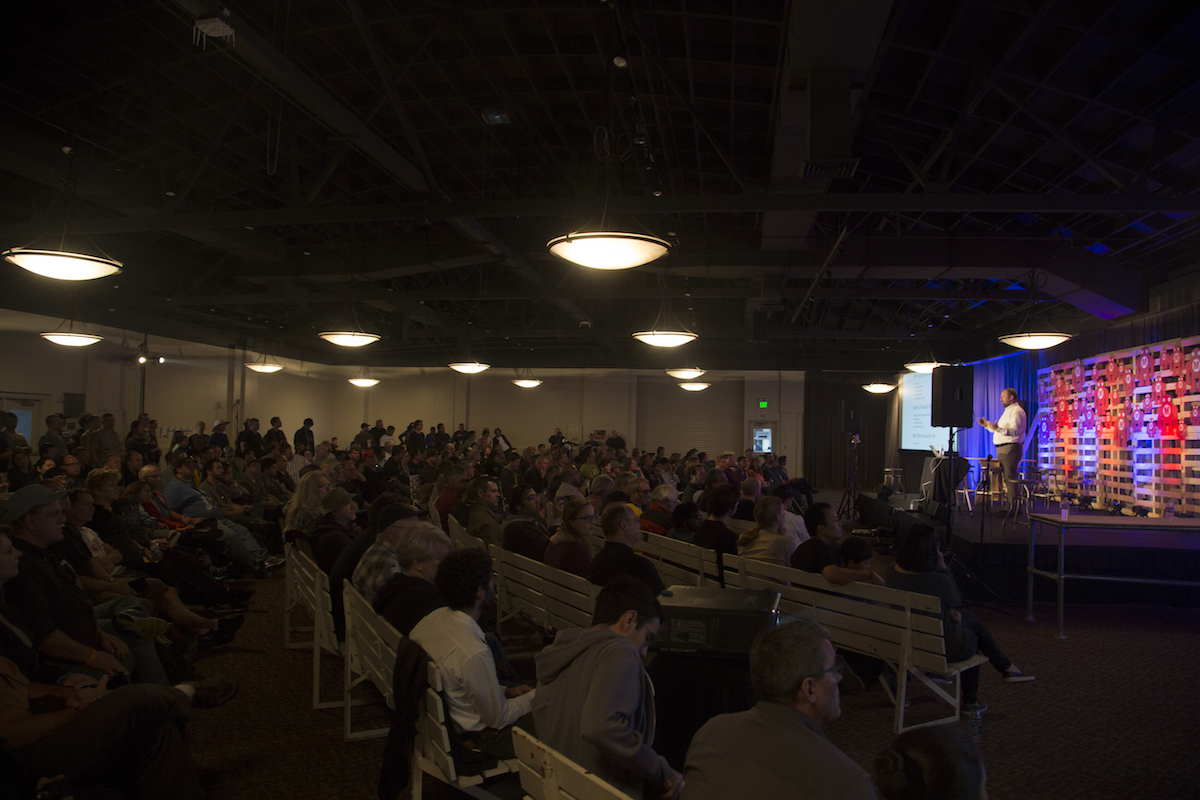
    Arduino has been present in all of the above-mentioned events, as reported by many of the students, teachers, parents, regional representatives, and distributors, that were on hand. I had the opportunity of interviewing a whole lot of students at RoboCampeones as well as Victor, one of the organizers of many of the 15 editions of the event, and Mati, a teacher from one of the schools participating.

    Since the interviews were in Spanish and while I consider putting some work in making the subtitles to the videos, I have already published some of the interviews to the  Arduino EDU LiveCast playlist, which you could find here.

    This is the interview made to Victor, the main organizer. In one sentence he said that RoboCampeones is the largest event of its type in Spain (CTC Catalunya 2018 had more students, but not coming from all over the country as in RoboCampeones).

    [youtube https://www.youtube.com/watch?v=HxiQpF_EKiY?feature=oembed&w=500&h=281]

    Mati, from the IES Sefarad in Toledo, comments about here experience and about how much students get motivated in making better projects year after year.

    [youtube https://www.youtube.com/watch?v=LeFdk2rfhl0?feature=oembed&w=500&h=281]

    Robocampeones in Numbers

    2018’s RoboCampeones represents the 15th edition of the event. It has not always been in Fuenlabrada, as it was an itinerating event for a while, and it has not always been having so much Arduino involved. In Victor’s words, it started as a Lego competition, but in 2011 through the intervention of Mati and her college Julio from the IES Sefarad school in Toledo, RoboCampeones added the “open category” to the competition. This category was not only opening up for the participants to use other technologies in the competition (which consisted of the traditional sumo, line following, and rescue challenges), but also brought in a couple of years later the possibility for students to present whatever project they had done in a faire-like environment.

    This year’s event had 2,000 participants, plus 1,000 kids that came just to watch. This is, in my opinion, an interesting trend that I have seen at the CTC Faires as well: not only do kids come to showcase their projects or to compete in challenges of different nature, they also come to see what others have done. It is certainly fun to observe some of the projects, see the robots fight on the tatami, and engage in endless conversations about how this or that has been built.

    There were over 100 projects in the open category, which took a substantial portion of Fuenlabrada’s Fernando Martin basketball court (where the event took place), 176 Arduino sumo robots, and more than 20 different prizes. You can check out the pictures taken by one of our historical moderators to the Spanish forum and contributor to many open projects in Spain, Juan Manuel Amuedo aka @ColePower.

    The Competition

    At RoboCampeones, participants compete in getting the most points from the audience, in addition to being the best in the competition. The 2018 edition included a special challenge where teams had to build and command two teleoperated robots (using Bluetooth from cell phones) to compete in moving a certain amount of colored balls from the center to a corner of a squared tatami. Just imagine two teams, two robots per team (thus four players) and 16 balls of different colors rolling on the tatami… messy and fun at the same time!

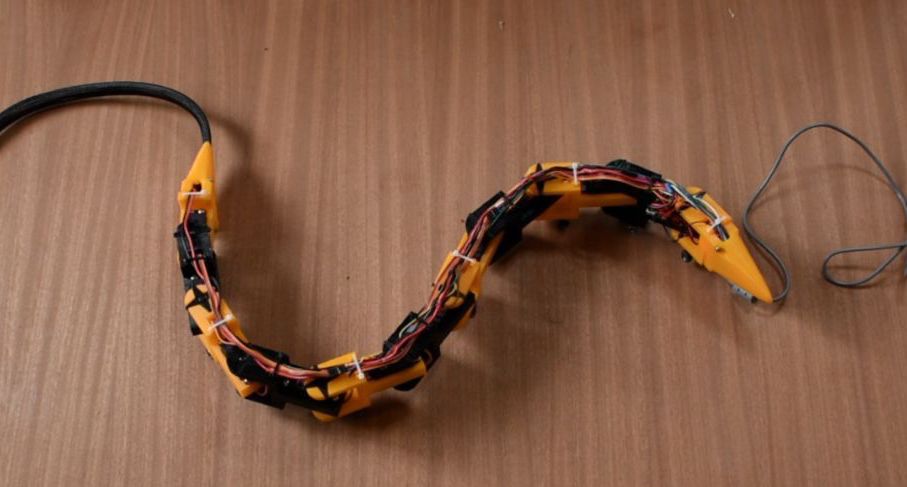
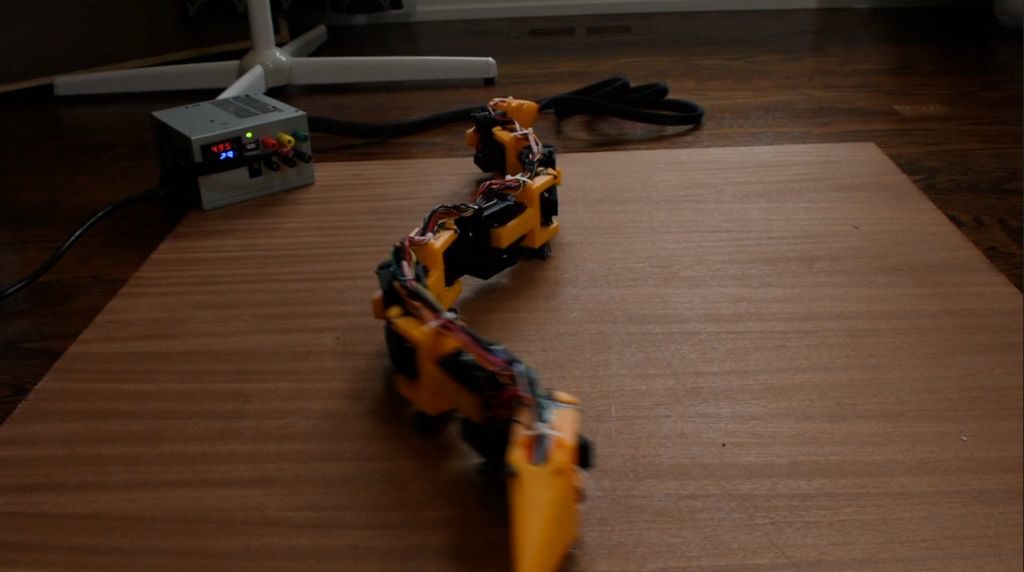
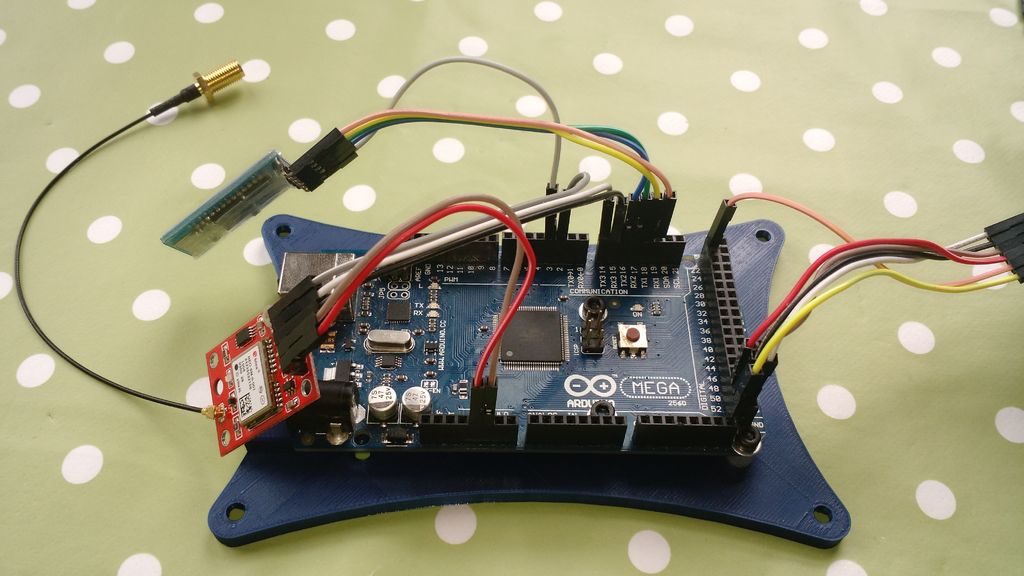
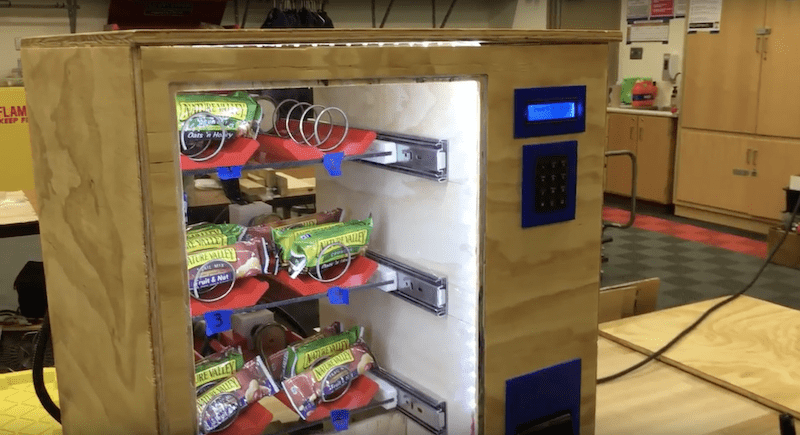
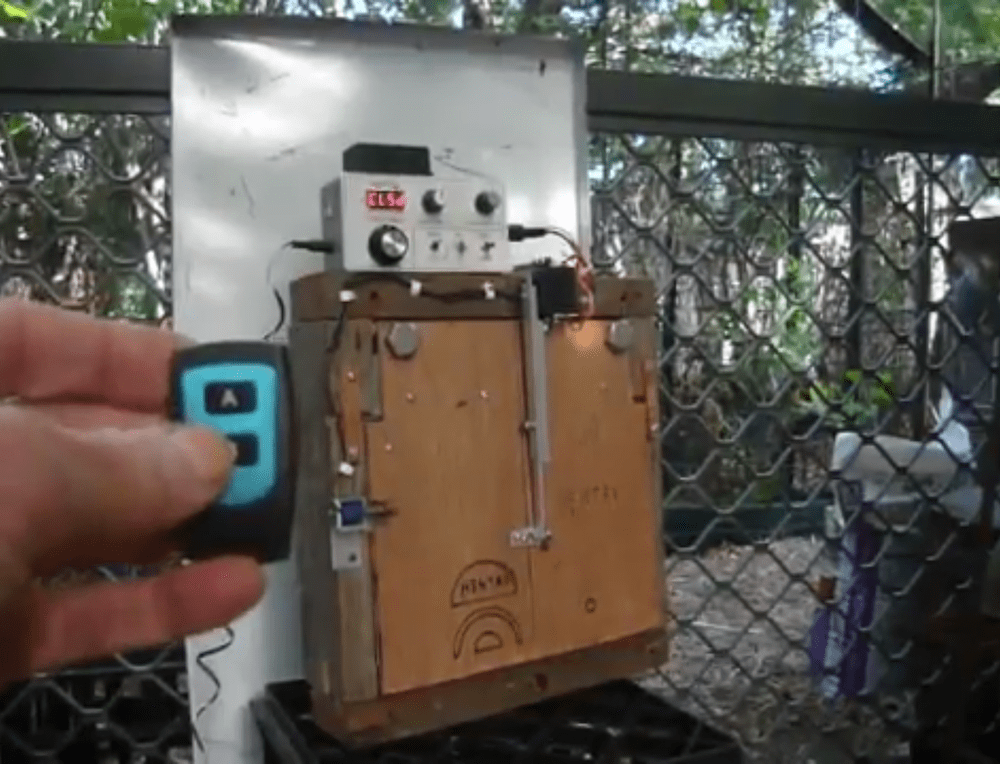
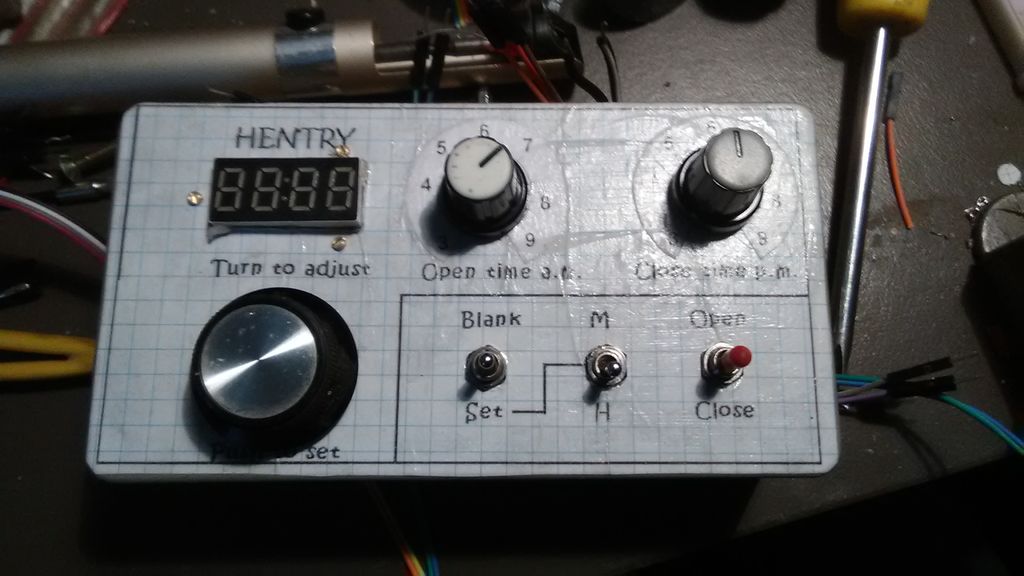
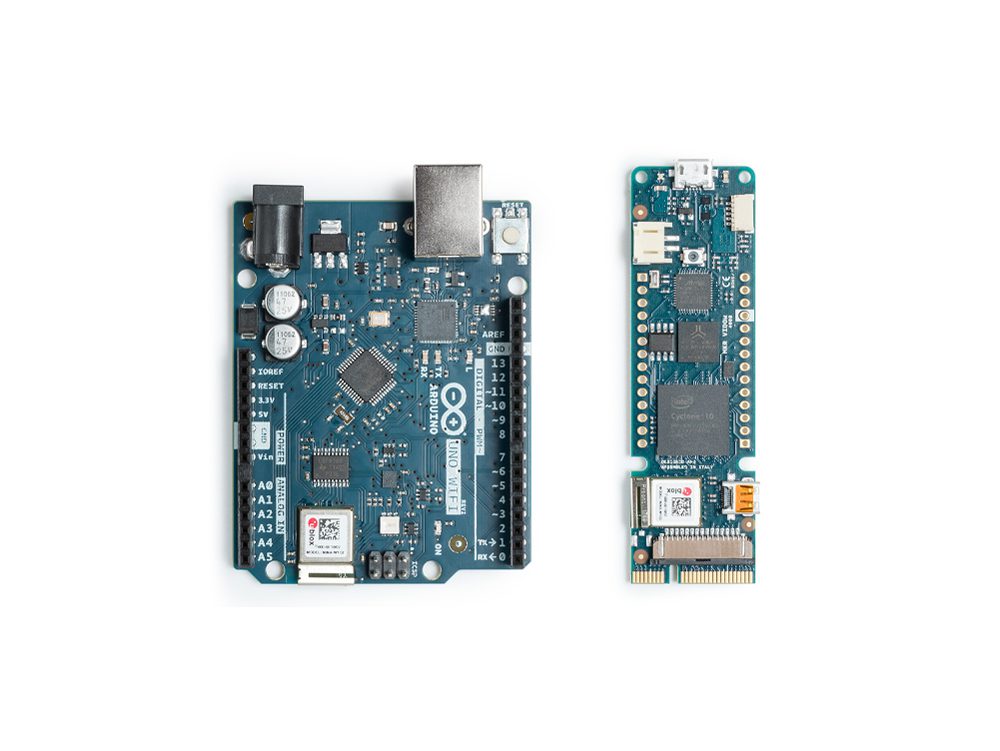
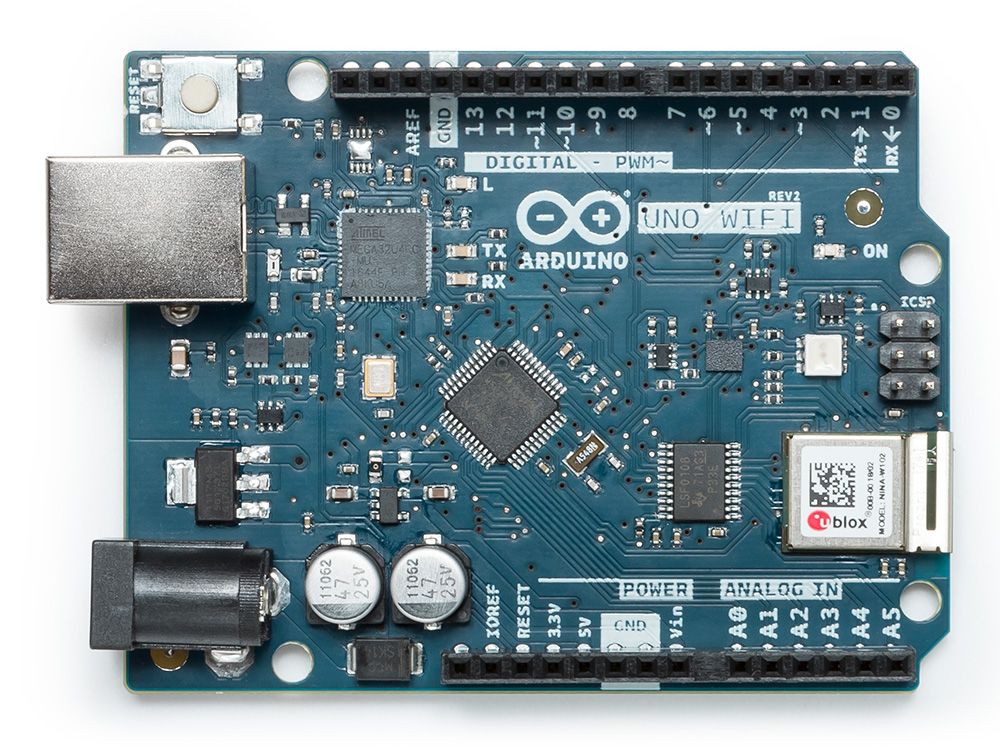
    The other categories were: sumo, rescue, 3D printing, and the open category. I was invited to deliver the prize to the best Arduino project in the open category based on my opinion (yes, I had the chance to judge for a project all by myself!). It was a hard competition, something you can see from the videos. I loved a candy delivering box made by a bunch of 11-year-old kids from Jaenthe eco-friendly shower by three girls from the region, or the funny robot head for dancing at events by yet another couple from Madrid. However, if I have to choose a project that displays excellence in its execution, I voted for the solar airplane-drone designed to fly with a 2kg cargo. It had two different Arduino boards controlling different parts of the operation of the drone: telemetry + flight control, and battery management. They made their own PCBs, installed telemetry equipment, and even implemented a text to speech mechanism so that anyone with a walkie-talkie in the 433Mhz band could connect to the drone and listen to it saying aloud all of the sensor data. See here the interview I made to Julian, one of the boys in the team.

    [youtube https://www.youtube.com/watch?v=c-w5hq_w6Ds?feature=oembed&w=500&h=281]

    The Trick: Open Your Lab After Lunch

    When asking teachers and students how they managed to get so many incredibly relevant projects made during the formal education time, I got a uniform response from them: you (teacher) need to change you class’ methodology and follow PBL centred one. Furthermore, the lab needs extra opening hours. According to the educators, kids demand the technology class (or dedicated lab) to be opened after lunch time, once the class-day has come to an end, for them to continue experimenting and building their projects. Different schools figured out different ways to make it happen: teachers spend some administration hours sitting in the lab and let the kids do, teachers delegate responsibility in older students that want to volunteer and help their schoolmates, the lab management was included in the school’s library management that had to be opened anyway, etc.

    This is again something we have experienced with CTC. Technology needs to become much more transversal and become part of different subjects, labs have to be open longer, we need to re-think the management of creative spaces at schools, and the school management has to integrate these activities as part of the overall pedagogic plan of the school. Technology is an important part of our lives, and at school it has to play the same role and have resources at the same level as gymnastics, physics, or other classes in the need for experimental settings.

    Other Events

    There were other events happening throughout Spain over the last couple of weeks. The following list should give you an idea as to how relevant empirical technology classes are becoming:

    • Robolot: A two-day robotics festival now in its 17th edition, which took place in Olot, and included robotics competition, a STEAM area, had workshops, lectures, and other side events.
    • FanTec: The technology teachers association from Andalucia celebrated the 3rd edition of their faire at the Faculty of Telecommunications and Informatics at the University of Malaga. They have an extensive program with a long selection process, prizes, and visits to museums. 
    • ROByCAD: Cadiz, also in Andalucia, hosted its first robotics day on May 25th. 
    • Granabot: Once more in Andalucia, a couple of enthusiast teachers arranged two days of activities including Arduino Day. 
    • Cantabrobot: In northern Spain, a small robotics festival in Colindres, Cantabria gathered 700 enthusiasts.

    To the question of who paid for all of these, typically teachers arrange the events on a volunteer basis, get donated spaces from the regional or local governments, prizes contributed by companies, and sometimes even received grants to help those having to travel long distances to participate in the event.

    Credits 

    All the images featured in this blog are courtesy of ColePower. 

    Website: LINK

  • This Arduino-controlled robot slithers like a snake

    This Arduino-controlled robot slithers like a snake

    Reading Time: 2 minutes

    This Arduino-controlled robot slithers like a snake

    Arduino TeamJune 11th, 2018

    Would you like to create a robot that slithers from place to place like a snake? Well now you can, thanks to this bio-inspired design from Will Donaldson. 

    Donaldson’s project uses 10 metal gear servos to allow his robotic snake to curl its body back and forth, sliding along on small wheels that replace a real serpent’s bottom scales. An Arduino Nano controls its 10 segments, and power is provided by an external tether from a recycled desktop power supply. 

    As shown in Donaldson’s video, he’s been experimenting with several different snake builds and forms of locomotion. These include an inchworm-style gait where sections are picked up off of the ground, and a sort of hybrid configuration where a snake can move in both the horizontal and vertical planes. 

    Instructions and code can be found in Donaldson’s write-up here, and you can check out the video below to see more about his design process.

    [youtube https://www.youtube.com/watch?v=e6Amh1GUPkA?feature=oembed&w=500&h=281]

    Website: LINK

  • A DIY Automobile Black Box with Arduino Mega

    A DIY Automobile Black Box with Arduino Mega

    Reading Time: 2 minutes

    A DIY Automobile Black Box with Arduino Mega

    Arduino TeamJune 8th, 2018

    If you’d like to monitor your driving habits, or perhaps keep them handy in the event of an accident, a “black box,” or more properly a “telematics” device is just what you’re looking for. 

    Monitoring driving habits can be interesting, but what if you’d like to make a telematics box yourself, giving you total control over how data is collected and used?

    That’s just what maker “TheForeignMan” did, using an Arduino Mega to take in data from his car’s OBD-II port, along with position information from a GPS module. Vehicle speed, engine RPM, and throttle depression are saved on an SD card, which can be removed and graphed on the driver’s computer.

    DISCLAIMER: This custom-made black box may not always be valid evidence in a court of law. Some countries/states/local laws may not allow installation of custom monitoring units into moving vehicles unless authorized by an approved installation team. For these reasons, and any other associated to tampering with the OBD port, the author(s) of this article and website hold no responsibility over the outcome of your driving, your car, your car’s electronics (including on board computer), and any other incidents occurred with a custom-made monitoring unit fitted.

    Instructions for this build are available here and code can found on GitHub. 

    Website: LINK

  • These high school students built their own vending machine

    These high school students built their own vending machine

    Reading Time: < 1 minute

    These high school students built their own vending machine

    Arduino TeamJune 7th, 2018

    If you’re a high school student and would appreciate a vending machine in class, what’s to be done? Most of the time the answer is “not much,” but Tustin High T-Tech students were able to get one—by building it themselves!

    In fact, this excellent device functioned both as a class project and as a fundraiser for their engineering program. It can be seen working in the video below, and uses an Arduino Mega for control, along with motor drivers and steppers to actuate six snack pusher coils. 

    Customers simply insert a dollar into the bill acceptor, punch in the correct number in the keypad, and snacks drop out. Arduino code is published here, and Solidworks design files are also available for your DIY vending edification.

    [youtube https://www.youtube.com/watch?v=6rVAdPPPhCo?feature=oembed&w=500&h=281]

    Website: LINK

  • A Flexible Arduino Prototype

    A Flexible Arduino Prototype

    Reading Time: 2 minutes

    We recently visited NextFlex, the flexible electronics manufacturing institute in Silicon Valley, where they developed a flexible prototype based on the Arduino Mini. Their mission is to make flexible electronics mainstream, opening up all kinds of new applications.

    [youtube https://www.youtube.com/watch?v=Yoi8ZFYwnwo?feature=oembed&w=500&h=375]

    How did you make the flexible Arduino prototype?

    Some of the equipment we use is familiar. For example, automated screen printers and industrial inkjet printers. We used them to print the circuit on a 1mm thick flexible plastic ‘board’ (known as the substrate).

    We then took the microcontroller silicon die, which is usually inside a chip package, and connected it directly to the substrate. For this, we used our production-level assembly equipment for precision adhesive dispense, die, and component attach.

    Using these techniques, we’re able to create flexible wire connections with a resolution of 50um (that’s 0.005 cm, roughly the thickness of a human hair).

    Silicon die inside a standard microcontroller package. (Image credit: NextFlex)

    What kind of conductive inks are you using to connect components?

    Conductive inks are not new, however we focus our efforts on making these materials very reliable and resilient.

    We are using advanced formulations of silver ink with strong adhesion to the base substrate, uniform particle distribution, and the ability to bend and flex after curing — all without degrading the electrical performance.

    Some components you use are rigid. When will they be flexible too?

    We use some rigid components, which is why we call it “Flexible Hybrid Electronics,” but aim for them to be as small and thin as possible.

    The unpackaged die can be thinned to 30um or less. At these thicknesses the silicon becomes flexible and allows for 10mm or smaller bend radii (roughly the radius of your thumb).

    Some passive components we use, like capacitors and resistors, are rigid today. Eventually we will print these components, so they are flexible too.

    When will flexible electronics be used in every day products? 

    The technology is already here! Over the next couple of years, we think it will reach prices that make it widely adopted in consumer products. Before then, by working on projects like the flexible Arduino implementation, we hope we can soon put development tools into the hands of more students, makers and product designers to innovate with.

    MCU silicon die bonded to the flexible Arduino prototype. (Image credit: NextFlex)

    NextFlex will be talking more about this project at the Sensors Expo & Conference in San Jose, California on June 26th, during the “Democratizing IoT” session.

    Website: LINK

  • Ultrasonic Arduino-to-Arduino Communication

    Ultrasonic Arduino-to-Arduino Communication

    Reading Time: 2 minutes

    Ultrasonic Arduino-to-Arduino Communication

    Arduino TeamJune 1st, 2018

    In the video below, Brazilian maker Eduardo Zola shows us that you don’t necessarily need radio waves to pass messages between Arduino boards; instead, he’s using ultrasonics. 

    Zola’s setup features TX and RX transducers desoldered from an HC-SR04 module along with a pair of Unos to transmit text short distances. An LM386 amplifier and LM393 comparator are also used for the receiver.

    While the transmission can easily be interrupted by putting a hand between the TX and RX, this configuration would certainly have some useful applications. So, how does it work exactly? As Hackaday explains:

    Looking through the source code for the transmitter and receiver, we can see it’s about as basic as it gets. The transmitter Arduino breaks down a given string into individual characters, and then further converts the ASCII to eight binary bits. These bits are sent out as tones, and are picked up on the receiving end. Once the receiver has collected a decent chunk of tones, it works through them and turns the binary values back into ASCII characters which get dumped over serial. It’s slow, but it’s simple.

    If you’d like to try it yourself, code and a full parts list can be found on the Zola’s website.

    [youtube https://www.youtube.com/watch?v=25FJy9Wcn9I?feature=oembed&w=500&h=281]

    Website: LINK

  • DIY submersible ROV flies through the water

    DIY submersible ROV flies through the water

    Reading Time: < 1 minute

    DIY submersible ROV flies through the water

    Arduino TeamMay 31st, 2018

    If you’d like to check out your pool or a lake without getting wet, this underwater ROV looks like a great solution. 

    The DIY device features a sturdy PVC frame with six thrusters that allow it to move through water like a drone through the air (complete with depth and heading hold), and uses the same kind of controller configuration as its airborne cousin.

    Onboard control is handled by an Arduino Mega along with an FPV camera, which transmits signals back to a base station via an Ethernet cable stuffed inside a length of polypropylene rope. The driver can then see what the ROV sees on a small display, supplemented with data from the base station’s Arduino Uno and an onscreen display (OSD) shield.

    [youtube https://www.youtube.com/watch?v=T7RhCNqM7I8?feature=oembed&w=500&h=281]

    [youtube https://www.youtube.com/watch?v=yslKyiAI5jw?feature=oembed&w=500&h=281]


    Website: LINK

  • Arduino-powered Infinity Bike virtual training environment

    Arduino-powered Infinity Bike virtual training environment

    Reading Time: 2 minutes

    Arduino-powered Infinity Bike virtual training environment

    Arduino TeamMay 30th, 2018

    Riding a bike can be great exercise, but unless you have access to a velodrome, when the weather turns bad, training is interrupted. There are of course training wheel setups that you can use to simulate riding indoors, but without the stimulus of actually moving, things can get boring rather quickly.

    The Infinity Bike by Alexandre Doucet and Maxime Boudreau, however, aims to change this as a system of 3D-printable parts and sensors that can be applied to an existing bike/trainer.  A Hall effect sensor is used to measure rotations per minute, while a potentiometer mounted to the handlebars detects the steering direction. This information is transmitted to a computer and the Unity 3D environment using an Arduino Nano, allowing participants to ride in a pristine virtual environment rain or shine.

    During the winter seasons, cold days and bad weather, cyclist enthusiasts only have a few options to exercise doing their favorite sport. We were looking for a way to make indoor training with a bike/trainer setup a bit more entertaining but most product available are either costly or just plain boring to use. This is why we started to develop Infinity Bike as an Open Source training video game. Infinity bike reads the speed and direction from your bicycle and offer a level of interactivity that cannot be easily found with bike trainers.

    We take advantage of the simplicity available from Arduino microcontroller and a few 3D printed parts to secure inexpensive sensors to a bicycle mounted on a trainer. The information is relayed to a video game made with the popular game making engine, Unity.

    An overview of the Infinity Bike can be found here, and a preview of the project can be seen in the video below! 

    [youtube https://www.youtube.com/watch?v=j3q3ih8c10g?feature=oembed&w=500&h=281]


    Website: LINK

  • Wake up to an Arduino-based overhead alarm clock

    Wake up to an Arduino-based overhead alarm clock

    Reading Time: 2 minutes

    Wake up to an Arduino-based overhead alarm clock

    Arduino TeamMay 29th, 2018

    Tired of wondering what time it is at night, only to have to roll over to look at your alarm clock? If you’d like to avoid this nighttime inconvenience, then Kurt Andros has a great solution with his Arduino Mega-based Overhead Alarm Clock. 

    The device consists of a nice wooden housing that gets mounted to a wall above where you sleep, and has separate displays for the alarm time and current time.

    Instead of a menu system that you must navigate through to tune settings, the clock features buttons to change both current time and alarm time, as well as potentiometer knobs to modify brightness and alarm volume. The result is a simple interface that requires little thought to set up, and no snooze button since you can simply reprogram the wake-up time with a single button.

    The overhead alarm clock offers the following features: 

    • Time and alarm time can be read effortlessly and glare-free even in the dark; without glasses, without pressing buttons, without having to leave the right or left side position.

    • The alarm clock can also be operated in the dark and with only one hand.

    • The alarm clock can be used by a first-time user by looking at the control panel. Reading any operating instructions is not necessary.

    • It wakes you up with a pleasant, volume adjustable sound (MP3 song).

    • It also functions reliably in the event of a power failure.

    • It is very accurate and independent of the reception of a radio signal, the power line frequency and the ambient temperature.

    • It does not occupy space on the nightstand.

    Sound like something you’d like in your bedroom? You can find Andros’ full project write-up here.

    [youtube https://www.youtube.com/watch?v=5isrQVwpdug?feature=oembed&w=500&h=281]

    Website: LINK

  • Combining a spirit level and range measurer into a single device

    Combining a spirit level and range measurer into a single device

    Reading Time: < 1 minute

    Combining a spirit level and range measurer into a single device

    Arduino TeamMay 23rd, 2018

    This device by Dejan Nedelkovski of How To Mechatronics implements both an ultrasonic sensor for range measurement and an accelerometer for measuring angles. While you’ve likely seen these implemented separately in other projects, combining them saves space, and allows the Arduino Nano onboard to use the two readings together to calculate a square area automatically.

    User interface consists of a power switch, along with a single button for program interaction and to choose between the different measurement routines. Results are displayed on an LCD screen, and the electronics are encased in clear acrylic for visibility. 

    Code and PCB files are available on the project’s write-up, and the video below gives a nice overview of its functionality and build process.

    [youtube https://www.youtube.com/watch?v=ZQ66mEs_9nA?feature=oembed&w=500&h=281]


    Website: LINK

  • Arduino timekeeper displays red for stay in bed

    Arduino timekeeper displays red for stay in bed

    Reading Time: 2 minutes

    Arduino timekeeper displays red for stay in bed

    Arduino TeamMay 23rd, 2018

    If you have young kids, you’ve probably realized that they don’t exactly like to sleep in. While their energy levels are enviable, if their clock-reading skills haven’t yet caught up, this device by maker “JonathonT” looks like a great and simple solution.

    With help from an Arduino and an RTC module, Jonathon uses a trio of LEDs to show red for “stay in bed,” yellow for “almost time,” and green to indicate “you can get up.” While the current 7:00am starting time might still seem early to some, when compared to his son’s previous 5:30-or-so awakening, this is a huge improvement. Cleverly, the LEDs are diffused with a normal white plastic stadium cup with wax paper inside, making it a very accessible project!

    GREEN MEANS GO!!! RED, STAY IN BED!!! This simple, inexpensive Arduino real-time clock can be set to light up LEDs at whatever time necessary. For us that means at 6:00am it turns RED, STAY IN BED. Then 10 minutes before 7:00am it turns YELLOW giving the indication it is almost time to come out and to play in your room. Then at 7:00am… “The light is GREEN!!!”, he says, as he bursts into our room each morning no earlier than 7:00am. What a lifesaver!!!

    Sound like something you can use in your home? You can find build instructions here.


    Website: LINK

  • ZIPY is a homebrew inverted pendulum

    ZIPY is a homebrew inverted pendulum

    Reading Time: 2 minutes

    ZIPY is a homebrew inverted pendulum

    Arduino TeamMay 23rd, 2018

    Graduate students Ben Wiener and Philip Zucker have been working on a classic controls problem for quite some time called an “inverted pendulum.” This type of device balances a stick on an axis, and in this implementation, a motor pulls the axis assembly that the pendulum—a paint stirrer—is sitting on to keep it stable.

    Control is handled by an Arduino Uno, which measures the angle of the stirrer as well as the position of the axis via a pair of encoders.

    The inverted pendulum or cart pole is a classic problem in control theory. It’s in OpenAI Gym of course, but we wanted to see it work in real life, not some lame simulation. 

    It took a few iterations, but we eventually found a system that works well. Our cart is 3D printed PLA driven by a DC motor via a toothed belt. The pole itself is a paint stirrer. One of the longer type, about 24″. A rotary encoder opposite the motor acts as a pulley for the belt and allows us to track the motion of the cart, while a second rotary encoder on the cart is a pivot for the pole and measures its angle. The motor is controlled by a 32 amp Sabertooth motor controller. It’s overkill, and pretty expensive at about $120, but we already had it for another project. We monitored the encoders with an Arduino. The foundation of the system is a piece of extruded aluminum rail called V-Slot, on which the cart slides and the motor and encoder are mounted. Our rail is 1.5 m long, from a company called  .

    Code for the setup can be found on GitHub and be sure to see it in action in the video below, as it swings the wooden stick from rest into a vertical position.

    [youtube https://www.youtube.com/watch?v=vmS8EdxgHoE?feature=oembed&w=500&h=281]


    Website: LINK

  • Automate your chicken coop’s door with Arduino

    Automate your chicken coop’s door with Arduino

    Reading Time: 2 minutes

    Automate your chicken coop’s door with Arduino

    Arduino TeamMay 21st, 2018

    Farmers have long been known for their ingenuity, able to accomplish urgent repairs with whatever is on hand. Now with the help of an Arduino, maker “rscholten” has even figured out how to automate his chicken coop.

    The device uses an Uno and a real-time clock module to schedule his automated coop door’s movement, while a servo and linkage system physically flips the door open and closed. A solenoid then locks the door in place when not in motion so that the servo doesn’t have to constantly maintain a position. 

    User interface is provided by a 7-segment LED, along with dials to set the current time and when it should be opened and closed. As shown in the video below, the coop can also be activated with a keyfob style remote when needed.

    I built this automatic chicken door to save me the twice daily task of opening and closing the door in the morning and evening. Chickens are great providers of eggs, manure and entertainment, but getting up early to let them out the coop – especially in winter – was drudgery. And then making sure I was home in time to close them in really restricted my freedom to come home late.

    Chickens follow a daily routine of returning to a coop around sunset and waking up around sunrise. The times they go in and out is not exact and is influenced on the weather of the day and ambient light. Should a chicken be seen to be too late to enter after the door closed, the door can be remotely opened then closed. The door can be closed during the day should the owner need to stop broody chickens from entering.

    As sunrise and sunset times vary throughout the year and depend on the latitude, any door controller needs to track the time of day, the day of the year and know the latitude of the location. This requirement can be accomplished with software or a sun tracker, but in this design uses manually adjustable open and close time settings to keep things simpler.

    [youtube https://www.youtube.com/watch?v=Kdt8fT_kVHE?feature=oembed&w=500&h=375]


    Website: LINK

  • Say hello to the next generation of Arduino boards!

    Say hello to the next generation of Arduino boards!

    Reading Time: 3 minutes

    We’re excited to kick off Maker Faire Bay Area by expanding our IoT lineup with two new boards: the MKR Vidor 4000 and the Uno WiFi Rev 2.

    The MKR Vidor 4000 is the first-ever Arduino based on an FPGA chip, equipped with a SAM D21 microcontroller, a u-blox Nina W102 WiFi module, and an ECC508 crypto chip for secure connection to local networks and the Internet. MKR Vidor 4000 is the latest addition to the MKR family, designed for a wide range of IoT applications, with its distinctive form factor and substantial computational power for high performance. The board will be coupled with an innovative development environment, which aims to democratize and radically simplify access to the world of FPGAs.

    “The new MKR Vidor 4000 will finally make FPGA accessible to makers and innovators,” said Massimo Banzi, Arduino co-founder. “And we are looking forward to changing the game yet again.”

    “Maker Faire Bay Area is always an unparalleled opportunity to interact with the Arduino community and makers,” added Fabio Violante, Arduino CEO. “This year I’m extremely excited about the launch of the most flexible Arduino ever, the MKR Vidor 4000 and the development environment vision around it. With this new product we aim at putting in the hands of professionals, makers and educators the electronic equivalent of a resourceful Swiss Knife to bring their creativity to the next level. The applications are countless.”

    Co-developed with Microchip, the Uno WiFi Rev 2 is built around the new ATmega4809, a u-blox Nina W102 WiFi module, and an integrated IMU. The Uno WiFi will make it even easier to deploy products that need connectivity using the classic Arduino form factor, and is ideal for emerging IoT industries such as automotive, agriculture, consumer electronics, smart home, and wearables. Among its other features, the ATmega4809 provides 6KB of RAM, 48KB of Flash, three UARTS, Core Independent Peripherals (CIPs), and an integrated high-speed ADC. Combined with Microchip’s ECC608 crypto chip on the Uno board, the microcontroller also provides hardware-based security for connecting projects to the cloud including AWS and Google.

    “As we grow, partner and invest, we will fuel the vast IoT and software markets across the industry,” said Banzi. “Inspiring the Arduino community with easy to deploy solutions that enable our users to have access to larger both flash and RAM memory for more demanding IoT projects.”

    “Arduino aims at supporting professional developers, makers and educators during the entire lifecycle of IoT product development, from the initial learning phases to mass deployment,” noted Violante. “Being based on the popular AVR technology, but on steroids, and with an enhanced WiFi connectivity, the Uno WiFi Rev 2 is a big step forward for all users that want to leverage the vast ecosystem of shields and libraries available for the traditional Uno form factor, in connected use cases.”

    Those heading to Maker Faire this weekend are invited to attend Massimo Banzi’s semi-annual ‘State of Arduino’ talk, where you can learn more about our latest developments including the MKR Vidor 4000, Uno WiFi Rev2, and our Arduino Day releases.

    Both the MKR Vidor 4000 and Uno WiFi Rev2 will be available on the Arduino online store at the end of June.


    Website: LINK

  • Restrict access to tools with this card reader power switch

    Restrict access to tools with this card reader power switch

    Reading Time: < 1 minute

    Restrict access to tools with this card reader power switch

    Arduino TeamMay 16th, 2018

    If you need a way to restrict access to power tools to only authorized users, Casey Horton’s magnetic card reader setup, shown in the video below, looks like a great solution. 

    When you swipe the correct card through a reader mounted on an 8”x8”x4” electrical enclosure, the Arduino Uno inside turns on power to the equipment via a relay.

    The system uses a USB host shield to interface with the reader, and a datalogger shield to handle file manipulation and record who swipes in at what time. Admin mode is accessed by holding the device’s single button by swiping the correct card, at which time another magnetic card can be swiped and added. 

    Full instructions and code are available here.

    [youtube https://www.youtube.com/watch?v=M08HMr_rnAs?feature=oembed&w=500&h=281]


    Website: LINK

  • An Arduino-based RFID tag system perfect for escape rooms

    An Arduino-based RFID tag system perfect for escape rooms

    Reading Time: < 1 minute

    An Arduino-based RFID tag system perfect for escape rooms

    Arduino TeamMay 16th, 2018

    As seen here, “Annaane!” has come up with what could form the guts of a very interesting escape room puzzle. 

    Her build features four RFID card readers, which cause an Arduino Uno to release a door lock or other device via a 5V relay, only when the corresponding tags are arranged correctly.

    From the looks of the video below, the design is very much a prototype, but could easily be morphed into an arrangement to frustrate and entertain participants. As noted, the project uses all but the TX and RX pins on the Uno, but this could be expanded by using a Mega or an I2C port expander. 

    Code for the system can be found on GitHub.

    [youtube https://www.youtube.com/watch?v=ahc8Yai_sWI?feature=oembed&w=500&h=281]


    Website: LINK

  • See you at Maker Faire Bay Area!

    See you at Maker Faire Bay Area!

    Reading Time: 2 minutes

    See you at Maker Faire Bay Area!

    Arduino TeamMay 15th, 2018

    In just a few days, the Arduino team will once again be attending Maker Faire Bay AreaThose heading to San Mateo on May 18-20th will want to swing by our booth, where we are partnering with Microchip, inside the Electronics Pavilion (Zone 2). 

    We have also been preparing a series of demos that showcase the latest Arduino products announced during Arduino Day, including the new MKR WiFi1010, MKR NB 1500, and Arduino Engineering Kit.

    As is tradition, Massimo Banzi will take Center Stage on Saturday at 12:30pm PT for The State of Arduino

    Also on Saturday, Microchip’s Wizard of Make Bob Martin will host a hands-on workshop covering advanced debugging techniques for Arduino sketches using Atmel Studio 7 from 3:00-5:00pm PT in Zone 3 Learning Lab.

    We look forward to seeing you this weekend! For more information on the program and venue, be sure to check out the Maker Faire website


    Website: LINK

  • The MKR family gets bigger with two new IoT boards!

    The MKR family gets bigger with two new IoT boards!

    Reading Time: 4 minutes

    We’re excited to announce two new wireless connectivity boards to help streamline Internet of Things development, the MKR WiFi 1010 and MKR NB 1500.

    The first of the boards is the MKR WiFi 1010which offers low power consumption and has been designed not only to speed up and simplify the prototyping of WiFi-based IoT applications, but also to be embedded in production IoT applications that require WiFi connectivity. The board is an evolution of the existing Arduino MKR1000, but now comes equipped with an ESP32-based module manufactured by u-blox. This key element delivers 2.4GHz WiFi and Bluetooth communications capability, along with leading RF and power performance: the ESP32 is a highly flexible device that provides adjustable power output, enabling optimal trade-offs between communication range, data rate and power consumption.

    Fully compatible with the Arduino IT cloud, the MKR1010 also offers simple migration from other Arduino boards, and uses open-source WiFi firmware, which makes it easy to reprogram for upgrading or to repair any security flaws. A significant feature is the MKR1010’s two standalone programmable processors – the first based on ARM processor core technology, the second based on a dual-core Espressif IC – making the board a high-performance solution that can distribute its workload across its dual-processor system. Another major feature is the integration of a secure authentication module – Microchip’s ECC508 – which uses crypto authentication to secure TLS network communications and connections.

    The second board to be introduced is the MKR NB 1500which employs the new low-power NB-IoT (narrowband IoT) standard, designed to work over cellular/LTE networks. When combined with the ease of use of the Arduino ecosystem, the MKR1500 becomes an excellent choice for applications in remote areas such as on-field monitoring systems and remote-controlled LTE-enabled modules. Designed for global deployment, it supports transmissions via AT&T, T-Mobile USA, Telstra, Verizon over the Cat M1/NB1 deployed bands 2, 3, 4, 5, 8, 12, 13, 20 and 28. 

    The NB-IoT communications technology makes use of existing LTE cellular networks and delivers significantly faster communications than alternative IoT networks such as LoRa and Sigfox, while also having a low impact on battery consumption. In addition, when compared to typical GSM or 3G cellular connectivity, wake up times and connections are much faster, which enables significant power saving.

    Importantly, both of the new boards are fully compatible with the Arduino Uno, Mega and existing MKR boards. Also common to both boards is their MKR footprint, as well as the same wide range of available interfaces, including I2S, I2C, UART and SPI. Both boards also operate at 3.3V and offer input/output options including 22 digital I/Os – 12 with PWM outputs – and seven analog inputs.

    “The new boards bring new communication options to satisfy the needs of the most demanding use cases, giving users one of the widest range of options on the market of certified products,” said Arduino co-founder and CTO Massimo Banzi.

    “NB-IoT and CAT M1 are gradually becoming a reality in many countries in the world. With MKR NB 1500 we wanted to create a versatile and standard technology to democratize the access to the new networks, enabling our customers to take advantage of this big opportunity early on,” said Fabio Violante, CEO of Arduino. “We strongly believe the MKR NB 1500 has all the ingredients to become the go-to product for many professional use cases”.

    “As far as the MKR 1010 is concerned, we had the opportunity to learn a lot from all the WiFi products that we have had on the market for several years. Based on customers’ feedback we thought it was now time to release a new ultra reliable board suitable for a variety of use cases that are difficult to support with other products,” added Fabio Violante. “The other aspect that we love about the products is that the firmware of the WiFi part is developed by us and open-source, opening new opportunities for continuous improvements and contributions from the community.”

    Both the MKR WiFi 1010 and the MKR NB 1500 will be available on the Arduino online store starting in June 2018.


    Website: LINK

  • Arduino goes to college with the new Arduino Engineering Kit!

    Arduino goes to college with the new Arduino Engineering Kit!

    Reading Time: 3 minutes

    Arduino goes to college with the new Arduino Engineering Kit!

    Arduino TeamMay 12th, 2018

    We’re excited to announce the Arduino Engineering Kit, the first product released as a result of our new partnership with MathWorks, to reinforce the importance of Arduino at the university level in the fields of engineering, Internet of Things, and robotics.

    The Arduino Engineering Kit, which will be available for purchase starting today on the Arduino online store, consists of three cutting-edge, Arduino-based projects and will teach students how to build modern electronic devices – challenging them intellectually and helping them develop physical engineering skills that will better prepare them to enter the commercial market following graduation. In addition to the hardware, after registering online, students and educators will have access to a dedicated e-learning platform and other learning materials. The kit also includes a one-year individual license for MATLAB and Simulink, providing the user with hands-on experience in system modeling and embedded algorithm development.

    Following the global success of Arduino CTC 101, a program tailored for upper secondary schools, the Arduino Engineering Kit enables college students and educators to incorporate core engineering concepts like control systems, inertial sensing, signal and imaging processing, and robotics with the support of MATLAB and Simulink programming. These software packages are the base of industry-standard tools for algorithm development, system modeling, and simulation, all of which will be required in their future careers.

    Each Arduino Engineering Kit comes with a durable and stackable plastic toolbox for easy storage and years of reuse. Inside the box is an Arduino MKR1000 board, several customized parts, and a complete set of electrical and mechanical components needed to assemble all three projects:

    • Self-Balancing Motorcycle: This motorcycle will maneuver on its own on various terrains and remain upright using a flywheel for balance.
    • Mobile Rover: This vehicle can navigate between given reference points, move objects with a forklift, and much more.
    • Whiteboard Drawing Robot: This amazing robot can take a drawing it’s given and replicate it on a whiteboard.

    “We designed the Arduino Engineering Kit the way we would have liked to have learned mechatronics, control algorithms, state machines, and complex sensing when we were in our first years of engineering school: in a fun and challenging way,” said David Cuartielles, Arduino co-founder and Arduino Education CTO. “It’s all about hands-on activities built on top of well-grounded theoretical concepts. But more importantly, after finishing the basic materials, there’s plenty of flexibility to experiment, for the students to deviate and test their engineering creativity.”

    [youtube https://www.youtube.com/watch?v=pymRl7FCV0A]


    Website: LINK

  • Arduino Mega + former nuclear indicator = coolest Nixie clock ever?

    Arduino Mega + former nuclear indicator = coolest Nixie clock ever?

    Reading Time: 2 minutes

    Arduino Mega + former nuclear indicator = coolest Nixie clock ever?

    Arduino TeamMay 11th, 2018

    There have been countless clocks made using Arduino boards, but you’ve likely never seen anything quite like this display. It features four Nixie tubes that alternate between the time, temperature, pressure, and relative humidity, in addition to a clock-like hand as a secondary indication of atmospheric pressure. That is interesting in itself, but to top it off, the synchroscope display housing used is actually recycled from a nuclear power plant!

    An Arduino Mega coordinates data from the sensors and an RTC module to control the Nixie tubes via driver ICs, along with a micro servo to move the pressure indicator. Power for the electronics is provided by three separate transformers in order to accommodate the tubes. 

    The clock displays the time from the top of the minute to 15 sec in, and then displays the temperature (F), then back to time until the bottom of the minute (30 sec.), then it displays atmospheric pressure (mm Hg), then back to time until 45 sec into the minute and displays relative humidity. Upon reaching 60 sec. it increments the time and repeats the cycle. The BMP280 has a very poor temperature sensing capability and is not nearly as accurate as a DS18B20 waterproof temperature sensor that I used in another project of mine. I may just swap this out. Also I had a nice mesh cage around the sensors to protect them from damage and this too led to inaccurate results so I modified that as well. The indicator arrow is scaled for the low and highest pressures found in my state. the indicator arrow does a good job of showing changes in the pressure when a storm or clear skies are developing.

    A full write-up on the build can be found here and the Arduino code in this repository.

    [youtube https://www.youtube.com/watch?v=9zIeVyw2Jqg?feature=oembed&w=500&h=281]


    Website: LINK

  • Get a feel for your computing energy usage with this setup

    Get a feel for your computing energy usage with this setup

    Reading Time: < 1 minute

    Get a feel for your computing energy usage with this setup

    Arduino TeamMay 10th, 2018

    Norbert Heinz, aka “HomoFaciens,” is no stranger to making versions of modern-day equipment in unusual ways, but what about the way that this equipment is actually powered? It’s not something that we normally consider if an AC adapter is nearby; you simply plug it into the wall and “free” power flows to your device.

    Heinz’s project, however, runs processing systems including an Arduino Uno, a Raspberry Pi, and a SIMATIC IOT2020 using not wall power or even a battery, but via chemical energy converted by himself through a hand crank, along with a model airplane engine. The setup uses geared DC motors acting as generators, while the eye-opening results are displayed on a 16×2 LCD screen.

    Check out the video below and the project’s write-up to see how its done. And by all means, make sure you do your experiments in a well-ventilated area if you’re going to use a combustion engine!

    [youtube https://www.youtube.com/watch?v=QxAi71IprRU?feature=oembed&w=500&h=281]


    Website: LINK

  • This Arduino-controlled machine draws on textile with wax

    This Arduino-controlled machine draws on textile with wax

    Reading Time: < 1 minute

    This Arduino-controlled machine draws on textile with wax

    Arduino TeamMay 9th, 2018

    Batik is a fabric decoration technique where wax is applied by hand to cloth that is then died, leaving behind beautiful patterns. While interesting, doing this manually is time-consuming and requires quite a bit of skill to properly execute. In a new take on this traditional technique, makers Olivia De Gouveia and Eugenia Morpurgo decided to make a machine to create wax patterns automatically.

    What they came up with is a gantry-style robot that moves molten wax over a surface using a tempeature-controlled pen, with the help of an Arduino Mega with a RAMPS 1.4 shield. In theory, the device allows for an infinite printing area, and can be used to draw decorative patterns or even cutting paths for clothing. 

    More information is available on GitHub and on the Digital Wax Print website!

    [embedded content]


    Website: LINK