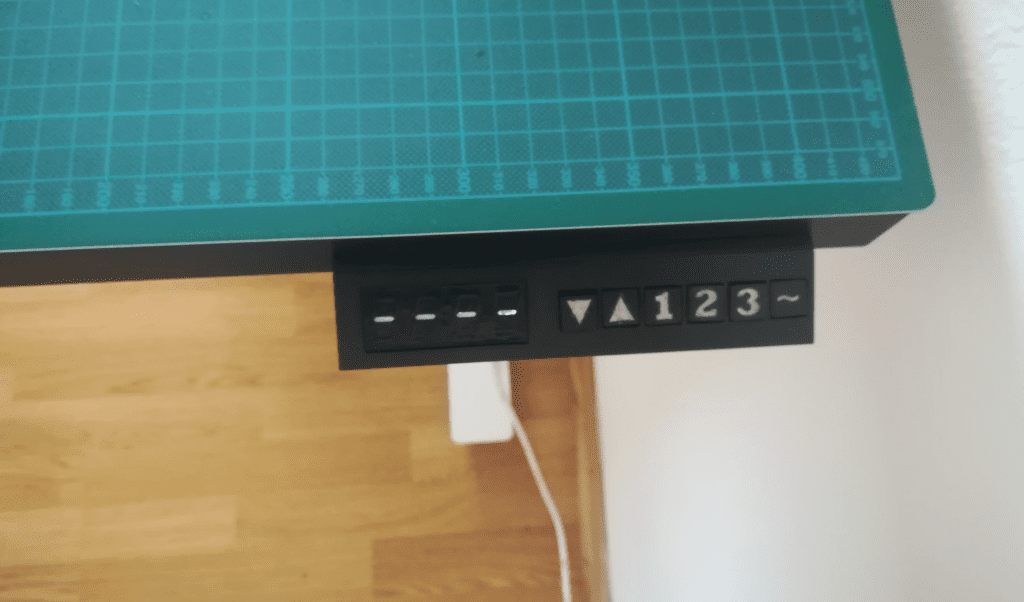
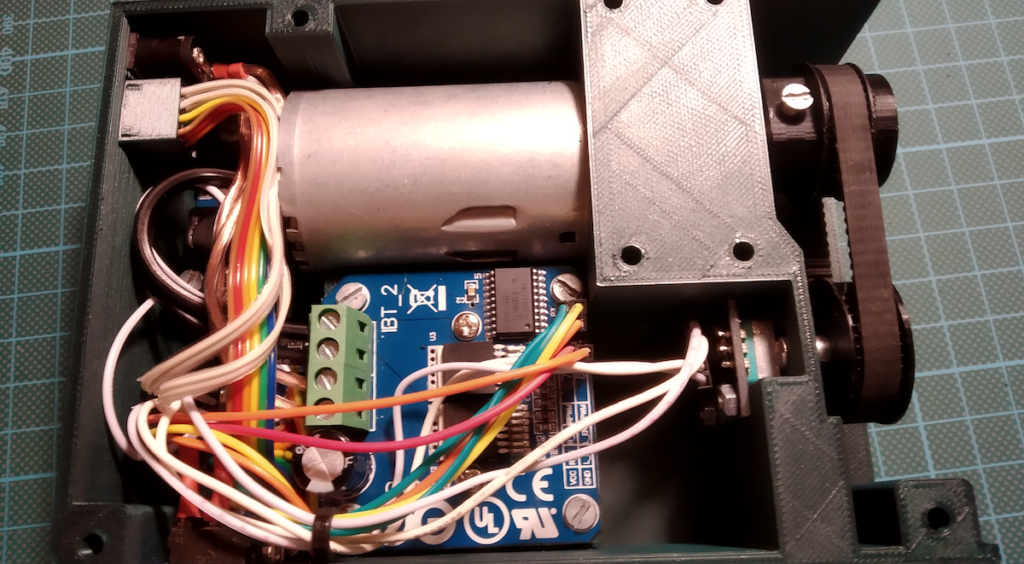
Martin Mihálek took the leap into standing desks, and purchased a SKARSTA table from IKEA. Although being able to adjust things by hand is useful, who wants to do that nowadays? Instead of manually cranking it every time, he—with help from iLLiac4—decided to augment it with a motor in order to lower and raise things as needed.
Initial experiments used a FIXA electric screwdriver (also from IKEA) to power the SKARSTA, but he eventually settled on a DC gearmotor, attached to the desk via a 3D-printed assembly.
Two versions are described in the project’s GitHub write-up; one employs an H-bridge board for control, the other uses relays. Both are controlled by an Arduino Nano. A keypad allows for calibration and three stored heights, while current position and feedback are shown on a TM1637 4-digit 7-segment display.
Save the date: Arduino Day 2019 is Saturday, March 16th!
Arduino Team — January 29th, 2019
For the sixth year, we are inviting the open source community to join us for Arduino Day 2019 on Saturday, March 16th!
Arduino Day is a worldwide celebration of Arduino’s birthday. It’s a 24-hour-long event—organized by both the community and our team—where those interested in Arduino get together, share their experiences, and learn more about the platform. Participation is open to anyone, either as a organizer or participant, from makers and students to professional developers and educators.
In 2018, there were 529 events spanning across the globe full of activities, workshops, talks, and project exhibitions for a wide range of audiences and skill sets. This year, we are hoping to make Arduino Day even bigger! If you want to organize an event, please fill out this online form and submit your proposal by March 3rd.
Wind your watch cheaply and quietly on your bedside table
Arduino Team — January 28th, 2019
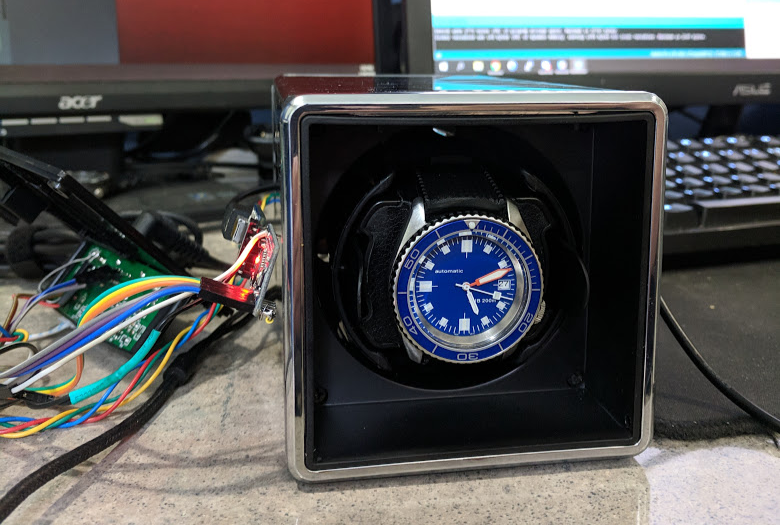
If you wear a self-winding watch—which uses your natural motions for power—you might notice that it stops working if it’s left off your wrist for too long. To avoid these situations, watch winders are available to turn them automatically, but tend to either be very expensive, or cheap and noisy.
With a bit of hacking, however, Kristopher Marciniak was able to get the best of both worlds. He replaced the stock motor of an inexpensive winder with a stepper, and used an Arduino along with a Trinamic SilentStepStick driver for silent and well-controlled movement.
The result is a device that rotates quietly as programmed, then stops in exactly the desired position.
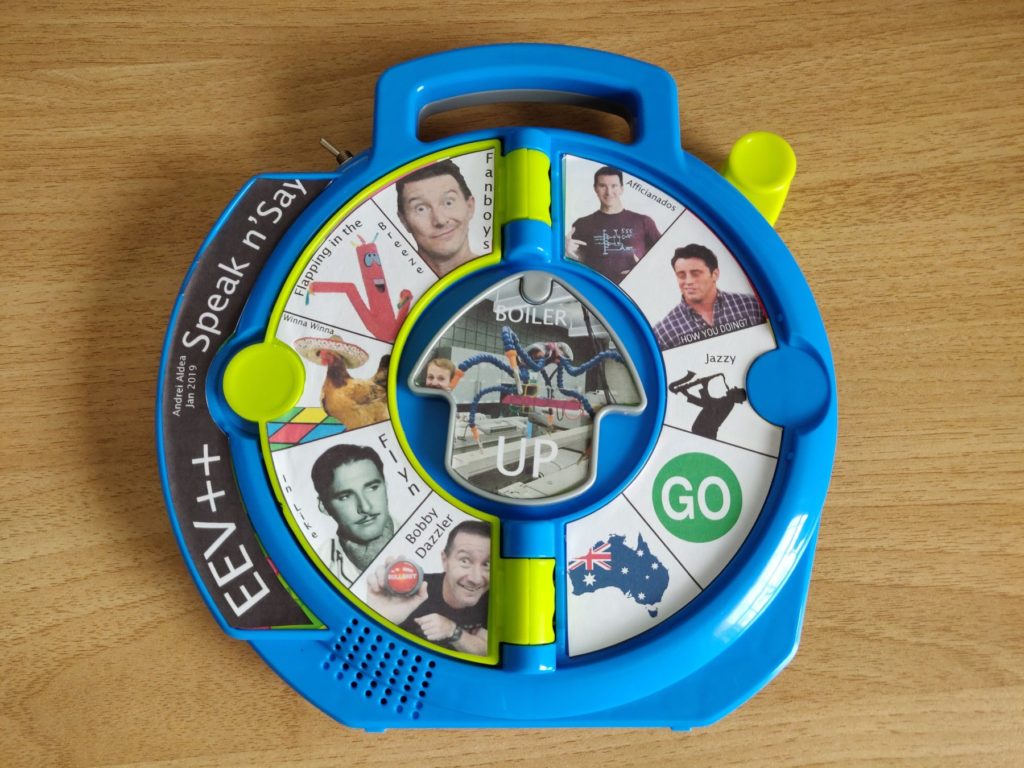
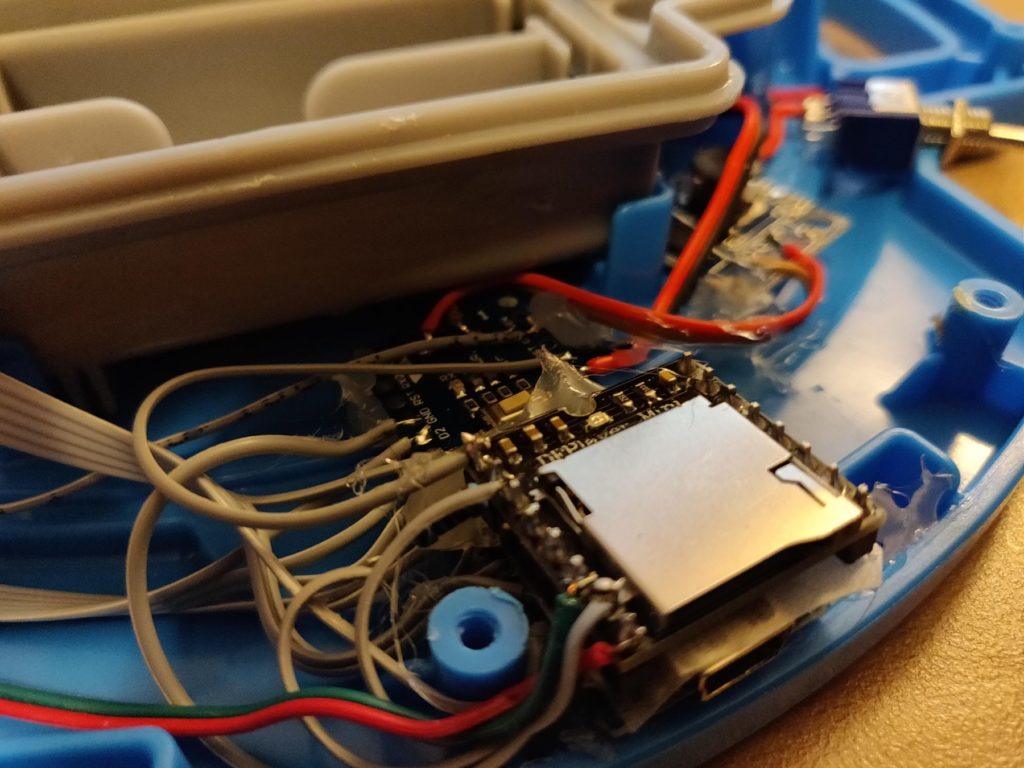
The See ‘n Say is an educational toy that originated in the 1960s, speaking out whatever the child pointed to on a dial. The device has evolved over the years from a mechanical sound mechanism to one that uses electronics in its design, which inspired Andrei Aldea to convert one of them into an EEV Blog catchphrase machine!
Aldea replaced most of the electronics with an Arduino Nano, plus an MP3 module to power the speaker. Internal buttons that normally trigger sounds based on the dial rotation, along with a “page” switch, are wired into the Arduino. The hacked toy can now select from a library of over 300 audio clips of host Dave Jones and other “bonus” material for hours of entertainment!
While binging some The Ben Heck Show videos I ran across and old episode titled Speak & Dave Jones in which Ben hacks a Fisher Price See N’Say toy to play a sound for each of Dave Jones’ catchphrases.
The video itself (and especially the idea) is quite fun, but he used a custom PCB for the button matrix and a Propeller(? I think it was) micro, which make the whole project a lot more tedious than it needed to be, not to mention he never posted any of the code/graphics/design files he used.
Since this seemed like an easy enough project to tackle in an afternoon, and I had all the parts (minus the toy itself) lying around, I decided to give it a go while adding some of my own features.
Announcing the Arduino Education thematic years initiative
Arduino Team — January 26th, 2019
Aside from all the product announcements at Bett, we’re excited to unveil a new annual initiative from the Arduino Education team to keep the community up-to-date on contests and exhibitions, suggest experiments, and highlight educational products and events of relevance within a selected topic.
The Arduino Education thematic years calendar is a unique way to involve our passionate educators and students, and work together to achieve something on a much larger scale.
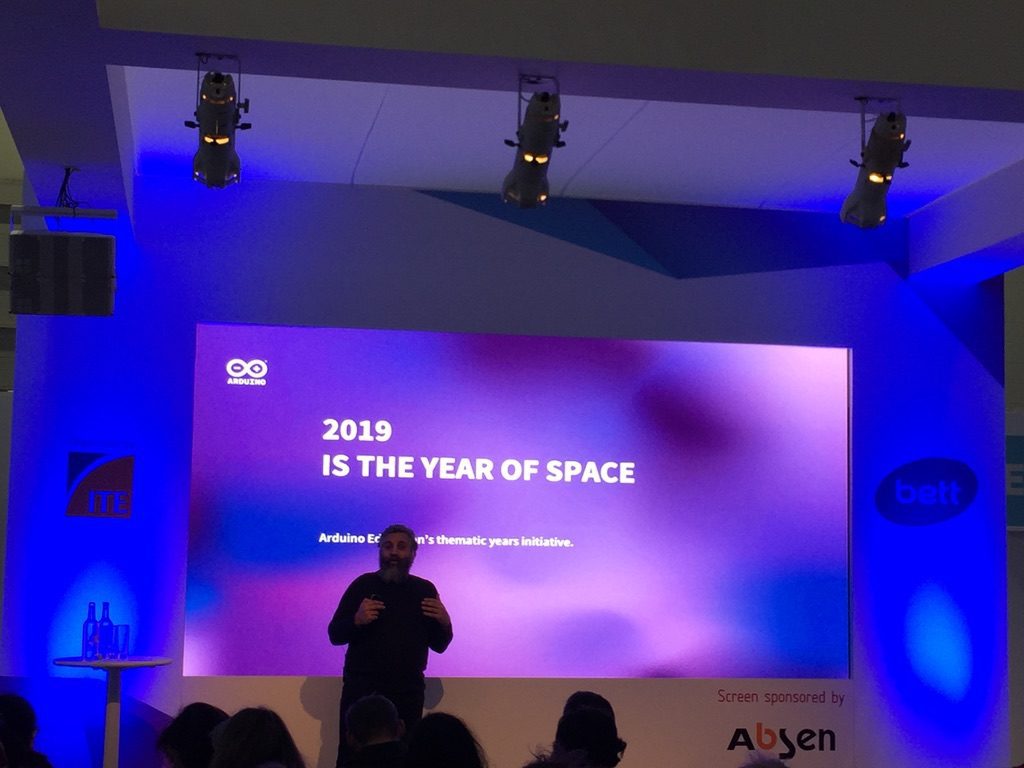
For 2019, we have decided to take our efforts from the classroom to outer space.
2019 Is the Year of Space
Educators from all over the world have been using space as a context to build inspirational education resources. Different space agencies, through dissemination activities, have reached out to schools and universities trying to inspire students to become the next generation of scientists and engineers. Robots, satellites the size of a soda can, radio communication systems, weather monitoring devices, maps, amongst others, are examples of projects from those who want to bring the topic of space closer to the classroom. Arduino plays a major role in this, and therefore we want to contribute to the development and dissemination of future space scientists.
A Calendar of Activities
The Arduino Education thematic year calendar is not written in stone. We, in collaboration with a series of stakeholders, suggest a point of departure, but we will welcome your contributions. Please send us your event proposals via email to space.year@arduino.cc and we will share them. If you would like to make an announcement for an upcoming workshop, event, course, or if you are looking for partners to do so in your region, we will use the Arduino forum as a public way to discuss the possibilities.
Each thematic year will see the direct involvement of the community, both in proposing/running events related to the chosen topic and to select the theme for the following year. For starters, here is a brief snapshot of planned activities in the months to come:
January
Official announcement at BETT London
Balloon launching in Malmö, Sweden
February
Balloon launching in Soria, Spain with Fundación Trilema
Arduino instrumentation course for space experiments at Luleå University of Technology (LTU), Sweden
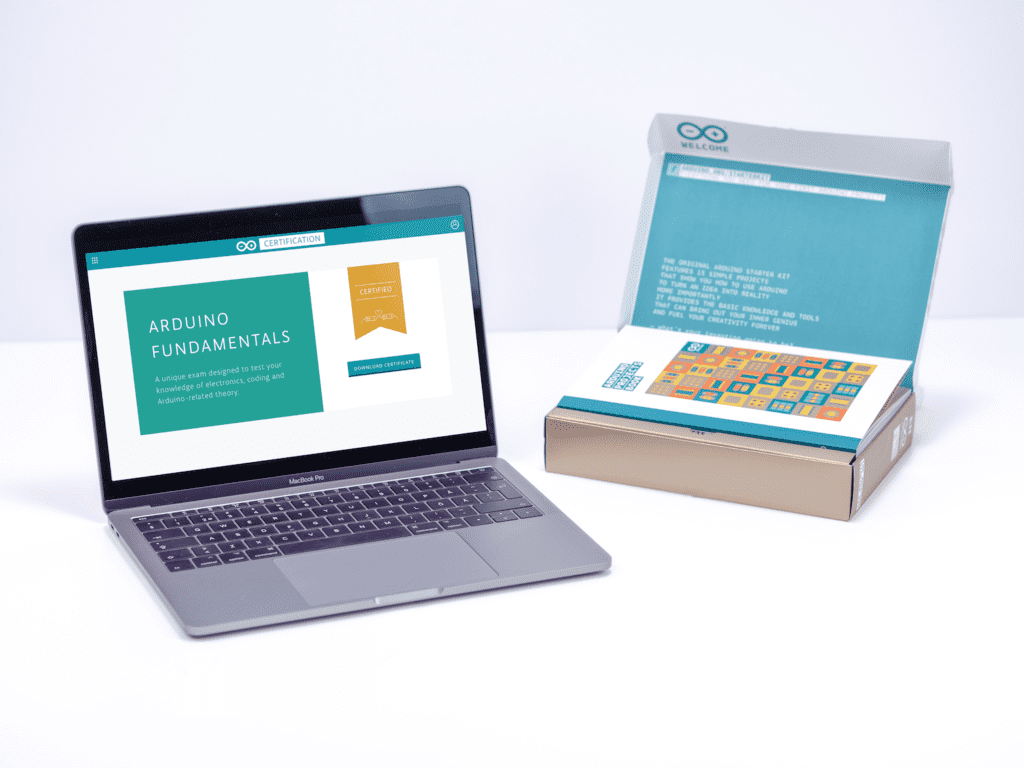
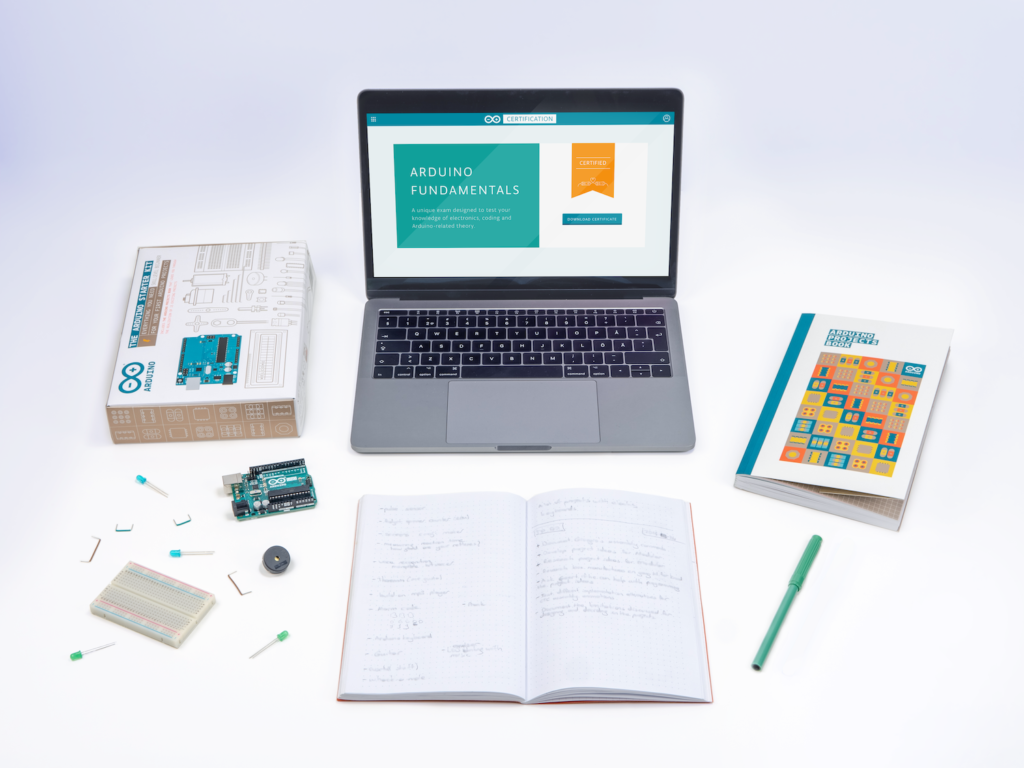
The Arduino Certification Program (ACP) is an Arduino initiative to officially certify Arduino users at different levels and evaluate their expertise in key Arduino knowledge areas. Certifications are offered at three tiers — enthusiasts, educators and professionals — which have been identified as the largest Arduino user groups through extensive feedback from the community.
The first step, the Arduino Certification: Fundamentals Exam, is a structured way to enhance and validate your Arduino skills, and receive official recognition as you progress. Anyone interested in engaging with Arduino through a process that involves study, practice, and project building is encouraged to pursue this official certificate.
Developed in consultation with leading technology curriculum, interaction design, and electronic engineering professionals, the Arduino Certification: Fundamentals Exam assesses skills based on exercises consisting of practical tasks from the Arduino Starter Kit.
The official assessment covers three main key areas: theory and introduction to Arduino, electronics, and coding.
During the exam, you will be asked to answer 36 questions of varied format and difficulty, which should take approximately 75 minutes to complete.
Questions will test your knowledge on, but will not be limited to, the following topics:
Introduction to Arduino: Physical computing and Arduino, Arduino Uno, Arduino IDE and uploading, programming basics, electronics concepts, blink!, and the breadboard.
Sensors and Actuator: Sensors, actuators, as well as digital and analog input/output.
Input and Output Types: Using serial monitor, LEDs, motors, piezo as input/output, switches, variable resistors, IR, and PIR.
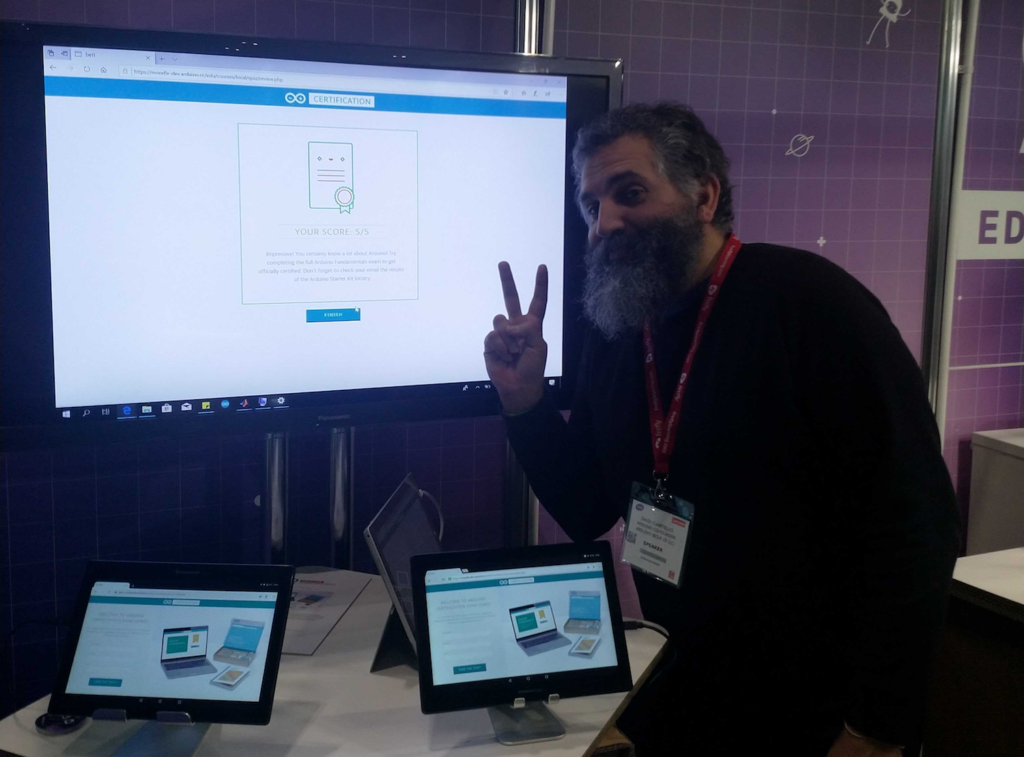
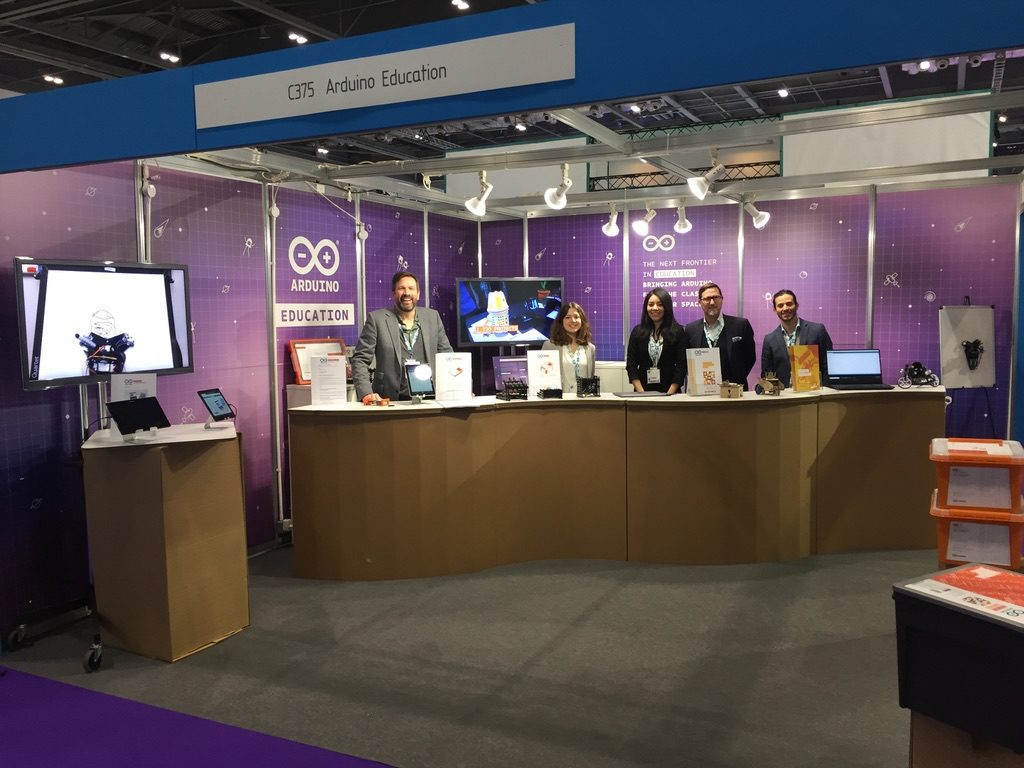
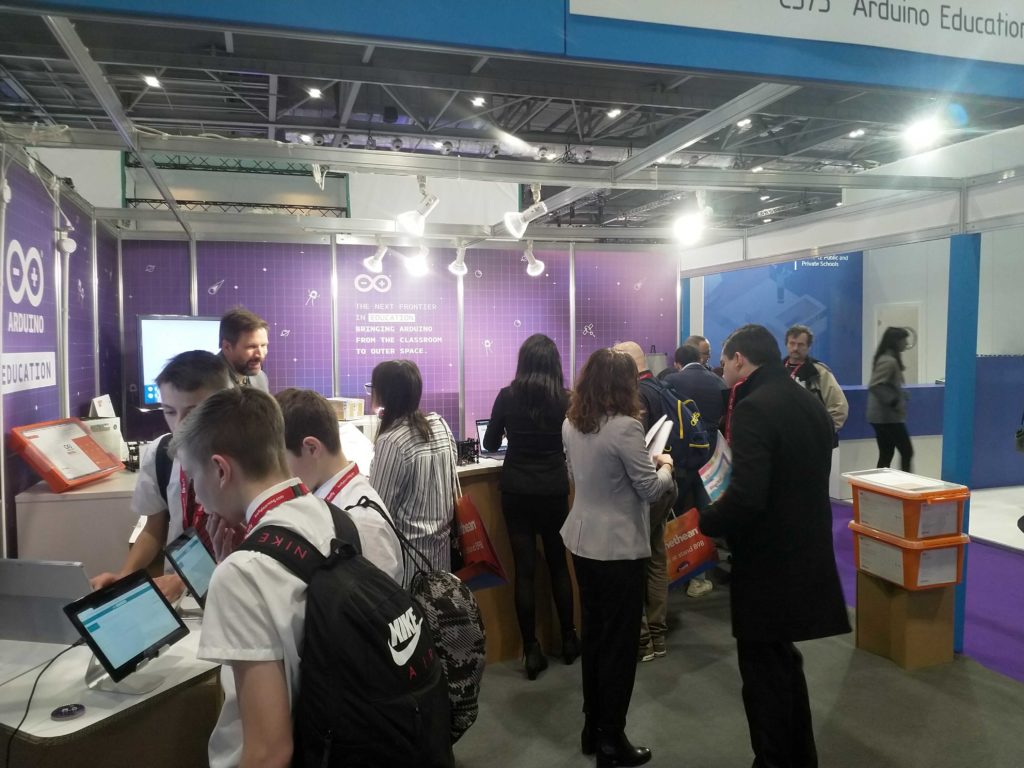
The Arduino Certification: Fundamentals Exam is currently on display at Bett 2019. Stop by stand C375 to see a demo for yourself and learn more about the program!
A university research project for Arduino community members by a community member
Arduino Team — January 24th, 2019
Back in December, we received an email from a university student named Lucrezia Alfonsi regarding her dissertation research. Lucrezia’s goal is to to understand what motivates our community to use Arduino, share knowledge, and produce open source innovations. Not only would we love to help Lucrezia, we always like hearing about our users’ involvement with open hardware and software.
The survey, which can be found here, will be up until February 20th and the results will be posted later on our blog. By answering Lucrezia’s report, we hope to provide our community with rich insights into the experiences and inspirations of our users.
Hi, I’m Lucrezia Alfonsi, a Bocconi University MSc student. Right now, I’m writing my MSc thesis and I would like to ask your help completing the survey I have prepared for last research steps – it takes only 10 minutes, the data are anonymously tracked and the results will be elaborated only for academic purposes.
“I strongly believe in ‘doing well, by doing good’ and I immediately associate this with the motivation that moves Arduino Community members to improve and innovate everyday”; this is what I think, how I started my email to Arduino, and why I decided to focus my thesis on individual attitudes and motivational factors that lead open-source software and hardware communities, like Arduino Community. This is my genuine interest in the new and the right moment to challenge it.
Here, you can find the direct link to the questionnaire I built appropriately; I think this research can give something interesting back. Feel free to take a look and decide if you would like to bring your precious contribution.
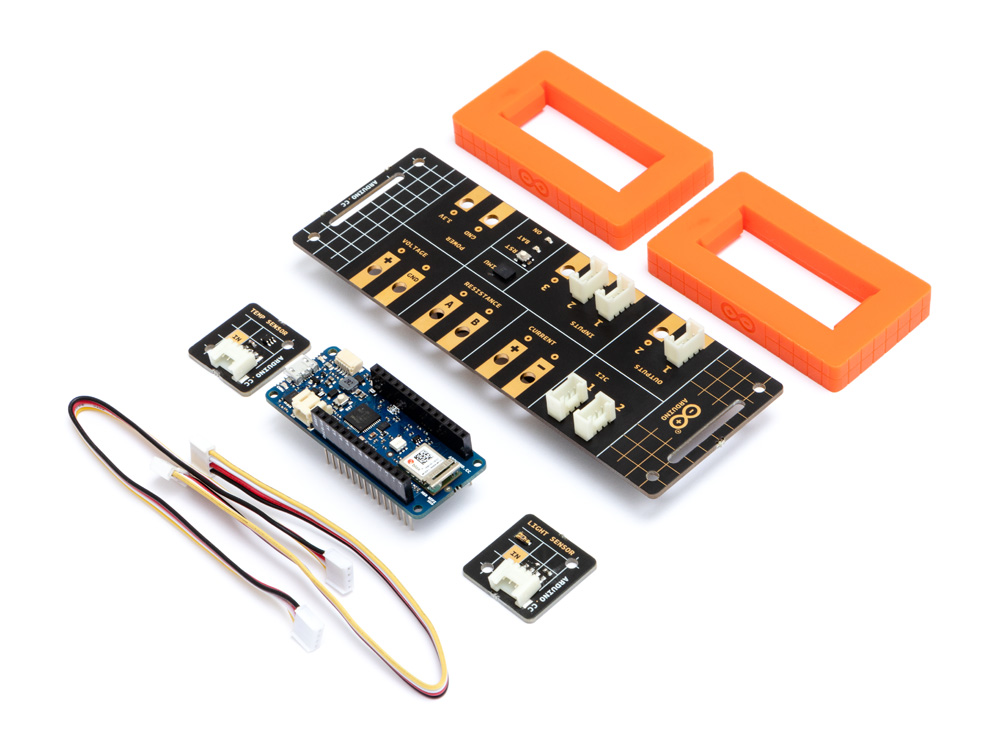
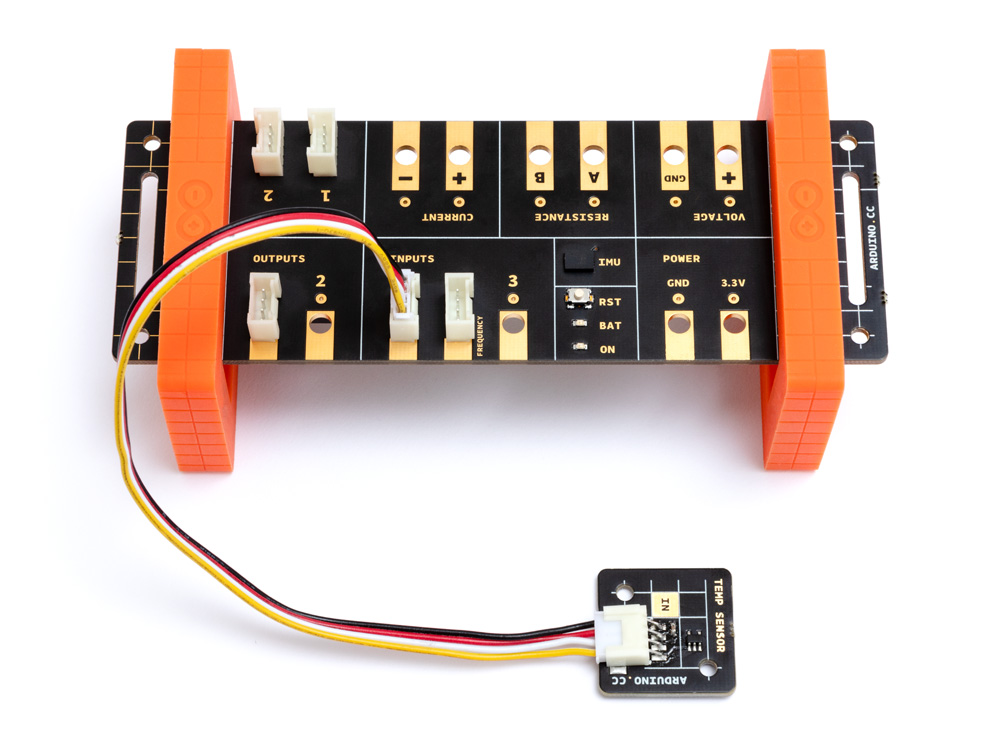
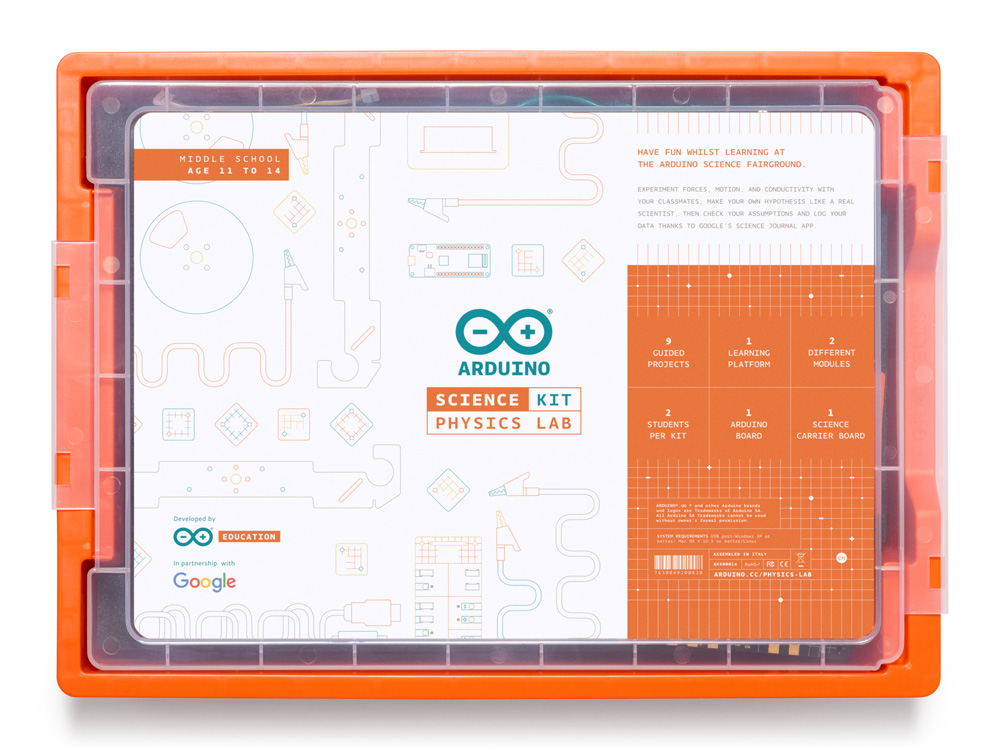
The Arduino Science Kit Physics Lab, developed in collaboration with Google, is the first official Arduino kit designed for middle school curriculum.
The Arduino Education Science Kit Physics Lab provides middle schoolers (ages 11 to 14) with a hands-on experience, enabling them to explore forces, motion, and conductivity with their classmates. Students can make their own hypothesis like a real scientist, then check their assumptions, and log data thanks to Google’s Science Journal app — a digital notebook for conducting and documenting science experiments using the unique capabilities of their own devices.
The kit, based on the MKR WiFi 1010, includes a range of sensors to measure light, temperature, motion, and magnetic fields, as well as a set of props and full access to online course content for teachers and students to conduct nine exciting science projects inspired by popular fairground rides like the Gravitron and Pirate Ship.
“The Arduino Science Kit is perfect for developing transferable skills such as critical thinking and problem solving through an inquiry-based learning approach. The projects featured in the kit have been aligned with several National curricula including the Next Generation Science Standard (NGSS) for K-12, and the National UK Curriculum, so teachers can be assured that the Physics Lab is not only easy to set up and fun to use, but also contains all the necessary lesson plans and physical experiments for students to actively engage with their learning.” – David Cuartielles
With the Physics Lab, no prior electronics knowledge is required. Students simply upload their sketch onto an Arduino board using Arduino Create for Chromebook, connect their Android mobile device to the board, build their project, and then use the onboard sensor and plug-and-play modules to simulate the rides’ dynamics. Data is transmitted from the experiment to the student’s mobile device via Bluetooth, where they can analyse and record their results in Google’s Science Journal App or worksheets.
The Arduino Education Science Kit Physics Lab isn’t confined to the classroom. In fact, students can use the kit outdoors to turn the playground into their very own fairground by applying the concepts they’ve learned to design and test their own rides.
The Arduino Education Science Kit Physics Lab comes in a handy storage box for later use, along with the MKR WiFi 1010 and all the parts needed to assemble and carry out the experiments. It will be coming soon to the Arduino Store and available globally starting in March 2019.
The Arduino Education team is returning to the Bett Show this week, where you can expect to find our latest products and programs for empowering students and teachers alike.
This year, we’re further strengthening our STEAM-focused offerings across the spectrum with the first-ever kit for middle schoolers, the Arduino Science Kit Physics Lab, developed in partnership with Google; the introductory module of the official Arduino Certification Program; a new addition to the Arduino Creative Technologies in the Classroom lineup, CTC GO!; and a thematic annual initiative which will kick off in 2019 with ‘Arduino and Space’ for the entire global education community.
Those visiting our stand (C375) will also have a chance to learn more about the Arduino CTC 101 program and Arduino Engineering Kit, both of are being successfully deployed in classrooms throughout the world.
Arduino and Google: A New Collaboration for Scientific Exploration
The Arduino Education Science Kit Physics Lab, our first kit targeted at middle schoolers, provides children ages 11 to 14 with a hands-on experience, enabling them to explore forces, motion, and conductivity with their classmates. Students can form their own hypothesis like a real scientist, then check their assumptions, and log data thanks to Google’s Science Journal app — a digital notebook for conducting and documenting science experiments using the unique capabilities of their own devices.
The kit, based on the MKR WiFi 1010, features a range of sensors to measure light, temperature, motion, and magnetic fields; plus it comes with a set of props and full access to online course content for teachers and students to conduct nine exciting science projects inspired by popular fairground rides like the Gravitron and Pirate Ship.
Take Your Arduino Skills to the Next Level and Become Certified!
The Arduino Certification: Fundamentals Exam is a structured way to enhance and validate your Arduino skills, and receive official recognition as you progress. Anyone interested in engaging with Arduino through a process that involves study, practice, and project building is encouraged to pursue this official certificate.
Developed in consultation with leading technology curriculum, interaction design, and electronic engineering professionals, the Arduino Certification: Fundamentals certification assesses skills based on exercises consisting of practical tasks from the Arduino Starter Kit.
The official assessment covers three main key areas: theory and introduction to Arduino, electronics, and coding.
Ready, Set, GO!
CTC GO! is the newest member of Arduino’s Creative Technologies in the Classroom lineup. The program consists of a series of modules which can be combined to teach various STEAM subjects to fit with different educational paths.
The core module — which is the foundation of CTC GO! — is now available, while an assortment of expansion modules will be launched sequentially from 2019 to 2021. These include a motion module, a wireless module, and math module, all of which will contain new materials, content, and educators training / support.
CTC GO! has been designed around the recently announced Arduino Uno WiFi, our most powerful board for education. The board maintains the simplicity of the standard Uno with the incorporation of WiFi so students can learn about wireless technology and begin creating their own IoT projects.
Through the project-based learning (PBL) methodology, CTC GO! introduces students to basic concepts via a series of playful, well-documented projects and easy-to-assemble experiments.
CTC GO! also provides premium training and support for educators through online videos, webinars, and expert-answered emails.
Space: The Next Frontier of Education
The human exploration of space has inspired endless projects within the STEAM community, many of which leveraging the Arduino platform. David Cuartielles, Arduino Co-Founder and Education CTO, took the Bett stage (Post 16 Theatre) on Wednesday morning to discuss innovative ways to engage students inside (and outside) the classroom.
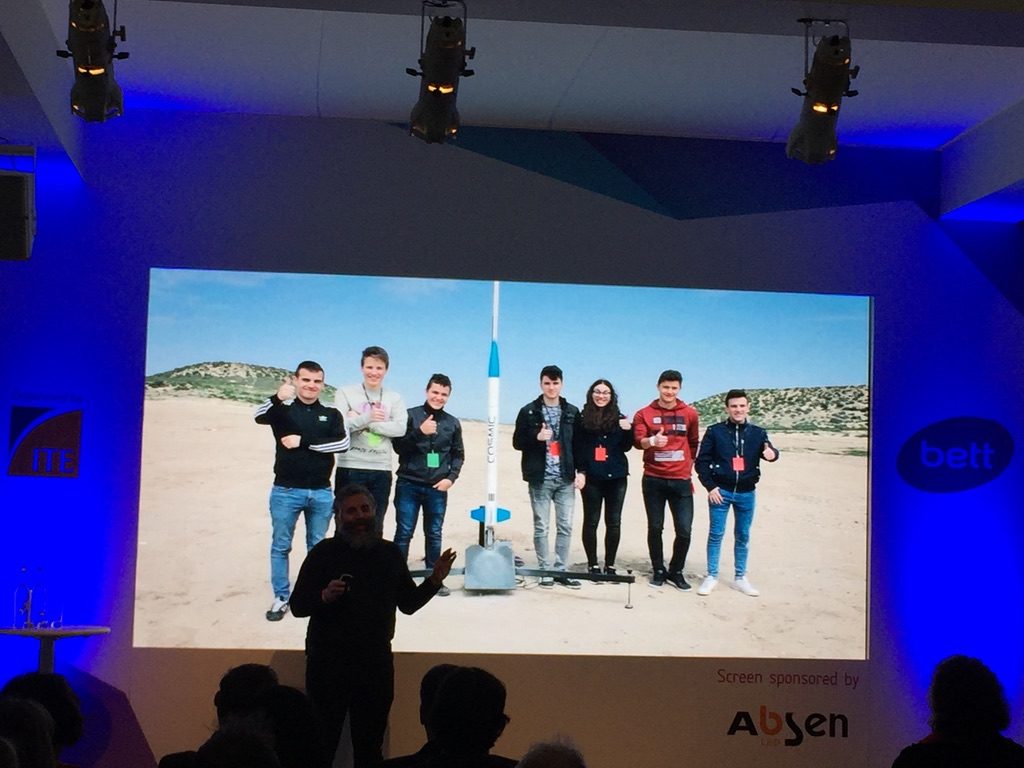
This session showcased the work of master students from the Space Department at Sweden’s Lulea University and their machines that extract water from the cold air of Mars; educational robots from the German Space Agency (DLR); and CanSats made by K12 students in Aguascalientes, Mexico, among others. During the talk, David and Electronic Cats CanSat’s Andres Sabas shared how they were able to get college students to program and launch 40 small satellites using open source hardware and aerostatic balloons.
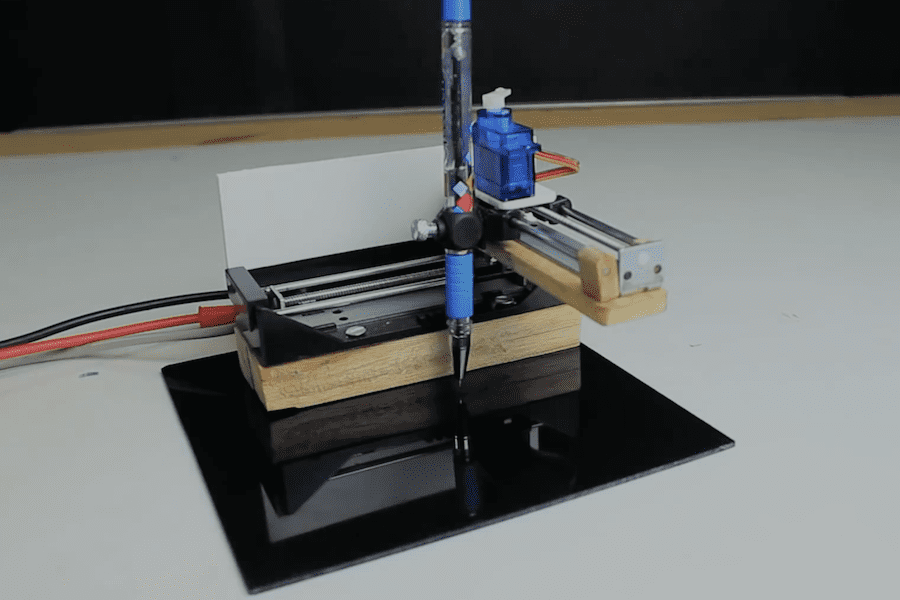
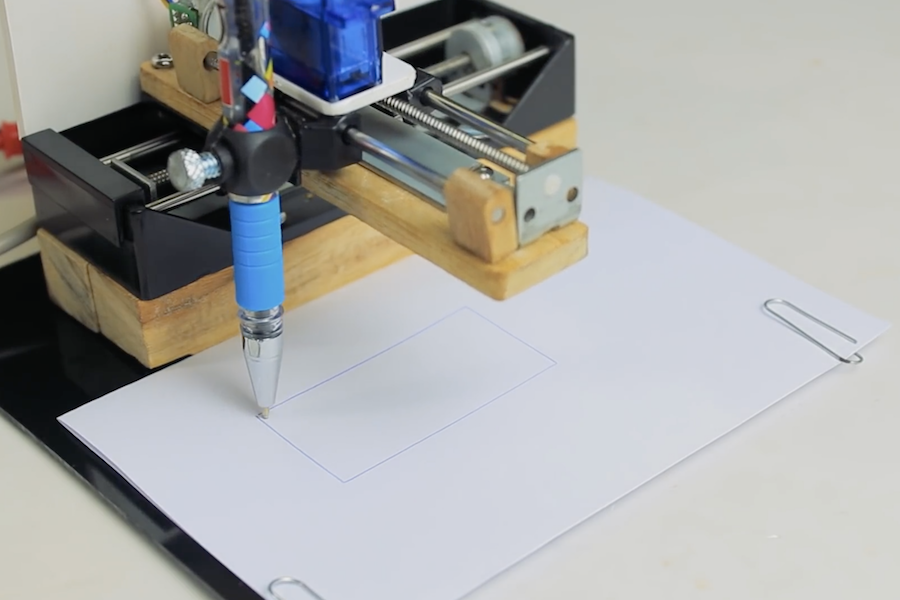
For an easy plotter design that you can build with only simple hand tools, be sure to check out this tiny project from Mr Innovative. The machine features a pair of stepper and lead screw assemblies to maneuver a pen in an X/Y plane, along with a clever string and servo setup to handle retraction.
An Arduino Nano and two L293D ICs mounted to a custom PCB are used to control the device, though a breadboard could certainly substitute for the PCB in a pinch. Drawings are translated into the proper format via Inkscape and Processing.
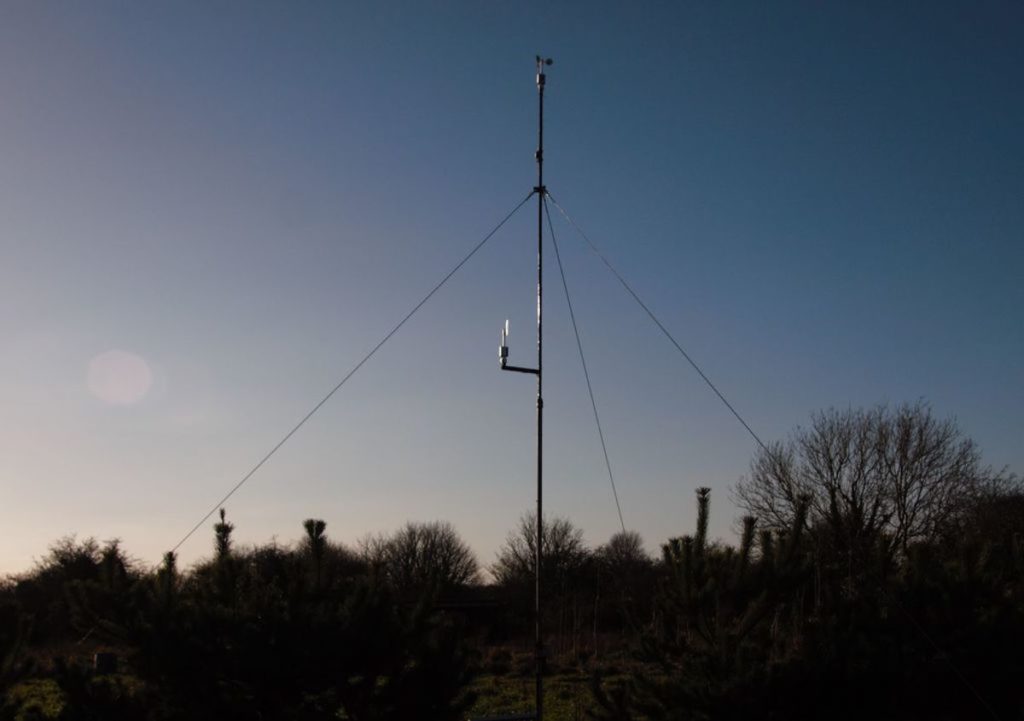
After deploying a remote weather station over two years ago, self-proclaimed ugly pirate Tecwyn Twmffat needed a better wireless communication solution.
Originally, his installation used a GPRS modem to transmit data over the cellular network, and while this normally worked quite well, the module would get booted off the network during updates. Additionally, its solar panel power supply couldn’t keep up with the system during the darker months of December and January.
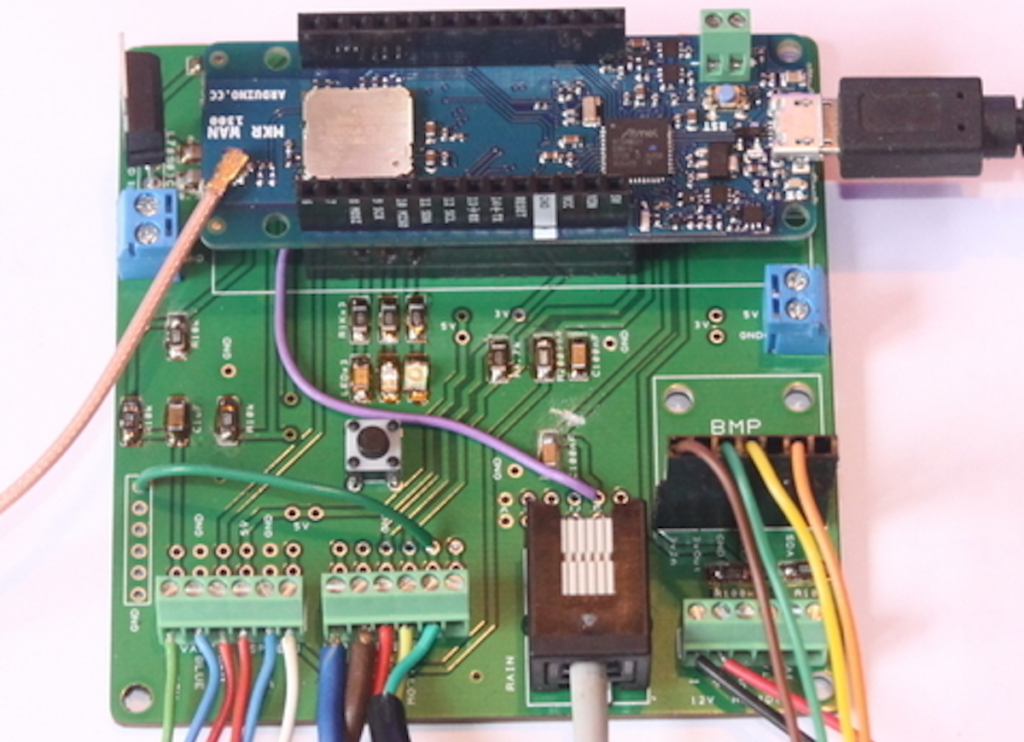
To solve both problems, he turned to a MKR WAN 1300 board to transmit data to a base station within range of WiFi and mains power. The base station then takes care of placing these readings on the wider Internet, which can be seen here as a series of gauges.
Now in its third version and having been tested for over two years, my weather station gets upgraded for better low power performance and data transfer reliability.
Power consumption – not a problem in the months other than December and January, but in these very dark months the solar panel, although rated at 40 Watts, was unable to keep up with the demand of the system … and most of the demand came from the 2G FONA GPRS module which transmits the data directly to the interwebs.
The next problem was with the FONA GPRS module itself, or more probably the cell phone network. The device would work perfectly for weeks / months, but then suddenly stop for no apparent reason. Apparently the network does try to send some kind of ‘system update info’ which, if not accepted, causes the device to get booted off the network, so GPRS is not really a maintenance free solution for data transmission. It’s a shame because when it did work, it worked really nicely.
This upgrade uses the low power LoRa protocol to send the data to a Raspberry Pi local server, which then will sends it on to the interwebs. In this way, the weather station itself can be low power on a solar panel and the ‘heavy lifting’ part of the process, done somewhere within WIFI range on mains power. Of course, if you have a public LoRa gateway within range, the Raspberry Pi would not be required.
Building up the weather station PCB is easy as the SMD components are all quite large (1206) and everything on the PCB works 100%. Some of the components, namely the wind instruments, are quite expensive but can sometimes be found secondhand on eBay.
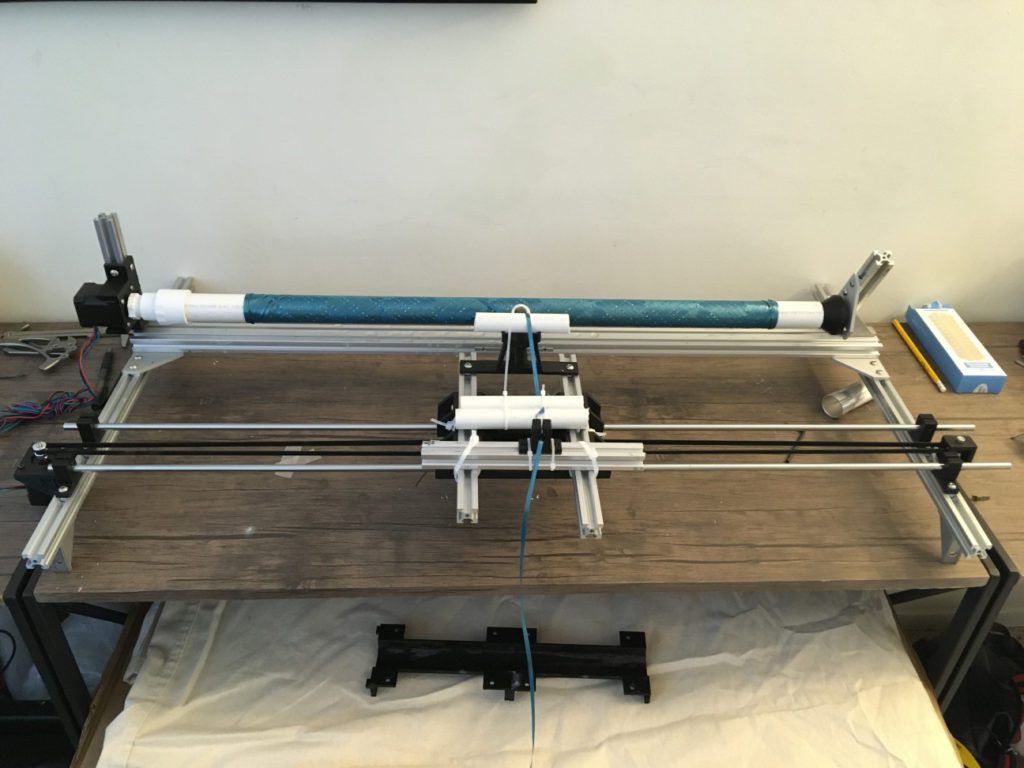
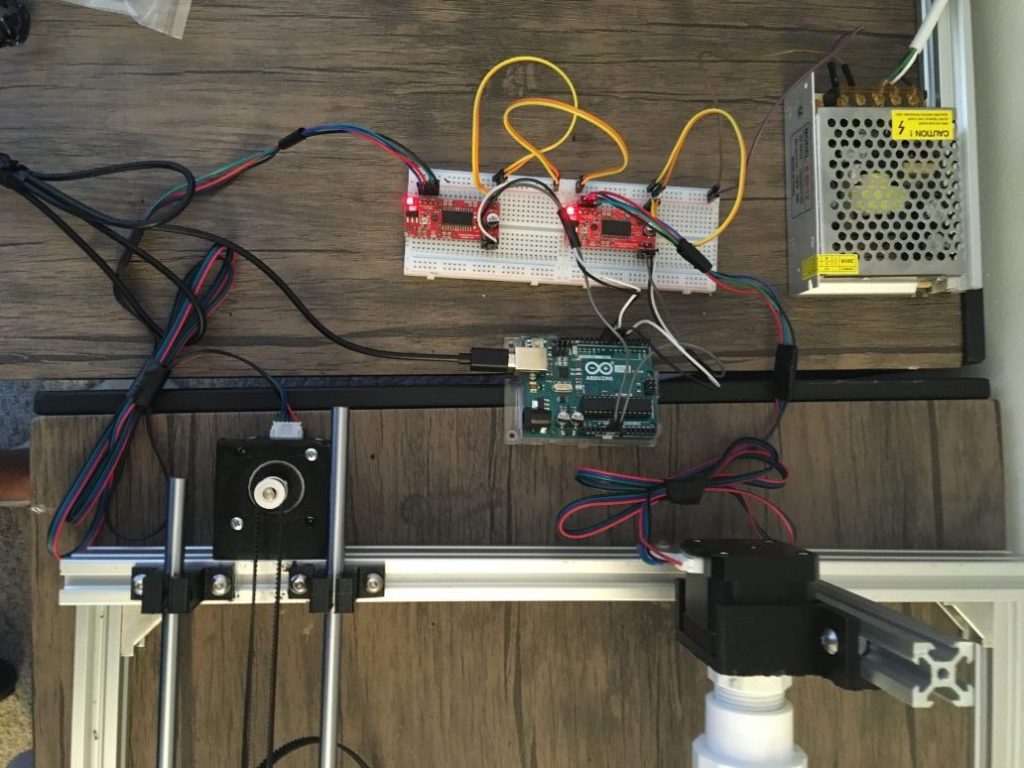
A carbon fiber bike filament winder controlled by Arduino
Arduino Team — January 18th, 2019
Bryan Kevan wanted to build his own bicycle, but wasn’t satisfied with purchasing a frame—or even ready-made tubing. He instead chose to create the frame from raw strands of carbon fiber.
The overall bike build is shown here, which necessitated him designing a variety of jigs, including a CNC wrapping machine.
His device uses an Arduino Uno, along with a pair of driver boards, to carefully roll strands of carbon fiber on a PVC mandrel in an overlapping pattern. Epoxy was dripped on the assembly during the process, resulting in CF rods that were lighter and much cheaper than purchased rods.
After quite a bit more work assembling everything together, Kevan now has a bike frame that is truly made to his specs!
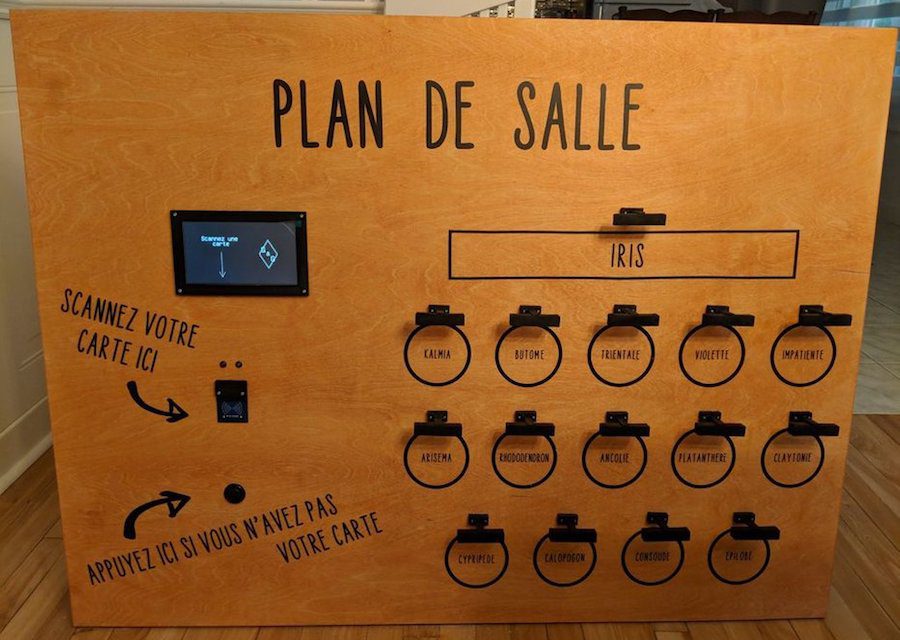
Seating charts at weddings and other formal events are usually handled by small cards at each table, but Gabrielle Martinfortier had other plans.
For her big event, she along with help from her now-husband and friends constructed a seating arrangement on a 3’ x 4’ wood canvas, equipped with a 7” TFT display and an RFID reader. An Arduino Mega serves as the brains of the device, taking advantage of its expanded IO capabilities to control an LED assembly over each table on the chart.
Wedding guests simply had to present the card they received with the invitation, then their proper table was lit. As seen in the video below, this eliminated seating confusion, and provided a bit of extra entertainment for those involved.
I wanted to make something special for my wedding tables chart, and I thought this was a good way of making it personal, as it reflects my love (addiction) for electronic projects.
So the plan was to make a big wood panel with the plan of the room on it, including, of course, the tables and their names (they are plant names, in French). The guests received a card with an RFID sticker on it along with their invitation. On the back of the card was written (in French) something like “This card is of great importance, keep it safe and carry it on you at the wedding.” I didn’t want them to know what it was for until the wedding.
The chart has several elements a TFT display, an RFID reader, a green LED and a red LED, a push button and one strip of 3 LEDs for each table. When the RFID tags are scanned, the green LED turns on if it is recognized, and a personalized message is displayed on the screen, including the name of the table where the guest is seated. In addition, the LED strip associated with the table is turned on, shedding light on the table on the room’s plan. If the card is misread or unrecognized, the red LED is turned on with an “access denied” message on the screen. The button is for those who did not succeed in not losing or forgetting the card. It displays a message on the screen, asking them to go to the bar and say something like “I am not reliable,” in exchange of which they get a backup chart to find their seat.
I changed a few things along the way: I wanted to paint the wood panel but changed my mind because I was scared I’d make a mess and have to start over with a new panel. Since I have a circuit machine I decided to make the writings and drawings with vinyl.
I also had a 20×04 character LCD screen in the beginning, but I upgraded to a 7″ TFT screen because it’s bigger and not as limiting in terms of message length.
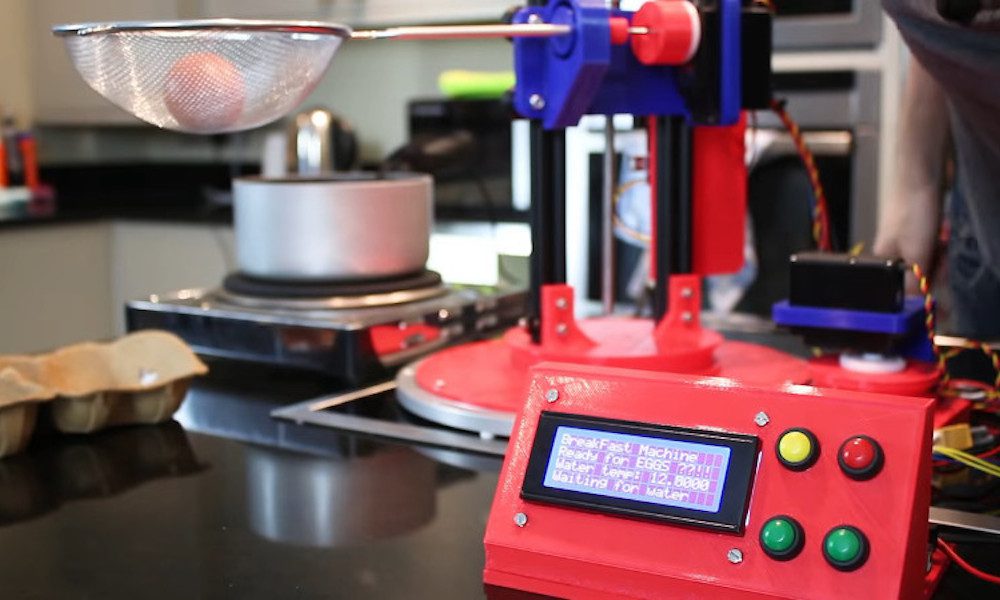
This robot is eggsactly what you need to cook breakfast
Arduino Team — January 17th, 2019
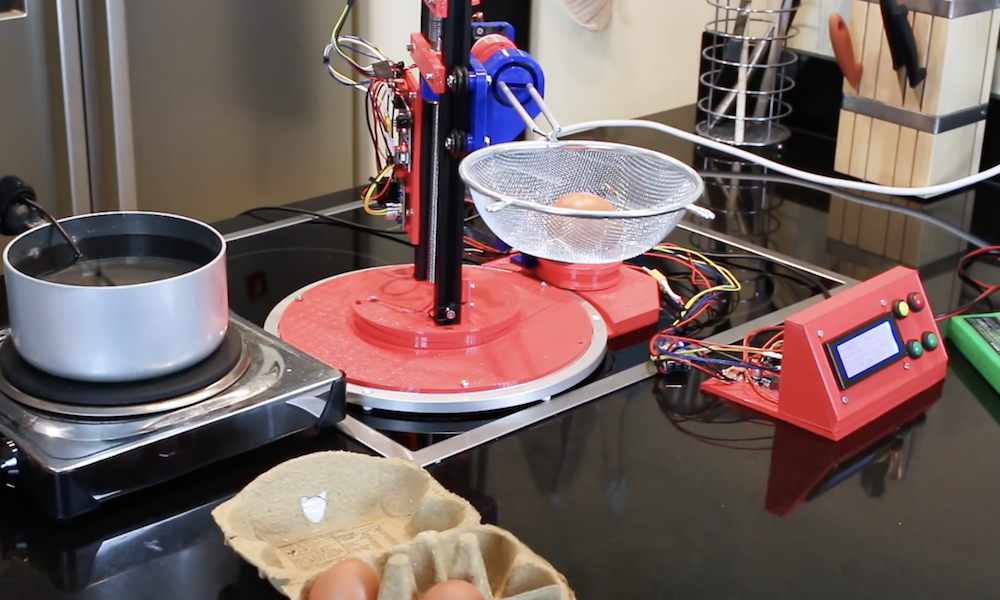
Normally, boiling an egg involves heating water in a saucepan, then dropping an egg inside to be properly heated. James Bruton, however, now has a bit of help in the form of his breakfast-making robot.
The device uses two servos, along with a motor/encoder/screw assembly to rotate and lower the egg into place. It then takes it out after six minutes, and tips it out into a secondary container.
As of now, temperature is manually controlled, but it’s tracked with a DS18B20 temperature sensor to initiate the egg lowering procedure. An Arduino Uno takes care of the lifting screw assembly, while an Arduino Mega handles everything else.
This Arduino-powered piano can play just about any MIDI file
Arduino Team — January 16th, 2019
After letting his Arduino languish in a drawer for some time, Brandon Switzer decided to take it out and start experimenting. While he could have started off small, Switzer chose to instead create his own player piano system, completing it at a cost of around $650.
While the details of the project aren’t explicitly spelled out, you can see a time-lapse of this amazing build in the video below. As you can imagine, it took a massive amount of breadboard space to get all the electronics laid out, and a similarly impressive number of solenoids to activate all of the keys.
Additionally, he had to do plenty of mechanical work, including the cringeworthy job of actually drilling into a what appears to be a functional piano!
In early August 2017 I was looking to partake in some kind of engineering project that would be fun and also help me learn new things. For a long time I had an Arduino Uno that had been sitting in a drawer, and for the first time I took it out to experiment with it and create something new.
For a long time I had been inspired by player pianos — it’s something about the way the keys move on their own that make them so wonderful. I wanted to create something like that — something that didn’t only work but also impressed the viewer — for a cheap cost.
One of my goals in creating this was to show that it’s possible to replicate amazing things for little money, and I think I proved this. While a player system from Yamaha or Pianodisc cost upwards of $10,000, I built my own system for a measly $650. Not only that, but once you buy your $10,000 player piano, you have to purchase extra apps and songs if you actually want to play something on it. Overall I’m very satisfied with the way the piano turned out, and I’m excited to use it in the future.
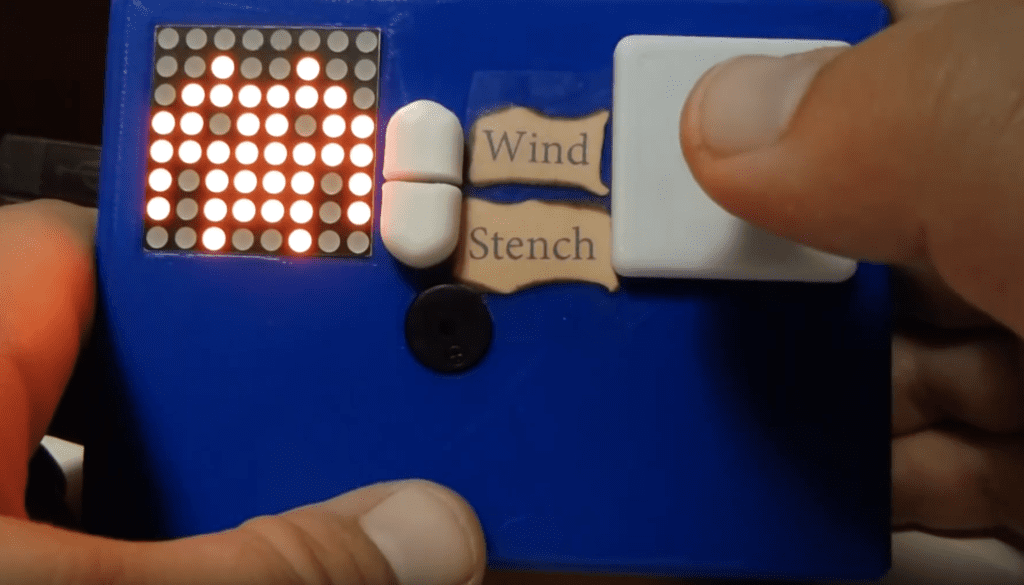
Hunt the Wumpus is a text-based survival/horror game developed in 1973. As such, it’s perhaps due for an update, and Benjamin C. Faure was able to do so using an Arduino Mega to run a graphical version on an 8×8 MAX7219 LED display.
The game consists of moving your character through the 64-LED randomly generated world, avoiding pits and bats, attempting to face the Wumpus to fire your one arrow. Navigation is aided by “wind” and “stench” lights, indicating either a pit or the foul Wumpus is nearby. The game is also enhanced with a few LED animations and a small piezo speaker.
On startup, the game will generate an 8×8 map for the player that contains bats, pits, and a Wumpus. The player must pay attention to their senses to ensure they don’t fall into a pit or run into a Wumpus. Running into a bat might not be instant death, but they can carry you over a pit or even straight to the Wumpus.
If the player wishes to win, they must pinpoint the location of the Wumpus. Then, they must take one step towards the Wumpus (so that they are facing the proper direction) and fire their only arrow. If they hit the Wumpus, they win! If they miscalculated, however, they will meet a grisly fate.
A demo can be seen below, while code for the project is available on GitHub.
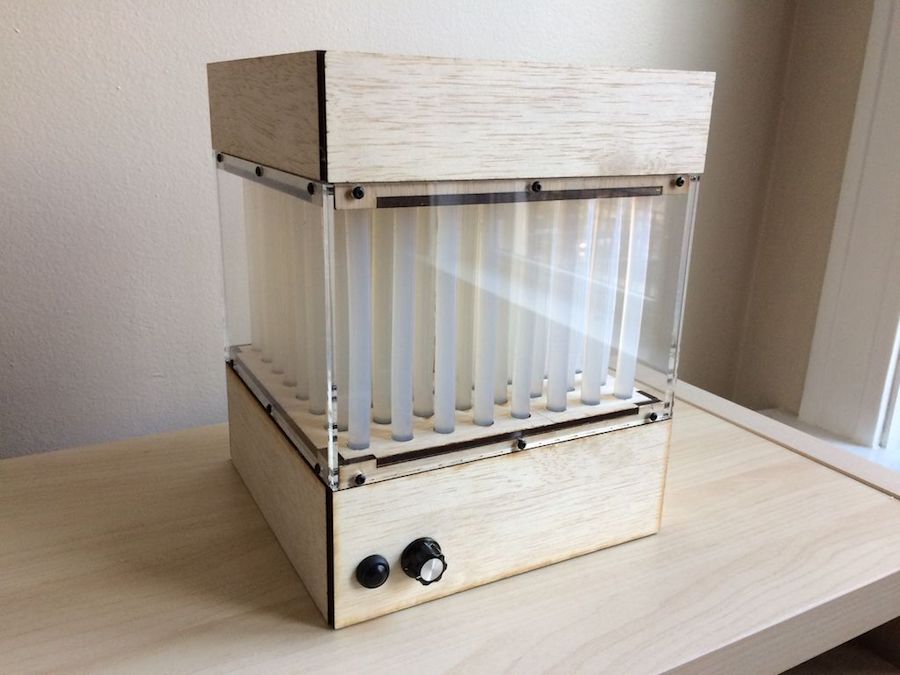
Glue sticks are great for attaching electronics and other bits to projects, but as Jon Bumstead shows in his latest work, they can also make pretty cool light diffusers.
His project takes the form of a wooden box with plexiglass panels, allowing observers to see 64 vertical illuminated glue sticks inside. Hidden within the cube are 128 WS2811 LED modules, melted into the top and bottom of each stick.
Everything is built around an Arduino Nano, using only a pair of its outputs to control each LED. User interface is provided by a button and knob to adjust speed, color, and patterns.
In this project, I created a “fiber optic” LED matrix using WS2801 LED strip and glue sticks. The light displays have a different look than similar LED cubes and a few advantages. First, you can’t see the actual LEDs in the display because the glue sticks guide the light away from the LEDs. Second, the device requires much fewer LEDs to make up the volume. Because the top and bottom have different LED strips, the fiber optic cables can take on two different colors that mix in the center. There are tons of different color displays that can be achieved with the device. I also added a button and knob for controlling the speed, color, and type of light display.
An Arduino-powered mini turntable with magnetic attachments
Arduino Team — January 14th, 2019
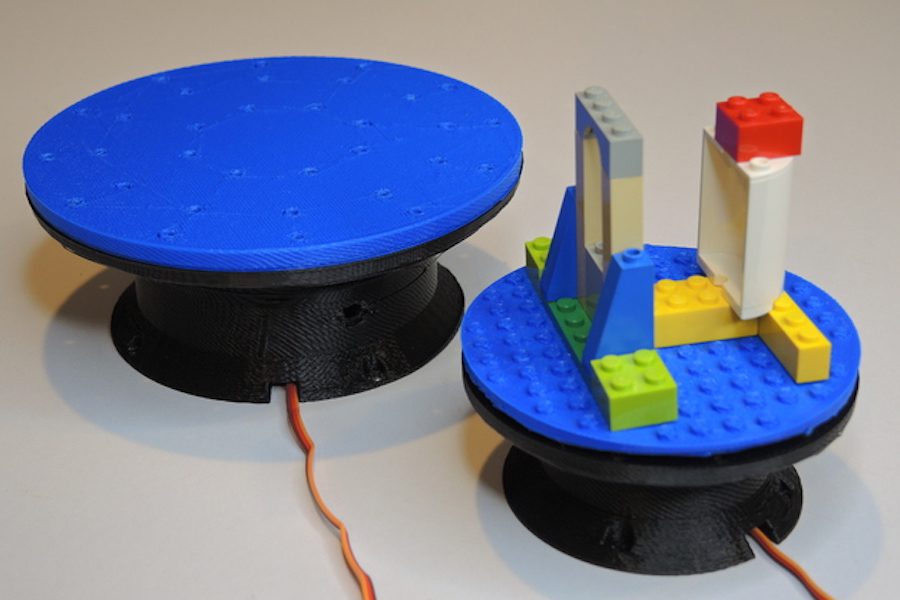
If you need a motorized turntable for filming or simply displaying your latest project, here’s an easy 3D-printable option from Ali of Potent Printables.
The design takes two forms—one using a full-sized hobby servo, and a smaller version that employs a micro servo for motion, both of which are set up for continuous rotation.
Electronics for the project are fairly straightforward, with an Arduino Uno powering the tables via an Adafruit Motor Shield. While this could be expanded for different I/O or sensor use, the clever bit of this configuration is its interchangeable design. A master circle is connected to the servo horn, while the swappable plates attach to it with magnets, accommodating a flat surface, mounting holes, or even LEGO bricks.
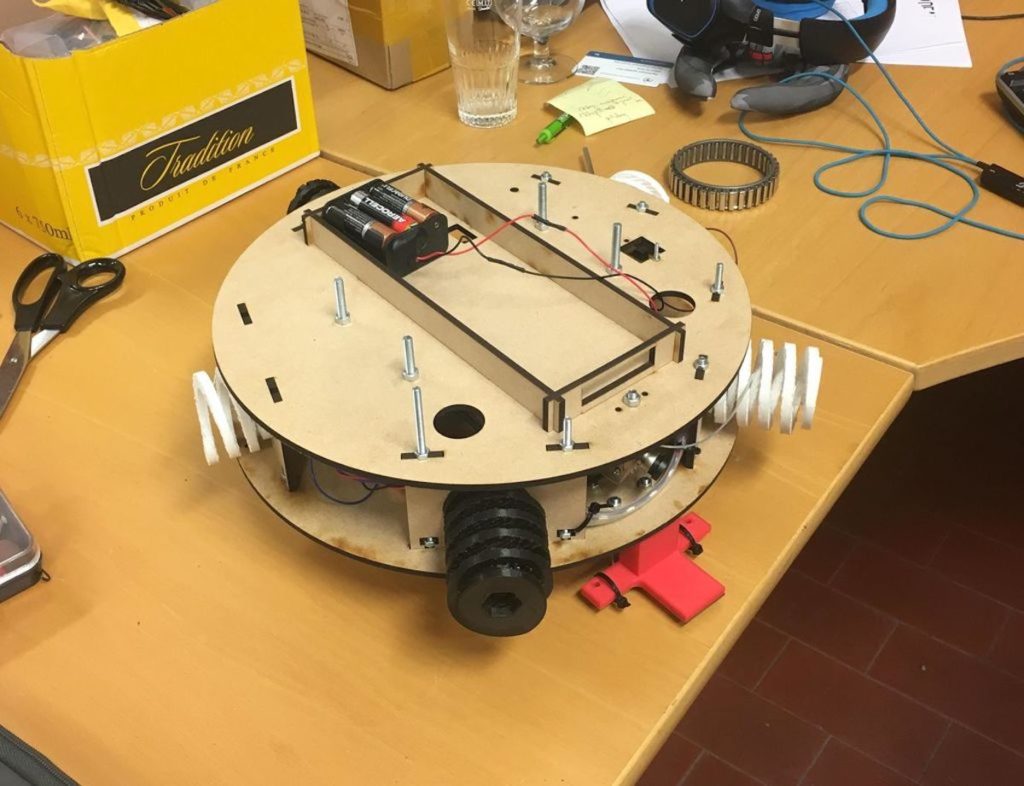
If you’ve ever been to an escape room, you’ve undoubtedly had to deal with a wide variety of puzzles that you have to solve in order to get out of the “prison” that you’ve willingly thrown yourself into. Beyond the puzzle that you’re trying to decode, the mechanisms used can be extremely clever, and coming up with a new device to use in these scenarios was a perfect challenge for this team of Belgian college students.
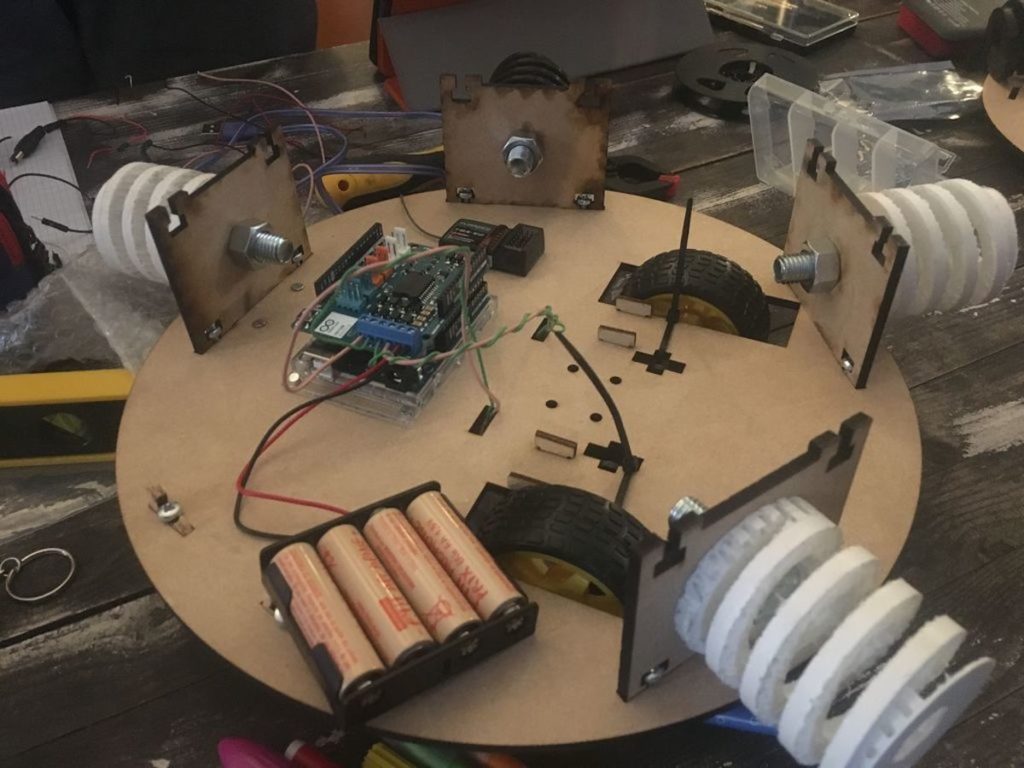
Based on the project requirements, they created a Roomba-like circular robot controlled by an Arduino Uno and motor shield that drives a pair of DC motors. The idea, while not fully implemented due to time constraints, is that it can be remotely operated only after solving a riddle and within a certain time period, then drive itself back to a designated spot once the game is over.
Here is a summary of what happens in the robot:
– The non-autonomous part: a remote controller is linked to Arduino through a receiver. Players control the remote and therefore control the Arduino which controls the motors. The Arduino is turned on before the game starts, but it enters the main function when players solve a riddle on the remote controller. An IR wireless camera is already turned on (turned on at the same time as the “whole” (controlled by the Arduino) when switch on/off turned on). Players guide the car with remote controller: they control the speed and the direction. When the timer that starts when the main function is entered is equal to 30 minutes, the control from the controller is disabled.
– The autonomous part: the control is then managed by the Arduino. After 30 minutes, the IR line tracker sensor starts following a line on the ground to finish the parcours.
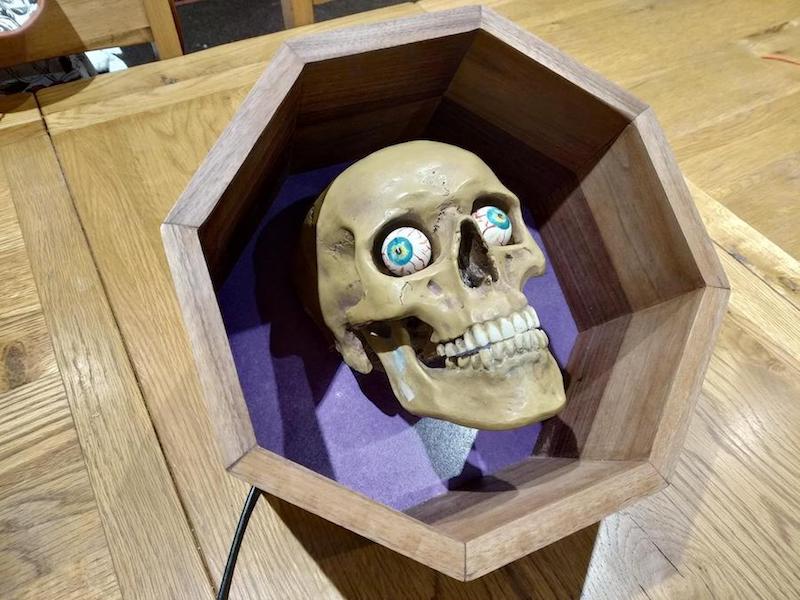
While model skulls are generally relegated to Halloween, or biology class, this maker decided to construct a very unique clock out of one.
The “hands” of the terrifying timepiece are represented by two eyes—right for hours, left for minutes—that are rotated about using a pair of 360-degree (but not continuous rotation) servos. If this wasn’t freaky enough, a third servo pulls the jawbone open with a thin cable, which then snaps shut with springs to “chime” the hour.
An Arduino is used for control of the assembly, along with a DS3232 RTC module to keep things accurate. A nice octagonal frame was built for it as well, giving this otherwise strange creation a classy home in which to reside.
Cooperative couch game uses aggressive sitting for input
Arduino Team — January 10th, 2019
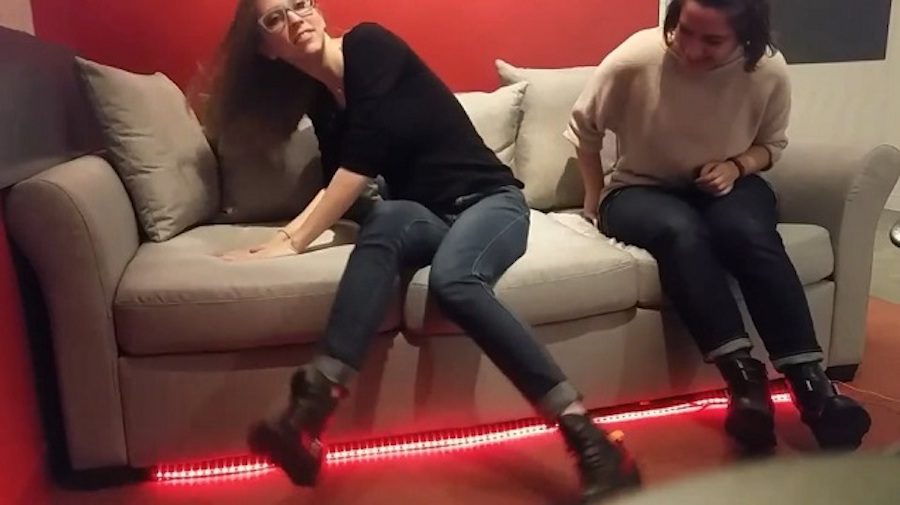
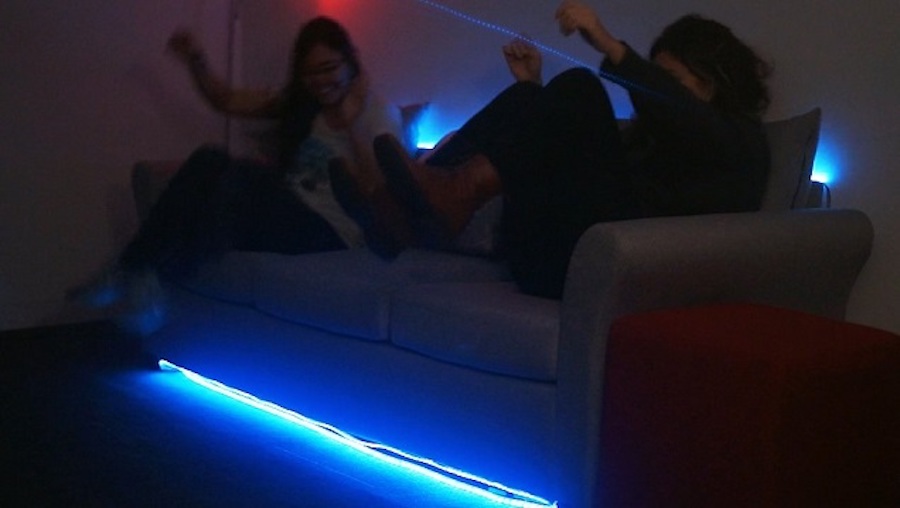
At some point in your life, you may have wrestled over the preferred sofa cushion on which to sit, but what if these informal games of couch dominance were codified into an actual contest? That’s the idea behind the co-op game by Carol Mertz and Francesca Carletto-Leon, aptly named “HELLCOUCH.”
Unlike most “video” games, this system—which runs on an Arduino along with the Unity game engine—has no screen. Instead, it relies on lighting and audio cues to guide the players on where to sit, or as its disembodied voice puts it, “Perform the sacred butt ritual!”
The game takes around 90 seconds to play, during which time participants’ normal attitudes about giving each other space—and not bouncing around on the couch like crazy people—are thoroughly questioned.
It’s a challenge. At first glance, HELLCOUCH is designed to look like just a regular couch, so players don’t necessarily enter into it with the expectation of being silly and letting their guard down. We didn’t design an attract mode, and were careful to keep any indication of it being a “possessed” couch hidden until someone sits down. As soon as a butt hits a cushion, though, players are met with a loud thunderclap, demonic cackling, and a fiery array of lights. And when the game starts, solo sitters have to face the fact that they’re not going to be able to play alone, so they need to figure out how to get another butt or two in the game. This theme and sound design are meant to set the stage for humor and joyful play. The first guidance players get is a disembodied demonic voice declaring that they need to “perform the sacred butt ritual,” which often makes players giggle or raise an eyebrow. The game only takes about 90 seconds to play, but often by the end folks get very comfortable embracing their role as a goofy demon liberator.
Monitor radioactivity levels with this low-cost Geiger counter
Arduino Team — January 9th, 2019
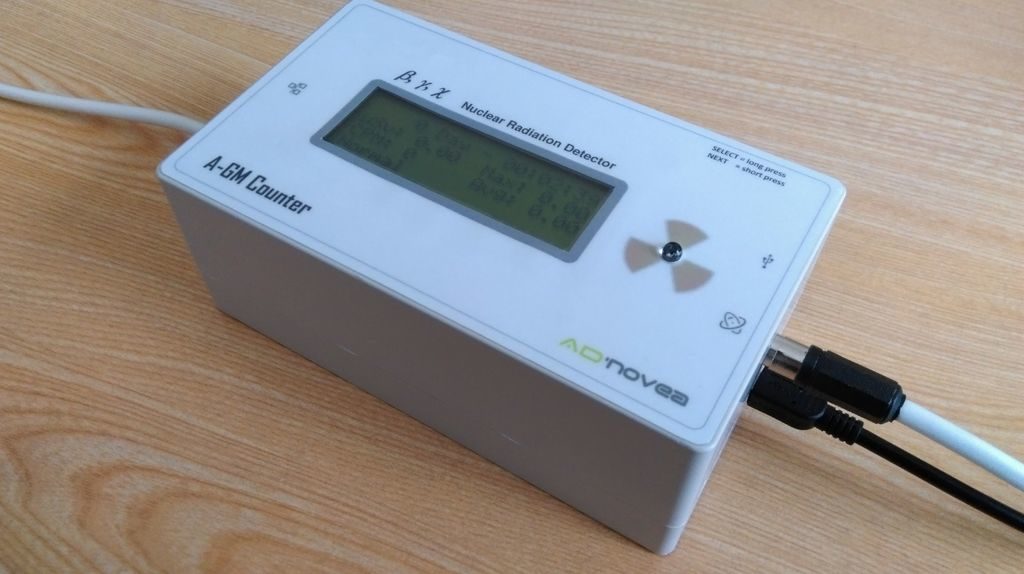
While you may not have a graduate degree in nuclear physics, you likely have some inkling that large amounts of radiation should be avoided. In order to monitor local levels, AdNovea has come up with a DIY Geiger-Müller counter, which displays values on a 20×4 LCD screen.
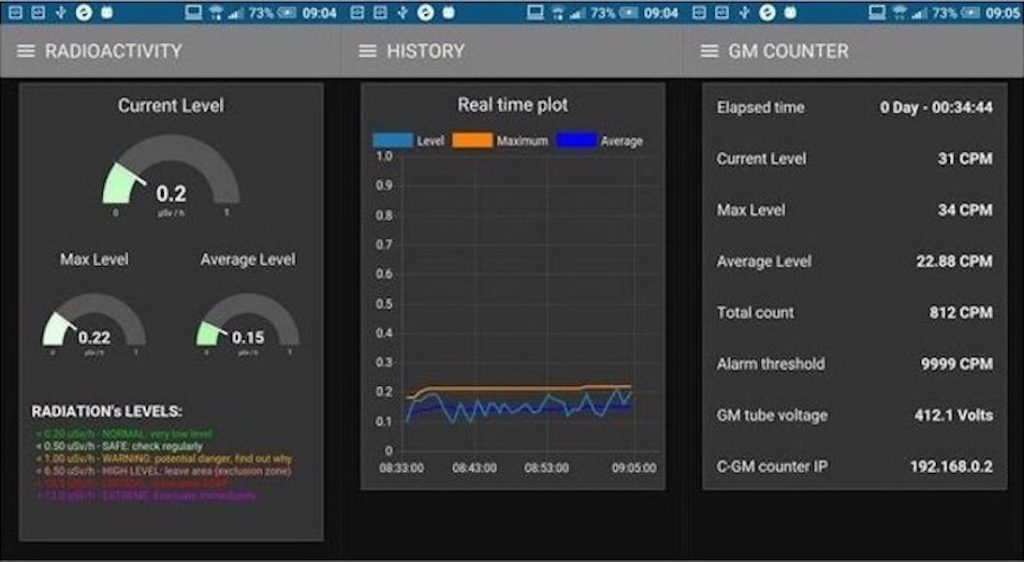
The device uses an SBM-20 or STS-5 tube to measure radioactivity, with an Arduino Nano to process this input. It can be employed as a standalone unit, or transmit readings wirelessly via an Ethernet interface. Data can then be tracked over time with a web app, or even shared with the wider world over the Internet.
This DIY low-cost ($50$/€43) C-GM Counter project provides hardware and firmware for building a Geiger-Müller counter device aka G.M. Counter for continuous measurement of the radioactivity level. It is based on an Arduino Nano, a 20 chars x 4 lines LCD display, a W5100 Ethernet card, a 400V power supply and very few components around. The number of components has been kept to minimum for easy assembling and reducing the cost.
The C-GM Counter is able to run as a standalone radioactivity counter or for ensuring long term radioactivity monitoring, the C-GM counter can be used in association with A-GM Manager (in the sequel) that is an open-source web application running on a SOHO server (e.g. QNAP sells Small Office Home Office servers). A-GM Manager is also able to publish the C-GM Counter measures on the worldwide shared map managed by GMC MAP. Finally, there is also a Node-RED version for integration of the C-GM Counter with Node-RED such as the QNAP IoT framework.
Um dir ein optimales Erlebnis zu bieten, verwenden wir Technologien wie Cookies, um Geräteinformationen zu speichern und/oder darauf zuzugreifen. Wenn du diesen Technologien zustimmst, können wir Daten wie das Surfverhalten oder eindeutige IDs auf dieser Website verarbeiten. Wenn du deine Einwillligung nicht erteilst oder zurückziehst, können bestimmte Merkmale und Funktionen beeinträchtigt werden.
Funktional
Immer aktiv
Die technische Speicherung oder der Zugang ist unbedingt erforderlich für den rechtmäßigen Zweck, die Nutzung eines bestimmten Dienstes zu ermöglichen, der vom Teilnehmer oder Nutzer ausdrücklich gewünscht wird, oder für den alleinigen Zweck, die Übertragung einer Nachricht über ein elektronisches Kommunikationsnetz durchzuführen.
Vorlieben
Die technische Speicherung oder der Zugriff ist für den rechtmäßigen Zweck der Speicherung von Präferenzen erforderlich, die nicht vom Abonnenten oder Benutzer angefordert wurden.
Statistiken
Die technische Speicherung oder der Zugriff, der ausschließlich zu statistischen Zwecken erfolgt.Die technische Speicherung oder der Zugriff, der ausschließlich zu anonymen statistischen Zwecken verwendet wird. Ohne eine Vorladung, die freiwillige Zustimmung deines Internetdienstanbieters oder zusätzliche Aufzeichnungen von Dritten können die zu diesem Zweck gespeicherten oder abgerufenen Informationen allein in der Regel nicht dazu verwendet werden, dich zu identifizieren.
Marketing
Die technische Speicherung oder der Zugriff ist erforderlich, um Nutzerprofile zu erstellen, um Werbung zu versenden oder um den Nutzer auf einer Website oder über mehrere Websites hinweg zu ähnlichen Marketingzwecken zu verfolgen.