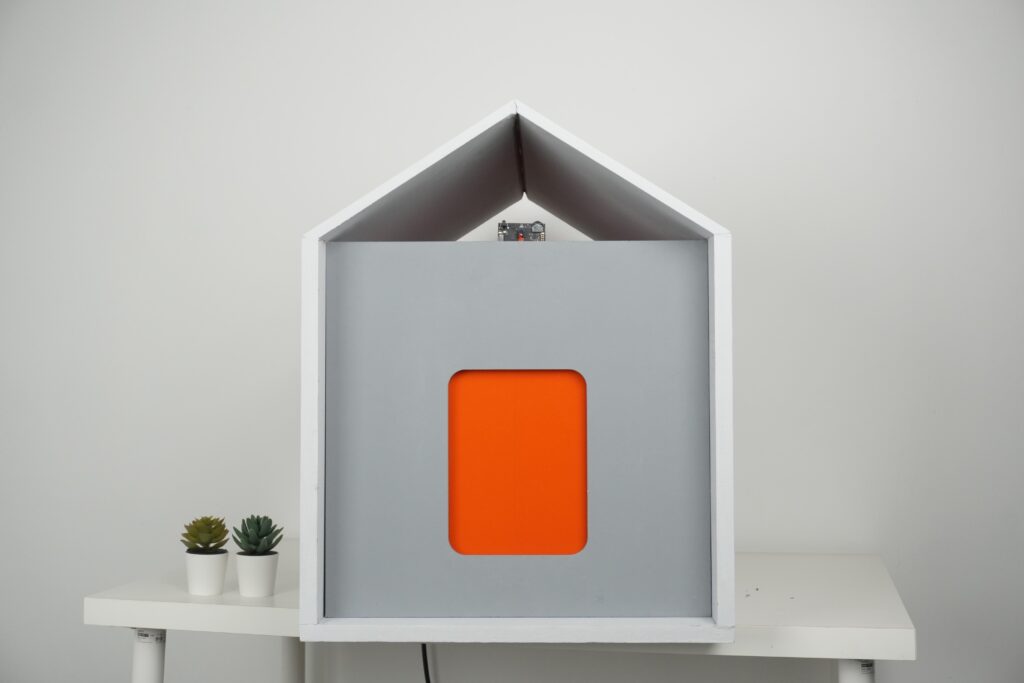
The traditional backyard chicken coop is a very simple structure that typically consists of a nesting area, an egg-retrieval panel, and a way to provide food and water as needed. Realizing that some aspects of raising chickens are too labor-intensive, the Coders Cafe crew decided to automate most of the daily care process by bringing some IoT smarts to the traditional hen house.
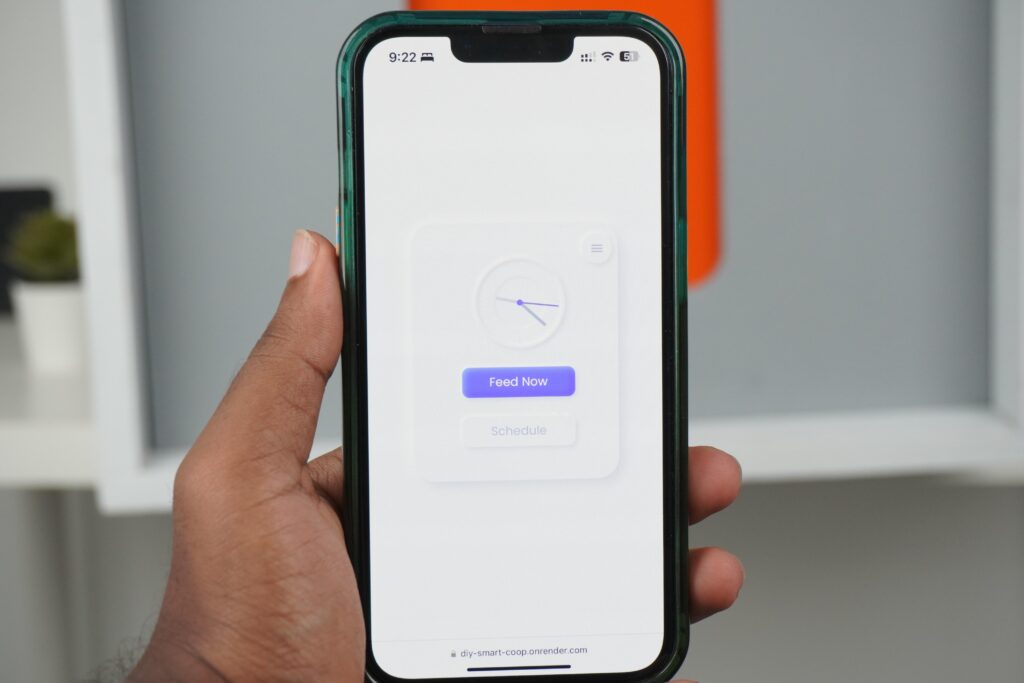
Controlled and actuated by an Arduino UNO R4 WiFi and a stepper motor, respectively, the front door of the coop relies on a rack-and-pinion mechanism to quickly open or close at the scheduled times. After the chickens have entered the coop to rest or lay eggs, they can be fed using a pair of fully-automatic dispensers. Each one is a hopper with a screw at the bottom which pulls in the food with the help of gravity and gently distributes it onto the ground. And similar to the door, feeding chickens can be scheduled in advance through the team’s custom app and the UNO R4’s integrated Wi-Fi chipset.
The last and most advanced feature is the AI predator detection system. Thanks to a DFRobot HuskeyLens vision module and its built-in training process, images of predatory animals can be captured and leveraged to train the HuskyLens for when to generate an alert. Once an animal has been detected, it tells the UNO R4 over I2C, which in turn, sends an SMS message via Twilio.
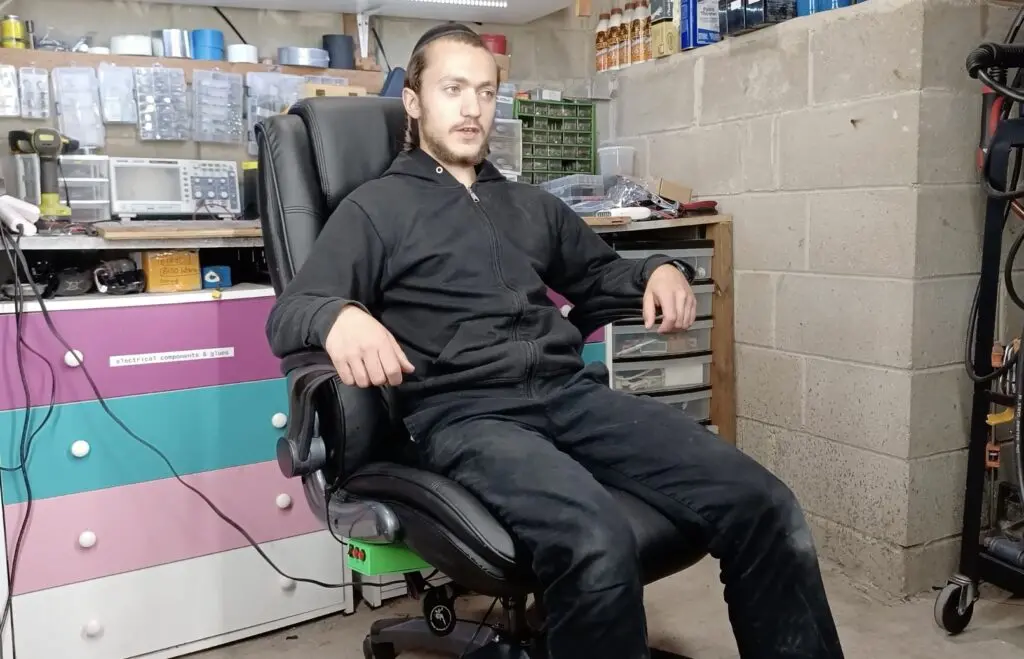
A month ago, ElectronicLab modified his office chair with an electric car jack, giving it motorized height adjustment. That worked well, but required that he push buttons to raise or lower the seat. Pushing those buttons is a hassle when one’s hands are full, so ElectronicLab went back to the workbench to add voice control capabilities.
ElectronicLab was using an Arduino Nano to control the electric jack motor in response to button presses, so he already had most of the hardware necessary to make the system smarter. He just needed the Arduino to recognize specific voice commands, which he was able to achieve using an ELECHOUSE Voice Recognition Module V3.
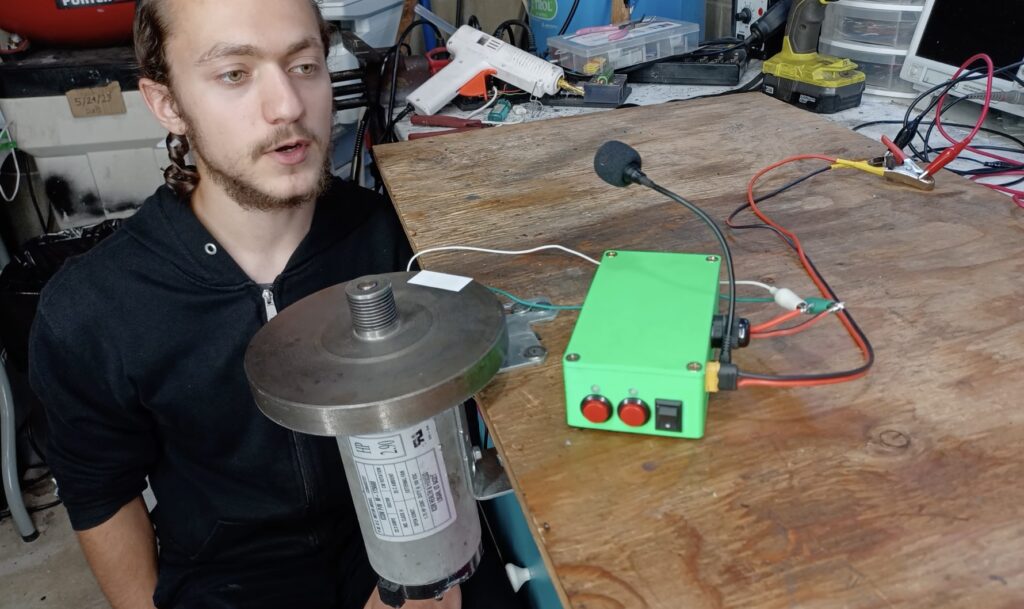
That voice recognition modules supports up to 80 voice commands, but ElectronicLab only needed a few of them — just enough to tell the chair which direction to move and how far to go. The module came with a microphone, which ElectronicLab was able to attach outside of the 3D-printed enclosure where it could pick up his voice.
But there was still one problem: the movement was very slow. The jack was designed to lift a car, so it uses a high-torque motor with a 10:1 planetary gearset to drive a hydraulic pump. ElectronicLab didn’t need that much torque, so he welded the planetary gears to give the motor a direct 1:1 ratio. Sadly, that was a mistake. The hydraulic oil can’t flow fast enough to keep up, so the motor pulls way too much current for the driver.
Still, the voice control was a success and so ElectronicLab can simply swap out the motor.
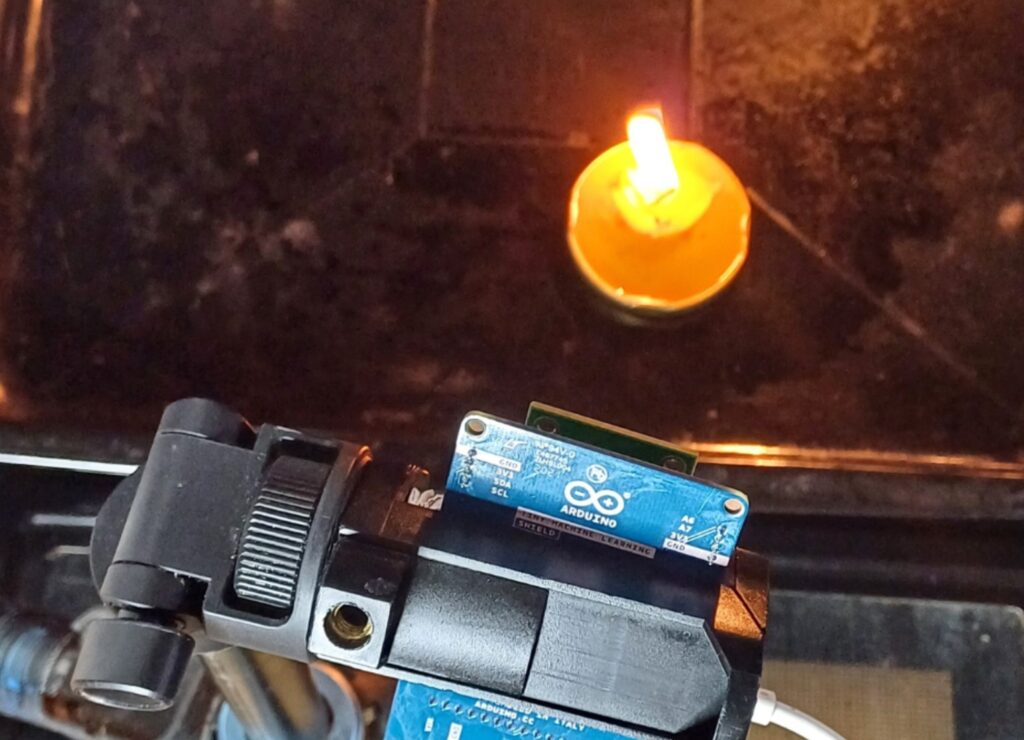
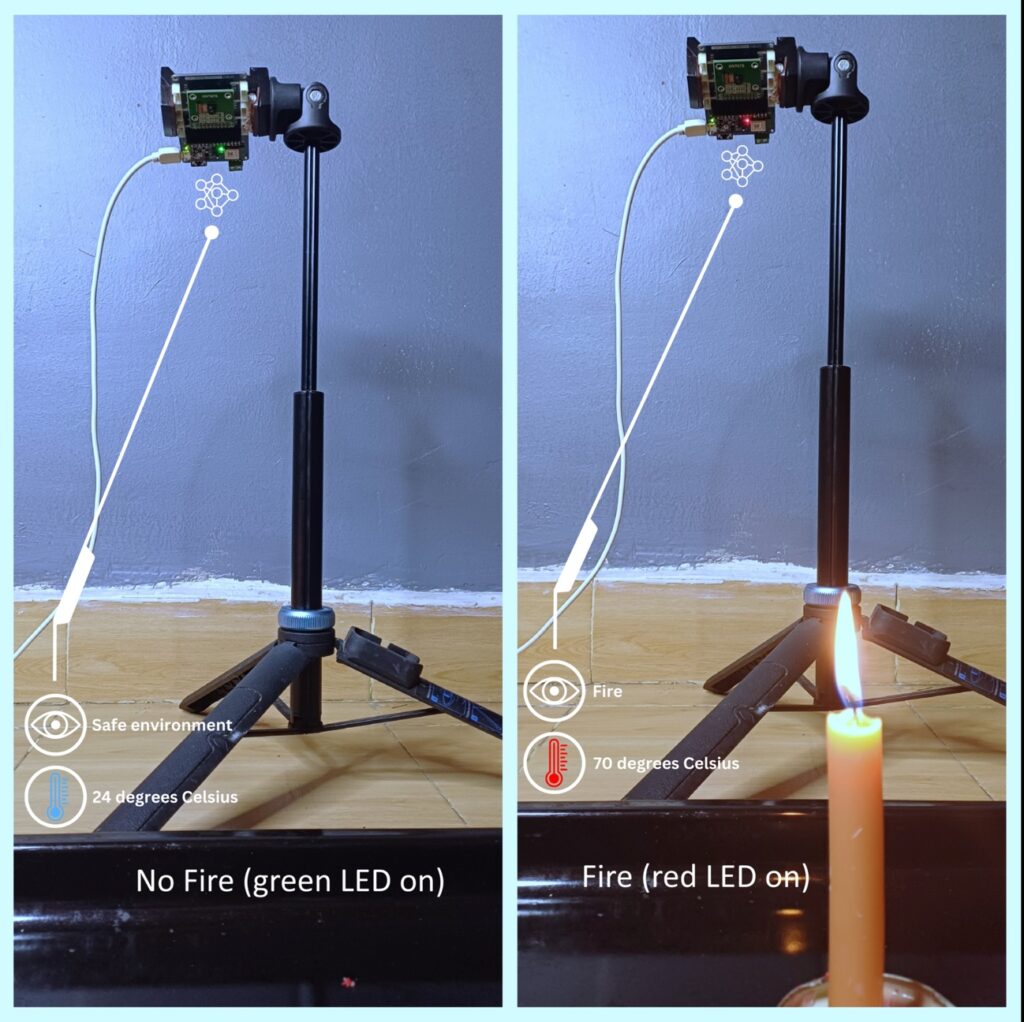
The mere presence of a flame in a controlled environment, such as a candle, is perfectly acceptable, but when tasked with determining if there is cause for alarm solely using vision data, embedded AI models can struggle with false positives. Solomon Githu’s project aims to lower the rate of incorrect detections with a multi-input sensor fusion technique wherein image and temperature data points are used by a model to alert if there’s a potentially dangerous blaze.
Gathering both kinds of data is the Arduino TinyML Kit’s Nano 33 BLE Sense. Using the kit, Githu could capture a wide variety of images thanks to the OV7675 camera module and temperature information with the Nano 33 BLE Sense’s onboard HTS221 sensor. After exporting a large dataset of fire/fire-less samples alongside a range of ambient temperatures, he leveraged Google Colab to train the model before importing it into the Edge Impulse Studio. In here, the model’s memory footprint was further reduced to fit onto the Nano 33 BLE Sense.
The inferencing sketch polls the camera for a new frame, and once it has been resized, its frame data, along with a new sample from the temperature sensor, are merged and sent through the model which outputs either “fire” or “safe_environment”. As detailed in Githu’s project post, the system accurately classified several scenarios in which a flame combined with elevated temperatures resulted in a positive detection.
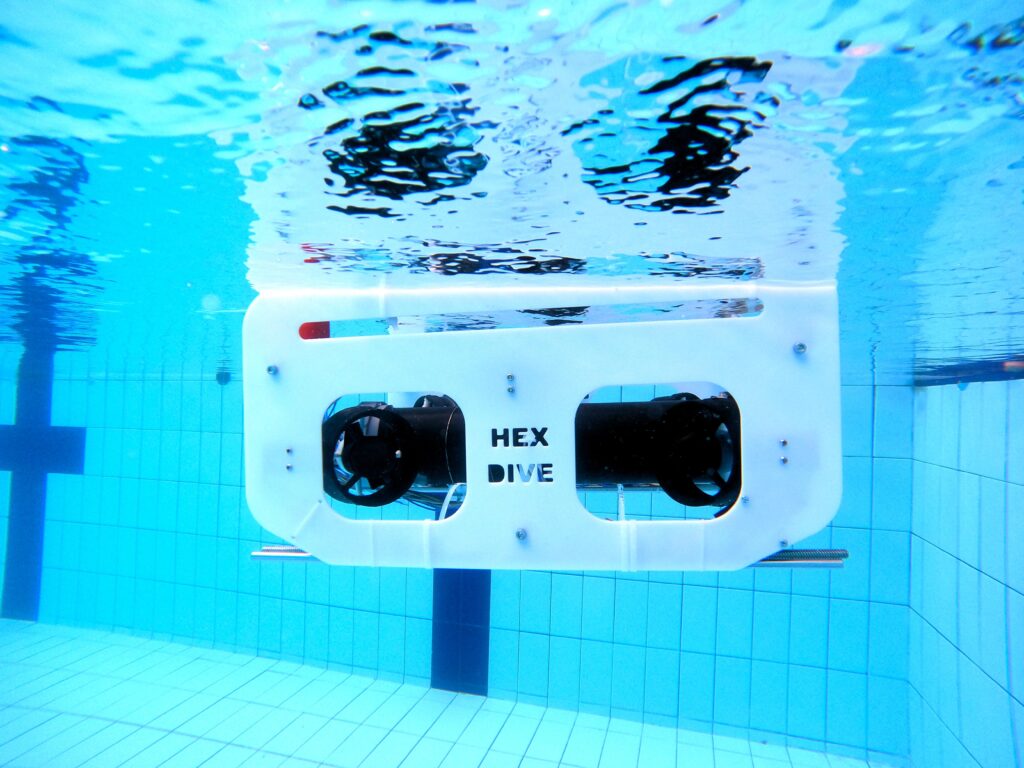
Who doesn’t want to explore underwater? To take a journey beneath the surface of a lake or even the ocean? But a remotely operated vehicle (ROV), which is the kind of robot you’d use for such an adventure, isn’t exactly the kind of thing you’ll find on the shelf at your local Walmart. You can, however, follow this guide from Ranuga Amarasinghe to build your own ROV for some aquatic fun.
Amarasinghe is a 16-year-old Sri Lankan student and this is actually the second iteration of his ROV design. As such, he’s dubbed it “ROV2” and it appears to be quite capable. All of its electronics sit safely within a 450mm length of sealed PVC tube. That mounts onto the aluminum extrusion frame structure that also hosts the six thrusters powered by drone-style brushless DC motors.
ROV2’s brain is an Arduino Mega 2560 board and it drives the BLDC motors through six electronic speed controllers (ESCs). It receives control commands from the surface via an umbilical. The operator holds a Flysky transmitter that sends radio signals to a receiver floating on the water. An Arduino UNO Rev3 reads those and then communicates the motor commands to the Mega through the tethered serial connection. That limits the maximum length of the tether to about 40 meters, which subsequently limits the maximum operating depth.
With the specified lithium battery pack, ROV2 can traverse the depths for 30-45 minutes. And when equipped with the 720p FPV camera, pilots can see and record all of the underwater action.
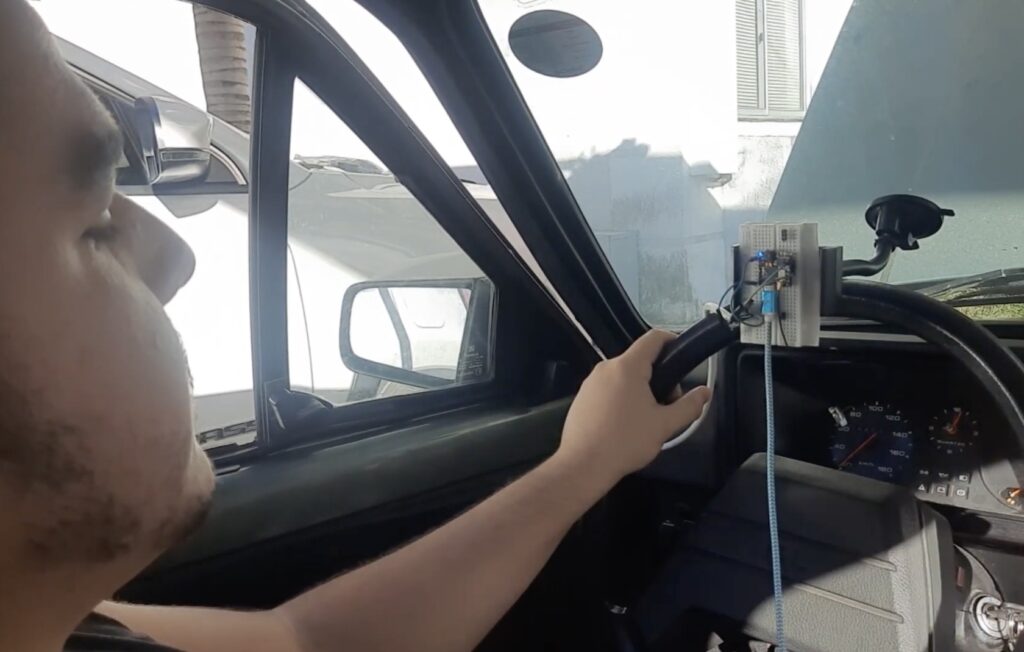
Shortly after attending a recent tinyML workshop in Sao Paolo, Brazil, Joao Vitor Freitas da Costa was looking for a way to incorporate some of the technologies and techniques he learned into a useful project. Given that he lives in an area which experiences elevated levels of pickpocketing and automotive theft, he turned his attention to a smart car security system.
His solution to a potential break-in or theft of keys revolves around the incorporation of an Arduino Nicla Vision board running a facial recognition model that only allows the vehicle to start if the owner is sitting in the driver’s seat. The beginning of the image detection/processing loop involves grabbing the next image from the board’s camera and sending it to a classification model where it receives one of three labels: none, unknown, or Joao, the driver. Once the driver has been detected for 10 consecutive seconds, the Nicla Vision activates a relay in order to complete the car’s 12V battery circuit, at which point the vehicle can be started normally with the ignition.
Through this project, da Costa was able to explore a practical application of vision models at-the-edge to make his friend’s car safer to use. To see how it works in more detail, you can check out the video below and delve into the tinyML workshop he attended here.
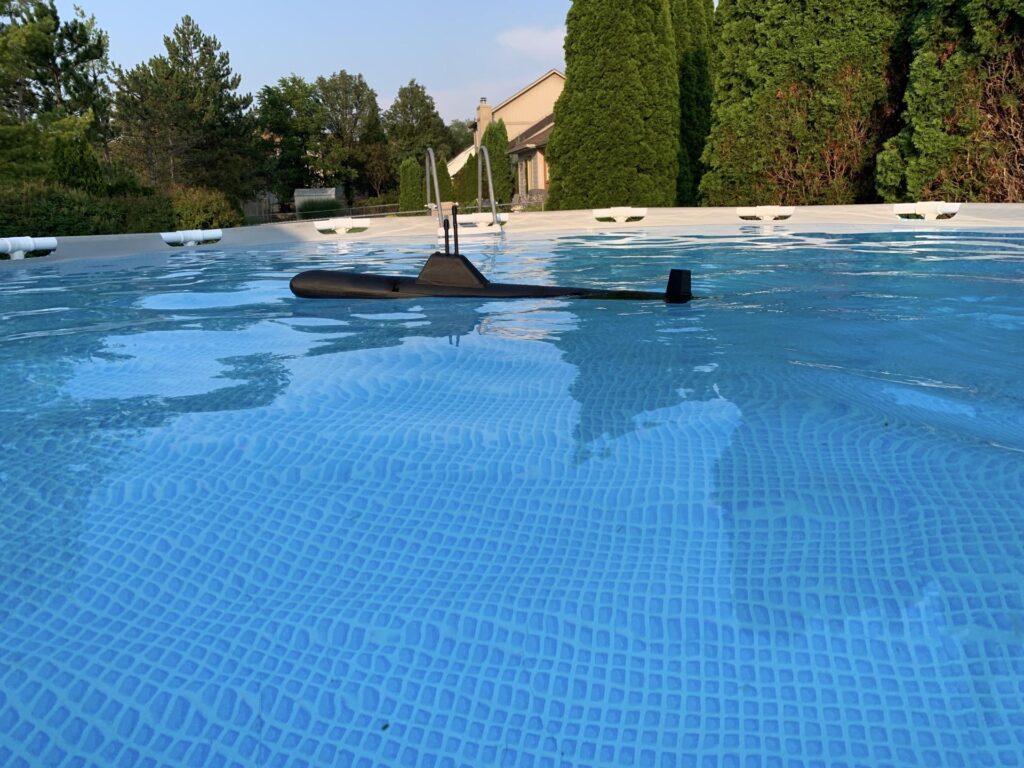
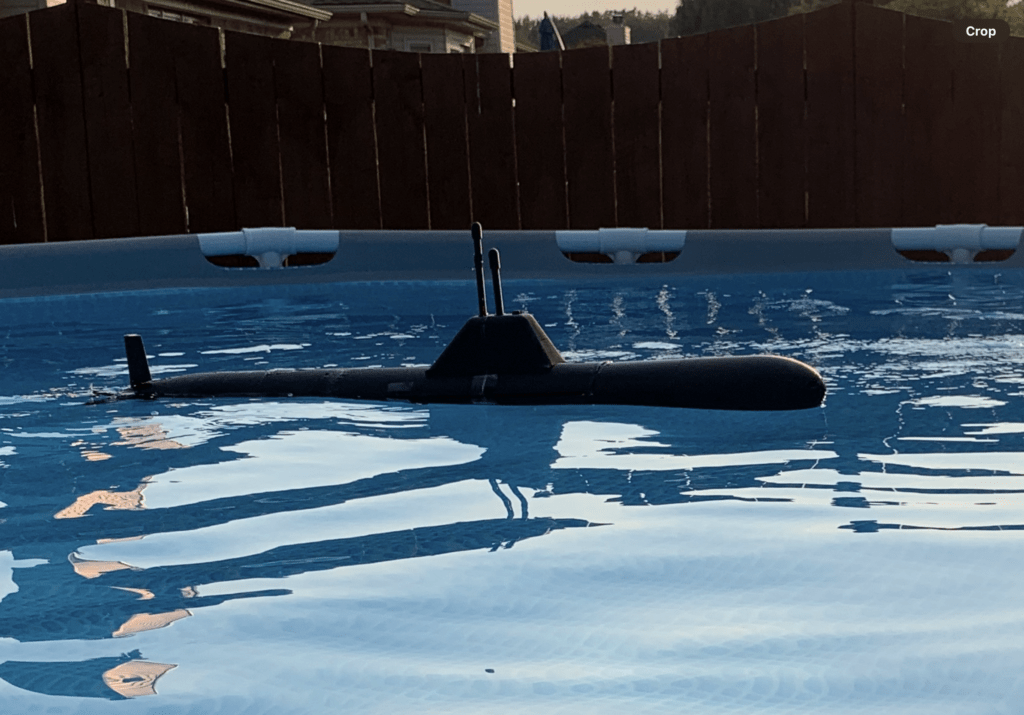
There is something inherently intriguing about submarines that doesn’t seem to apply to other vehicles. Maybe that reflects our natural fears and phobias, or maybe it is a result of our curiosity about the mysterious depths. Maybe it is simply that most of us will never get the chance to ride in a submarine. But you can get some of the experience with a model, like 15-year-old Ben Kennedy did with this DIY RC submarine.
This is a remote-controlled submarine built entirely from scratch and it is very impressive. It is a 500mm-long vessel loosely modeled after the Soviet (and now Russian) Akula-class submarine. But the resemblance is entirely superficial, as the Kennedy’s design is 100% original.
The hull and most of the rest of the parts were modeled in Autodesk Fusion 360 and then 3D-printed. An Arduino Nano board receives radio signals from a Flysky FS-i6X transmitter controller via a Flysky iA10B receiver. The Arduino then controls the various systems that allow the submarine to move through the water.
Four small aquarium pumps move water in and out of the ballast tanks to control buoyancy. A single brushless DC motor, which is naturally waterproof, provides thrust. Two waterproof MG995 servo motors actuate the rudders for yaw and pitch, which are necessary for diving/surfacing and steering. Most of the hull isn’t watertight, so Kennedy placed a waterproof plastic bag inside the hull to protect the Arduino and the lithium battery that provides power.
Kennedy tested the sub in his family’s backyard pool and it seems to have performed nicely. He posted his design files and code, so anyone can build their own RC submarine.
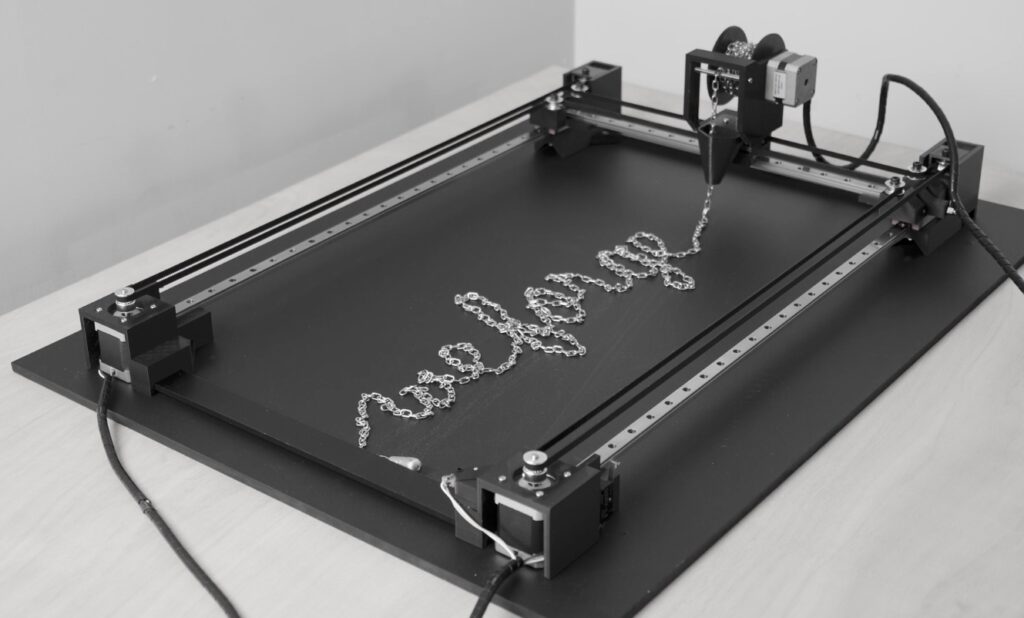
Art is very personal and we often consider the process of creation itself when evaluating the resulting piece. Does a sculpture have more artistic value when molded by human hands rather than a 3D printer? Most would say that it does. But what if the automation was, itself, part of the art? Yuichiro Katsumoto explored that idea with the “Renment (alpha)” chain art machine.
This is a bit like a large pen plotter, except that it “draws” with chains instead of ink. As the machine’s toolhead moves around the table following the paths of characters, a spool slowly drops steel chain into the form of those characters. After the machine finishes spelling out a word or phrase, it reels the chain back in and the process repeats.
In the published video demonstration, it writes out the phrase “we forge the chains we wear in life” coined by Charles Dickens.
The machine has three axes: the linear X and Y axes typical of a pen plotter, plus an additional rotary axis for the 3D-printed chain spool. Katsumoto based the design on DIY Machines Ltd’s coffee table kinetic sand art machine. An Arduino UNO Rev3 board controls the machine’s stepper motors through an Arduino CNC Shield V3.51, which is compatible with Grbl and can accept any g-code of that flavor.
Katsumoto created “Renment” with support from JSPS KAKENHI Grant Number JP20K12125 and displayed the piece at SIGGRAPH Art Galley ’24.
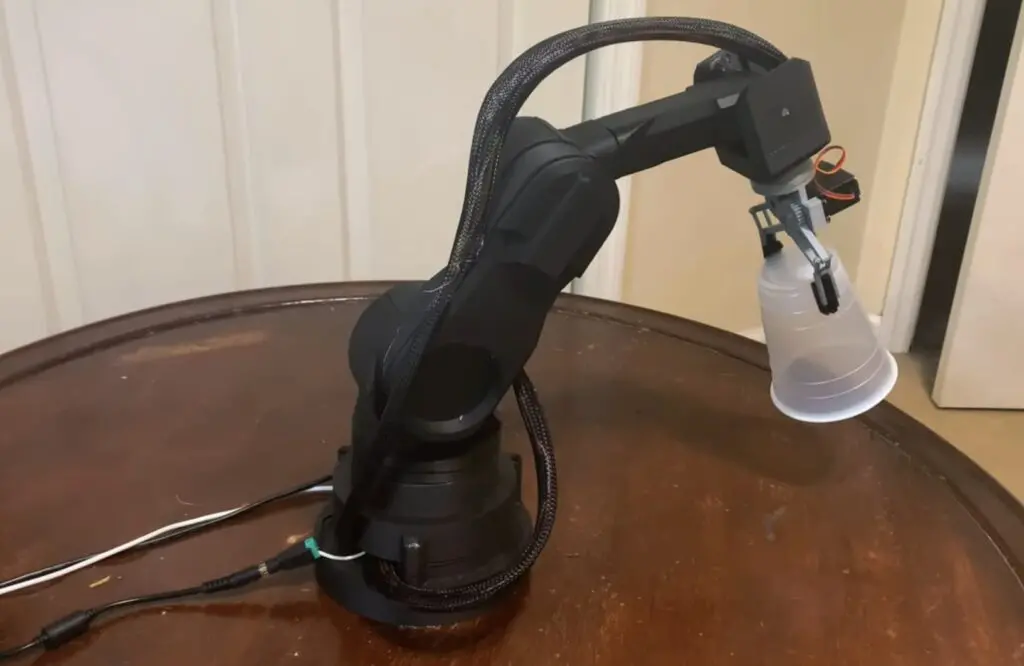
If you have an interest in robotics, then a robot arm is a great educational tool to start your journey. But professional robot arms are expensive and the DIY route is more informative anyway. That’s especially true if you take the time to design the arm yourself, as did Oliver Paff after he got himself a 3D printer and used his newfound fabrication capability to create this affordable 3D-printable robot arm.
Paff’s goal wasn’t to build the best robot arm in history. His goal was to learn the basics of robotics, including mechanical design, CAD, 3D printing, electronic design, and programming. This robot arm was perfect for that goal. It doesn’t have a high payload capacity or very good repeatability, but it was cheap to assemble and gave Paff a platform for experimentation and learning.
This is a 6DOF robot arm that Paff designed himself in Onshape. Almost all of the structural and mechanical parts were 3D-printed on an inexpensive Creality Ender 3.
An Arduino UNO Rev3 board controls the servo motors that actuate the joints. Paff initially tried to drive those directly from the Arduino, but ran into a common issue: the Arduino’s pins cannot supply a lot of current. So Paff added a servo motor driver module, which solved that problem and gave the motors plenty of power. Paff also redesigned the gripper to be more versatile. And the code even incorporates inverse kinematics to make user control more intuitive.
In testing, this worked quite well and Paff has plans to continue improving the design over time and expand its capabilities. If you’re interested in constructing the current version, Paff was kind enough to upload his files.
The news has sent ripples through the embedded development community, particularly affecting brands like micro:bit, Raspberry Pi and, of course, Arduino – all of which received Arm’s support over the years and “gained momentum in educational settings and among the maker community, enabling many of the features that Mbed offered to become more widespread and accessible, from browser-based IDEs and hardware abstraction to code hosting and remote build services.”
So, if you found yourself wondering how will Mbed’s retirement affect Arduino? – as a recent Hackster article did – this blog post is for you!
We’re always ready to innovate
At Arduino, we consider every new development in technology an opportunity to improve our platform and offer better and better tools to all our users. In the case of Mbed, which primarily affects a subset of our boards (see below), we knew the end of life was nearing and began proactively searching for a substitute years in advance. Spoiler: we found an excellent one in ZephyrOS! This is one of the reasons why we joined the Zephyr® Project as Silver members in 2023, as announced in our latest Open Source Report.
We are actively working to enable Arduino users to continue using the language and libraries they are familiar with. This involves creating an Arduino core based on an underlying Zephyr layer (you can dive deeper into some of the details about our progress with the project during the 2024 Arduino Days, with a conversation between our own Martino Facchin and Zephyr’s Benjamin Cabè). We plan to release the first beta of this transition by the end of 2024, with a rollout for various boards starting in 2025 – so we hope you’ll stay tuned and join the testing phase to support our efforts!
How is Mbed used in the Arduino ecosystem?
Every Arduino board has its corresponding “core,” i.e. the implementation of the Arduino programming language for its particular microcontroller architecture. The goal of Arduino cores is to expose the same commands and instructions (APIs) regardless of what board is being used.
For some boards – mainly GIGA, Nano 33 BLE, Nano RP2040 Connect, Portenta, Nicla family, and Opta – we implemented the Arduino core on top of an abstraction layer provided by Mbed OS in order to speed up development. The Arduino cores for other popular Arduino boards in the UNO, MKR and Nano families are implemented differently, and do not use Mbed OS.
In general, whether an Arduino core is based on Mbed or other underlying software layers does not have any practical impact on how end users program our boards.
We’re built for longevity
The advantage of using Arduino as an abstraction layer lies in its universal language, which remains consistent regardless of the underlying implementation. Therefore, programs written for Arduino will continue to work whether Mbed is there or not.
This is a significant reason to use Arduino for projects that need to stand the test of time.
We face change as a community
What do you think? Do you have any concerns about Mbed reaching its EOL two years from now? Comment below to let us know, or reach out to us on social media. We love to hear from you and want to support all our users in this transition.
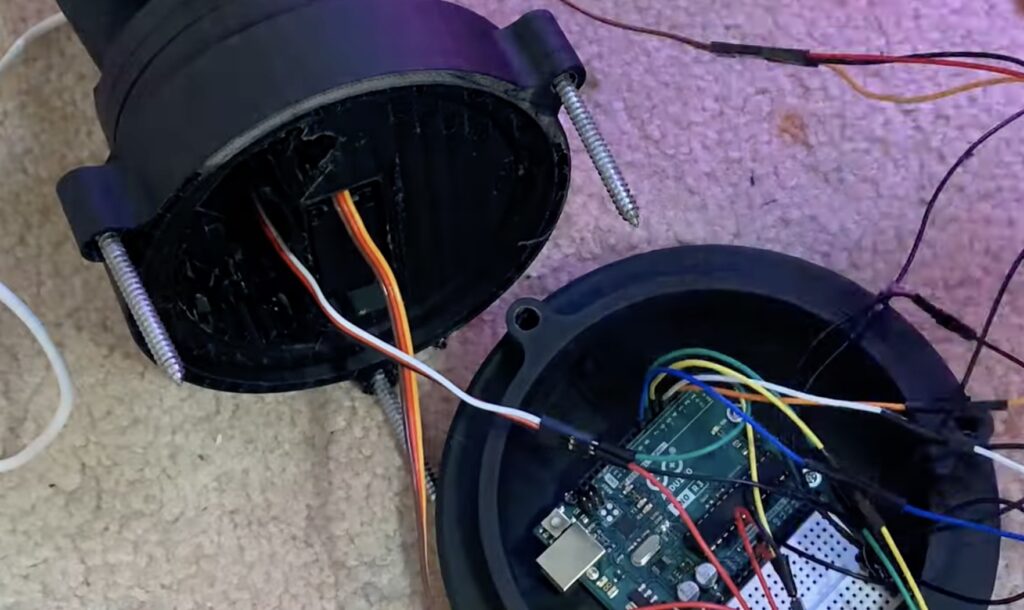
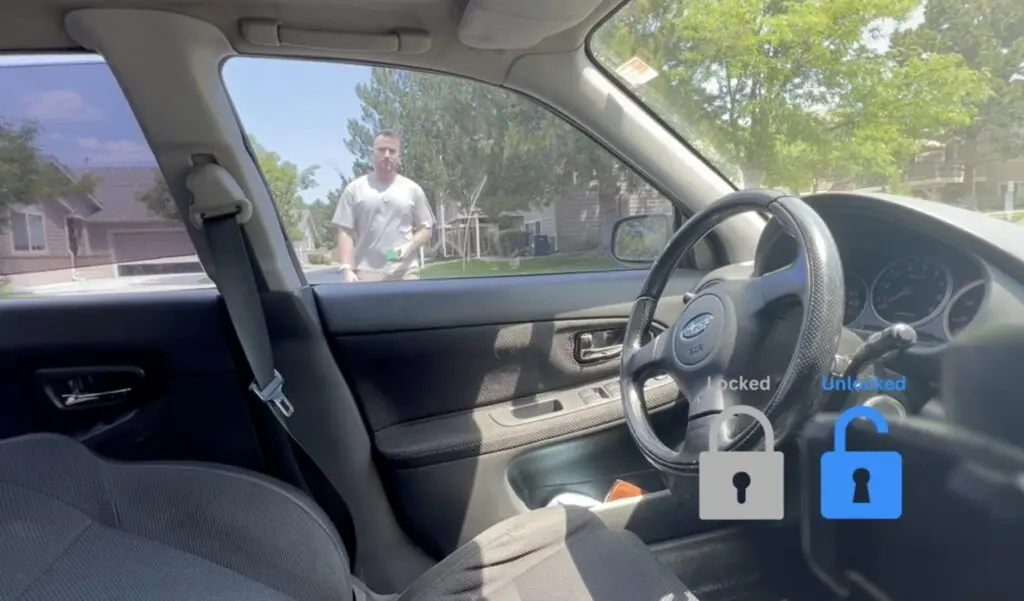
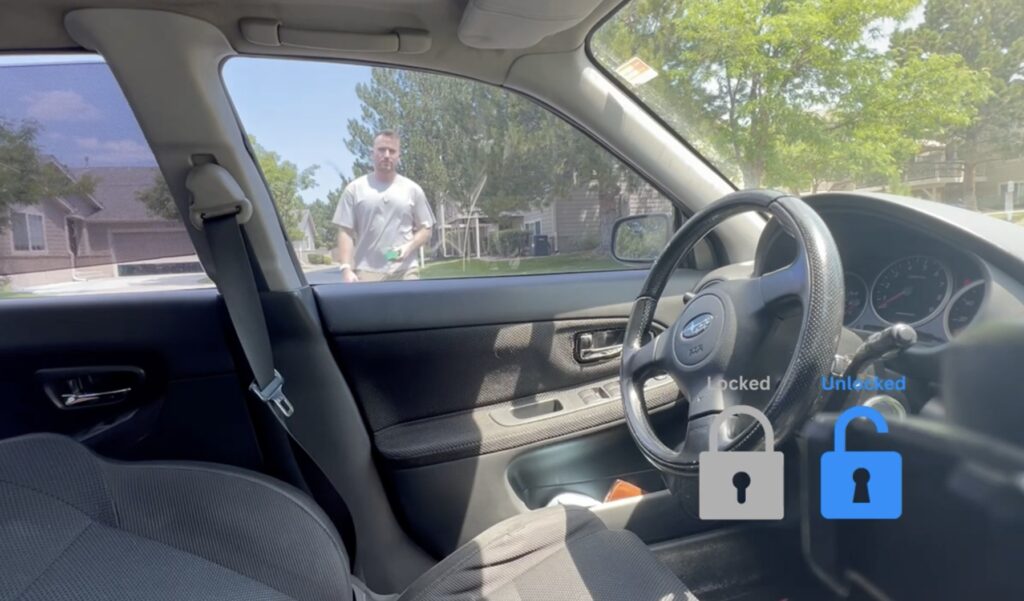
A lot of newer cars have a really nifty feature called “proximity unlock,” which automatically unlocks the doors when the driver approaches while carrying their key fob. When paired with a push-to-start ignition switch, the driver never has to take their keys out of their pocket. But Nick’s 2004 Subaru STI is too old to have come with that feature from the factory, so he used a couple of Arduino boards to create a DIY proximity unlock system.
Car manufacturers need to pay serious attention to security when designing their access and ignition systems, but Nick had a bit more freedom. It is unlikely that any thieves would suspect his car of possessing a feature like this and so they wouldn’t even bother trying to hack it.
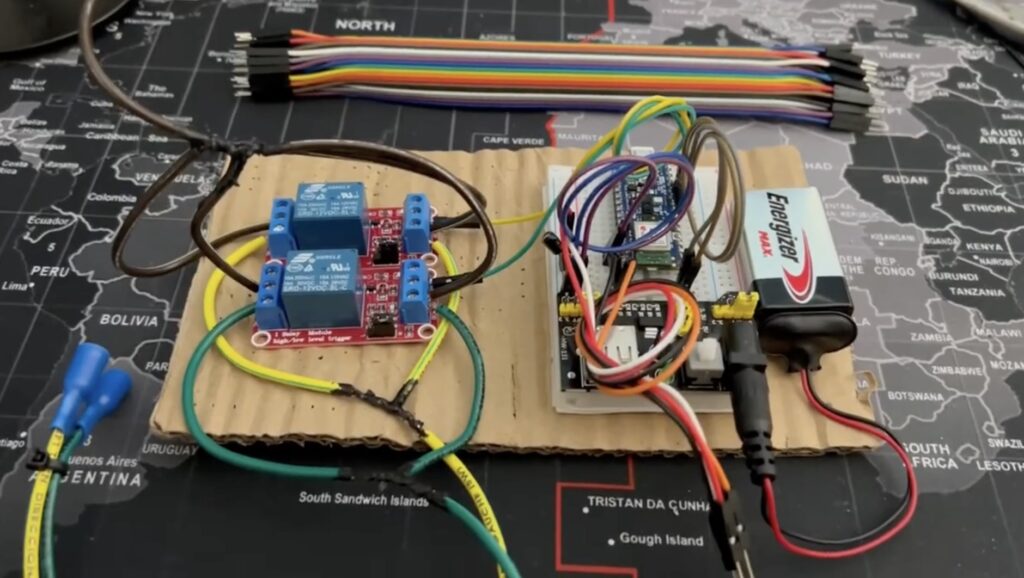
Nick’s proximity unlock works by evaluating the received signal strength indicator (RSSI) of Bluetooth® Low Energy connection. If all else is equal, RSSI is inversely proportional to distance and that makes it useful for rough proximity detection. An Arduino Nano 33 BLE inside the car unlocks the doors when it has an active BLE connection with an RSSI over a set threshold. It unlocks the doors by shorting the switch with a 12V relay and it receives power from the car’s 12V system through a buck converter.
The driver-carried device (equivalent to a key fob) can be either another Arduino or Nick’s smartphone. In fact, it can be any device with a BLE adapter, so long as it can connect to the in-car Arduino with the proper device name.
Now, Nick can enjoy his classic car and the convenience of proximity unlock.
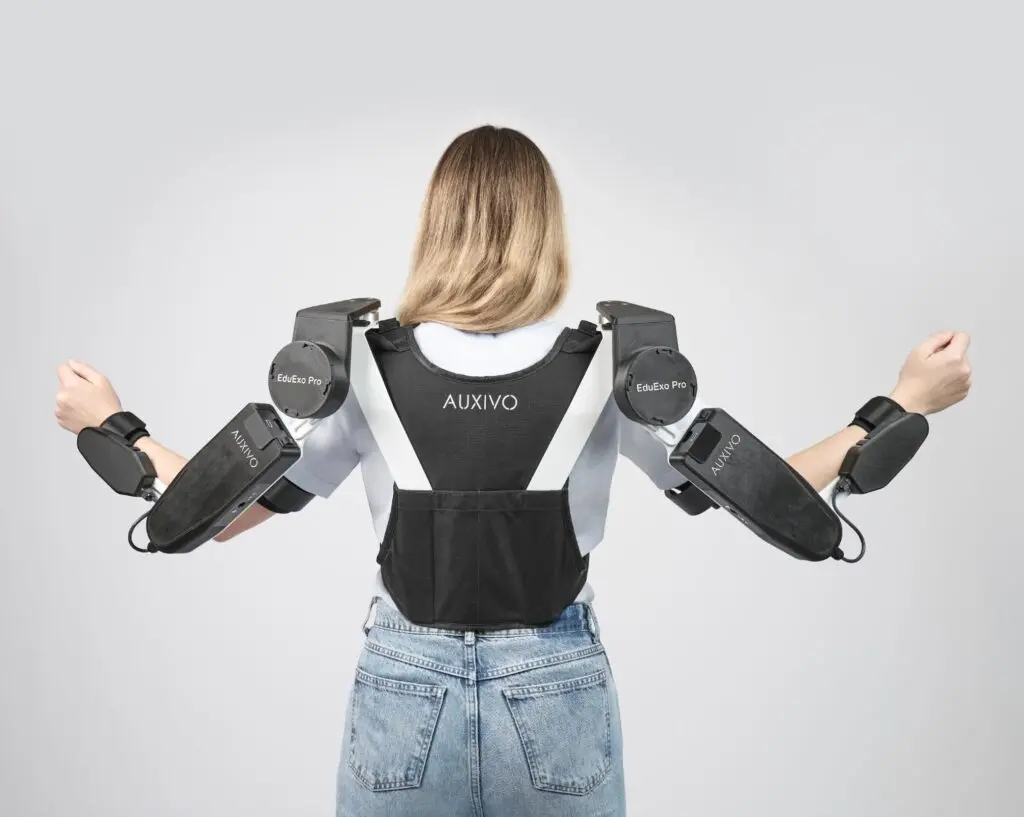
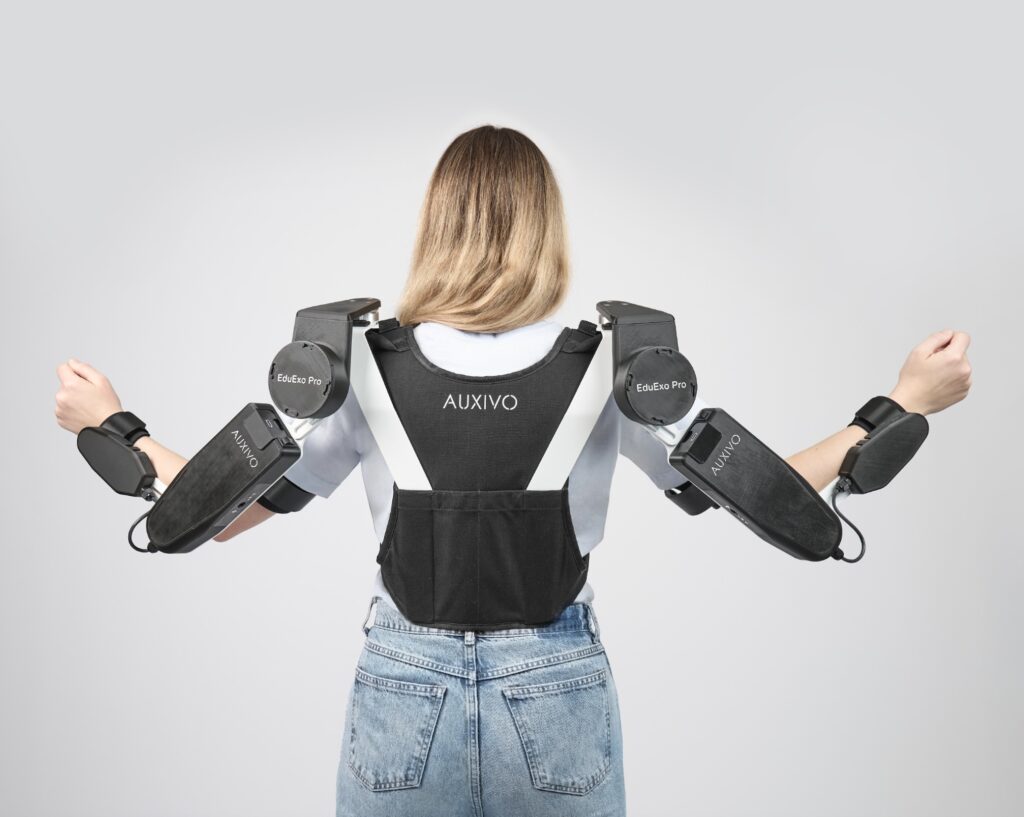
Emerging technologies initially develop at a slow pace and that is due in large part to the lack of resources available to students. Complex technology is built on existing knowledge and higher education students need the tools to gain hands-on experience. To help educate the next generation of exoskeleton engineers, Auxivo has just introduced the newly updated EduExo Pro exoskeleton kit.
The Auxivo EduExo Pro is an educational exoskeleton platform designed to help students learn fundamentals via a project-based learning approach, with enough flexibility for those students to experiment with their own designs. It originally launched on Kickstarter in 2021 and now Auxivo has released an updated version.
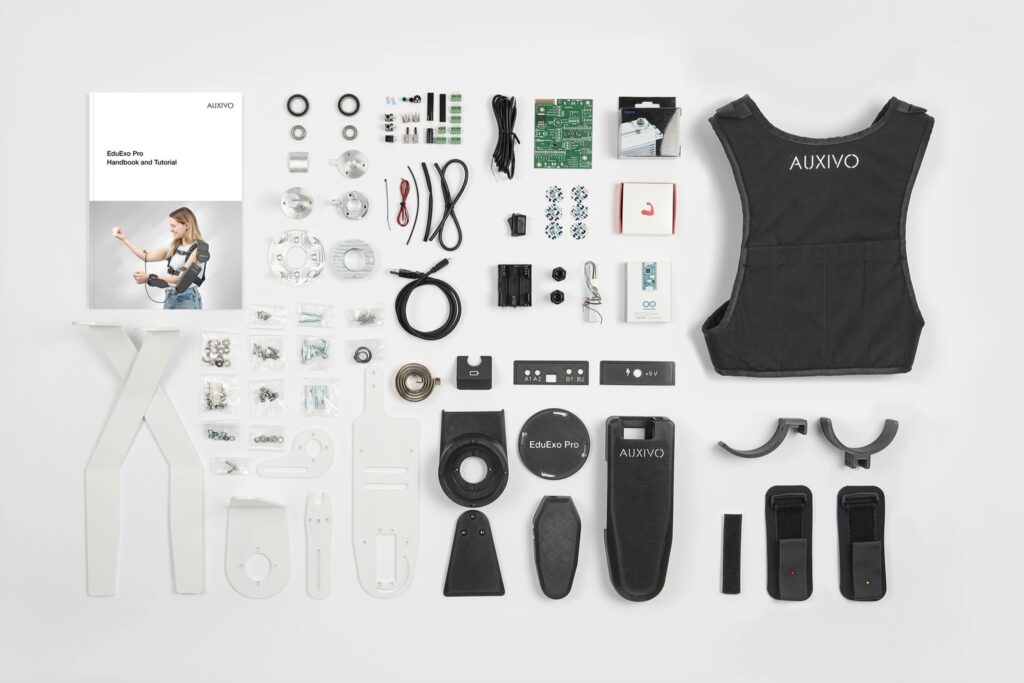
The hardware in the kit consists of structural parts, mechanical components, motorized actuators, sensors, and control electronics. The kit includes everything necessary — except 3D-printed parts — to build a full-arm exoskeleton that has a 2DOF (degrees of freedom) shoulder joint and a 1DOF elbow joint.
For maximum compatibility and versatility, the Auxivo EduExo Pro operates under the control of an Arduino Nano 33 IoT board. Students can take advantage of the powerful Arduino IDE to program sophisticated behaviors and integrate that with other software, such as Unity 3D.
The provided handbook will walk students through assembling and programming the arm exoskeleton, but educators can also create their own curriculums or let students devise new designs. That makes the Auxivo EduExo Pro perfect for high school and university-level engineering courses.
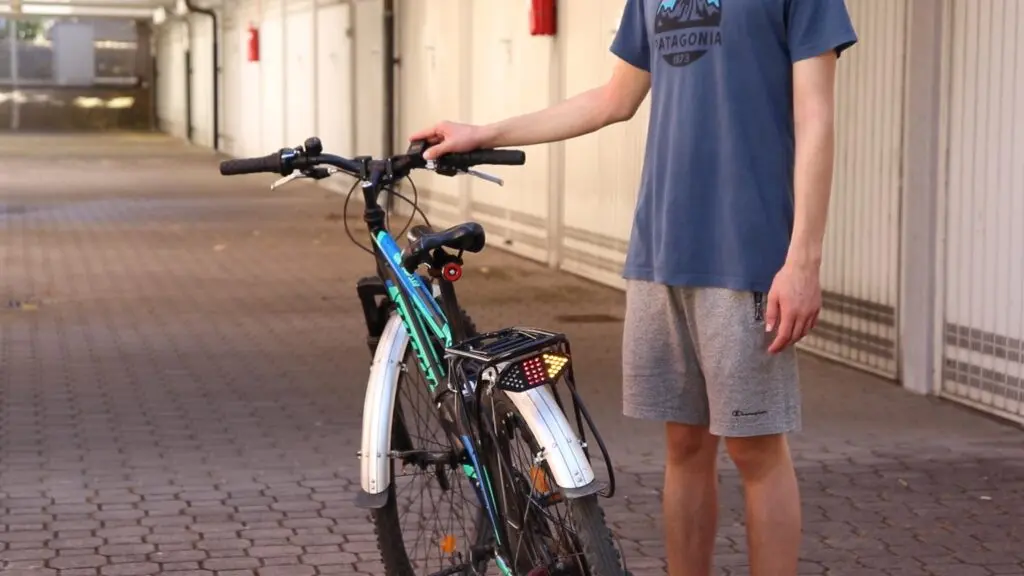
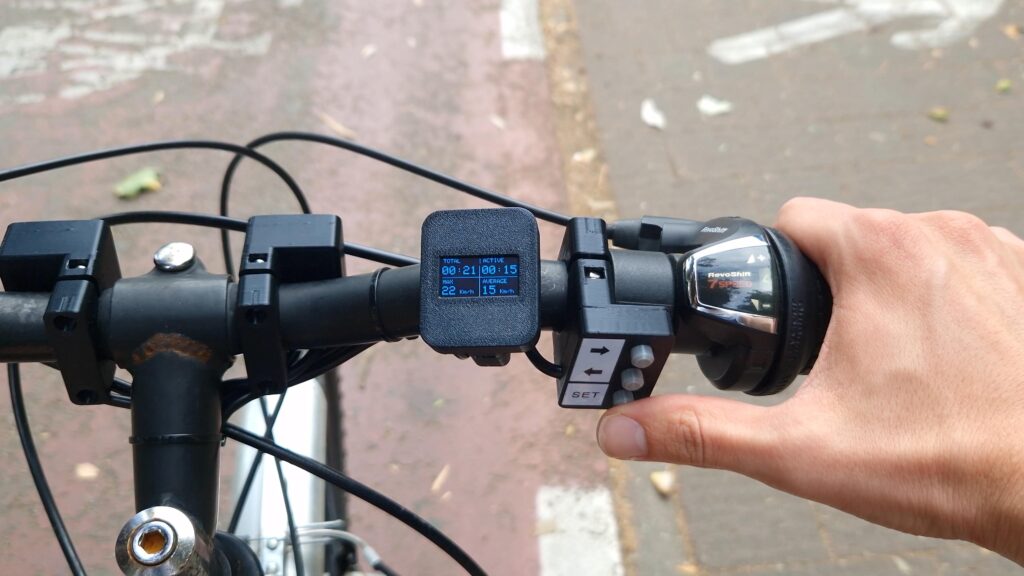
Many people around the world live in cities designed for cars, with bicycle use being a distant afterthought. That makes cycling dangerous and lights can do a lot to make riding safer. That’s why Giovanni Aggiustatutto designed this DIY system that includes headlights, a taillight, turn signals, and even an integrated odometer/speedometer.
Aggiustatutto wanted this system to work with most bicycles, so he designed the front lights and controls to clamp onto the handlebars. The rear light pod attaches to a cargo rack and should be compatible with a wide range of models. There are two bright white LED headlight arrays on the front with integrated yellow turn signal LEDs. Also on the front is an OLED display that shows the speed, time, and odometer, as well as three buttons. The back lights consist of red taillight LEDs and yellow turn signal LEDs in a single 3D-printed enclosure.
An Arduino Nano board controls everything, directing power to the LEDs from an 18650 lithium battery through IRFZ44N MOSFETs. A DS3231 RTC module helps the Arduino track time accurately and that gives it the ability to monitor speed — and therefore total distance — with the help of a Hall effect sensor. That sensor detects the passing of a magnet attached to a spoke, so the Arduino can count each rotation. The Arduino then displays the results on a 0.96” 128×64 monochrome OLED screen.
Finally, Aggiustatutto tucked the Arduino and battery into an enclosure disguised as a water bottle to prevent theft.
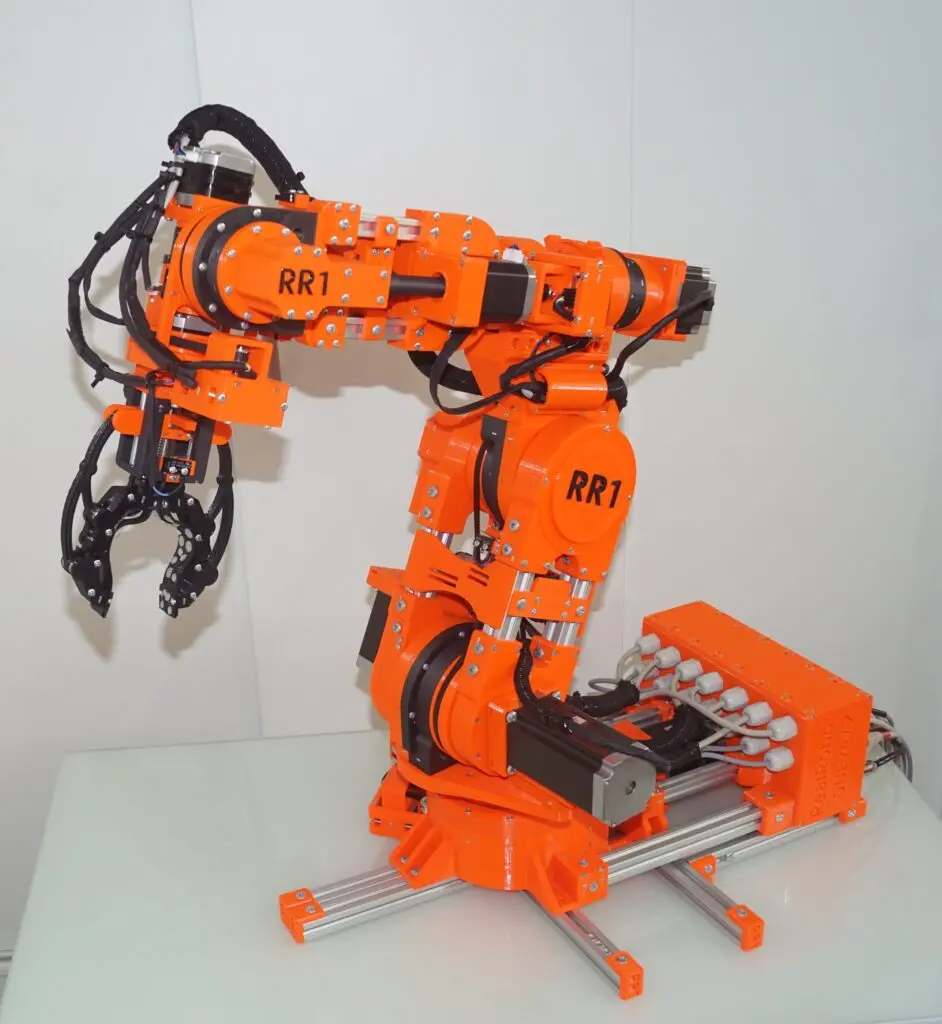
Started in 2022 as an exploration of what’s possible in the field of DIY robotics, Pavel Surynek’s Real Robot One (RR1) project is a fully-featured 6+1-axis robot arm based on 3D-printed parts and widely available electronics. The initial release was constructed with PETG filament, custom gearboxes for transferring the motor torque to the actuators, and a plethora of stepper motors/shaft-mounted encoders to provide closed-loop control.
The lessons learned from V1 were instrumental in helping Surynek design his next iteration of the RR1 project, including improved motion, rigidity, and control schemes. Replacing the more flexible PETG filament is a far stronger polycarbonate composite which aided in reducing backlash in the gearing. Beyond the plastic housing, Surynek also swapped the planetary gearboxes for a series of belt-driven mechanisms as well as moved the encoders to the perimeter of each joint to get better positional tracking. The last major change involved printing the gripper in TPU and securing it to the wrist assembly with more points of contact.
Controlling all seven stepper motors is an Arduino DUE, which talks to the host machine using its serial USB connection and a custom GUI. It is through this interface that each joint can be configured, set, and continuously monitored, thus giving a comprehensive way to operate the arm.
For more information about revision 2 of the Real Robot One project, watch Surynek’s video below!
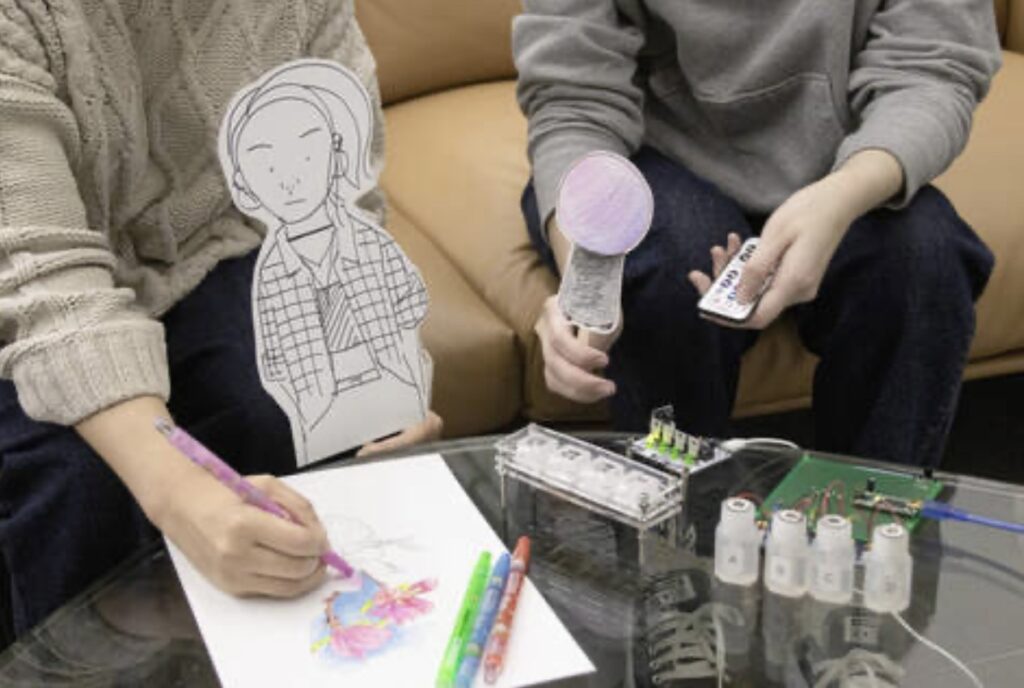
Almost all human-robot interaction (HRI) approaches today rely on three senses: hearing, sight, and touch. Your robot vacuum might beep at you, or play recorded or synthesized speech. An LED on its enclosure might blink to red to signify a problem. And cutting-edge humanoid robots may even shake your hand. But what about the other senses? Taste seems like a step too far, so researchers at KAIST experimented with “Olfactory Puppetry” to test smell’s suitability for HRI communication.
This concept seems pretty obvious, but there is very little formal research on the topic. What if a robot could communicate with humans by emitting scents?
Imagine if a factory worker suddenly began smelling burning rubber. That could effectively communicate the idea that a nearby robot is malfunctioning, without relying on auditory or visual cues. Or a personal assistant robot could give off the smell of sizzling bacon to tell its owner that it is time to wake up.
The researchers wanted to test these ideas and chose to do so using puppets instead of actual robots. By using puppets — paper cutouts on popsicle sticks — test subjects could act out scenarios. They could then incorporate scent and observe the results.
For that to work, they needed a way to produce specific smells on-demand. They achieved that with a device built using an Arduino Nano R3 board that controls four atomizers. Those emit rose, citrus, vanilla, and musk scents, respectively. Another device performs a similar function, but with solid fragrances melted by heating elements.
This research was very open-ended, but the team was able to determine that people prefer subtle scents, don’t want those to happen too frequently, and want them to mesh well with what their other senses are telling them. That knowledge could be helpful for scent-based HRI experiments in the future.
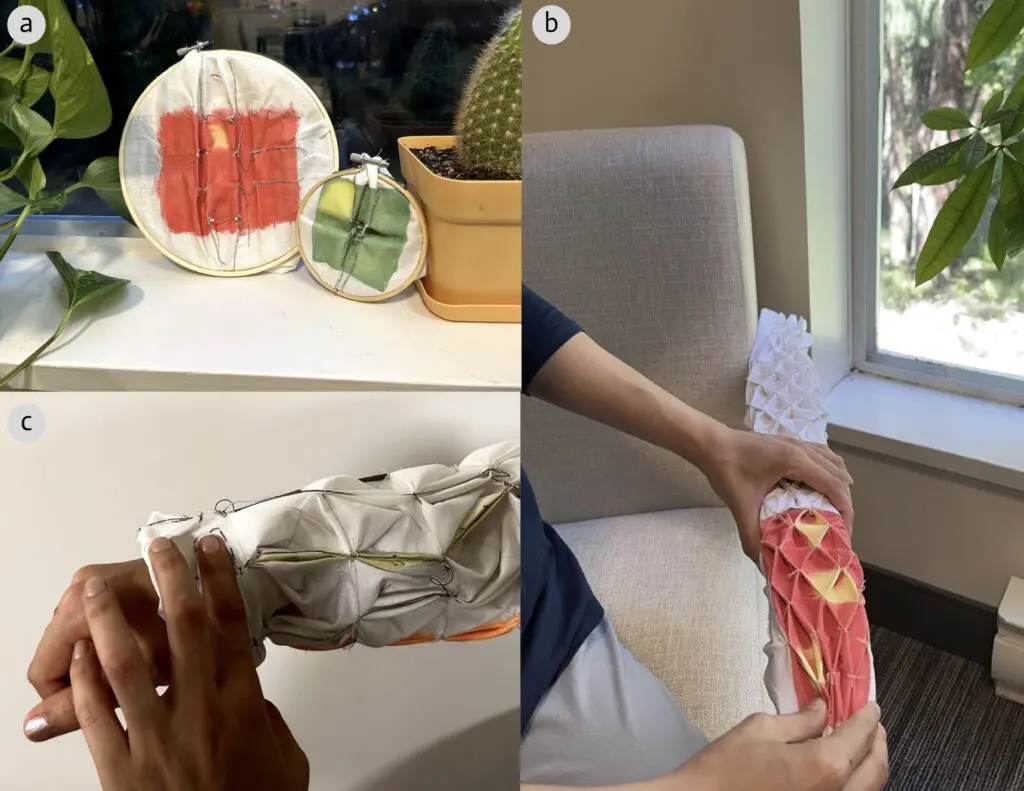
Elastic use in the textile industry is relatively recent. So, what did garment makers do before elastic came along? They relied on smocking, which is a technique for bunching up fabric so that it can stretch to better fit the form of a body. Now a team of computer science researchers from Canada’s University of Victoria are turning to smocking to create interesting new “data physicalization” displays for clothing.
These “smocking displays,” part of the researchers’ VISMOCK approach, can convey information through changes in form and changes in color. The practical implementation of this idea would be up to the garment maker, but there are many intriguing possibilities. Imagine, for instance, that your shirt sleeve could get tighter to indicate that it is time for an appointment on your daily calendar. Or if your pants could show the current time.
Both of those concepts — and much more — are entirely feasible. The team made that true by combining two techniques. The first is impregnating the fabric with thermochromic pigments that change color in the presence of heat. Heating elements embedded in the fabric, controlled by an Arduino Mega 2560 board through MOSFETs, influence that change. Resolution is low, because heat spreads, but this is enough to show quite a bit of information.
The second technique is smocking, but with special SMA (Shape Memory Alloy) wires and springs. Those can be deformed, but will then return to their original shape when current (and heat) runs through them. By integrating SMA into the smocking pattern, the fabric can change shape on-demand. As with the thermochromic heating elements, this occurs under the control of an Arduino.
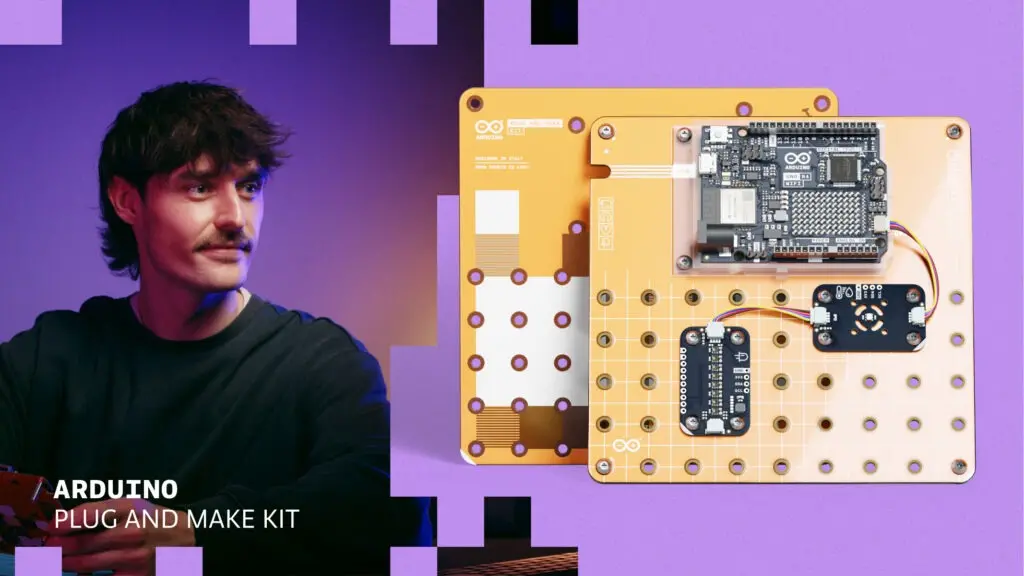
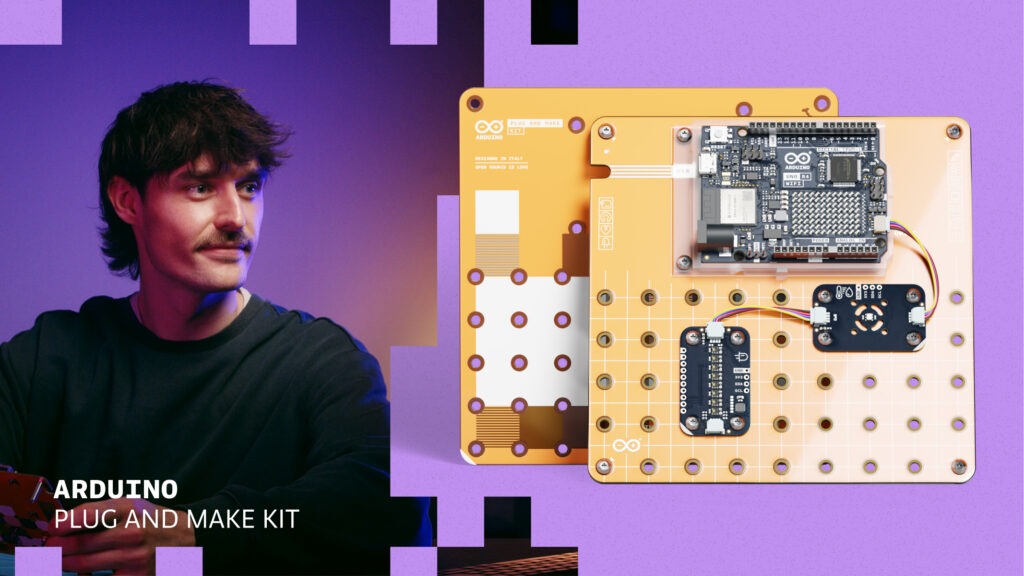
Hey, creating an IoT device shouldn’t be rocket science. We believe technology is for everyone. That’s why we’ve developed the whole new, beginner-friendly Plug and Make Kit – the easiest way to get started with Arduino!
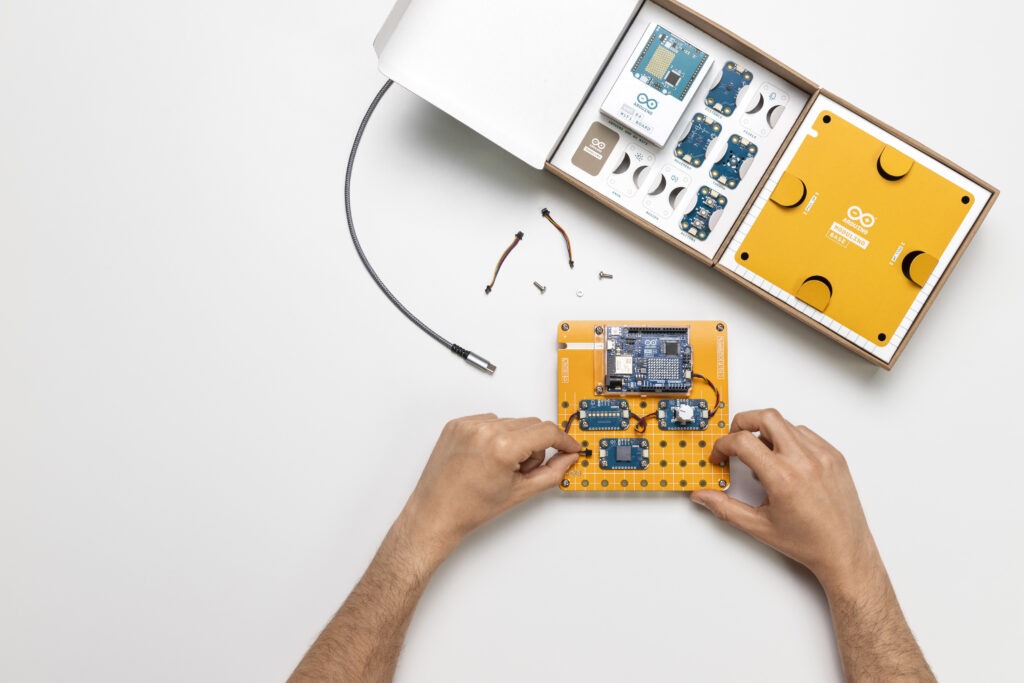
Inside the box, you’ll find everything you need to create your first smart solution for everyday life. For example, you can build a fully functional timer, a weather forecast station, or even a game controller – in a single session.
There are seven projects complete with step-by-step instructions ready to try (and dedicated tutorials on how to use individual components included): start wherever you like, follow your interests, and have fun with it!
Weather Report: Never get caught in the rain again, with a visual reminder to take an umbrella when needed.
Hourglass: Who needs an egg timer? Customize your own digital hourglass.
Eco Watch: Make sure your plants thrive in the perfect temperature and humidity.
Game Controller: Level up with your very own HID (human interface device) gamepad.
Sonic Synth: Get one step closer to being a rockstar, DJ or sound engineer!
Smart Lights: Set the mood with your very own smart lamp.
Touchless Lamp: Control lights with a simple gesture.
Our hope is that the skills you learn and satisfaction you gain will fuel your tech journey in making for years to come, wherever your passions may take you.
This is just the beginning
The components in the Plug and Make Kit can be used to come up with endless new applications – also swiftly integrating with our full ecosystem of hardware and software tools.
We can’t wait to see the original ideas you will share, for new projects the community can try!
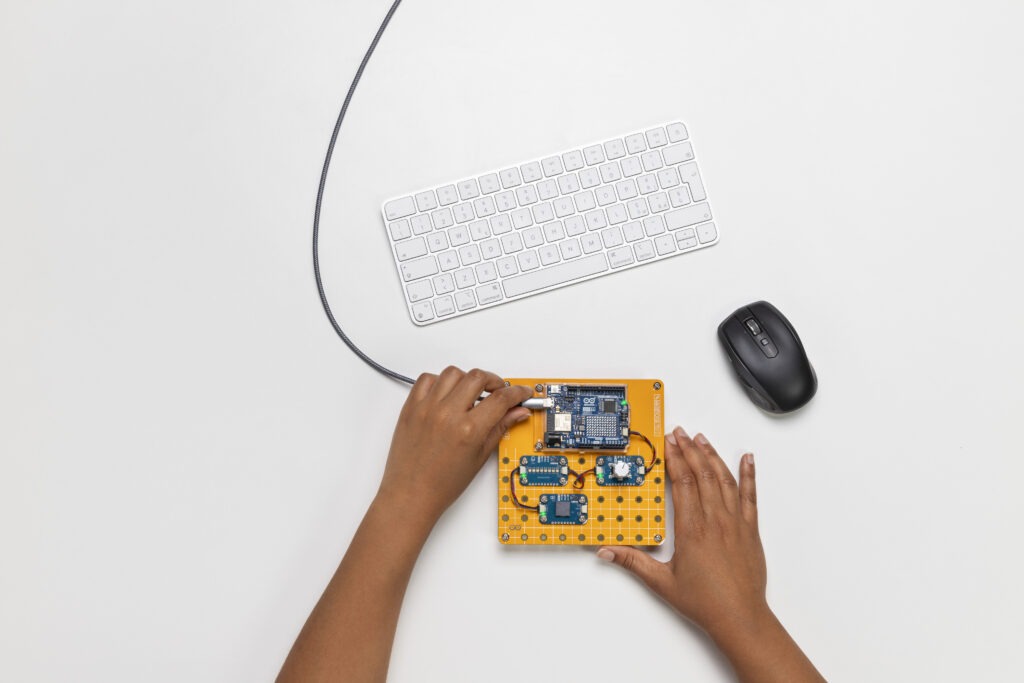
Build it in a snap, control it via the app!
For the Plug and Make Kit, we’ve developed a whole new hardware approach: components just connect together – no breadboard, jumper wires or soldering needed.
Once you’ve built your device, you’ll find all the resources and support you may need to get going via the Arduino Cloud:
Save precious time and focus on bringing your next idea to life, by simply importing templates (pre-configured projects for quick device setup), freely available to turn your ideas into fully operational devices within minutes.
Visualize data any way you wish, with unlimited dashboards, also on your smartphone.
Based on makers’ favorite, the UNO R4 WiFi
The Arduino UNO R4 WiFi features a powerful microcontroller with Wi-Fi®/Bluetooth® Low Energy connectivity, a Qwiic connector, a large LED matrix, and more. If you don’t fully understand what that all means for now, don’t worry: the UNO is the definition of ease of use, and its latest version is perfect for beginners and beyond.
Plug & play with Modulino®
The Plug and Make Kit offers a collection of seven Modulino® sensors and actuators, all included in the box:
Knob: for super-fine value setting
Pixels: eight LEDs to shine bright or dim down – you choose!
Distance: a time-of-flight proximity sensor to measure distances
Movement: to perfectly capture movements like pitch, roll or tilt
Buzzer: to compose your own alarm sounds or simple tunes
Thermo: a sensor for both temperature and humidity
Buttons: three buttons for quick user selection
Each Modulino simply connects via the UNO R4 WiFi’s onboard Qwiic connector: no breadboard, no soldering – and no wondering which side goes where, because the connector is polarized.
If you like the sense of accomplishment you get when things just click, you’ll love this: once you have a few nodes, you can keep your project looking neat by arranging everything on the Modulino Base structural frame.
Connect to your passions
Whether you are new to making or want to share your passion with someone taking their first steps in this world, the Plug and Make Kit offers the easiest, most fun introduction to a world of possibilities where technology is open to all.
Ready to put your hands on technology? The Plug and Make Kit can be purchased worldwide from the Arduino Store, as well as from official network of Arduino partners listed below:
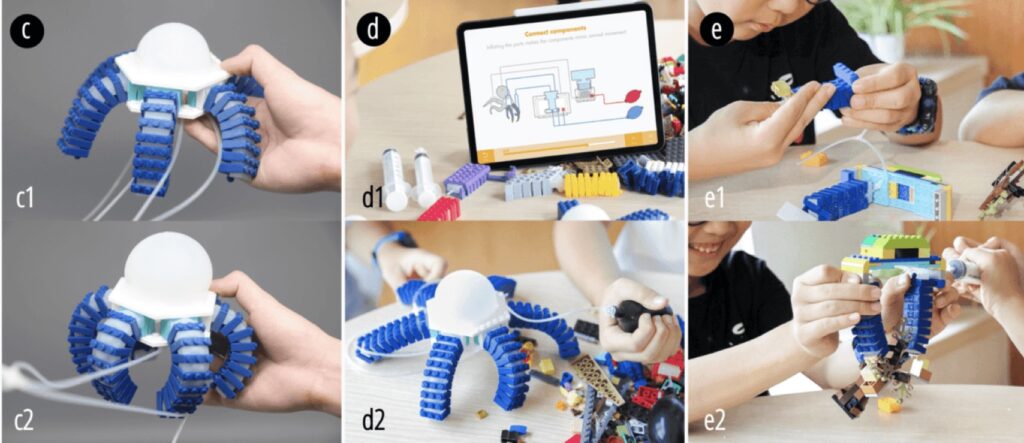
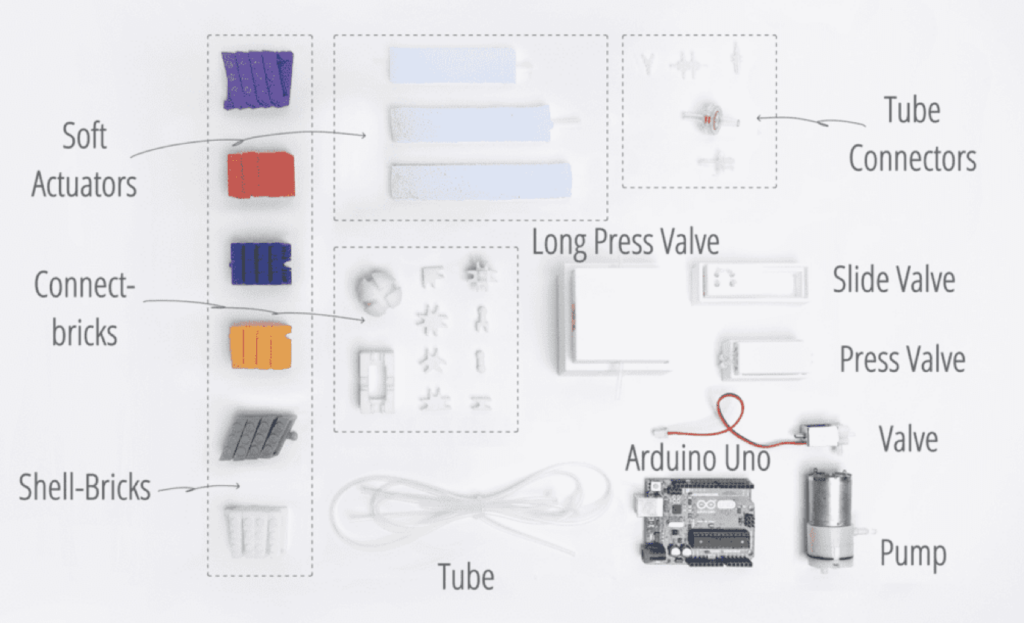
Biomimicry, which is a method for developing new technology inspired by nature, has been one of humanity’s greatest assets. But systems reliant on soft tissue, such as an octopus’s tentacles, have been notoriously difficult to reproduce in the robotics world. To give STEAM students an advantage in the soft robotics arena, a team of Chinese researchers developed a pneumatic biomimicry platform called KiPneu.
Pneumatics are ideal for biomimetic soft robots because they’re subject to fewer of the constraints typical of electric motors and rigid mechanical linkages. KiPneu is a hardware and software ecosystem designed to speed up the assembly of pneumatically actuated soft robots. It consists of inflatable pneumatic actuators and custom bricks compatible with LEGO bricks. Users can use those bricks and actuators to construct the physical forms of their robots.
After construction, students can make their robot move by pumping in air and controlling the flow of that air using valves. The initial prototype relied on an Arduino UNO Rev3 board to control power going to the pump, as well as the positions of the valves. The Arduino could, of course, perform those functions in sequence or in response to input commands, giving the robots the ability to move in complex ways.
But the team also created an electronics-free version, which relies on a hand pump and “tangible valves.” Together, those allow for similar functionality, but the user must pump air and change valve positions manually.
Both KiPneu systems have potential, with the manual system better suited to younger students and the more versatile Arduino-controlled system for the older students.
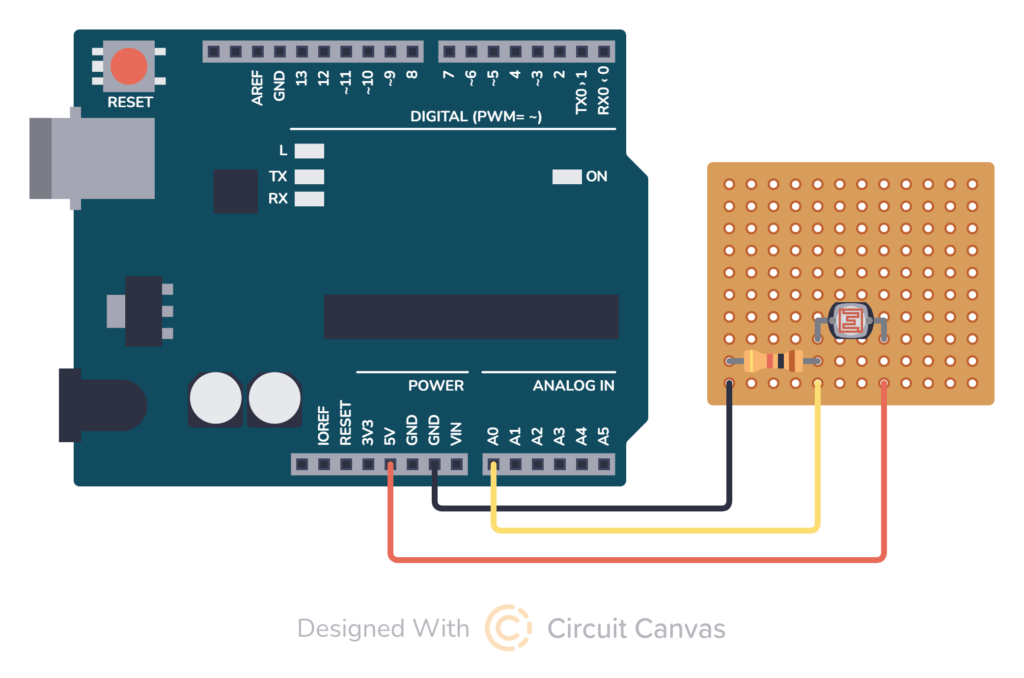
Good documentation is extremely useful when conceiving, building, or sharing electronic circuit designs, but traditional schematics and technical drawings are difficult for non-professionals to interpret and create. Makers can benefit from intuitive illustrations that look good enough to share. Circuit Canvas, developed by Oyvind Nydal Dahl, makes it easy to quickly create beautiful and useful illustrated diagrams.
Circuit Canvas is quite similar to Fritzing, but developed with the goals of being easy to use and fast. A user can create a schematic or an illustrated diagram for a basic circuit in less than a minute — if the components already exist in the library. But as with Fritzing, users may end up in a situation where they need to add custom parts. Circuit Canvas promises to make that process as painless as possible and even supports Fritzing parts, so it can take advantage of that ecosystem’s huge library.
At this time, Circuit Canvas already has a substantial library of parts. That includes Arduino UNO and Arduino Nano development boards, as well as other boards that are compatible with the Arduino IDE, such as the Seeed Studio XIAO ESP32C3 and the Raspberry Pi Pico. And, of course, there are many discrete components, ICs, and modules in the library to work with.
Users can either build schematics using standard symbols, or more friendly illustrated diagrams. In the future, the two document types will link together. Creating a diagram is as simple as placing components and drawing wires between them. After making the connections, users can move components around and the wires will automatically follow.
If you’ve been looking for a way to improve the documentation for your Arduino projects, then Circuit Canvas is worth checking out. It is free to try and you can run it right in your browser now.
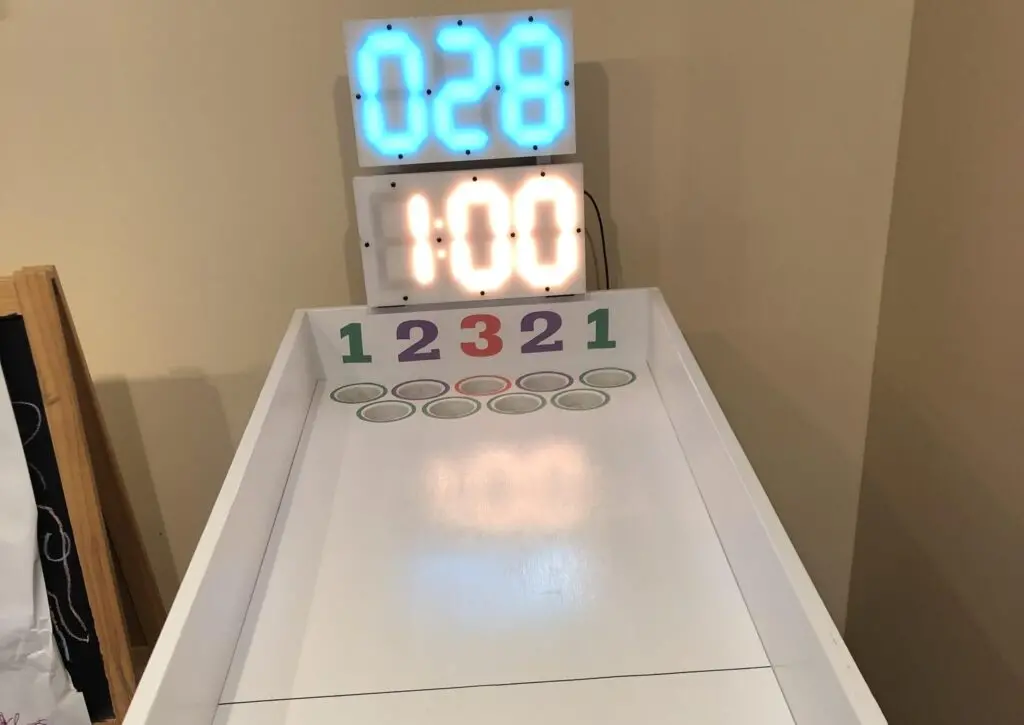
Ask your friends about their favorite games at the arcade and the most common answer will likely be Skee-Ball. But while many other popular arcade games have viable at-home alternatives, Skee-Ball doesn’t — at least not unless you’re willing to spend a serious amount of money. Luckily, you can get your Skee-Ball fix with a similar carnival-style rolling ball game by Gary Nelis.
This isn’t exactly the same as Skee-Ball; it seems to be a unique creation inspired by several different ball-rolling games that you might come across at carnivals and arcades. The player rolls balls across the table and into an array of holes. If the ball falls through a hole, the player gets the number of points associated with that specific hole. To make this even more fun, Nelis added electronic scorekeeping and fun sound effects.
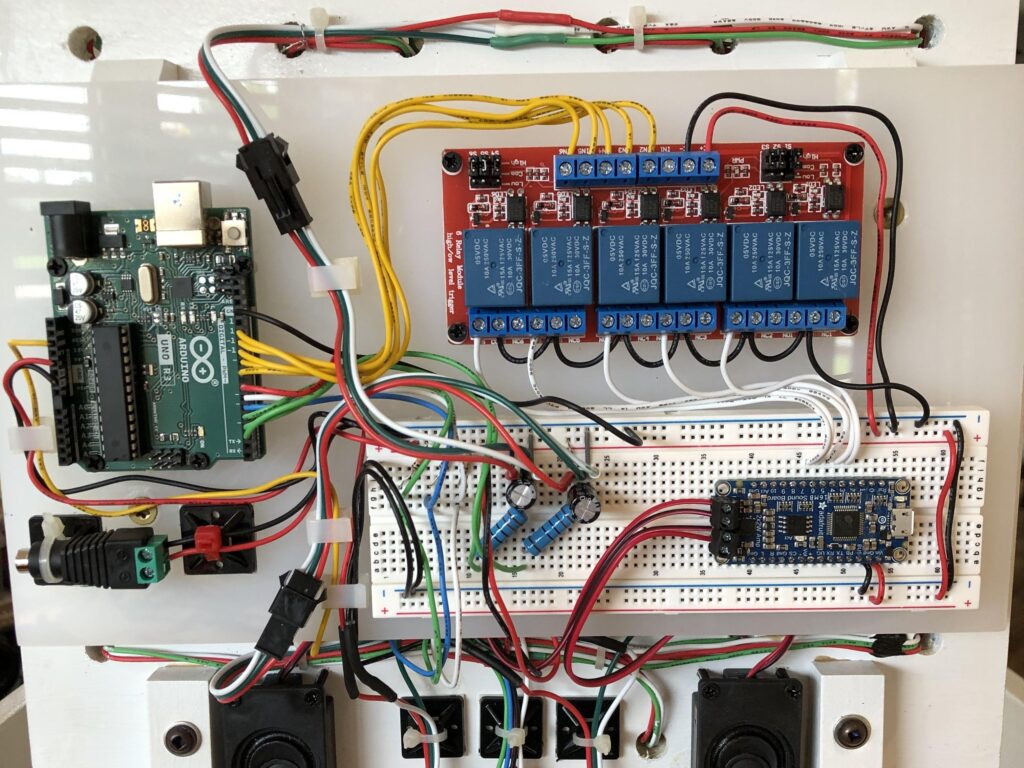
The hardest part of this project is constructing the table, which will require some woodworking experience. Next, you’ll need to add the electronics, including the Arduino UNO Rev3 board that detects balls and keeps score. It detects balls falling through the holes using infrared break beam sensors. Nelis grouped those by point value, wiring the sensors in parallel so that they only use a total of three Arduino pins.
The Arduino shows the score and remaining time on a pair of three-digit, seven-segment displays made using strips of WS2812B individually addressable RGB LEDs. Those can be set to any color and they even support animated effects. Finally, the Arduino plays sound effects through an Adafruit Audio FX Sound Board module.
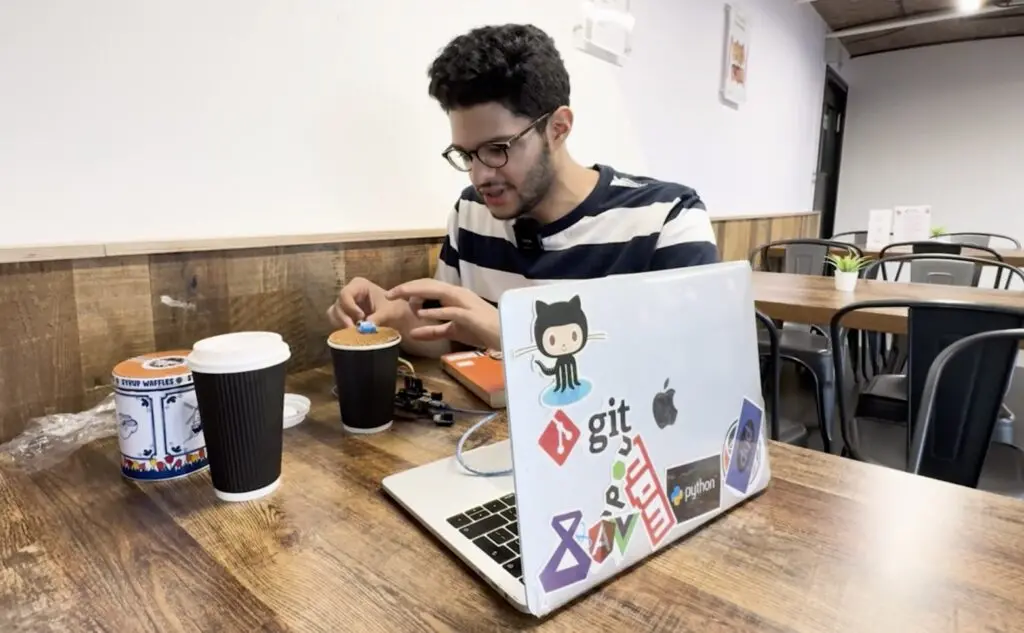
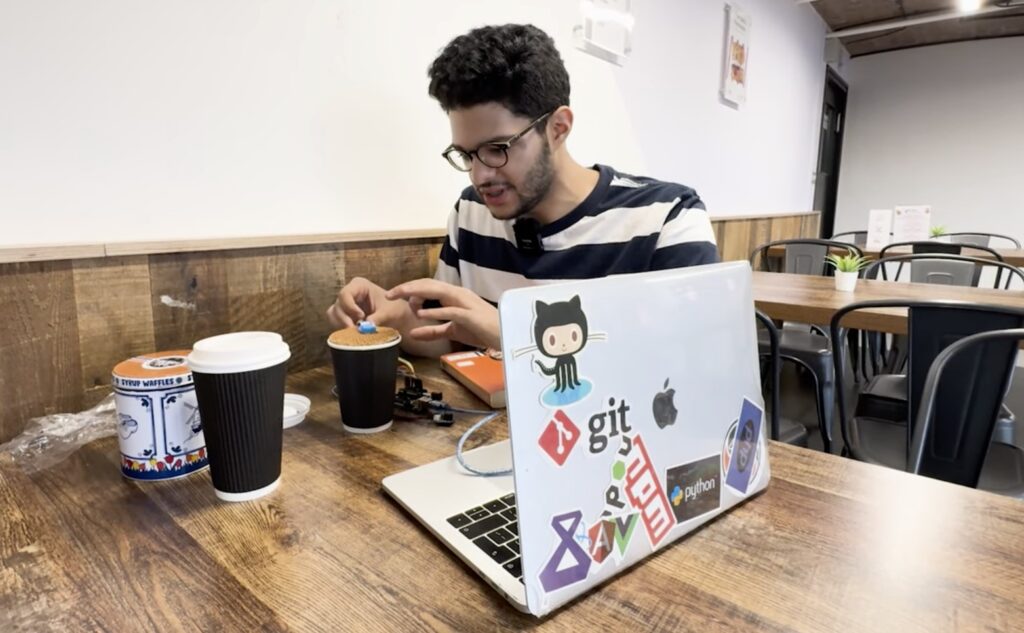
If you’re lucky enough to visit the Netherlands and you order a hot drink, you’ll likely be given a sweet treat as well. That is a stroopwafel, a crispy little waffle-syrup sandwich that the Dutch like to rest on top of their drink so that the rising heat will soften the pastry. But Eamon Magd is just a visitor to the country and didn’t know how long to leave it, so he built this stroopwafel doneness detection device.
Magd inferred that there are three factors that, together, might help him determine when a stroopwafel becomes ready for consumption: heat, time, and movement. That last one might seem strange, but stroopwafels tend to curl up after they reach a certain point — probably a result of the sandwich style construction and a differential in temperature/moisture. So, by looking for movement, Magd thought he could detect the beginning of that process.
A computer vision application, running on Magd’s laptop, detects that movement by looking for blurry pixels. Assuming the image is otherwise sharp, blurry pixels indicate movement. Magd also used an Arduino UNO Rev3 board to detect the temperature on the surface of the stroopwafel with a simple temperature sensor. The Arduino displays the current time since start on a small LCD and sounds an alarm through a buzzer when it determines that the stroopwafel has softened to Magd’s liking.
The system attempts to guess the right moment using a linear regression model trained on input data Magd collected. He tried to account for beverage types, as some might soften the stroopwaffel faster than others, but the model is really just working on averages anyway. It doesn’t, for instance, differentiate between stroopwafel makers. Regardless, this is an amusing project.
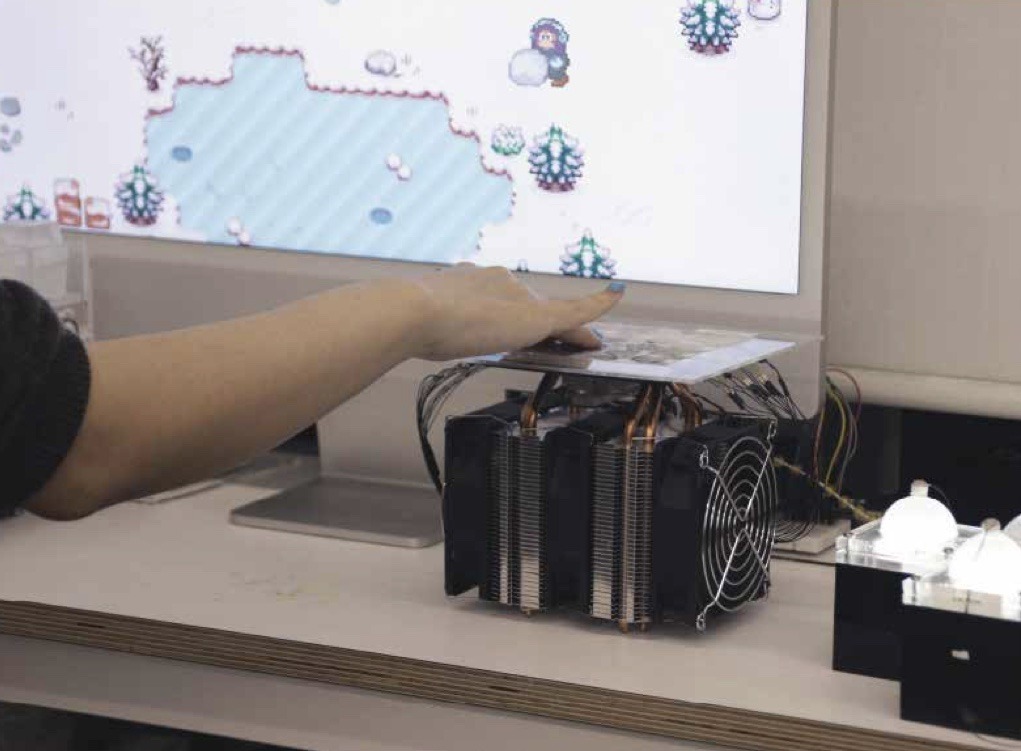
Nintendo’s Joy-Con controller system is very innovative and generally well-regarded, with one major exception: stick drift. That’s a reliability issue that eventually affects a large percentage of Joy-Cons, to the frustration of gamers. But what if that was intentional and gamepads were designed to deteriorate in short order? That’s the idea behind ICY Interfaces.
Yoonji Lee and Chang Hee Lee at KAIST (Korea Advanced Institute of Science & Technology) created three devices under the ICY Interfaces umbrella: MeltPress, FrostPad, and IceSquish. Each incorporate ice — literal frozen water — in a manner meant to make use of the material’s ephemeral nature. Imagine, for instance, a gamepad with buttons that melt at an increasing rate as you touch them. Or another gamepad with buttons that don’t become accessible until a protective sheet of ice melts away. The ICY Interfaces are experiments in this kind of dynamic design.
Each device contains an Arduino Mega 2560 board to read button presses and control additional hardware, like Peltier coolers. Those are thermoelectric solid-state heat pumps capable of refreezing the ice after it melts.
The researchers developed a simple game, called Iceland: Frozen Journeys, to work with ICY Interfaces. They built that game in Processing in order to take advantage of its strong compatibility with Arduino boards and the Arduino IDE. The game challenges players to build snowmen, capitalizing on the ice theme.
MeltPress has an array of buttons with key caps made of ice. FrostPad has a surface with several capacitive touch pads covered in a layer of ice. IceSquish has buttons made of ice-filled silicone balls, which don’t become flexible enough to press until they’ve melted a bit. All of them make use of ice in an interesting way to explore new gameplay ideas.
The pandemic made a lot of things obvious, not the least of which is that humans need social interaction to maintain good mental health. Sadly, many of us spend our lives physically separated from our loved ones by great distances or inopportune circumstances. That’s why a team of researchers decided to explore remote co-presence design within the category of smart home technology.
The goal of this design research, conducted by an interdisciplinary team from McMaster University and Simon Fraser University, was to experiment with technology that fosters human connection over long distances. But in contrast to typical communication, like email and video chats, this creates a sense of shared physical proximity.
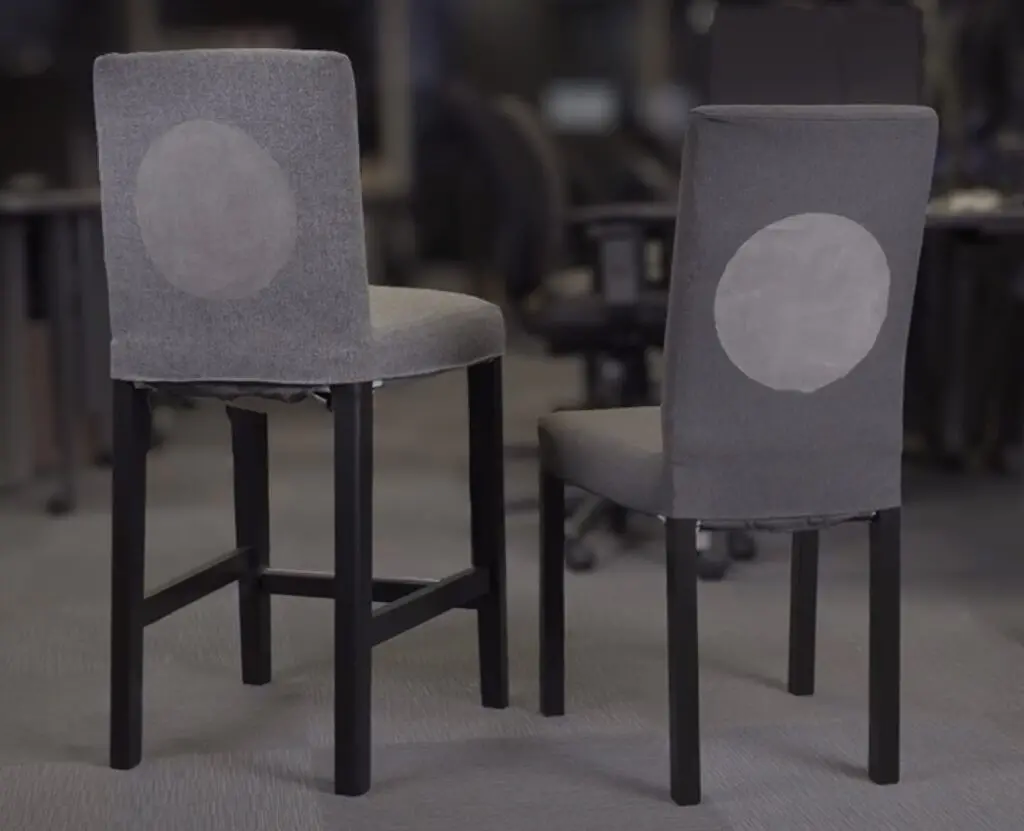
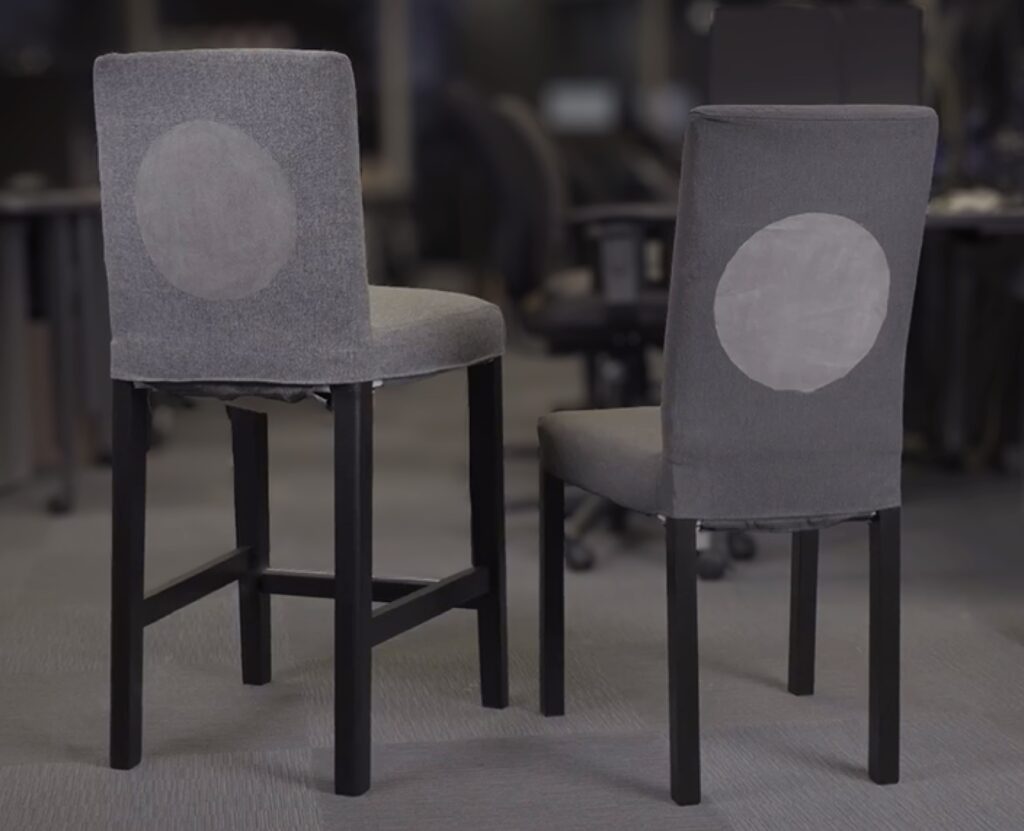
The team developed two devices to demonstrate the concept. The first is a paired chair system called There Chair, with one chair visually indicating when someone occupies the other. If one chair is in a loved one’s home and the other in your own, then you would see when they sit down — and vice-versa. The visual indicator is a “display” made up of a spiral wire covered in special fabric that changes color when current flow causes that wire to heat up. There are also heating pads in the seat to mimic the warmth of a person’s body. Those operate under the control of an Arduino UNO Rev3 board.
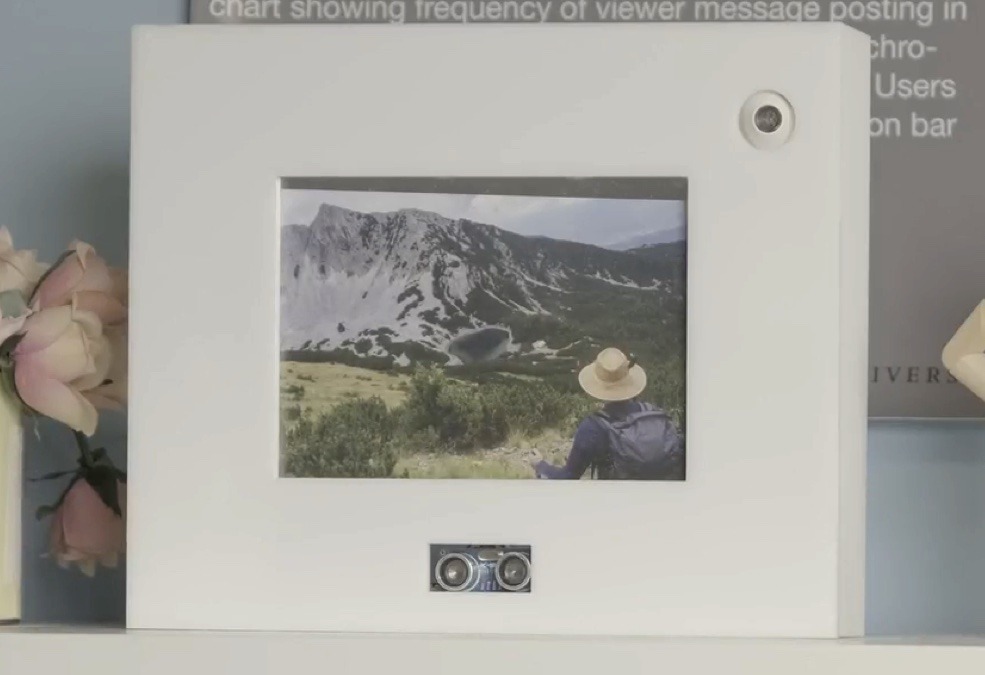
The other device, called The Fragrance Frame, is also intended to pair with a remote equivalent. It, too, contains an UNO Rev3. The device looks like a picture frame, but with an ultrasonic sensor and a fragrance sprayer. When one unit detects someone nearby, it tells the paired unit to spray its scent. Ideally, a specific scent will trigger a memory associated with that individual.
Both of these are an attempt at using technology to create a feeling of closeness. These specific devices may not make it onto the consumer market, but the idea behind them will inevitably catch on.
Um dir ein optimales Erlebnis zu bieten, verwenden wir Technologien wie Cookies, um Geräteinformationen zu speichern und/oder darauf zuzugreifen. Wenn du diesen Technologien zustimmst, können wir Daten wie das Surfverhalten oder eindeutige IDs auf dieser Website verarbeiten. Wenn du deine Einwillligung nicht erteilst oder zurückziehst, können bestimmte Merkmale und Funktionen beeinträchtigt werden.
Funktional
Immer aktiv
Die technische Speicherung oder der Zugang ist unbedingt erforderlich für den rechtmäßigen Zweck, die Nutzung eines bestimmten Dienstes zu ermöglichen, der vom Teilnehmer oder Nutzer ausdrücklich gewünscht wird, oder für den alleinigen Zweck, die Übertragung einer Nachricht über ein elektronisches Kommunikationsnetz durchzuführen.
Vorlieben
Die technische Speicherung oder der Zugriff ist für den rechtmäßigen Zweck der Speicherung von Präferenzen erforderlich, die nicht vom Abonnenten oder Benutzer angefordert wurden.
Statistiken
Die technische Speicherung oder der Zugriff, der ausschließlich zu statistischen Zwecken erfolgt.Die technische Speicherung oder der Zugriff, der ausschließlich zu anonymen statistischen Zwecken verwendet wird. Ohne eine Vorladung, die freiwillige Zustimmung deines Internetdienstanbieters oder zusätzliche Aufzeichnungen von Dritten können die zu diesem Zweck gespeicherten oder abgerufenen Informationen allein in der Regel nicht dazu verwendet werden, dich zu identifizieren.
Marketing
Die technische Speicherung oder der Zugriff ist erforderlich, um Nutzerprofile zu erstellen, um Werbung zu versenden oder um den Nutzer auf einer Website oder über mehrere Websites hinweg zu ähnlichen Marketingzwecken zu verfolgen.