In the world of music, being able to keep time accurately is vital when playing a piece, as even small deviations in timing can cause the notes played to sound “off.” Ordinarily a device called a metronome is used to provide consistent ticks that the musician can use, but most are not that visually interesting. This is what inspired ChristineNZ over on Instructables to create her own metronome that uses an Arduino Uno to both show the beat and produce a small noise.
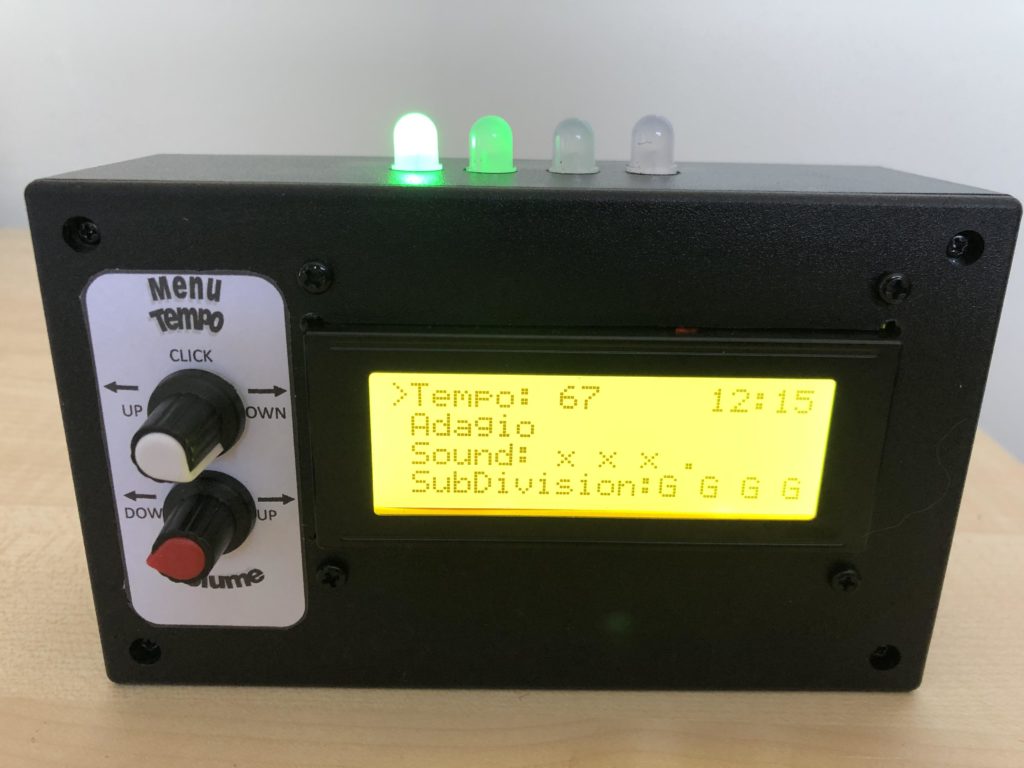
ChristineNZ’s Piano Metronome enables users to select both the rate (tempo) of the beat and its volume by turning one of two rotary encoders. Rather than having some clunky interface, this project has a large 20×4 I2C LCD on the front that displays the current time via an RTC, the sound’s amplitude, and even subdivisions. The top of the enclosure also holds four RGB LEDs that visually indicate the beat and subdivision if present.
One other cool feature of the Piano Metronome is its ability to show various tempo markings, which are the names given to the beats-per-minute value. To observe ChristineNZ’s project in action, check out the video below or visit its write-up to see how it was built along with the accompanying software.
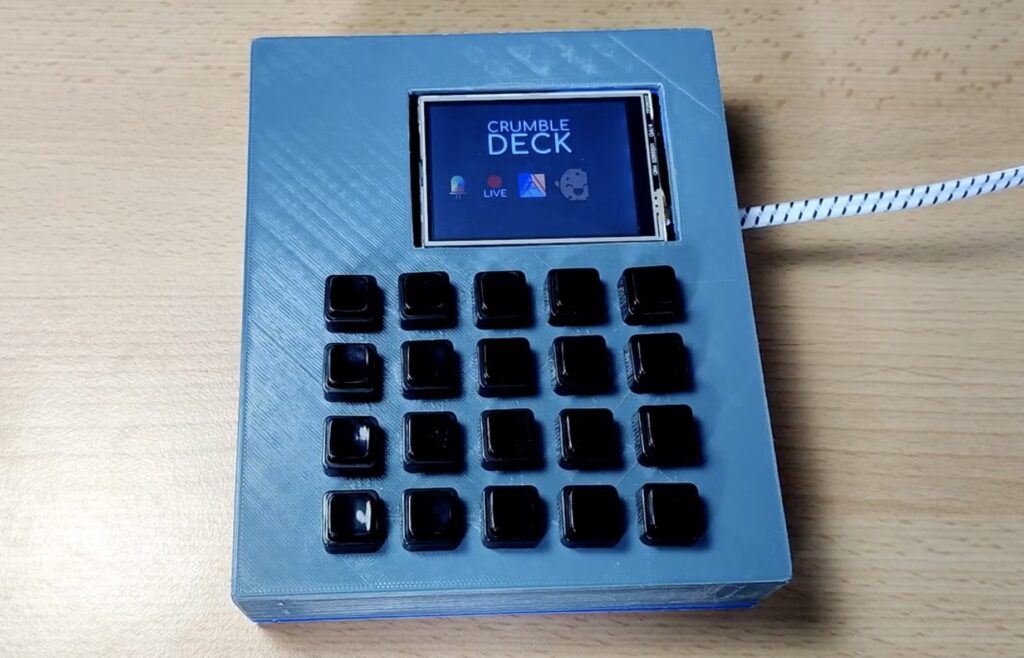
Stream Decks have gained a great deal of popularity within recent years. However, increased demand and a limited supply of them has caused their prices to skyrocket and availability to dwindle, leading many to seek alternatives. The streamer known as CoCoaCoCi has created a DIY Stream Deck before, but this first iteration only had a 3.5” touchscreen that wouldn’t always pick up inputs. So, for his next project, CoCoaCoCi wanted to have some physical buttons along with a display that would only be used to navigate menus and actions.
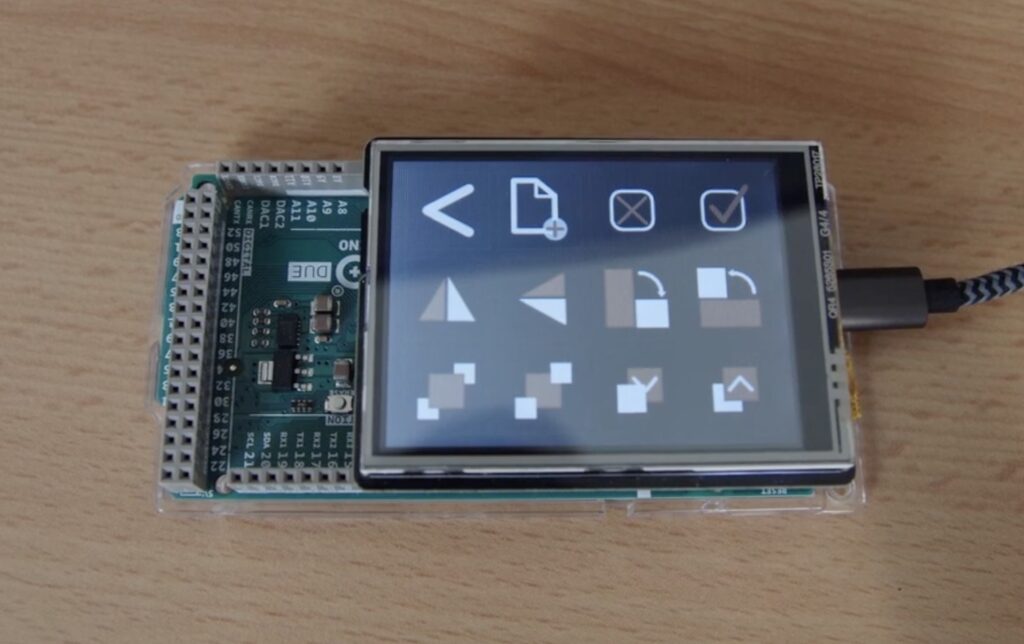
He started by quickly designing and 3D printing a case to house the Crumble Deck’s electronics, including an Arduino Due as the main processor, a 3.5” TFT LCD screen, and 20 buttons. All the buttons were wired together in a matrix that reduces the number of GPIO pins required to detect them. His code then polls each column and row to check which button is currently being pressed.
As with the previous model of the Crumble Deck, this version also contains some very handy macros that can be used when streaming. Many of the buttons are dedicated to switching certain audio and video inputs on or off, while others can change which scene is selected. Some buttons can also automatically write and send small messages with the stream’s chat for quick interactions with viewers.
The Crumble Deck is a great and cheap alternative to more expensive off-the-shelf solutions, and you can see more about how it was created below.
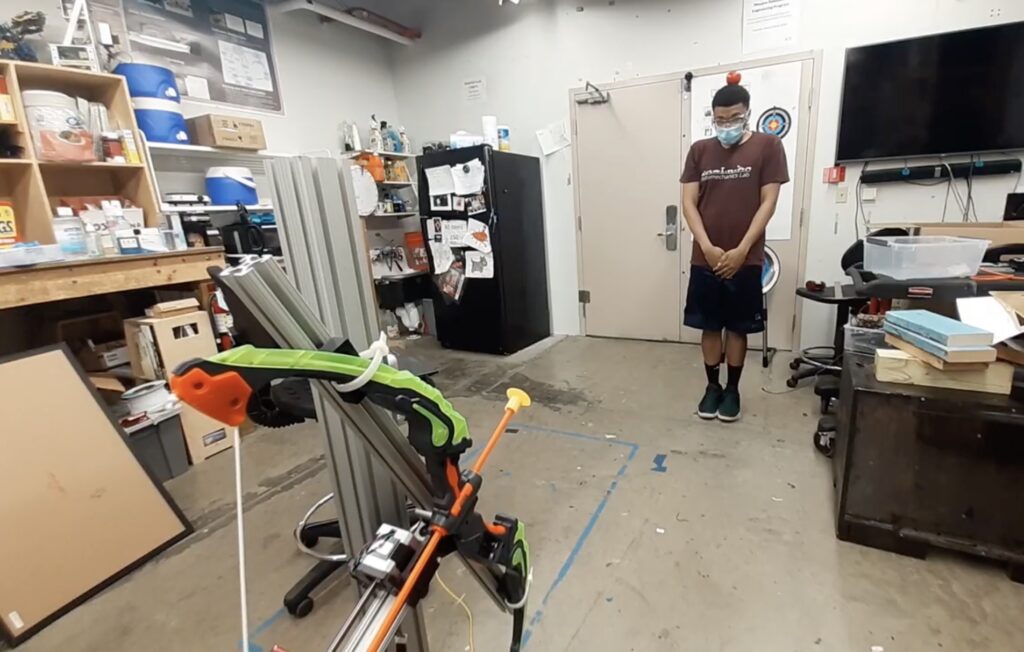
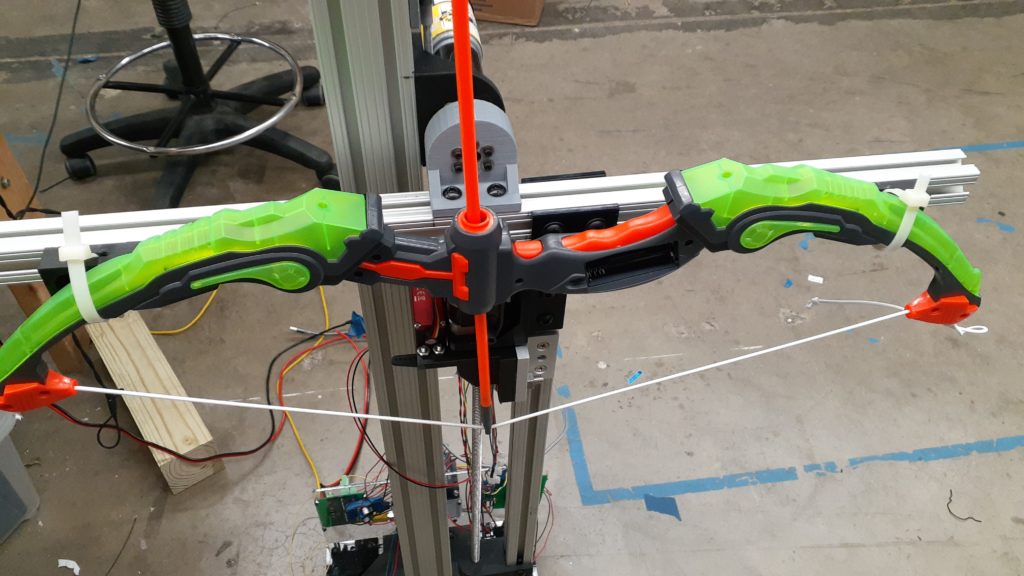
Both archery and robotics are extremely fun, but what happens when you combine the two? In Kamal Carter’s case, he constructed his own autonomous robotic archery system that can not only acquire and aim at targets, but even draw back the bow and fire an arrow all on its own.
The project features an Intel RealSense Depth Camera at its heart to acquire targets by looking for abnormally bright colors and to compute its distance away from them. This information is then fed to an Arduino Mega that uses some simple physics to determine where exactly the bow should be aimed via a pair of stepper motors. Once the target has been dialed in, another stepper pulls back the bow while a servo releases the string’s tension, thus firing the arrow.
Carter has shared a video where he demonstrated the effectiveness of his autonomous archery system — and it’s impressive. The robot was able to recognize the apple on his head (just like in Robin Hood), tilt the bow up slightly, and then fire, which ended up knocking the apple off with minor collateral damage.
Designer Che-Wei Wang built a simple Arduino project that’s counting to a billion, and has been doing so for over 10 years. Could this be the longest continually running Arduino project in the world?
Che-Wei has a background in art, architecture and industrial design. He now runs a boutique design studio with is wife Taylor, called CW&T. But it was during his time at university that he first discovered his love for Arduino.
“I first started using Arduino when I went to [the Interactive Telecommunications Program] at NYU in 2007,” he explains. “I got hooked the moment I got an LED to blink and went on to build a fuzzy GPS robot that guides you to places around the city.”
Even now there’s a clear technological slant to his design work. As you look through the products CW&T has created, more than a few have embedded electronics at their core. He also has a rare eye for the beauty of minimalism, both in terms of design and function. Which is probably why one of his first Arduino projects is both simple, and stunning.
“As a kid, I would challenge myself to count to as high of a number as possible,” he laughs. “I don’t remember how high I got. Probably not past a few hundred. So I built this device as a way to fulfil my childhood dream of counting to an insanely high number!”
The Counting to a Billion project
Back in 2009, Che-Wei created his next project to help him achieve that childhood objective. Counting to a Billion has an Arduino board with a text-to-speech converter and a speaker that continually reads out the next number. When it gets to billion, it’ll stop.
“It lives in our basement, so every time you go downstairs, there’s a voice just counting away.”
Che-Wei clearly gave this a lot of thought in his initial designs. Like a lot of minimalist product designs, there’s a lot of work needed to make them look so simple. Counting at one number per second, continually, you’re looking at over 31 years to get to a billion. That means this apparently simple project needs to be incredibly robust.
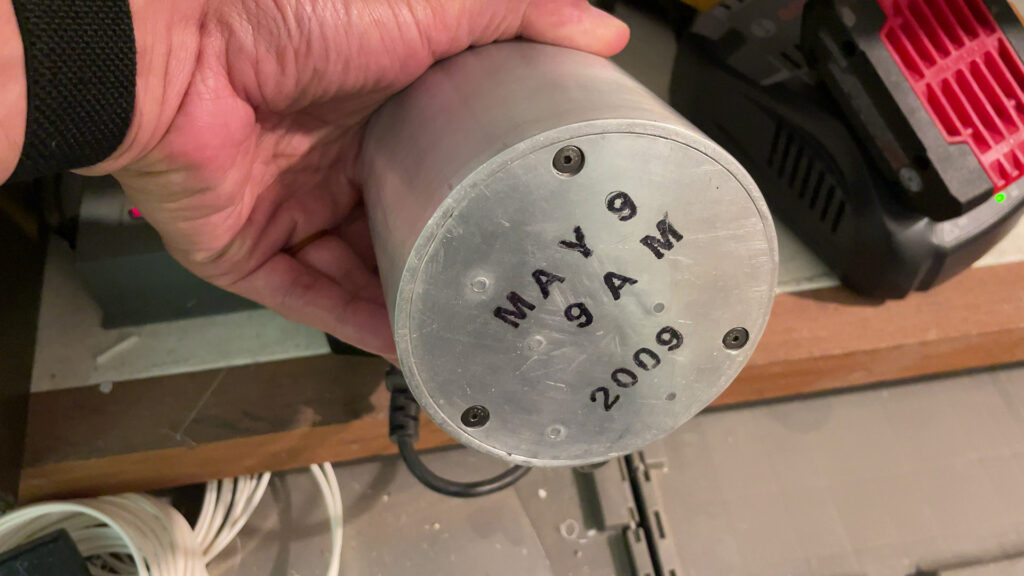
Counting to a Billion is encased in a machined aluminium housing for safety. It writes the last number to EEPROM, in case of catastrophic power failure. And there’s a rechargeable backup battery so it keeps counting whenever the devices needs to be moved or unplugged.
It was activated at 9AM on May, 9th, 2009 and is still happily running, without interruption. It’s hard to imagine there are many other Arduino projects that have been running continuously for this long. If there are, we definitely want you to tell us all about them!
Down for the count
“I still use Arduino all the time,” Che-Wei continues, “for work, for home projects, and gifts.”
The Counting to a Billion project has actually provided inspiration for CW&T’s current products. In their shop is a strangely attractive device, called Nothing Lasts Forever. This sealed glass capsule has an e-ink display that counts up ever time you press the button on the machined aluminium cap. If and when it reaches 999,999, the device will stop functioning. Although the electronics are custom, it still uses the EEPROM method developed for Counting to a Billion to keep track of the number.
So, you’re probably wondering what number Che-Wei’s project is currently at? To recap, at the exact moment of writing, it’s now been running continuously for 12 years, one month and five days, or:
145 months
631 weeks
4419 days
106,046 hours
6,362,764 minutes
381,765,878 seconds
“As of right now, on June 8th, 2021, 10:42AM,” Che-Wei concludes, when we spoke about his project, “the count is at 47,684,610.”
Have you built a project that’s been running for a long time? We want to hear all about it! Share it on the Arduino Project Hub, in the comments, on social media, or over on the forum.
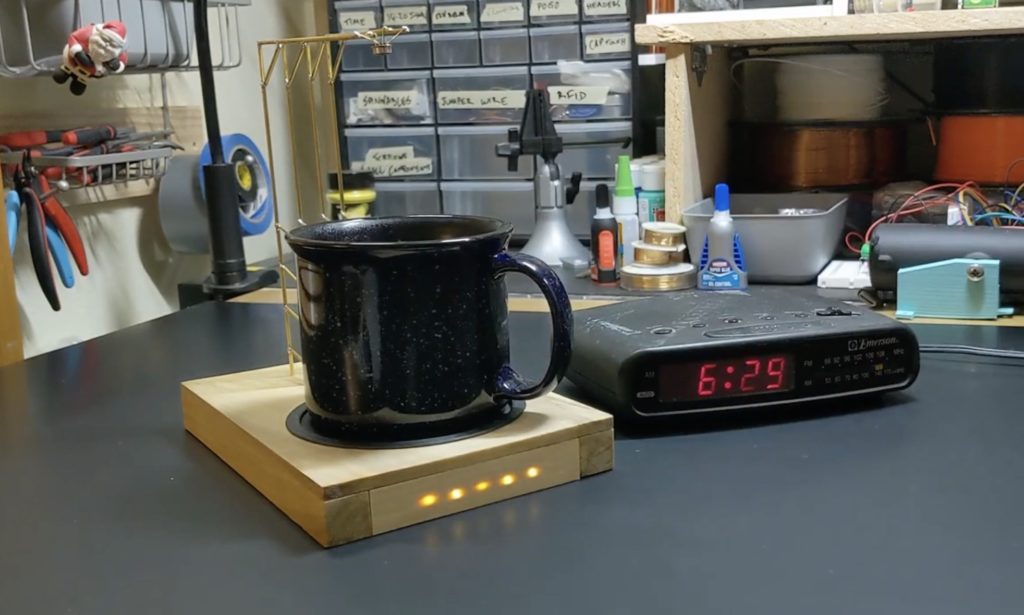
While some prefer iced coffee, few like a cup of Joe that’s been sitting out for too long and has simply stabilized to room temperature. To ensure his beverage is up to snuff, YouTuber Make Fun Stuff has created his own non-contact temperature display for his desk.
The device features a brass rod circuit sculpture that holds an IR sensor over the drink, transferring signals to an Arduino Nano in the assembly’s base. The Nano is turned on via a small switch, which is activated by the weight of the mug when in place. Five LEDs are used to indicate how hot the coffee is, embedded inside almost-drilled-through holes in the wood. This allows the lights to shine visibly when active and disappear when off, preserving an understated look for the unit.
More details on the project’s construction can be found in Make Fun Stuff’s video below.
At this point, asking “what is cloud computing?” has become difficult. We say it all the time. “Cloud computing” this, “in the cloud” that, “connect to the cloud” the other thing. Cloud, cloud, cloud.
What, you mean you don’t know what the cloud is?
This is why breaking into new technology can be so daunting. This post is for anyone getting started with Arduino who wants to know what we’re talking about when we say “cloud” but is afraid to ask. We’ll also look into the reasons you might want an IoT, maker or Arduino project to be connected to that elusive cloud.
What is cloud computing, and where did it come from?
Let’s start with a brief history of cloud computing.
In many respects, it predates personal computing. When a computer cost hundreds of thousands of dollars and took up the floor of a building, very few people had them. Instead, coders, businesses, universities and even governments would rent computational time on a large mainframe somewhere else. They’d send in their data, it’d be crunched by these massive computers, and the results were returned to the user.
There were enormous benefits to this. For instance, the user didn’t have to know how those big, complex computers worked. Chances are they never even saw one in person. No installation, repairs, upgrades or maintenance to worry about. All the benefits of computerized operation without the costly infrastructure or technical issues.
It wasn’t until the late ’70s and early ’80s when computers were small enough to be owned personally that “timeshare” computers fizzled out. At that point, renting computer power from elsewhere was no longer necessary. Our data was processed and stored locally for the next 15 or 20 years so.
This proliferation of personal computing has left us thinking it all began this way. But initially, almost all computers were remote. Or dare we say, “in the cloud?”
High-speed networks are readily available now (what we happily call an internet connection). So you can have your software and data run and stored on big, powerful mainframes somewhere else in the world is practical again. Renting computer power and storage is, as before, cheaper and easier than buying your own gear.
So you can see how we’ve come full circle. At its most basic, cloud computing is just a connection to a much bigger, more powerful computer that runs software, stores files and crunches data instead of doing it at home. What was once called “time sharing” is now called cloud computing. But the result is much the same.
So how and why do I use the cloud?
You already are. Email, Google Drive, Spotify, Facebook and even Netflix are cloud computing services. Huge computers that take up entire warehouses rather than just a back room at MIT are waiting for commands from you. Play a song, binge watch a show, share a Word doc. Then they process and return the data as music, movies, computer files and more.
There’s no limit to what a cloud computing service can do, or provide. In fact, we use them so much that there are now lots of very specific cloud services, depending on what you want. That includes cloud computing that caters specifically to maker projects, and the Internet of Things (IoT).
Example of how you’re using cloud computing
Think about it like this. You’re going out in the car, so you prepare a Spotify playlist on your phone. Somewhere on another continent a Spotify supercomputer receives that data from you (the playlist). It begins processing the files (the music), sends them back and your phone plays them on the car radio. That’s how you’re making use of a music-based cloud computing system.
But what if you had to do all that manually? Compile different songs from different albums, convert them into MP3 files, transfer them to your phone from a PC and download a music player app. It would make this into a much bigger job. Lots of people do actually go through those steps manually for their playlists. However, as a Spotify subscriber you’re renting time on the Spotify mainframe (“in the cloud”) instead.
How an IoT project might use the cloud
Now let’s say that an Arduino Nano RP2040 Connect in your garden weather station project has a temperature sensor. It drops could outside, so the Nano sends a temperature reading to the IoT cloud. The cloud processes the information (the temperature) and sends commands to the MKR IoT Carrier in your living room that’s controlling the heating. This tells the Carrier to turn the heating on until it reaches a certain temperature, when it can switch it off again. All handled on the IoT cloud service.
Of course, you could do it manually, just like you could with your music. You could write code for the Nano that talks to the sensor, processes the external temperature, stores the software, connects to another device inside the house, exchanges the data, and then another set of code at the Carrier would activate a relay and monitor the temperature inside the room. Again, lots of people do it this way. Arduino’s great for that. The cloud simply gives you an easier, more efficient option by doing the complex work for you.
That’s an IoT-based cloud computing service at work, just as Spotify is a music-based cloud service. And just as Spotify can do a lot more than our simple playlist example, an IoT cloud can do a lot more than read simple data and send on/off commands.
Should I use an IoT cloud service?
This post is aimed at helping total newcomers answer that elusive “what is the cloud” question. To help you feel comfortable getting started with cloud-based IoT projects. If you’re one of those people, hopefully you can now see that cloud computing isn’t an advanced feature reserved for engineers and coders. The whole point of cloud computing is that you don’t need to know how it works in order to use it to its fullest.
There are an infinite number of reasons that experienced, advanced makers, engineers and businesses are using an IoT cloud service like Arduino Cloud. But it’s also there to give complete newcomers a much easier point of entry. If you want to build electronics projects with your kids, or learn a new skill, automate your home, or build yourself a device, the cloud makes it significantly easier than attempting it all manually.
Best of all, you can do it for free. If you’re researching how to get started on your first ever maker project, you’d be doing yourself a huge favor by starting with an Arduino IoT Cloud account. No effort, no advanced knowledge, no experience (and no credit card) needed.
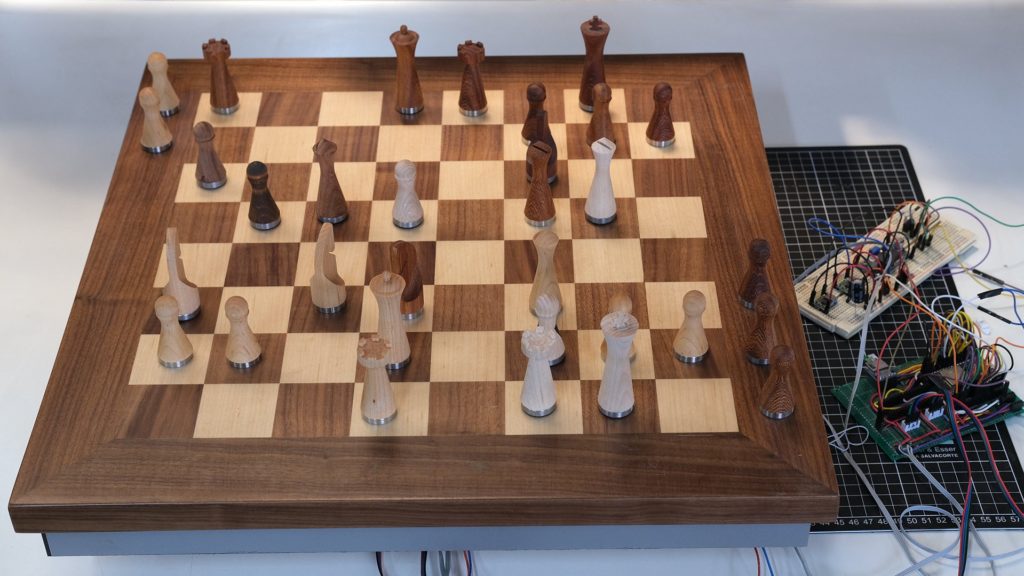
Chess is an excellent game to play with friends, but what if you don’t have any to compete against nearby? This is what prompted maker Carlos Pendas to create an automatic chessboard that’s not only able to record which pieces got moved, but even move the pieces itself. This means you can play a game of physical chess with someone thousands of miles away.
To begin, Pendas started out by designing and milling his own chess pieces with a special cutout underneath to hold both a weight and a magnet. The magnet is vital here as it’s what gets detected by the array of 500 Hall effect sensors underneath the board and moved by the articulating arm. After a player makes their move, an Arduino Nano reads which Hall sensors were activated and in what order to determine the piece moved. This data is then relayed to a Nano 33 IoT that communicates with a Lichess server to send movement and general game commands.
Once the remote player makes their move, a command is sent to an ESP32 that controls a robotic arm with an electromagnet placed on the end. It precisely maneuvers each piece to avoid collisions and keep the board looking tidy.
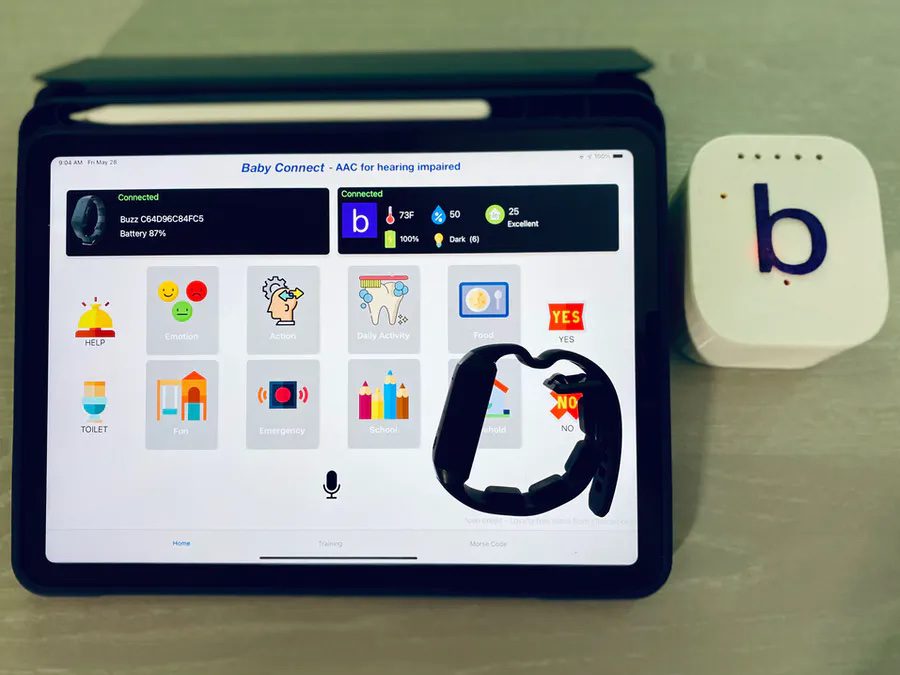
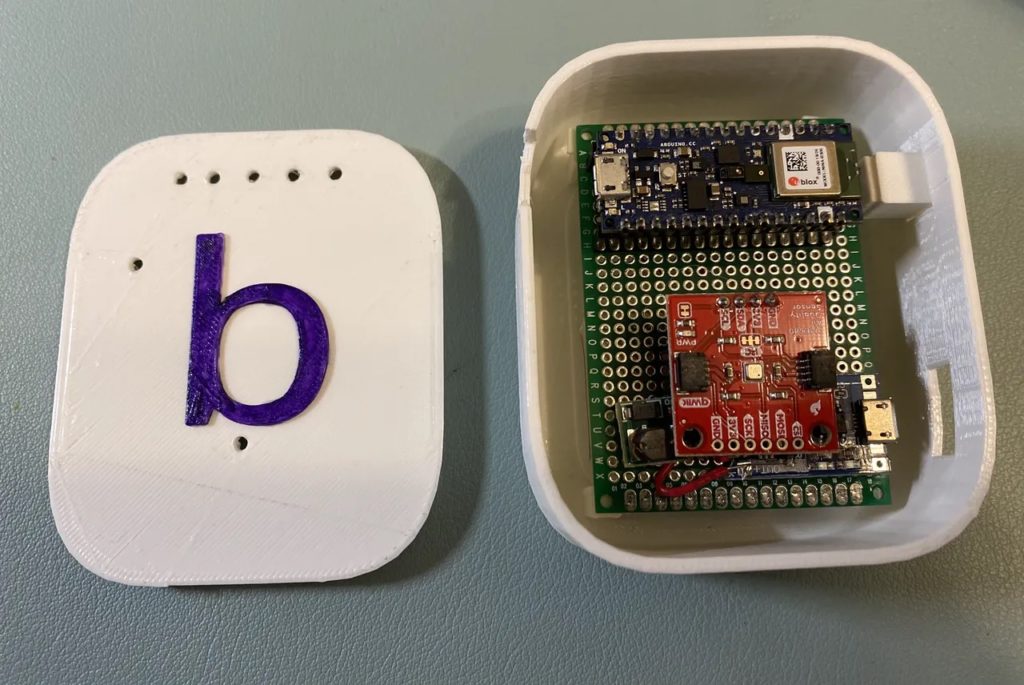
For the hearing impaired, communicating with others can be a real challenge, and this is especially problematic when it is a deaf parent trying to understand what their child needs, as the child is too young to learn sign language. Mithun Das was able to come up with a novel solution that combines a mobile app, machine learning, and a Neosensory Buzz wristband to enable this channel of communication.
Called the “Baby Connect”, Das’ system involves using a mobile app with a series of images that correspond to various feelings, actions, or wants/needs of a child. When something is requested, such as wanting to take a nap, the action is mapped to a sort of Morse code language that buzzes the four haptic motors on the Neosensory Buzz in a certain pattern. For instance, dislike is mapped to a dot, dash, and then dot, while yes is a single dot.
The Baby Connect also has some more advanced features including baby activity monitoring and environmental logging. Because deaf parents are unable to hear the difference between certain cries, the Nano 33 BLE Sense that controls the device runs a model trained with Edge Impulse that can distinguish between cries for pain, hunger, and general malaise. Finally, there’s the ability to use the app as a speech-to-text converter that takes words and changes them automatically into mapped vibrations.
This disguised campsite security system lets you know ‘hoos’ there
Arduino Team — June 10th, 2021
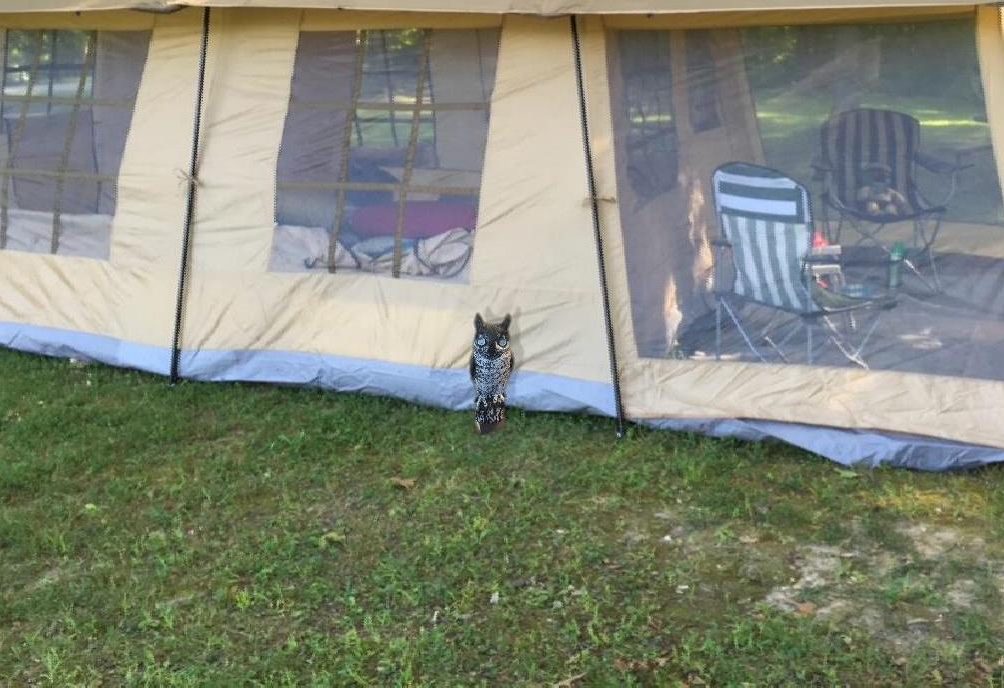
Motion sensors for home security stick out like a sore thumb, as their shiny white exteriors can be easily seen from a distance. This is made worse when camping, as small, discrete security devices that blend into their surroundings are even harder to come by. This is what inspired Sean Miller to create his own that uses automotive bumper sensors to detect intruders and play loud noises when necessary. Better yet, the circuitry for this project was stuffed inside of an owl decoy, making it the perfect unassuming campsite guardian.
At the heart of this disguised intruder detection system is an Arduino MKR Zero, which handles both the incoming distance readings from the sensors and playing various sounds from an onboard SD card. Miller had to perform a few hacks to get the automotive sensors working, as they use different custom protocols that can vary between manufacturers. After figuring it out, he then wired up the sensors to the MKR Zero and connected a small speaker to a custom amplifier circuit. With the electronics completed, he produced some code that checks the distances between the owl and any obstacles, with an alert being produced if an intruder is detected nearby.
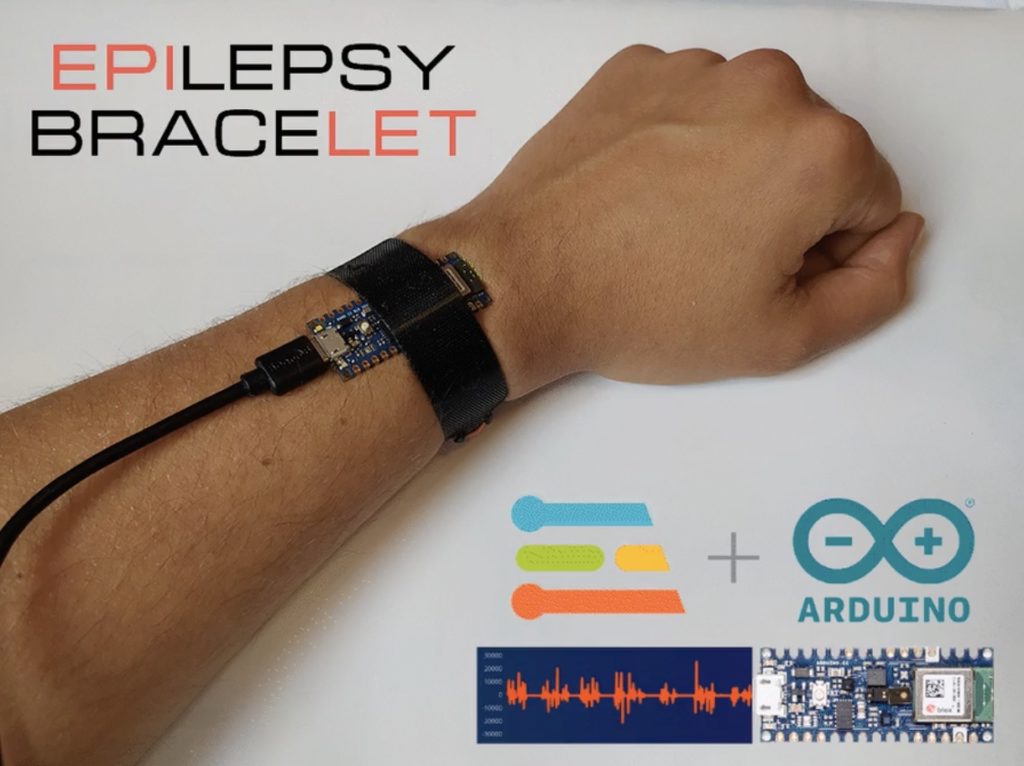
Epilepsy can be a very terrifying and dangerous condition, as sufferers often experience seizures that can result in a lack of motor control and even consciousness, which is why one team of developers wanted to do something about it. They came up with a simple yet clever way to detect when someone is having a convulsive seizure and then send out an alert to a trusted person. The aptly named Epilet (Epilepsy + bracelet) system uses a Nano 33 BLE Sense along with its onboard accelerometer to continually read data and infer if the sensor is picking up unusual activity.
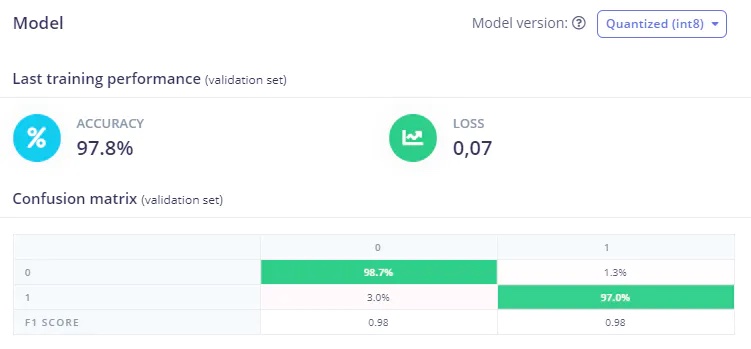
The Epilet was configured to leverage machine learning for seizure detection, trained using data captured from its accelerometer within Edge Impulse’s Studio. The team collected 30 samples each of both normal, everyday activities and seizures. From this, they trained a model that is able to correctly classify a seizure 97.8% of the time.
In addition to the physical device itself is an accompanying mobile app that handles the communication. When it receives seizure activity that lasts for at least 10 seconds from the Nano 33 BLE Sense, the app sends an SMS message to a contact of the user’s choice. The Epilet has a lot of potential to help people suffering from epilepsy, and it will be exciting to see what other features get added to it in the future.
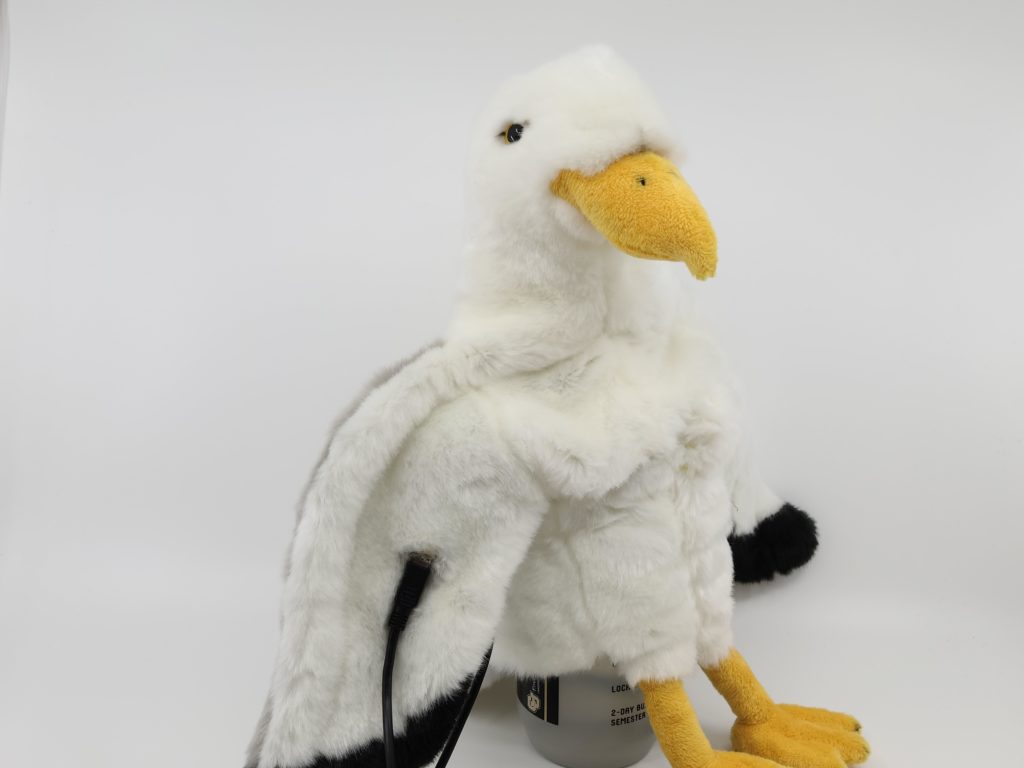
Birds have an amazing sense of direction that aids in migrating across vast distances, and scientists think this is due to their ability to detect magnetic fields — just like a compass. Chris Hill on Instructables wanted a way to experience this for himself by using a sensor and some sort of feedback mechanism to feel a magnetic field’s directionality and strength.
The sensor implemented is an AAH002 GMR module, which senses magnetic fields using a sandwich of materials that change their resistance when a field is nearby. By reading this value, the strength of the magnetic field can be calculated. Hill’s device employs a pair of these to accurately pinpoint the direction, while an Arduino Nano does the controlling. He also soldered together a set of nine ERM vibration motors into a grid to create a very low-resolution tactile display for the wearer.
Once the wiring was finished, Hill stuffed the GMR sensors into an eagle puppet’s beak and the main circuitry in its chest cavity. Power is provided by a single micro-USB cable. As seen in his video, it looks pretty cool, albeit a bit creepy as well. Read more about how the project works in Hill’s write-up here.
Arduino library submissions have a new, easier and more transparent workflow.
Libraries are one of the pillars of the Arduino ecosystem. At time of writing, more than 3,780 open source libraries are available to perform any kind of task. This includes communication with external components and using algorithms for data processing. Such a variety of shared building blocks helps achieve things quickly without the need to write low-level code.
Beyond the official libraries maintained by the Arduino team, most are contributed by the community. Anyone can submit a new library for inclusion, provided it meets the specification and passes the Arduino Lint checks.
We’re happy to announce that the submission process for community libraries has been refactored. The goal is making it leaner, more automated and more transparent. Previously you would open an issue on the Arduino IDE repository for the Arduino team to handle the request manually. Instead, we’ve now established an official GitHub repository containing the library registry.
Submitting a new library is now as simple as opening a pull request to that repository. Then you add the URL of the library’s repository to the list. A bot performs automated checks and, when passed, the request will be merged immediately. Within one day, the new library will be listed in the Arduino library directory. It’ll also be made available within the IDE, the Arduino CLI command line tool and the Web Editor. The Arduino team will still be monitoring the process in order to fight abuses and to provide assistance.
After a library is indexed, new versions are automatically detected and published (if compliant). So nothing changes for existing libraries and no action is required. See the repository documentation for more details about the new process and join the discussion in the forum to provide your feedback.
Subscribe to the Arduino newsletter so you don’t miss any other exciting developments!
DIY Perseverance rover replica looks and moves like NASA’s
Arduino Team — June 7th, 2021
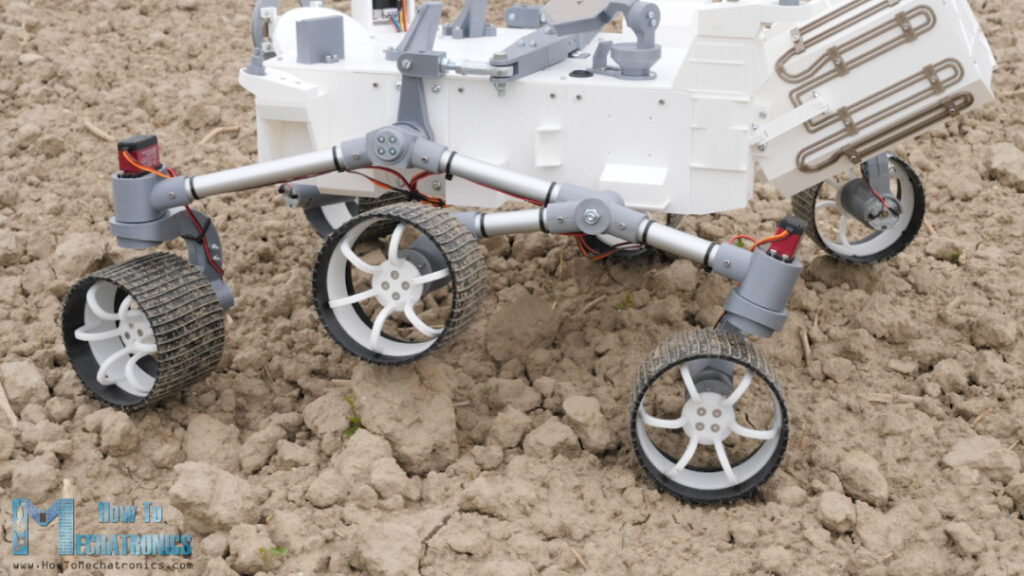
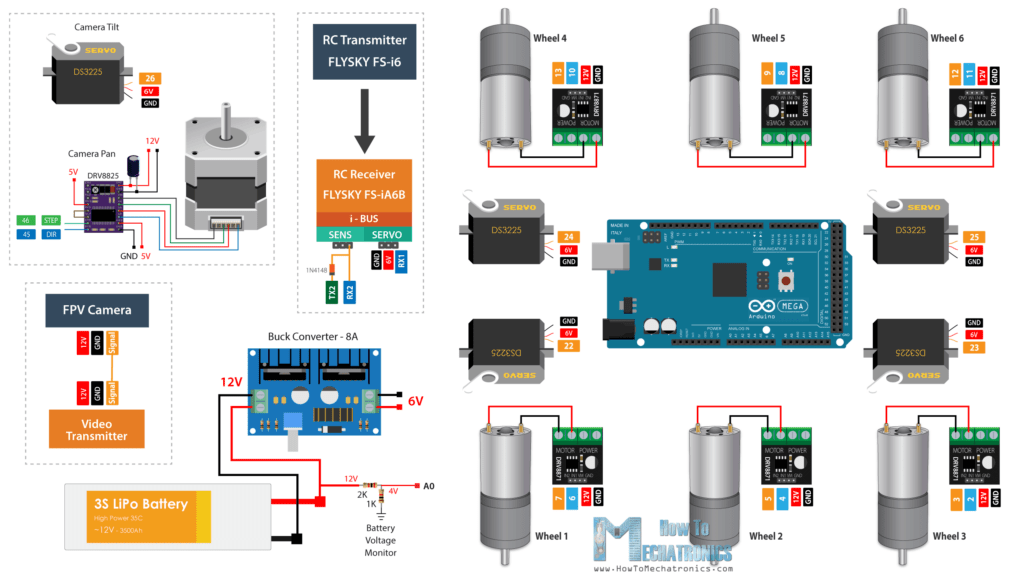
Merely looking at the latest Mars rover, Perseverance, will make almost any nerd giddy with excitement over the amount of cool tech that’s crammed into the vehicle before it gets shot into space. This feeling is what probably inspired Dejan of How to Mechatronics to create his own scaled-down version of the interplanetary vehicle, but not only would it look great, his DIY rover would also be able to drive and show what it’s “seeing” to the operator.
After designing a CAD model in Solidworks, Dejan got to work printing out the myriad of pieces required. The frame and structure of the rover is comprised of aluminum T-slot extrusions and tubes, while the rest is built from 3D-printed plastic. Each wheel was made to resemble the ones that are on the actual rover, and they are each driven by their own independent DC motor. Additionally, the four outer wheels are steered by separate servo modules. At the heart of the project is an Arduino Mega, which handles the DC motor drivers, servos, and the A4988 stepper driver that pans the camera horizontally.
The rover’s driver has the ability to don a VR headset or just use their phone to view the output of its onboard FPV camera, which is pretty cool when trying to recreate what Perseverance does. More details about the project can be found here and seen in the video below where Dejan details how he built the scale rover and what all it can do.
James Bruton’s robot uses three ball-shaped wheels to move in any direction
Arduino Team — June 5th, 2021
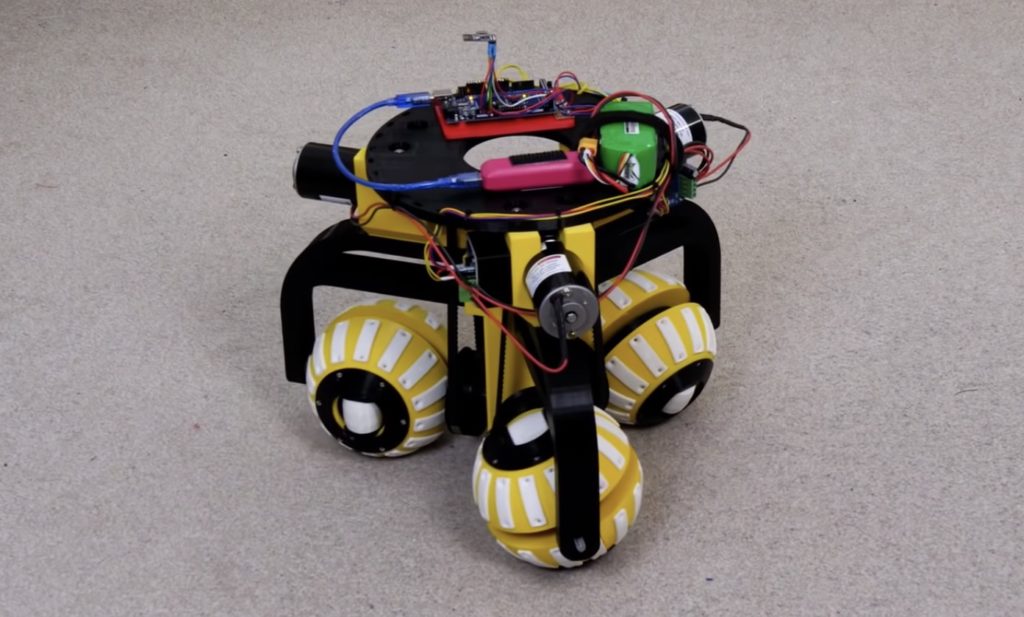
Wheeled robots normally have wheels that move in a single axis and steer by using either differential speeds or by pivoting some kind of guide wheel. However, this leads to some drawbacks, the most obvious being an inability to move in really tight spaces. When presented with this challenge, YouTuber James Bruton came up with a great design for a highly mobile robot platform that employs a novel setup to move in any direction. Inspired by the work of researchers at Osaka University in Japan, the omni wheel uses a single drive shaft to spin, yet nearly every surface has a way to move along the ground.
After designing his robot in Fusion 360 and 3D printing each part, Bruton assembled the wheels and added a pulley to each drive shaft which could be spun by a motor sitting directly above. An Arduino Mega is tasked with controlling each of the three BTS7960 motor drivers and it receives commands via an nRF24L01 radio module. All of the drive components are powered by a single 3-cell LiPo battery pack, while the main board is supplied current by a USB battery bank.
By spinning certain wheels at the correct speed, straight line motion can be produced, as shown in the video below. Bruton tested his robot by driving over carpet, tile, aluminum extrusions, and even a plastic lid, which did very well across everything except the lid. This robot has countless potential uses, such as a garbage collection device for around the house.
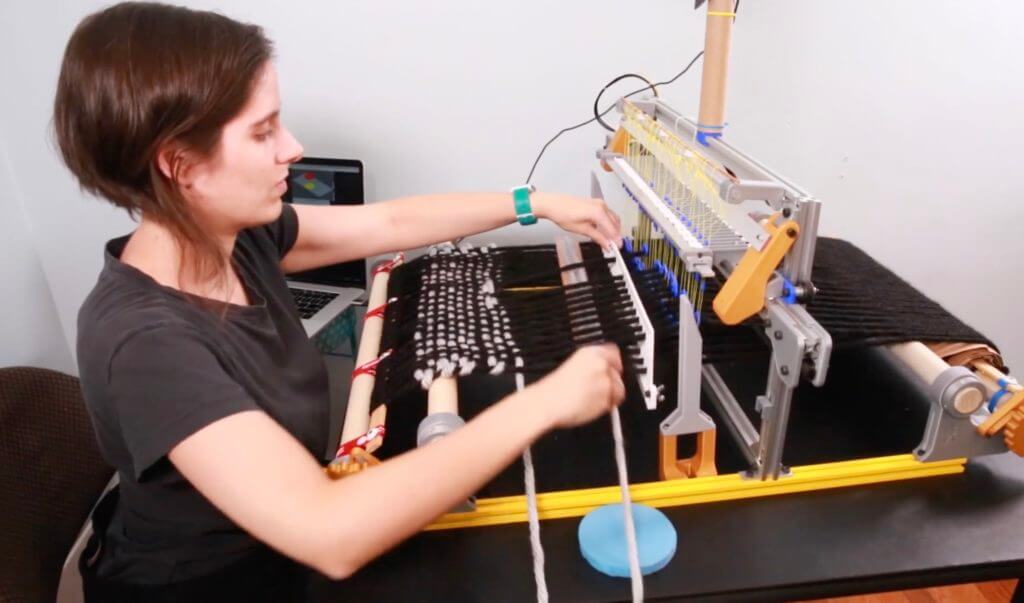
Jacquard looms revolutionized the weaving process by independently controlling each heddle’s position. That made it possible to weave complex patterns. But modern Jacquard looms are very expensive, because they require a solenoid or other means of actuation for each and every heddle. Lea Albaugh and her team at Carnegie Mellon University found an affordable way to build a Jacquard loom from 3D printer parts — including an Arduino-based controller.
The key development for this Jacquard loom was a special bistable switch for each heddle. Those switches keep their heddles in the position in which they were last set. That makes it possible to set the heddle positions sequentially, instead of simultaneously with a multitude of solenoids. All of the heddle positions can be set by a single solenoid, which slides back and forth across the loom. This keeps costs down and makes it possible to build a Jacquard loom for about $200 using common 3D printer components.
The frame of this loom was built using aluminum extrusion and 3D-printed brackets. The linear rails and stepper motors are the same type that you would find in a 3D printer. The controller, a RAMPS 1.4 shield on an Arduino Mega board, is also typically used for 3D printing. The Arduino receives G-code commands from a connected computer, which monitors the loom through a commodity webcam running OpenCV computer vision software. While the loom still requires hand weaving, the automated heddle positioning allows for the quick and accurate production of complex patterns by hobbyists at home.
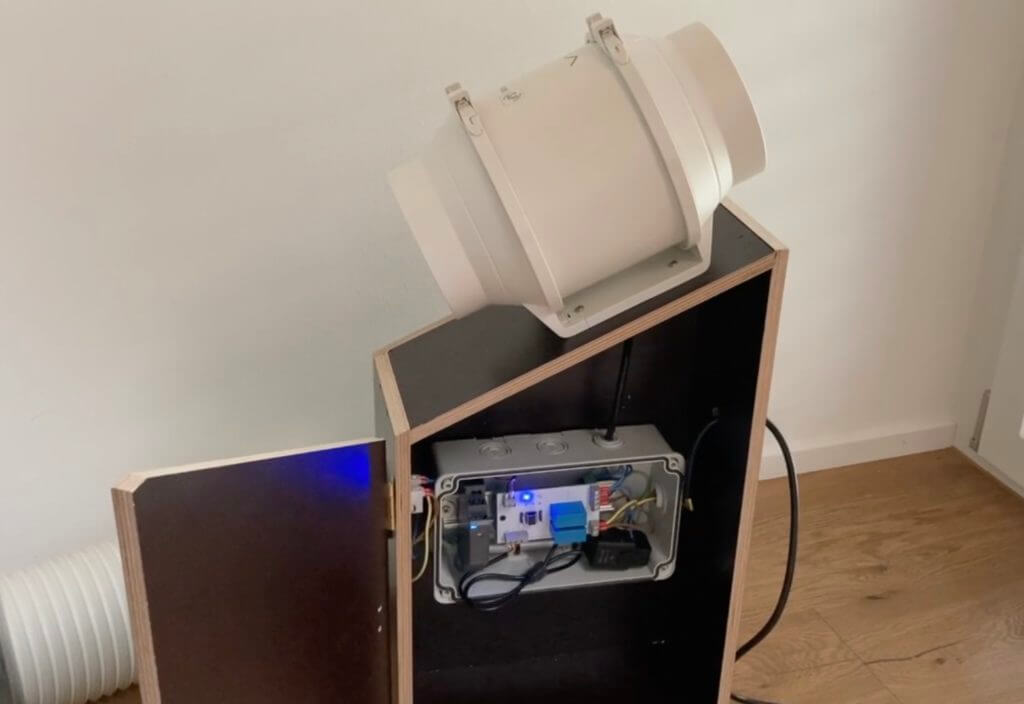
Extending a mobile AC unit’s exhaust duct with an air extractor
Arduino Team — June 4th, 2021
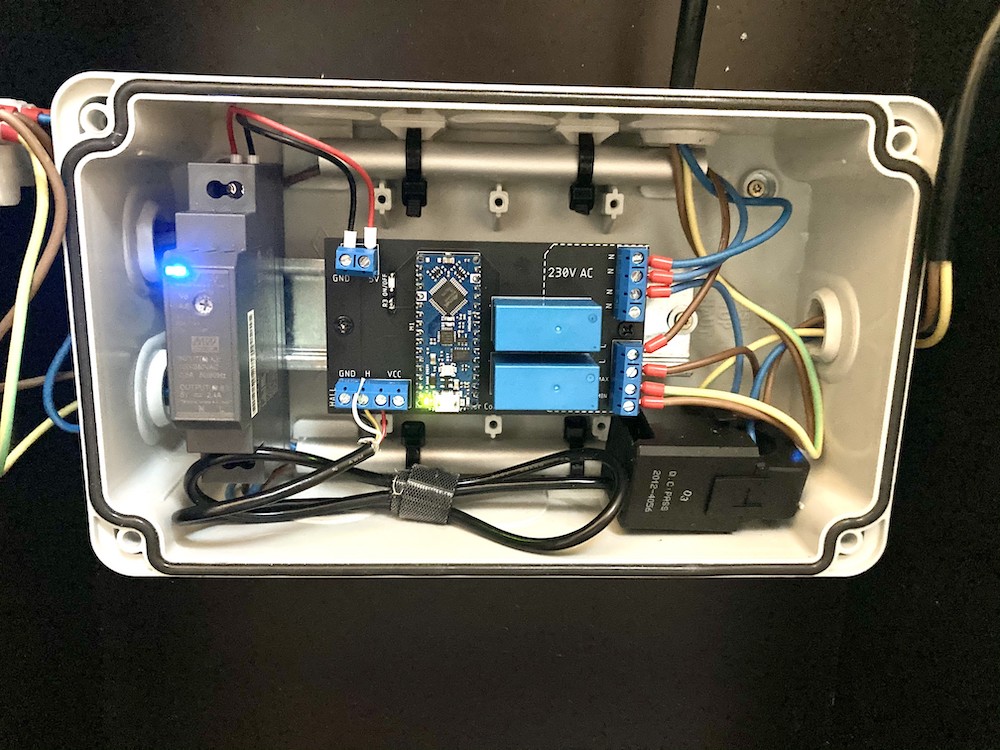
Portable air conditioners are amazing, especially as we head into the hot summer months. But one big downside is having to place them close to a window that will fit the guard, otherwise it’s really tough getting the hot exhaust air out of the room. This is exactly the problem Hackaday user vincentmakes ran into when he set up a mobile AC unit, as his window was the wrong shape. To solve it, he created a little system that allows the AC unit to be plugged in on one side and then match its air flow to shoot hot air out of the window.
It measures the current draw of the air conditioner by using a Hall effect sensor and then correlating the resulting value with a target air speed. When the AC is off, the extractor cuts power to its fan, but otherwise will try to adjust the fan speed while the AC is on. Vincent designed a custom PCB for the project around an Arduino Nano Every for control and interfacing with the Hall sensor and a pair of relays. After some fine-tuning of the fan curves, the air extractor worked great for extending the reach of the AC’s exhaust, thus letting it escape outside.
Weekend projects, as we like to call them, are often the most fun. We all have half-a-dozen unfinished projects that we need to work on. But weekend projects are the kind of things you want to work on. Something that isn’t a big commitment, doesn’t take too much effort, and offers a fun result.
As you probably know, the Arduino Cloud underwent a small renovation recently. The free tier got a lot of extra features, and you can even use it for ESP8266 and ESP32 devices now. So if you’d like to take a fun weekend project into the Arduino Cloud, we’ve got a few for you to try out.
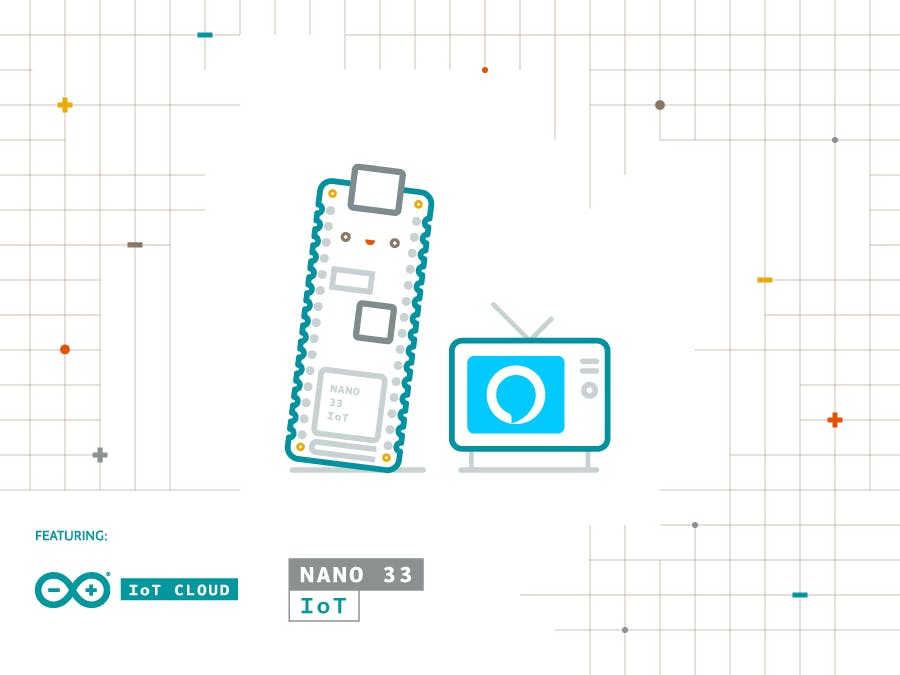
It almost feels like universal remote controls have had their day. They were super popular for a while, as our list of multimedia household gadgets started to grow. But then TV manufacturers stepped up their game, and universal remotes disappeared a bit.
Home automation fans are bringing the concept back, though. There’s still a lot of audio/visual gear that will only interface with you though infrared. So this great Arduino Nano 33 IoT project learns your remote control’s IR commands, and lets you control them through Arduino Cloud. And once it’s in the Cloud, there’s no limit to what you can do in terms of integrating any remote controlled household device into your home auto setup.
This is an old project now, from back when the Arduino Cloud was just taking shape. But if you’re looking for a great weekend project, it’s still just as relevant as ever.
Although the project calls itself a doorbell, it’s really underselling itself. This is actually a connected access controller you can operate from anywhere. Like, anywhere in the world.
It gets you started by creating a wireless doorbell that plays a tune. But there’s also a relay at the door unit, which lets you control the lock. This could be a maglock, an electronic keep, a solenoid deadbolt, or any other electronic lock. What’s great is the lock itself doesn’t have to connected, or particularly fancy or clever. As long as it can be activated by a relay, this great weekend project makes it into a smart lock.
Chances are you’ve already got lots of great maker projects around the house. And if you’re anything like us, you regularly tinker with them to make them better (or to break them). So a great weekend project doesn’t have to be brand new. You could just have fun adding new features to an old project.
Alexa, for example. This is a super easy way to add one of the world’s most advanced voice control functions to anything.
Follow along with the project to connect your Arduino Cloud account with Alexa. Once the skill is in place, you’ve effectively got a whole new way to easily interact with any project. Great for home auto devices, or you could even make your TV voice controlled if you combined it with the project above!
We make no secret that the Arduino Cloud Web Editor is the easiest, smoothest way to program your boards. All your boards; not just Arduinos. Once you’ve used it, it’s one of those features that you can’t imagine how you lived without.
But seasoned makers probably have a whole library of projects and sketches saved locally. It’s inevitable, after using the Arduino IDE for years. This weekend you could do what you’ve been promising yourself for a long time. Get organized with your work.
Moving your sketches and work into the Cloud is the first step in bringing a lot of awesome projects back to life. They’re instantly endowed with lots of new connectivity features, and the Web Editor makes it a pleasure to refine your old code.
Here’s how to import your work into Arduino Cloud the easy way. Then next weekend, you’ll be rich with ideas for what your next project will be!
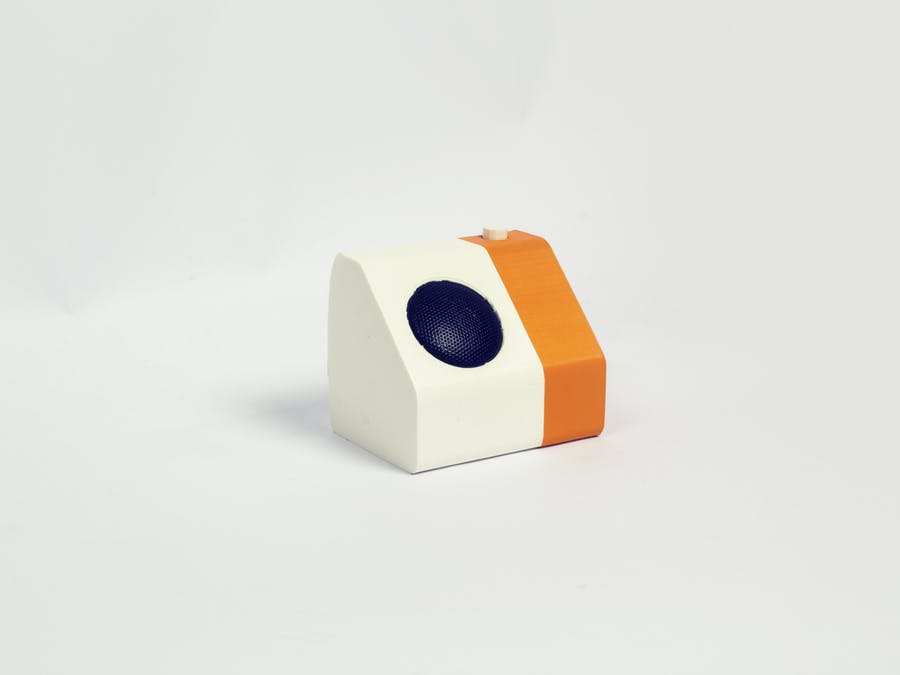
If you’re looking for more ambitious weekend projects, a sensor tower is awesome. It’s something we’ve considered a few times, especially around home automation. When your heating or lighting is automated, you need sensors to give feed them data, or they’re useless. Which is fine, if you can get those sensors into the right location.
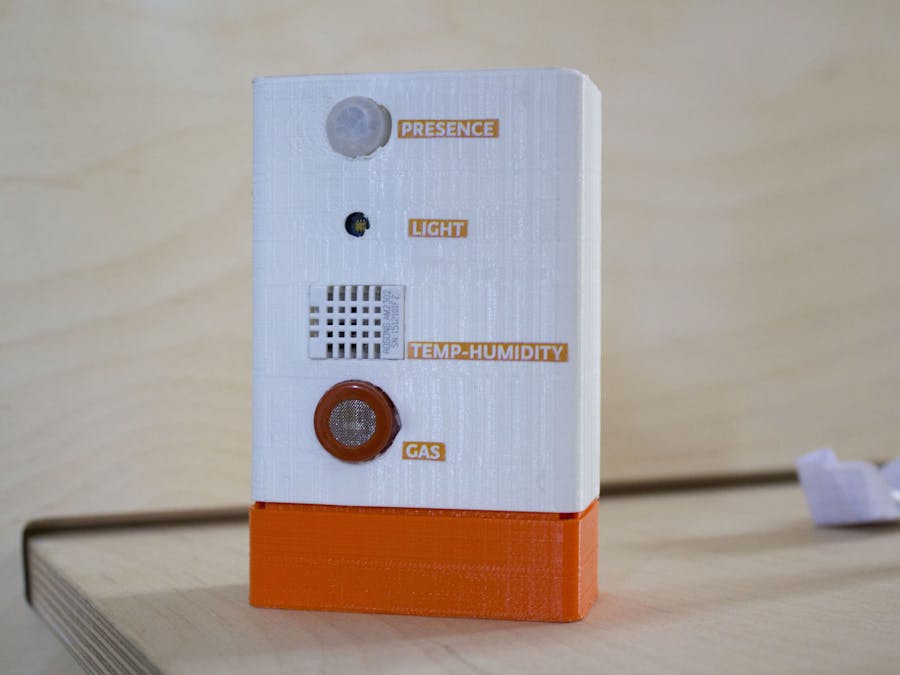
This Cloud-based project combines temperature, humidity, movement, luminosity and even a gas detector into one handy package. You don’t have to include them all, or you can add more. Totally up to you. What’s exciting about this is how it lets you locate the sensors in exactly the right place for optimal data collection.
Arduino Cloud’s device-to-device communication (which was added after this project was published) makes communication incredibly simple. Building the sensor box is one thing, but now you can harness the data in new and incredibly flexible ways. Build the tower this weekend, and spend next weekend integrating the data into your whole home auto setup.
Make sure you share your weekend projects with us on social media. And if you’re taking this opportunity to get started with the Arduino Cloud, here’s where you begin.
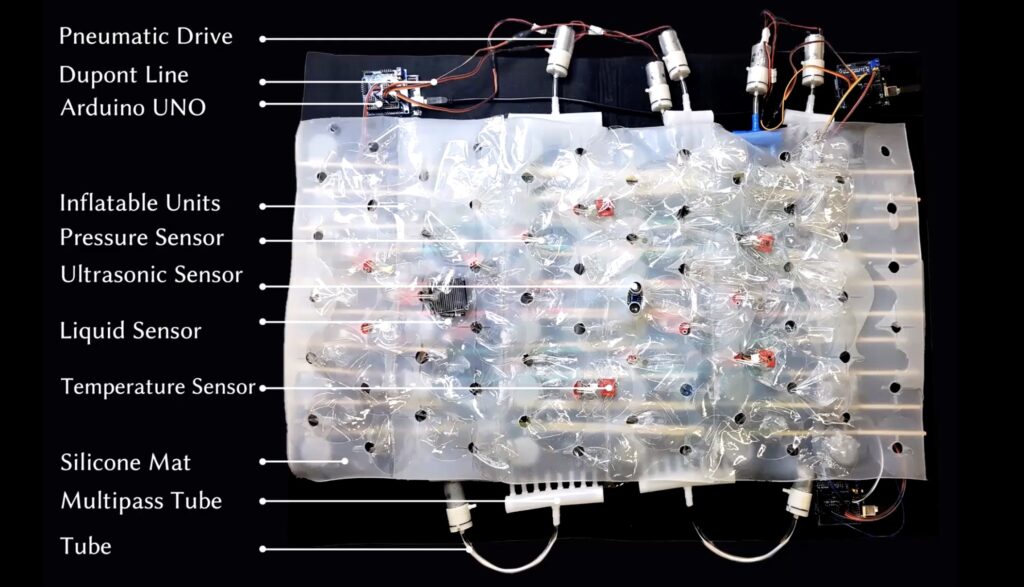
Every parent knows that babies need to sleep in specific conditions. Sudden Infant Death Syndrome (SIDS) is a very tragic possibility and a number of steps must be taken to prevent it, such as avoiding blankets that can restrict an infant’s breathing. But babies can also choke on milk if they aren’t lying in an ideal position. PneuMat is a special Arduino-controlled system that is capable of autonomously moving a baby back into a safe resting position.
Babies would rest on top of a PneuMat in their crib or on table. Pressure sensors line the surface of the mat and detect the baby’s position. It can differentiate between a baby lying on its side and a baby lying on its back. If the baby’s position is inappropriate, the air chambers in the mat inflate independently to change their posture. If, for instance, a baby has just been fed, PneuMat can keep the baby on their back and in an inclined position to keep them from choking on milk. It can also roll a baby over.
An Arduino Uno is important for enabling PneuMat’s functionality. It monitors the pressure sensors that line the mat and controls the pumps that inflate the air chambers when required. In addition to saving lives directly, PneuMat could provide useful data over time. Because it is always monitoring the infant’s sleeping position, it can determine how they toss and turn while they sleep. That information could help doctors better understand SIDS and learn how best to prevent the worst from happening.
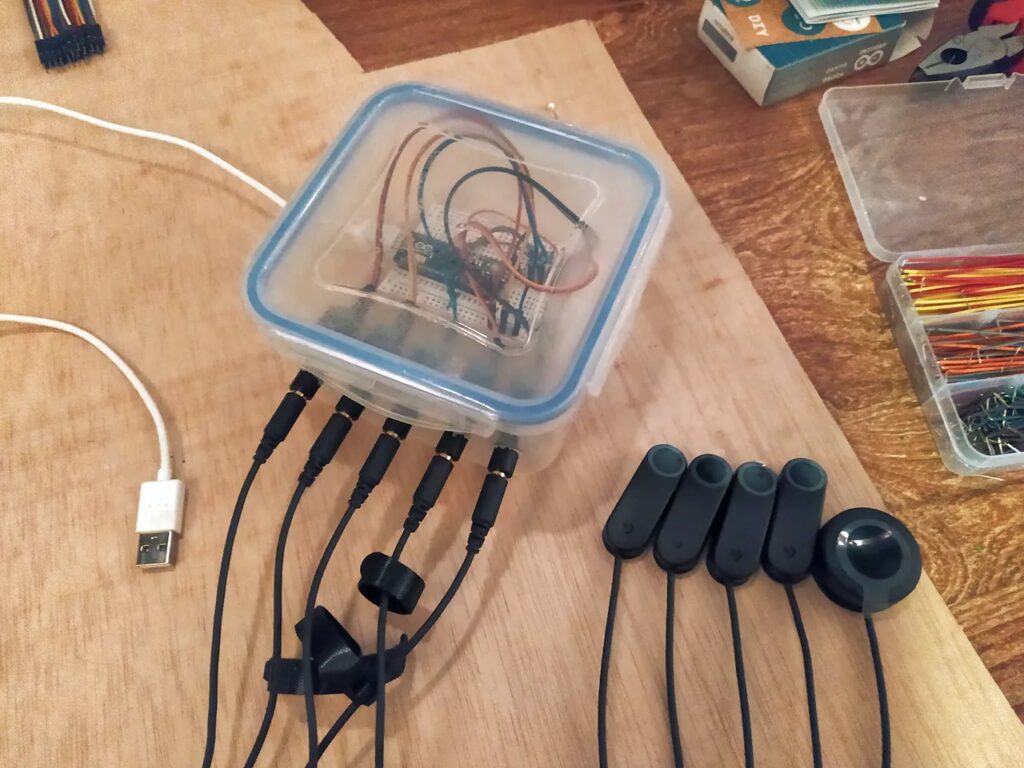
Having a disability can severely impact one’s ability to perform tasks that others do regularly, such as eating, walking, or even speaking. One maker by the name of ‘gtentacle‘ has a son who needs to use a ventilator constantly in order to breathe as he suffers from a myotubular myopathy, a disease that greatly impacts the strength of his muscles. Due to his condition, he is unable to talk; however, that that didn’t stop his father from coming up with a solution. This project involves five Logitech Adaptive Buttons and an Arduino Micro to type in letters for a text-to-speech (TTS) system to read.
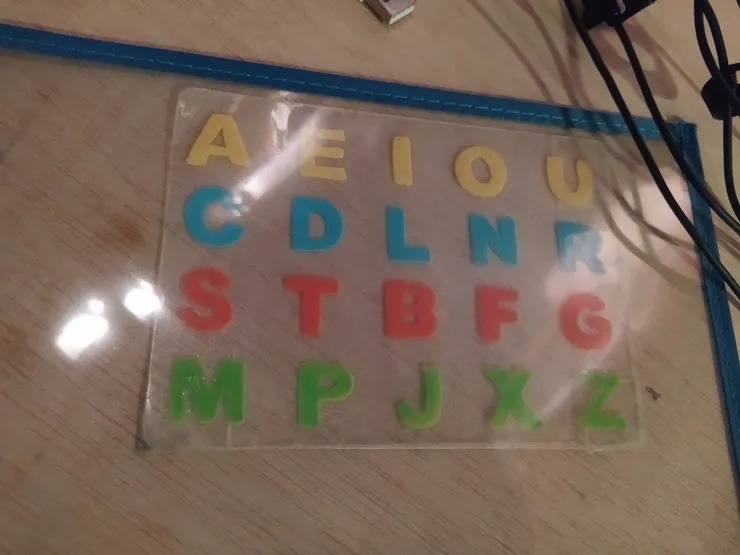
Up to 20 letters can be entered in total, and each one can be accessed with a grid-type system. For instance, the letter ‘T’ can be typed by pressing the 3 button followed by the 2 button. The ‘Enter’ command is sent whenever button 5 is the first key pressed. Thanks to the ATmega32u4, the system works with any device that supports a USB keyboard and has TTS software. The project’s creator even used it with Android Talkback.
Note: Google Drive is available to all users over the age of 14. This is so we adhere to the COPPA compliance requirements for students under 14-years-old.
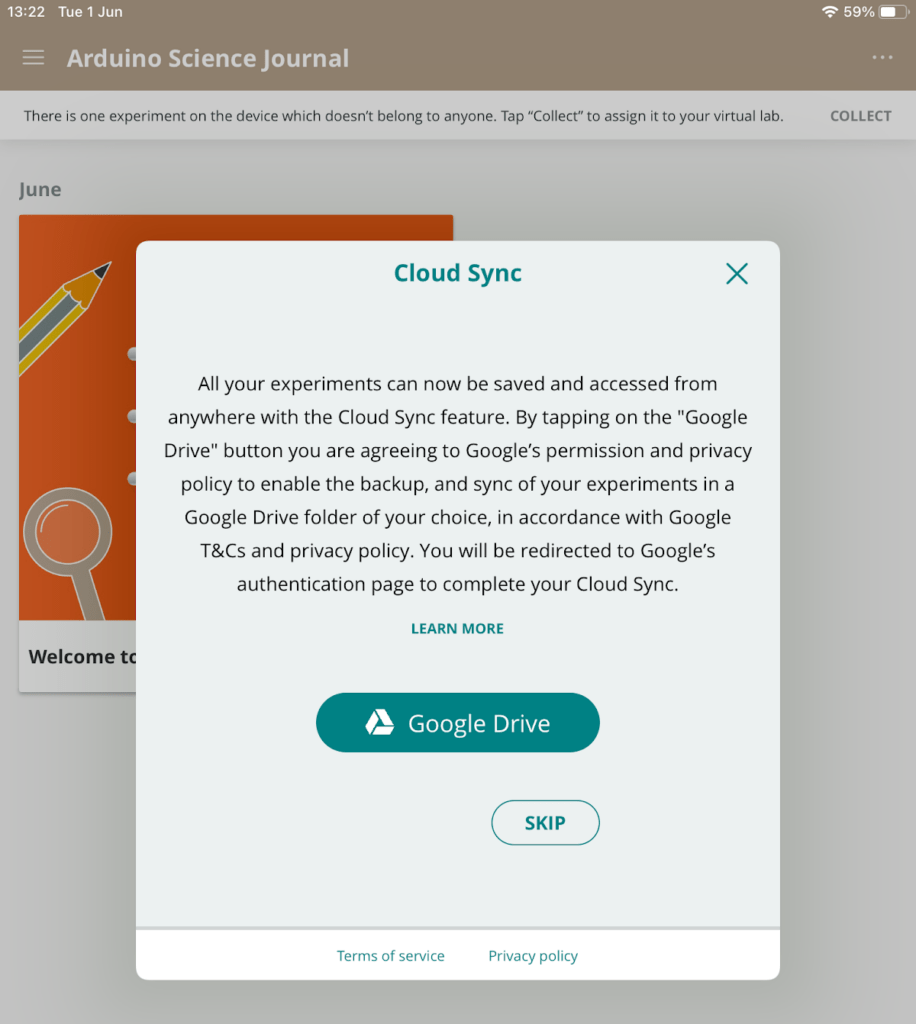
Students and teachers can now sync Google Drive with their Arduino Science Journal experiments. This means you can access experiments from any device using your Arduino account. The brand new Google Drive integration is available through the latest app update.
Benefits of using Google Drive
You can benefit from Google Drive sync immediately. Simply sign in with your Arduino account and authenticate the Google Drive connection. Then select the folder where you want to back up your experiments. From then on, all your experiments will be accessible from any devices whenever you log in.
Don’t worry. You’ll still be able to use Arduino Science Journal without logging in. But your experiments won’t be associated with your Arduino account, and will only be locally stored.
What else is new?
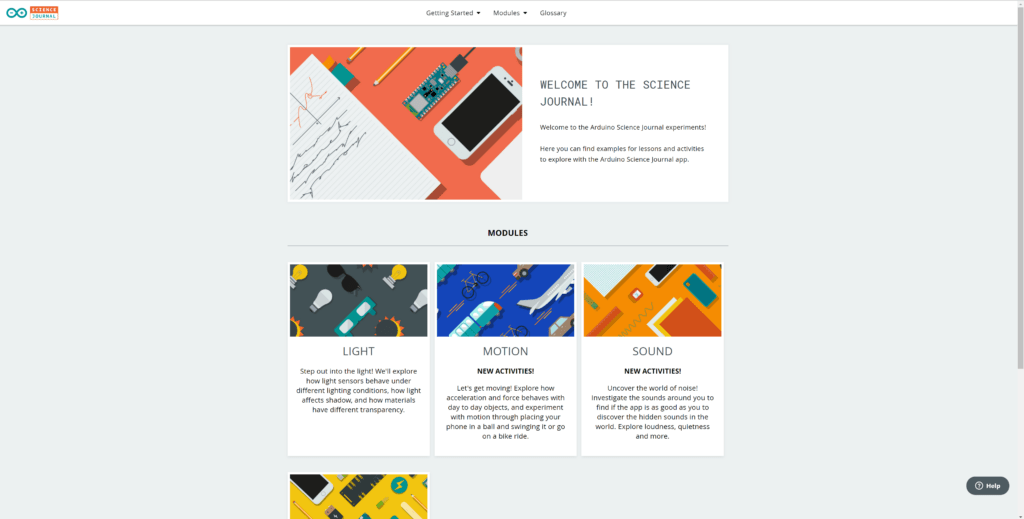
You’ll also find new useful links on the sidebar of your app, so learning becomes even simpler. With just a few clicks, you’ll be able to access the free Science Journal activities, browse the help center articles, and learn more about the Arduino Science Kit straight from the app.
The Arduino Science Journal content platform welcomes seven new activities, as well as great new partners and content creators. The Tech Interactive, Alison Green and Isabella Liu have helped us create some amazing new lessons. Check them out here.
You will be able to experiment with motion and sound, as well as a step-by-step guide to help you access Google Drive on your Science Journal app!
We’re also delighted that the Arduino Science Journal is certified by the Educational App Store with a 4-star rating!
We’ve helped hundreds of thousands of educators with remote teaching, and we strive to make data literacy and scientific thinking more accessible, wherever you are. If you’re an Arduino Science Journal user, you can help out by recommending the app to your fellow educators. And we’d love to hear how you are using the app in your classroom!
Tag us on social media to show us what you’re working on with #ScienceJournal.
If you don’t have the app already, join over 700,000 other teachers, students and makers by downloading it now!
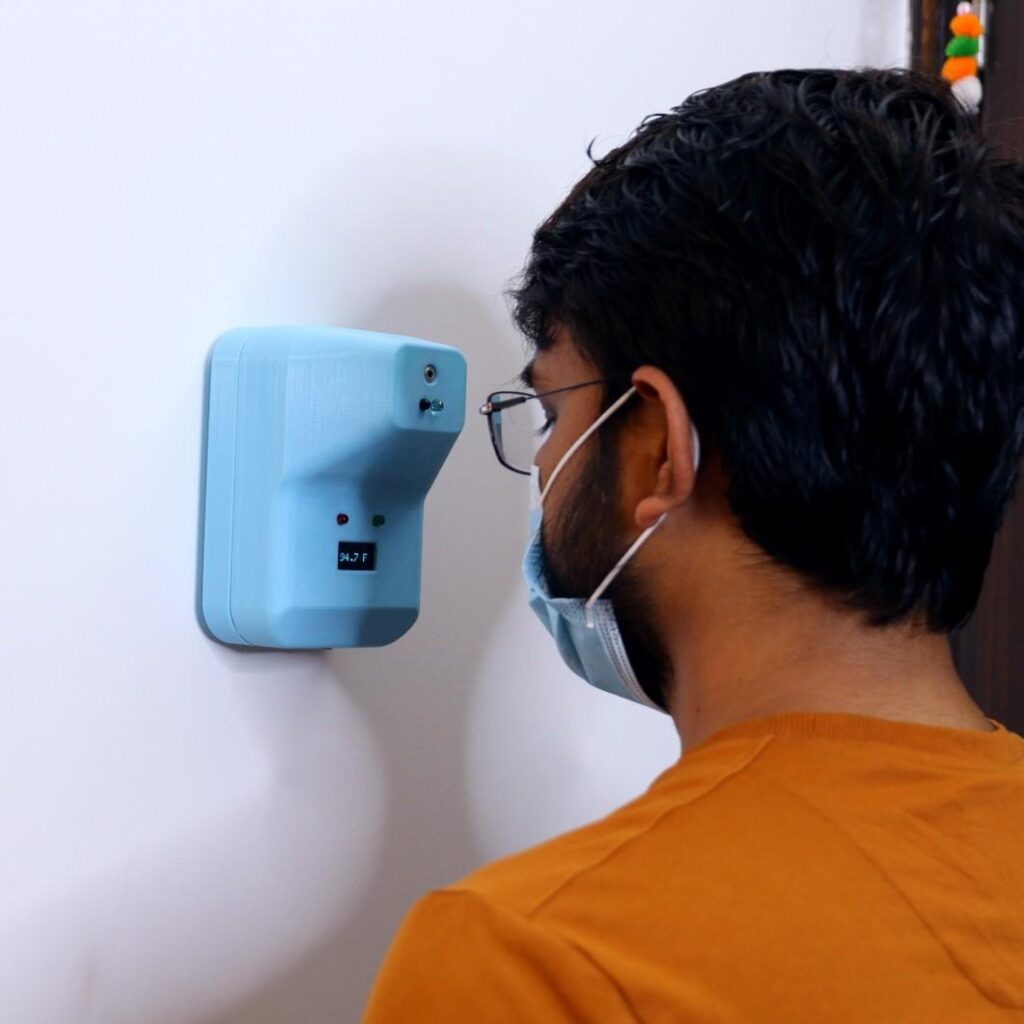
In the age of COVID-19, being able to know when someone’s sick is vital, especially in countries where the disease is currently surging. It’s for this reason that Open Green Energy decided to build a battery-powered portable thermometer that not only takes a person’s temperature but also alerts other if it’s too high.
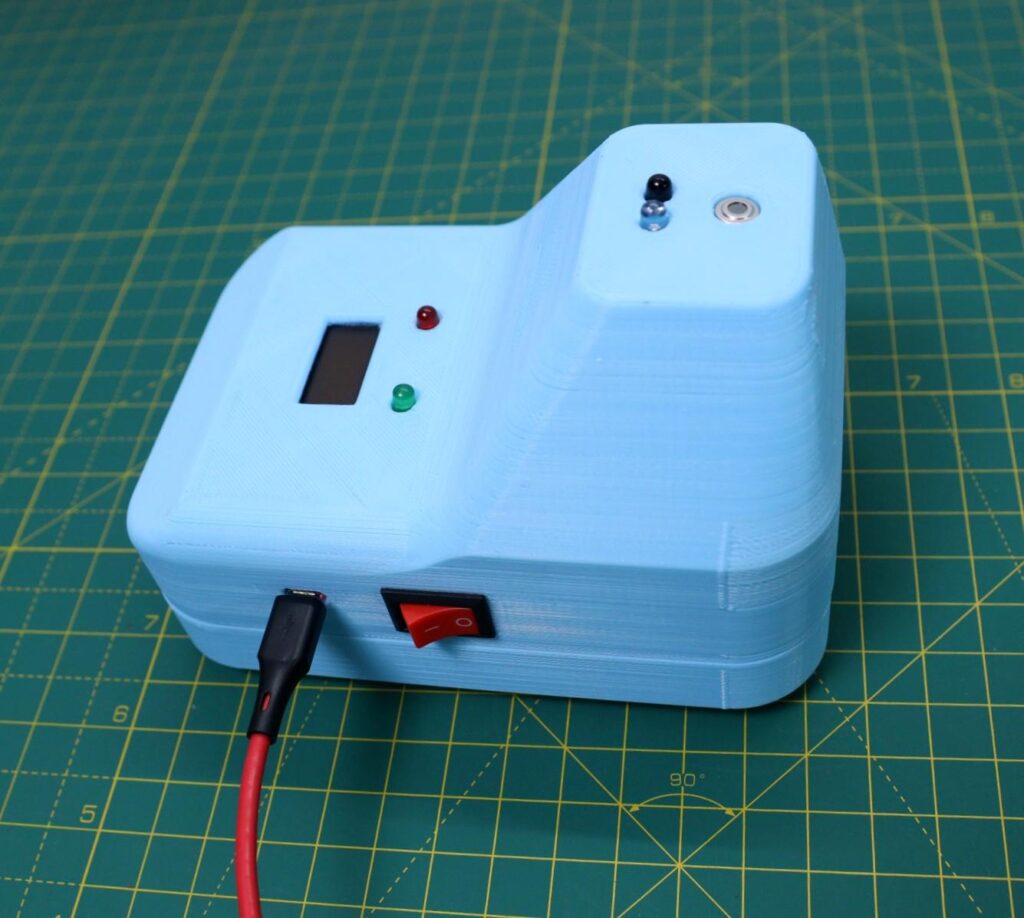
At the heart of the device is an Arduino Nano that takes in temperature data from a GY-906 module and displays it on a 0.96” OLED screen. Additionally, there’s an IR emitter/receiver that detects when a person is in front of the thermometer so their temperature can be read. If the value falls within the acceptable range, a green LED lights up, but if the value is too high, such as in the case of a fever, a buzzer begins to sound, and the red LED turns on.
All of the electronics were assembled onto a custom-designed PCB that has headers for the various modules and LEDs, along with a place for the Arduino and battery charging circuit. All of these components were then positioned inside of a 3D-printed enclosure that holds both the batteries and PCB at the bottom and the screen/LEDs at the top.
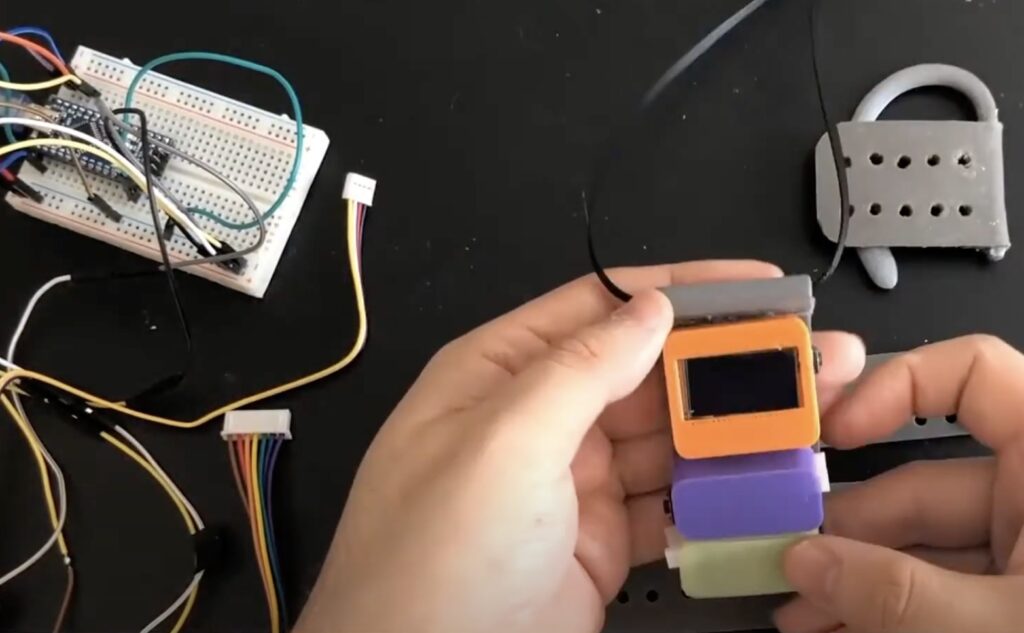
While diabetes is still very much a serious disease, medical advancements over the past few decades make it much easier to live with. Wearable glucose monitors in particular provide a convenient way for people to keep an eye on their blood sugar, so they can get the extra insulin that they need before they start feeling the effects of low blood sugar. DiaFit is a customizable glucose monitor system that gives people options and it relies on an Arduino Nano 33 IoT board.
Most wearable glucose monitors available today, like the popular FreeStyle Libre 2, are small patch-like devices that stick to the skin. They connect through Bluetooth to a separate device that users can check to see their blood sugar levels. Those are often either bulky units that take up space in a purse or pocket, or wearable gadgets that resemble smartwatches. DiaFit is modular and gives people more options.
The DiaFit system consists of a few individual modules and one of those, based on the Nano 33 IoT board, has an OLED screen that shows current blood sugar levels. Because DiaFit is modular, it is wearable in multiple ways. The team behind DiaFit created a wristband, a ring, a necklace, and an earpiece. People with diabetes could choose any of those and even switch between them as the situation demands. You might want to wear DiaFit as a necklace when at the office and then switch to the wristband when you go for a jog. DiaFit is still a prototype, but this technology could make it more convenient to live with diabetes.
Um dir ein optimales Erlebnis zu bieten, verwenden wir Technologien wie Cookies, um Geräteinformationen zu speichern und/oder darauf zuzugreifen. Wenn du diesen Technologien zustimmst, können wir Daten wie das Surfverhalten oder eindeutige IDs auf dieser Website verarbeiten. Wenn du deine Einwillligung nicht erteilst oder zurückziehst, können bestimmte Merkmale und Funktionen beeinträchtigt werden.
Funktional
Immer aktiv
Die technische Speicherung oder der Zugang ist unbedingt erforderlich für den rechtmäßigen Zweck, die Nutzung eines bestimmten Dienstes zu ermöglichen, der vom Teilnehmer oder Nutzer ausdrücklich gewünscht wird, oder für den alleinigen Zweck, die Übertragung einer Nachricht über ein elektronisches Kommunikationsnetz durchzuführen.
Vorlieben
Die technische Speicherung oder der Zugriff ist für den rechtmäßigen Zweck der Speicherung von Präferenzen erforderlich, die nicht vom Abonnenten oder Benutzer angefordert wurden.
Statistiken
Die technische Speicherung oder der Zugriff, der ausschließlich zu statistischen Zwecken erfolgt.Die technische Speicherung oder der Zugriff, der ausschließlich zu anonymen statistischen Zwecken verwendet wird. Ohne eine Vorladung, die freiwillige Zustimmung deines Internetdienstanbieters oder zusätzliche Aufzeichnungen von Dritten können die zu diesem Zweck gespeicherten oder abgerufenen Informationen allein in der Regel nicht dazu verwendet werden, dich zu identifizieren.
Marketing
Die technische Speicherung oder der Zugriff ist erforderlich, um Nutzerprofile zu erstellen, um Werbung zu versenden oder um den Nutzer auf einer Website oder über mehrere Websites hinweg zu ähnlichen Marketingzwecken zu verfolgen.