Schlagwort: arduino

  • Introducing Arduino cores with ZephyrOS (beta): take your embedded development to the next level

    Introducing Arduino cores with ZephyrOS (beta): take your embedded development to the next level

    Reading Time: 3 minutes

    Last July, when we announced the beginning of the transition from Mbed to Zephyr, we promised to release the first beta by the end of 2024. Today, we are excited to announce the first release of Arduino cores with ZephyrOS in beta!

    ZephyrOS is an open-source, real-time operating system (RTOS) designed for low-power, resource-constrained devices. We are transitioning Arduino cores to ZephyrOS to ensure continued support and innovation for developers. This change follows ARM’s deprecation of MbedOS, which has historically powered some of our cores. By adopting ZephyrOS, we are introducing a more modern, scalable, and feature-rich RTOS that aligns with the evolving needs of the embedded development community. This ensures that Arduino users have access to a robust, actively maintained platform for creating advanced applications.

    With this brand new beta program, we invite our community to explore, test, and contribute to this significant new development in Arduino’s evolution – one that will allow old and new Arduino users all around the world to continue using the language and libraries they know and love for many years to come.

    What is ZephyrOS?

    ZephyrOS is a state-of-the-art RTOS designed to enable advanced embedded systems. It is modular, scalable, and supports multiple hardware architectures, making it an excellent choice for the next generation of Arduino projects.

    Its key features include:

    • Real-time performance: Build responsive applications requiring precise timing.
    • Flexibility: Customize and scale the system to your specific needs.
    • Extensibility: Benefit from a rich ecosystem of libraries and subsystems.
    • Community-driven innovation: Collaborate with a vibrant open-source community.

    What’s new in this core?

    The Arduino core for ZephyrOS brings significant changes to how Arduino sketches are built and executed. However, the integration between Arduino core and ZephyrOS operates seamlessly under the hood, providing advanced RTOS capabilities like real-time scheduling and multitasking, while keeping the development process as straightforward as ever. This means you can enjoy the best of both worlds: the ease of Arduino and the power of a modern, robust RTOS.

    • Dynamic sketch loading: Sketches are compiled as ELF files and dynamically loaded by a precompiled Zephyr-based firmware.
    • Zephyr subsystems: Leverage features like threading, inter-process communication, and real-time scheduling.
    • Fast compiling: Since only a thin layer of user code and libraries are compiled, while the rest of the ZephyrOS is already binary, compilation is faster and resulting binary files are smaller.

    How to get started

    Ready to dive into the future of Arduino development with ZephyrOS? Head over to our repository for comprehensive installation instructions, troubleshooting tips, and detailed technical documentation.

    Contribute to the beta!

    This is your opportunity to shape the future of Arduino development! We welcome feedback, bug reports, and contributions to the core. Visit the GitHub Issues page to report bugs or suggest features. Your feedback will play a critical role in refining this integration and unlocking new possibilities for embedded systems.

    Visit the ArduinoCore-Zephyr GitHub repository today and start exploring this exciting new platform! Thank you for being a part of the Arduino community.

    The post Introducing Arduino cores with ZephyrOS (beta): take your embedded development to the next level appeared first on Arduino Blog.

    Website: LINK
  • Build Button Clash in minutes: a new fun game with Plug and Make Kit 

    Build Button Clash in minutes: a new fun game with Plug and Make Kit 

    Reading Time: 3 minutes

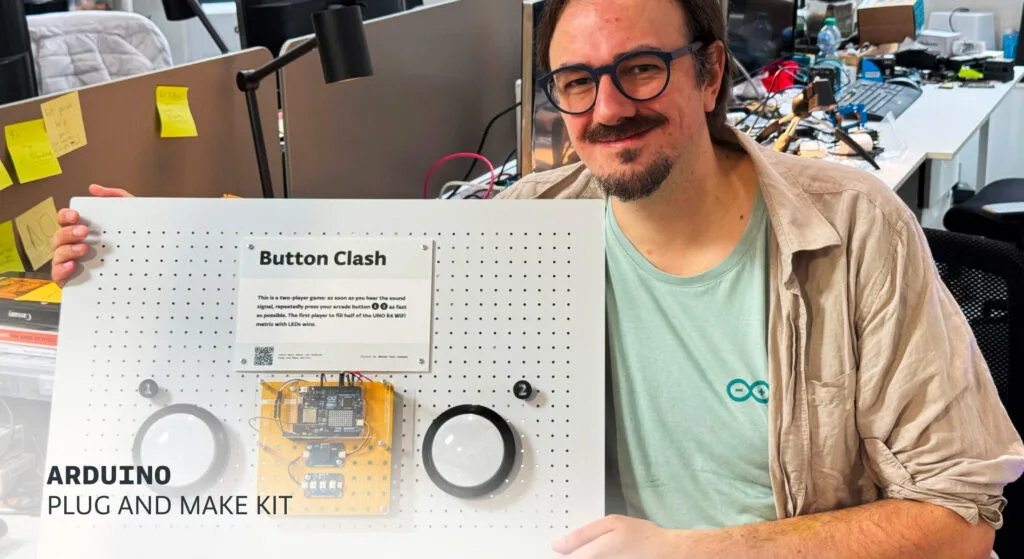
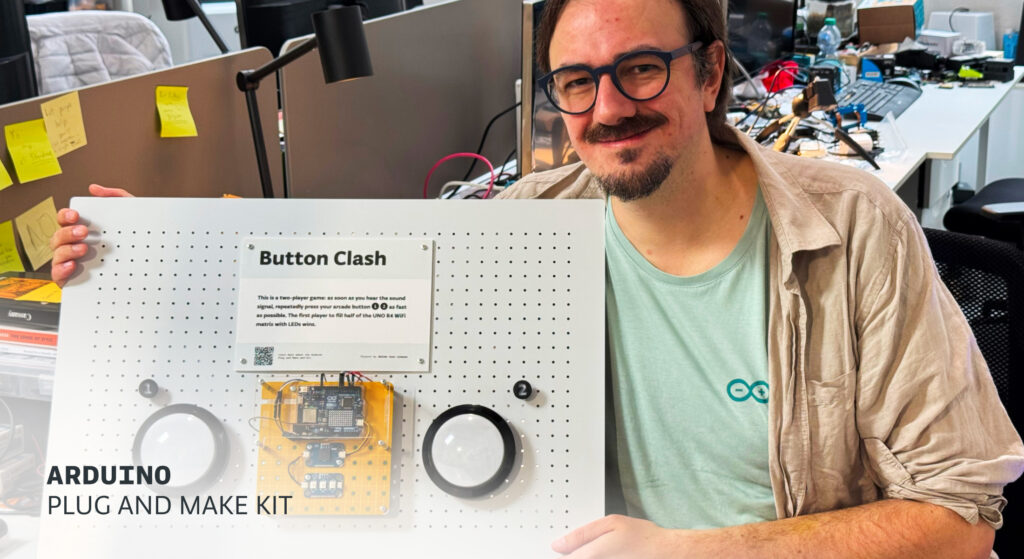
    The Arduino Plug and Make Kit is all about turning creative sparks into reality in mere minutes. With its intuitive, snap-together design, even the wildest ideas become achievable – fast, fun, and frustration-free. That’s exactly what Julián Caro Linares, Arduino’s Product Experience team leader, discovered when he built his latest project for our in-house Make Tank: Button Clash, an arcade-inspired game for two players.  

    Button Clash was a popular attraction among the interactive demos we had at the Arduino booth at this year’s Maker Faire Rome! By connecting it via Arduino Cloud, we were able to collect stats in real time (fun fact: the left side won 54% of the matches!). 

    Meet Julián Caro Linares, Plug and Make Kit Star  

    Julián brings together technical expertise and passion for robotics, making, and human-centered design to create documentation, tutorials, and more for the Arduino Pro ecosystem. “Our team gets to truly transform prototypes into products,” he says. “It’s exciting to figure out the best way to explain to users how awesome these tools are, and to help them truly learn to create what they want or need.”  

    Outside of work, he loves creating projects that inspire connection and joy. From social robots that mimic emotional states to interactive gift boxes, his creations show how technology can engage people in meaningful and unexpected ways. And have you seen his recent LEGO®-Alvik mashup?

    When it came to Button Clash, Julián drew inspiration from his love of physical interfaces and the pure satisfaction of smashing arcade buttons: “This game puts players into ‘inner childhood’ mode, where all you want to do is beat your opponent!”

    Button Clash 

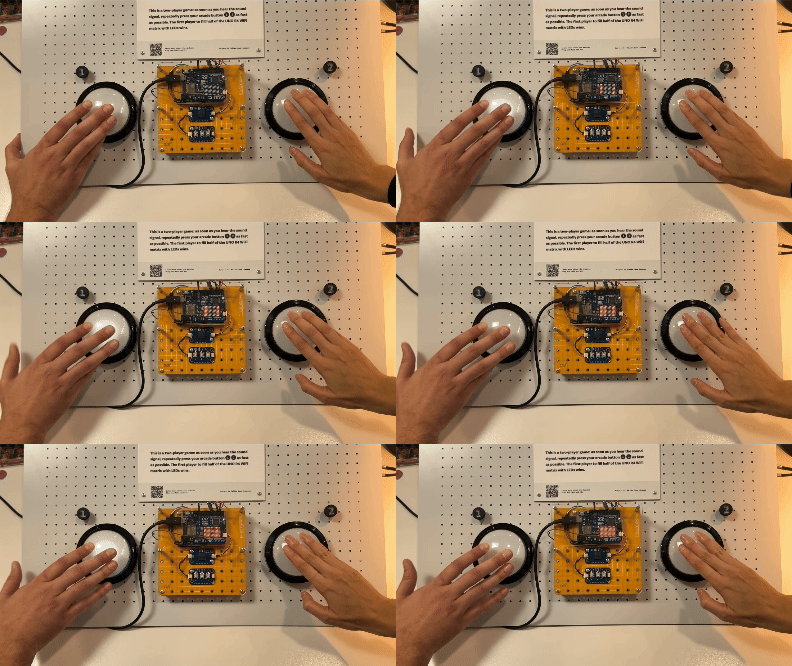
    Button Clash is a two-player game that challenges you to press an arcade button faster than your opponent. The rules are few and intuitive:  

    • Once both players press their buttons simultaneously, the game begins with a simple melody played by the Modulino Buzzer node.  
    • Smash your button as fast as possible, to fill your side of the LED matrix on the Arduino UNO R4 provided in the Plug and Make Kit.  
    • The first player to take over half the matrix wins!  

    Building this game is a breeze thanks to the Modulino nodes and Qwiic cables in the kit. The arcade buttons require just a bit of soldering, but add a unique retro charm: well worth the extra step, in our opinion! The result is a highly engaging, customizable game that’s perfect for parties, family nights, or just unleashing your competitive spirit.  

    Creativity made easy  

    For Julián, the best part of the Plug and Make Kit is how it simplifies the process of turning out-of-the-box ideas into real projects. “Like the name says, you can just plug the different Modulino together and make your project: no matter how unconventional it is,” he says.  
    Explore the full tutorial to replicate Button Clash on Arduino’s Project Hub and get inspired to create your own fun and interactive games! With the Plug and Make Kit, you can start your creative adventure today.

    The post Build Button Clash in minutes: a new fun game with Plug and Make Kit  appeared first on Arduino Blog.

    Website: LINK
  • Zoo elephants get a musical toy to enrich their lives

    Zoo elephants get a musical toy to enrich their lives

    Reading Time: 2 minutes

    Everyone loves looking at exotic animals and most of us only get to do that at zoos. But, of course, there is a lot to be said about the morality of keeping those animals in captivity. So, good zoos put a lot of effort into keeping their animals healthy and happy. For more intelligent animals, like elephants, enrichment through intellectual stimulation is a solid strategy. With that in mind, a team of Georgia Tech students worked with Zoo Atlanta to give elephants a musical toy to enrich their lives.

    Like the toys you get for your dog, this device’s purpose is to give the elephants some mental stimulation. It provides them with an activity that they can enjoy, thus improving their lives. It works by playing specific tones (known to please elephant ears) when the elephants stick their trunks in holes in a wall. In essence, it is similar to an electronic toy piano for kids — just optimized for elephant physiology.

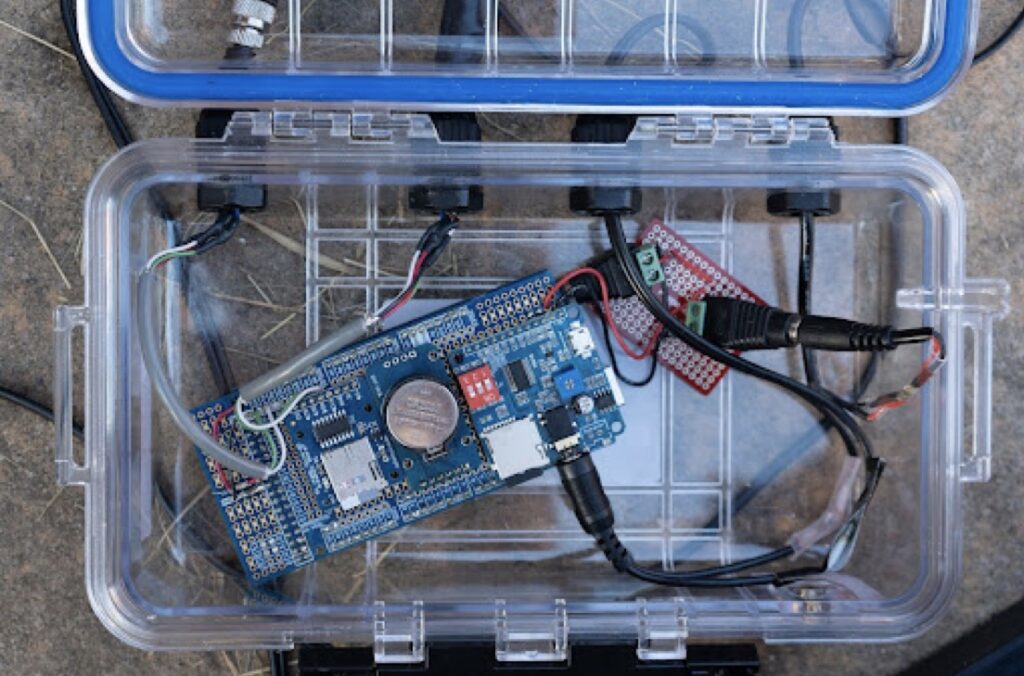
    An Arduino Mega 2560 board plays the tones through a DY-SV5W media player module, which outputs an audio signal to an outdoor speaker system. Each hole in the wall has a VL53L0X ToF (Time of Flight) sensor to detect trunks. Those sensors were paired with ATtiny85 microcontrollers that tell the Arduino when a trunk is present.

    The researchers also added a real-time clock and an SD card reader to log activity, giving the team the ability to evaluate the response from the elephants. In the same way that you can tell your dog loves his new toy by how much he plays with it, the team was able to determine that the elephants enjoyed their musical device over the course of about a week.

    Image credit: A. Mastali et al.

    The post Zoo elephants get a musical toy to enrich their lives appeared first on Arduino Blog.

    Website: LINK
  • Simplifying IoT for smarter manufacturing: Join the chat with Arduino, AWS, and Atlas Machine

    Simplifying IoT for smarter manufacturing: Join the chat with Arduino, AWS, and Atlas Machine

    Reading Time: 2 minutes

    We all know that the future of manufacturing lies in IoT — yet the path to adoption can sometimes feel daunting. But what if you could simplify the process and start seeing results quickly? That’s exactly what we’re going to explore in our upcoming Arduino Cloud Café webinar on December 10 at 5PM CET / 11AM EST.

    This session is a unique opportunity to hear from experts at Arduino, AWS, and Atlas Machine as they dive into how industrial IoT is transforming manufacturing operations. Whether you’re just starting to explore IoT or looking for ways to optimize your existing systems, this webinar is for you.

    What to expect

    In this session, we’ll be sharing actionable tips and insights to help you easily integrate IoT into your operations:

    • Learn how to collect data quickly — without months of delays.
    • Understand how to retrofit your legacy equipment and get real-time visibility into your operations.
    • Discover how to integrate the data from Arduino devices with the rest of your business systems on AWS for smarter decision-making.

    We’ll also be sharing real-world success stories, including how Atlas Machine & Supply leveraged Arduino (Opta and Arduino Cloud) and AWS solutions for predictive maintenance and remote monitoring across their global fleet of industrial equipment.

    And don’t forget, we’ll have a live Q&A session at the end, where you can ask our experts anything. Feel free to submit your questions throughout the webinar, and we’ll do our best to address as many as possible.

    Meet the speakers

    We’re excited to be joined by a fantastic lineup of speakers who are experts in their fields:

    • Richie Gimmel, CEO at Atlas Machine & Supply
    • Danny Kent, IoT Development Director at Atlas Machine & Supply
    • Andrea Richetta, Principal Product Evangelist at Arduino
    • Gabriel Verreault, Senior Manufacturing Partner Solutions Architect at AWS

    Why you should join

    If you’ve been looking for a way to simplify IoT adoption in your manufacturing operations, this is your chance to learn from industry leaders who are making it happen. Whether you’re trying to modernize old equipment or integrate IoT into your larger business strategy, you’ll walk away with valuable insights and tips you can start using right away.

    Save your spot today! Don’t miss out on this chance to hear from the experts and get your questions answered. We can’t wait to see you there!

    The post Simplifying IoT for smarter manufacturing: Join the chat with Arduino, AWS, and Atlas Machine appeared first on Arduino Blog.

    Website: LINK
  • This fake CRT TV works using lasers and UV magic

    This fake CRT TV works using lasers and UV magic

    Reading Time: 2 minutes

    Until the 21st century, cathode-ray tube (CRT) TVs were pretty much the only option. As such, media was made to suit them. Retro video game consoles in particular look best on CRT TVs. But those old TVs are getting hard to find and desirable models are now quite expensive. So, bitluni built his own “fake CRT TV” that works using lasers and UV magic.

    Conventional CRT TVs work by shining an electron beam onto a phosphorescent screen, which glows for a moment after being excited by the electrons. Electromagnetic coils deflect that beam so it can scan across the X and Y axes of the screen. Add some clever modulation and you’ve got moving pictures.

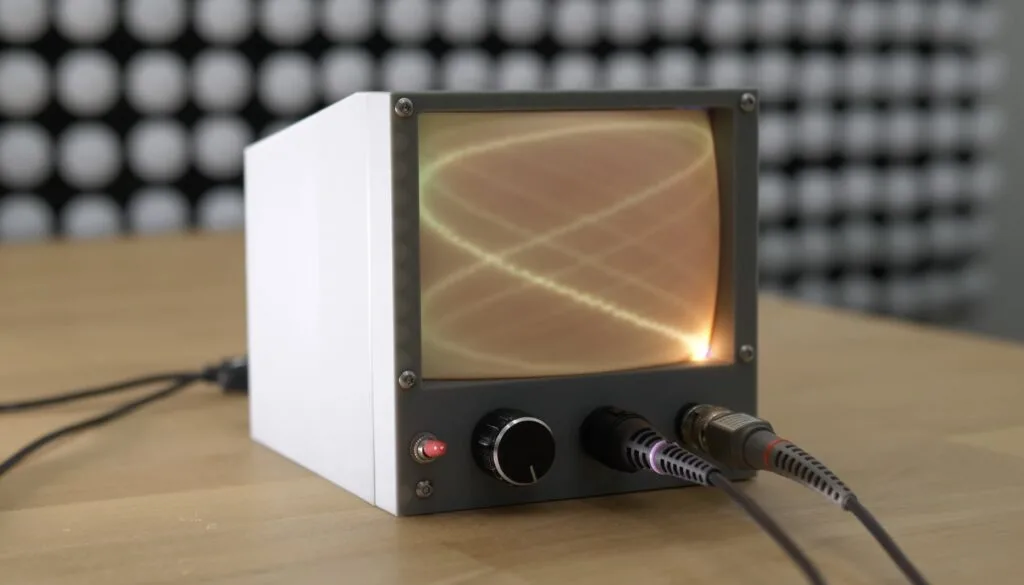
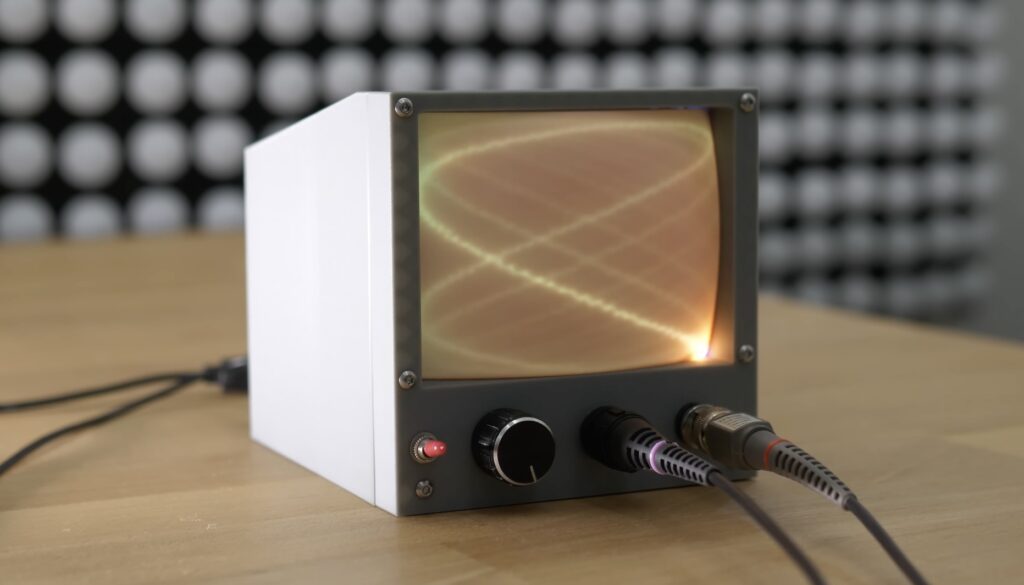
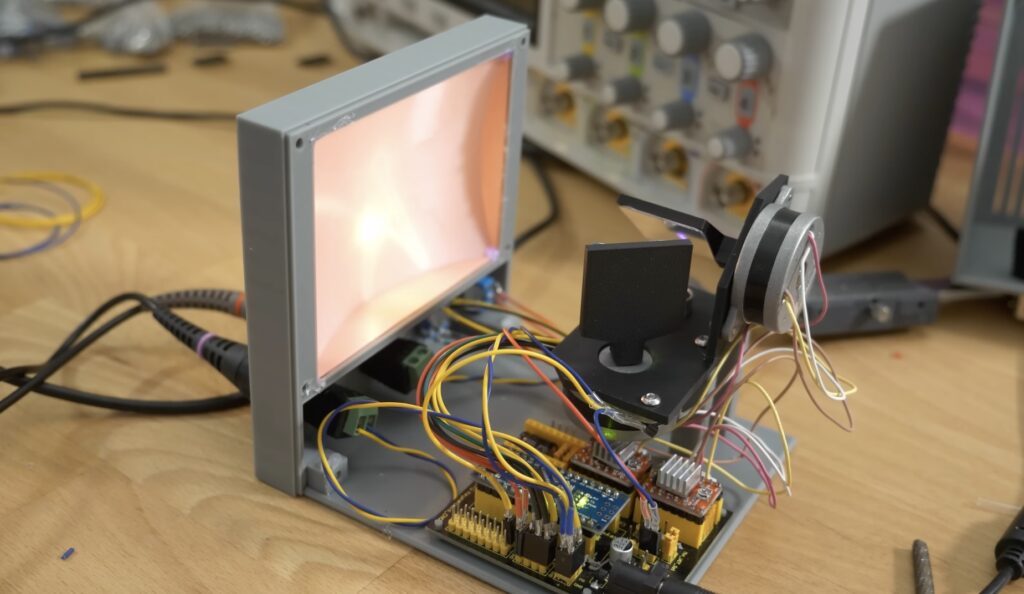
    The fake CRT made by bitluni works in a similar manner, except it has a 405nm laser pointer instead of an electron beam, stepper motors instead of deflection coils, and a screen printed in special UV-reactive filament instead of a phosphorescent screen. The two stepper motors move mirrors to direct the laser and an Arduino Nano board controls those through a CNC shield.

    However, that system is far slower than that of a real CRT, so bitluni had to operate it a bit differently. CRT TVs normally make raster images by scanning across the entire screen, row by row, until the beam reaches the bottom and the process repeats. The fake CRT TV works displays vector graphics instead. That means that it moves the laser to trace the lines of the shapes to display, which is the same way that old tube oscilloscopes worked.

    But that is still pretty slow, so bitluni can’t display anything particularly complex or fast-moving. Still, it looks great in the 3D-printed retro-style enclosure. It isn’t suited to playing Super Mario Bros., but it is a nice decorative piece. 

    [youtube https://www.youtube.com/watch?v=9qPc_I1V6go?feature=oembed&w=500&h=281]

    The post This fake CRT TV works using lasers and UV magic appeared first on Arduino Blog.

    Website: LINK

  • It’s silver, it’s green, it’s the Batteryrunner! An Arduino-powered, fully custom electric car

    It’s silver, it’s green, it’s the Batteryrunner! An Arduino-powered, fully custom electric car

    Reading Time: 5 minutes

    Inventor Charly Bosch and his daughter Leonie have crafted something truly remarkable: a fully electric, Arduino-powered car that’s as innovative as it is sustainable. Called the Batteryrunner, this vehicle is designed with a focus on environmental impact, simplicity, and custom craftsmanship. Get ready to be inspired by a car that embodies the spirit of creativity!

    When the Arduino team saw the Batteryrunner up close at our offices in Turin, Italy, we were genuinely impressed – especially knowing that Charly and Leonie had driven over 1,000 kilometers in this unique car! Their journey began on a small island in Spain, took them across southern France, and brought them to Italy before continuing on to Austria. 

    Building a car with heart – and aluminum

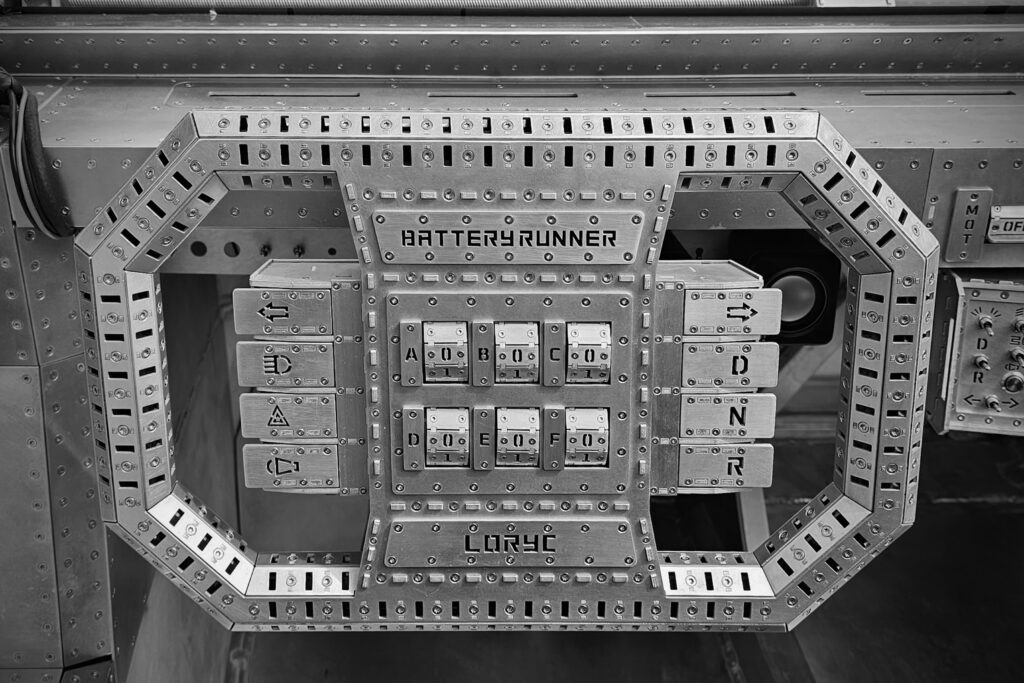
    In 2014, Charly took over LORYC – a Mallorca carmaker that became famous in the 1920s for its winning mountain racing team. His idea was to ??build a two-seater as a tribute to the LORYC sports legacy, but with a contemporary electric drive: that’s how the first LORYC Electric Speedster was born. “We’re possibly the smallest car factory in the world, but have a huge vision: to prove electric cars can be cool… and crazy,” Charly says. 

    With a passion for EVs rooted in deep environmental awareness, he decided to push the boundaries of car manufacturing with the Batteryrunner: a car where each component can be replaced and maintained, virtually forever. 

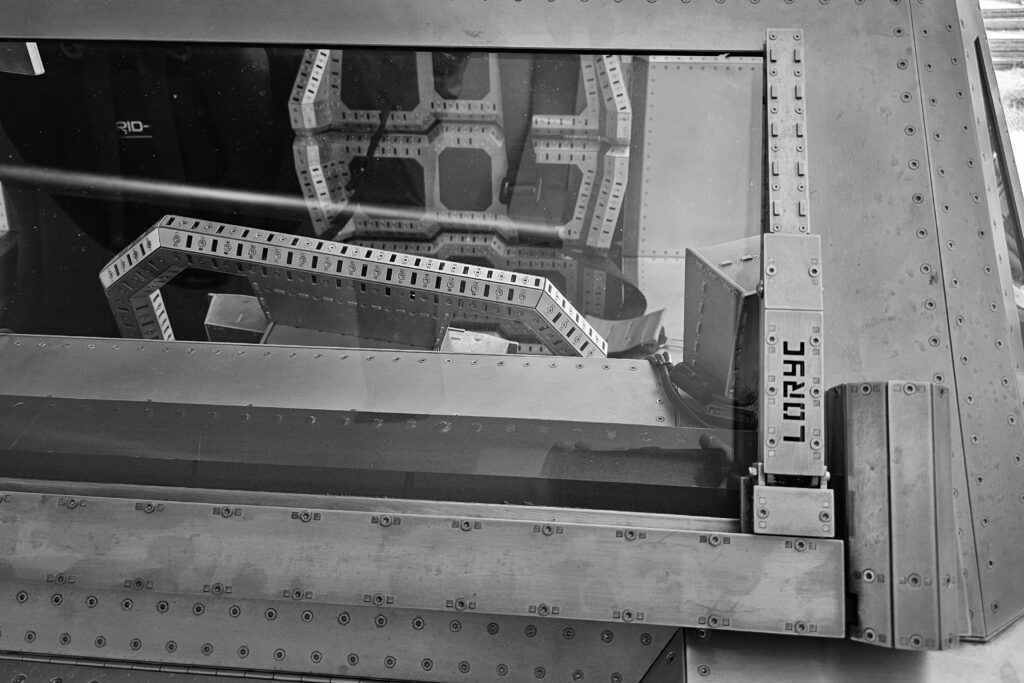
    Indeed, it’s impossible not to notice that the vehicle is made entirely from aluminum: specifically, 5083 aluminum alloy. This material is extremely durable and can be easily recycled, unlike plastics or carbon fiber which end up as waste at the end of their lifecycle. 

    The car’s bodywork includes thousands of laser-cut aluminum pieces. “This isn’t just a prototype: it’s a real car – one that we’ve already been able to drive across Europe,” Charly says.

    The magic of learning to do-it-yourself

    “People sometimes ask me why I use Arduino, as if it was only for kids. Simple: Arduino never failed me,” is Charly’s quick reply. After over a decade of experience with a variety of maker projects, it was an easy choice for the core of Batteryrunner’s system. 

    In addition to reliability, Charly appreciates the built-in ease-of-use and peer support: “The Arduino community helps me with something new every week. If you are building a whole car on your own, you can’t be an expert in every single aspect of it. So, anytime I google something, I start by typing ‘Arduino’, and follow with what I need to know. That’s how I get content that I can understand.” 

    This has allowed Charly and Leonie to handle every part of the car’s design, coding, and assembly, creating a fully integrated system without needing to rely on external suppliers. 

    Using Arduino for unstoppable innovation

    A true labor of love, after four years since its inception the Batteryrunner is a working (and talking!) car, brought to life by 10+ Arduino boards, each with specific functions

    For instance:

    • An Arduino Nano is used to manage the speedometer (a.k.a. the “SpeedCube”), in combination with a CAN bus module, stepper motor module, and stepper motor.

    • Different Arduino Mega 2560, connected via CAN bus modules, control the dashboard, steering wheel, lights and blinkers, allowing users to monitor and manage various functions.

    Arduino UNO R4 boards with CAN bus transceivers are used to handle different crucial tasks – from managing the 400-V battery system and Tesla drive unit to operating the linear windshield wiper and the robotic voice system.

    Charly already plans on upgrading some of the current solutions with additional UNO R4 boards, and combining the GIGA R1 WiFi and GIGA Display Shield for a faster and Wi-Fi®-connected “InfoCube” dashboard.

    All in all, the Batteryrunner is more than a car: it’s a rolling platform for continuous innovation, which Charly is eager to constantly improve and refine. His next steps? Integrating smartphone control via Android, adding sensors for self-parking, and experimenting with additional features that Arduino makes easy to implement. “This is a car that evolves,” Charly explains. “I can add or change features as I go, and Arduino makes it possible.”

    Driving environmental awareness

    Finally, we see Batteryrunner as more than a fun, showstopping car. Given Charly’s commitment to low-impact choices, it’s a way to shift people’s mindset about sustainable mobility. The environmental challenges we face today require manufacturers to go well beyond simply replacing traditional engines with electric ones: vehicles need to be completely redesigned, according to sustainability and simplicity principles. To achieve this, we need people who are passionate about the environment, technology, and creativity. That’s why we fully agree with Charly, when he says, “I love makers! We need them to change the world.”

    Follow LORYC on Facebook or Instagram to see Charly and Leonie’s progress, upgrades, and experiments, and stay inspired by this incredible, Arduino-powered journey.

    The post It’s silver, it’s green, it’s the Batteryrunner! An Arduino-powered, fully custom electric car appeared first on Arduino Blog.

    Website: LINK

  • This Halo helmet features an adjustable-transparency RGB-backlit visor

    This Halo helmet features an adjustable-transparency RGB-backlit visor

    Reading Time: 2 minutes

    The Halo franchise is full of iconic designs, from vehicles like the Warthog to weapons like the Needler. But the armor, such as the Spartan armor worn by Master Chief, is arguably the most recognizable. The helmets are especially cool, and LeMaster Tech put his own unique spin on an ODST-style helmet by adding an adjustable-transparency RGB-backlit visor.

    The ODST helmet that LeMaster Tech used for this project was made by Anthony Andress, AKA “enforce_props,” and it is a solid resin casting. LeMaster Tech’s goal was to make the coolest visor imaginable for that helmet.

    He achieved that using a PDLC (Polymer Dispersed Liquid Crystal) “smart film” that changes from opaque to transparent when it receives current. That film can be cut to shape without causing any harm. He further enhanced the effect with some RGB LED backlighting, which illuminates the interior of the helmet and helps to make the wearer’s face more visible when the visor is transparent.

    LeMaster Tech used an Arduino Nano board to the control the PDLC film and the NeoPixel individually addressable RGB LEDs. Momentary buttons in a 3D-printed enclosure control the LED lighting color, the lighting effect modes, and the visor transparency. The PDLC needs 20V to become transparent, so LeMaster Tech used a large battery to power that and a step-down converter to power the Arduino and LEDs. 

    The result looks fantastic and this helmet is going back to enforce_props, who will finish turning it into a cosplay masterpiece. 

    [youtube https://www.youtube.com/watch?v=TNV_GaneIJE?feature=oembed&w=500&h=281]

    The post This Halo helmet features an adjustable-transparency RGB-backlit visor appeared first on Arduino Blog.

    Website: LINK
  • CapibaraZero: a student’s journey in reinventing hacking tools with Arduino

    CapibaraZero: a student’s journey in reinventing hacking tools with Arduino

    Reading Time: 2 minutes

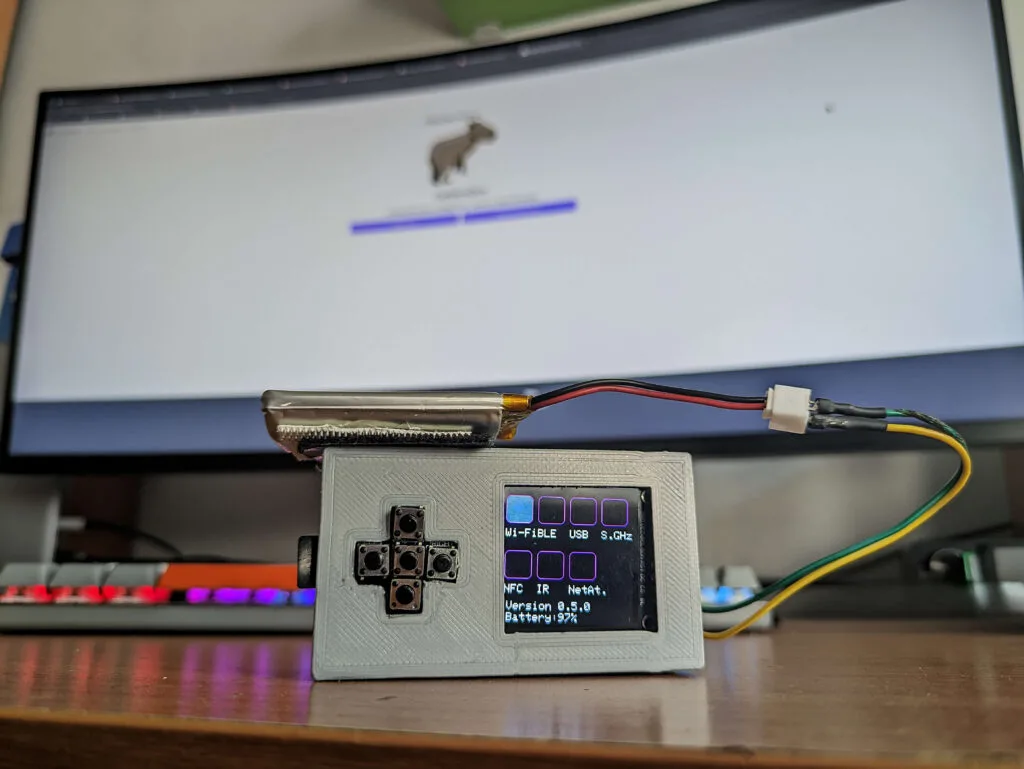
    Inventive, open-source, and cost-effective – these words perfectly describe CapibaraZero, a multifunctional security and hacking tool developed by young innovator Andrea Canale.

    Inspired by the popular Flipper Zero, a portable device used to interact with digital systems, Canale sought to create a more accessible, Arduino-based alternative. 

    The original Flipper Zero, known for its ability to read, copy, and emulate RFID tags, NFCs, and even remote control signals, has become a valuable tool for tech enthusiasts. Canale’s CapibaraZero captures much of this functionality but adds his own unique approach and vision.

    A student’s vision for an accessible, open-source alternative

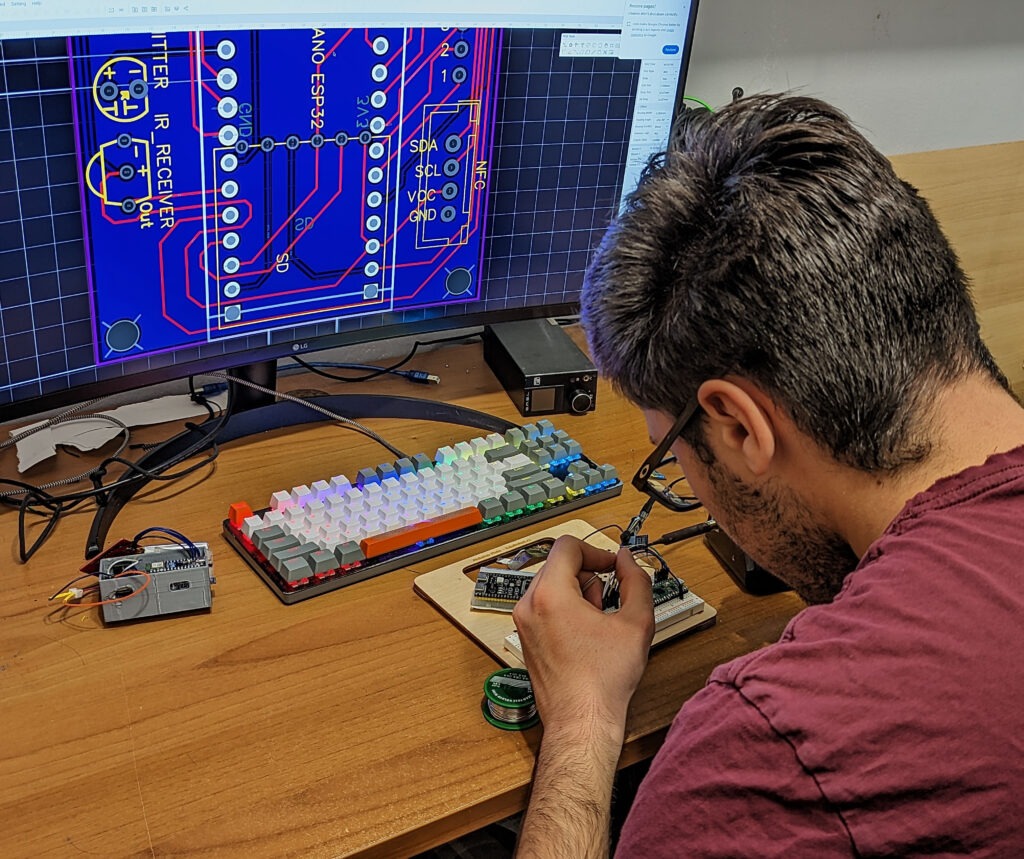
    A passionate student from the University of Turin, Canale began working on CapibaraZero while still in high school, driven by the desire to build a tool that didn’t just replicate Flipper Zero’s capabilities but improved upon them through the power of open-source design. 

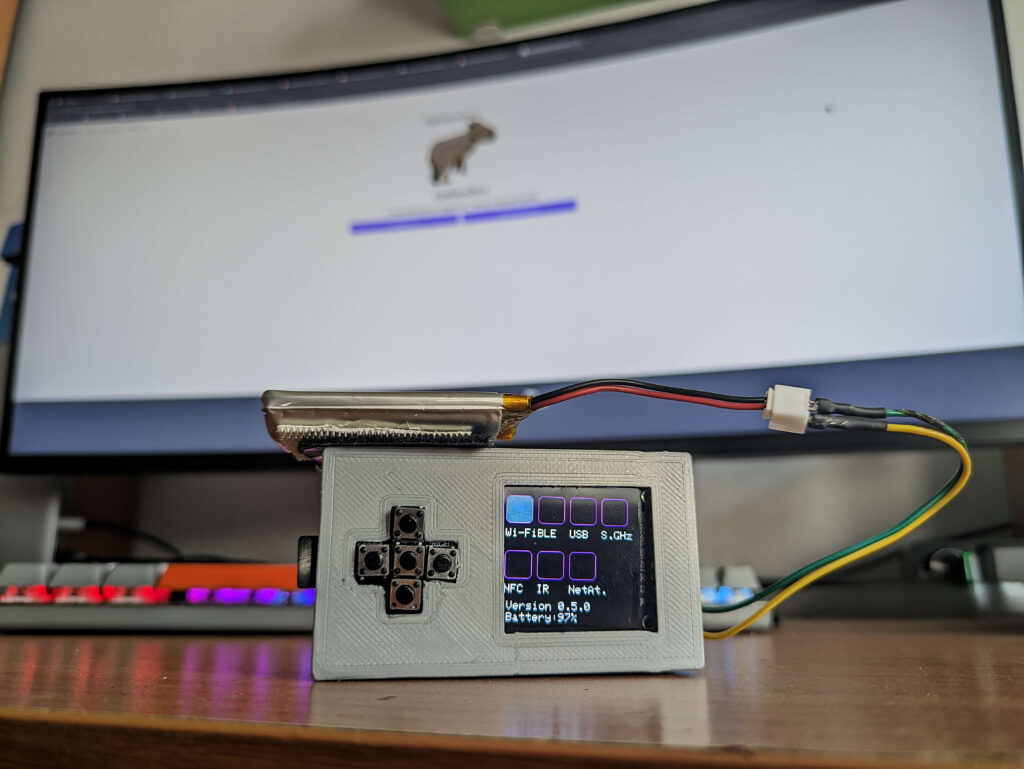
    CapibaraZero, named after Canale’s favorite animal, combines an Arduino Nano ESP32 with custom-designed PCB boards, making it adaptable and expandable. With sections dedicated to Wi-Fi®, Bluetooth®, infrared, NFC, and even network attacks, CapibaraZero allows users to experiment with multiple forms of wireless communication and digital security protocols in a way that’s affordable and accessible.

    A tool for experimentation and learning

    What makes CapibaraZero remarkable is not only its functionality but also Canale’s dedication to ensuring it remains open-source, user-friendly, and continually evolving. With additional modules for advanced features like Sub-GHz communication and network attacks (such as ARP poisoning and DHCP starvation), CapibaraZero empowers enthusiasts to expand the tool’s potential beyond traditional hacking devices

    Canale has even provided an in-depth tutorial for anyone interested in building or exploring CapibaraZero on Arduino’s Project Hub. He also is sharing the project on a dedicated website and public GitHub repository. Check out the details and join Canale’s journey to push the boundaries of DIY security tools!

    The post CapibaraZero: a student’s journey in reinventing hacking tools with Arduino appeared first on Arduino Blog.

    Website: LINK

  • How to use vintage LED bubble displays with your Arduino

    How to use vintage LED bubble displays with your Arduino

    Reading Time: 2 minutes

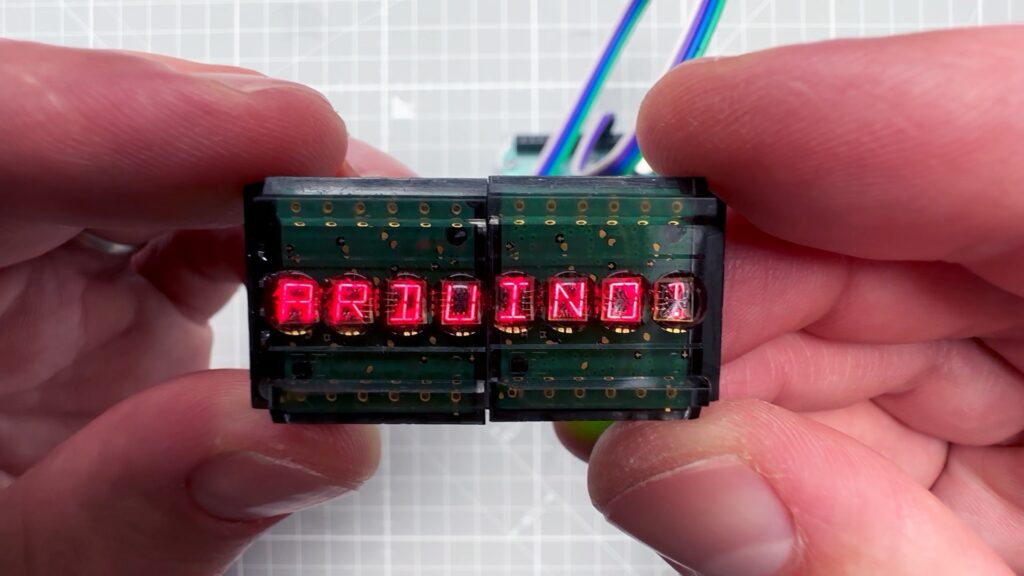
    If you want to add a display to your Arduino project, the easiest solution will likely be an LCD or OLED screen. But though those are affordable and work really well, they may not provide the vibe you’re looking for. If you want a more vintage look, Vaclav Krejci has a great tutorial that will walk you through using old-school LED bubble displays with your Arduino.

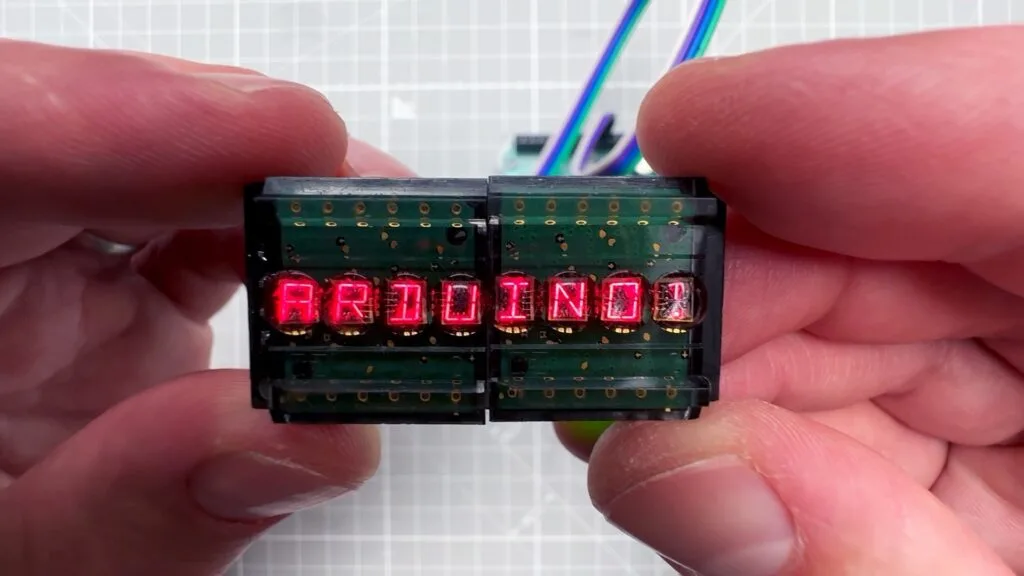
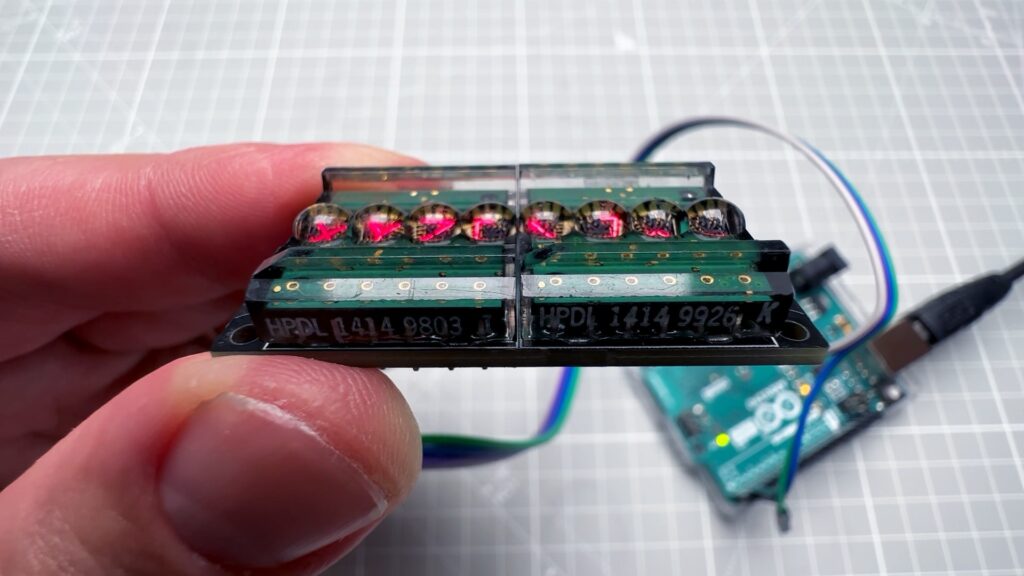
    Krejci’s video demonstrates how to use HPDL-1414 displays, which are what most people call “bubble” displays, because they have clear bubble-like lenses over each character’s array of LEDs. They were fairly popular in the late ‘70s and ‘80s on certain devices, like calculators. These specific bubble displays can show the full range of alphanumeric characters (uppercase only), plus a handful of punctuation marks and special symbols.

    The HPDL-1414 displays Krejci used come on driver boards that set the characters based on serial input. In the video, Krejci first connects those directly to a PC via a serial-to-USB adapter board. That helps to illustrate the control method through manual byte transmission.

    Then Krejci gets to the good stuff: connecting the HPDL-1414 bubble displays to an Arduino. He used an Arduino UNO Rev3, but the same setup should work with any Arduino board. As you may have guessed based on the PC demonstration, the Arduino controls the display via Serial.print() commands. The hex code for each character matches the standard ASCII table, which is pretty handy. That makes it possible to Serial.write() those hex codes and even Serial.write() the actual characters.

    Don’t worry if that sounds a little intimidating, because Krejci has sample code that will let you easily turn any arbitrary array of characters into the serial output you need. Now you can use those awesome bubble displays in your own projects!

    [youtube https://www.youtube.com/watch?v=qZ0up4YSiyE?feature=oembed&w=500&h=281]

    The post How to use vintage LED bubble displays with your Arduino appeared first on Arduino Blog.

    Website: LINK

  • Turning a desk mat into a MIDI drum kit

    Turning a desk mat into a MIDI drum kit

    Reading Time: 2 minutes

    Playing drums is a lot of fun, but drum sets are very big and very loud. They also aren’t cheap. Those factors keep them from being an option for many people who would otherwise be interested. Conventional electronic drum sets are much quieter and a bit more compact, but they still take up a fair amount of space and come with hefty price tags. That’s why Cybercraftics designed this DIY drum set mat that solves all of those problems.

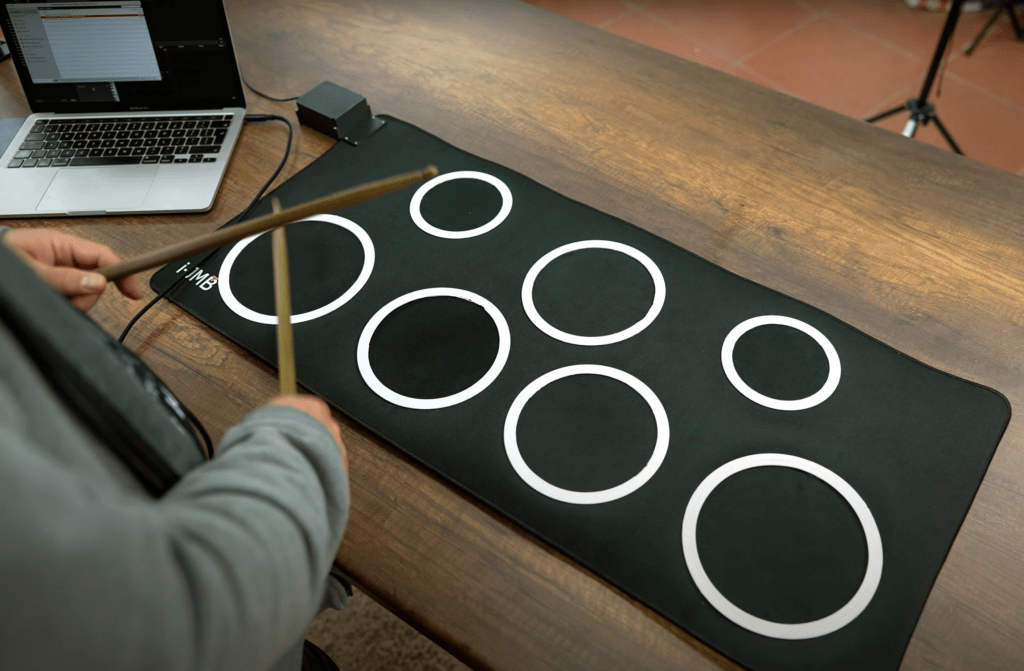
    This is an electronic drum set in the form of a flexible desk mat. It is affordable to build and can be tucked away in a closet or cupboard when not in use. It doesn’t have the same layout as a real drum set, but it can still help new drummers learn fundamentals like paradiddles. Those require a lot of practice to ingrain the motions into muscle memory and this mat makes it possible to run through the rudiments just about anywhere without loud noises disturbing anyone.

    Cybercraftics designed this drum mat to work like a standard MIDI (Musical Instrument Digital Interface) input device, but with piezoelectric sensors instead of buttons. Those produce a signal when struck. They are analog signals and there are seven sensors, so this project uses an Arduino Leonardo board that has enough analog input pins. The Leonardo also has a Microchip ATmega32U4 microcontroller, which means it is configurable as a USB HID — handy for interfacing with whatever MIDI software you may want to use.

    On the physical side, this is just two desk mats cut and glued together, which circular pieces covering the piezoelectric sensors. A small 3D-printed enclosure protects the Arduino.

    [youtube https://www.youtube.com/watch?v=3wSPyhD2FfM?feature=oembed&w=500&h=281]

    If you’ve ever wanted to get into drumming, this may the opportunity you’ve been waiting for.

    The post Turning a desk mat into a MIDI drum kit appeared first on Arduino Blog.

    Website: LINK
  • Exploring fungal intelligence with biohybrid robots powered by Arduino

    Exploring fungal intelligence with biohybrid robots powered by Arduino

    Reading Time: 3 minutes

    At Cornell University, Dr. Anand Kumar Mishra and his team have been conducting groundbreaking research that brings together the fields of robotics, biology, and engineering. Their recent experiments, published in Science, explore how fungal mycelia can be used to control robots. The team has successfully created biohybrid robots that move based on electrical signals generated by fungi – a fascinating development in the world of robotics and biology.

    A surprising solution for robotics: fungi

    Biohybrid robots have traditionally relied on animal or plant cells to control movements. However, Dr. Mishra’s team is introducing an exciting new component into this field: fungi – which are resilient, easy to culture, and can thrive in a wide range of environmental conditions. This makes them ideal candidates for long-term applications in biohybrid robotics.

    Dr. Mishra and his colleagues designed two robots: a soft, starfish-inspired walking one, and a wheeled one. Both can be controlled using the natural electrophysiological signals produced by fungal mycelia. These signals are harnessed using a specially designed electrical interface that allows the fungi to control the robot’s movement.

    The implications of this research extend far beyond robotics. The integration of living systems with artificial actuators presents an exciting new frontier in technology, and the potential applications are vast – from environmental sensing to pollution monitoring.

    [youtube https://www.youtube.com/watch?v=M1-3YlfVQks?feature=oembed&w=500&h=281]

    How it works with Arduino

    At the heart of this innovative project is the Arduino platform, which served as the main interface to control the robots. As Dr. Mishra explains, he has been using Arduino for over 10 years and naturally turned to it for this experiment: “My first thought was to control the robot using Arduino.” The choice was ideal in terms of accessibility, reliability, and ease of use – and allowed for seamless transition from prototyping with UNO R4 WiFi to final solution with Arduino Mega.

    To capture and process the tiny electrical signals from the fungi, the team used a high-resolution 32-bit ADC (analog-to-digital converter) to achieve the necessary precision. “We processed each spike from the fungi and used the delay between spikes to control the robot’s movement. For example, the width of the spike determined the delay in the robot’s action, while the height was used to adjust the motor speed,” Dr. Mishra shares.

    The team also experimented with pulse width modulation (PWM) to control the motor speed more precisely, and managed to create a system where the fungi’s spikes could increase or decrease the robot’s speed in real-time. “This wasn’t easy, but it was incredibly rewarding,” says Dr. Mishra. 

    And it’s only the beginning. Now the researchers are exploring ways to refine the signal processing and enhance accuracy – again relying on Arduino’s expanding ecosystem, making the system even more accessible for future scientific experiments.

    All in all, this project is an exciting example of how easy-to-use, open-source, accessible technologies can enable cutting-edge research and experimentation to push the boundaries of what’s possible in the most unexpected fields – even complex biohybrid experiments! As Dr. Mishra says, “I’ve been a huge fan of Arduino for years, and it’s amazing to see how it can be used to drive advancements in scientific research.”

    The post Exploring fungal intelligence with biohybrid robots powered by Arduino appeared first on Arduino Blog.

    Website: LINK
  • Alumnus Software joins Arduino’s System Integrators Partnership Program

    Alumnus Software joins Arduino’s System Integrators Partnership Program

    Reading Time: 2 minutes

    We are thrilled to announce that Alumnus Software, based in India and the United States, has joined our System Integrators Partnership Program (SIPP) at the Gold level. With over 20 years of expertise in embedded software, IoT applications, and Edge AI development, Alumnus has a strong track record of building custom embedded systems and data-driven IoT applications for industries ranging from automotive and healthcare to industrial automation and consumer electronics.

    As an official SIPP partner, Alumnus will enable Arduino users to leverage their expertise in resource-constrained environments – overcoming challenges like limited CPU, memory, and storage, low bandwidth, extended battery life requirements, and real-time response demands. This collaboration means faster deployment, quicker revenue generation, and a seamless bridge between connected devices and cloud-based applications for enterprise-scale projects.

    Ashis Khan, Board Member at Alumnus Software, shared his enthusiasm for the partnership:  

    “With Arduino, businesses have achieved a 25-40% faster time-to-market and up to 60% reduction in non-recurring engineering (NRE) costs when connecting their data to the cloud. Through this partnership, Alumnus Software plans to help Arduino users scale enterprise-class applications more efficiently, leveraging data and AI with our two decades of expertise in Data, IoT, Edge AI, Cloud enablement, and embedded software development.”

    Rob Ponsoby, Partner Sales Manager – AMER at Arduino, added: “We are excited to welcome Alumnus to the SIPP program. Their depth of experience in embedded software and IoT solutions will provide valuable resources for Arduino users, helping them bring their innovative ideas to life in faster, more efficient ways.”

    Follow Alumnus Software’s journey on LinkedIn and Facebook, and learn more about their contributions to advancing embedded technology by visiting the company website.


    The System Integrators Partnership Program by Arduino Pro is an exclusive initiative designed for professionals seeking to implement Arduino technologies in their projects. This program opens up a world of opportunities based on the robust Arduino ecosystem, allowing partners to unlock their full potential in collaboration with us.

    The post Alumnus Software joins Arduino’s System Integrators Partnership Program appeared first on Arduino Blog.

    Website: LINK
  • A riddle wrapped in an enigma… made easy, with Arduino Plug and Make Kit

    A riddle wrapped in an enigma… made easy, with Arduino Plug and Make Kit

    Reading Time: 3 minutes

    The Arduino Plug and Make Kit was designed to open up infinite possibilities, breaking down the idea that technology is a “black box” reserved for experts. With its snap-together system, this kit gives everyone – beginners and seasoned makers alike – the power to create and innovate without barriers. Forget being a passive user! With the Plug and Make Kit, technology is accessible and ready to bring your ideas to life.

    Meet Giulio Pilotto, Plug and Make Kit Star

    Giulio Pilotto is one of Arduino’s senior software engineers and works closely on Arduino Cloud projects. When we held a “Make Tank” workshop at our Turin office to showcase the potential of the Plug and Make Kit, he joined in with inspiration from a recent escape room experience. 

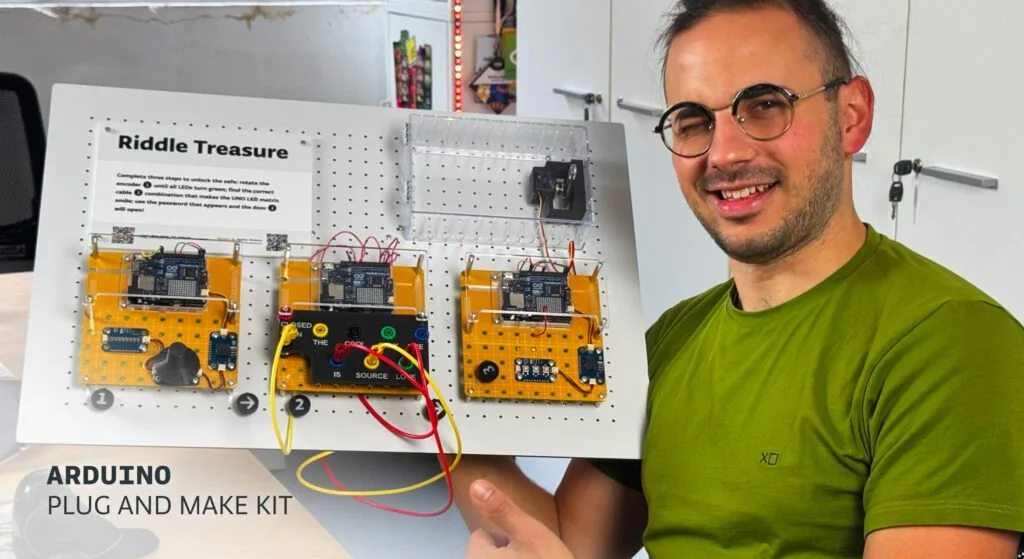
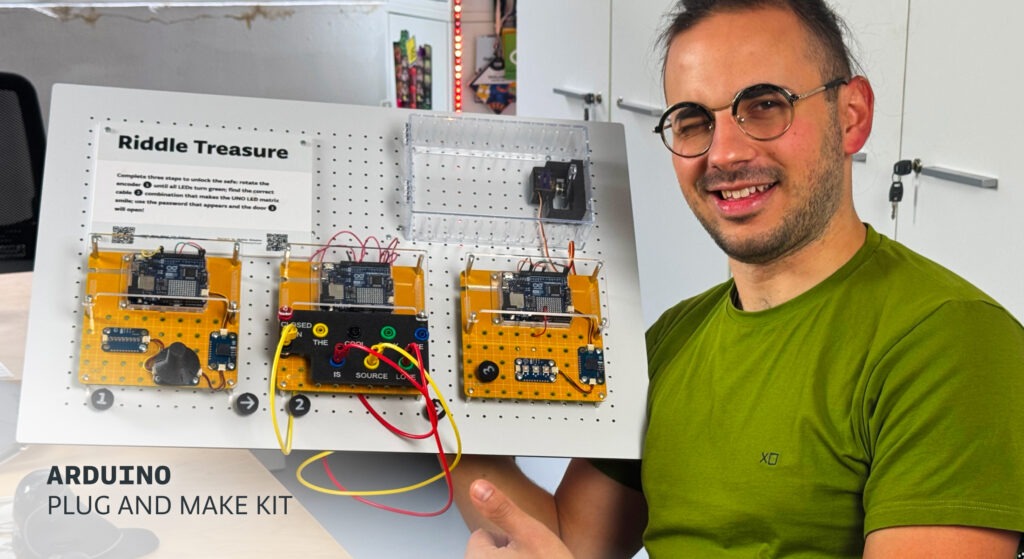
    The result was Riddle Treasure, a puzzle-based game that allows you to recreate the excitement of an escape room anywhere you are.

    [youtube https://www.youtube.com/watch?v=qMewu2yG1CE?feature=oembed&w=500&h=281]

    At this year’s Maker Faire, Pilotto had the opportunity to present Riddle Treasure at the Arduino booth. While he had showcased his own creations at previous Maker Faire editions, this time felt special: “The Maker Faire is always a wonderful high-energy event,” he says. “I was happy to represent the Arduino team as we focus more than ever on the community: all our products were presented in the light of what people can do with them.” 

    Riddle Treasure

    To be honest, this is probably the most advanced project our in-house “Make Tank” came up with (so far!). After all, it has to be somewhat complicated to emulate intricate escape room puzzles! However, following Pilotto’s step-by-step instructions on Project Hub and leveraging the easy snap-together mechanism of Modulino nodes, anyone can recreate Riddle Treasure – or even invent a personal, unique variation.

    The goal of the game is to unlock a safe. But to get there, you need to complete three steps in order. 

    1. Combination Lock: First, you must rotate the encoder in Modulino Knob like a safe’s combination lock. When you hit the right position, one of the lights on Modulino Pixels turns from red to green. When you get all five LEDs to turn green, you can move on to the next step. 

    2. Secret Sentence: Use the banana cables to connect the words in the panel. When you get them all in the right order to form the secret sentence, a password is revealed on the LED matrix of the UNO R4 included in the Plug and Make Kit. 

    3. Final Unlock: Input the password via Modulino Buttons, and watch the safe unlock! 

    We take care of the complexity, so you can simply plug into tech!

    Arduino has done the hard work so you can play and have fun even with deliberately complex projects like this one. 

    “Building this without having to solder, or even worry about settings or any electronics aspect at all, is a game changer. With Plug and Make Kit, Arduino has already selected and optimized the Modulino sensors: all you have to do is put them together to get started on your ideas,” Pilotto says. 

    Search Project Hub for “Plug and Make” to find Riddle Treasure and many more ideas, and get inspired to create your own amazing projects with the Plug and Make Kit!

    The post A riddle wrapped in an enigma… made easy, with Arduino Plug and Make Kit appeared first on Arduino Blog.

    Website: LINK

  • Receive an alert when your device goes offline in Arduino Cloud

    Receive an alert when your device goes offline in Arduino Cloud

    Reading Time: 3 minutes

    You’re managing a network of IoT sensors that monitor air quality across multiple locations. Suddenly, one of the sensors goes offline, but you don’t notice until hours later. The result? A gap in your data and a missed opportunity to take corrective action. This is a common challenge when working with IoT devices: staying informed about the real-time status of each device is crucial to ensure smooth operation and timely troubleshooting.

    This is where Device Status Notifications, the latest feature in the Arduino Cloud, comes in. Whether you’re an individual maker or an enterprise, this feature empowers you to stay on top of your devices by sending real-time alerts when a device goes online or offline.

    What is “Device Status Notifications?”

    Device Status Notifications allow you to receive instant alerts whenever one of your devices changes its connectivity status, whether it’s going offline or coming back online. You can customize these alerts for individual devices or all devices under your account, with the flexibility to exclude specific devices from triggering notifications.

    We announced it a while ago, Arduino Cloud already supports Triggers and Notifications, allowing you to create alerts based on specific conditions like sensor readings or thresholds. With the addition of Device Status Notifications, you can now monitor device connectivity itself. This means you can now receive an alert the moment a device loses connection, providing a proactive way to manage your IoT ecosystem. For more details on the original feature, check out our Triggers and Notifications blog post.

    Key benefits for users

    • Real-time monitoring: Get notified instantly when a device disconnects or reconnects, helping you take corrective actions promptly.
    • Customization: Configure your alerts to focus on specific devices or apply rules to all your devices, with the flexibility to add exceptions. You can also decide when the notification should be sent — either immediately upon a status change or after a set period of downtime.
    • Convenience: Choose to receive notifications via email or directly on your mobile device through the Arduino IoT Remote app, making it easy to stay informed wherever you are.

    How to set up Device Status Notifications

    Video link

    [youtube https://www.youtube.com/watch?v=OKxlaJ5XknM?feature=oembed&w=500&h=281]

    1. Set up a Trigger

    Go to the Triggers section and select “+ TRIGGER

    2. Choose “Device Status” as your condition

    Decide whether to monitor the status of:

    • A specific device (select “Single device”), or
    • Any device (select “Any device (existing and upcoming)”).

    If you select “Single device,” you can choose the device that you want to be monitored.

    If your selection is “Any device,” you can add exceptions for devices you don’t want to trigger the alert.

    3. Configure what you are going to monitor

    Choose whether to monitor when the device goes online, offline, or both. Then decide if the notification should be sent immediately or after a set period (options range from 10 minutes to 48 hours).

    4. Customize the notification settings

    Notifications are configured in the same way as any other Trigger. You can add the action of sending an email or a push notification to your phone via a push notification on the Arduino IoT Remote app.

    Ready to test Device Notifications?

    Want to make sure your IoT devices stay connected and functioning? Start using the Device Status Notifications feature today. Simply log in to your Arduino IoT Cloud account, and configure your notifications to stay informed whenever your devices go online or offline. 

    Make sure you’re on a Maker, Enterprise, or School plan to access this feature.

    And don’t forget to download the Arduino IoT Remote app from the App Store or Google Play  to receive real-time alerts on the go and stay connected, wherever you are.

    Black Friday is here – Save Big on Arduino Cloud!

    Take your IoT projects to the next level this Black Friday!

    Black Friday Arduino Cloud deals 25% off Maker Yearly Plan

    For a limited time, enjoy 25% off the Arduino Cloud Maker Yearly plan with code BLACKFRIDAY. Don’t miss this opportunity to access premium features and elevate your creativity. Hurry—this offer is valid for new Maker Yearly plan subscriptions only and ends on December 1st, 2024.

    The post Receive an alert when your device goes offline in Arduino Cloud appeared first on Arduino Blog.

    Website: LINK

  • Using Arduino UNO to sync a visual neuroscience lab

    Using Arduino UNO to sync a visual neuroscience lab

    Reading Time: 3 minutes

    Common research methods to study the visual system in the laboratory include recording and monitoring neural activity in the presence of sensory stimuli, to help scientists study how neurons encode and respond, for example, to specific visual inputs. 

    One of the biggest technical problems in the neural recording setups used in such experiments, is achieving precise synchronization of multiple devices communicating with each other, including microscopes and screens displaying the stimuli, to accurately map neural responses to the visual events.

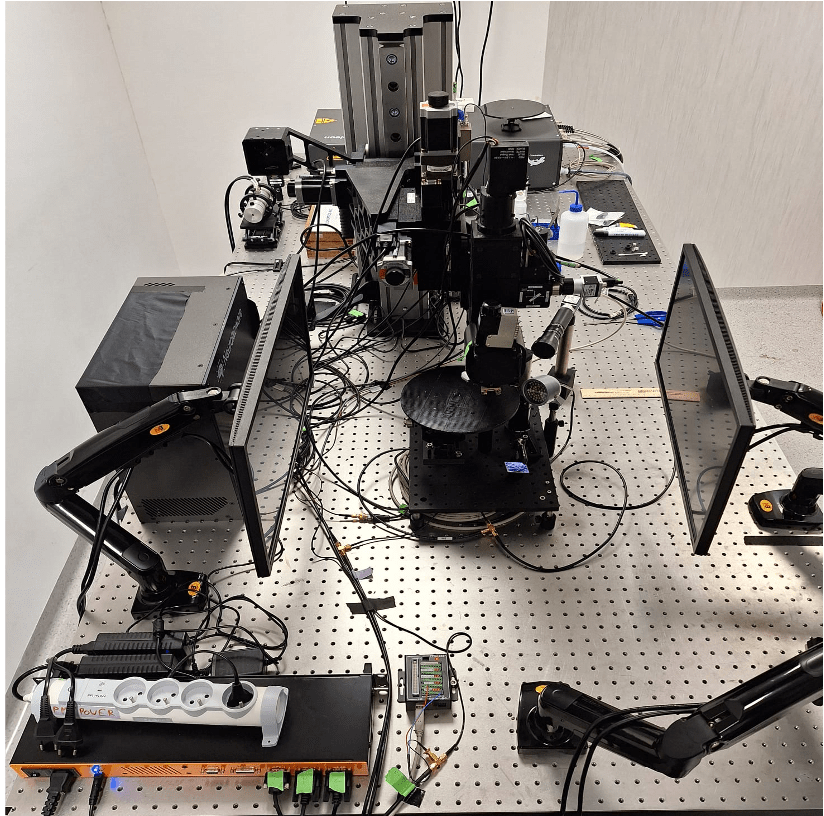
    For example, in the Rompani Lab, a visual neuroscience laboratory at the European Molecular Biology Laboratory (EMBL) in Rome, the recording system (a two-photon microscope) needs to communicate with the visual stimulation system (composed of two screens) that are used to show visual stimuli while recording neural activity. To synchronize these systems efficiently, they turned to an Arduino UNO Rev3. “Its simplicity, reliability, and ease of integration made it an ideal tool for handling the timing and communication between different devices in the lab,” says Pietro Micheli, PhD student at EMBL Rome. 

    How the setups works

    The Arduino UNO Rev3 is used to signal to the microscope when the stimulus (which is basically just a short video) starts and when it ends. While the microscope is recording and acquiring frames, a simple firmware tells the UNO to listen to the data stream on a COM port of the computer used to control the visual stimulation. 

    Within the Python® script used for controlling the screens, every time a new stimulus starts a command is written on the serial port. The microcontroller reads the command, which can be either ‘H’ or ‘L’, and sets the voltage of the output TTL at pin 9 to 5V or 0V, respectively. This TTL signal goes to the microscope controller, which generates time stamps for the microscope status. These timestamps contain the exact frame numbers of the microscope recording at which the stimulus started (rising edge of the TTL) and ended (falling edge of the TTL).

    All this information is essential for the analysis of the recording, as it allows the researchers at EMBL Rome to align the neural responses recorded to the stimulation protocol presented. Once the neural activity is aligned, the downstream analysis can begin, focusing on understanding the deeper brain activity. 

    Ever wonder what neurons that are firing look like? 

    Micheli shared with us an example of the type of neural activity acquired during an experimental session with the setup described above. 

    The small blinking dots are individual neurons recorded from the visual cortex of an awake, behaving mouse. The signal being monitored is the fluorescence of a particular protein produced by neurons, which indicates their activity level. After the light emitted by the neurons has been recorded and digitised, researchers extract fluorescence traces for each neuron. At this point, they can proceed with the analysis of the neural activity, to try to understand how the visual stimuli shown are actually encoded by the recorded neural population.

    The post Using Arduino UNO to sync a visual neuroscience lab appeared first on Arduino Blog.

    Website: LINK

  • Is there an online Arduino IDE?

    Is there an online Arduino IDE?

    Reading Time: 5 minutes

    Since the inception of Arduino, the Arduino IDE has been a go-to tool for people learning to code and creating projects ranging from remote-controlled cars to soil moisture monitoring. No wonder it’s been downloaded over 24 million times this year, so far! 

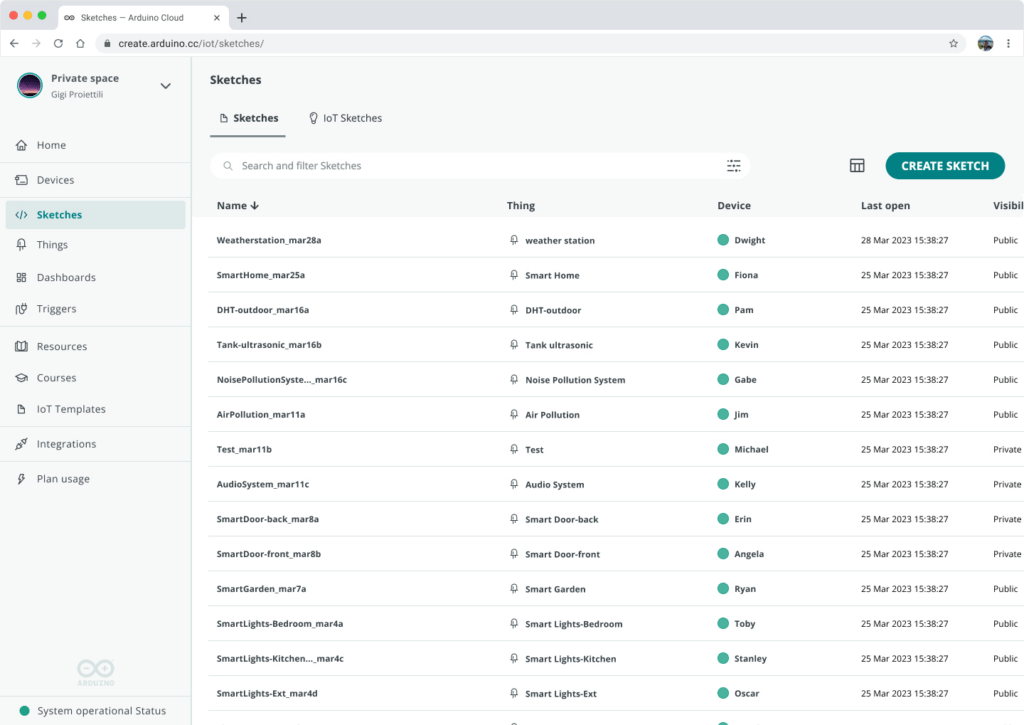
    Now if you’ve ever wondered whether you can use Arduino IDE online, you’re not alone. Many Arduino enthusiasts, from hobbyists to professionals, have been asking the same question. The good news? Yes, there is an online Arduino IDE, and it’s called the Arduino Cloud Editor! Available through Arduino Cloud, the Cloud Editor (previously known as the Arduino Web Editor), offers a seamless, free way to code from anywhere without the hassle of traditional software. It gives you peace of mind knowing that there is no risk of losing your valuable sketches – or all the hours you spent developing them.  

    Both the traditional Arduino IDE and the Cloud Editor have their strengths, but choosing the right one depends on your specific needs and project requirements. So, in this post, we’ll dive into the details so you can make an informed choice and pick the editor that is most suitable for you.

    Arduino IDE: greater control, offline use, and stability

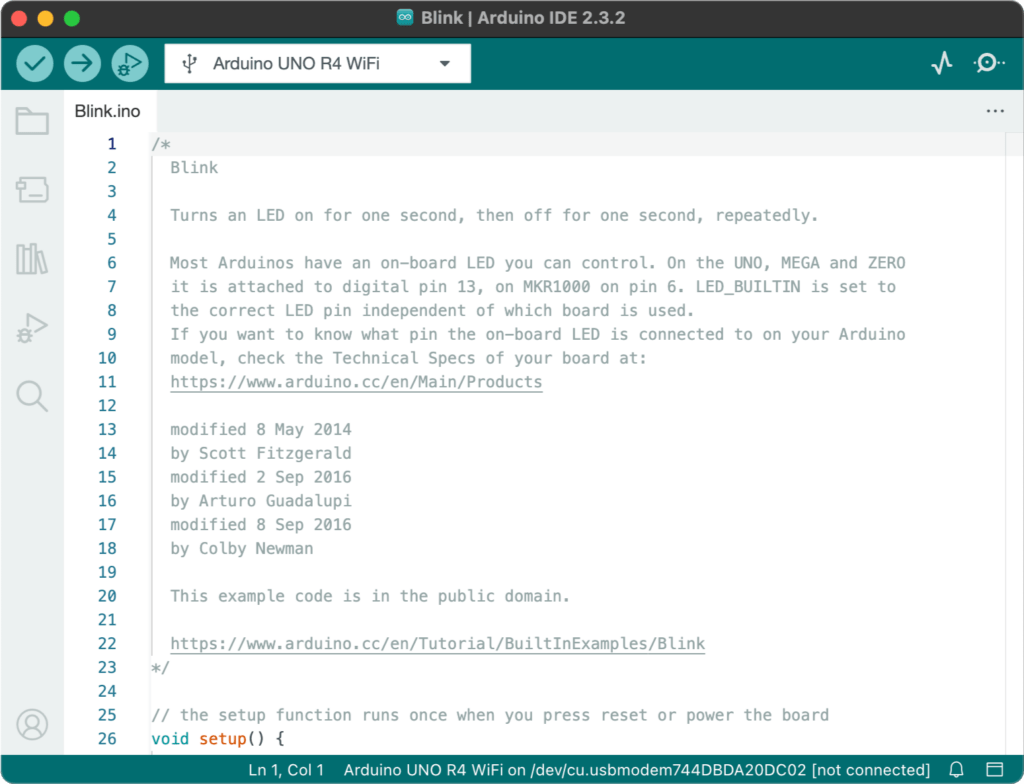
    Screenshot of the Arduino IDE 2.3.2

    The traditional Arduino IDE is installed on your computer, allowing you to write and upload code directly to your Arduino board via a USB cable. Once installed, the IDE can be used offline, making it a reliable choice for projects in areas with limited or no internet access, for example while camping or in remote work locations.

    It gives you complete control over updates, letting you maintain a stable environment by choosing when (or if) to install the latest changes. Plus, it’s equipped with a robust debugger, a serial monitor, and access to thousands of libraries contributed by the Arduino community.

    Key features of the desktop IDE include:

    • Serial Monitor & Serial Plotter: Essential tools for debugging and visualizing data.
    • Library Manager: Access to over 5,000 libraries created by the Arduino community.
    • Autocompletion: The easiest way to speed up your coding process.

    In short, the traditional IDE offers more control, such as the option to manually update or freeze the version you’re using, and requires only occasional internet connection for updates. 

    Who can benefit from the Arduino IDE? Teachers and users who prefer a stable environment without frequent changes may find it particularly valuable.

    Arduino Cloud Editor: a convenient Arduino IDE online experience

    The Arduino Cloud Editor offers a similar experience to the traditional version but adds the convenience of cloud storage and extra features.

    One of its most appealing benefits is accessibility: you can access your projects from any computer, whether you’re at school, at home, or at work. Actually, you can even have them in your backpocket on your smartphone when you’re on the go! Cloud auto saving also ensures you never lose progress due to technical issues, providing a safeguard for your projects.

    The Cloud Editor automatically updates itself as well as pre-installed libraries, saving you from manual maintenance. Real-time collaborative coding is another standout feature, enabling teams and students to work together on sketches seamlessly.

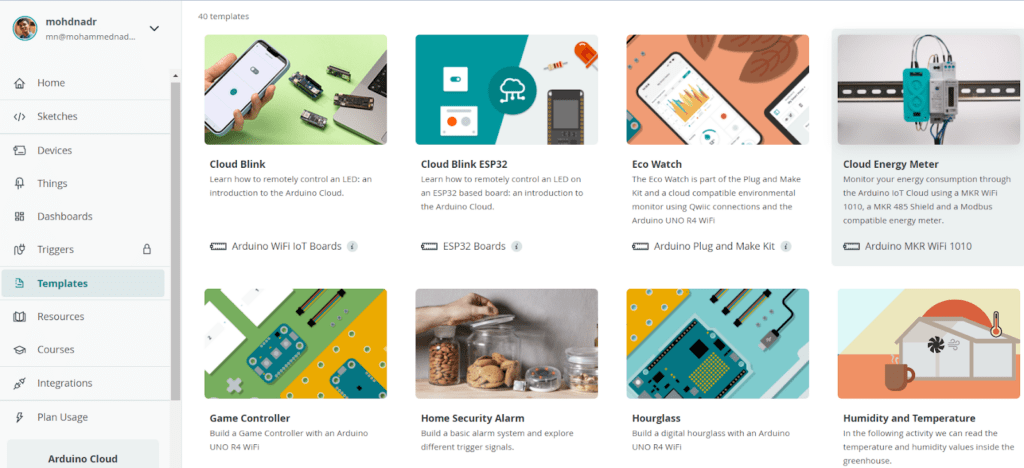
    The Cloud Editor is available through Arduino Cloud, a full integrated development experience. In other words, it’s part of a bigger ecosystem. You can build IoT projects faster with pre-built templates, customize dashboards to monitor and control your devices remotely, and even integrate voice commands via Alexa or Google Home without writing a single line of code.

    Screenshot of the templates section in Arduino Cloud

    Who can benefit from the Cloud Editor? Anyone who needs real-time collaboration and easy access to their projects from anywhere.

    Which editor should you choose?

    The traditional Arduino IDE is ideal for users who need offline access and greater control over updates. It’s faster when compiling and uploading code, and offers advanced debugging tools that the Cloud Editor lacks.

    On the other hand, if you need flexibility to work from multiple locations or collaborate in real-time, the Arduino Cloud Editor’s seamless integration with cloud storage and automatic updates make it a more convenient option, especially for beginners. Features like OTA updates are particularly useful for projects requiring frequent, remote updates.

    As a quick summary:

    Choose the traditional Arduino IDE if:

    • You prefer working offline or in remote locations without internet access.
    • You want full control over when updates are installed.
    • You’re using non-Arduino hardware that requires specific libraries or configurations.

    Choose the Arduino Cloud Editor if:

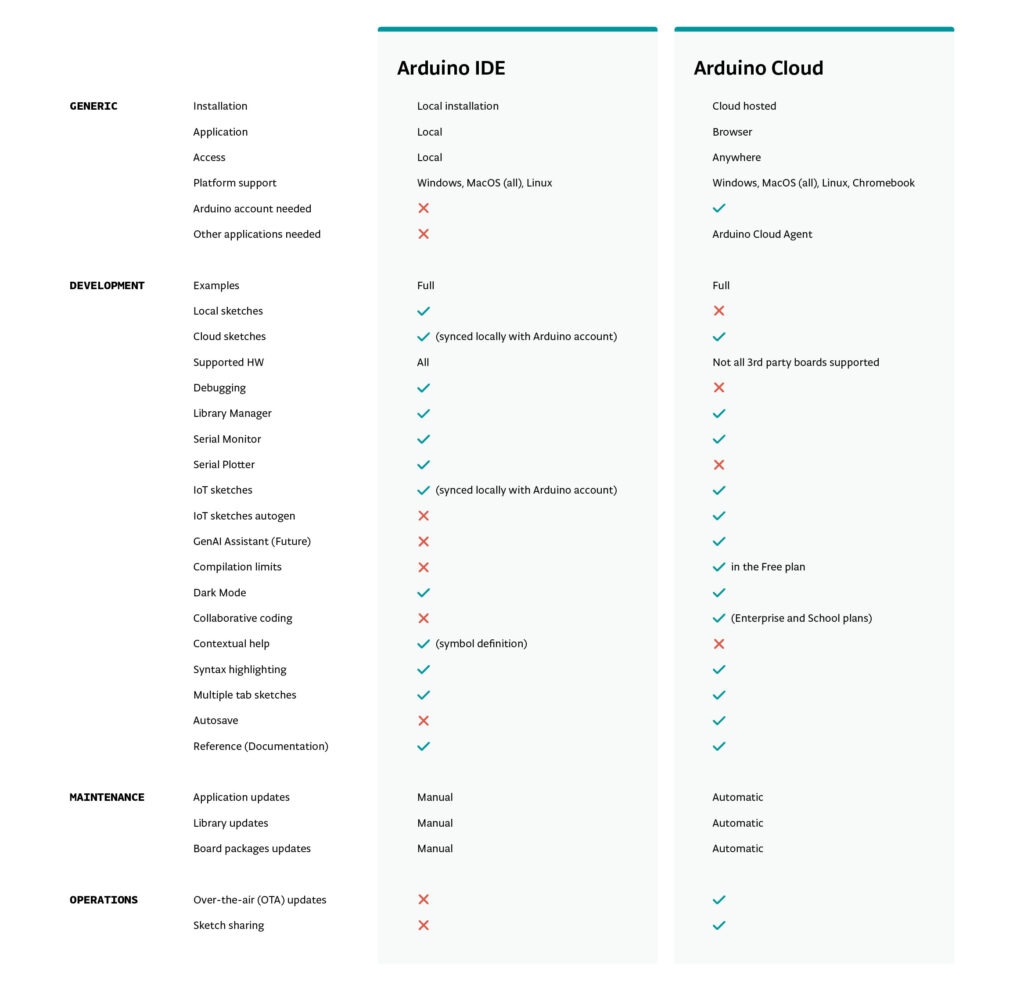
    We’ve summarized the features available in the two editors in the detailed comparison table below, to help you decide which option best suits your project needs.

    Arduino IDE vs Arduino Cloud Editor

    Ultimately, your choice should reflect your project’s complexity, collaboration needs, and hardware requirements.

    How to get started with the IDE of your choice

    Having decided which IDE is best for you, are you now ready to dive in? 

    To get started with the traditional Arduino IDE, download the software and check out the Arduino Docs guide that shows you how to program using the IDE.

    For the Cloud Editor, simply create an Arduino account and explore the detailed Cloud documentation to help you bring your dream project ideas to life!

    The post Is there an online Arduino IDE? appeared first on Arduino Blog.

    Website: LINK

  • Discover #Virgil: history comes to life with Arduino

    Discover #Virgil: history comes to life with Arduino

    Reading Time: 2 minutes

    We’re excited to introduce #Virgil, an innovative project that combines the power of Arduino technology with a passion for history, creating a groundbreaking interactive experience for museums

    Using Arduino’s versatile and scalable ecosystem, #Virgil operates completely offline, allowing visitors to interact with 3D avatars in a seamless and immersive way. The project brings the past to life, offering dialogue-driven encounters with key historical figures thanks to voice recognition and edge AI – with the option to choose among many different languages.

    “#Virgil is meant to celebrate the past and, more importantly, open new avenues for education and inspiration. We want to prove how technology, when guided by ethical values, can amplify and perpetuate our cultural heritage in ways that used to be unimaginable,” comments Enrico Benevenuta, coordinator of the Territori Svelati project and AI expert.

    [youtube https://www.youtube.com/watch?v=hQBPIePZDMs?feature=oembed&w=500&h=281]

    Matteo Olivetti, great-grandson of Olivetti’s founder Camillo, drew inspiration from the iconic Divisumma to design a dedicated hardware setup, Olivox. 

    Powered by the Portenta X8 and Max Carrier, the device connects via HDMI to any screen, engaging visitors in a rich, interactive experience without the need for smartphones or a stable internet connection. This approach allows the project to adapt easily to different exhibitions and contexts, while offering full control over the visitor experience.

    Internationally renowned 3D artist Elvis Morelli was entrusted with creating the first avatar of the project – and it’s no coincidence that Camillo Olivetti was chosen. 

    The story of Olivetti resonates deeply with Arduino’s own mission of pushing the boundaries of technology, and #Virgil represents a continuation of that legacy by bridging the gap between the past and future through cutting-edge tools.

    To find out more about the project and perhaps have a chat with your favorite pioneer of technology and innovation, visit #Virgil’s booth at the upcoming 2024 Maker Faire Rome, booth E.09. Don’t forget to stop by Arduino’s booth N.07 to find out more about our products, and let us know what you asked Camillo!

    The post Discover #Virgil: history comes to life with Arduino appeared first on Arduino Blog.

    Website: LINK

  • Technology meets creativity in two interactive art student projects

    Technology meets creativity in two interactive art student projects

    Reading Time: 2 minutes

    Art and engineering are not separate concepts. There is a great deal of overlap between the two and many modern disciplines increasingly blur those lines. Mónica Riki is an “electronic artist and creative coder” who embodies that idea: you might remember her and her incredible Arduino UNO R4-powered installations from our blog post last year. In addition to her artistic practice, her technology-forward approach inspires her work as an educator, as she helps her master’s students develop hybrid concepts that use microcontrollers, sensors, lights and a variety of different technologies to create interactive art pieces. The level of creativity that technology is able to unleash is readily apparent in two of her students’ projects: Flora and Simbioceno.

    [youtube https://www.youtube.com/watch?v=PvYn_yYEQ5w?feature=oembed&w=500&h=375]

    Flora, created by College of Arts & Design of Barcelona students Judit Castells, Paula Jaime, Daniela Guevara, and Mariana Pachón, is a board game in the form of an interactive art installation. It was inspired by nature, with gameplay occurring throughout a simulated ecosystem. An Arduino UNO R4 WiFi board handles the interactive elements, with additional hardware including NFC readers, motors and accompanying drivers, sensors, pumps, LEDs, and more. 

    [youtube https://www.youtube.com/watch?v=rf9-mkIkiGY?feature=oembed&w=500&h=375]

    Simbioceno, by Ander Vallejo Larre, Andrea Galano Toro, Pierantonio Mangia, and Rocío Gomez, also uses an UNO R4 WiFi. It consists of two ecosystems: one aquatic and one aerial-terrestrial. They exist in symbiosis, communicating and sharing resources as necessary. Hardware includes LEDs, pumps, and biofeedback sensors. The students put particular thought into the construction materials, many of which are recycled or biomaterials. 

    Both projects are interactive art and expressions of creativity. While they do integrate technology, that technology isn’t the focal point. Instead, the technology helps to bring the two experiences to life.Feeling inspired by this creative use of the Arduino platform? We hope you’ll develop your own projects and share them with us and the entire community: contact creators@arduino.cc or upload directly to Project Hub! You could be our next Arduino Star.

    The post Technology meets creativity in two interactive art student projects appeared first on Arduino Blog.

    Website: LINK
  • Use sound to trigger your camera’s flash with this DIY device

    Use sound to trigger your camera’s flash with this DIY device

    Reading Time: 2 minutes

    In the world of photography, the exposure triangle is immutable. To get a properly exposed photo (not too bright or too dark), you need a balance of aperture size (how much light gets in), shutter speed (how long the light gets in), and ISO (sensitivity to light at the expense of noise). But the shooting situation often limits how the photographer can adjust each parameter. To freeze action, for example, you need a very fast shutter — reducing the light you let in and therefore exposure. To compensate, you might need to use a flash and this DIY device can help with the timing.

    There is a reason that photography flash units only come on for a split second (about 1/10,000th of second is normal): they’re incredibly bright and would burn out if left on for any length of time. To freeze action, such as a balloon popping, you need a fast shutter speed. Too slow and the photo will be all blurry. Exact numbers vary, but 1/8,000th of a second isn’t unusual for the mechanical shutter on a modern mirrorless camera. To get proper exposure, you need to time the shutter to open at the exact same time that the flash is illuminating your subject and that is something you could never achieve through manual control.

    That’s hardly a new problem and so cameras are capable of releasing the shutter at the proper time in relation to the flash, but how do you sync those two events with whatever action you want to freeze? If that action happens to make a noise, this device is the solution.

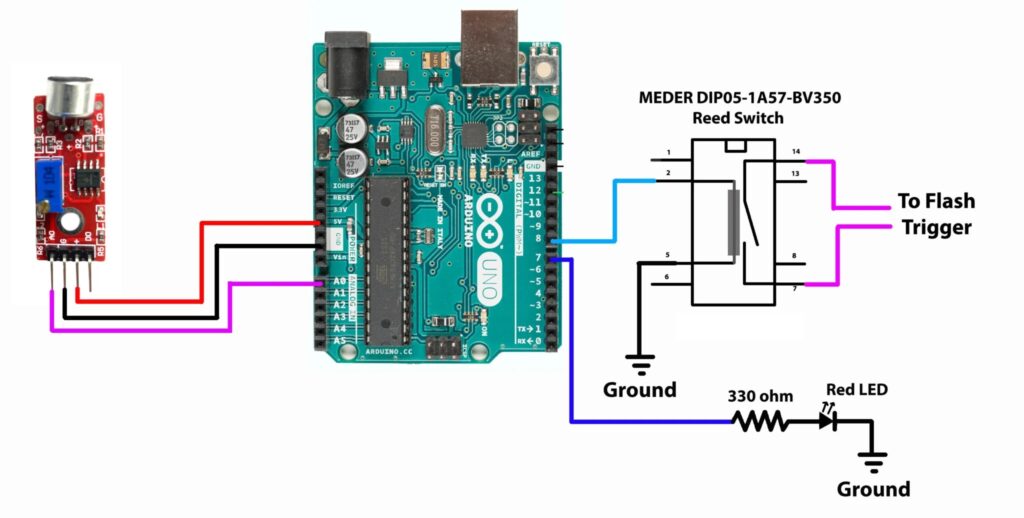
    This device, based on an Arduino UNO Rev3 board, uses a microphone to listen for loud noises. If a noise exceeds a set threshold, the Arduino triggers the flash. An isolation circuit made with a Reed switch protects the Arduino from the high voltage of the flash. Reed switches are relatively slow, but they’re affordable. For better performance, an opto-isolator could be used instead.

    To demonstrate this, students at Rochester Institute of Technology froze the action on some ballon pops and the results look great.

    The post Use sound to trigger your camera’s flash with this DIY device appeared first on Arduino Blog.

    Website: LINK
  • Get notified of impending floods with this Arduino Nano 33 IoT-based display

    Get notified of impending floods with this Arduino Nano 33 IoT-based display

    Reading Time: 2 minutes

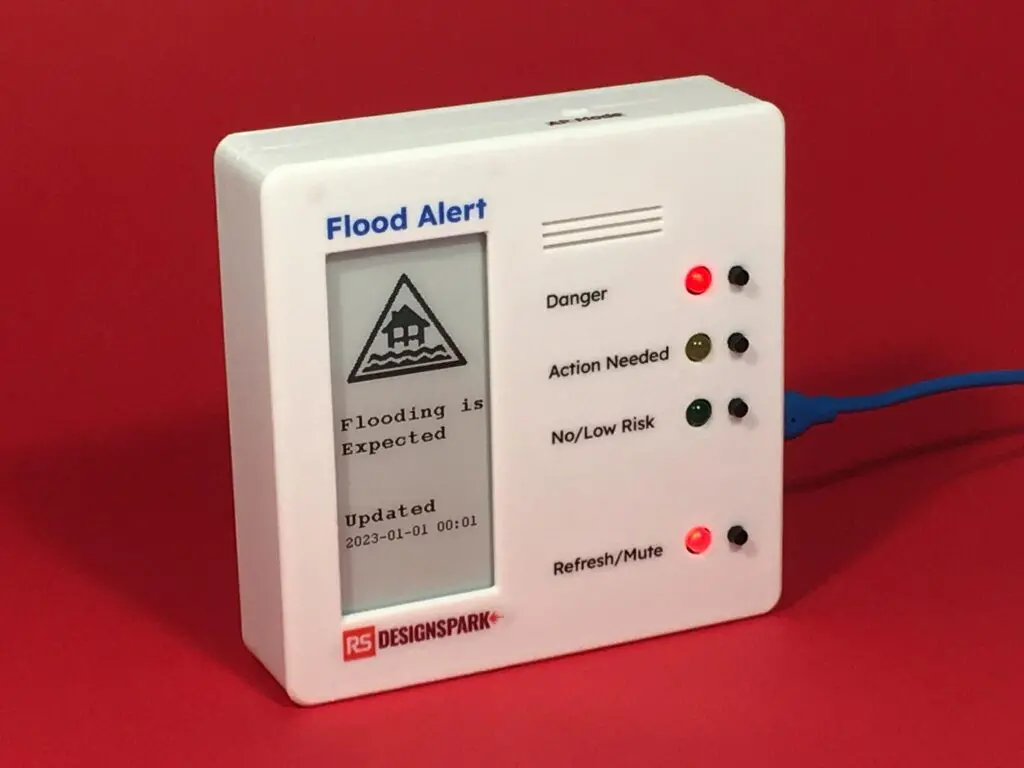
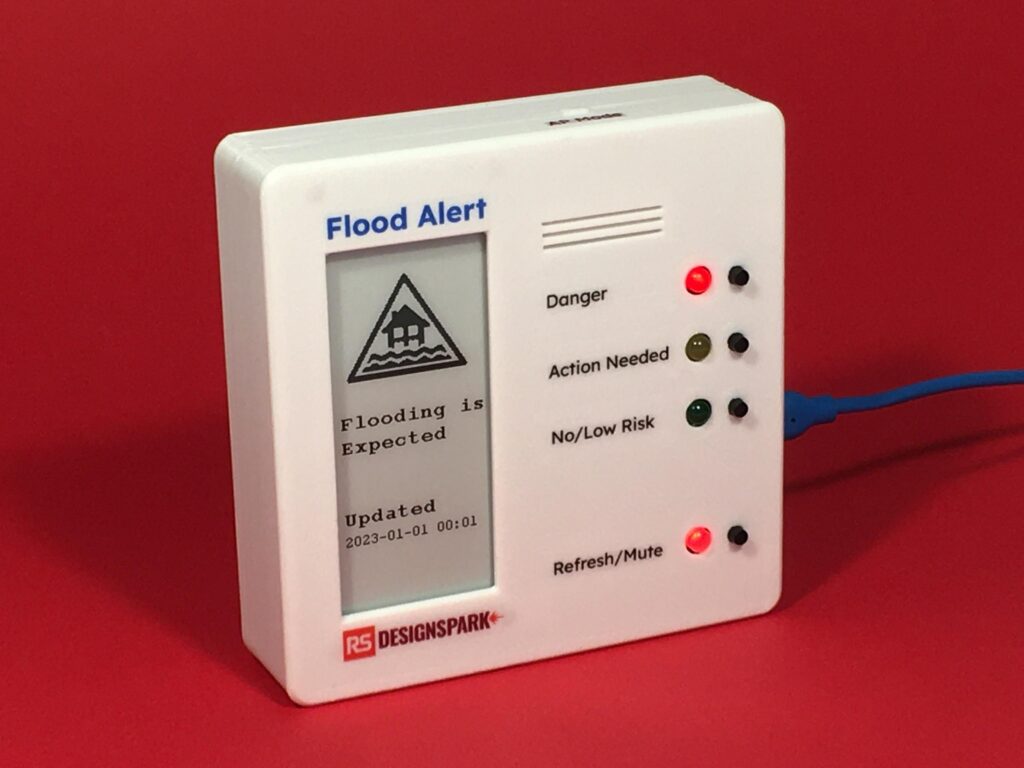
    As climate change continues to worsen, events such as heavy rains, hurricanes, and atmospheric rivers have only intensified, and with them, large amounts of flooding that pose serious risks to life and property. Jude Pullen and Pete Milne, therefore, have responded by creating a “physical app” that can show the potential for flood dangers in real-time with sound, lights, and an ePaper display.

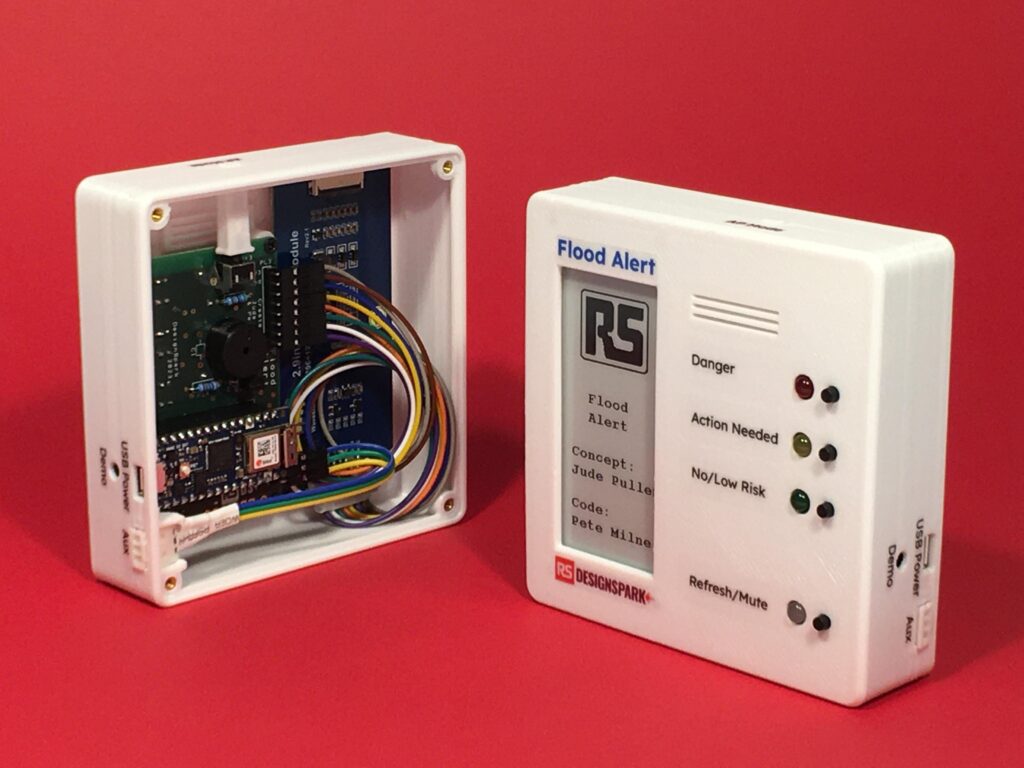
    The Arduino Nano 33 IoT powering the Flood Alert device sources its data from the UK Environmental Agency’s API to get statistics on an area’s latest risk level along with an extended description of what to expect. Initially, the electronics were mounted to a breadboard and housed within a cardboard enclosure, but a later revision moved everything to soldered protoboard, a 3D-printed case, and even added a piezoelectric buzzer to generate audible alerts.

    For now, the Flood Alert’s sole source of data is the aforementioned API, but Pullen hopes to expand his potential data sources to include “hyper-local” sensors that can all be aggregated and analyzed to give a much more precise view of flooding in a smaller area.

    [youtube https://www.youtube.com/watch?v=GEiZtaUzWaQ?start=6&feature=oembed&w=500&h=281]

    To learn more about Flood Alert and its myriad applications to local communities and beyond, check out Pullen and Milne’s well-detailed Instructables tutorial.

    The post Get notified of impending floods with this Arduino Nano 33 IoT-based display appeared first on Arduino Blog.

    Website: LINK

  • 7 powerful ways to integrate Collaborative Coding into education with the Arduino Cloud

    7 powerful ways to integrate Collaborative Coding into education with the Arduino Cloud

    Reading Time: 4 minutes

    Collaborative coding in education can be a game-changer for students, providing them with real-world skills in communication, teamwork, and problem-solving.

    With the new collaborating coding feature of the Arduino Cloud, students can collaborate in real time on coding projects, making it easier to test, integrate, and refine their work in the classroom or remotely.

    If you are on a paid Cloud School or Business plan and you have created a Shared Space, Collaborative Coding will already be enabled for you. Just open a sketch file from your organization space and start editing.

    You can purchase an Arduino Cloud School or Business plan on this page.

    How does Collaborative Coding work?

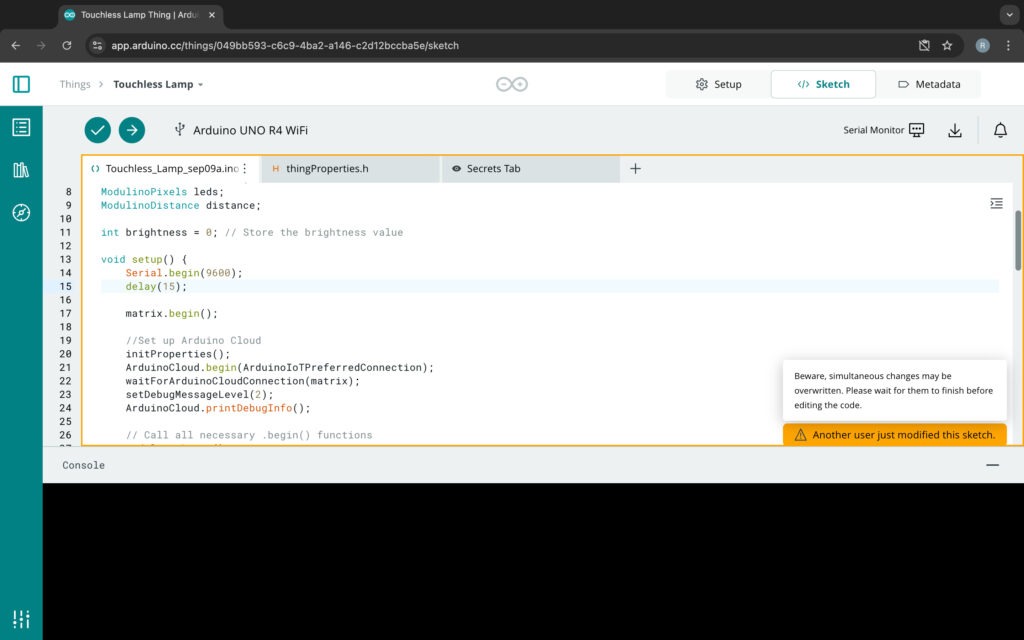
    Before, to edit a shared sketch, the user needed to make a copy to edit it, only the owner could edit the original sketch. Users could end up with many copies of the same sketch. Now, if you’re editing a shared sketch and another user tries to access it, they’ll get an instant notification in the lower corner of the Arduino Cloud Editor. Once you’re done or have uploaded the sketch, the other user can edit it.

    Below are seven ways that showcase how collaborative coding can enhance learning experiences in educational settings.

    1. Remote team projects

    In today’s increasingly connected world, remote collaboration has become a critical skill. By assigning students to a remote team project, such as building a smart greenhouse, educators can simulate real-world tasks. In this scenario, each student tackles a different component of the project: one works on coding for temperature sensors, another handles humidity control, while another focuses on pressure regulation.

    Through real-time collaboration tools, students can test and integrate their code seamlessly, making it easier to identify and resolve issues as they arise. This approach doesn’t just encourage communication and teamwork; it also gives students valuable exposure to the challenges of coordinating efforts across distances – a skill essential in modern engineering and tech careers.

    2. Peer learning and mentorship

    As the students code, mentors can provide immediate feedback, guide them through debugging, and teach best practices. This instant interaction accelerates learning by allowing students to correct mistakes as they occur and learn more efficiently. Mentors can also demonstrate advanced coding techniques, improving the overall skill set of junior students while fostering a supportive learning environment.

    3. Interdisciplinary projects

    A great way to incorporate collaborative coding is through interdisciplinary projects, which  bring together students from diverse fields like computer science, physics, and environmental science. Take a weather station project, for example. Each student can code different elements, and with the Collaborative Coding feature, they can seamlessly integrate their work into a unified system in real time. This setup not only helps students share their domain-specific knowledge but also prepares them for real-world scenarios where interdisciplinary collaboration is crucial.

    4. Classroom code review sessions

    Arduino Cloud simplifies live code review sessions. Teachers can use the platform to host collaborative peer reviews, where students suggest improvements and optimizations on each other’s code. The Collaborative Coding feature allows these suggestions to be implemented and tested instantly, creating an interactive learning experience. This real-time feedback helps students improve their coding skills by learning to write cleaner, more efficient code. It also exposes them to different problem-solving approaches.

    5. Hackathons and coding competitions

    Hackathons are a great way to encourage teamwork and creative problem-solving, with students having to work closely together under time constraints. The Collaborative Coding feature enables real-time teamwork, allowing students to brainstorm, write, and debug code simultaneously. This setup encourages effective communication and quick decision-making, which are crucial skills in high-pressure environments like coding competitions. Students also learn how to divide tasks, manage time, and integrate different components swiftly.

    6. Cross-school collaborative projects

    Collaborative coding doesn’t have to be limited to one classroom. By connecting students from different schools, you can promote collaboration on larger, more ambitious projects. For example, students from various schools could work on a shared environmental monitoring system, with each school responsible for different parts such as data collection, interface design, and system integration.

    Using the Collaborative Coding feature, they can integrate their code into a unified system in real time, learning from each other’s approaches and gaining exposure to different coding styles and experiences.

    7. Pair programming exercises

    In pair programming exercises, two students work together on a single coding task – whether that’s in the classroom or remotely. One student writes the code while the other reviews it in real time, and they switch roles regularly so both get hands-on experience with every part of the project.

    This technique encourages close collaboration and helps  students develop their communication skills and systematic debugging techniques. It also gives them the opportunity to learn from each other’s strengths and weaknesses, improving their overall coding abilities.

    Conclusion

    Integrating collaborative coding into the classroom can dramatically enhance the learning experience for students, giving them the skills they need to thrive in the modern workforce. From remote team projects and interdisciplinary work to peer mentoring and hackathons, these use cases demonstrate how coding can be both a collaborative and creative activity. By fostering teamwork, communication, and technical expertise, educators can prepare students for success in coding and beyond.

    The post 7 powerful ways to integrate Collaborative Coding into education with the Arduino Cloud appeared first on Arduino Blog.

    Website: LINK

  • Slot machine game harnesses the beauty of Nixie tubes

    Slot machine game harnesses the beauty of Nixie tubes

    Reading Time: 2 minutes

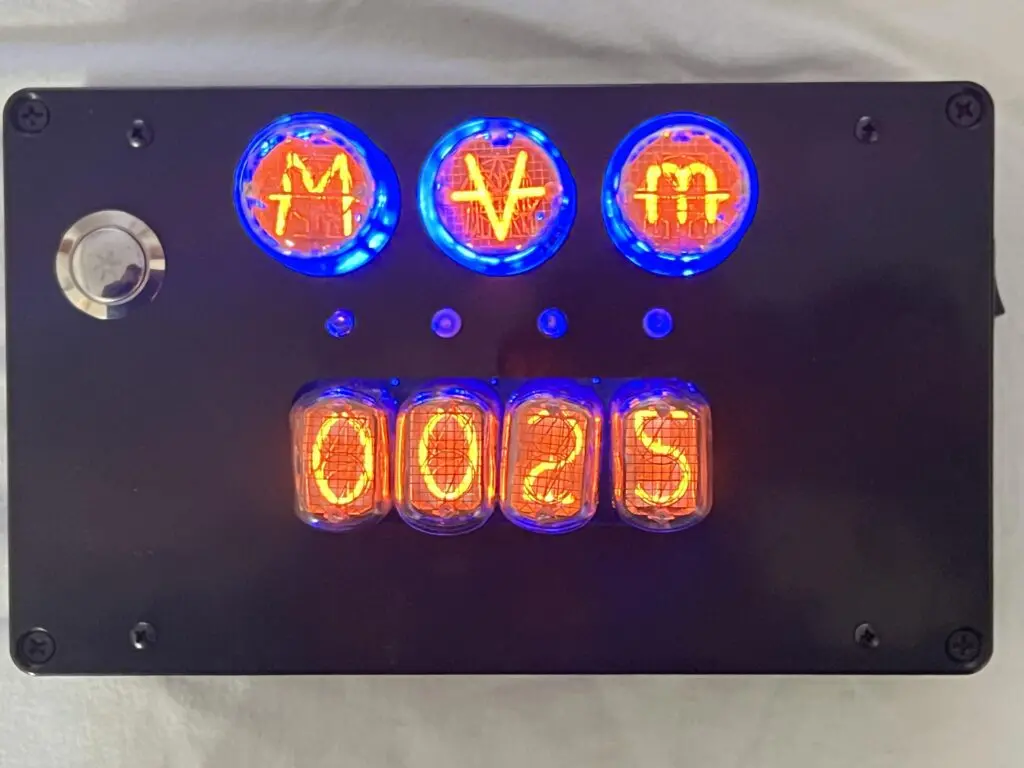
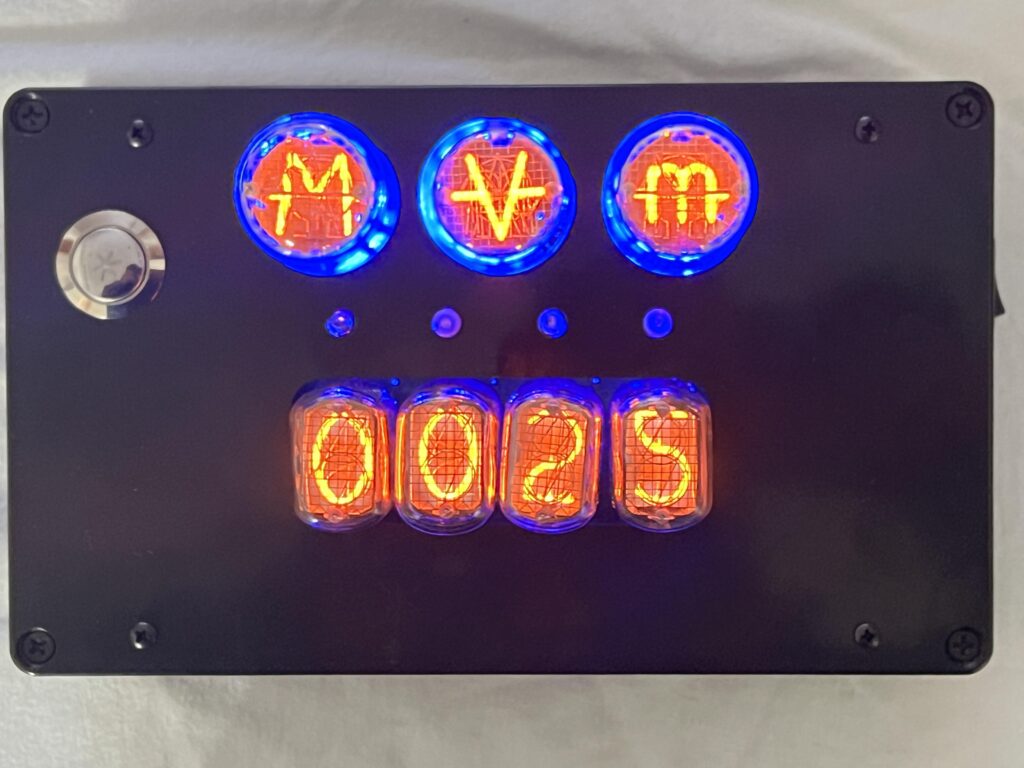
    Everyone loves the look of Nixie tubes, with their glowing orange characters made of curvy filament. But we usually only see makers using Nixie tubes for one purpose: clocks. That’s unfortunate, because they have a lot more potential, as illustrated by Bob Cascisa’s Nixie tube slot machine game.

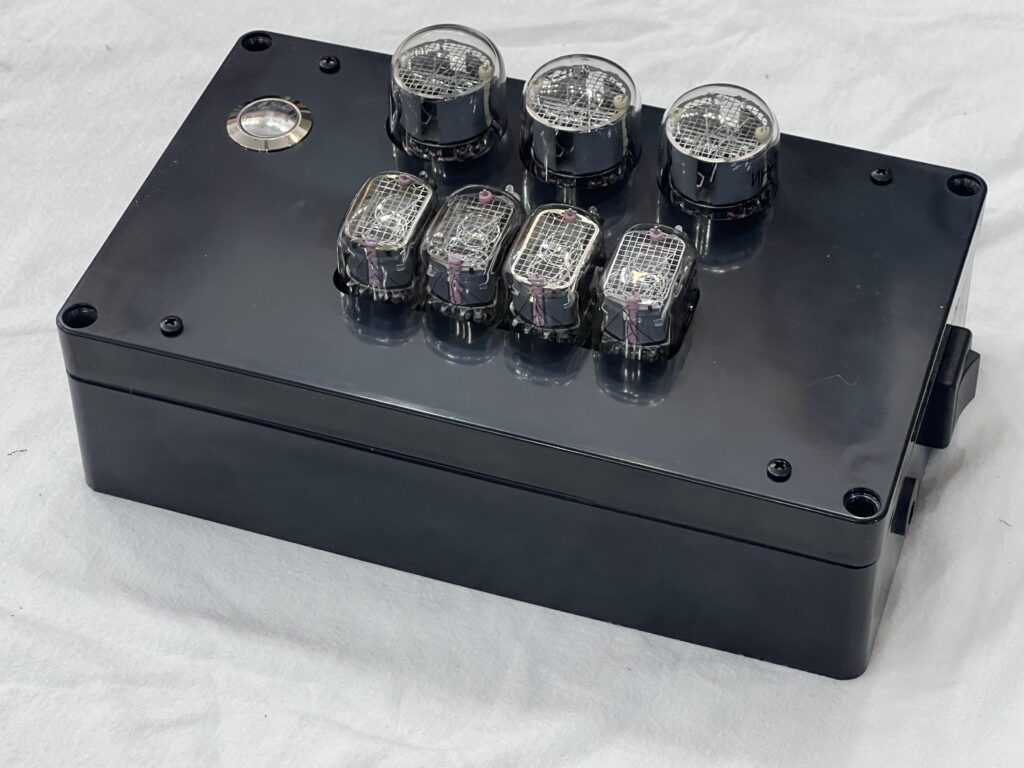
    This is a really delightful device that puts the slot machine experience into a handheld form factor, with a beautiful Nixie tube display. It has a single button to spin the “wheels,” and seven Nixie tubes to show the action. The top three Nixie tubes represent the wheels and they cycle through distinct symbols. The bottom four Nixie tubes show the player’s balance to keep track of payouts.

    The bottom Nixie tubes are IN-12 models, which are Soviet NOS (New Old Stock) models capable of displaying numeric digits. The top Nixie tubes are rarer IN-7 models that can display a handful of symbols that would be useful for lab instruments, such as ?. Cascisa chose those IN-7 tubes because their symbols have a more iconographic appearance than standard alphanumeric characters, which English-speakers would try to read.

    An Arduino Nano board controls the gameplay. It plugs into a custom PCB that Cascisa designed to house all of the components necessary to drive the Nixie tubes — a difficult job compared to modern LED and LCD displays. It requires a power supply that can provide high voltage to the Nixie tubes. Power comes from an 18650 battery pack inside the simple enclosure, with a charging port on the side. 

    By Vegas slot machine standards, the gameplay is pretty simple. But this unit’s Nixie tube display certainly looks much nicer than the retina-scarring graphics on those machines. 

    [youtube https://www.youtube.com/watch?v=zXMITZR9ciQ?feature=oembed&w=500&h=281]

    The post Slot machine game harnesses the beauty of Nixie tubes appeared first on Arduino Blog.

    Website: LINK