Schlagwort: arduino

  • Time Slider is an interesting spin on clock design

    Time Slider is an interesting spin on clock design

    Reading Time: 1 minute

    You can build a simple and accurate clock with any Arduino board, an RTC (real-time clock) module, and a four-digit seven-segment display. But if you want to be inspired by a more unique design, check out Hans Andersson’s Time Slider.

    This clever clock features four sliders — one for each digit of the time. Those sliders are 3D-printed frames which contain grids of “pixels” that are either open to make the backing visible, or closed to be black. They move up and down to whatever position is necessary to show the pixels necessary to form a numeric digit. The great thing about this design (aside from the interesting aesthetic), is that it is easy to scale up or down to whatever size the user wants.

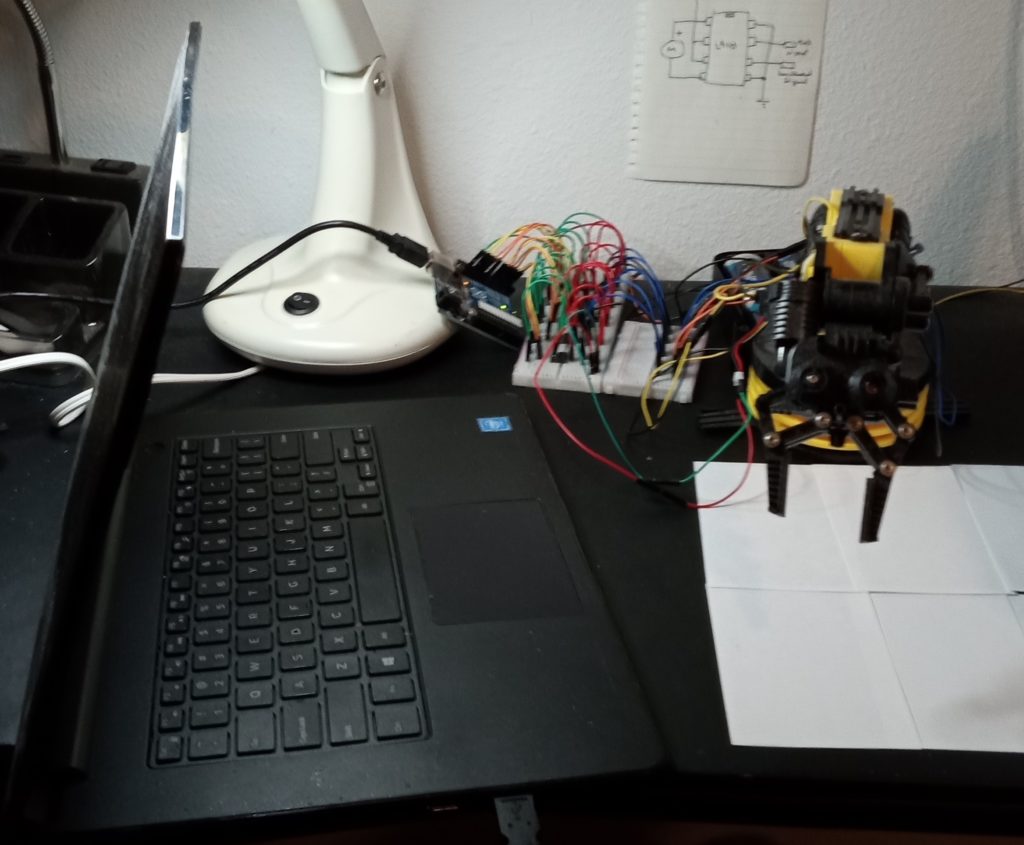
    The hardware components for this project include an Arduino Mega 2560 board, a DS3231 RTC module, eight ULN2003 motor drivers with 28BYJ-48 pancake stepper motors, wires, and a power supply. All of the mechanical parts are 3D-printable. Two stepper motors drive each slider to ensure smooth operation. There are not any buttons to set the time, so the user must configure that in the included sketch and then immediately upload the code during setup.

    The post Time Slider is an interesting spin on clock design appeared first on Arduino Blog.

    Website: LINK

  • Controlling a robot arm over the internet

    Controlling a robot arm over the internet

    Reading Time: 2 minutes

    For those with an interest in robotics, there is little in this world more enticing than a robot arm. A rover may be able to drive around, but so can a cheap RC car. A robot arm, on the other hand, can do real work, like stacking blocks or moving colored balls from one bin to another. But what if you want to control that robot arm over the internet? Engineer Zero has a nice tutorial explaining exactly how to do that.

    Engineer Zero started with a cheap OWI-535 “Robotic Arm Edge” kit, which isn’t much more than a toy. It comes with a cheap little controller that lets the user manually operate the arm, but that’s it. To upgrade it into a “real” robot arm, Engineer Zero connected its five motors to an Arduino Uno board through L9110 motor drivers. That let them control the robot arm from their computer and provided the potential for other kinds of control.

    In this case, the control that Engineer Zero was interested in was remote. Not just from across the room, but from anywhere in the world. They already had the Arduino connected to a cheap old laptop, so they just needed a way to interact with that laptop from afar. To accomplish that, they used a Google Chrome extension called Chrome Remote Desktop. When installed on the local computer’s and remote computer’s browsers, that extension lets the remote computer control the local computer — the remote computer being a second laptop. Engineer Zero can take that second laptop anywhere in the world with an internet connection, and they’ll be able to control their robot arm.

    The post Controlling a robot arm over the internet appeared first on Arduino Blog.

    Website: LINK

  • Digital barometer channels vintage aesthetics

    Digital barometer channels vintage aesthetics

    Reading Time: < 1 minute

    There are many reasons why you might want to know the local barometric pressure. Maybe you do long-range target shooting and want to know how it will affect your ballistic trajectory. Or maybe you want to evaluate the performance of an internal combustion engine. To find that information, you’ll need a barometer like this digital model built by Mirko Pavleski that channels vintage aesthetics.

    A traditional analog barometer looks a bit like a watch, with a dial readout. But many researchers wanted to record barometric pressure over time, and they would use a graphing instrument resembling a seismometer. Pavleski’s digital barometer replicates that functionality, showing barometric pressure over a period of 24 hours on an LCD bar graph. A numerical readout shows the total change over that period of time.

    The components for this project include an Arduino Nano, a BME280 temperature, humidity, and pressure sensor, and a 16×4 character LCD display. Normally, a display like this can only show alphanumeric characters, but Pavleski was clever and used custom character blocks to create the bar graph. The components reside inside of a PVC enclosure with self-adhesive wallpaper to give it a classic look.

    The post Digital barometer channels vintage aesthetics appeared first on Arduino Blog.

    Website: LINK

  • Controlling a model railroad with a vintage Atari ST

    Controlling a model railroad with a vintage Atari ST

    Reading Time: 2 minutes

    Back in the ’90s, Cyril Rossignol had a dream of controlling his model railroad with his computer. While that was possible at the time, it wasn’t easy and would have required some serious skill with hardware and programming. But today, thanks to development boards like those from Arduino, this is a much more accessible project. That’s how Rossignol was able to achieve his dream and control a model railroad with a vintage Atari ST.

    The Atari ST line of computers hit the market in the mid 1980s and featured mouse-controlled GUIs (graphical user interfaces). Rossignol recently found his vintage Atari 1040 STE while sorting through old belongings and realized that he could accomplish his dream from the ’90s using an Arduino as an intermediary between the computer and the model railroad. With a custom software interface programmed for the Atari, Rossignol was able to control his model locomotives from his computer.

    Rossignol’s model railroad features DCC (Digital Command Control), which controls the amount of power and its polarity going to the tracks, as well as switches. Rossignol just needed a way for his Atari to communicate with the DCC. For that, he chose an Arduino Mega 2560 board. The Atari talks to the Arduino via an RS232-to-TTL converter, and the Arduino, in turn, talks to Rossignol’s DCC-EX via I2C.

    This setup was a success and now Rossignol can operate his trains with his Atari, just like he envisioned 30 years ago.

    The post Controlling a model railroad with a vintage Atari ST appeared first on Arduino Blog.

    Website: LINK

  • A DIY peristaltic pump controlled by an Arduino

    A DIY peristaltic pump controlled by an Arduino

    Reading Time: 2 minutes

    There are many different fluid pumping mechanisms to choose from, but the peristaltic pump is a great choice when you don’t want the liquid to contact any moving parts. That is ideal for beverage dispensers and medical equipment, because the liquid only touches the tube it runs through and that is easy to clean or replace. If you want to build your own peristaltic pump, YouTuber Mr Innovative created a DIY design that utilizes an Arduino for precise control.

    A peristaltic pump works by pushing the liquid through a flexible tube. Inside the pump there are rollers that spin while pushing against the tube, forcing the liquid (or air) along. The rollers only make contact with the outside of the tube, so there is no risk of contamination. To clean the inside of the tube, one only needs to run a solution through the pump. If contamination is a serious concern, as would be the case for medical equipment, it is easy and affordable to replace the entire tube.

    Mr Innovative kept this DIY peristaltic pump design simple. The 3D-printed pump housing mounts onto a stepper motor, which turns the rollers. Those rollers are three skate bearings mounted in a triangular formation. The flexible tube runs through the housing around the outside of the rollers. As with other projects from Mr Innovative, this uses an Arduino Nano mounted onto a custom driver board to control the stepper motor. A Nextion LCD touchscreen lets the user enter how much liquid to pump. To calibrate that, the user simply runs the pump for one minute and measures the amount of liquid pumped during that time.

    The post A DIY peristaltic pump controlled by an Arduino appeared first on Arduino Blog.

    Website: LINK

  • Detecting falls by embedding ML into clothing

    Detecting falls by embedding ML into clothing

    Reading Time: 2 minutes

    Bone density, strength, and coordination all decrease as we age, and this fact can lead to some serious consequences in the form of slips, falls, and other accidents. In Finland, falling is the most common type of accidental death among those age 65 and over, amounting to around 1,200 per year. But Thomas Vikstrom hopes to decrease this number by detecting falls the moment they occur through the use of the Arduino Nicla Sense ME’s accelerometer together with a K-Way jacket and a smartwatch.

    At first, Vikstrom tried to gather and label data for all kinds of activities, including sitting, walking, running, driving, etc., but later realized anomaly detection would be much better suited for this application. After collecting around 80 seconds of data with Edge Impulse Studio, he trained an anomaly detection model to detect when any out-of-the-ordinary events occur. The model was then deployed to the Nicla Sense ME by integrating the inferencing code with a BLE service that outputs a positive value when a fall is detected, as well as illuminating the onboard LED.

    To receive this information, Vikstrom added a Bangle.js 2 smartwatch to the system which automatically calls an emergency number if the wearer fails to intervene. For more details, you can check out his Edge Impulse docs page here. Although only a proof of concept, this K-Way project demonstrates how tinyML-powered outerwear can be used to detect falls, and together with cellular network devices send for help in case the user is immobile.

    The post Detecting falls by embedding ML into clothing appeared first on Arduino Blog.

    Website: LINK

  • James Bruton improves his triangle-tracked tank

    James Bruton improves his triangle-tracked tank

    Reading Time: 2 minutes

    Tanks are already quite maneuverable, because the tracks allow them to rotate in place. But what if they were even more maneuverable and could drive in any direction? About a year ago, James Bruton built a small robot tank that had that capability thanks to a triangle-shaped track system with omniwheel-style rollers. But it had trouble climbing over obstacles, so Bruton redesigned his omnidirectional Triangle Tank in his newest video.

    The overall concept is the same as the original: three tank tracks arranged in a triangle formation contain rollers perpendicular to the track direction. The rollers let the tracks slide freely side-to-side, but provide grip when the track moves forward or backward. With three of those tracks, the robot can move in any direction by vectoring the relative rotational speeds. The original design struggled, because it couldn’t get traction unless it was flat on the ground. The new design has three differences to address that: trapezoidal tracks, a sort of pivoting suspension system, and dual rollers positioned on the outsides of the tracks.

    Bruton 3D-printed all of the parts, with the exception of the hardware and electronic components. Those components include an Arduino Mega 2560 board, an OrangeRX DSM radio receiver, and a trio of motor drivers. Power comes from a hobby LiPo battery pack and Bruton can use his custom DSM radio transmitter for control.

    The new Triangle Tank proved to be much more capable than the first version. While it isn’t quite as adept as a regular tank, it is far more maneuverable and does a pretty good job of clearing obstacles.

    The post James Bruton improves his triangle-tracked tank appeared first on Arduino Blog.

    Website: LINK

  • This little robot helps fight fires

    This little robot helps fight fires

    Reading Time: 2 minutes

    Firefighting is a dangerous profession, but it is possible to mitigate some of that danger with good data. When firefighters entered a burning building, their biggest fear is the unknown. They don’t know if they can trust the structural integrity of the building, if there is a pocket of toxic or explosive gas, or how to navigate the interior to find casualties. As part of a project called HelpResponder, a team of researchers from Universidad Rey Juan Carlos and Universidad Autónoma de Madrid created a robot that can enter a building to gather the data firefighters need to do their job safely.

    This robot, which is a mid-sized rover, can operate via manual control or in an autonomous mode. In both cases, its job is to explore buildings, either during a fire or after a disaster, to map the interior and find hazards. Its camera system allows for visual detection, but it also has a host of integrated sensors for detecting elevated temperatures, gas pockets, and more. With that information, firefighters can then enter the building and rescue anyone trapped inside while avoiding hazardous areas or bringing the equipment necessary to deal with them.

    Control and monitoring happens on two levels. At the high level, a Raspberry Pi 4 Model B single-board computer records video, handles mapping operations, and coordinates autonomous navigation. At the low level, an Arduino UNO WiFi Rev.2 collects incoming sensor data and controls the motor driver. The onboard sensors include a temperature/humidity sensor, an air quality sensor, and ultrasonic sensors for navigation. Thanks to a modular design, additional hardware can be added to fit specific scenarios.

    The team plans to continue improving the robot, particularly its autonomous operation mode. But they’ve already tested it in simulations and the real world with positive results. More details on the HelpResponder can be found in their paper here.

    Image credit: Fernández Talavera et al.

    The post This little robot helps fight fires appeared first on Arduino Blog.

    Website: LINK

  • This original video game console features a VFD

    This original video game console features a VFD

    Reading Time: 2 minutes

    VFDs (vacuum fluorescent displays) were common a few decades ago and have a nice, distinct glow that many find appealing. But like Nixie tubes and CRTs, VFDs have are outdated and almost obsolete at this point. They can’t come close to matching the price or functionality of modern LCD and OLED screens, but they still have a lot of charm. Simon Boak harnessed that charm when he built this custom video game console that features a VFD.

    This console is 100% custom and looks fantastic. It has two parts: the display and the controller. Both have enclosures made of formed sheet metal and wooden side panels, which enhance the retro aesthetic. Users can run Conway’s Game of Life, play a snake game, watch a snow animation, or draw within a painting program. If the user wants to keep their art, they can save it to EEPROM for later viewing.

    Boak originally planned to build this as a custom 6502 machine and program everything in Assembly, but realized that that plan was a bit too ambitious. Instead, he built this console around an Arduino Nano board. The screen is a Noritake Itron Gu20x8, which can display three different colors across the 20×8 grid of pixels. The controller uses an array of push buttons and there is a piezo buzzer for sound effects.

    While the current game/program selection is limited, Boak now has a console for which he can develop as many games as he likes.

    The post This original video game console features a VFD appeared first on Arduino Blog.

    Website: LINK

  • Monitoring hospital bed occupancy with an Arduino Nano 33 BLE Sense

    Monitoring hospital bed occupancy with an Arduino Nano 33 BLE Sense

    Reading Time: 2 minutes

    In care facilities and hospitals, being able to tell when beds are occupied or free is vital knowledge for the staff, as they can move onto other tasks more quickly with up-to-date information. Adam Milton-Barker’s hospital bed occupancy detection system aims to accomplish this goal by combining embedded machine learning models and connected hardware for gathering real-time data.

    Milton-Barker’s first step was to create a new Edge Impulse project and add several samples of himself either getting into bed for an occupied status or standing up to indicate a vacancy by taking continuous measurements from a Nano 33 BLE Sense’s built-in accelerometer, gyroscope, and magnetometer. Once passed through a spectral analysis block, the resulting nine-channel data was used to train a classification model that could accurately detect when a person either gets in or out of bed, or for a lack of general activity.

    The resulting model was exported as an Arduino library and added to a custom sketch that fuses the readings from each of the sensors’ three axes and passes it through the same spectral analysis block and the now-trained model to receive an inference.

    In his project write-up, Milton-Barker speculates that this solution could be further extended by leveraging the Arduino’s onboard LEDs, Bluetooth connectivity, and recognizing more motions.

    The post Monitoring hospital bed occupancy with an Arduino Nano 33 BLE Sense appeared first on Arduino Blog.

    Website: LINK

  • All aboard the java train!

    All aboard the java train!

    Reading Time: 2 minutes

    These days, everyone seems to turn to robots for automating tasks in the physical world. But robots are often clumsy and unreliable — not to mention expensive. Trains, on the other hand, are famous for their reliability. With that in mind, YouTuber James Whomsley designed a model train railway to bring coffee from his kitchen to his desk.

    Whomsley’s home office is downstairs, but his coffee machine is upstairs in his kitchen. He didn’t want to make that trek every time he needed caffeine, so he constructed a model railroad track that traverses the distance. When he wants a coffee, he activates the train. It leaves his desk carrying an empthy mug on a car, goes to the kitchen, stops at the coffee machine, starts the brewing process, waits until the mug is full, then returns to the desk. That is simple in theory: an Arduino Uno board at each end detects the train and controls power to the rails. But the stairs posed a real challenge.

    Model trains receive their power through the tracks, which means that those tracks must make a complete electrical circuit. To move the train on an elevator up and down the stairs, Whomsley had to find a way to break the circuit and then reconnect it. Once again, an Arduino detects the presence of the train. When it does, it activates a motor in a LEGO elevator lift mechanism. That starts moving the elevator platform either up or down, which breaks the circuit. When the lift reaches the top or bottom, it touches contacts to complete the circuit, which restores power and lets the train continue on its journey to deliver bean juice.

    The post All aboard the java train! appeared first on Arduino Blog.

    Website: LINK

  • Small, MKR WAN 1310-powered device monitors CO2 levels in classrooms

    Small, MKR WAN 1310-powered device monitors CO2 levels in classrooms

    Reading Time: 2 minutes

    Humans are animals and like all animals, we evolved in mostly outdoor conditions where the air is nice and fresh. But modern society keeps most of us indoors the vast majority of the time, which could have negative health effects. There are many potential hazards, including a lack of sunlight and psychological effects, but CO2 may pose a more tangible risk. To keep tabs on that risk within classrooms, a team from Polytech Sorbonne built this small CO2 monitor.

    This CO2 monitor performs two functions: it shows anyone nearby the CO2 levels in the area and it uploads that data over LoRaWAN to a central hub that can track the levels across many locations. A school could, for example, put one of these CO2 monitors in every classroom. An administrator could then see the CO2 levels in every room in real time, along with historical records. That would alert them to immediate dangers and to long term trends.

    At the heart of this CO2 monitor is an Arduino MKR WAN 1310 development board, which has built-in LoRa® connectivity. It uses a Seeed Studio Grove CO2, temperature, and humidity sensor to monitor local conditions. To keep power consumption to a minimum, the data displays on an e-ink screen and an Adafruit TPL5110 timer only wakes the device up every ten minutes for an update. Power comes from a lithium-ion battery pack, with a DFRobot solar charger topping up the juice.

    It uploads data through The Things Network to a PlatformIO web interface. An Edge Impulse machine learning model detects anomalies, so it can sound a warning even if nobody is watching. The enclosure is 3D-printable.

    The post Small, MKR WAN 1310-powered device monitors CO2 levels in classrooms appeared first on Arduino Blog.

    Website: LINK

  • Adorable model trolley livens up a garden

    Adorable model trolley livens up a garden

    Reading Time: 2 minutes

    Model railroading is a popular hobby going back more than a century, but which has remained largely unchanged for many decades now. The typical model railroad uses an electric locomotive with a motor powered through the rails by DC current, with the polarity of the power supply determining direction and voltage determining speed. But development boards, like Arduinos, open up new possibilities, as demonstrated by this adorable, Mister Rogers-esque model trolley that moves back and forth across a garden.

    This looks like the kind of trolley you might see traversing cities like San Francisco. It endlessly crosses a rail between two “stations” a few feet apart in a garden, while playing sound effects. A standard model railroad would require manual control to change directions, but this railroad has automatic polarity reversal.

    An Arduino controls the power going to the rails through an Adafruit Motor Driver Shield. It monitors infrared sensors at the ends of the track, inside the stations, to detect the presence of the trolley and then reverses the polarity. It also plays sound effects through an Adafruit Audio FX Sound Board. And like with any good model railroad, a lot of effort went into making the stations look realistic. It is a fun way to liven up a garden that doesn’t need constant oversight.

    The post Adorable model trolley livens up a garden appeared first on Arduino Blog.

    Website: LINK

  • Instantly understand 40+ languages, with Speech Recognition Engine

    Instantly understand 40+ languages, with Speech Recognition Engine

    Reading Time: 2 minutes

    Voice commands are a contactless, hands-free, natural way to interact with devices, equipment, and machines of all kinds: no wonder they are increasingly popular! With speech recognition technology advancing faster than you can say “users expect it,” developers often need to find ways to integrate it in their new projects. This, however, requires them to take the time to train a smart device to listen for wake-up words, understand commands… and potentially start over for every new voice or language.

    To cut through all the hassle and help you integrate speech recognition in the easiest and fastest way, Arduino Pro has released Speech Recognition Engine: a powerful, ready-to-use and extensive software library born out of the collaboration with worldwide leader in the field, Cyberon.

    Let’s break it down:

    • Widely compatible: Speech Recognition Engine is compatible with various Arduino Nano and Portenta boards as well as with the Arduino IDE, and requires no additional hardware, software or internet connectivity. Integrate it in any new or existing project you have in mind.
    • Zero training time: Because it uses text input to define voice commands, Speech Engine Recognition translates what you say into instant results, with flexibility over the speaker’s actual voice, tone or accent.
    • It speaks your language: Its AI/ML engine understands commands in 40+ languages. This means you can quickly configure multiple wake-up words and sequences, in any major language spoken in the world.
    • Great for multiple users: With Speech Recognition Engine, your next smart device will be able to listen to different people without skipping a beat, making it perfect for applications ranging from information kiosks, vending machines and lockers, smart beds in hospitals, emergency call systems, and more. Its ability to filter background noises makes it especially suitable for public spaces and busy factory floors.
    • Industrial-grade performance: As part of Arduino Pro’s growing ecosystem of advanced professional solutions, Speech Recognition Engine was developed for industrial and building automation applications such as hands-free control of machinery, equipment, and devices of all kinds.

    You can find out more details from the dedicated page. Or, if you’ve had enough of the talk and want to quickly and effortlessly integrate speech recognition in your next project, head to the Arduino Store and get started with the Speech Engine Recognition library!

    The post Instantly understand 40+ languages, with Speech Recognition Engine appeared first on Arduino Blog.

    Website: LINK

  • Arduino Nano Every brings Knight Rider sound effects to Knight Rider RC car

    Arduino Nano Every brings Knight Rider sound effects to Knight Rider RC car

    Reading Time: 2 minutes

    KITT (Knight Industries Two Thousand) was a fictional car based on a 1982 Pontiac Trans Am in the Knight Rider television series. KITT featured an artificial intelligence, voiced by the legendary William Daniels, and some iconic styling. Savall21 built a replica RC KITT and used Arduino boards to add sound and light effects that he can trigger with the RC transmitter.

    This is a custom RC car created by Savall21 using a Tamiya TT-02 kit and a resin 3D-printed body shell. The controller/transmitter is a Jumper T18, which has a customizable touchscreen interface. Savall21 programmed his own widget for that touchscreen. It mimics the fictional KITT control panel and lets the user select different sound effects and activate the iconic headlights. The T18 sends commands to an FrSky XR8 radio receiver located in the car.

    The FrSky receiver communicates with two Arduino Nano Every boards via the S.Port. The first Arduino controls the sound effects, which play through a DFPlayer Mini MP3 player module. The FrSky receiver simply sends a numerical code to the Arduino, which then activates the corresponding audio clip. The second Arduino drives a strip of WS2812B individually addressable RGB LEDs for the headlights and taillights. The user can control the headlights directly, while the taillights automatically come on any time the throttle is below 50%.

    For fans of Knight Rider and RC vehicles, this is the ultimate project. The car looks fantastic and the Arduino effects add polish to the build.

    The post Arduino Nano Every brings Knight Rider sound effects to Knight Rider RC car appeared first on Arduino Blog.

    Website: LINK

  • The Protector is a life-saving wearable packed with intelligent sensors

    The Protector is a life-saving wearable packed with intelligent sensors

    Reading Time: 2 minutes

    Exercising outdoors is great for our general health and mental wellbeing, but it also carries some risks that are not always apparent, such as bad air quality, incoming storms, or simply falling down. To assist in tracking these environmental parameters and overall physical activity, Christopher Mendez Martinez created a small wearable device he calls “the Protector.”

    Built using the Arduino Nicla Sense ME, the Protector integrates into pendant hanging around a K-Way jacket’s zipper that can use its onboard sensor suite to read data such as temperature, humidity, pressure, CO2, and air quality. Christopher was able to add activity detection by gathering accelerometer data of falling, standing still, and walking before importing the labeled samples into the Edge Impulse Studio. From here, he trained a motion recognition model and deployed it back to the Nicla Sense ME as an Arduino library.

    Beyond just the hardware, Martinez also developed his own accompanying mobile app which connects wirelessly to the Nicla Sense ME over Bluetooth®. The app constantly receives new data from the board, including the current activity, pressure, and air quality readings. It then displays all of these values in a convenient dashboard along with a map that plots where data has been recorded on a map.

    For more information on the project, you can read Martine’z Hackster.io write-up here and check out his demo below.

    The post The Protector is a life-saving wearable packed with intelligent sensors appeared first on Arduino Blog.

    Website: LINK

  • This 3D-printed robot is made for sumo battle tournaments

    This 3D-printed robot is made for sumo battle tournaments

    Reading Time: 2 minutes

    While the majority of makers are unable to afford the fancy equipment and components that go into modern state-of-the-art battle robots, there do exist lesser-known tournaments for more DIY designs, including sumo robot battles. Instructables user noclaf8810373’s design incorporates all of the high-powered components one would expect to find, along with an innovative defense mechanism.

    Construction of the robot began by 3D printing nearly everything from ABS filament due to its strength and resistance to high temperatures, whereas nylon was used in the gear. Once cleaned up, a series of strong magnets were set into both the front blade and undercarriage to assist in preventing the robot from flipping over due to an opposing robot. Internally, a pair of motors drive the wheels through several gears for increased torque, and they are both controlled by an Arduino Micro. In this case, the microcontroller’s role is to take incoming data from the radio transmitter, convert it into commands, and set the motors accordingly.

    After assembling the electronic components, including the Arduino, motor drivers, and large capacitors onto a piece of perfboard, they were securely fastened inside the robot’s interior compartment. To see more about the build process, you can check out the project’s write-up here on Instructables.

    The post This 3D-printed robot is made for sumo battle tournaments appeared first on Arduino Blog.

    Website: LINK

  • Using sensor fusion and tinyML to detect fires

    Using sensor fusion and tinyML to detect fires

    Reading Time: 2 minutes

    The damage and destruction caused by structure fires to both people and the property itself is immense, which is why accurate and reliable fire detection systems are a must-have. As Nekhil R. notes in his write-up, the current rule-based algorithms and simple sensor configurations can lead to reduced accuracy, thus showing a need for more robust systems.

    This led Nekhil to devise a solution that leverages sensor fusion and machine learning to make better predictions about the presence of flames. His project began with collecting environmental data consisting of temperature, humidity, and pressure from his Arduino Nano 33 BLE Sense’s onboard sensor suite. He also labeled each sample either Fire or No Fire using the Edge Impulse Studio, which was used to generate spectral features from the three time-series sensor values. This information was then passed along to a Keras neural network that had been configured to perform classification, resulting in an overall accuracy of 92.86% when run on real world test samples.

    Confident in his now-trained model, Nekhil deployed his model as an Arduino library back to the Nano 33 BLE Sense. The Nano sends a message over its UART pins to an awaiting ESP8266-01 board when a fire has been detected. And in turn, the ESP8266 triggers an IFTTT webhook to alert the user via an email.

    If you would like to learn more about the construction of this fire recognition system, plenty of details can be found on the project page.

    The post Using sensor fusion and tinyML to detect fires appeared first on Arduino Blog.

    Website: LINK

  • Iana’s smart glove in real life

    Iana’s smart glove in real life

    Reading Time: 2 minutes

    Rainbow Six is a series of tactical shooter video games dating back to 1998. The series contains many individual titles set in various points of time, from historical wars to fictional futures. Rainbow Six Siege (2015) is set in the future and the character Iana has the ability to project a virtual clone of herself, which she controls using a smart glove. For his most recent project CiferTech recreated Iana’s smart glove.

    This replica of Iana’s smart glove can control a variety of devices and isn’t intended for any specific purpose. It looks just like the smart glove from Rainbow Six Siege and is a real, functional wearable device. It monitors the movement and orientation of the user’s hand, as well as the positions of their index finger and middle finger. Via radio communication, the user can use their hand and fingers to control any device with a compatible radio receiver.

    CiferTech modeled the smart glove to match what is seen in the game and then 3D-printed the parts. Inside the enclosure is an Arduino Nano board, an MPU-6050 accelerometer/gyroscope sensor to monitor hand movement, and an nRF24 radio transceiver module for communication. Two potentiometers on the finger linkages monitor finger position. The user just needs to equip the end device with another nRF24 module for radio control.

    The post Iana’s smart glove in real life appeared first on Arduino Blog.

    Website: LINK

  • Plotting AI-generated art onto paper

    Plotting AI-generated art onto paper

    Reading Time: 2 minutes

    AI-generated art is all the rage right now, thanks to widespread sharing on social media. The appeal is obvious: anyone can utilize an online service to create a unique (and often hilarious) piece of art based on a simple prompt. To display that art, one can utilize a high-quality printer or a digital photo frame. Or they can follow the lead of Eric Oaks, who built this pen plotter named “Drew” that draws AI-generated art onto paper.

    This pen plotter works with DALL-E 2, which is a popular AI art generator model from OpenAI. Like most AI art models, DALL-E 2 costs money to use. But OpenAI gives users 50 free credits to start and another 15 free credits each month. Oaks utilizes the DALL-E 2 API to generate a new piece of art using the credits he has available, then plots that image onto paper.

    The pen plotter in question is a DIY machine that Oaks constructed using linear rails, stepper motors, and an Arduino Uno board with a CNC Shield that runs Grbl firmware. The computer connected to the Arduino takes the DALL-E 2-generated art in bitmap format and converts it to vector art, which contains line paths. It then translates those line paths into g-code that the Grbl firmware can understand, so the plotter can draw the lines.

    This works really well for art pieces that look good as line art. Oaks even created a one-player Pictionary mode, in which the player can try to guess the randomly chosen prompt used to generate a piece of art.

    The post Plotting AI-generated art onto paper appeared first on Arduino Blog.

    Website: LINK

  • A CNC pen plotter with very unusual kinematics

    A CNC pen plotter with very unusual kinematics

    Reading Time: 2 minutes

    The vast majority of automated, CNC-controlled machine tools utilize a kinematic motion system that is (not coincidentally) the easiest for people to wrap their heads around. This is your standard Cartesian layout, in which the tool head rides on linear rails along two or three axes. But there are many other kinematic systems, especially once you start utilizing advanced trigonometry. One example of that comes from Mike Barkelew’s Scribble Buddy CNC Pen Plotter.

    Almost every other pen plotter you’ll see will have standard Cartesian kinematics: two stepper motors, two belts, and two linear rails/rods. Scribble Buddy is a lot different. It has a kinematic system that resembles the parallelogram linkage that you’ll see on something like a pantograph, but with the two linkage ends attached to motorized wheels. By rotating those wheels to specific angles, the machine can change the geometry of the linkage and move the pen to any location within the work area. The downside is that it can’t draw perfectly straight lines. The benefit is that it is interesting and cool.

    Scribble Buddy’s structure is a combination of wood and 3D-printed mechanical parts. On the electronics side, it uses an Arduino Mega 2560 board to control the two wheel stepper motors and the servo motor that lifts the pen. Hall Effect sensors give Scribble Buddy closed-loop feedback for precise positioning. The control interface consists of an LCD screen, a sliding potentiometer, a rotary encoder, and a joystick. Scribble Buddy accepts standard G-code and uses formulas to convert the commands into wheel rotation that works for this kinematic system.

    From a practical perspective, Scribble Buddy has very little utility. But it is always great to see makers experimenting with different kinematics.

    The post A CNC pen plotter with very unusual kinematics appeared first on Arduino Blog.

    Website: LINK

  • Arduino Project Hub: Share and compete in Project of the Month!

    Arduino Project Hub: Share and compete in Project of the Month!

    Reading Time: 2 minutes

    After the successful launch of the new Project Hub at the end of last year, we are ready for a new challenge and the opportunity for you to be rewarded for your awesome work.

    Starting February 1st, we are launching a new ‘Arduino Project of the Month’ competition for everyone in our community.

    Simply share your best project on the new Project Hub.

    Every month, our team will then select up to three projects and their creators will receive fabulous gifts!

    • First selected will receive a gift card worth $500.
    • Second selected will receive a gift card worth $300
    • Third selected will receive a gift card worth $100.

    (Gift cards can only be redeemed on the Arduino Store.)

    We will officially start considering projects uploaded after February 1, 2023.

    Please keep in mind the general rules to enter the competition:

    • All the participants must be 18+ years of age.
    • All projects accepted for Project Hub will be evaluated by the Arduino Team. If your project is shortlisted you will be contacted with further instructions.
    • Please make sure that you are uploading your project using your Arduino account. Projects submitted using Hackster.io accounts will not be accepted.
    • The Arduino team will evaluate the projects based on the quality of the project itself, not on the number of projects a user updates. But obviously the more projects you add, the more you increase your chances of  being selected.
    • Projects submitted by companies won’t be considered part of this competition.
    • The Arduino Team is solely responsible for monthly selection(s). Each selection is final and will not be amended.
    • Projects can only be submitted to the challenge once. It is not permitted to delete a project and then re-submit it again in the following month(s).
    • Complete Terms and Conditions can be found here.

    So, what are you waiting for? Upload your project on the new Arduino Project Hub for a chance to receive a $500 gift card to help make your next project even more amazing!

    The post Arduino Project Hub: Share and compete in Project of the Month! appeared first on Arduino Blog.

    Website: LINK