Schlagwort: arduino

  • Arduino and Silicon Labs team up to make the Matter protocol accessible to all

    Arduino and Silicon Labs team up to make the Matter protocol accessible to all

    Reading Time: 3 minutes

    The world of IoT just got more exciting: Arduino and SiLabs unveil plans for Matter protocol integration.

    In a groundbreaking development for IoT enthusiasts and professionals alike, Arduino and Silicon Labs (SiLabs) have announced a collaboration that promises to revolutionize access to the Matter protocol. This initiative is set to unfold in two major phases, ushering in a new era of connectivity and innovation.

    Phase one: The dawn of a new era in IoT development begins at CES 2024

    At CES 2024, Arduino and SiLabs have revealed the first phase of their ambitious project. This phase marks the release of an extremely user-friendly Arduino library tailored for the Matter protocol, alongside the Arduino core for SiLabs microcontrollers. This integration into the Arduino IDE is a significant leap forward, making advanced IoT development more accessible than ever.

    “Our partnership with Arduino brings simplicity and ease of use to wireless development for Silicon Labs developers as well as Arduino’s 40M users to take their project from concept to production,” said Rob Shane, VP of Global Mass Markets for Silicon Labs. “By integrating Matter with Arduino’s ecosystem, we’re opening a universe of possibilities for developers.” 

    This announcement is not just about new tools; it’s a statement of intent to make IoT technology more accessible to a wider range of users, from hobbyists to professionals.

    Get started now: Use existing Matter boards

    In anticipation of the second phase, the Arduino community can begin experimenting with Matter protocol through existing boards. Our friends at SparkFun have provided an excellent platform for this purpose, allowing users to get a head start in exploring the potential of Matter with Arduino.

    You can download the new core right now to start experimenting with the Silabs xG24 Explorer Kit and the Sparkfun Thing Plus Matter.

    “We are thrilled with the continued adoption of Matter to support IoT applications. The Matter implementation in Arduino has been a massive undertaking and it will make Matter even more accessible for engineers, creators, and innovators across the globe. This is another major step forward in interoperability and improving our daily interactions with the devices we have come to reply upon.” – Glenn Samala, CEO at SparkFun

    Phase two: The launch of a revolutionary board ads to Arduino Day celebrations

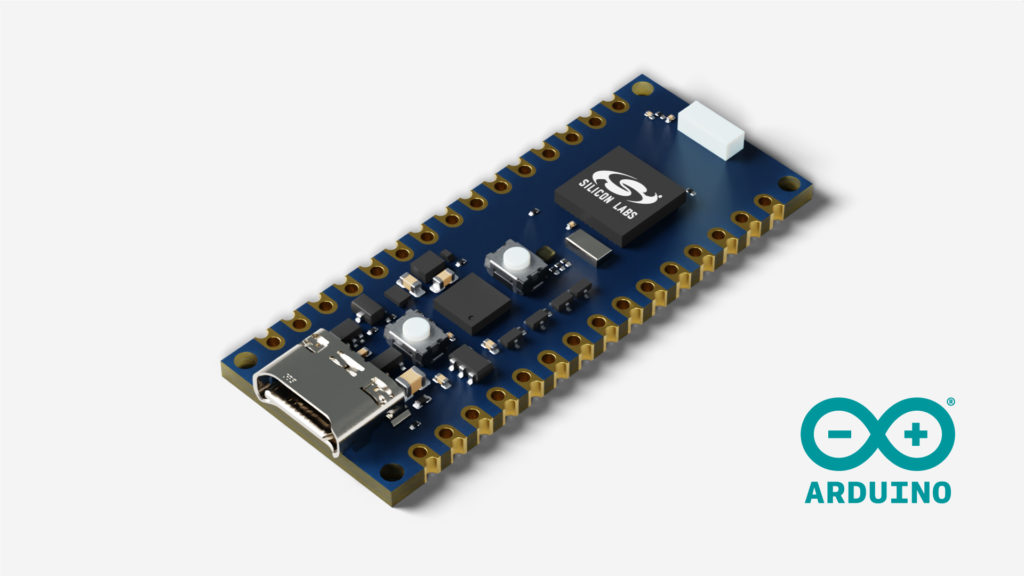
    The second phase is set to culminate on Arduino Day, in March 2024, with the release of an innovative addition to the über-popular Nano family, with a board based on the SiLabs MGM240SD22VNA. This board is expected to be a game-changer in the field of IoT, offering unparalleled ease of use and capabilities.

    What this means for the Arduino community

    The collaboration between Arduino and SiLabs, leading up to these releases, represents a major stride in making advanced IoT technologies more accessible. The combination of Arduino’s user-friendly interface with the robust capabilities of SiLabs’ technology and the universality of the Matter protocol is a recipe for innovation.

    For educators, students, hobbyists, and professionals, this means an unprecedented opportunity to dive into IoT projects with greater ease and more powerful tools. The implications for smart home applications, industrial IoT, and educational projects are immense.

    Looking ahead

    Here is a sneak peek of the new board being developed – stay tuned for the launch in March 2024!

    As we eagerly await these releases, the excitement within the Arduino community is palpable. This collaboration is not just about new products; it’s about empowering a whole generation of creators and innovators, breaking down barriers, and opening up new horizons in the world of IoT.

    Stay tuned for more updates as we approach these landmark dates, and get ready to embark on a journey of discovery and innovation with Arduino and SiLabs.

    Are you in Las Vegas? Come meet the Arduino team at CES 2024 – Venetian Tower — Suite 29-228.

    The post Arduino and Silicon Labs team up to make the Matter protocol accessible to all appeared first on Arduino Blog.

    Website: LINK

  • Affordable fixed-belt CNC plotter runs on Arduino

    Affordable fixed-belt CNC plotter runs on Arduino

    Reading Time: 2 minutes

    Design paradigms are the norm in every industry and automated machine tools aren’t any different. Most 3D printers, for example, function in a similar way: each axis rides on rails, with belts pulled by fixed motors. Pen plotters tend to utilize similar kinematics. But sometimes we see builds that ignore established paradigms, like this DIY fixed-belt CNC pen plotter.

    Unlike most pen plotters, this machine moves along fixed belts. This layout treats the belts almost like rigid bodies, similar to a rack-and-pinion gear set. Because the belts remain fixed in place, the motors must move. The result is a unique form factor. In this case, creator tuenhidiy made heavy use of PVC pipe for the machine’s structure and enclosures. The materials are very inexpensive, but this machine’s axes ride on hardened steel rods and so it is still capable of drawing very well.

    To keep costs down without sacrificing capability, tuenhidiy chose to use an Arduino UNO Rev3 board for control. That reads GRBL G-code files through a microSD card module and controls the stepper motors through a CNC shield with A4988 stepper drivers. There is also a simple Arduino Nano-based controller interface made with a 16×2 character LCD, button, and rotary encoder.

    [youtube https://www.youtube.com/watch?v=qfODq9p7jYg?start=1&feature=oembed&w=500&h=281]

    This will work with a variety of different open-source software tools, including popular plugins for Inkscape. 

    The post Affordable fixed-belt CNC plotter runs on Arduino appeared first on Arduino Blog.

    Website: LINK

  • OpenAutoLab lets you automatically develop photos at home

    OpenAutoLab lets you automatically develop photos at home

    Reading Time: 2 minutes

    20 years ago, you could walk into any pharmacy or big box store with your rolls of film, then get developed photos back within 24 hours at a reasonable price. But that industry is dead and life is much more difficult for film photographers today. While big chain pharmacies still have developing services, they have to send the film out to a lab and it is quite an expensive. One alternative is to build the OpenAutoLab, which can automatically develop black-and-white and color film photos without user interruption.

    The OpenAutoLab machine only develops film and so you’ll still need to turn elsewhere to get your prints, but it makes the process much easier to perform at home. It handles most of the steps you would need to do in a dark room, so you aren’t fumbling around with baths and washes. It pumps the chemicals back and forth as needed and, most importantly, maintains the ideal temperature and performs periodic agitation.

    An Arduino Nano board is responsible for most of the process control. It opens and closes the valves and operates the pump. It monitors each reservoir with a load cell and HX711 amplifier or float switch, moving the liquids back and forth at specific times according to the user-set parameters. Interestingly, the designers chose to use a sous vide stick to maintain temperature and circulate the bath. That’s a clever idea, because those sous vide sticks are very affordable and quite precise. 

    OpenAutoLab is intended to be a more affordable alternative to the Jobo Autolab and it appears to have promise. Documentation is sparse at the moment and we aren’t sure how well it works, but brave photographers can use the build instructions to try out OpenAutoLab right now.

    [youtube https://www.youtube.com/watch?v=qe7pgEp7S68?feature=oembed&w=500&h=281]

    The post OpenAutoLab lets you automatically develop photos at home appeared first on Arduino Blog.

    Website: LINK

  • This automated machine shuffles and deals cards so you don’t have to

    This automated machine shuffles and deals cards so you don’t have to

    Reading Time: 2 minutes

    Shuffling and dealing is very serious business when you’re playing any card game that puts money on the line, like poker. Even when the stakes aren’t that high, poor shuffling or dealing can drive a family apart. If you’re tired of being criticized for your card-handling skills, maybe you should build this automatic card dealer and shuffler designed by VUBGROUP1.

    VUBGROUP1 consists of electromechanical engineering students at Bruface (The Brussels Faculty of Engineering) and this machine was a project for a mechatronics course. It is capable of both shuffling and dealing cards. Both of those subsystems work in a similar manner: DC motors spin wheels that grip the top card and push it out.

    To shuffle, the user splits the deck and loads the two halves. The machine then pushes the cards together in semi-random order into the pre-deal area. That probably isn’t enough for a true shuffle, so it might be worth running the deck through a few times. From the pre-deal area, the machine spits out a selected number of cards, pivots on a stepper motor, and the repeats until all hands have been dealt. 

    An Arduino UNO Rev3 board controls that entire process according to user parameters set through a simple interface consisting of a 16×2 character LCD and push buttons. The enclosure is laser-cut MDF held together by M3 screws and there are a handful of 3D-printed parts, such as the gears attached to the motors.

    [youtube https://www.youtube.com/watch?v=S8MGI8j-0hs?feature=oembed&w=500&h=281]

    We think it is safe to say that the students received an A+ on this project. 

    The post This automated machine shuffles and deals cards so you don’t have to appeared first on Arduino Blog.

    Website: LINK

  • Transform your coffee table into a piece of kinetic sand art

    Transform your coffee table into a piece of kinetic sand art

    Reading Time: 2 minutes

    Like most furniture, a coffee table should both look good and function well. To function well, a coffee table just needs a flat surface. But looking good is a lot more complicated and depends entirely on owner taste. If kinetic art is your thing, then you might consider building this automatic sand art coffee table.

    This is a coffee table with a large pocket in the center filled with sand. A ball bearing rolls around in the sand, leaving intricate patterns behind. LED lighting highlights those patterns and users can program their own sequences of movements to create whatever art they like.

    The secret to a kinetic sand coffee table like this one is magnetism. There is a two-axis CNC system underneath the table with a strong magnet that pulls the ball bearing through the sand. In this case, the kinematics are straightforward with a linear rail gantry riding on a pair of linear rails. Stepper motors pull the gantry and carriage with GT2 belts.

    An Arduino UNO Rev3 board controls those stepper motors through a CNC Shield V3 with two TMC2209 drivers. The sketch is very simple and doesn’t run G-code directly. Instead, the user must extract a series of coordinates from a G-code file and copy them into the sketch. But because this is a coffee table, most users will only need to do that one time to program a series of patterns to cycle through. 

    [youtube https://www.youtube.com/watch?v=HX3F_D5yuN4?feature=oembed&w=500&h=281]

    The post Transform your coffee table into a piece of kinetic sand art appeared first on Arduino Blog.

    Website: LINK

  • Desktop elevator provides a positive sensory experience for an autistic child

    Desktop elevator provides a positive sensory experience for an autistic child

    Reading Time: 2 minutes

    Autism often comes with a unique sensory experience that differs from that of most neurotypical people. That tends to be publicized as a negative thing, as some sensations can cause some autistic people a lot of discomfort. But the opposite can also be true, with positive sensory experiences providing great joy. The latter scenario inspired CapeGeek to build this desktop elevator for a friend’s autistic son.

    Elevators are popular with many people living with autism because they provide a multi-sensory experience that can be quite enjoyable. As such, there is a whole community of people with a shared love of elevators. This desktop model may have been designed for one child in particular, but it should appeal to many others. It has three floors and a car that moves between them in an elevator shaft. The user can send the car to a specific floor by pushing the corresponding button. The car will then move to that floor and the elevator doors will open.

    CapeGeek constructed this using a frame made of aluminum extrusion. The elevator car rides on a lead screw driven by a stepper motor and servo motors open the doors. An Arduino UNO R3 board controls those motors in response to the call buttons, which are standard momentary push buttons. Three micro switches tell the Arduino when the car reaches a floor. Optional upgrades include a small LCD screen reads “Zach’s Elevator” and a prompt to select a floor, sound effects, and LED lighting to illuminate the elevator car.

    [youtube https://www.youtube.com/watch?v=2YmV20TKIGg?feature=oembed&w=500&h=281]

    The post Desktop elevator provides a positive sensory experience for an autistic child appeared first on Arduino Blog.

    Website: LINK

  • The best Secret Santa gift in an oversized Furby

    The best Secret Santa gift in an oversized Furby

    Reading Time: 2 minutes

    Some of YouTube’s most famous makers get together every year for a Secret Santa gift exchange. We already showed you the heartbeat-controlled drum machine that Sam Battle created for Ali Spagnola, but what did Battle receive? Roboticist extraordinaire James Bruton drew Battle and decided to build him this oversized robotic Furby.

    Bruton started by skinning a normal Furby to take a look inside and find out how it ticks. The current models are a bit different than the originals from a couple of decades ago, but they’re still pretty simple. There are basic mechanical linkages for the animatronic movement, sensors to detect touch and movement, a speaker for the sound, and cheap LCD eyes. Bruton didn’t reuse any of those components, but this dissection gave him some direction.

    With a Furby anatomy lesson under his belt, Bruton designed the scaled-up version with a 3D-printed skeleton. That houses several servo motors to actuate the eyes, eyelids, ears, and mouth, along with two small linear actuators that let it rock back and forth. An Arduino Mega 2560 board controls those motors, as well as a DFRobot DFPlayer Mini MP3 player for the sound effects. An infrared proximity sensor lets the Arduino detect nearby movement, so it can react. Under normal conditions, it just cycles through pre-programmed movement and audio. But if the infrared proximity sensor triggers, the Arduino will switch to something new immediately.

    [youtube https://www.youtube.com/watch?v=jV4xyMilqn0?feature=oembed&w=500&h=281]

    The final step was to cover the giant Furby in its signature fur. Bruton left an opening in the chest where there is a cavity big enough for a normal Furby to reside, complete with LED illumination. That has some concerning implications, but the entire Furby aesthetic skirts the creepy line and so it seems fitting.

    The post The best Secret Santa gift in an oversized Furby appeared first on Arduino Blog.

    Website: LINK

  • Empowering the transportation of the future, with the Ohio State Buckeye Solar Racing Team

    Empowering the transportation of the future, with the Ohio State Buckeye Solar Racing Team

    Reading Time: 3 minutes

    Arduino is ready to graduate its educational efforts in support of university-level STEM and R&D programs across the United States: this is where students come together to explore the solutions that will soon define their future, in terms of their personal careers and more importantly of their impact on the world.

    Case in point: the groundbreaking partnership with the Ohio State University Buckeye Solar Racing Team, a student organization at the forefront of solar vehicle technology, committed to promoting sustainable transportation by designing, building, and racing solar-powered vehicles in national and international competitions. This collaboration will see the integration of advanced Arduino hardware into the team’s cutting-edge solar vehicles, enhancing driver displays, data transmission, and cockpit metric monitoring.

    In particular, the team identified the Arduino Pro Portenta C33 as the best option for their car: “extremely low-powered, high-quality and reliable, it also has a CAN interface – which is how we will be getting data from our sensors,” team lead Vasilios Konstantacos shared.

    We have also provided Arduino Student Kits for prototyping and, most importantly, accelerating the learning curve for new members. “Our goal is to rapidly equip our newcomers with vital skills, enabling them to contribute meaningfully to our team’s progress. Arduino’s hardware is a game-changer in this regard,” Vasilios stated.
    In addition, the team received Nicla Vision, Nicla Sense ME, and Nicla Voice modules to integrate essential sensors in the car, and more Portenta components to make their R&D process run faster (pun intended!): Portenta Breakout to speed up development on the Portenta C33, Portenta H7 to experiment with AI models for vehicle driving and testing, and Portenta Cat. M1/NB IoT GNSS Shield to connect the H7 to the car wirelessly, replacing walkie-talkie communication, and track the vehicle’s location.

    Combining our beginner-friendly approach with the advanced features of the Arduino Pro range is the key to empower students like the members of the Buckeye Solar Racing Team to learn and develop truly innovative solutions with the support of a qualified industrial partner and high-performance technological products. In particular, the Arduino ecosystem offers a dual advantage in this case: components’ extreme ruggedness, essential for race vehicle operations, paired with the familiarity and ease of use of the Arduino IDE.

    The partnership will empower Ohio State University students to experiment with microcontrollers and sensors in a high-performance setting, fostering a seamless, hands-on learning experience and supporting the institution’s dedication to providing unparalleled opportunities for real-world application of engineering and technology studies. Arduino’s renowned reliability and intuitive interface make it an ideal platform for students to develop solutions that are not only effective in the demanding environment of solar racing but also transferable to their future professional pursuits.

    “We are thrilled to collaborate with the Ohio State University Buckeye Solar Racing Team,” commented Jason Strickland, Arduino’s Higher Education Sales Manager. “Our mission has always been to make technology accessible and foster innovation. Seeing our hardware contribute to advancing solar racing technology and education is a proud moment for Arduino.”

    The post Empowering the transportation of the future, with the Ohio State Buckeye Solar Racing Team appeared first on Arduino Blog.

    Website: LINK

  • The user’s heart beat controls this drum machine

    The user’s heart beat controls this drum machine

    Reading Time: 2 minutes

    Every holiday season, several of YouTube’s most prominent makers get together for a Secret Santa gift exchange. It is always fun to see what kind of tailored gifts they create and this year is no different. Sam Battle of the LOOK MUM NO COMPUTER YouTube channel drew Ali Spagnola in the most recent exchange. Ali likes both music and exercise, so Battle built her this quirky drum machine controlled by the user’s heart beat.

    At first glance, this looks like a fairly conventional drum sequencer. It cycles through eight beats and can play from five different samples. Each beat has a set of five switches to select the sample to play on that beat. But the twist is that the machine only moves to the next beat when the user’s heart beats, as opposed to moving through the sequence at a consistent rate.

    That sounds a little bit jarring, because hearts are not metronomes. But the benefit is that the tempo increases with the user’s heart rate, so the pace matches their activity level.

    An Arduino Nano board detects the user’s pulse through a Pimoroni Pulse Sensor. It plays drum samples (or any audio clips) loaded onto a SparkFun WAV Trigger module. Battle wired the sequencer switches in a keyboard-style matrix, which reduces the number of IO pins required to just the number of rows plus columns instead of one pin for every switch. On each beat, the Arduino checks the switches and then plays the corresponding drum samples. Finally, Battle crammed all of that hardware into an enclosure with 3D-printed decoration that makes the device look like an oversized heart.

    [youtube https://www.youtube.com/watch?v=39Upfs-fVWA?feature=oembed&w=500&h=281]

    This isn’t something you’d ever see on a store shelf, which is what makes it the perfect gift for one maker to send another.

    The post The user’s heart beat controls this drum machine appeared first on Arduino Blog.

    Website: LINK

  • C3D joins Arduino Pro’s System Integrators Partnership Program

    C3D joins Arduino Pro’s System Integrators Partnership Program

    Reading Time: 2 minutes

    We are pleased to announce a new partnership with Chilean engineering services firm C3D, joining our System Integrators Program at the Gold level. The collaboration will focus on enhancing the company’s IoT and automation capabilities by leveraging the entire Arduino Pro product line to accelerate the product development of connected applications in key verticals. 

    “Through exploration, design, prototyping and manufacturing, we strive to solve every challenge that may prevent our clients from turning their product into a reality,” states Juan Pablo Oyarzún Alcayaga, CEO of C3D. “By combining Arduino Pro industrial-grade modular products and our expertise, we can now offer accelerated development and lower non-recurring engineering fees at the same time.”

    According to a Gartner report published in June, “Spend on the Internet of Things (IoT) across key industries reached over $268 billion in 2022, and IoT devices are forecast to grow at a compound annual growth rate (CAGR) of 15% from 2021 through 2025.” The significant global growth experienced by the IoT market has been driven by increased connectivity and the integration of smart devices across various industries – including healthcare, manufacturing, transportation and logistics, smart homes and smart cities. On top of this, 2023 has been the year of artificial intelligence, leading to unprecedented advancements in automation: the integration of AI into IoT systems currently allows for intelligent decision-making and process automation at an entirely new level. Businesses that incorporate AI-driven automation into their workflows can enhance efficiency, reduce costs, and improve overall performance – and C3D offers a variety of services to achieve all of this and more.

    The firm is particularly interested in the potential impact that the emergence of Narrowband Internet of Things (NB-IoT) technology will have on the market, as it gains traction as a specialized communication standard designed for the IoT. Offering low power consumption, extended coverage, and support for a massive number of devices, it stands out as the ideal solution for applications in agriculture, utilities, asset tracking, and mining. 

    “We are excited C3D is our first system integrator partner in Chile,” comments Paul Kaeley, Strategic Sales Advisor to Arduino. “Their strategic insights and expertise, in the context of machine design and manufacturing increasingly moving to South America, create amazing opportunities to potentially set a new standard, and drive customer value in this market.”


    The System Integrators Partnership Program by Arduino Pro is an exclusive initiative designed for professionals seeking to implement Arduino technologies in their projects. This program opens up a world of opportunities based on the robust Arduino ecosystem, allowing partners to unlock their full potential in collaboration with us.

    The post C3D joins Arduino Pro’s System Integrators Partnership Program appeared first on Arduino Blog.

    Website: LINK

  • Stairway stopwatch tracks climb time

    Stairway stopwatch tracks climb time

    Reading Time: 2 minutes

    With Christmas just around the corner, you may start reminiscing about childhood races down the stairs to rip open presents under the tree. You’ll likely never do be any faster than you were when you were 12, but why not turn stair racing into an event anyway? Jared Dilley made that possible with his stairway stopwatch device.

    It seems prudent to give you a disclaimer here: running up and down stairs is dangerous. We promise that your bones aren’t nearly as resilient as they were when you were a kid.

    Dilley’s device is a timer system meant to measure the time it takes to ascend or descend a flight of stairs. It could also be used for races across flat ground or any other kind of terrain. That’s because it consists of two separate units that act as race gates. Each has an ultrasonic sensor to detect a passing person. Together, they measure the time it takes to pass the second gate after triggering the first.

    Each unit contains an Arduino Nano board and the two boards communicate via HC-12 433MHz radio transceiver modules. Those have enough range to allow for positioning anywhere within a house, assuming you don’t live in a mansion with multiple wings. The primary unit displays the current record on a small LCD screen, as well as the most recent time on a large LED matrix panel. Both the primary and secondary units have nifty 3D-printed enclosures that Dilley designed to mount onto walls.

    image

    If you want to start your own racing career, all of the design files are available on GitHub.

    The post Stairway stopwatch tracks climb time appeared first on Arduino Blog.

    Website: LINK

  • Syncing tunes to Christmas tree lights with the Arduino Opta

    Syncing tunes to Christmas tree lights with the Arduino Opta

    Reading Time: 2 minutes

    We all know that one neighbor who always goes the extra mile when decorating for the holidays, and after taking inspiration from these large displays of light and sound, Marcelo Arredondo, Andres Sabas, and Andrea ZGuz of the Electronic Cats crew decided to build a smaller version for their Christmas tree using the Arduino Opta micro PLC.

    The team chose to create their music-synchronized light show with the Opta because of its reliability and bank of four built-in relays that could be utilized to switch specific light strings on or off. Lining up and triggering certain lighting effects for the music was all handled through the open-source Vixen Lights software. In here, the Opta was configured as a quad-channel controller that receives its commands over a GPIO connection sent by an Arduino UNO mediator. The PLC is programmed visually to read a programmable input pin for each relay and then leverage a comparator to toggle the relay when the signal is high.

    Back in the Vixen Light software, the team imported their favorite Christmas song and began the process of charting it. First, they generated markers over the audio waveform to signify the beats and overall tempo. Next, various effects were added to the timeline which trigger the lighting channels in a particular sequence. Lastly, the UNO was flashed with a sketch that allowed it to read the incoming Serial data from Vixen over USB and then toggle its digital outputs for the Opta to register.

    [youtube https://www.youtube.com/watch?v=ES7W_O3CeZk?feature=oembed&w=500&h=281]

    More information about this project can be found in its write-up here on Hackster.io.

    The post Syncing tunes to Christmas tree lights with the Arduino Opta appeared first on Arduino Blog.

    Website: LINK

  • Our October top picks from Project Hub: play more, with less!

    Our October top picks from Project Hub: play more, with less!

    Reading Time: 3 minutes

    A will to create something new by subtracting and simplifying, rather than adding, seems to inspire the three projects uploaded to Project Hub in October that we are proud to highlight today. This “less, but better” attitude is often the key to great ideas and even better executions, creating magical interactions and efficient solutions. Sometimes, all you need is the openness to imagine a different way of doing things!

    3. Play sounds with colors

    You may know that synesthesia allows some people to experience color when listening to music, but have you heard of a scanning tool that lets anyone translate color into sound? It’s the open-source, portable IMSO, Color on the Scale of Sound: a wooden “magic wand” powered by an Arduino Mini and a few lines of code, perfect to inspire kids, ages 7 and up, to explore the worlds of art, music and technology all at once.

    2. Play music with laser lights

    If you still believe instruments must have keys or strings or some surface to hit in order to produce sound, have a look at this project. Based on an Arduino UNO Rev3 and coded with the IDE 1.8, it enables you to play music by moving your hands in the air! Designed for musicians at any skill level, this one-of-a-kind instrument works by reproducing a different note depending on which of its 8 laser beams you are interrupting, and conveniently displays both the note and octave on an LCD display.

    1. Re-play the past with a DIY digitizer

    Faced with the staggering costs of digitizing his father’s high school 16-mm football films from the 1970s, dstein425 decided to leverage his professional software engineering skills to create a DIY solution based on the Arduino UNO Rev3, Raspberry Pi, an old projector, and only under 200 lines of code. His efforts led not only to great savings, but also to the huge satisfaction of creating a better-quality result that will preserve family memories through the years. 

    For your chance to be selected for a $100, $300 or even $500 gift card to spend on the Arduino Store, submit your best project on Project Hub! We will be awarding three new entries every month, as detailed in the complete terms and conditions. Good luck! 

    The post Our October top picks from Project Hub: play more, with less! appeared first on Arduino Blog.

    Website: LINK

  • This Nicla Vision-powered ornament covertly spies on the presents below

    This Nicla Vision-powered ornament covertly spies on the presents below

    Reading Time: 2 minutes

    Whether it’s an elf that stealthily watches from across the room or an all-knowing Santa Claus that keeps a list of one’s actions, spying during the holidays is nothing new. But when it comes time to receive presents, the more eager among us might want to know what presents await us a few days in advance under the tree, which is what prompted element14 Presents host Milos Rasic to build a robotic ornament equipped with vision and a compact movement system.

    On the hardware side, Rasic went with an Arduino Nicla Vision board as it contains a camera and the ability to livestream the video feed over the network. A pair of continuous servo motors allow the mobile robot platform to move along the ground while another set of servos open the ornament’s trapdoor to expose the wheels and carefully lower it from the tree through a clever system of bands and thread.

    The livestreaming portion of the project was based off an existing MJPEG RTP example that exposes a web API endpoint for fetching the latest frame from the Nicla’s onboard camera and delivering it via Wi-Fi. To control the robot, including winching, driving, and toggling the lights, Rasic created a Node-RED interface that sent MQTT messages to the Nicla.

    To see more about how this creative device was designed, watch Rasic’s video below or read his full write-up here.

    [youtube https://www.youtube.com/watch?v=UnwMHgpKqw4?feature=oembed&w=500&h=281]

    The post This Nicla Vision-powered ornament covertly spies on the presents below appeared first on Arduino Blog.

    Website: LINK

  • Patti Engineering is Arduino Pro’s new System Integrators Partner

    Patti Engineering is Arduino Pro’s new System Integrators Partner

    Reading Time: 2 minutes

    We are thrilled to announce an exciting collaboration that is set to revolutionize the landscape of Industry 4.0 digitalization and beyond. Arduino Pro is proud to welcome Patti Engineering into our esteemed family of System Integrators Partners. This partnership marks a significant milestone in our commitment to providing cutting-edge solutions to manufacturers worldwide.

    Patti Engineering’s expertise encompasses a wide range of high-potential applications, including:

    1. Industry 4.0 digital transformation

    Patti Engineering specializes in guiding manufacturers through the dynamic realm of Industry 4.0 digital transformation. Their expertise lies in leveraging digitalization technologies to propel production to unprecedented heights. 

    2. Robotics

    In the era of automation, Patti Engineering stands out as an expert in the design and integration of robotic cells. Their solutions are crafted to enhance productivity, efficiency, safety, consistency, and quality. 

    3. Control systems integration

    Partnering with world-leading manufacturers, Patti Engineering excels in streamlining and optimizing production through the integration of control systems. This expertise ensures a seamless flow of operations, allowing businesses to achieve new levels of efficiency and reliability. 

    4. Asset tracking

    Visibility and traceability of materials are paramount in modern manufacturing. Patti Engineering employs the latest asset tracking technologies to improve these crucial aspects.

    “We believe that Patti Engineering’s wealth of experience and proficiency in Industry 4.0, robotics, control systems integration, and asset tracking will bring unparalleled value to our community,” Paul Kaeley, Strategic Sales Advisor to Arduino commented. “Together, we look forward to pushing the boundaries of what is possible and driving innovation in the world of technology and manufacturing.”

    Stay tuned for the incredible solutions and advancements that will emerge from this powerful partnership!


    The System Integrators Partnership Program by Arduino Pro is an exclusive initiative designed for professionals seeking to implement Arduino technologies in their projects. This program opens up a world of opportunities based on the robust Arduino ecosystem, allowing partners to unlock their full potential in collaboration with us.

    The post Patti Engineering is Arduino Pro’s new System Integrators Partner appeared first on Arduino Blog.

    Website: LINK

  • Classifying audio on the GIGA R1 WiFi from purely synthetic data

    Classifying audio on the GIGA R1 WiFi from purely synthetic data

    Reading Time: 2 minutes

    One of the main difficulties that people encounter when trying to build their edge ML models is gathering a large, yet simultaneously diverse, dataset. Audio models normally require setting up a microphone, capturing long sequences of sounds, and then manually removing bad data from the resulting files. Shakhizat Nurgaliyev’s project, however, eliminates the need for the arduous process by taking advantage of generative models to produce the dataset artificially.

    In order to go from three audio classes: speech, music, and background noise to a complete dataset, Nurgaliyev wrote a simple prompt for ChatGPT that gave directions for creating a total of 300 detailed audio descriptions. After this, he grabbed an NVIDIA Jetson AGX Orin Developer Kit and loaded Meta’s generative AudioCraft model which allowed him to pass in the previously made audio prompts and receive sound snippets in return.

    The final steps involved creating an Edge Impulse audio classification project, uploading the generated samples, and designing an Impulse that leveraged the MFE audio block and a Keras classifier model. Once an Arduino library had been built, Nurgaliyev loaded it, along with a simple sketch, onto an Arduino GIGA R1 WiFi board that continually listened for new audio data, performed classification, and displayed the label on the GIGA R1’s Display Shield screen.

    [youtube https://www.youtube.com/watch?v=SMixY8lOAN4?feature=oembed&w=500&h=281]

    To read more about this project, you can visit its write-up here on Hackster.io.

    The post Classifying audio on the GIGA R1 WiFi from purely synthetic data appeared first on Arduino Blog.

    Website: LINK

  • A glockenspiel that plays itself

    A glockenspiel that plays itself

    Reading Time: 2 minutes

    A glockenspiel is a pretty ordinary instrument with a very silly name. Many Westerners will immediately notice the similarities between glockenspiels and xylophones, but there are slight differences in pitch and range. Both are played with mallets and so anyone can hammer out some notes. But playing well is much more difficult, which is why CamsLab built this auto-glockenspiel that plays itself.

    CamsLab chose the glockenspiel over other instruments because they wanted an excuse to experiment with solenoids. Compared to string, brass, and wind instruments, a percussion instrument like a glockenspiel is very easy to play by electromechanical means. Each bar is a copper pipe of a specific length calibrated to produce a desired note. Every one of those bars has its own solenoid, which strikes the copper on demand.

    An Arduino Mega 2560 board controls those solenoids through FETs (field-effect transistors). Those are necessary because the solenoids each require about 1A of current, which is more than the Arduino can supply through a pin. CamsLab also implemented flyback diodes to prevent damage, since solenoids are inductive loads. Those components and the copper bars mount onto a simple frame made of aluminum extrusion.

    [youtube https://www.youtube.com/watch?v=qdH86Tfd4jA?feature=oembed&w=500&h=281]

    CamsLab programmed each note in sequence within the sketch, which is cumbersome. A good alternative would be MIDI control. But even as it is, the auto-glockenspiel sounds great.

    The post A glockenspiel that plays itself appeared first on Arduino Blog.

    Website: LINK

  • ’Tis the season to get making!

    ’Tis the season to get making!

    Reading Time: 4 minutes
    Arduino Gift ideas

    The holidays can be a great time to pick up a new passion, or start a new project! And if you are at home with friends and family, a DIY challenge can be just what you need to spend a few hours together – learning and laughing all the way. We’ve definitely kept all of this in mind while fine tuning our 2023 gift guides, full of ideas and inspiration for the special people on your list! We’re sure you’ll find something for everyone… and a treat for yourself too.

    Giving the gift of creativity

    A kit with step-by-step instructions and all the components you need can provide the perfect pastime, even with kids: you can go through the Starter Kit one project at the time to learn the basics of electronics and coding, or try your hand at IoT – it’s easy with the Arduino Oplà IoT Kit! This 8-projects-in-1-box gift allows even beginners to explore smart connectivity: anyone can have their smart lights system, personal weather station, or home security alarm ready by New Year’s Eve, and do the whole thing without coding, using the templates available on Arduino Cloud. And once the basics are mastered, the experience can be customized to infinite creative ideas: for example to monitor a room’s temperature and humidity levels, connect the heating to Alexa, or control Spotify – three ideas to make your time at home even more pleasant, during the holidays and beyond.

    Arduino Gift ideas

    Learning something new in the new year

    Speaking of the new year, we have some great options for anyone making 2024 their year to learn something new. For example, the Make Your Uno Kit can take anyone from the basics of soldering to their first synth (also available as part of the Make Your UNO Soldering Bundle). Sound daunting? Not to worry: the learning experience is supported by a dedicated content platform with video tutorials, a 3D interactive viewer to help with the finest details of soldering, and instructions on how to program the board once it is finished.
    If you have someone on your list who would enjoy a huge confidence boost to go with their newly acquired electronics and programming skills, the official recognition of the Arduino Junior Certification Bundle will make for the perfect present.

    Finally, for anyone interested in learning MicroPython, the Nano ESP32 is the perfect choice to start their journey! But it can also be the key to amazing home automation projects like the one created by one of our Project Hub users, help you recreate Penny’s computer (remember Inspector Gadget?), or make one of the most interesting, hypnotizing timepieces ever. And yes, it can even run Doom.

    Automating your living and work spaces

    If being home gets you thinking about how you could make your humble abode more comfortable, fun, or futuristic, experiment with automation using the MKR WiFi 1010 (the easiest point of entry to basic IoT). Bigger plans? Check out the new Arduino Pro Opta micro PLC, offering industrial-grade performance within the friendly Arduino programming experience.

    Looking for something more open-ended?

    Our gift guides highlight a wide range of versatile and feature-packed modules that can be at the heart of any project you – or your loved ones – may have in mind. Caution: you may end up spending your holidays creating a humanoid robot! Choose the iconic UNO R3, a cornerstone in the maker revolution, or the UNO R4: WiFi or Minima are both great options for any creative project and for any skill level. Artists like Tigris Li and Monica Rikic have used the UNO R4 for their recent works, and fashiotech designer Anouk Wipprecht even made a beautiful dress light up with it. But an UNO R4 can also be used for a DIY filament extruder, or to make a small robot with PID control.

    Last but not least, check out the Nano 33 BLE, introducing a better processor, a micro-USB connector, and a 9 axis IMU to the Nano family: that’s enough, for example, to create a micro robot arm to control a macro robot arm (it actually makes a lot of sense: read more about it here!).

    Arduino Gift ideas

    Have a friend passionate about technology? Look no further!

    Our gift guides include cutting-edge gadgets that will surely light up their faces, and make this holiday season unforgettable. Consider the Portenta Hat Carrier for the robotics enthusiast, or the powerhouse combo that is the GIGA Display Bundle for anyone into gaming, sound design, or really any tech-driven pursuit. Examples of what you can do with these are a whole system to control the lights and fans in your home via a single, custom dashboard, or even a Chat GPT client to boost productivity!

    No matter who is on your list and what their skill level or interests may be, head to our 2023 gift guides and find the perfect present for them! We hope you’ll enjoy learning, creating, and making together.

    The post ’Tis the season to get making! appeared first on Arduino Blog.

    Website: LINK

  • Macro DLP mirror array scales up a fascinating mechanical structure

    Macro DLP mirror array scales up a fascinating mechanical structure

    Reading Time: 2 minutes

    Digital light processing (DLP) devices, which we often see in digital projectors, work by reflecting light off of a two-dimensional array of many thousands — or even millions — of moving mirrors. For that to be practical, each mirror must be microscopic and that makes it very difficult to see and understand the way a DLP device functions. To make that more intuitive, Jon Bumstead scaled up a mirror array to build a “macro” DLP mirror device.

    Bumstead’s DLP mirror device only has 25 mirrors arranged in a 5×5 grid, so the resolution is too low to be of any use for displays. But the large size makes this the perfect educational demonstration, because users can easily see how the device operates. Each mirror can pivot to one of two states. The first state angles the mirror so light reflects out to where a lens would be. The second state angles the mirror inwards, so light reflects to where an absorbent pad would be. The first state is an “on” pixel and the second state is an “off” pixel. A real DLP device can switch between states fast enough to create shades of gray and the light would go through filters to introduce color.

    Each mirror in the macro DLP device is a square half an inch to a side. Mini push-pull solenoids actuate the mirrors between states and an Arduino Mega 2560 board controls those solenoids through transistors on a custom PCB shield. The frame and mechanical components were 3D-printed to keep costs down.

    This device isn’t practical for a display, but it is functional and works great as a tangible illustration of DLP technology. In a hazy room, users can see the reflected rays of light in order to grasp the underlying concept.

    [youtube https://www.youtube.com/watch?v=MtsJR2oc2Jk?feature=oembed&w=500&h=281]

    The post Macro DLP mirror array scales up a fascinating mechanical structure appeared first on Arduino Blog.

    Website: LINK

  • UNO R4 Stars: Meet Michael Cheich

    UNO R4 Stars: Meet Michael Cheich

    Reading Time: 3 minutes

    The launch of the Arduino UNO R4 marks a huge leap forward for our community. For us, it’s also the chance to celebrate the people who bring our ecosystem to life with their bright ideas, radiant enthusiasm, and shining insight.

    That is how the UNO R4 Stars blog post series began: to highlight makers who have not only created amazing projects with Arduino, but who are giving back to the community by sharing as they go and helping others make anything they wish.

    We invite you to discover each profile, hoping you might find a North Star to navigate around an expanding galaxy or venture into completely new universes.

    Learning can be overwhelming for anyone – and we mean anyone. Michael Cheich studied neuroscience and spent 20 years in the US military flying helicopters, yet candidly admits he was intimidated when he first began exploring his passion for programming and electronics. 

    Discovering the Arduino ecosystem turned around his perspective, allowing him to solve every challenge he encountered. Building projects that leverage technology now gives him a sense of accomplishment — a feeling he hopes to share with the almost 200K subscribers to Programming Electronics Academy

    On Cheich’s YouTube channel, you will find weekly videos that promise to give viewers not only the information but also, and more importantly, the confidence they need to keep learning. Just pick among hundreds of tutorials from basic to advanced – including a 90-minute masterclass on programming – as well as product reviews and project ideas.

    For example, Cheich recently has had a ton of fun building a ChatGPT terminal and decided to start writing an Arduino library for interfacing the large language model (LLM) with Wi-Fi-enabled microcontrollers. “I’ve always been fascinated by AI, and I just can’t express how amazing it is that an average guy like me has access to such powerful tools. It’s a great time to be alive and be a maker.”

    And his creativity does not stop at your typical coding or IoT endeavors. Cheich is also the mind behind The Arduino Paradox (use this affiliate link to support him!), a graphic novel written by Mark Lambert and illustrated by Brandon Scribner. We may not be the most objective, but we thought it was a great read! 

    [youtube https://www.youtube.com/watch?v=lQO_4ndairU?feature=oembed&w=500&h=281]

    We asked Cheich, “What’s your favorite part of the UNO R4?”

    • The wireless capabilities of the UNO R4 WiFi, which make interfacing with LLMs really accessible.
    • The bigger, more powerful processor: “I am excited to explore some edge AI applications.”  
    • The debug port in the UNO R4 Minima, making it easier than ever to catch and correct any mistakes.

    In his full review of the Arduino UNO R4 Minima, Cheich also pointed out how he appreciates both what has been improved in the new revision and what has been kept the same: while packed with new exciting features, in his eyes the R4 is still perfect for beginners. And clearly “Arduino has thought hard about the hardware compatibility between the R4 and its predecessor, the R3.” So, no matter where you are on your learning journey, head to his Programming Electronics Academy for a booster of knowledge and confidence!

    The post UNO R4 Stars: Meet Michael Cheich appeared first on Arduino Blog.

    Website: LINK

  • Three September debuts on Project Hub, three top picks!

    Three September debuts on Project Hub, three top picks!

    Reading Time: 3 minutes

    The Project Hub is where Arduino users share their achievements to inspire, help others, and maybe show off a little. With thousands of projects already uploaded, in categories that run the gamut from “flying things” to “smart lighting,” we are proud to celebrate this community-boosting initiative by selecting three highlights every month for a special mention and gift card to spend on our Store. 

    If you are new to the portal and think you’d never be picked, think again! All three top users from September stood out with the very first project they uploaded.

    3. Keep your energy levels in check

    This advanced project allows you to successfully build an Arduino-based power meter system with internal PLC, able to accurately collect and calculate data to monitor energy consumption, improve efficiency, and add value to home automation solutions. Follow the instructions to display voltage, power factor, current, power and frequency instantly, with a handful of commonly available components and a compact Arduino Nano. 

    2. Start your own band, with animatronics

    Syncing up different props – from different manufacturers and retailers – to create a cohesive overall installation is no easy feat! This project was specifically intended for Halloween, to get skeletal animatronics to play the same music together thanks to the UNO R3 and some ingenious wiring… but we think it would work great also with more festive characters, for a truly unforgettable holiday display. 

    1. Stop manually logging in and out of Windows

    A fan of Arduino since graduating with a dissertation on smart homes in 2022, kela910512 has successfully used an Arduino Micro to devise a secure tool to log in and out of Windows 10 using an RFID card. Instead of manually typing passwords, the solution leverages an Android application to send the user’s password to the Arduino via Bluetooth, with a range of additional security mechanisms. To find out more and perhaps try this yourself, head to Project Hub! 

    For your chance to be selected for a $100, $300 or even $500 gift card to spend on the Arduino Store, submit your best project on Project Hub! We will be awarding three new entries every month, as detailed in the complete terms and conditions. Good luck! 

    The post Three September debuts on Project Hub, three top picks! appeared first on Arduino Blog.

    Website: LINK

  • This DIY humanoid robot talks back to you

    This DIY humanoid robot talks back to you

    Reading Time: 2 minutes

    Most people with an interest in robotics probably dream of building android-style humanoid robots. But when they dip their toes into the field, they quickly learn the reality that such robots are incredibly complex and expensive. However, everyone needs to start somewhere. If you want to begin that journey, you can follow these instructions to assemble your own talking humanoid robot.

    This robot, dubbed “CHAD,” is a humanoid torso with moving arms, face tracking, and some voice assistant capabilities. It can understand certain voice commands, provide spoken responses, and even hold chat bot-style conversations. The arms weren’t designed to lift anything, but they are capable of movement similar to human arms up to the wrists and that gives CHAD the ability to gesture. It can also move its head to follow a face that it sees.

    CHAD achieves that on a remarkably small budget of just ?5000 (about $60 USD) with a handful of components: two Arduino UNO R3 boards, several hobby servo motors, simple L298N motor drivers, and a PC power supply. One Arduino board controls most of the servo movement, while the second focuses on the face tracking movement.

    The Arduino boards don’t handle the processing, which is instead outsourced to a PC running Python scripts. Those do the heavy lifting of face recognition, voice recognition, and voice synthesis. The PC then passes movement commands to the Arduino boards through serial.

    CHAD’s body and most of its mechanical components are 3D-printable, with two lengths of wood acting as the primary structure. That helps to keep the cost down, giving everyone the chance to create a humanoid robot.

    [youtube https://www.youtube.com/watch?v=CE7XnjM0FNQ?feature=oembed&w=500&h=281]

    The post This DIY humanoid robot talks back to you appeared first on Arduino Blog.

    Website: LINK