Schlagwort: arduino

  • Find astronomical objects in the night sky with this Arduino telescope assistant

    Find astronomical objects in the night sky with this Arduino telescope assistant

    Reading Time: 2 minutes

    Find astronomical objects in the night sky with this Arduino telescope assistant

    Arduino TeamMay 7th, 2018

    No matter how good your telescope is, if you don’t know where to point it, it’s little more than a curiosity. Motorized GoTo telescopes are available at a very high price, but maker “DentDentArthurDent” has come up with an automated star-finder, showing you where your telescope needs to be aimed.

    The system takes the form of a 3D-printed telescope pendant, allowing you choose from a database of objects displayed on a red LCD screen. A GPS module enables the device to know where it is, and potentiometers, initially calibrated using the North Star, tell where the telescope is pointed. Four LEDs then guide your telescope to the proper heading and elevation, so you can observe your selected object in no time!

    Ready to explore galaxies, nebulae, and clusters? Check out the project’s write-up here!


    Website: LINK

  • Hot Ninja messages other devices using WiFi SSIDs

    Hot Ninja messages other devices using WiFi SSIDs

    Reading Time: 2 minutes

    Hot Ninja messages other devices using WiFi SSIDs

    Arduino TeamMay 7th, 2018

    When you need to access the Internet via WiFi, it’s not too hard to find a hotspot if you’re in the right location, and the SSID usually gives you some clue as to who is providing it. What if you instead generated network names in order to communicate with people attempting to log on?

    That’s the idea behind Hot Ninja, made by Moscow-based artist Dmitry Morozov, better known as “::vtol::.” His device uses a trio of ESP8266 modules to form and name three different networks, giving him 96 characters with which to message the surrounding area. If other gadgets do log on, Hot Ninja can also create a registration page with more information and even the ability to message back and forth. An Arduino Mega serves as the brains of this portable device, and a keyboard and OLED screen form its user interface–shown in the video below. 

    Multifunctional network device for autonomous activity in the city environment. Its main function is communication and propaganda through the WiFi wireless standard. This is the hacktivism DIY response to attempts by the authorities in different countries to control the Internet. The project serves as an example of the possible opposition and decentralisation of networks to ensure communications and provide notifications irrespective of whether there is access to the global internet or certain restrictions are applied.

    [embedded content]


    Website: LINK

  • Expanding Death Star lamp with MKR1000

    Expanding Death Star lamp with MKR1000

    Reading Time: < 1 minute

    Expanding Death Star lamp with MKR1000

    Arduino TeamApril 27th, 2018

    What could be better than a lamp that expands with the pull of a control cord? How about one that looks like the Death Star and is controlled with your voice? 

    That’s exactly what maker Adi Singh created using a popular IKEA lamp and embedding it with an Arduino MKR1000 to take voice commands via Alexa. A stepper motor is tasked with opening and closing the exterior segments, and a solid-state relay turns the light on and off. It also features a spectacular custom paint job, making this lamp/superweapon stand out even more.

    You can see the results in the video below as it changes shape and blinks to the soothing sounds of the Imperial March!

    [embedded content]


    Website: LINK

  • RC truck packs Arduino control system… and an electromagnetic accelerator turret!

    RC truck packs Arduino control system… and an electromagnetic accelerator turret!

    Reading Time: 2 minutes

    RC truck packs Arduino control system… and an electromagnetic accelerator turret!

    Arduino TeamApril 27th, 2018

    While some toy vehicles perform quite well out of the box, others are just begging to be equipped with supplemental electronics. This was the case for YouTuber Tanner Tech, who after receiving a capable 4WD truck in the mail with no control system, outfitted it with a transmitter and receiver, along with an Arduino Uno.

    That’s interesting enough by itself, highlighting the fact that Arduino boards can take in PWM signals from a normal RC receiver. What really sets this build apart is the coil gun that he constructed in the bed. This device is powered by three capacitors, and a servo pan/tilt assembly aims it. While the projectile isn’t particularly dangerous in its current configuration, one would need to use caution when dealing with capacitors here, as they can be charged to the “shockingly” high potential of 400 volts.

    More info on the project can be found here or in the video below!

    [youtube https://www.youtube.com/watch?v=TFHs4VYPxsQ?feature=oembed&w=500&h=281]


    Website: LINK

  • Robot Van Gogh will paint your portrait

    Robot Van Gogh will paint your portrait

    Reading Time: 4 minutes

    Maker Faire Rome, where everything started

    I participated in Maker Faire Rome back in December 2017. I came with the rest of the Arduino crew to spend two days talking to other makers in the show, check out the projects made in the field of education and to…  get a portrait painted. Now seriously, I hadn’t planned to get a painting of my beard made at Maker Faire, it just happened. I was walking around together with Marcus, one of the guys running the Arduino Education web infrastructure, when I saw my own picture on a computer screen at a not-so-distant booth. We came closer just to satisfy my curiosity, and then the surprise… there was a robot making my portrait!

    The process of making this portrait was not exactly short, the robot moves back and forth every couple of brush strokes to get some more paint. The colors are created by dipping into small containers. Imagine a CNC of sorts moving on the X-Y plane and making a small movement with the brush in order to make a mark on the canvas. My portrait is made of several A4 pages glued together, as you can see in the picture. In total it takes several hours to produce a portrait like this one.

    You can see the first traces made by the machine while painting my portrait in the following video.

    [youtube https://www.youtube.com/watch?v=-eHGRJ1dQ7I?feature=oembed&w=500&h=281]

    The painting robot was built by Jose Salatino, a painter gone roboticist that used to go around making portraits to famous musicians and giving the paintings away to them. He told me that this is how he started in the art world. At some point he wanted to bring together his life passion with his hobby (electronics) and got interested into painting robots (seems like there is a whole niche there I haven’t explored yet) and realized that very few people were really using a painter’s technique to mix the colors. That triggered him into learning more about machines in general, and machines that could paint in particular.

    [Jose’s self portrait process, image courtesy of Jose Salatino]

    The machine itself

    The painter robot, which I came to call Van Gogh because of its painting style, is a two-axis machine that can be programmed to move all over the canvas. The machine uses the technique of creating a color by mixing first basic pigments (blue, yellow, red) and then dipping the brush again into one of a series of containers grading from white to black. This is, Jose told me, how he would mix the paint: first dip into the different containers of basic color (e.g. to make a bright green, need to dip once in blue and maybe three times in yellow), second assign the luminosity by dipping into a certain gray color. When asked about whether the paint containers would not get dirty by doing so, Jose replied that so it goes when painting for him. The colors get dirty on the palette and you need to keep on adding new color. And this is when I realized that I was totally over engineering the project in my head when I tried to imagine how I would do it. Check the robot in action in the following video.

    [youtube https://www.youtube.com/watch?v=oVwRXeMYCKI?feature=oembed&w=500&h=281]

    Note the sponge used to clean the brush before reloading it with paint, yet another master move, in my opinion. You can read more about the machine by visiting the project’s write-up here

    The contest Jose is participating in

    Jose has entered a robotics painting contest with the works made by his robot. One of the proposed pieces is actually my portrait. 🙂 

    The 2018 “3rd Annual” International Robotic Art Competition’s goal is to challenge teams to produce something visually beautiful with robotics – that is, to have a robot use physical brushes and paint to create an artwork.

    Jose’s robot is all about brushes, as I already told you. And he is all for the competition, for which he teamed up with his kids who learned everything that was needed to make the robot paint as it does. The idea is that, in case he won this contest, 90% off the $100.000 USD prize would be donated to an NGO in the US. Are you interested in art? More specifically, are you into robotic art? Then visit the contest’s site, register, and vote for your favorite pieces. If you voted for Jose’s work, you could also help him choose an NGO where to give the money away: Red Cross, Black Girls Code, Learn2Teach-Teach2Learn… as he lives in Barcelona, he doesn’t really know who he would give the price to in the US. Jose is open to suggestions, but remember he needs your vote first!

    Check the whole contest here and Jose’s entry here.

    Read more about Jose

    If you are interested in reading more about Jose’s project, his daughter, Flor, made a very nice interview and reflection about the role of the artist when there is a machine making the work. This is something I bet many readers were wondering by now: “if the machine paints it, who is the one to be credited, the machine or the person making the machine?” In my opinion, and since I am one of the models, I think we–the models giving away our image–should be also getting some credit, or? (Note: this last sentence was a joke!)


    Website: LINK

  • A look back at CTC Valencia Fair 2018

    A look back at CTC Valencia Fair 2018

    Reading Time: 7 minutes

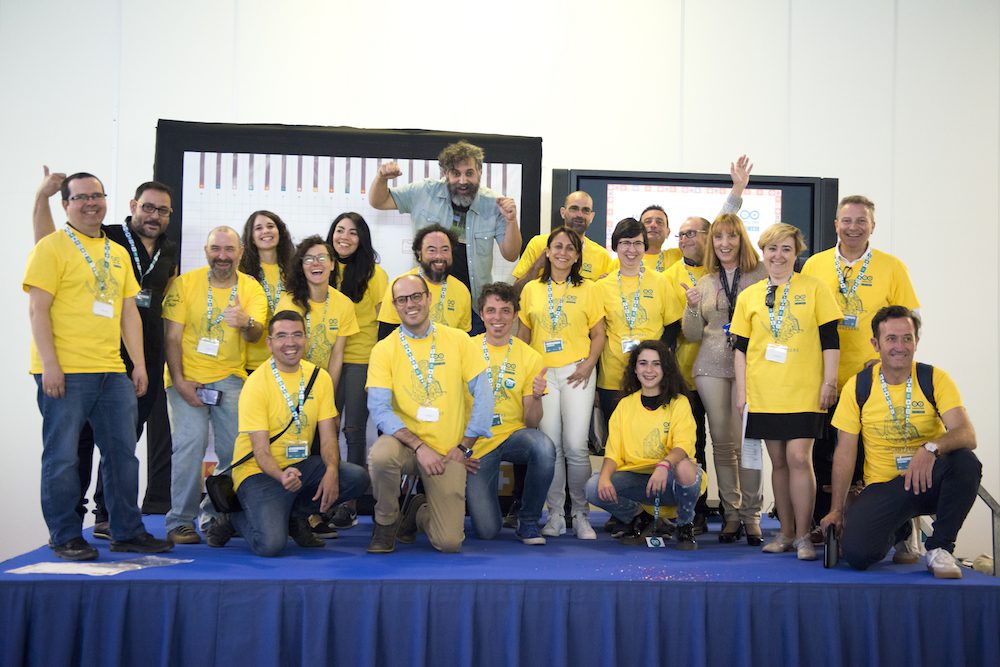
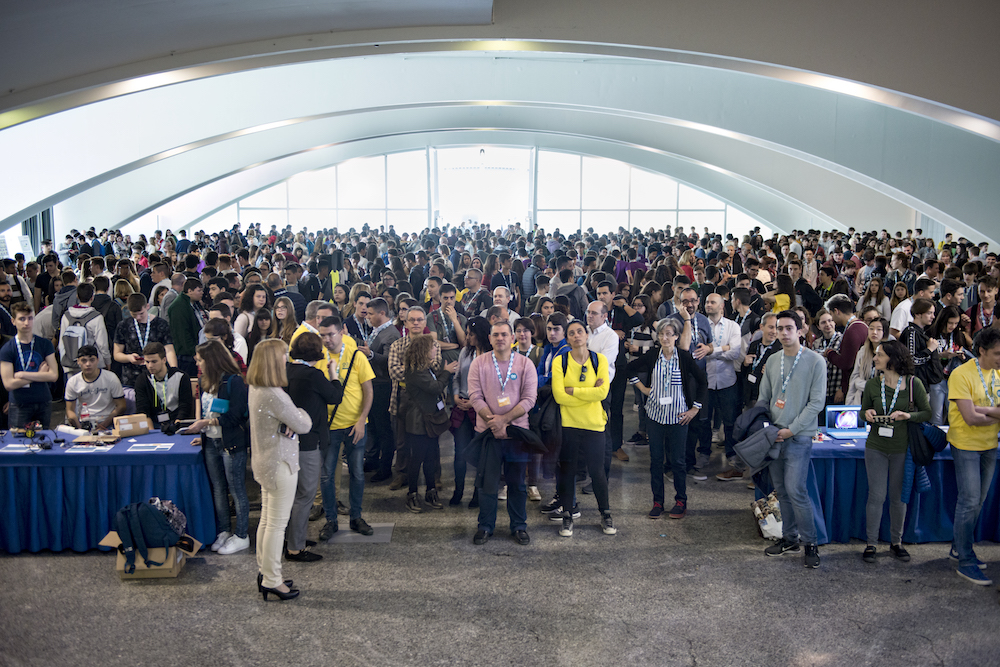
    On April 18th, a team from Arduino Education made it to the museum Ciudad de las Artes y las Ciencias in Valencia to participate in the CTC Valencia Fair. A total of 1,200 students (out of 1,500 people in attendance) participated in the five-hour-long event where the students exhibited what they had been producing over the last couple of months.

    CTC, the Creative Technologies in the Classroom initiative

    CTC started as a project in the region of Castilla La Mancha in Spain. I was asked what kind of process could be implemented in order to bring teachers and school up to speed with new educational technologies. Back then, in 2012, I had been teaching students from many different disciplines, mostly at the university level: interaction design, medicine, engineering, product design, mathematics, multimedia, fine arts… I had also been working with upper secondary school teachers from Spain, Argentina, and Sweden in the creation of small curriculums introducing interactive technologies a part of more transversal teaching in subjects like science and design.

    When asked by the people in charge at the regional centre for educators in Castilla La Mancha, I suggested a quick iterative design process that began with a collective survey to teachers in 25 schools and followed by a curriculum suggestion on topics that they considered relevant. The most complex aspect in this process was how to design interventions in the way of implementing this programme so that I could incorporate the teachers’ as well as the students’ opinions and debug the content as we went. CTC has over 25 different mid-size experiments designed to help a class get acquainted to work in a project-based learning methodology through an iterative process.

    The first CTC fair brought together over 400 students from all over Castilla La Mancha that presented 100-plus projects. Almost five years later, we have witnessed yet another incredible fair with very nice results, only this time in Valencia.

    What has changed

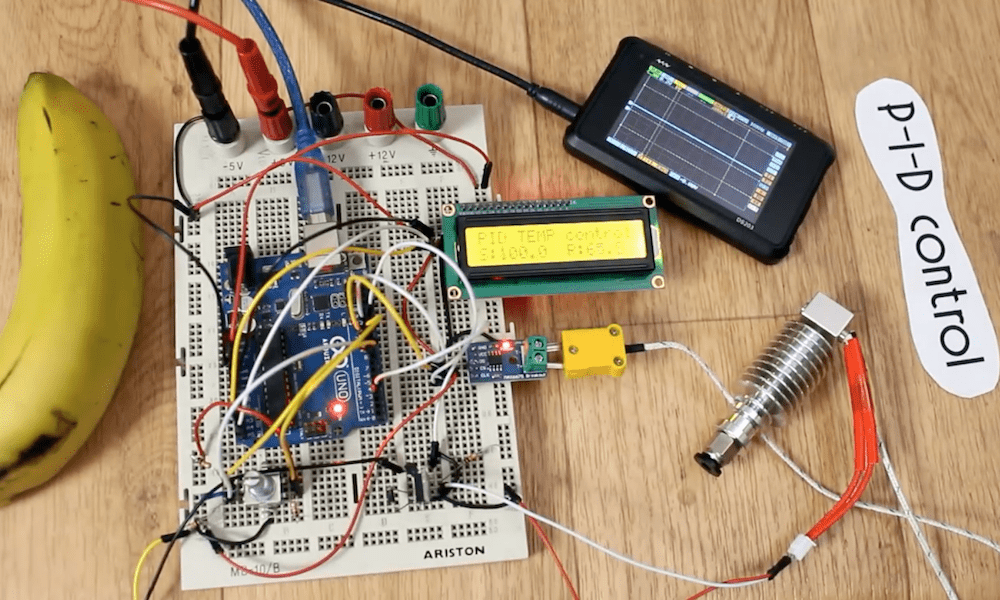
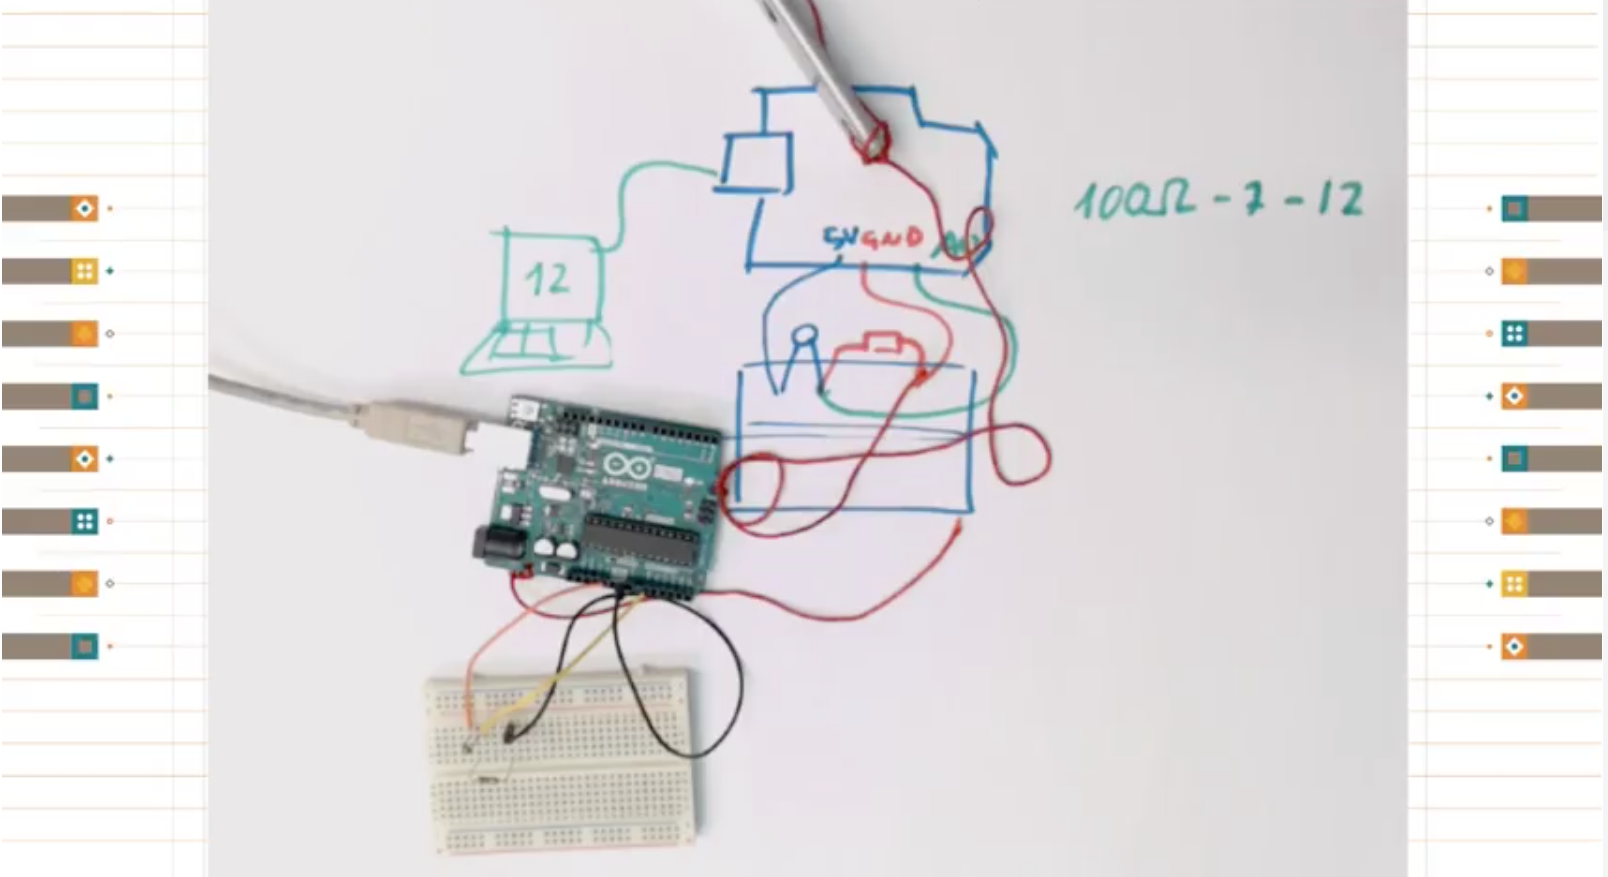
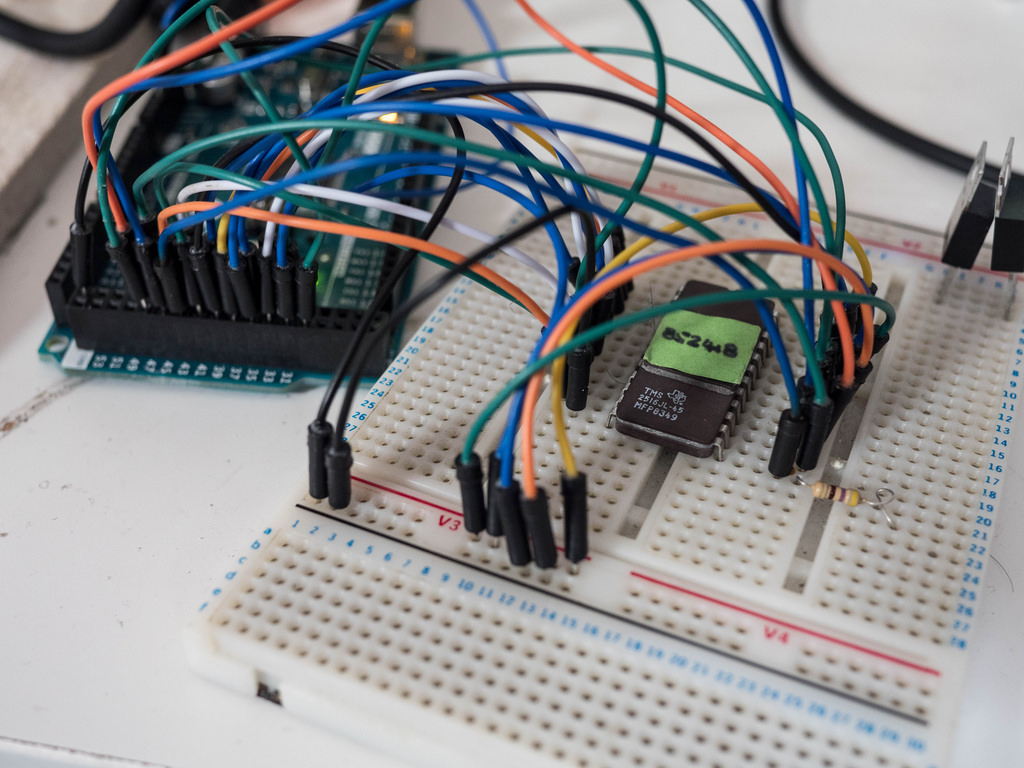
    CTC now includes experiments with wireless technology, accelerometers, capacitive sensing, motors, lights, and other interesting tricks, thanks to using the Arduino 101 board that comes with BLE, an IMU, and some other goodies. Students are introduced to programming using Processing and the Arduino IDE. But not everything is coding, given our pedagogic approach, they learn how to work in groups, search for technical information, organize time, and present their results…

    On the Arduino side, we have jumped from having a good old WordPress site to enable communication between the students, to a full-fledged platform that is being augmented with new materials and courses on a yearly basis. The content works for both the classic IDE and the more modern Create IDE. At the same time, we have implemented a hotline where teachers can ask questions directly to Arduino’s support specialists. Of course, there is a forum just for teachers to talk to one another and the Arduino forum still supporting them; but we have learned that teachers like one-to-one communication because each school is somehow different in terms of equipment, network facilities, classrooms and policies, and social environment–teachers, students, and their families.

    We have learned about complex deployments; for example, in Valencia there is a special Linux distribution called Lliurex that we had to hack in order to get the IDE running properly. During a previous project in Andalucia, teachers had no administration password to the computers! Well, we did figure things out and got the project to work. So big kudos to our support team that had to get out the hacker hoodie and code a clever solution!

    Also, for the CTC webinars we make on a bi-weekly basis, we have changed our online seminar backend to have a much more efficient one. Now our calls allow full interaction with the participants that can be invited to talk and share screens when needed instead of simply having a chat line back.

    Valencia is cool, isn’t it?

    We had a CTC fair at the Ciudad de las Artes y las Ciencias, a museum by Santiago Calatrava in the shape of a huge boat put upside-down. There are fountains surrounding the building, the weather was amazing (remember I am coming from Sweden, where we just had the worst winter in 10 years, so anything over 15°C is good at this point), the organizers from CEFIRE (the teacher organization in Valencia’s region) made a great preparation of the location, schools arrived on time, the show went fine-great-FABULOUS… so yes, Valencia is cool, and the so was the CTC fair.

    On stage we could see almost 30 projects being presented by the students, while we conducted a two and a half-hour livecast for those interested in seeing the projects from anywhere in the world. We held 15 interviews, but unfortunately we couldn’t show everything happening, considering that there were a more than 150 projects on display!

    The following video is a summary of livestream from the museum; for your benefit, we have chosen some highlights of the broadcast I conducted throughout the day.

    [youtube https://www.youtube.com/watch?v=mX3bvJ1RYT8?feature=oembed&w=500&h=281]

    The interviews were conducted in Spanish, which is another reason for the summary; but if you are interested in the actual interviews, check out the following video.

    [youtube https://www.youtube.com/watch?v=mC0elmjF0W4?feature=oembed&w=500&h=281]

    Some seriously nice projects

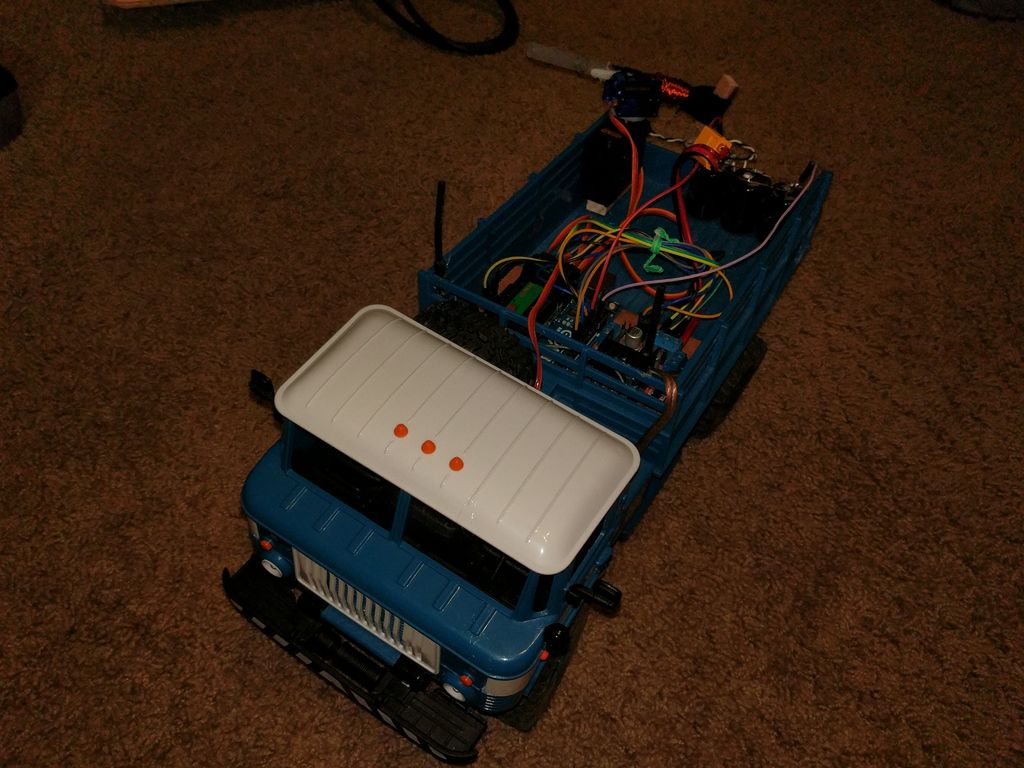
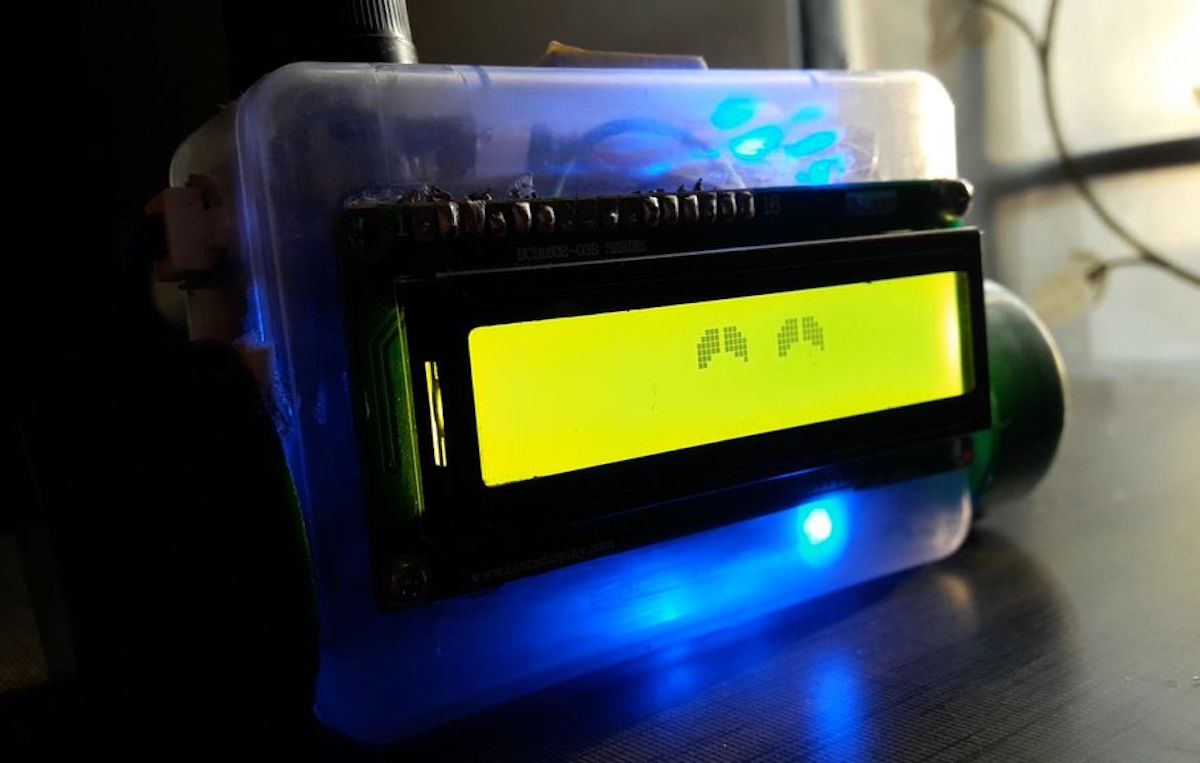
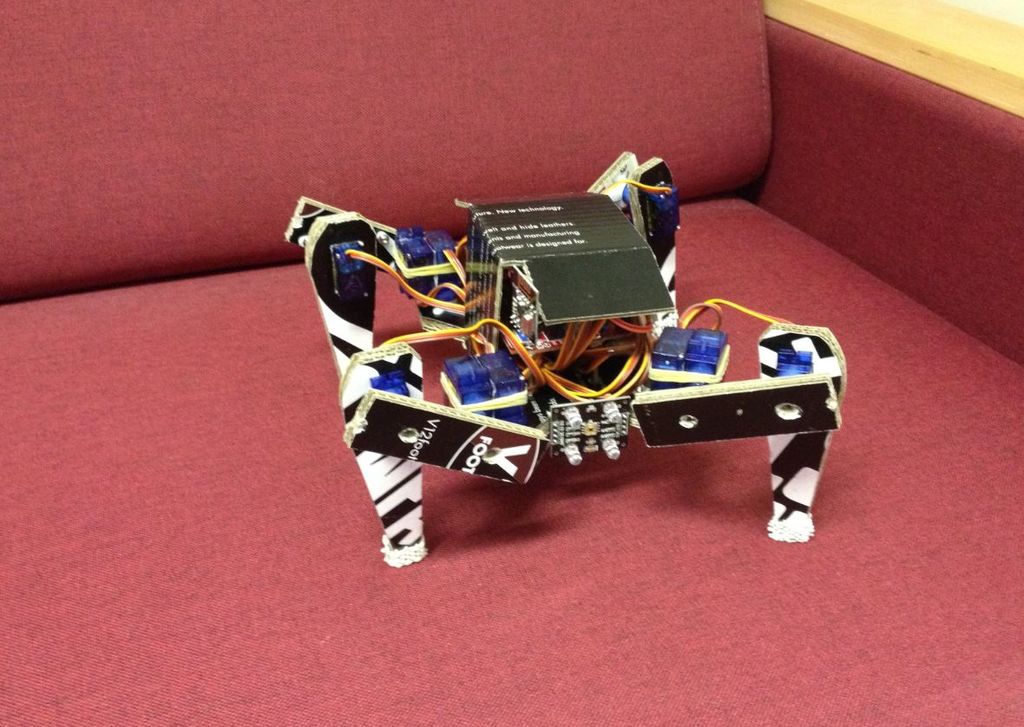
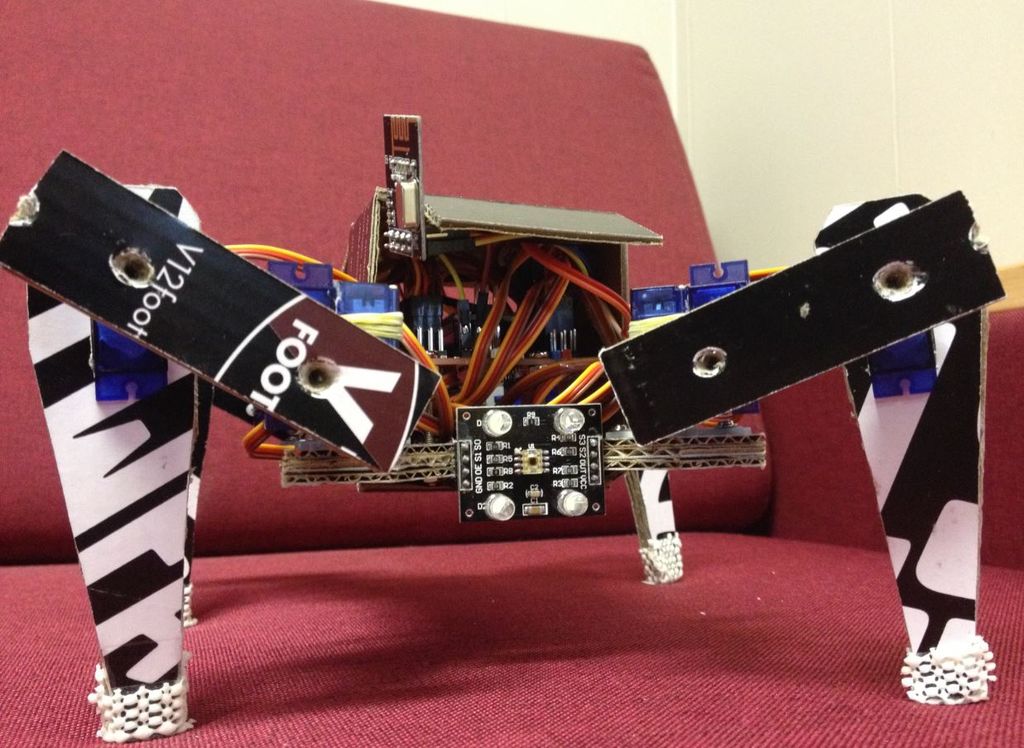
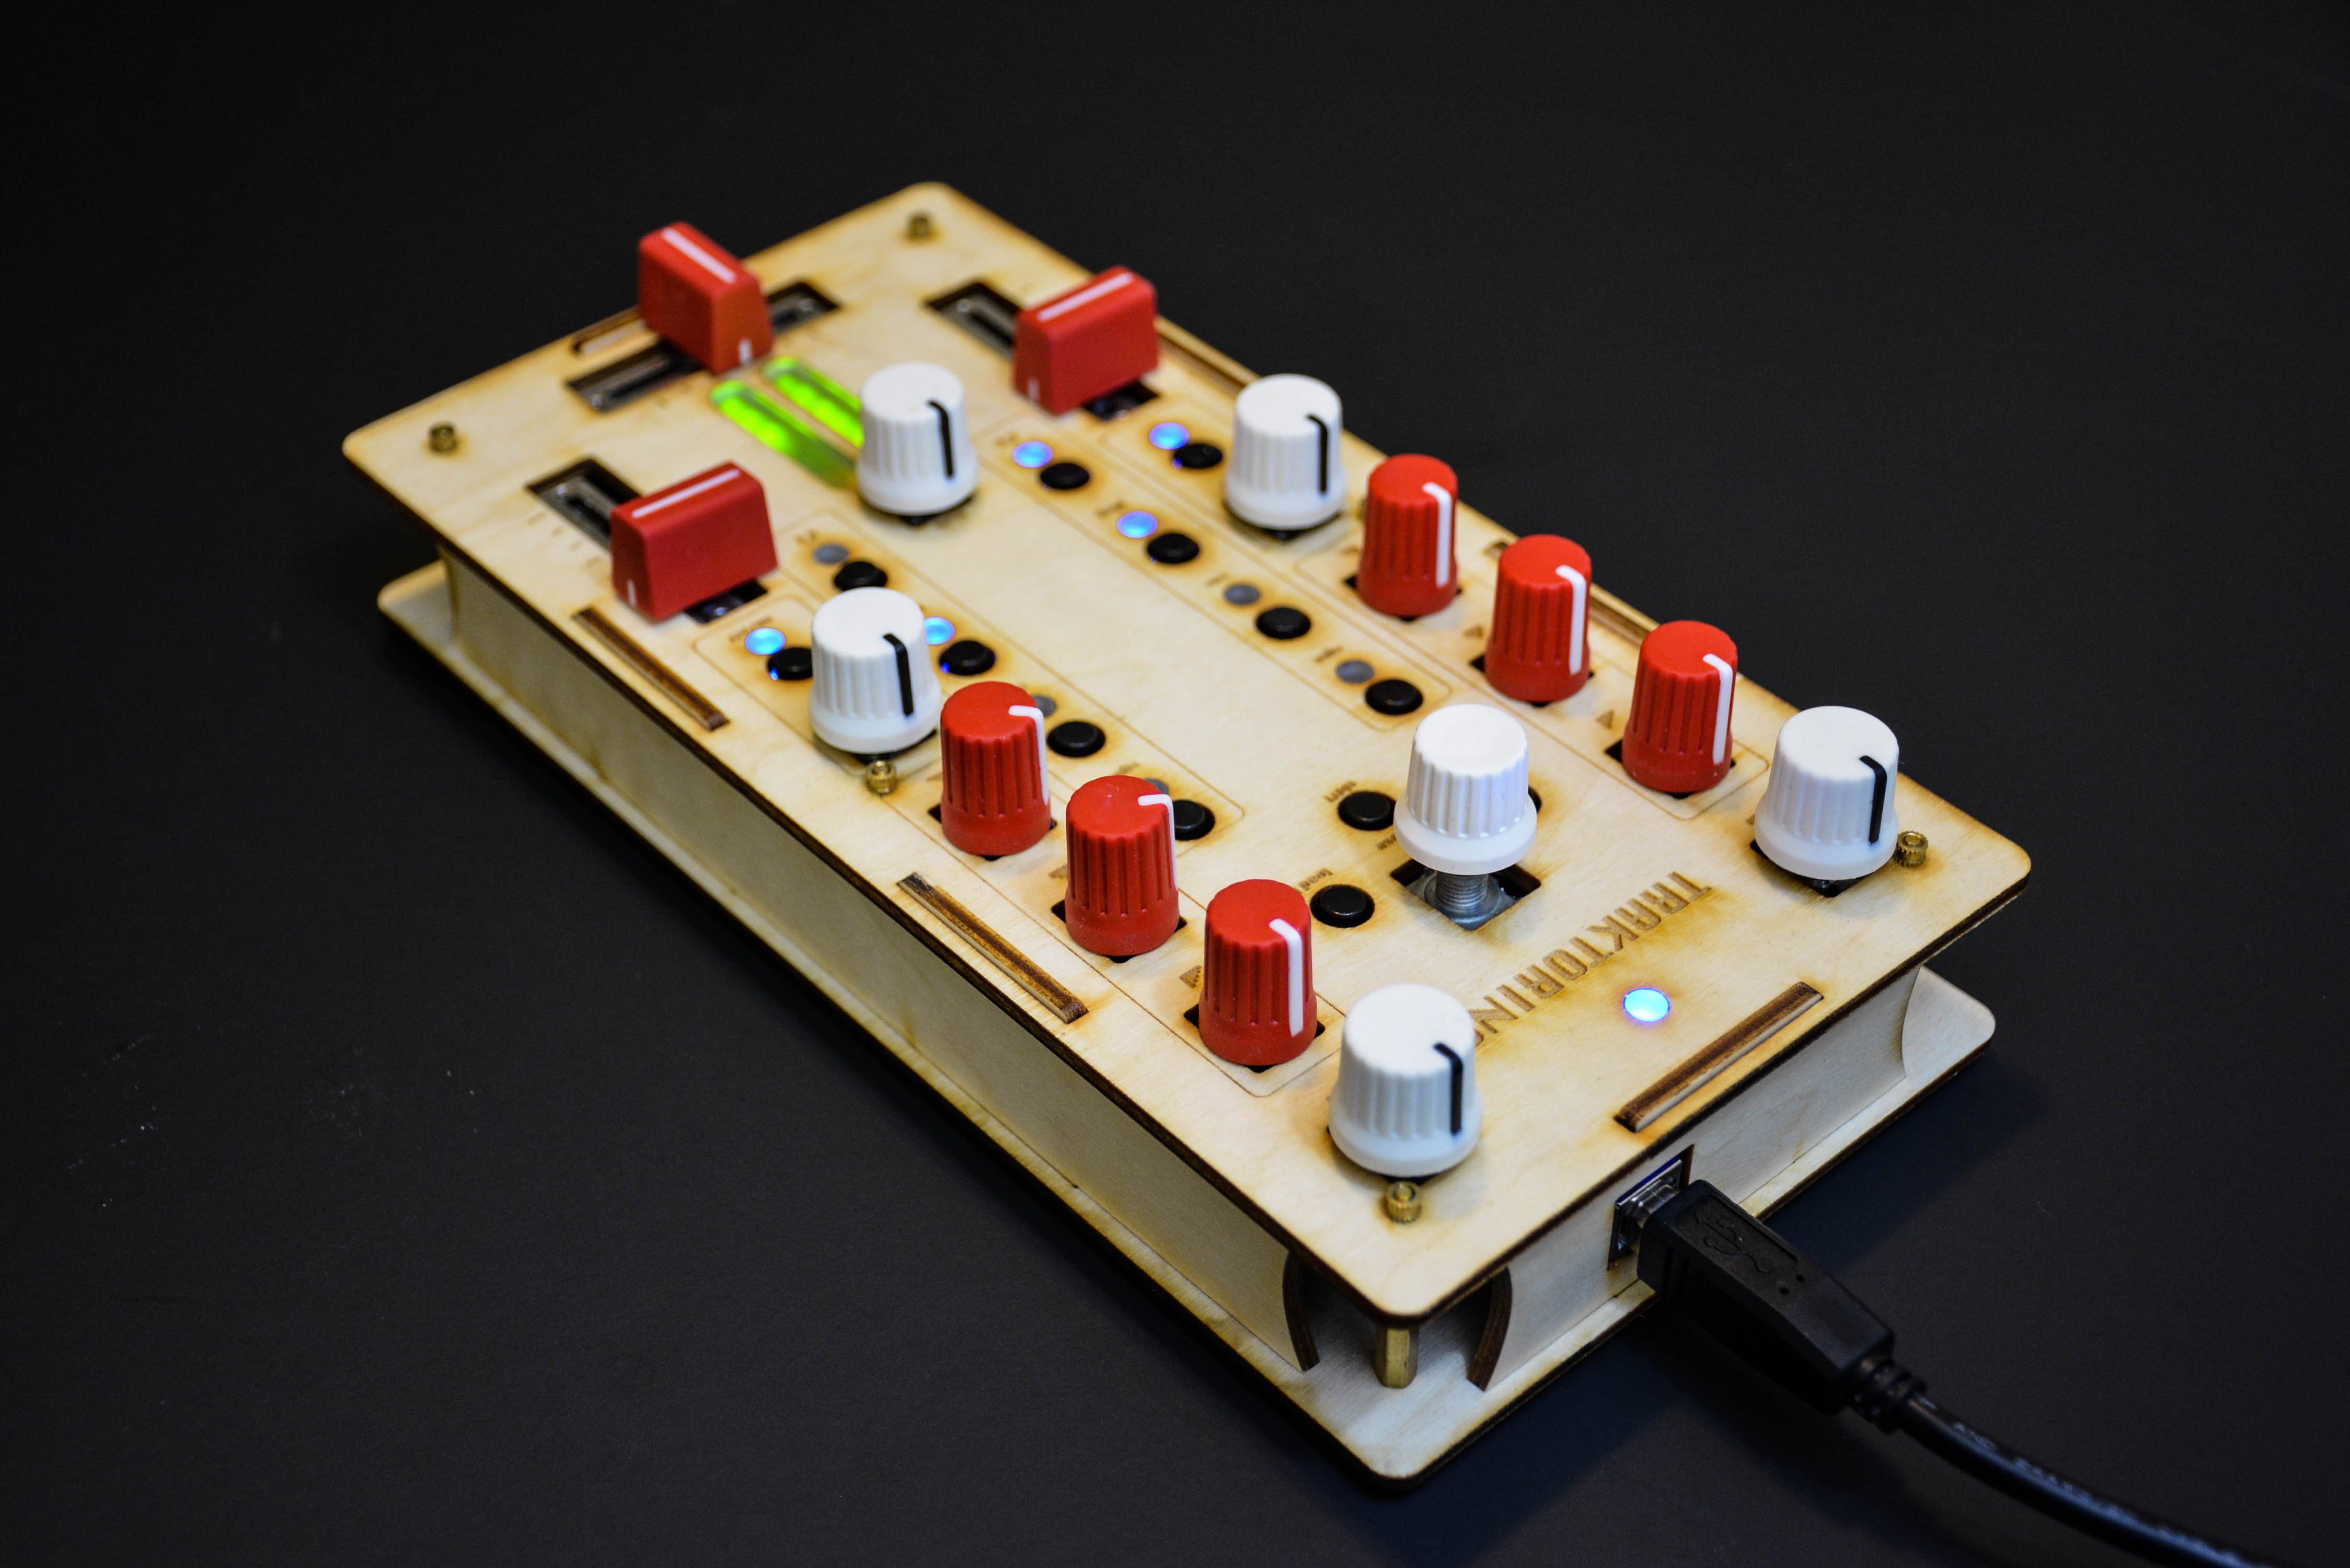
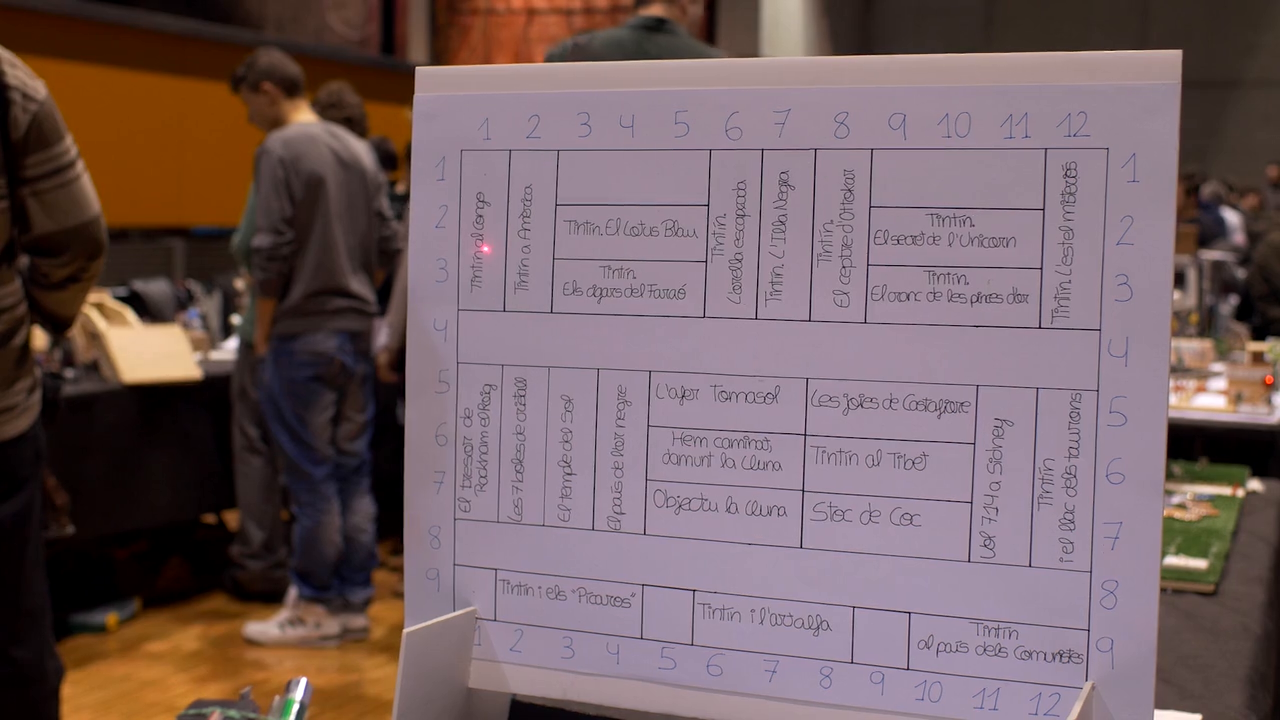
    I cannot stop being surprised by the amount of creativity students show when making projects. Even if I attend an average of five events of this nature per year, I keep on finding projects that make an impression in me. Students are always challenging any pre-conceptions I might have about what could be done with something as simple as an Arduino board. The one thing teachers keep on saying again and again is that it was them, the students, that pushed the process forward, that once they got started with the course, it was hard not to get carried away by the students initiative. The role of the teachers is playing the realist, trying to make sure the projects come to an end. That said, here some of the things I saw while walking around in the fair.

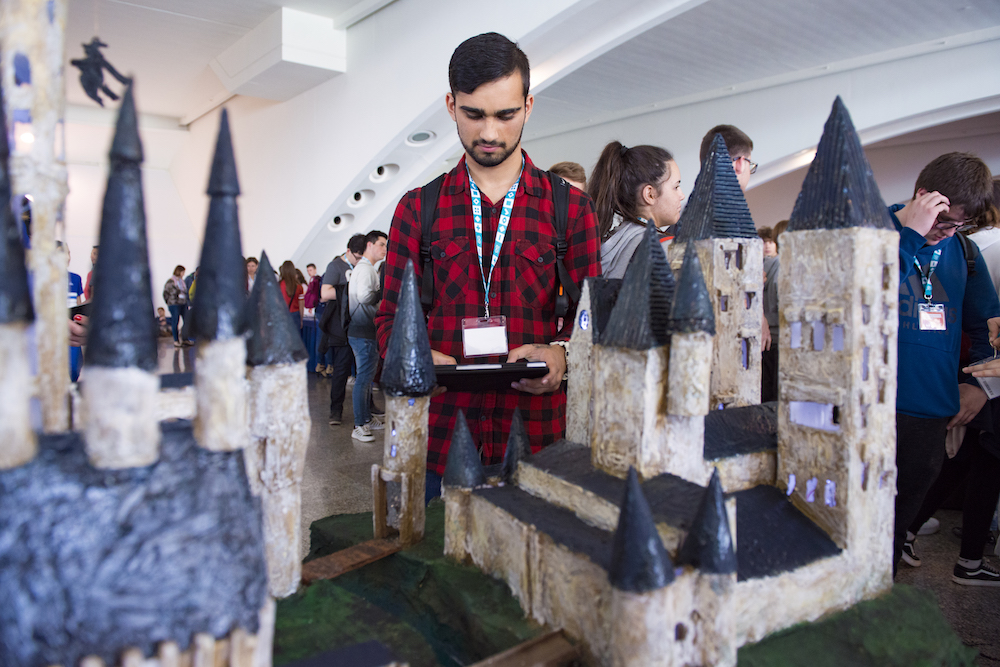
    Probably the most impressive project I came across was a model of the Hogwart’s castle inspired by the Harry Potter movies. It took the students four months to build the entire project. It was a replica of the castle, so heavy that it needed four people to carry it around. It had dragons flying around one tower, the lights could be turned on and off… there was even a fountain with running water! The whole mode could be controlled via Bluetooth from an Android tablet. In total, the model took three months to construct, the students said, while making the electronics and software work took one month.

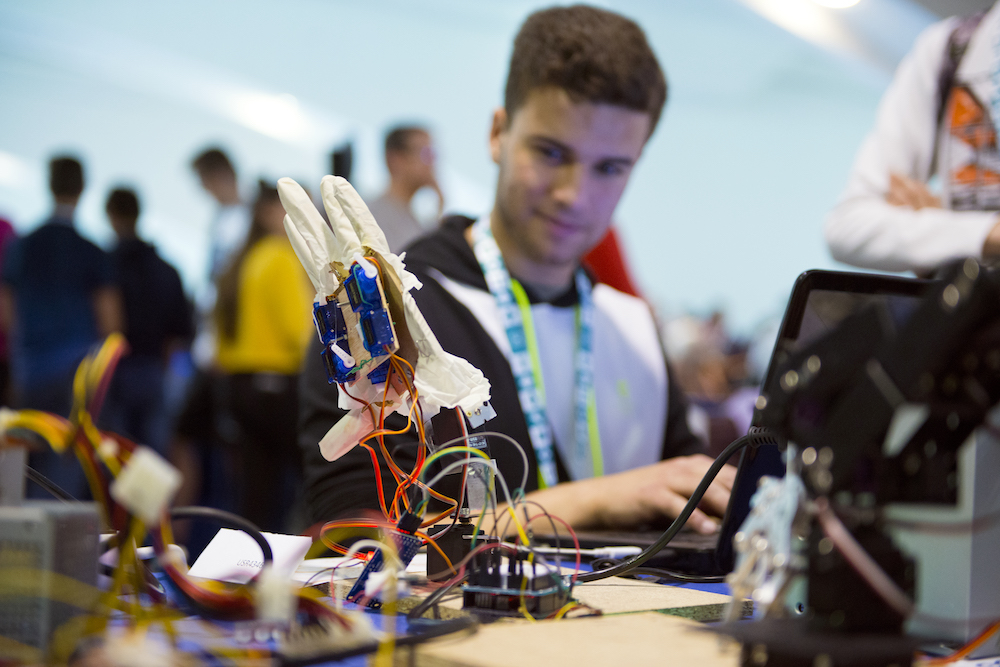
    On the other side of the spectrum, I could play with a small arm wrestling toy made by a single student that took only 5 hours to build. You can check out the interview with the student in the above-posted videos. While the project seems to be simple, it is clear that the student had become quite knowledgeable in the craft of making projects, since he had figured everything for the project on his own without any external help.

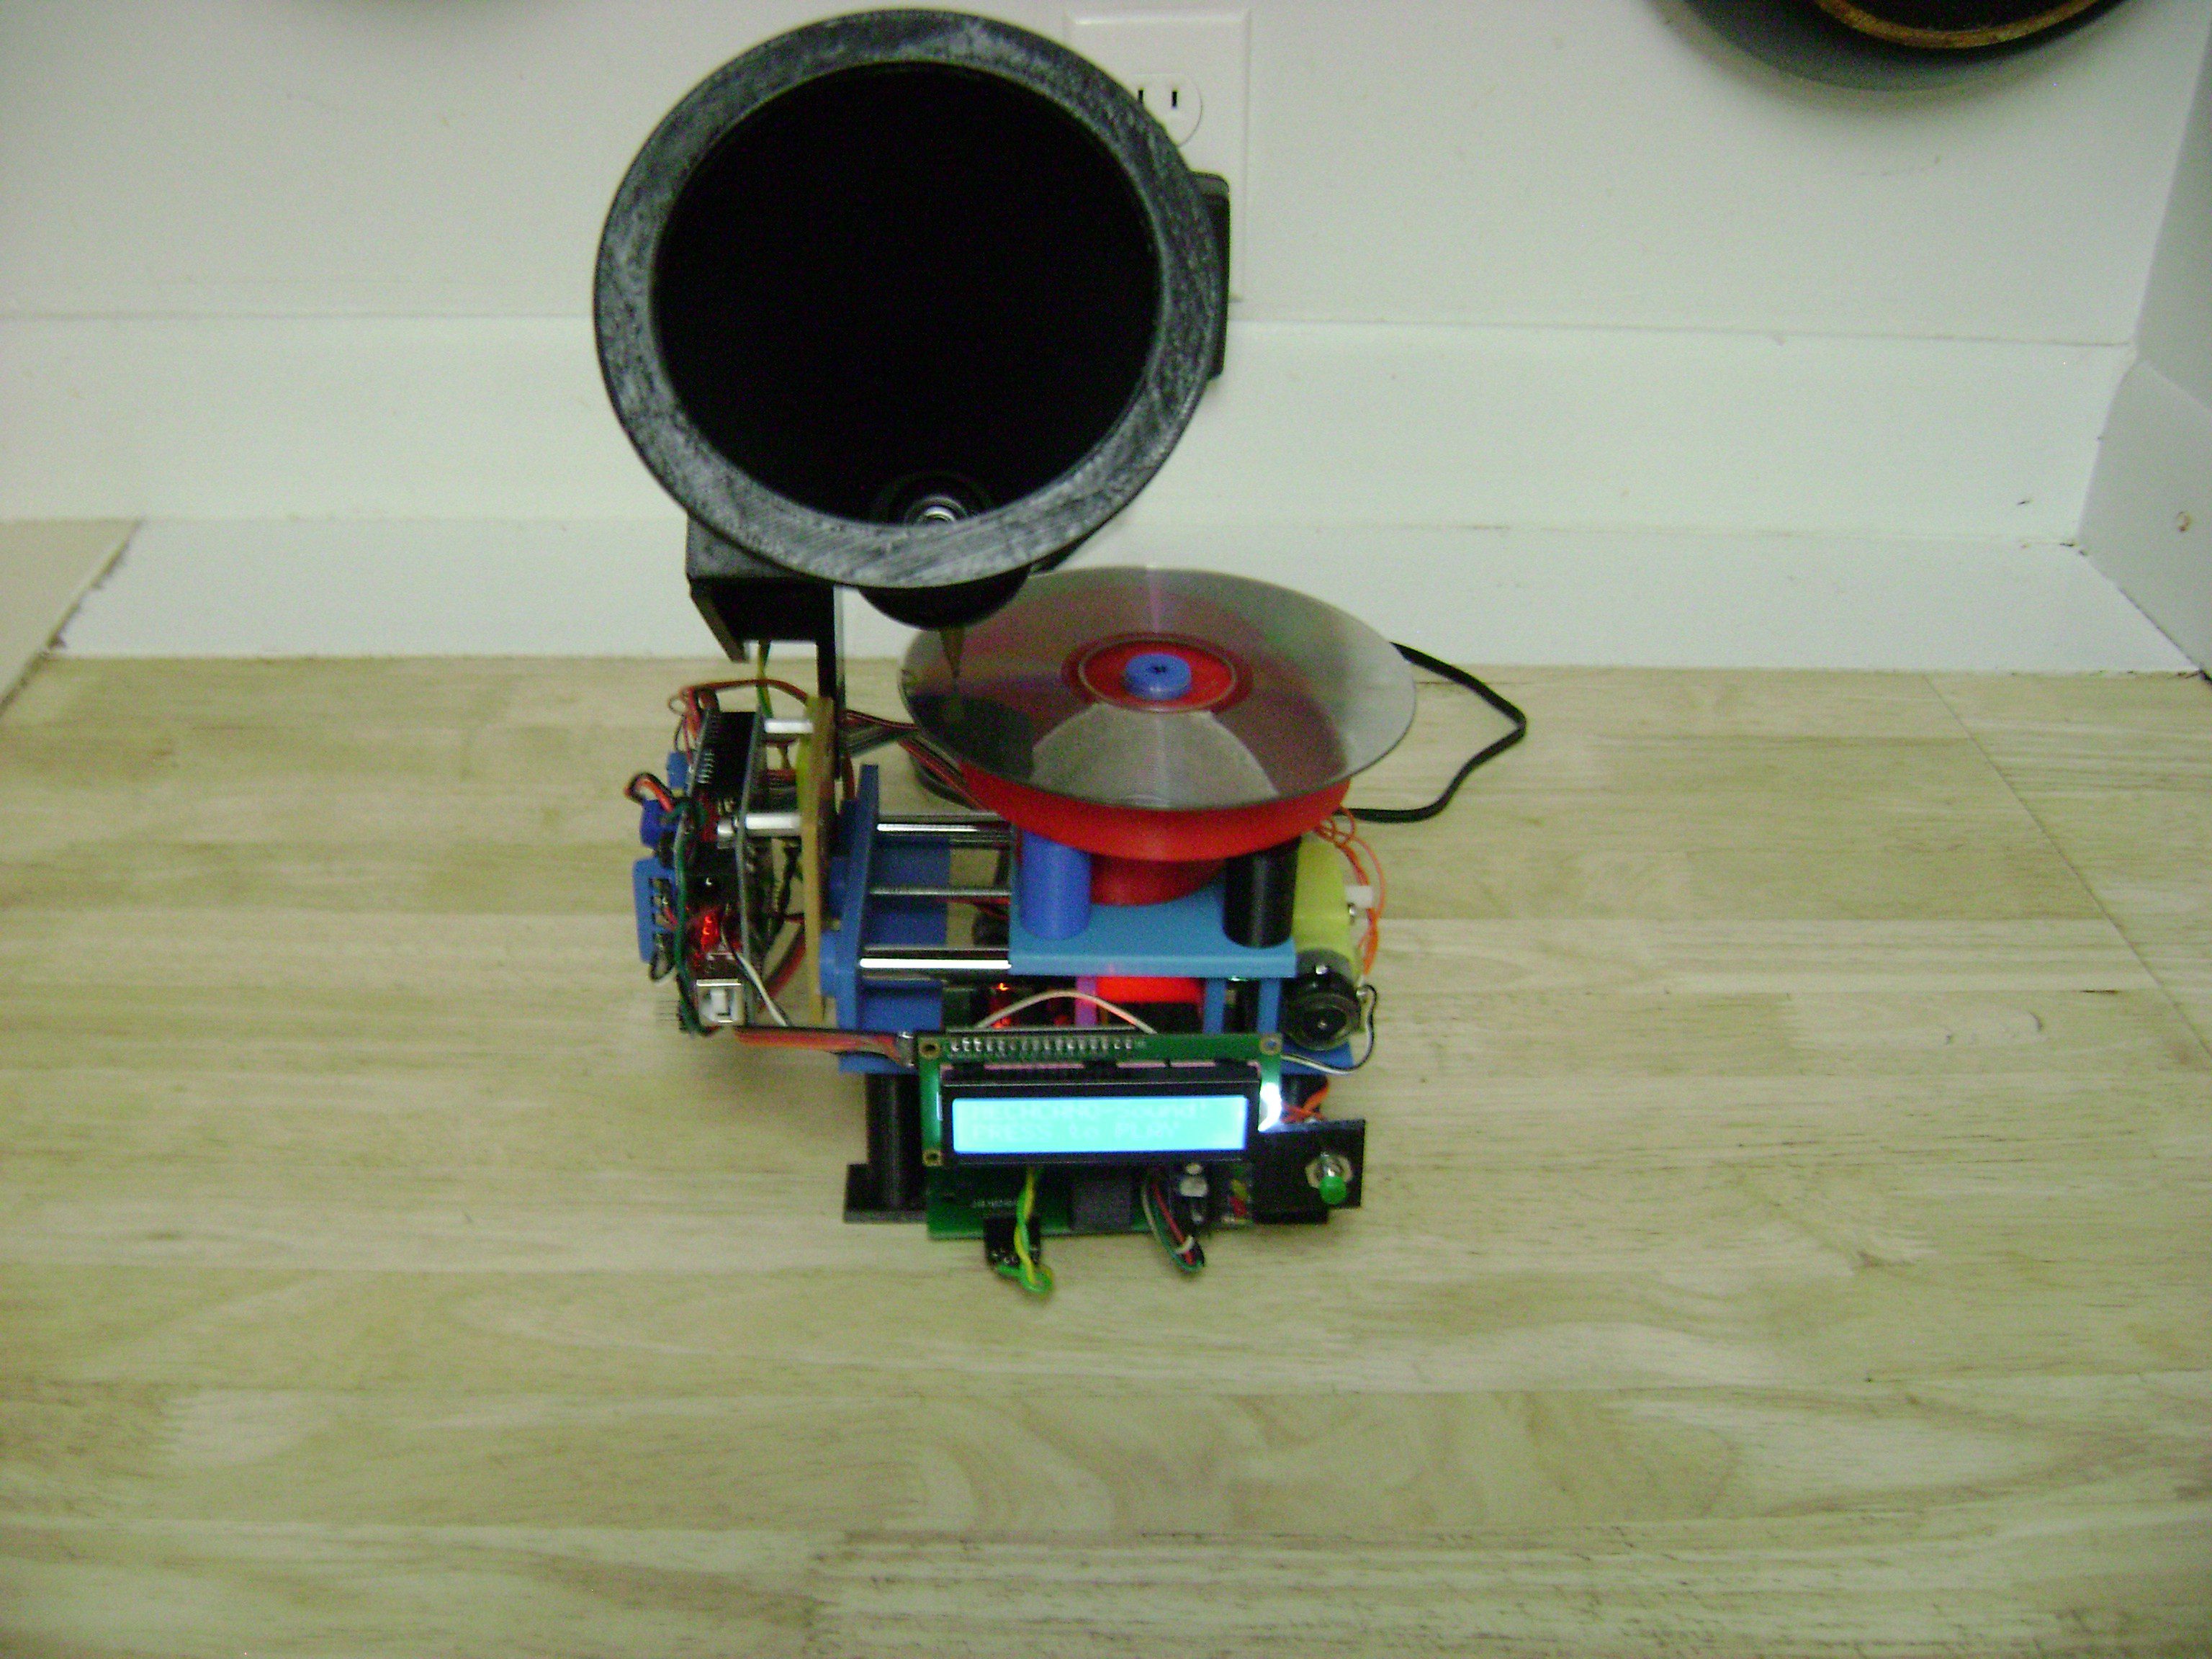
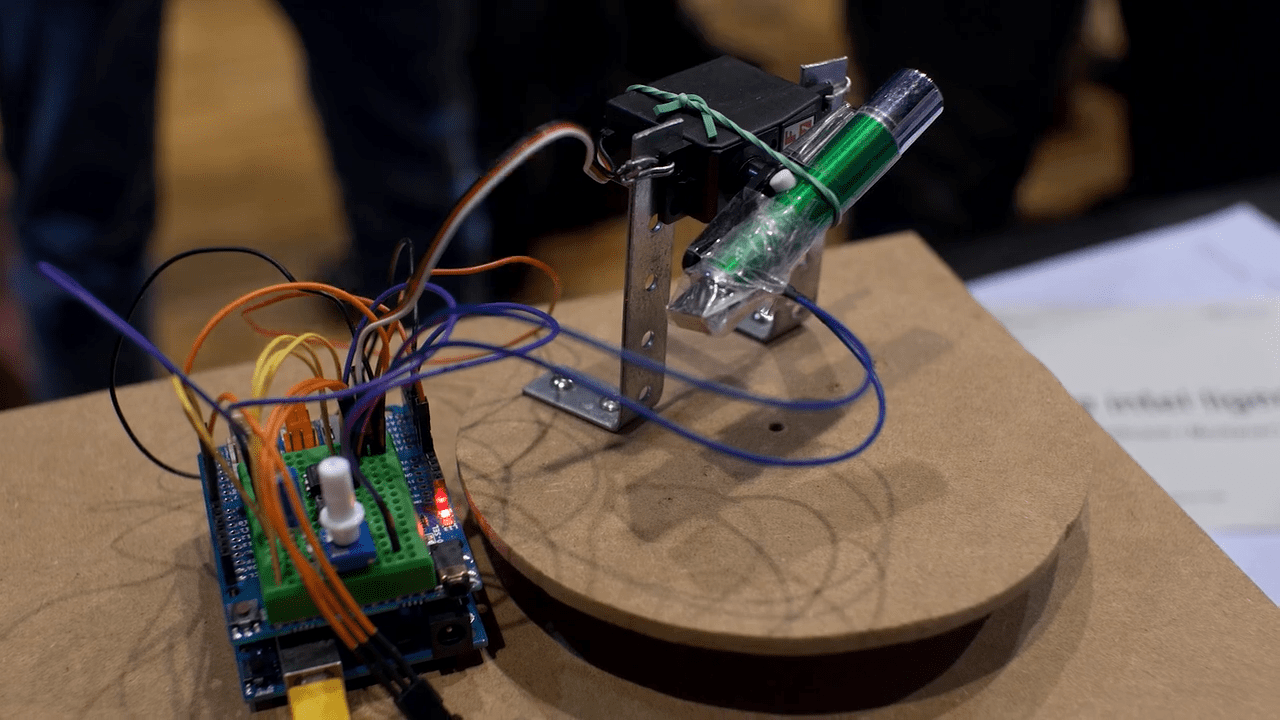
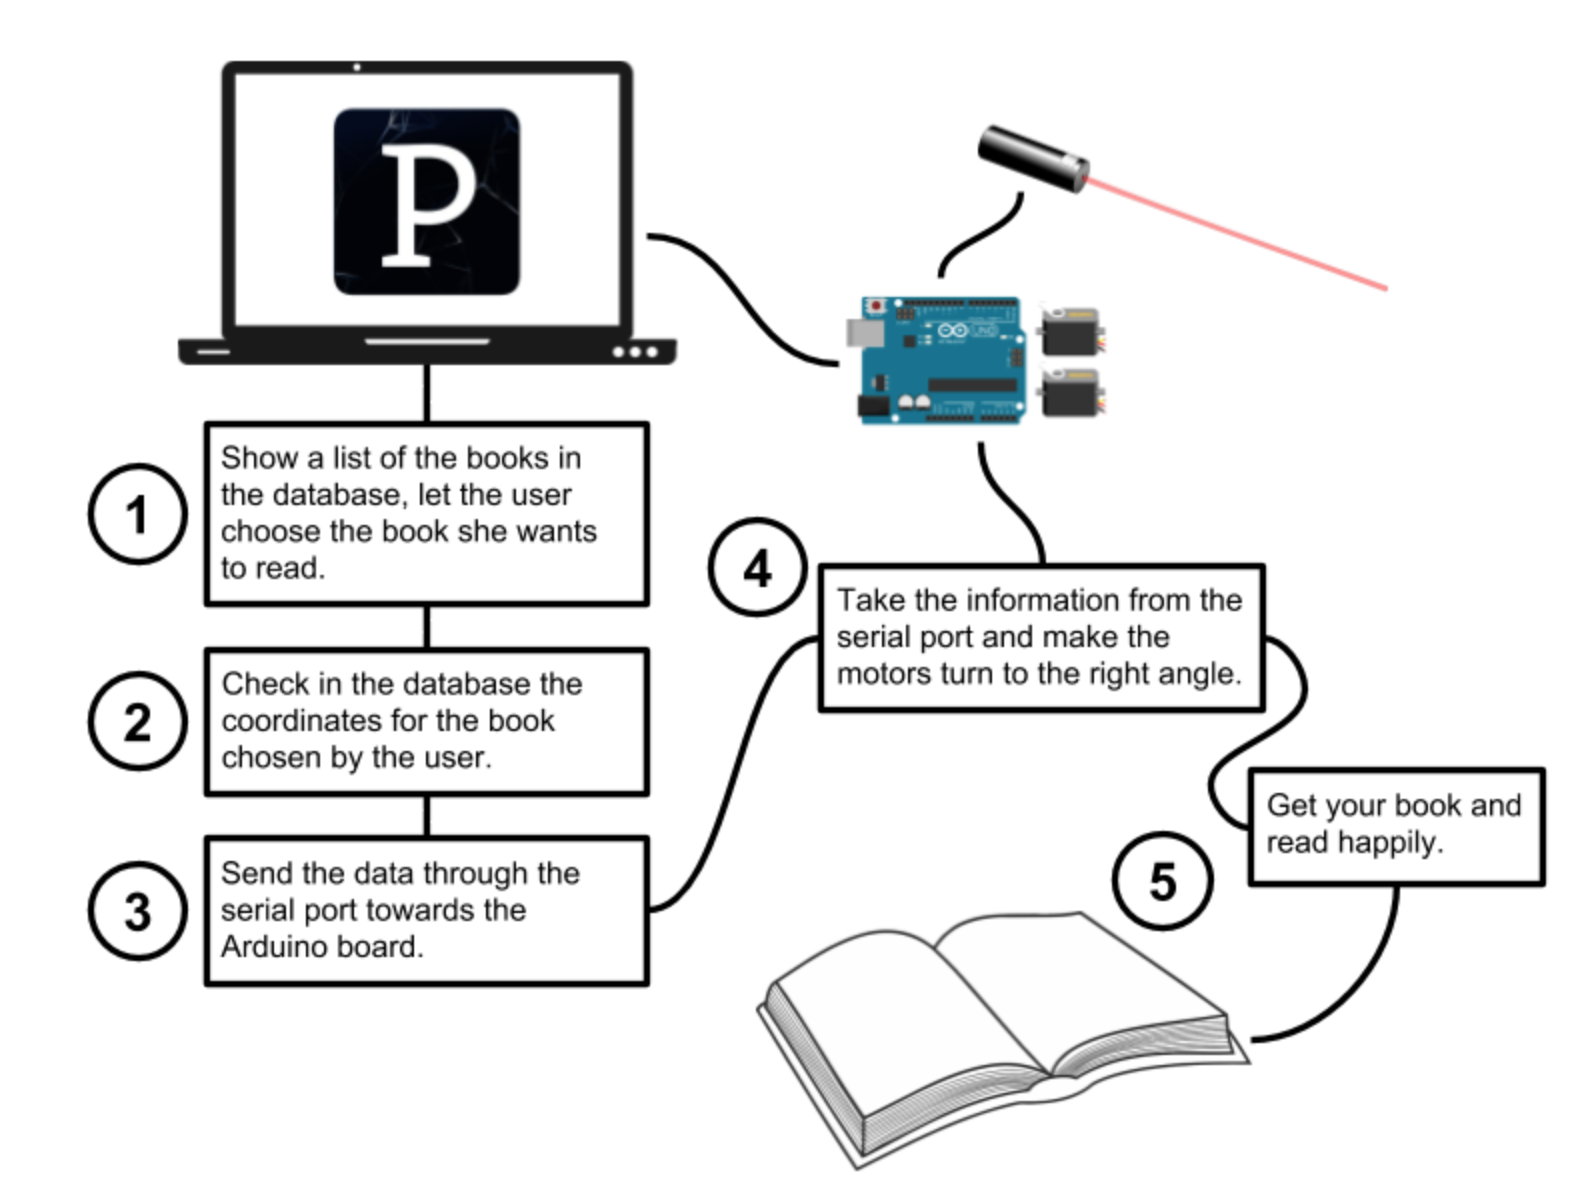
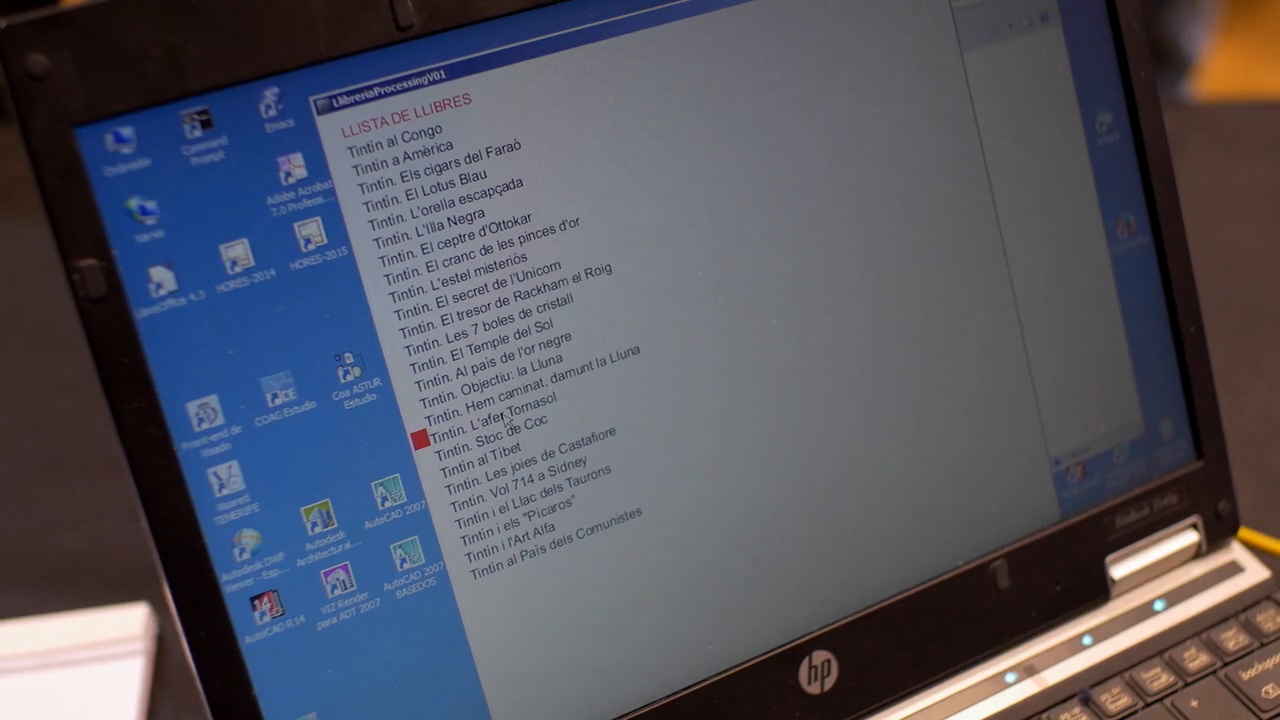
    One last project I would like to talk about was a small drawing machine comprised of mechanics from DVD drives that could replicate small drawings (less than 10x10cm big) using a pen. The students explained that it barely worked the night before, but that they finally figured out the calibration process minutes before leaving for the fair. The results, as you can see on the video interviews, are quite remarkable. They can export drawings using the open source program Inkscape in a format (G-code) their machine can understand, this allows them to trace any kind of vectorized drawing and reproduce it with their machine.

    There were a lot more projects, take a look at the videos and pictures in this blog post. We will be presenting some others as part of the Arduino Livecast series in the the future. If you want to know more, just subscribe to Arduino’s YouTube channel and you will get weekly notifications on our videos.

    Acknowledgements

    The CTC Valencia project has been possible thanks to the generous contribution of EduCaixa, the on-site collaboration of the technical body at CEFIRE, the kind support of the regional government of Valencia – the Generalitat -, and the help of our old friend Ultralab.

    From everyone involved in the project, big thanks to Ismael and Oscar, who believed in the project and pushed for it. Personally I want to thank Nerea who coordinated the project, and Roxana who was there making it happen from Arduino on a weekly basis; also Carla and Carlos who covered up when needed. Finally to Laura, who worked long evenings on top of everything else to make all of graphics needed for the fair.

    At a more technical level, we have a new revision to the look and feel of the CTC project site coming, and it is looking awesome. Marcus, Gabrielle, Luca and everyone working with the UX in Arduino are creating one of the best-looking educational experiences ever. If not only the content is good, but if it feels good and looks good, then the experience will be excellent!

    Do you want CTC in your world?

    If you want to be part of the CTC initiative, visit Arduino Education’s website, subscribe to the Arduino Education Newsletter [at the bottom of that site], or send us a request for more information via email: ctc.101@arduino.cc.

    [Photos by Pablo Ortuño]


    Website: LINK

  • 1961 rotary phone gets a 2018 cellular upgrade

    1961 rotary phone gets a 2018 cellular upgrade

    Reading Time: < 1 minute

    1961 rotary phone gets a 2018 cellular upgrade

    Arduino TeamApril 23rd, 2018

    While it’s hard to beat today’s mobile devices functionality-wise, if you need a phone built like a tank and designed for voice communication and voice communication only, you can’t go wrong with the Western Electric Model 500 rotary telephone. As maker “bicapitate” shows on Imgur, these models include a generous amount of space inside, enough room in fact for an Arduino Uno along with a tiny Adafruit FONA module for cellular capabilities.

    While project details are slim, it appears that the Uno takes pulses from the rotary input, then makes calls via the FONA. A DC motor drives the bell to indicate a call is being made, and the original headset, possibly modified with a new speaker and mic, is used for audio. It now also includes a LiPo battery, allowing you to use this wherever convenient—while still slamming the headset down with authority!


    Website: LINK

  • YouTuber makes his own Overwatch laser turrets

    YouTuber makes his own Overwatch laser turrets

    Reading Time: 2 minutes

    YouTuber makes his own Overwatch laser turrets

    Arduino TeamApril 23rd, 2018

    If you ever wanted to to see what Symmetra’s sentry turrets from Overwatch would look like in real life, now you can thanks to Mr. Volt. The YouTuber has produced a pair of them powered by a LiPo battery and controlled with an Arduino Mega, utilizing a relay shield to provide enough power to each laser.

    In theory, the turrets can each be aimed with a servo motor and sense objects with an infrared range finder. The main control feature, however, is an arcade button that controls firing, along with a big red e-stop switch to cut things off as needed. 

    After a couple weeks of tinkering, my first iteration of Symmetra’s turrets are alive! They may be 3D-printed instead of hard light constructs, but I still think they’re pretty cool. Each turret holds a 2W 445nm laser and RGB (Dotstar) LEDs. They’re controlled by an Arduino Mega and some relays.

    You can see it demonstrated popping balloons at just after the 8:30 mark in the video below. Also, please be sure to use the necessary precautions when working with lasers. For his part, Mr. Volt decided to build his own FPV rig out of a welding helmet!

    [youtube https://www.youtube.com/watch?v=xpUE_8hHXck?feature=oembed&w=500&h=281]


    Website: LINK

  • Arduino and Distrelec launch a new automation & robotics contest!

    Arduino and Distrelec launch a new automation & robotics contest!

    Reading Time: 2 minutes

    Arduino and Distrelec launch a new automation & robotics contest!

    Arduino TeamApril 23rd, 2018

    How can you help advance Industry 4.0 using the Arduino ecosystem? From robots and predictive maintenance to remote control and data acquisition, we’ve teamed up Distrelec to launch a new Automation & Robotics Contest challenging our community to create innovative solutions that can make the industry faster, cheaper, more flexible, and efficient.

    Participants are required to tap into our extensive range of IoT boards like the MKR1000 WiFi and MKR GSM 1400, libraries, and online platform to bring their ideas to life. Industrial automation projects could target energy management, remote monitoring, machine safety, or predictive maintenance, for example, using Arduino Create to set up, control, and connect your Arduino, Intel, and Arm-based devices. Robotics projects could include designs for surveillance drones, robotic arms, rovers, or autonomous transportation, leveraging feature-rich boards like the Mega and Due to prototype advanced systems. 

    [youtube https://www.youtube.com/watch?v=9Sf–pVNr9M?feature=oembed&w=500&h=281]

    How to Enter

    • Create a free account on Arduino.cc (or log in if already a member).
    • Register for the contest by clicking “Register as a participant.”
    • Send your concept to the Arduino/Distrelec: Automation & Robotics Contest by June 29, 2018. The top 150 makers will receive a coupon for Distrelec online store. Moreover, there will be a series of micro contests, with weekly prizes handed out from Distrelec.
    • Design, build, and submit your project by September 16, 2018. Winning projects will be selected based on their originality, quality, creativity, and social impact. 

    Prizes

    Ready to get started? You can find more information on the contest here and browse Distrelec’s entire Arduino lineup on their website. To submit your ideas, please visit the Arduino Project Hub. And remember, projects must use an Arduino board in order to be eligible to win!


    Website: LINK

  • PID temperature control with Arduino

    PID temperature control with Arduino

    Reading Time: 2 minutes

    PID temperature control with Arduino

    Arduino TeamApril 16th, 2018

    If you want to keep something at a certain temperature, say a block of aluminum, you’ll need a thermocouple and some sort of heating element. While you could turn a heater on and off abruptly in a sequence appropriately known as “bang-bang,” a more refined method can be used called PID, or proportional-integral-derivative control. This takes into account how much the temperature is outside of a threshold, and also how it’s changing over time.

    As shown in this example by Electronoobs, PID control can be accomplished using an Arduino Uno, along with a type K thermocouple and a MAX6675 module for sensing. The Arduino sketch reads the data and sends the proper amount power to a heating element via a MOSFET in order to maintain the desired temperature without excessive oscillations.

    What I want, is the aluminum block below to have let’s say, exactly 100 degrees. I’ll control the real temperature using a K type thermocouple. To read the data I’ll use the MAX6675 breakout module and control the PID algorithm with and Arduino. Finally, to apply power we will make a small circuit using a MOSFET or maybe a TRIAC in case of high AC voltages. This will be a close loop. The thermocouple measures the real values, the Arduino creates the signal applied to the MOSFET and this transistor will control the power of a heating element inside of the aluminum block and once again the thermocouple will measure the value, that’s why it’s a close loop.

    Be sure to check it out for an introduction to this powerful control scheme!

    [youtube https://www.youtube.com/watch?v=LXhTFBGgskI?start=618&feature=oembed&w=500&h=281]


    Website: LINK

  • Thursday Night Live(cast) with your host David Cuartielles

    Thursday Night Live(cast) with your host David Cuartielles

    Reading Time: 7 minutes

    Why livecasting from Arduino Education

    About a month ago we started livecasting from Arduino’s YouTube channel. This is something I had been willing to do for quite some time, but I never figured out the way to make room in my agenda to fit the planning required to make it happen. Technology has changed a lot over the last couple of years and it is relatively easy to start broadcasting from anywhere given there is an Internet connection. Not only has the tech for transmission evolved, there are also several options on where to send the video so that others can watch it whether live or in its recorded form later.

    What we are excited about

    We want to reach you when you’re commuting to/from school and have some time to chat about things that matter in the field of tech and education. We want to test LIVE experiments made by others and see whether we get the same results. We want to showcase projects from the Arduino community that are relevant for those involved in education. We want to give a voice to makers from all over the world that we meet when traveling (something I do often). We want to fail on air, and get help from the chat to fix things. We want to have a more inclusive audience. Livecasting is a quick and honest way to approach all of this, minimizing the impact in terms of the amount of resources needed to put it in place.

    Our yearly livecasting plan

    Even if the livecasts will be super LoFi in nature, it doesn’t mean we will not be thinking carefully about the content to be presented in them. We have prepared a (preliminary) agenda all the way to 2019. While the exact topics of the livecasts are open to change, we will keep a balance between technical casts, interviews, project presentations, and basic introductory sessions for those starting. We will air in English on Thursdays at 7pm CEST (CET) unless there’s a holiday, in which case we’ll try on an earlier day that same week. Some weeks we might transmit more than once, like e.g. if we find ourselves at a conference or event where there might be something meaningful to inform you about.

    That said, follows an overview of the livecasts we have planned to make (along with those that have already taken place).

    In the program you will see how some of the livecasts are actually sponsored by the eCraft2Learn EU research project. This is a project we have been working with for over a year, where our role is to provide teachers interested in Arduino related topics with introductory tutorials to the technology. We call those livecasts “teacher tutorials.”

    List of Livecasts: past and (near) future

    Teacher Tutorial 1: Introduction to Arduino and the popular Arduino Uno board. (Please note that the audio was not good in this transmission, we have learned a lot since then.) 

    [youtube https://www.youtube.com/watch?v=TSYWDnfYjrc?feature=oembed&w=500&h=281]

    Hacking STEM 1:  A water quality sensor experiment, where we took one of the Microsoft Hacking STEM projects and replicated it. The building process went fine, but the sensor gave us some trouble because of some alligator clips.

    [youtube https://www.youtube.com/watch?v=xw5282zEumo?feature=oembed&w=500&h=281]

    Sensors Q&A 1: We are always receiving questions about how different sensors work. Here we devoted one session to test different temperature sensors… ah, and we threw an Arduino Uno into the frozen sea and proved it works (after drying up).

    [youtube https://www.youtube.com/watch?v=tEmuSuW3Tzc?feature=oembed&w=500&h=281]

    Live from Hackergarage GDL, Mexico: We interviewed a series of people from the Mexican maker scene. People from all over the country came to Guadalajara for an event and we managed to squeeze in a series of live interviews.

    [youtube https://www.youtube.com/watch?v=7ufWPH7qePY?feature=oembed&w=500&h=281]

    Live from Hacedores CDMX, Mexico: We went to Mexico City and interviewed the founder of the Hacedores MakerSpace, Antonio Quirarte, who could also be considered one of the founding parents of the Mexican make scene. We had a great talk and he showed some of the educational projects they have been working with for some time. Are you into weather stations? Then this is your podcast!

    [youtube https://www.youtube.com/watch?v=tbtgAHFFSJ0?feature=oembed&w=500&h=281]

    Teacher Tutorial 2: Learn about Arduino’s classic IDE and how it differs from the new online Create IDE. We also found out about the Microsoft OneDrive issue with the classic IDE (bug that will be solved in the next release).

    [youtube https://www.youtube.com/watch?v=wOkKWuqEejo?feature=oembed&w=500&h=281]

    April 18th (between 10AM and 12AM CEST) – Live from CTC Valencia Faire: We will be transmitting live from the museum Ciudad de las Artes y las Ciencias, showing projects made by students participating in the CTC initiative.

    April 19th – CTC Projects 1: We will dissect a CTC project made by students and try to replicate it, to some extent, with whatever materials we have in our office.

    April 26th – Microsoft Hacking STEM Project 2: Yet another project from the Microsoft Hacking STEM collection.

    May 3rd -Teacher Tutorial 3: Learn how to extend Arduino’s classic IDE, add libraries, use other cores, etc.

    May 10th – CTC Projects 2

    May 17th – Real World Applications: Let’s look at a project where Arduino is being used in the wild to see how it could inspire our students to think more about this kind of design cases.

    May 24th – Teacher Tutorial 4: Electronics and electricity basis

    May 31st – CTC Projects 3

    June 7th – Microsoft Hacking STEM Project 3

    June 14th – Summer Projects: What can you do with Arduino this summer?

    There is a full agenda, although it may be a bit too much to include in this blog post. We will update you with more details in the coming weeks, so stay tuned.

    The equipment

    As you could imagine, there are different techniques for livecasts. Since we are looking at a consistent experience over the programs, we have settled on using gamer computers (because of the graphics card), together with a couple of webcams, an external mixer board, and a good ambient mic. We have an extra HDD to record the programs should the bandwidth be so bad that we need to lower the quality beyond our own standards and a Zoom recorder because sound is sometimes troublesome. The software of choice is OBS that can push the stream directly into YouTube and uses the graphics card for real-time compression of the video, which is very helpful. This is the reason why we had to fall for MS Windows (those that know me know I’m a Linux guy), as OBS doesn’t support some of the extra features of the graphics card in the Linux operating system.

    In the studio, we have a stationary gaming PC with two screens; when on the road, I have a gamer laptop of similar characteristics. The other difference is that the stationary has a control panel made with an Arduino Leonardo operating as MIDI device, which sends keystrokes to OBS via an interfacing program. These are used to change between scenes, switch cameras, add overlays, etc. For the portable station, I got a control panel from El Gato that takes a lot less space.

    What has (and hasn’t) worked so far
    At the time of writing I’ve made six livecasts with different degrees of success. I have no problem admitting that we (I) are still learning how to prepare the system, switch scenes, and even select the content and write scripts. During our first transmission, the audio ended up having a terrible echo that we couldn’t figure out how to filter. For the second one, the sensors didn’t work even after a full day of preparations. In the third, there were times when I was talking about something but the screen was showing something unrelated. That day I came in the studio and someone had taken one of the monitors to use it in a lab experiment so I had to improvise and had no monitor to check whether I was doing it right or wrong.

    So far we have learned a lot, yet we still consider the livecasts to be in beta. We are having fun making them and will continue to do so. Also, we are nurturing a new chat community using Discord where people interact live during the programs making suggestions, adding links, and competenting the show. If you want to join the conversation, use the following link and join us on your computer or smartphone via the Discord app.

    Finally, do not forget subscribing to the Arduino YouTube channel. If we see a good response from the community, we will start making a lot more video content. Don’t discard seeing some other relevant members from the crew coming online, I will do my best to convince them!

    Other livecasts you can follow

    We didn’t invent livecasting, obviously, and there are other streams you can subscribe to if you want to learn more about the maker culture. Personally, I have to recommend two Spanish channels. First, La Hora Maker, run by Cesar, with whom I collaborate on making live Q&A sessions. Cesar is probably the most knowledgeable person in the maker culture in Spanish language. The other relevant channel is Programar Facil from Luis, where you will find a lot of sessions about projects made with Arduino and various programming techniques.


    Website: LINK

  • MP3 player “reads” CDs like a vintage Victrola

    MP3 player “reads” CDs like a vintage Victrola

    Reading Time: 2 minutes

    MP3 player “reads” CDs like a vintage Victrola

    Arduino TeamApril 10th, 2018

    Digital music—which gives us access to a virtually unlimited amount of media at our fingertips—is an amazing innovation. On the other hand, if you get nostalgic for something a bit more tangible, this “Victrola for the 21st century” may just fill that gap.

    The device, by maker “castvee8,” plays digital music with the help of an Arduino Uno. Instead of simply emitting the tunes, however, the speaker is augmented with 3D-printed parts to make a horn assembly, and pushed over a CD spinning on a turntable using a worm drive. This creates the illusion that it’s playing digital music in a strange mashup of ‘90s tech and vintage vinyl record players.

    My goal was make a music player with a mechanism that simulated a phonograph design but actually was just for aesthetics, and use modern digital media for the actual music. The combination of nostalgia with the modern components like an LCD screen, microcontroller and SD song storage would round this out as a unique build.

    The main features of the build are a large cone type speaker supported on a moving axis that scans it across the cd simulating a tonearm pickup, an LCD module that gives instructions such as “press to play” and “select song” with pushbuttons that match, an LED analog level indicator and volume control, a rotating table to turn the cd as if it were being played, and of course the electronics to make it all work. At the end of the song the axis returns home so everything is reset for the next song to be played.

    Check it out in the short clip below!

    [youtube https://www.youtube.com/watch?v=VSaBmFU46Gw?feature=oembed&w=500&h=281]


    Website: LINK

  • A 3D-printed personal weather station

    A 3D-printed personal weather station

    Reading Time: 2 minutes

    A 3D-printed personal weather station

    Arduino TeamApril 9th, 2018

    If you need to know the forecast, generally you can look outside, listen to a weather report, or take advantage of the wide range of online services available. For something local to your dwelling place, however, this 3D-printed weather measurement device gives a great way to see what’s going on.

    The system features a 3D-printed rain gauge, anemometer, and weather vane, along with a barometer and temperature sensor. Information from these sensors is piped to an Arduino Uno and displayed on a 4×20 character LCD.

    While meant as a demonstration for an arts/science exhibition and would need to be calibrated for real world use, it is a perfect starting point if you’d like to build your own personal station!

    The thrust bearings should be a tight fit and not require glue. The 5mm brass tube for the axles though will benefit from some cyanoacrylate on the ABS to hold them in place. Rough the tube up a bit with sandpaper or a file to help adhesion. The temperature and barometric pressure does not need calibrating. However rainfall (it is fairly close) and wind speed will need calibration. As long as the magnet in the wind direction sensor is close enough to trigger two adjacent reed switches when half way between the two reeds, it will allow 8 reed switches to reliably indicate 16 directions.

    The reed switches in the direction indicator are vertical and are not trimmed, just the top end curled over to allow easy soldering to the common earth wire ring. Extra spacing maybe required, eg a small ring of heat shrink tubing to keep the moving parts of the anemometer and wind speed separated and seated on the bearings in the stationary base. This was too fine to print.

    All the magnets N-S poles should be aligned along the line of the reed switch. The magnet lines of force between N-S have the best switching effect, not one of the poles, N or S, on its own. This also helps eliminate bounce, or multiple triggering.

    More details on the project can be found on Thingiverse.


    Website: LINK

  • Give new life to an old electron microscope with Arduino

    Give new life to an old electron microscope with Arduino

    Reading Time: 2 minutes

    Give new life to an old electron microscope with Arduino

    Arduino TeamApril 9th, 2018

    As seen here, although you might consider your oscilloscope and other test equipment to be pretty neat, you most likely don’t have anything nearly as cool as the scanning electron microscope that was dragged out of a shed at Benjamin Blundell’s local hackerspace.

    The small detail is that it doesn’t currently work. They’ve been able to track down the machine’s schematics, and Blundell was asked to get the contents off each of its ROM chips. Whereas this might have been difficult 20 years ago, he was able to hook chips up to an Arduino Mega and extract the contents of each one using code provided via his write-up.

    Some of you might have watched the TV series, Halt and Catch Fire? If not, don’t worry, I won’t spoil it much. Basically, a couple of the lead characters decide to read the bios out of the latest IBM machine. It’s quite a dramatic moment, but the reality is perhaps somewhat more sober. Anyway, the process they had was quite involved, as it was the eighties after-all. Nowadays, we have things like the Arduino Mega that has enough digital input pins to read a ROM with ease.

    While he still needs to figure out what’s going on with this information, they have a place to start and will hopefully have a very exotic tool running in the near(ish) future!


    Website: LINK

  • Build a light painting device with Arduino and LEDs

    Build a light painting device with Arduino and LEDs

    Reading Time: 2 minutes

    Build a light painting device with Arduino and LEDs

    Arduino TeamApril 9th, 2018

    Graffiti with spray paint is generally impolite and illegal, but as hacker “Reven” shows in his write-up, you can get a very similar effect with long exposure photography and carefully-timed LEDs.

    Instead of blindly moving a light point about to make this effect, he built his own handheld light painter using an Arduino Uno and a custom enclosure—shared on Thingiverse—to hold everything.

    The project’s Arduino sketch can be found here, and adds a 16×2 LCD display to a light painting device conceived of by Phil Burgess for Adafruit, which enables to control the brightness of the LED strip as well as select and load various images from a micro SD card.

    This has been done before, many, many times; and even commercially. But I wanted to build my own, both to learn in the process and because commercial options were out of my budget. I chose adafruit’s implementation as a starting point, because it worked on the hardware I already had and they have provided detailed instructions. I also wanted some additional features: I wanted to add a display and a menu system to be able to choose the image to display and adjust the settings (like brightness or speed). I also wanted to be able to turn off the brightness balancing that adafruit’s sketch did, because frame or animation painting wasn’t something I really needed. And most importantly, I adjusted the project to the materials I had at hand.

    With this fantastic build in hand, Reven can now produce beautiful light graffiti wherever it’s needed!


    Website: LINK

  • Designing a fake dynamic price tag

    Designing a fake dynamic price tag

    Reading Time: 2 minutes

    Designing a fake dynamic price tag

    Arduino TeamApril 5th, 2018

    Wile we know on some level that prices adjust to market conditions, with Amazon now owning Whole Foods, one could perhaps see a day when this happens electronically and instantaneously.

    To get a preview of what this might look like, maker “msbirfday” decided to create a random price generator based on an Arduino Uno and a 16×2 LED display. This was then disguised as an official price tag, and set up in a store to observe how shoppers reacted.

    The unit blends in nicely, and while employees might get annoyed at the device, it’s certainly an ingenious prank.

    Amazon’s recent acquisition of Whole Foods Market made us wonder: what’s stopping dynamic pricing from stepping into the physical world of retail? What if the prices in a supermarket were just as flexible as those online?

    Check out how it was made here, and see it in action in the video below!

    [youtube https://www.youtube.com/watch?v=z8l4fS0Mlns?feature=oembed&w=500&h=281]


    Website: LINK

  • Meet Eve, the Arduino chatterbot

    Meet Eve, the Arduino chatterbot

    Reading Time: < 1 minute

    Meet Eve, the Arduino chatterbot

    Arduino TeamApril 5th, 2018

    If you ever find yourself needing someone to talk to and can’t find a confidant—or perhaps even a pet—then the Eve chatbot by Debashish Buragohain will happily fill in.

    This little robot uses Google Voice Recognition on an Android phone to listen to what you say and convert it to text, then pipes it over to the Arduino-based robot via Bluetooth. Eve processes the information and emits the proper audio response, stored on an MP3 sound module. Along with audio feedback, the robot’s LCD screen is able to form simple facial expressions to help convey emotions.

    If you’d like to build your own, instructions and the needed files can be found here. You can also see Eve pleasantly chatting away in the video below!

    [youtube https://www.youtube.com/watch?v=bov56_1GDPo?feature=oembed&w=500&h=375]


    Website: LINK

  • Quadruped robot made entirely out of cardboard

    Quadruped robot made entirely out of cardboard

    Reading Time: < 1 minute

    Quadruped robot made entirely out of cardboard

    Arduino TeamApril 4th, 2018

    Walking robots can be a lot of fun, but many people would logically think that they need CNC equipment or a 3D printer to make this sort of bot. Creator “Raz85,” however, shows that this isn’t actually required, and built a quadruped using a structure comprised entirely out of corrugated cardboard.

    Each of the four legs are driven using 9g micro servos, controlled by an Arduino Nano. A human operates the spider-inspired robot with a remote consisting of an Arduino Uno and a small joystick module, while pair of NRF24L01 radio transceivers provide a link between the robot and controller.

    Despite its simple construction, the quadruped moves around impressively well…

    [youtube https://www.youtube.com/watch?v=UFnqBFXOsVk?feature=oembed&w=500&h=375]


    Website: LINK

  • Traktorino is an open-source DIY MIDI controller for DJs

    Traktorino is an open-source DIY MIDI controller for DJs

    Reading Time: 2 minutes

    Traktorino is an open-source DIY MIDI controller for DJs

    Arduino TeamApril 3rd, 2018

    A keyboard and mouse is a great user interface system for general computing tasks, but in other situations custom knobs, sliders, and lights would certainly be more fun. If you enjoy making digital music, then you should check out this low-cost, Arduino-based MIDI controller by Músico Nerd

    The Traktorino gives you access to a plethora of knobs and sliders, as well as LEDs for custom feedback in a laser-cut package. Internally, the device acts as an Arduino Uno shield, and is designed to control Traktor DJ software by default. It also supports other MIDI programs, and perhaps could even be adapted to work with other applications as well.

    The Traktorino is a MIDI class compliant device, designed for controlling Traktor. It has several features and custom made mappings, so you can take the most of the software. However, it can do much more than that. The Traktorino can control any software that accepts MIDI, like Ableton Live, Serato, FL Studio, Logic, etc.

    More information and build files can be found here and on GitHub. You can see it in action in the video below!

    [youtube https://www.youtube.com/watch?v=eT9N1NJRlqc?feature=oembed&w=500&h=281]


    Website: LINK

  • This window blinds controller follows the sun

    This window blinds controller follows the sun

    Reading Time: < 1 minute

    This window blinds controller follows the sun

    Arduino TeamApril 3rd, 2018

    Blinds let you see out and let the light into your dwelling, then flip them down when you need privacy or darkness. They do, however, have their disadvantages in that the cords constantly get mixed up and tangled, and—most importantly—they’re not automated!

    While we’ve seen several mods to the holder assembly for automation, cmp3mt’s device puts a different spin on things, holding the control rod with a sleeve made out of polymer clay, allowing it to turn with a continuous rotation servo.

    The setup is powered by an Arduino Uno and features an LCD display for user feedback. A button is used for manual control, or it can operate via a timer or even based on a light-dependent resistor that enables it to open and close with the sun.


    Website: LINK

  • Arduino Yùn Rev.2 is here!

    Arduino Yùn Rev.2 is here!

    Reading Time: 2 minutes

    Arduino Yùn Rev.2 is here!

    Massimo BanziMarch 29th, 2018

    Since its launch in 2013, the Yùn–a small Linux machine and a microcontroller in a small Arduino form factor–found its way into hundreds of thousands of projects and professional applications. Last year, we decided that it was time for a refresh and began working hard to develop a true open-source design, with more compelling features and better overall software support.

    The new board, which is expected to hit the market in the second half of April, will include enhanced functionality and compatibility with its predecessor.

    Why a New Yùn

    The Yùn enjoyed tremendous success; however, it ended up being affected by the internal issues we dealt with over the past couple of years and support has been quite intermittent.

    For example, the board was never really an open-source product and the software had some challenges that we wanted to fix, especially from a security point of view.

    What’s New in Rev.2

    Hardware:  

    • Much better, more robust power supply
    • New Ethernet connector with a clever mounting solution that enables the use of all possible shields with no risk for accidental short circuits
    • Horizontal USB connector to save vertical space
    • Improved USB hub

    Software: 

    • Software stack updated to OpenWRT latest version, including all patches
    • SSL support on the bridge Arduino / Linux bridge

    Yùn Rev.2 is scheduled to begin shipping in April. Until then, you can stay up-to-date by clicking “NOTIFY ME” on our store


    Website: LINK

  • CTC Classics: Finding books with frickin’ laser beams!

    CTC Classics: Finding books with frickin’ laser beams!

    Reading Time: 6 minutes

    CTC, a project from the 2015 edition

    CTC stands for Creative Technologies in the Classroom, an initiative from Arduino Education aimed at helping teachers get up to speed with 21st century skills in the context of STEAM. We have been working with CTC since 2013, with our first experience in Castilla La Mancha, Spain. During a varying period of time, teachers are introduced to project-based learning as they run a full course with their students. At the end, teachers and students meet with their partners at a technology faire to show the result of an open-ended innovation process.

    In this article series, I present projects made by students and exhibited at CTC faires. At those events, students come and pitch their experiments in front of hundreds of thousands of their peers from schools spanning all across their region. I select some of these projects and reinterpret them as a way to inspire other groups of students and their teachers in making new, interesting, user-centric, and thrilling projects.

    What is CTC Catalunya and what makes it different?

    CTC Catalunya is the longest of Arduino’s CTC projects, having had faires since 2015. Thanks to the generosity of the EduCaixa Foundation and the help from Cesire, Catalunya’s government department, we have reached out to as many as 200 public schools at the time of writing.

    In order to achieve this, we designed a plan where the educators of different regions of Catalunya were trained in becoming trainers themselves, so that they could constitute their own regional support teams as a way to make the project sustainable over time. You can imagine that, after four years, there are many familiar faces. People have grown to like this project, and the CTC faire has become part of the educational landscape to the point that many teachers plan for it within their annual agendas.

    What about the project I chose for this blog post 

    One of my favorite projects of all-time is a system that enables you to look for books on the shelf by means of a laser pointer. Imagine you want to find that one novel; how many times have you had to browse through hundreds of your books and were unable to locate it for a while? Even if you have a database of all of your books, you would still have to make sure you place them in a certain location and need to go looking for it.

    Two students at the CTC Catalunya Faire 2015 conceived the idea of a database of books that connected to an Arduino-controlled laser, which would point to a particular book on the shelf.

    Schematic diagram: lasers, servo motors, and some code

    As many years have passed since the project was presented, I don’t have documentation on how it was built. This is going to be a bit of the topic in this series. I am not looking at being super precise in replicating these projects; rather, my aim is provide some guidelines on how this could be made and inspire others to get the idea and improve it. If you want to see how I make things for real, I invite you to follow my livecast sessions every Thursday at 7pm CET. I’ll be implementing one project from scratch each month.

    When it comes to my understanding on how this project was built, it is clear that the students used an Arduino Uno board, a Processing sketch, two standard servo motors, and a laser pointer. I have prepared a schematic for you to see how it could work, as well as a diagram that explains the basic interactions between the Processing code and the Arduino one.

    (Here is where I have to apologize because of the diagram. I didn’t have a lot of time to enhance its appearance, but CC0 clipart images are your friend and let me make things quickly.)

    An idea of how it works

    Take a look at the flow chart above, which explains more about the project. The user will interact with the Processing sketch whenever he or she wants to search for a book. It is very likely the project that the students made had everything hardcoded in the program. In other words, the system was not letting you easily add new books to the database, but were stored in a text file that the Processing sketch would load upon boot.

    The books were presented in the form of a dropdown list for you to choose from. Once you selected one of the items in the list, the Processing sketch would send the coordinates to the servo motors. Those coordinates also had to be stored in the same text file as the names of the books. With the coordinates, that had to be the angles for each one of the servos, the pointer would be directed towards the shelves, highlighting the location of the book.

    Since this had to be shown at a faire where thousands of people would come by over a four-hour period, the students couldn’t prepare a much more complex presentation. This is why I have to make some assumptions about how far they went in their building. I also assume that they had to think through the ways to calibrate everything, since they didn’t have a lot of time to set up. The project worked flawlessly for the entire faire.

    This is why I like it so much

    At home we like books, we always have. When I was a kid, my parents had books in the living room, the dining room, mine and my brother’s room. As an adult, I have bought thousands of books and read every week. We own a 7m long bookshelf where books are sorted by color. When we discuss a project or think about possible ideas for what to build next, we look through our books. After a while, finding books is a time-consuming activity. I need one of these book-finding robots in my home!

    Other projects with lasers?

    You’ve likely seen at least one of the servo-controlled laser pointer projects for entertaining your cats here, here, or even here. Those are just one example of the fun things you can do with Arduino and lasers. In the context of CTC, there is actually a whole series of projects using laser diodes for creating music instruments. But that is an entirely different story, If you want to read about it, stay tuned for more adventures in CTC at the Arduino blog!

    The CTC Caire was supported by Cesire at the Generalitat de Catalunya and the EduCaixa foundation.


    Website: LINK