Schlagwort: arduino uno
-

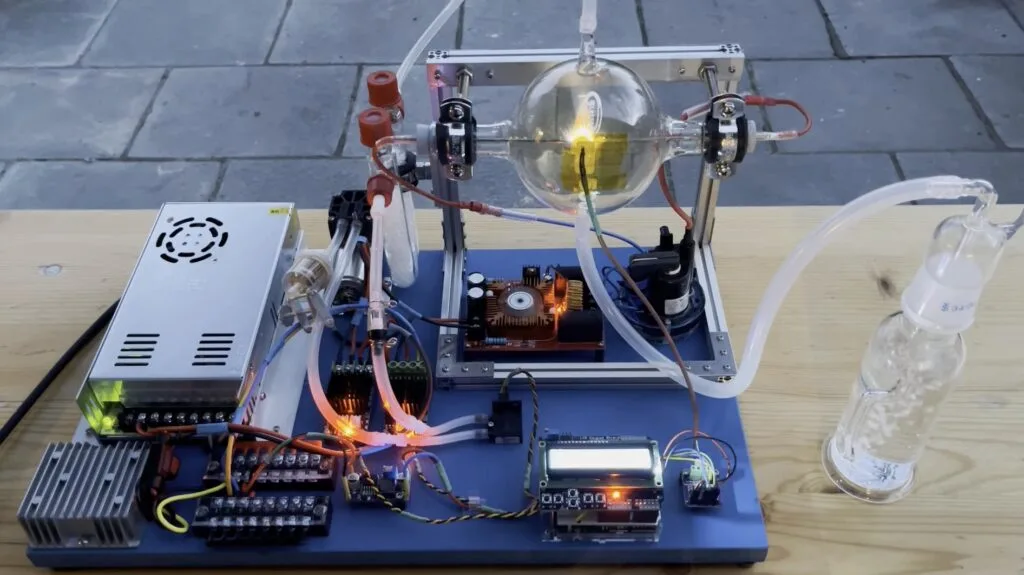
This DIY experimental reactor harnesses the Birkeland-Eyde process
Reading Time: 2 minutesNitrogen is critical for farming at scale and without some form of nitrogen to enrich the soil, we couldn’t grow staple crops efficiently enough to feed our large global population. Serious science goes into the production of fertilizers and the Birkeland-Eyde process was one early example. It uses electrical arcs to turn…
-

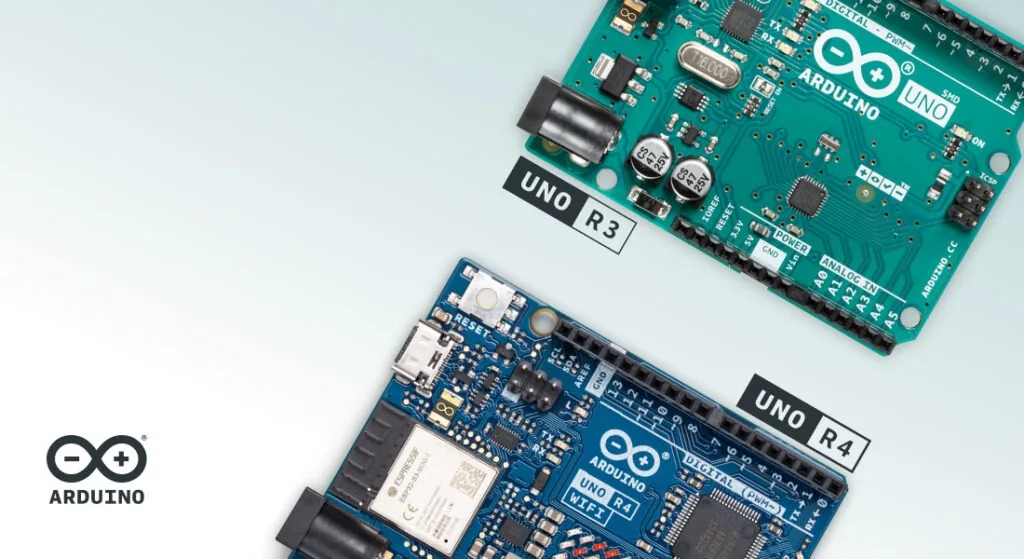
UNO Rev3 or UNO R4? Choosing the perfect Arduino for your project
Reading Time: 5 minutesThe Arduino UNO is legendary among makers, and with the release of the UNO R4 in 2023, the family gained a powerful new member. But with two incredible options, which UNO should you pick for your project? Here’s a breakdown of what makes each board shine, depending on your needs, skills, and…
-

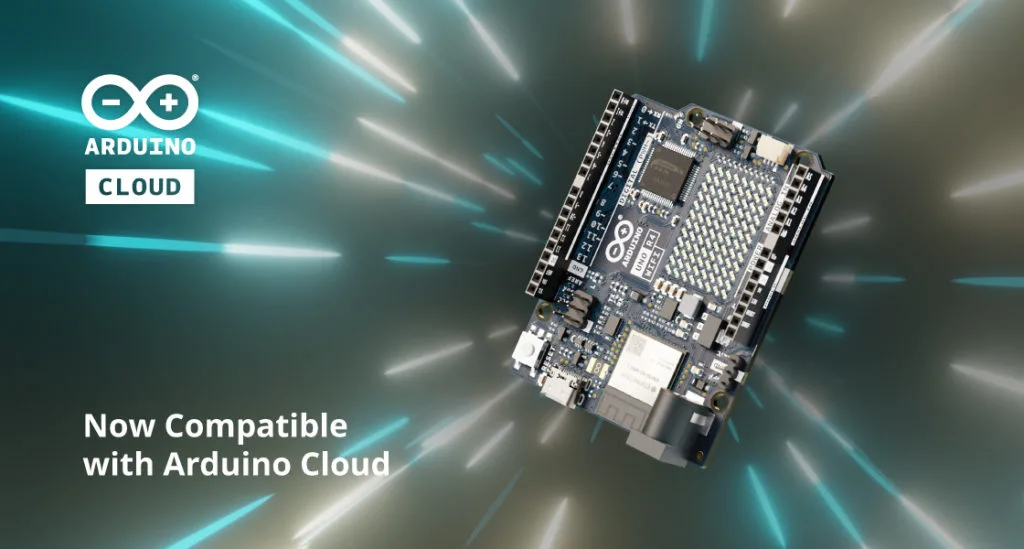
Introducing UNO R4 WiFi support in the Arduino Cloud
Reading Time: 2 minutesWe are excited to announce that the Arduino Cloud now supports the UNO R4 WiFi board, providing makers with seamless connectivity and enhanced features. Building upon the recent release of the much-anticipated UNO R4 in our store, this new integration significantly amplifies the capabilities of the Arduino Cloud. The UNO R4 WiFi…
-

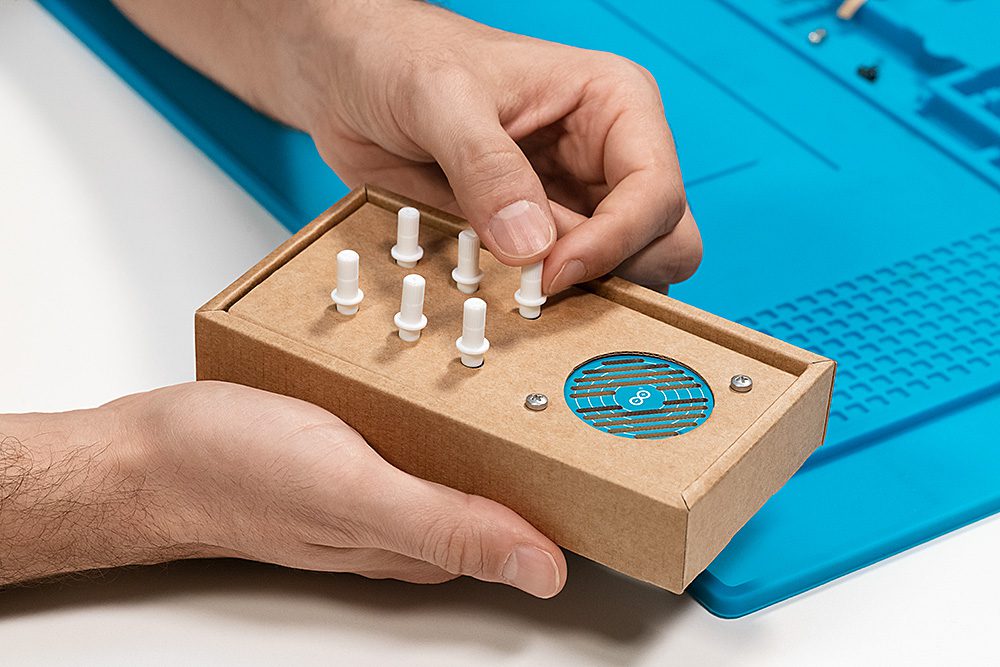
Are you ready to go back to the future?
Reading Time: 3 minutesArduino Make Your UNO Kit is finally here The first Arduino UNO was launched back in 2005, with a clear purpose to allow everyone who had an idea to make it possible through a simple and open interface. Many years have passed, technology has evolved, but we never forgot that initial thrill…
-
Top 5 Arduino projects for beginners
Reading Time: 3 minutesTop 5 Arduino projects for beginners Arduino Team — December 18th, 2020 Home for the holidays? This is the perfect time to make something! The Arduino Project Hub offers around 6,000 projects for levels: each tutorial includes detailed assembling instructions and the Arduino code. We have selected the top five Arduino projects…
-

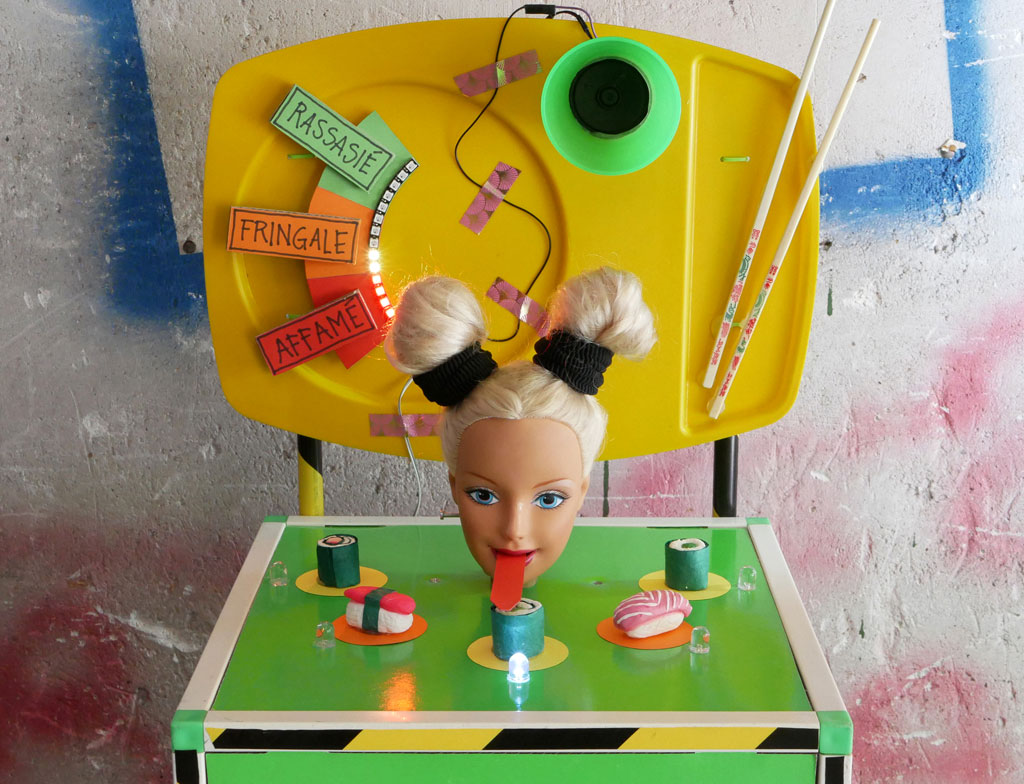
Feed Barbie with the J’ai faim! mechatronic game
Reading Time: < 1 minuteFeed Barbie with the J’ai faim! mechatronic game Arduino Team — August 7th, 2018 According to this project’s write-up, while some struggle to get enough nourishment, those in more developed countries often aspire to consume too little food. As an apparent commentary on this situation, Niklas Roy and Kati Hyyppä have…
-

Notable Board Books are an Arduino-powered way to enjoy music
Reading Time: < 1 minuteNotable Board Books are an Arduino-powered way to enjoy music Arduino Team — August 6th, 2018 Annelle Rigsby found that her mother, who suffers from Alzheimer’s, is delighted to hear familiar songs. While Annelle can’t always be there to help her enjoy music, she and her husband Mike came up with…