Schlagwort: arcade cabinet
-

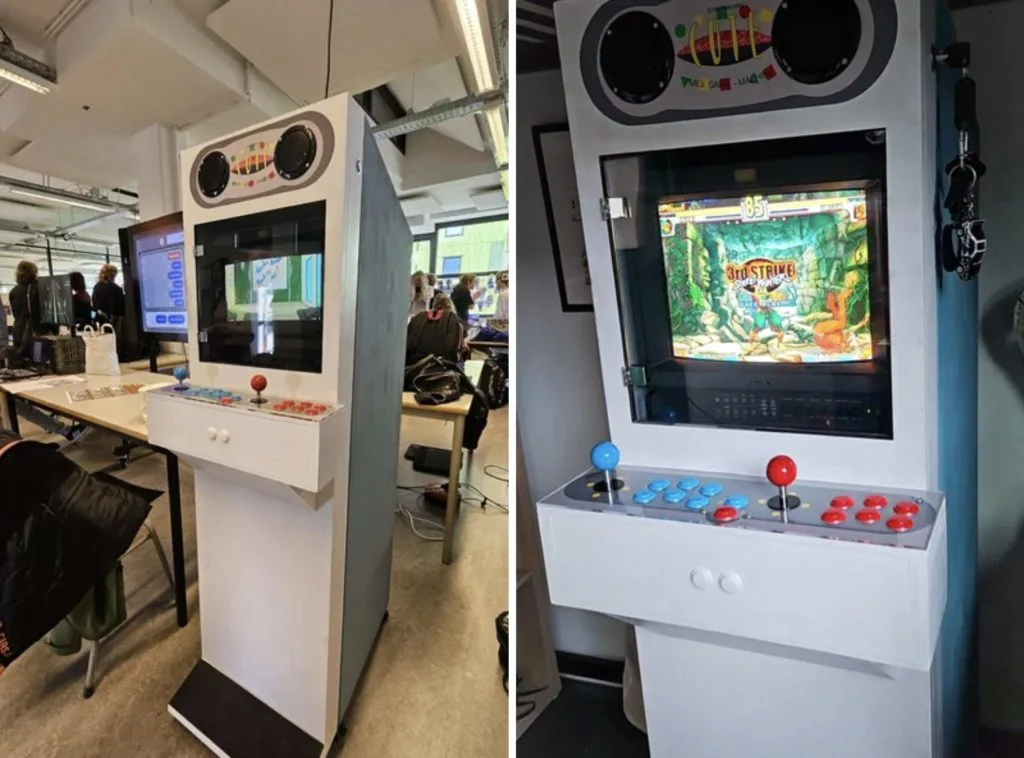
Build an adorable arcade cabinet with custom controls
Reading Time: 2 minutesArcade machines are a dying breed and that’s a shame, because their purpose-built approach to gaming is so wholesome. There is something intrinsically satisfying about a device that does one thing and does it well. If you want to bring that beauty into your own home, Migi has a great Instructables tutorial…
-

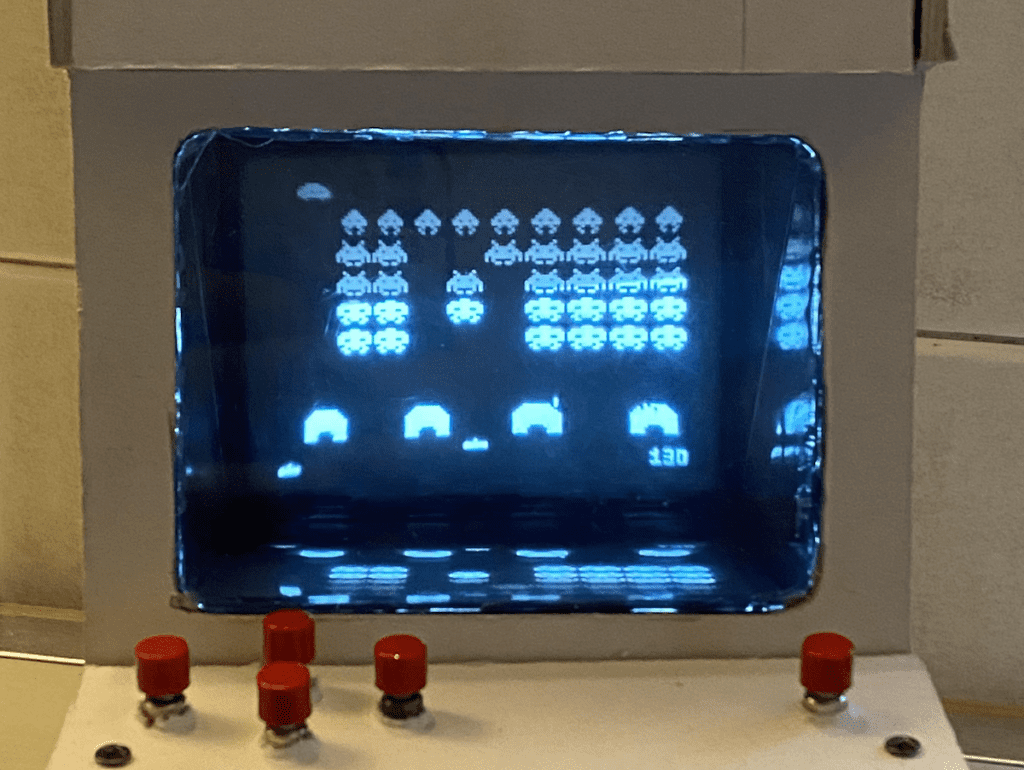
This small Space Invaders game runs on an Arduino Nano with a salvaged CRT display
Reading Time: 2 minutesArduino Team — July 6th, 2022 Rob Cai over on Instructables has created his own version of the classic video game Space Invaders using an Arduino Nano. However, unlike most other projects that would typically incorporate some kind of LCD or OLED screen, he chose to use a small black and white cathode ray tube (CRT)…
-

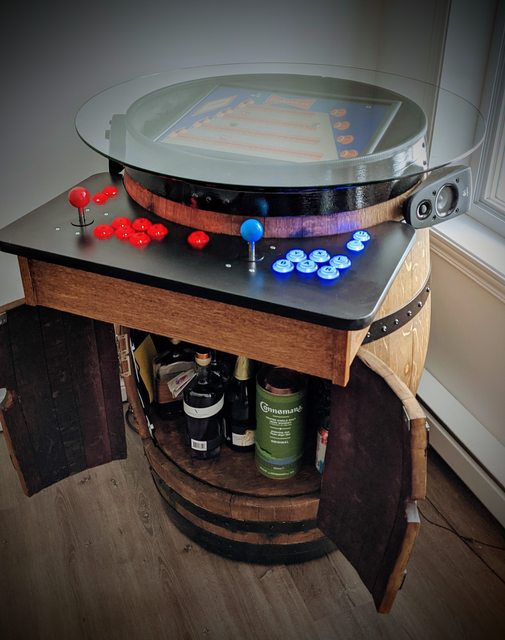
RetroPie booze barrel
Reading Time: 2 minutesWhat do we want? Retro gaming, adult beverages, and our favourite Spotify playlist. When do we want them? All at the same time. Luckily, u/breadtangle took to reddit to answer our rum-soaked prayers with this beautifully crafted beer barrel-cum-arcade machine-cum-drinks cabinet. We approve of this drink selection The addition of a sneaky…
-

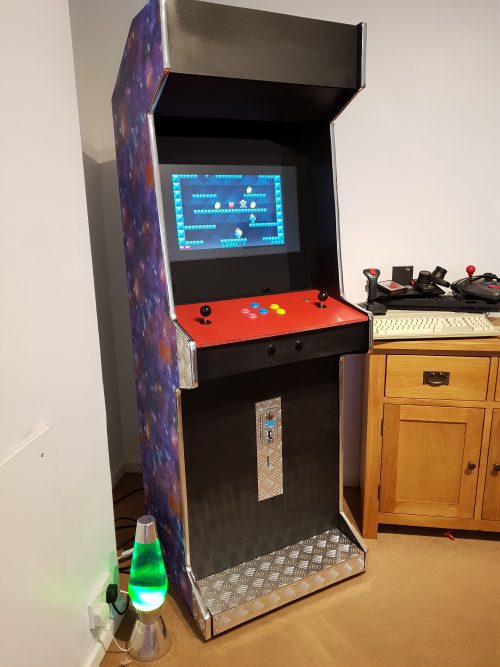
Build an arcade cabinet | Hackspace 35
Reading Time: 5 minutesGames consoles might be fast and have great graphics, but they’re no match for the entertainment value of a proper arcade machine. In this month’s issue of Hackspace magazine, you’re invited to relive your misspent youth with this huge build project. There’s something special about the comforting solidity of a coin-eating video…
-

New book: Retro Gaming with Raspberry Pi
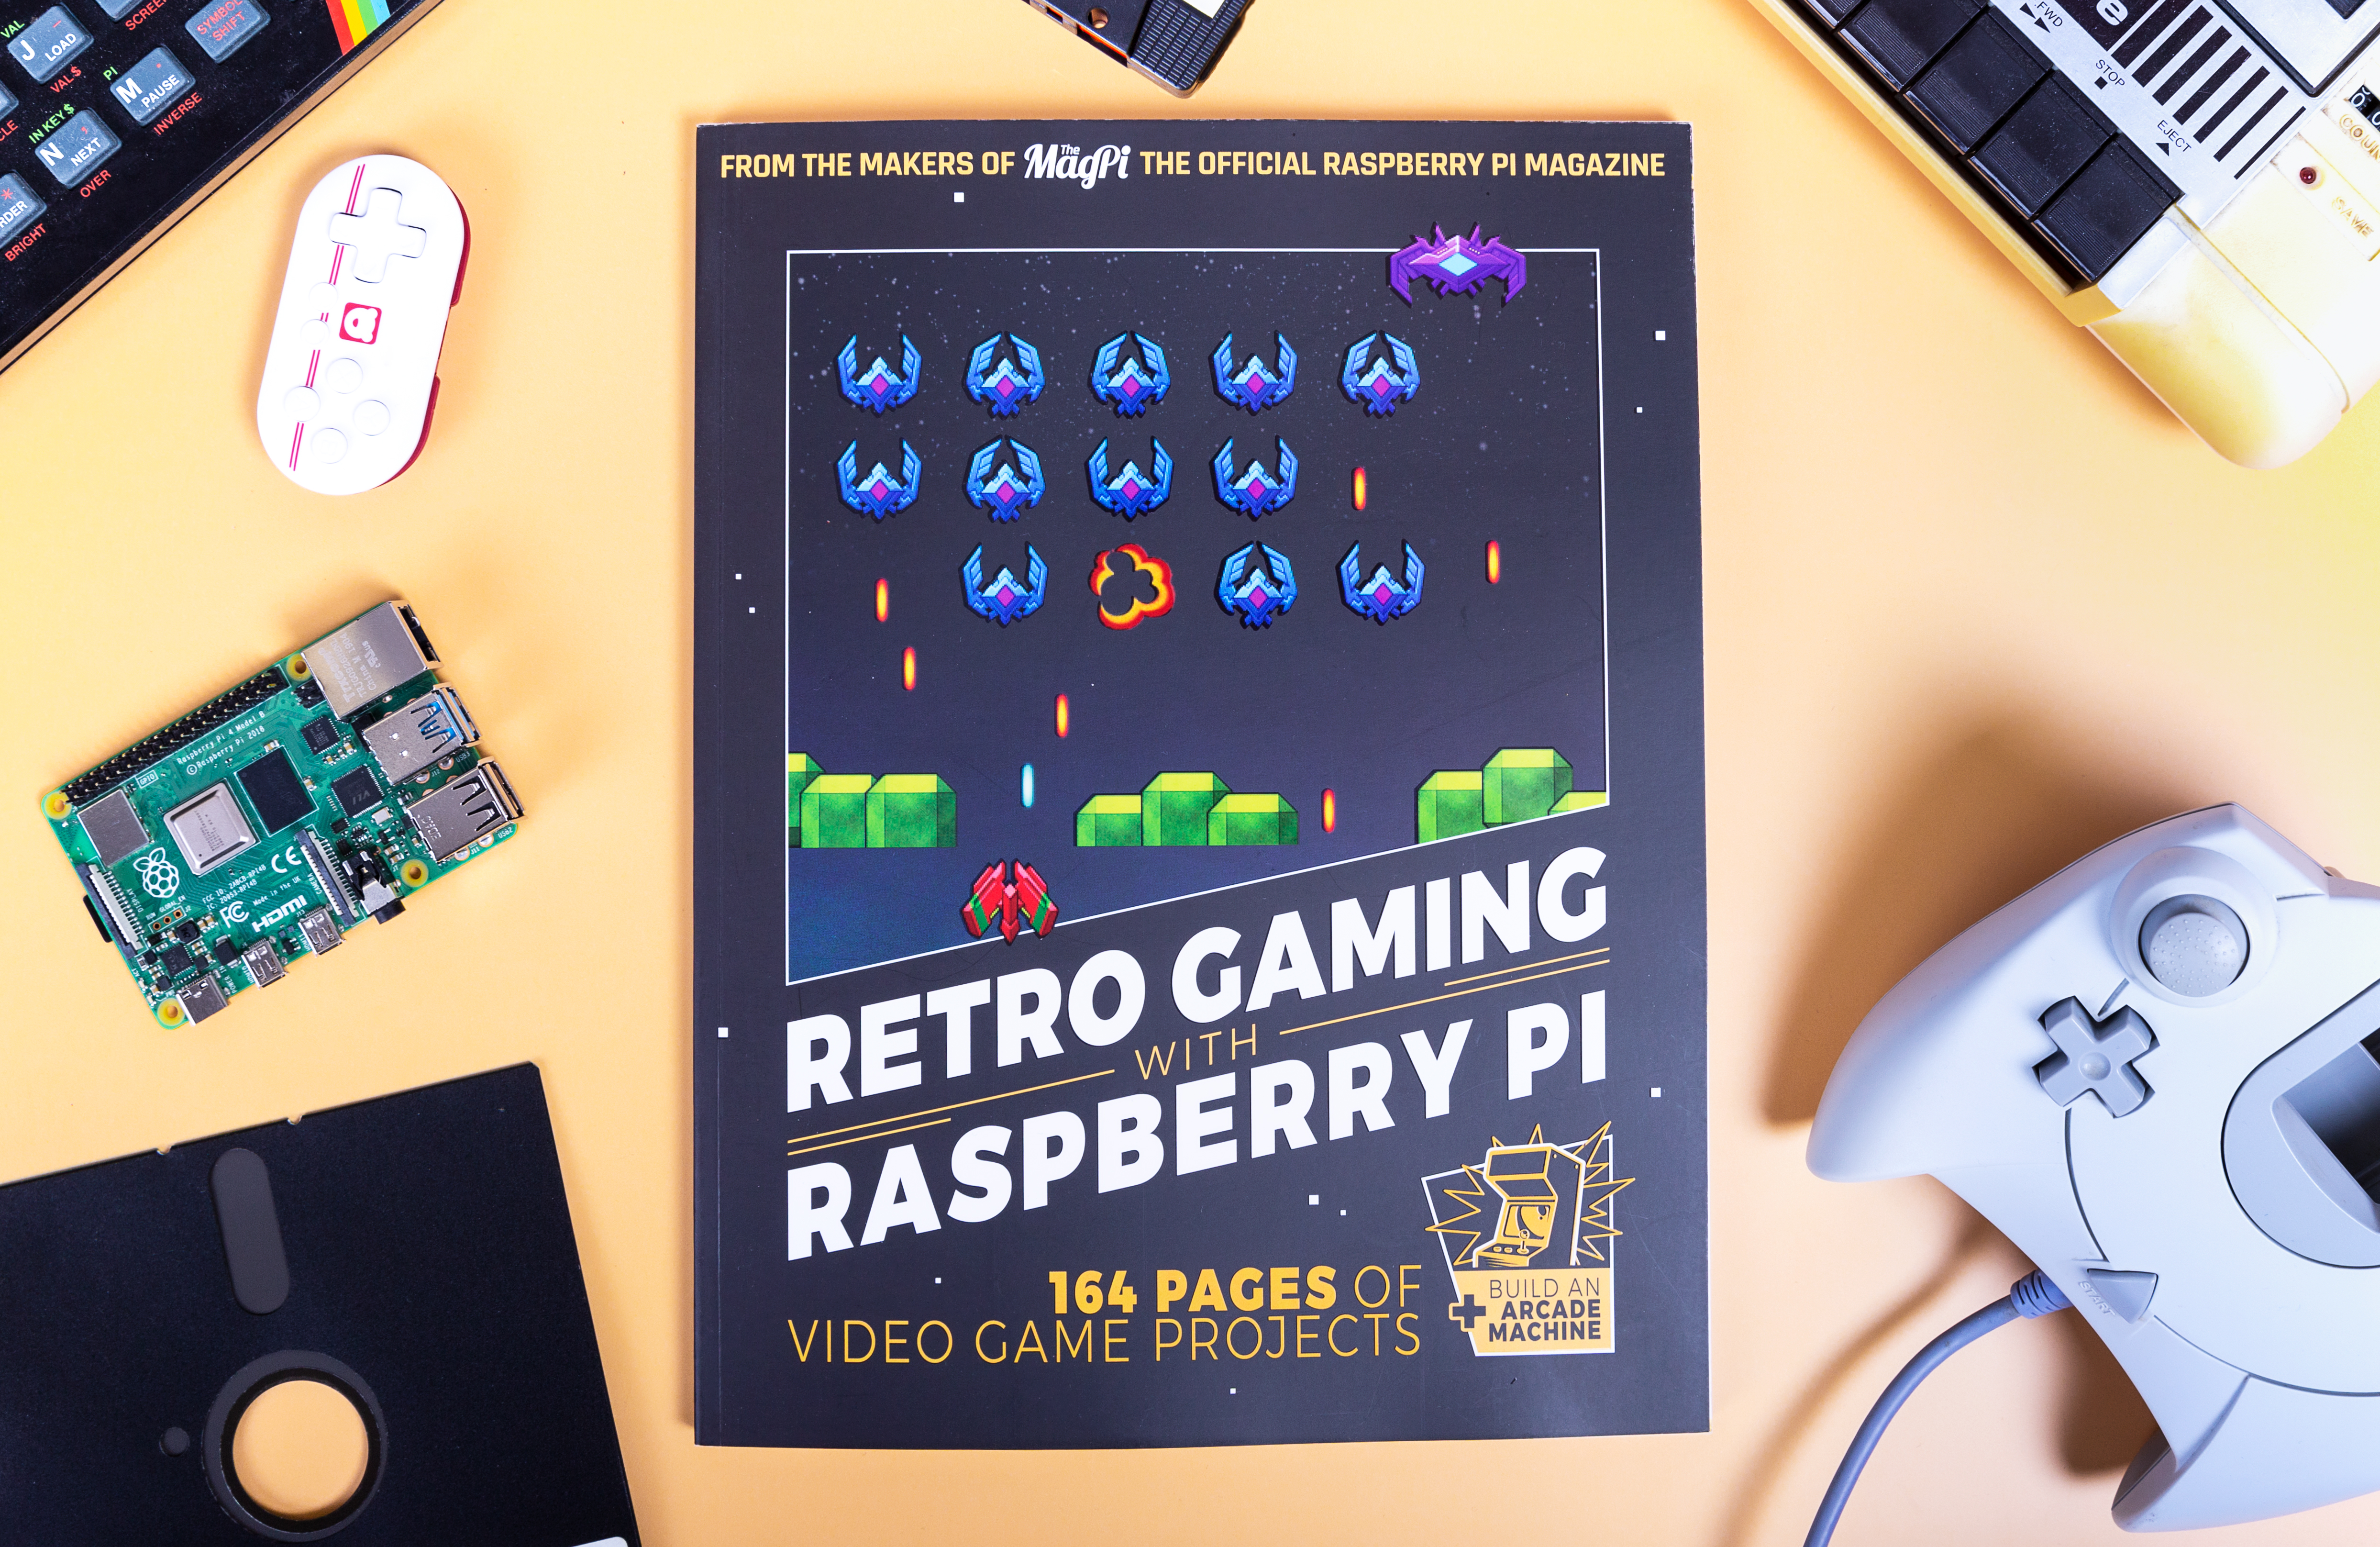
Reading Time: 2 minutesRaspberry Pi Press is delighted to announce the release of the latest addition to your bookshelf: Retro Gaming with Raspberry Pi! Retro Gaming with Raspberry Pi Subscribe to our YouTube channel: http://rpf.io/ytsub Help us reach a wider audience by translating our video content: http://rpf.io/yttranslate Buy a Raspberry Pi from one of our…
-
New book: Retro Gaming with Raspberry Pi
Reading Time: 2 minutesRaspberry Pi Press is delighted to announce the release of the latest addition to your bookshelf: Retro Gaming with Raspberry Pi! Retro Gaming with Raspberry Pi Subscribe to our YouTube channel: http://rpf.io/ytsub Help us reach a wider audience by translating our video content: http://rpf.io/yttranslate Buy a Raspberry Pi from one of our…