Schlagwort: 7-Segment Display

  • A single stepper motor drives this mechanical seven-segment display clock

    A single stepper motor drives this mechanical seven-segment display clock

    Reading Time: 2 minutes

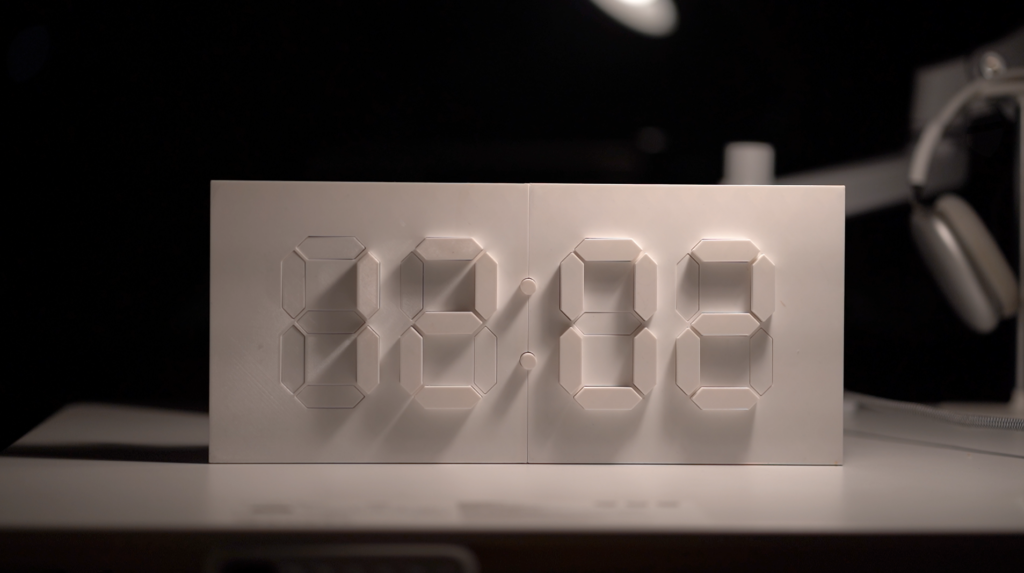
    It is amazing how much technological progress humanity has achieved over the past few centuries. But while our capability with electronics has shot ahead, it seems that we’ve almost regressed when it comes to mechanical and electromechanical design. Watches and clocks are great examples of this, as pre-digital craftsmen were capable of astonishing feats that are still impressive today. But some people are keeping those traditions alive, as evidenced by this mechanical seven-segment display clock driven by a single stepper motor.

    This clock is truly a work of art. It shows the time across six digits, each of which is a seven-segment display. But those aren’t segments lit by LEDs, they’re physical pieces of plastic. A complex series of gears flips them in and out in the appropriate sequence to display the numeric characters. That is very impressive when you consider that the segments don’t actuate in an order that correlates with the numerical value — the number 4 isn’t simply turning “on” one more segment than the number 3. But even so, the clock progresses through the numbers in order.

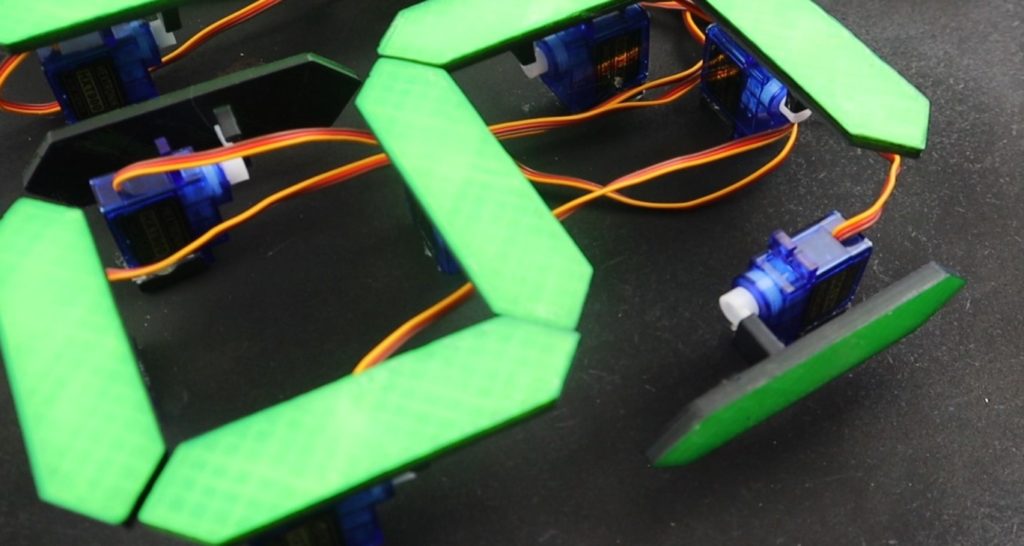
    That’s only possible because of the genius mechanical design of the clock. Further increasing the wonder is the fact that the clock and all of its parts were 3D-printed — no precision machining necessary. An Arduino Nano board controls the stepper motor that drives the whole series of gears. That ensures that the motor turns at a constant rate, which is required to keep accurate time.

    [youtube https://www.youtube.com/watch?v=TmxXhfyIY5g?feature=oembed&w=500&h=281]

    The post A single stepper motor drives this mechanical seven-segment display clock appeared first on Arduino Blog.

    Website: LINK

  • Kinetic digital clock takes 7-segment displays to another dimension

    Kinetic digital clock takes 7-segment displays to another dimension

    Reading Time: 2 minutes

    Arduino TeamJuly 20th, 2021

    Seven-segment displays have been around for ages, and they have a really cool retro aesthetic about them. Over on Instructables, user alstroemeria (known as Jacky Mok in real life) decided to build a different kind of display that utilizes individual servo motors to slide the segments out, thus creating a 3D clock. The main board in this project was the Arduino Mega, which was selected due to its large number of digital GPIO pins that can set all 28 of the servos to the correct positions. 

    The current time was tracked using the DS3231 RTC module that stores the time and can keep it even if power is removed. The program Mok wrote first initializes the servos and sets them in the “off” position. Within the main loop, the time is retrieved from the RTC module and converted into digits. From here each digit is mapped to a series of segments which are then moved into the correct spot with the corresponding motor. 

    The clock enclosure Mok designed is quite elegant and captures the feeling of a classic seven-segment display. As seen in the accompanying video, watching the digits slowly move and morph into various shapes can be mesmerizing. More details on the concept and its construction can be found on Instructables

    [youtube https://www.youtube.com/watch?v=lkjKl4GjinQ?feature=oembed&w=500&h=281]

    Website: LINK

  • Mechanical 7-segment display made using electromagnets

    Mechanical 7-segment display made using electromagnets

    Reading Time: < 1 minute

    Mechanical 7-segment display made using electromagnets

    Arduino TeamJuly 21st, 2020

    When you think of a “7-segment” display, your mind naturally goes to something involving LCD or LED technology. As seen here, however, this 0-9 pattern can also be duplicated mechanically using a series of electromagnets.

    Neeraj Rane’s 3D-printed device is controlled by an Arduino Nano, along with a shift register. These activate seven hand-wound coils that push the magnet-embedded segments in and out, via a series of IRF540N MOSFETs.

    As of now, the display simply cycles through numbers. If a few more digits were added, and perhaps a user interface and/or an RTC module, it could form the basis of an even more interesting project. Check it out in action below!

    [youtube https://www.youtube.com/watch?v=3phLYcJFsy8?feature=oembed&w=500&h=281]

    Website: LINK

  • A 7-foot-tall 7-segment display

    A 7-foot-tall 7-segment display

    Reading Time: 2 minutes

    Seven-segment displays are normally diminutive items, able to show info from a clock or other device, in a size that’s easily tucked away when not needed. Jegatheesan Soundarapandian’s single-digit display, however, is just the opposite standing at nearly seven feet tall.

    The project is constructed out of cardboard, with a PVC spine for extra strength. Inside, addressable LED lighting illuminates each segment under Arduino control, with an HC-05 module used to interface with an Android app. Two 18550 batteries provide power for the unit, along with a DC-DC voltage regulator to supply the strip with 5V.

    You can see it demonstrated in the clips below!

    [youtube https://www.youtube.com/watch?v=LKxuMsX9yzM?feature=oembed&w=500&h=281]

    [youtube https://www.youtube.com/watch?v=9Od_xC0A3ww?feature=oembed&w=500&h=281]

    [youtube https://www.youtube.com/watch?v=SJIlTgb6L48?feature=oembed&w=500&h=281]

    [youtube https://www.youtube.com/watch?v=AXmfMuW09lM?feature=oembed&w=500&h=281]

    Boards:Uno
    Categories:Arduino

    Website: LINK

  • Mechanical 7-segment display made with micro servos and an Arduino Mega

    Mechanical 7-segment display made with micro servos and an Arduino Mega

    Reading Time: < 1 minute

    Mechanical 7-segment display made with micro servos and an Arduino Mega

    Arduino TeamFebruary 12th, 2020

    Flip displays are an interesting piece of technology, physically moving segments into place that stay put until other information is needed. Michael Klements has been especially fascinated by these devices, and after inspiration from another project, he decided to craft his own.

    His version utilizes 14 micro servos to flip segments into a visible position, then rotate them to 90° when no longer needed. This “off” mode displays a slimmer profile, and the sides and back are painted black, making them much less visible.

    An Arduino Mega, with 15 possible PWM outputs, is used to control the servos, while a hobby RC-style battery eliminator circuit provides power to the motors. 

    Be sure to check out the build process and in-action shots below! 

    [youtube https://www.youtube.com/watch?v=QMtNqJvMyzU?feature=oembed&w=500&h=281]

    Website: LINK

  • Intuitive Arduino clock has seven alarms and three LED displays

    Intuitive Arduino clock has seven alarms and three LED displays

    Reading Time: 2 minutes

    Intuitive Arduino clock has seven alarms and three LED displays

    Arduino TeamJune 19th, 2019

    Alarm clocks of old—and certainly many of those today—require several button pushes to set things up properly. Maker Michael Wessel, however, decided to implement his own take on a more intuitive clock, creating a device that features three separate eight-digit seven-segment LED panels. Eight buttons allow for direct manipulation of each of the digits, with their own dedicated LEDs.

    The info on display includes time and date, as well as temperature, and it can even show how many days, hours, or minutes have passed since a special pre-programmed day. Up to seven audible alarms are available, which can be silenced by a loud noise (e.g. clapping your hands) via a sound sensor. 

    The clock is controlled via an Arduino Mega, along with an RTC module to keep things accurate.

    I remember I always had to set all digital clocks for my grandparents in the ’80s — these clocks and watches always required some complicated button juggling! So, here it is: a DIY LED alarm clock that my grandparents would have been able to set and use without my help! 

    An Arduino-based LED clock with 7 individual alarms, highly intuitive user interface, temperature display, and display of days / hours / minutes passed since a special date, e.g., your birthday. An active / ringing alarm can be disabled by making a loud noise, e.g., by clapping your hands. Timer-based PWM sound output for alarm melodies. 

    The Arduino’s EEPROM is being used to store the alarms of course, and the DS3231 RTC is battery backed up, so it survives a temporary power outage and you won’t be late for work the next morning. 

    This was put together rather quickly, thanks to off the shelf components, Velcro and existing Arduino libraries for them! The clock can be built for about $30 – 40. 

    [youtube https://www.youtube.com/watch?v=Uzu9-YZ3jMU?feature=oembed&w=500&h=281]

    Website: LINK